

Page 1
“We Deliver Information at the Speed of Light”
AlphaNet Plus v 3.0
Basic Wireless Setup using WaveWare SPS- 5 v7 Paging System
Not Intended for Short Range or Graphics.
Please see “Additional Information” at the end of this setup guide.
Creating and Adding a Site:
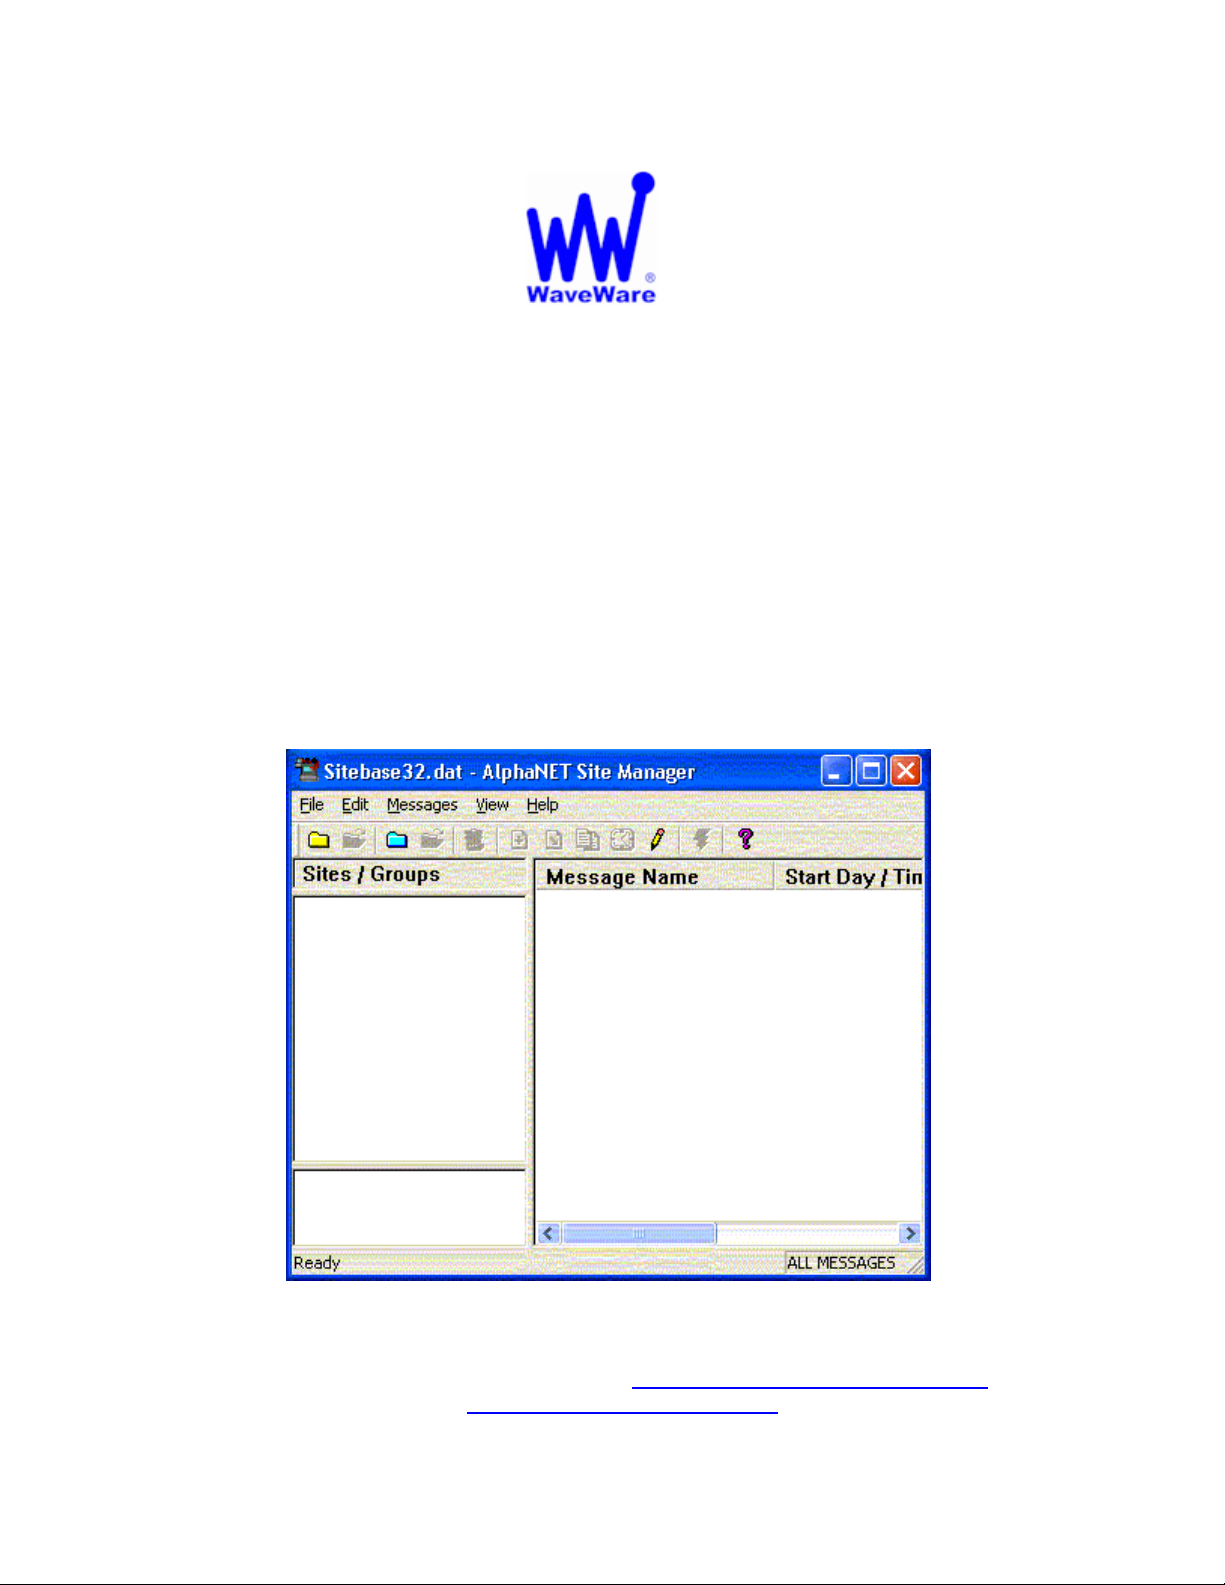
Open the SITE Manager:
• Click File
• New Site
See Fig. 1
WaveWare Technologies, Inc. 1-800-373-1466 Fax: 972-479-1735
Technical Support at: x 109 or E-mail to: support@wirelessmessaging.com
www.wirelessmessaging.com
Site Manager Main Screen
Fig. 1
Page 2
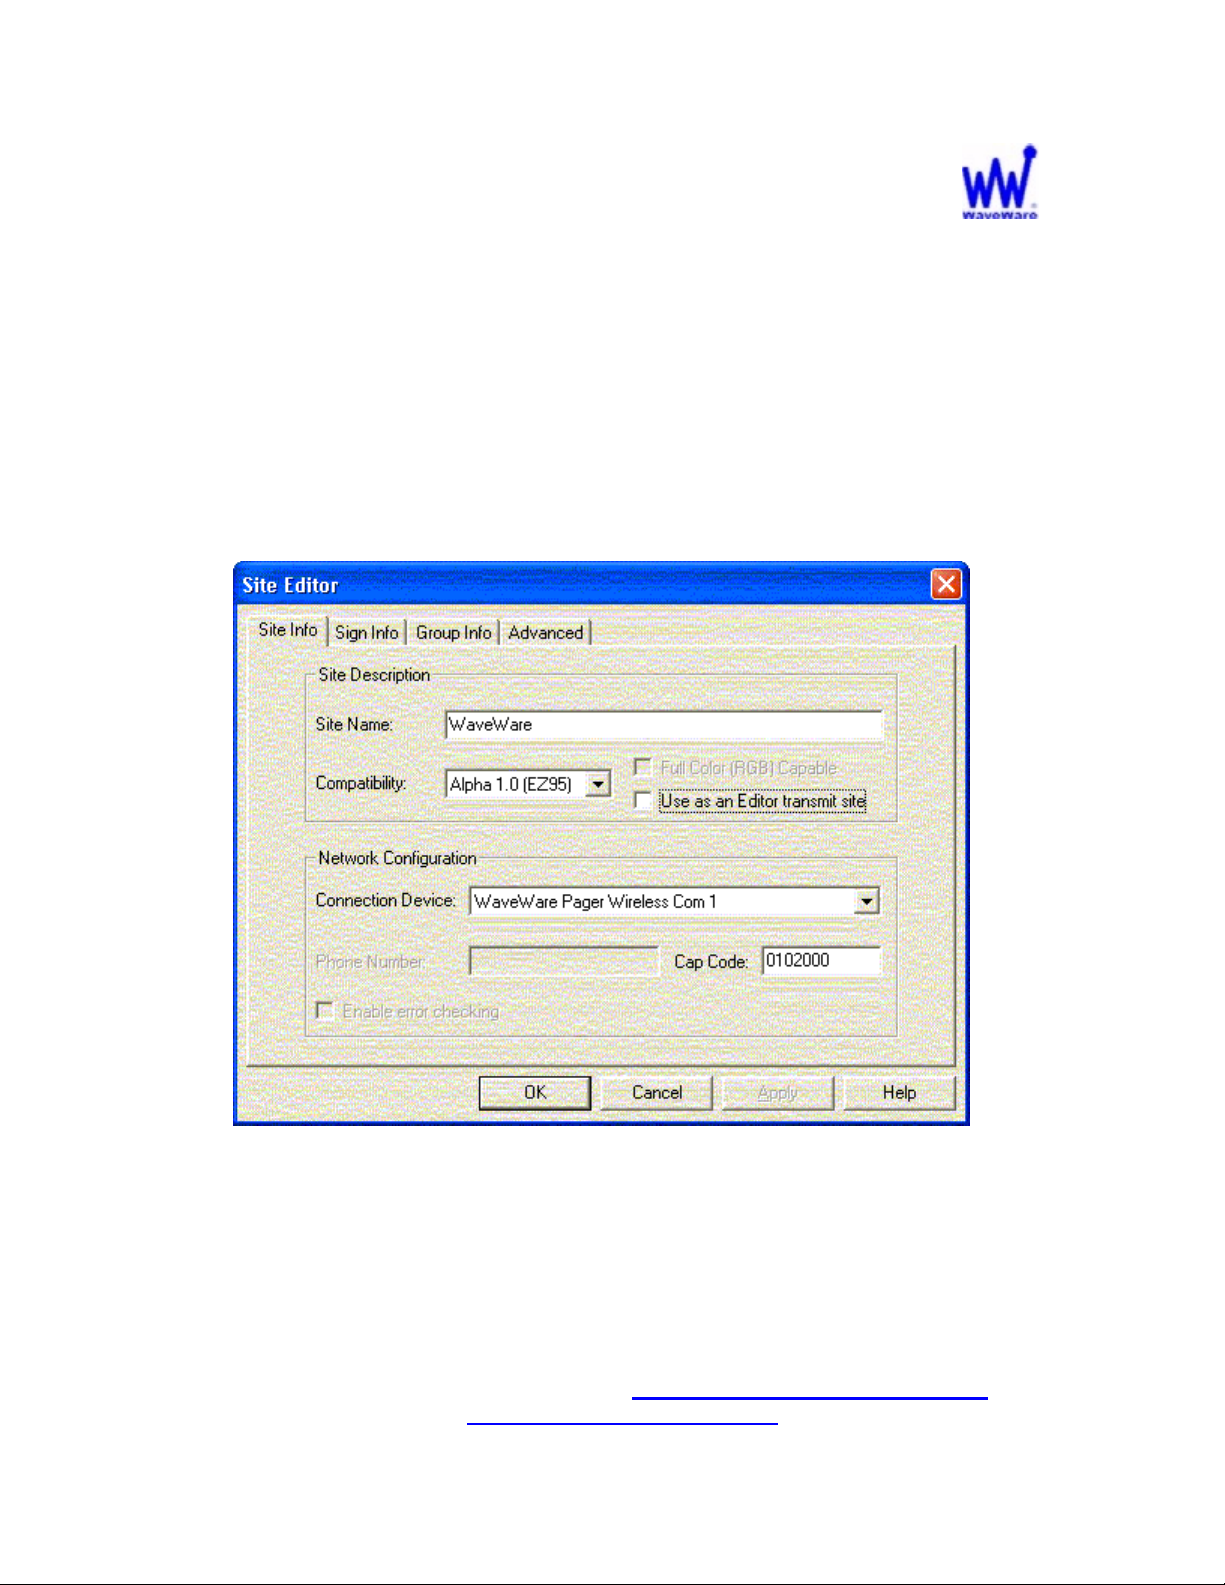
Creating and adding a site, continued:
In the “Main Screen” of the Site Editor:
• Create a Site Name.
• Use compatibility of Alpha 1.0 (EZ95).
• Select your Connection Device.
• Enter the Cap Code of the Paging Data Receiver.
See Fig. 2
Site Editor Main Screen
Fig. 2
Note: “Use as an editor transmitter site” is an option and does not need to be checked.
WaveWare Technologies, Inc. 1-800-373-1466 Fax: 972-479-1735
Technical Support at: x 109 or E-mail to: support@wirelessmessaging.com
www.wirelessmessaging.com
Page 3

Creating and adding a site, continued:
Click on the “Sign Info” Tab.
• Set Sign Address to 00, or to the address you have set the sign to.
See Fig. 3
Site Editor SIGN INFO Screen
NOTE: The default address of m ost signs is set to 00.
Fig. 3
WaveWare Technologies, Inc. 1-800-373-1466 Fax: 972-479-1735
Technical Support at: x 109 or E-mail to: support@wirelessmessaging.com
www.wirelessmessaging.com
Page 4
Creating and Adding a Connection Device:
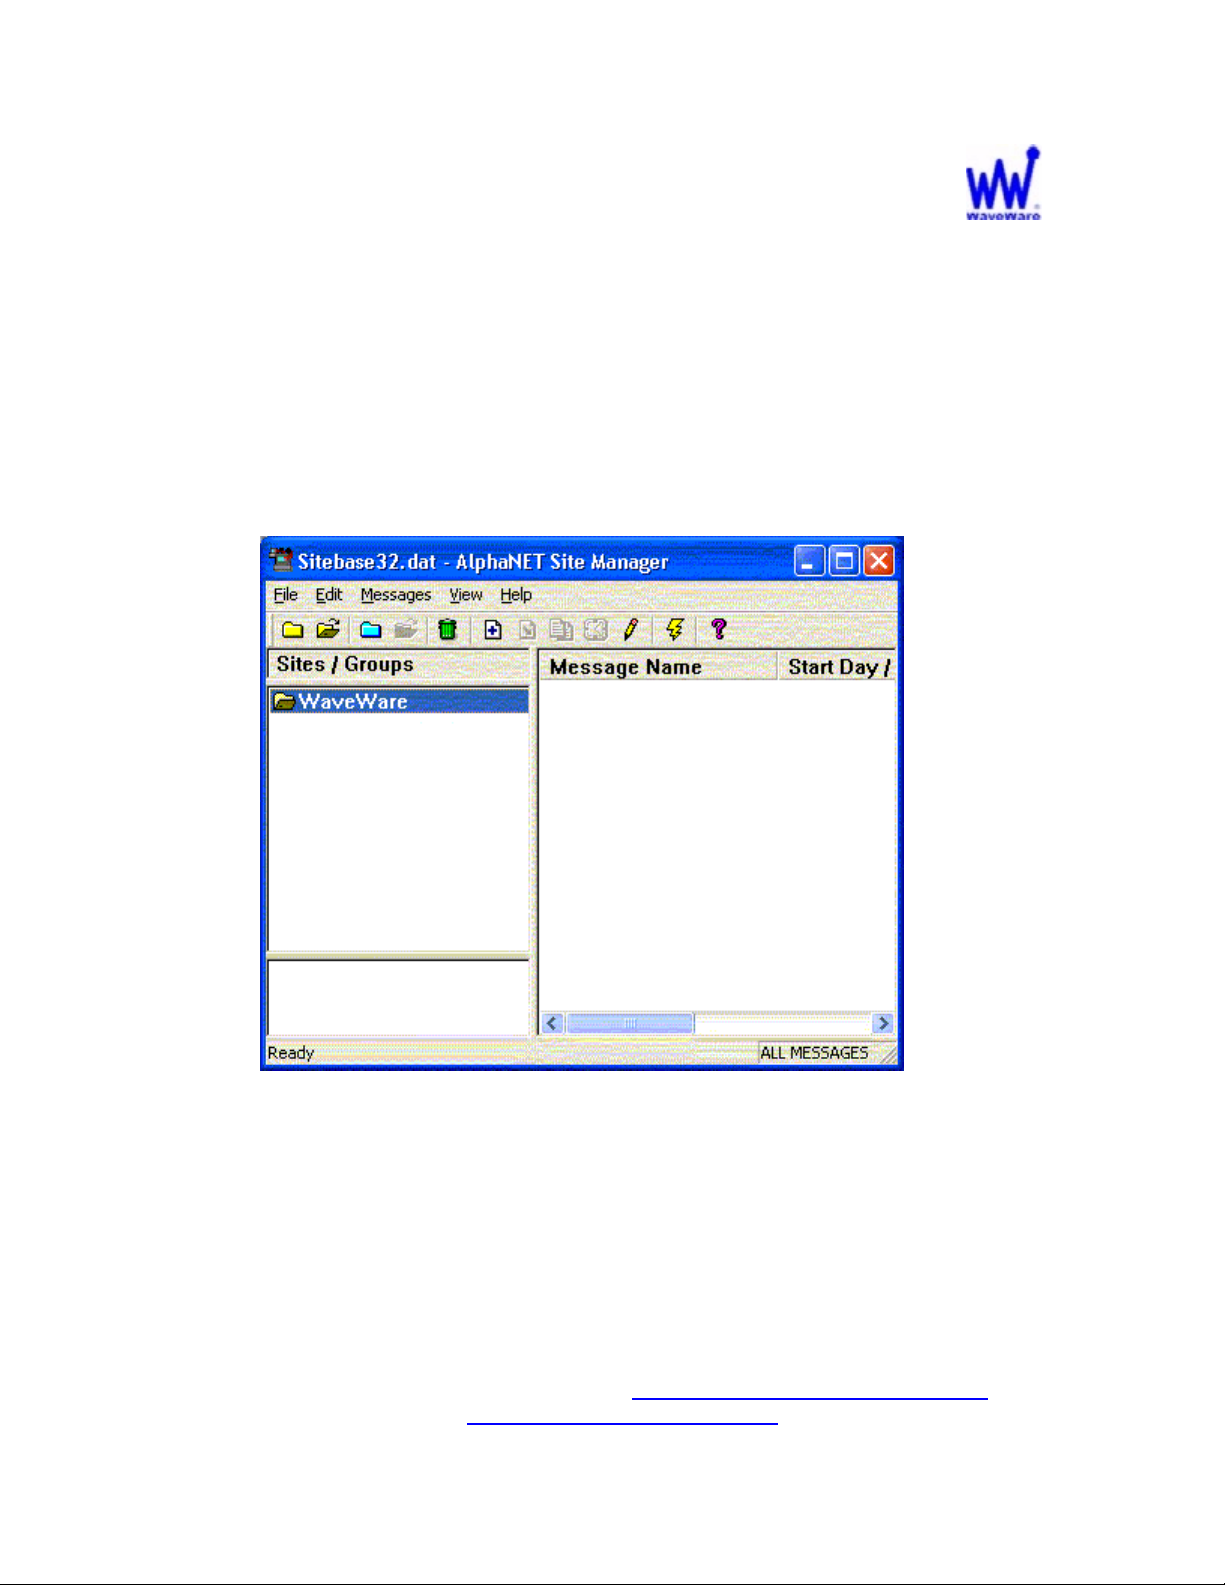
In the “Main Screen” of the Site Editor:
• Highlight the “Site” you created.
• Click on the “Edit” tab.
• Select “Connection Device”.
See Fig. 4
Site Editor Main Screen
Fig. 4
WaveWare Technologies, Inc. 1-800-373-1466 Fax: 972-479-1735
Technical Support at: x 109 or E-mail to: support@wirelessmessaging.com
www.wirelessmessaging.com
Page 5
Creating and adding a Connection Device, continued:
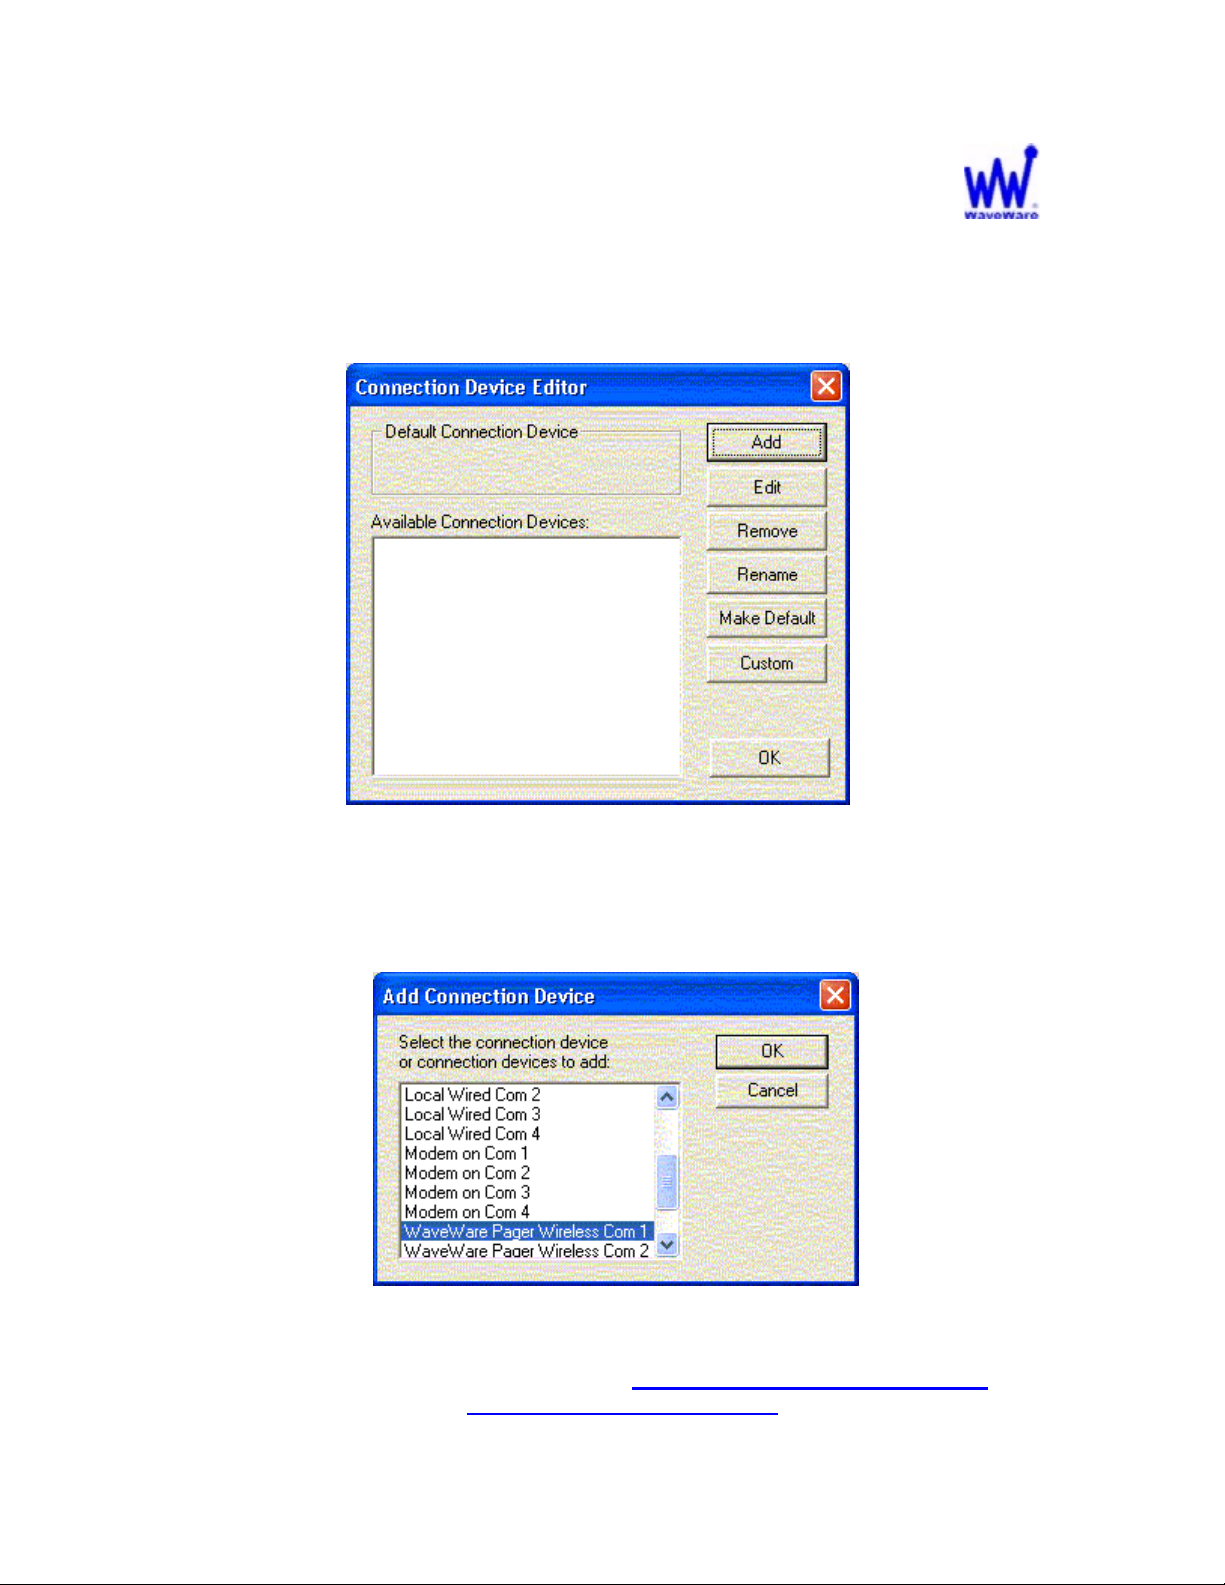
On the “Connection Device Editor” screen”:
• Click “ADD” to pick a connection device.
See Fig. 5
Fig. 5
Connection Device Editor Screen
• Choose “WaveWare Pager Wireless Com 1” from the list of connection
devices. Click OK.
See Fig. 6
Fig. 6i
ADD Connection Device Screen
WaveWare Technologies, Inc. 1-800-373-1466 Fax: 972-479-1735
Technical Support at: x 109 or E-mail to: support@wirelessmessaging.com
www.wirelessmessaging.com
Page 6

Creating and adding a Connection Device, continued:
• Highlight the connection device and click on the “EDIT” tab.
See Fig. 7
Connection Device Editor Screen
Fig. 7
This concludes the Setup of the Connection Device Editor.
Next: Setting up communication ports and other information.
WaveWare Technologies, Inc. 1-800-373-1466 Fax: 972-479-1735
Technical Support at: x 109 or E-mail to: support@wirelessmessaging.com
www.wirelessmessaging.com
Page 7

Setting up Com Port Communications:
• Under “General Settings”:
• Choose the “Com Port” that you have the paging system attached to.
• Choose the “Data Format”, usually N 8 1.
• Choose the “Baud Rate” of the com port, usually 9600.
See Fig. 8
Other Setup Information:
• Place a check mark next to the word “Wireless”, and you will see that the
“Wireless Settings” fields have open to enter the “Pager Header” and
the “Pager Trailer” Information.
• Enter this information as shown.
See Fig. 8
Settings Configure Screen
Fig. 8
WaveWare Technologies, Inc. 1-800-373-1466 Fax: 972-479-1735
Technical Support at: x 109 or E-mail to: support@wirelessmessaging.com
www.wirelessmessaging.com
Page 8

Other Setup Information, continued:
Important Setup Information for the “Pager Header” field:
• The number 2, shown here in red color, (\001A2[CAP CODE]\002)
represents the Pager Baud Rate of the Paging Data Receiver (PDR) and
is set at 2400 BR.
• WaveWare sets that baud rate at 512 BR for better signal reception, but
you may use any of the 3 Baud Rate settings shown in the Chart below.
See Fig. 9
PDR Baud Rate Pager Header Field Info Pager Trailer Field Info
512 \001A5[CAP CODE]\002 \003\004
1200 \001A1[CAP CODE]\002 \003\004
2400 \001A2[CAP CODE]\002 \003\004
Fig. 9
• Be sure to properly enter the new “Pager Header” Field that corresponds
to the PDR Baud Rate that you are using. If this information is not correct,
the PDR will not receive the signal.
• The “Pager Trailer” field is normally not changed.
• Click OK when finished.
This concludes the General Setup and Other Information Setup.
Next: Creating and Saving Messages.
WaveWare Technologies, Inc. 1-800-373-1466 Fax: 972-479-1735
Technical Support at: x 109 or E-mail to: support@wirelessmessaging.com
www.wirelessmessaging.com
Page 9

Creating and Saving Messages:
• To open the “Message Editor” to create a message to be sent to the
PDR, click on the “Pencil” icon in the toolbar of the Main Screen of the
Site Manager.
See Fig. 10.
Site Editor Main Screen
Fig. 10
WaveWare Technologies, Inc. 1-800-373-1466 Fax: 972-479-1735
Technical Support at: x 109 or E-mail to: support@wirelessmessaging.com
www.wirelessmessaging.com
Page 10

Creating and saving messages, continued:
In the Message Editor screen:
• Write the message you want to send to the PDR.
See Fig. 11
Fig. 11
Message Editor Screen
WaveWare Technologies, Inc. 1-800-373-1466 Fax: 972-479-1735
Technical Support at: x 109 or E-mail to: support@wirelessmessaging.com
www.wirelessmessaging.com
Page 11

Creating and saving messages, continued:
After writing the message:
• Click File and Save As.
• Create a folder where you want to save your message(s).
• Choose a name for your message(s).
• Click “SAVE”.
See Fig. 12
Fig. 12
Save as Message Screen
This concludes Creating and Saving Messages.
Next: Adding you messages to the Site Editor.
WaveWare Technologies, Inc. 1-800-373-1466 Fax: 972-479-1735
Technical Support at: x 109 or E-mail to: support@wirelessmessaging.com
www.wirelessmessaging.com
Page 12

Adding your message(s) to the Site Editor screen:
• Highlight the site that you want to add a message(s).
• Click on “Messages”.
• Click on “Add”.
NOTE: The “Add” option will not be available if you don’t highlight the site name.
• Highlight the message you want to add to the Site.
• Click OPEN.
• The message will be added to the Site under the “Message Name” field.
See Fig. 13
Add Messages Screen
Fig. 13
This concludes Adding Messages to the Site Editor.
Next: Sending Messages.
WaveWare Technologies, Inc. 1-800-373-1466 Fax: 972-479-1735
Technical Support at: x 109 or E-mail to: support@wirelessmessaging.com
www.wirelessmessaging.com
Page 13

Sending Messages:
• Highlight the Site you want to use to send a message.
• Choose the message you want to send.
• Click on the Lightening Bolt from the toolbar. See Fig. 14
Site Editor Main Screen
WaveWare Technologies, Inc. 1-800-373-1466 Fax: 972-479-1735
Technical Support at: x 109 or E-mail to: support@wirelessmessaging.com
www.wirelessmessaging.com
Fig. 14
Page 14

Sending messages, continued:
• You can use the site you selected or choose to send the message to ALL
sites.
• Click OK, to send the message.
See Fig. 15
Fig. 15
Transmit Options screen
This concludes Sending Messages.
This concludes the WaveWare Wireless Basic Setup Instructions.
Any Questions, please call or E-Mail Tech Support.
Additional Information:
Wireless Paging to LED Message Boards is applicable for use for Text Messaging for greater
distances than what the RF900 Devices can normally do. Since Wireless Paging throughput
capability is significantly less than other RF Devices like the RF900 or Aerocomm or Locus.
Wireless Paging is Not intended for use with Graphics or for Short Ranges.
Recommend using RF Devices for these applications.
WaveWare Technologies, Inc. 1-800-373-1466 Fax: 972-479-1735
Technical Support at: x 109 or E-mail to: support@wirelessmessaging.com
www.wirelessmessaging.com
 Loading...