

Page 1
The mounting bracket
and screws are included.
1
ALPHA™ series sign installation instructions
for the Personal Priority Display, Big Dot®, and Series 200, 300, 4000, and 7000 signs
Introduction
These instructions show how to change the serial address and how to mount the following ALPHA series signs: Personal Priority
Display (PPD), Big Dot, Series 200, Series 300, Series 4000, and Series 7000.
Changing the serial address
An ALPHA sign’s serial address is a number from 0 to 255 in hexadecimal (00 to FF). An ALPHA SA sign’s serial address is a number
from 000 to 255 in decimal (000 to 255.) The address is used to identify the sign in a network of signs. All signs leave the factory with a default
address of 0 or 000.
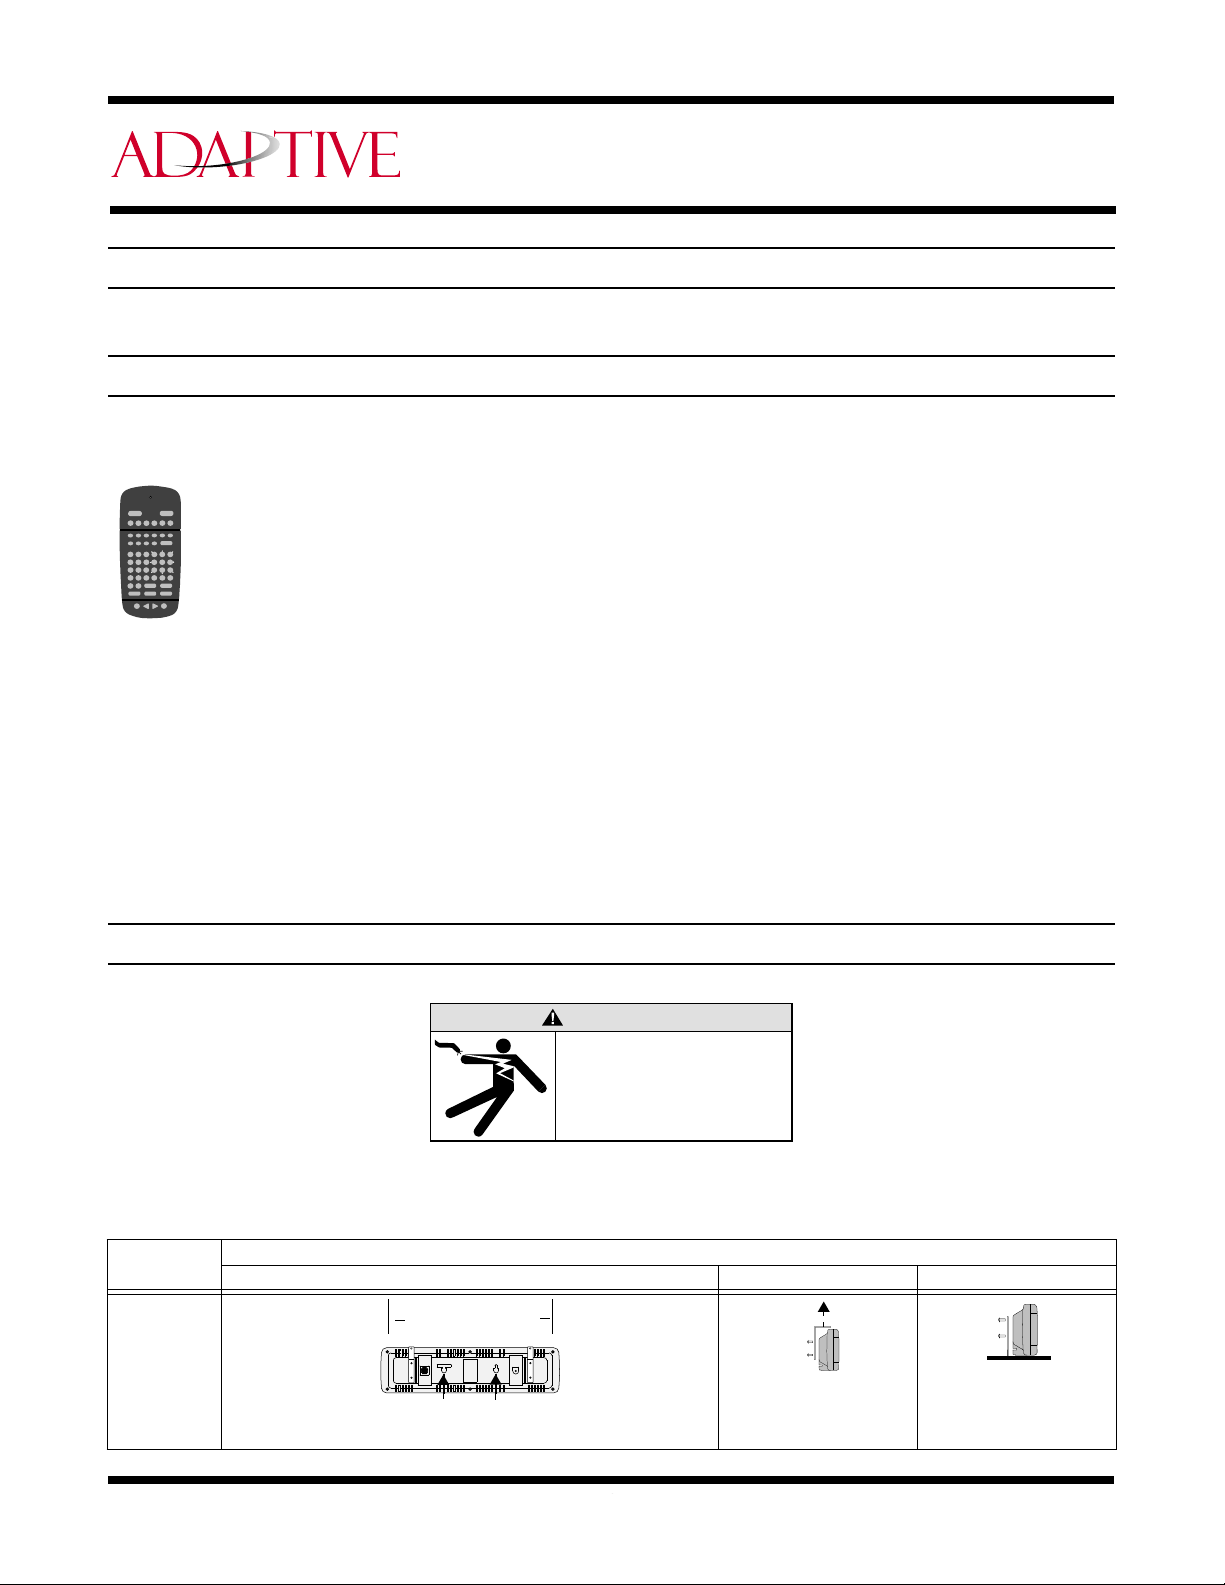
REMOTE CONTROL
ON - OFF
PROGRAM
SPECIAL FONT WIDTH
APPEND CURSOR
SCROLL FLASH HOLD ROTATE
ROLL WIPE
1234
TIME DOT
AUTO SPEED
890
7
ABCDE
¢
#
$
HIJK
G
=
<>
NPQRO
M
:
;
”’
TUVW
S
?!
Y
Z
SHIFT CAPS
INSERT BACK ADV DELETE
To change the serial address on all the signs except the PPD , follow these steps:
SOUND
RUN
1.Point a hand-held Remote Control (shown at left) at the sign, and press PROGRAM .
COLOR
6
5
SELECT
2.Press BACK until SET SERIAL ADDRESS (or SET ADDRESS ) is displayed.
F
%&
*
L
+
-
/
3.Press ADV and SERIAL ADDRESS = 00 (or ADDRESS = 00 ) will appear.
.
,
X
RETURN
SPACE
SHIFT
4.Type in the new serial address using the numbered keys on the Remote Control. (A serial address is actually a
number from 0 to 255 in hexadecimal . Typically, a number from 00 to 99 is used.)
5.Press RUN twice to set the new serial address and return the sign to normal operation.
To change the serial address on a PPD , follow these steps:
1. Press the A and B keys on the front of the PPD at the same time.
2. Press B until SET SERIAL (A) appears.
3. Press A . The sign should display the following: A Next, B Change and the current serial address below.
4. Press B to change the first digit of the serial address.
5. Then press A to select the second digit.
6. Press B to change the second digit of the serial address.
7. Press A (for Next ).
8. Press A and B at the same time. Then press A (for RESUME ).
Mounting instructions
Before mounting a sign, remove power from the sign.
NOTE: ALPHA signs are for indoor use only and should not be continuously exposed to direct sunlight.
NOTE: Mounting hardware that is used to hang or suspend a sign must be able of supporting at least 4 times the
weight of the sign.
Model
(weight)
PPD
(1 lb 5 oz, 595.35 g)
WARNING
Hazardous voltage.
Contact with high voltage may
cause death or serious injury.
Always disconnect power
to sign prior to servicing.
Mounting instructions
Wall Ceiling Counter
Ceiling mounts
9 3/8" (23.8 cm) apart
The mounting bracket
and screws are included.
Wall mounting holes 4" (10.2 cm) apart
Revision date: 2/29/00 © 1997-2000 Adaptive Micro Systems 9700-0043C
Page 2
The flip-up ceiling mounts will
come out if the sign if turned
over.
The sign will stand up if placed on
a counter. However, for greater
stability user the mounting kit
(pn 1036-9003).
Using the mounting kit (pn
1038-9003) and a chain (not
supplied in the kit), mount the
sign from the ceiling as shown:
3. Slide the mounting brackets
to the desired locations.
Then use the suppled screws
to fasten each mounting
bracket to the sign.
Use a chain (not supplied) to
hang the sign from a ceiling.
NOTE: Choose a chain and
mounting system
capable of supporting
a minimum of 250
pounds (113.3 kg).
NOTE: Keep a minimum 1.0-
inch (2.54 cm)
clearance on all sides
of the sign for
adequate ventilation.
1. Remove the end cap from each
side of the sign by unscrewing
the two screws that hold each
end cap to the sign.
2. Insert a mounting
bracket into the
“rail” on each side
of the sign.
Model
(weight)
215C
(6.25 lb, 2.83 kg)
215R
(6.25 lb, 2.83 kg)
220C
(4.7 lbs, 2.13 kg)
Mounting instructions
Wall Ceiling Counter
Flip-up ceiling mounts 24" (61 cm) apart
Wall mounting holes 24" (61 cm) or 16" (40.6 cm) apart
A mounting kit (pn 1040-9005) can be used to mount the sign on a wall, ceiling, or
counter. (The kit contains brackets that attach to the end of the sign and can swivel.)
1. Attach the mounting brackets to the wall or surface.
2. Attach the sign to the mounting brackets using screws and washers as shown
36.5 inches (92.7 cm)
Flat washers (between bracket and sign
Top View
Screws and lock washers
or
Mounting bracket
Front View
Attach the ceiling bracket to the
sign (screws provided)
Ceiling
mount
Note: Mounting chain
and ceiling hook
(not supplied) must
be able to support
at least four times
the weight of the
sign
The sign will stand up if placed
on a counter. However, for
greater stability use a mounting
kit (pn 1040-9005).
Big Dot
(12.25 lbs, 5.6 kg)
320C
(12.5 lbs, 5.7 kg)
330C
(17 lbs,7.7 kg)
1. Attach two wall brackets in the mounting kit (pn 1038-9003) to a wall 46 3/4”
(118.7 cm) apart (measured from the center of each bracket).
2. Attach the mounting brackets to the sign as shown.
Wall mounting distance
Lock washers
1. Attach two wall brackets in the mounting kit (pn 1043-9005)
to a wall the following approximate distance apart
(measured from the center of each bracket):
320C: 51 1/4” (130.2 cm)
330C: 78 3/4” (200 cm)
Wall bracket
2. Unscrew the two screws that secure each end cap to the sign. Then remove the end
caps.
3. Fasten the two signs brackets to the sign using the supplied hex screws.
4. Connect the sign brackets to the wall brackets using the supplied two, large bolts
and lock washers.
Wall mounting distance
Wall brackets
Sign brackets
NOTE: Do NOT install the sign directly
to drywall or plasterboard. The
Lock
washers
Hex
screws
sign must be fastened to a wall
capable of supporting at least
250 pounds (113.3 kg).
NOTE: Keep a minimum 1.0-inch
(2.54 cm) clearance on all
sides of the sign for adequate
ventilation.
2
The sign will stand up if placed
on a counter. However, for
greater stability use the
mounting kit (pn 1038-9003):
1. Attach the two mounting
brackets to the sign as
described in the wall
mounting instructions.
2. Either rest the sign on the
mounting brackets or fasten
the brackets to the counter.
NOTE: Keep a minimum 1.0-
inch (2.54 cm)
clearance on all sides
of the sign for
adequate ventilation.
Page 3

1. Remove the end cap from
each side of the sign by
unscrewing the two screws
that hold each end cap to the
sign:
2. Insert a mounting bracket
(shown below) into the “rail”
on each side of the sign.
3. Slide the mounting brackets
to the desired locations.
Then use the suppled screws
to fasten each mounting
bracket to the sign.
Use a chain (not supplied) to
hang the sign from a ceiling.
NOTE: Choose a chain and
mounting system
capable of
supporting a
minimum of 250
pounds (113.3 kg).
NOTE: Keep a minimum
1.0-inch (2.54 cm)
clearance on all
sides of the sign for
adequate ventilation.
Model
(weight)
4120C
4120R
(18.5 lbs, 8.4 kg)
4160C
4160R
(24.5 lbs, 11.2 kg)
4200C
4200R
(31 lbs, 14.1 kg)
4240C
4240R
(37.5 lbs, 17 kg)
Mounting instructions
Wall Ceiling Counter
1. Attach two wall brackets to a wall the
following approximate distance apart
(measured from the center of each bracket):
4120C / 4120R: 34” (86.4 cm)
4160C / 4160R: 46” (116.8 cm)
4200C / 4200R: 57-7/8” (147 cm)
4240C / 4240R: 69-7/8” (177.5 cm)
Bumpers
2. Stick two rubber “bumpers” to the bottom of each sign bracket. The bumpers
should end up between the sign bracket and the sign. Then use four screws to
attach each sign bracket to the sign.
3. Connect the sign
brackets to the wall
brackets using the two,
large bolts supplied.
4. Tilt the sign to select a viewing angle. To hold the sign in place, insert a cotter pin
into the small holes located on each bracket (see arrows).
NOTE: Do NOT install the sign directly to drywall or plasterboard. The sign
must be fastened to a wall capable of supporting at least 250 pounds
(113.3 kg).
NOTE: Keep a minimum 1.0-inch (2.54 cm) clearance on all sides of the sign
for adequate ventilation.
1. Stick two rubber “bumpers”
on each mounting bracket.
The bumpers should end up
between the bracket and the
sign.
2. Attach each mounting bracket
to the sign using two screws
(supplied) per bracket:
Bumpers
3. Either rest the sign on the
mounting brackets or fasten
the brackets to the counter.
NOTE: Keep a minimum
1.0-inch (2.54 cm)
clearance on all
sides of the sign for
adequate ventilation.
3
Page 4

1. Remove the end cap from
each side of the sign by
unscrewing the two screws
that hold each end cap to the
sign (see the wall mounting
instructions).
2. Insert a mounting bracket
(shown below) into the “rail”
on each side of the sign.
3. Slide the mounting brackets
to the desired locations.
Then use the suppled screws
to fasten each mounting
bracket to the sign.
Use a chain (not supplied) to
hang the sign from a ceiling.
NOTE: Choose a chain and
mounting system
capable of
supporting a
minimum of 250
pounds (113.3 kg).
NOTE: Keep a minimum
1.0-inch (2.54 cm)
clearance on all
sides of the sign for
adequate ventilation.
Model
(weight)
7080C
(15 lbs, 6.8 kg)
Mounting instructions
Wall Ceiling Counter
1. Remove the end cap from each side of the sign by unscrewing the two screws that
hold each end cap to the sign:
2. Stick two rubber “bumpers” to the bottom of each sign bracket. The bumpers
should end up between the sign bracket and the sign.
Place four screws through the bottom of each bracket. Then screw a nut onto each.
Slide the screw heads on each bracket into the two “channels” on the sign.
Position the brackets where you want them. Then tighten the screws using a 9/32”
(7 mm) socket wrench.
Channels
The sign will stand up if placed
on a counter.
NOTE: Keep a minimum
1.0-inch (2.54 cm)
clearance on all
sides of the sign for
adequate ventilation.
7120C
(20 lbs, 9 kg)
7160C
(26 lbs, 11.8 kg)
7200C
(32 lbs, 14.5 kg)
Sign bracket
Bumpers
3. Attach two brackets to a wall. The distance between these brackets will depend on
how far apart you spaced the sign brackets.
4. Connect the sign
brackets to the wall
brackets using the two,
large bolts supplied.
5. Tilt the sign to select a viewing angle. To hold the sign in place, insert a cotter
pin into the small holes located on each bracket (see arrows).
NOTE: Do NOT install the sign directly to drywall or plasterboard. The sign
must be fastened to a wall capable of supporting at least 250 pounds
(113.3 kg).
NOTE: Keep a minimum 1.0-inch (2.54 cm) clearance on all sides of the sign
for adequate ventilation.
4
 Loading...