

Page 1
For Residential and Commercial Applications
ES-WP-WPCCT-6
Job Name
Job Location
Engineer
Approval
–––––––––––––––––––––––––––––––––––––––––––
–––––––––––––––––––––––––––––––––––––––––
–––––––––––––––––––––––––––––––––––––––––––––
–––––––––––––––––––––––––––––––––––––––––––––
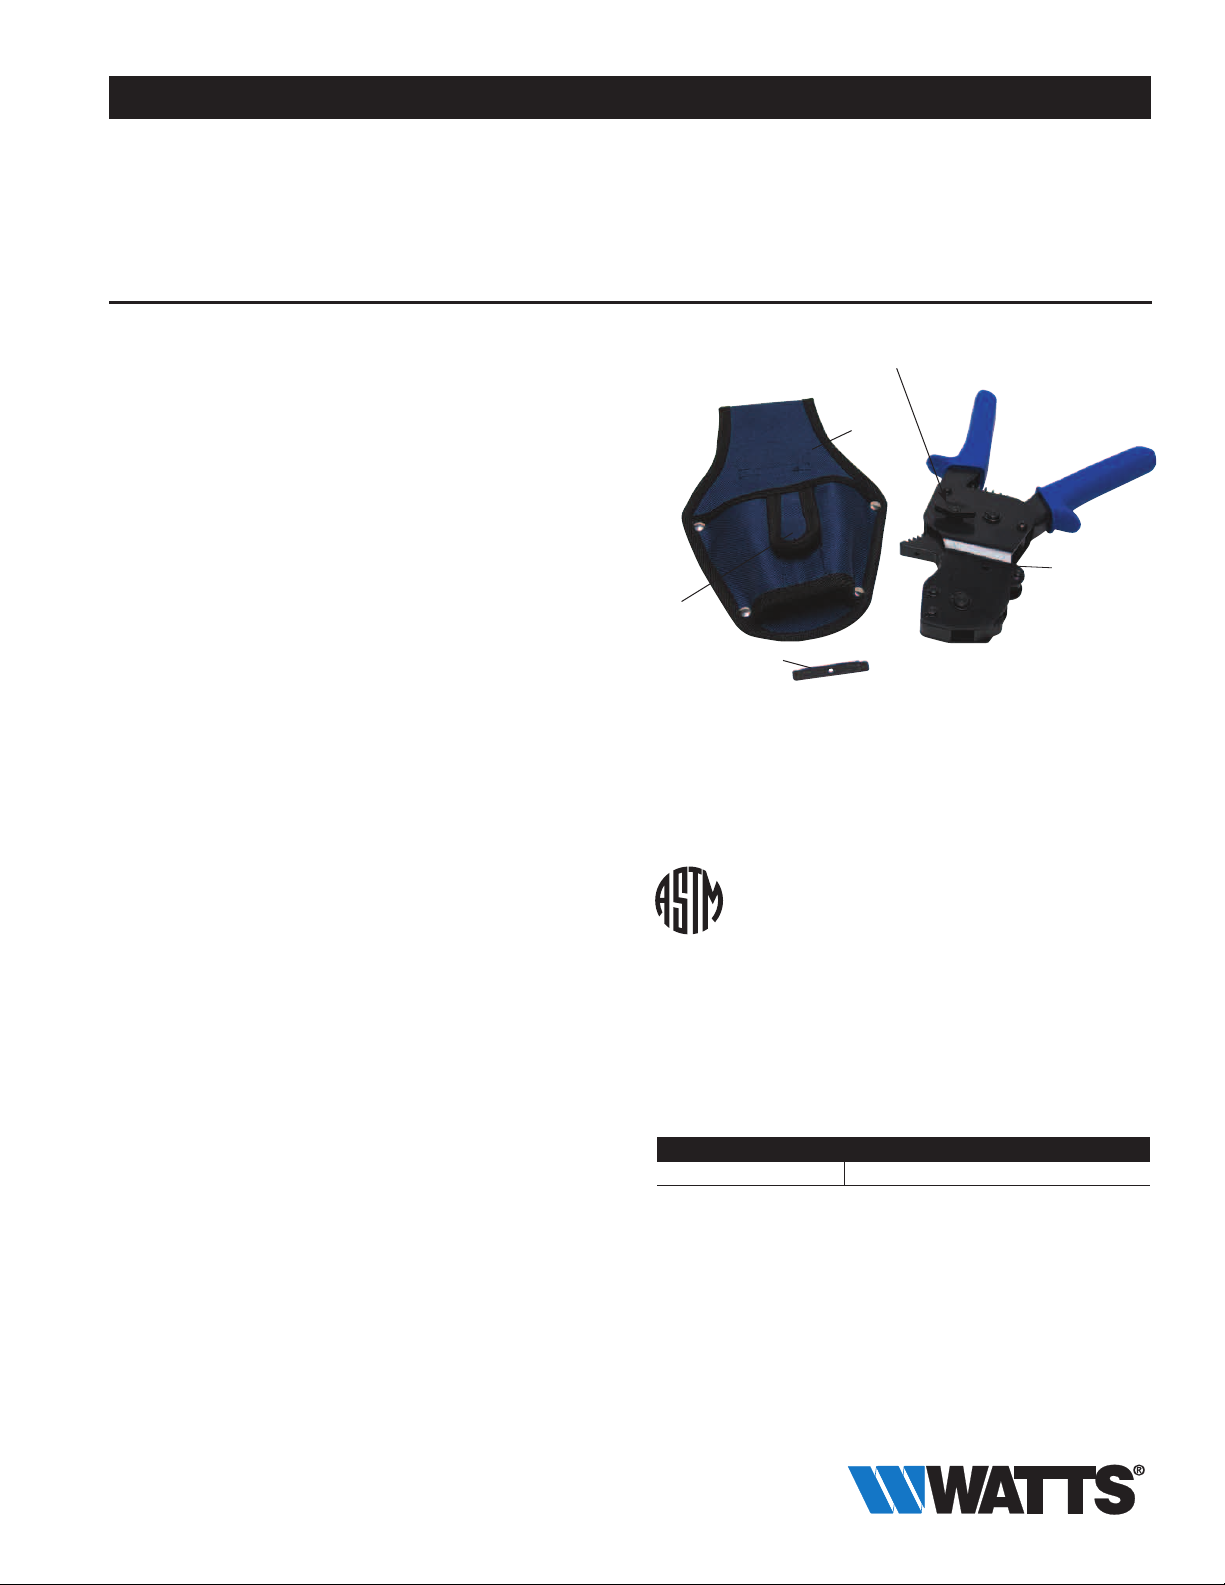
Model WPCCT-6
Ratcheting CinchClamp™ Tool
Sizes:
Watts Ratcheting CinchClamp™ Tool is designed to be used
with WaterPEX tubing and CinchClamp™ connections.
Specifications
Connections shall use Watts brass and poly-alloy crimp fittings
and WaterPEX
Installation
All CinchClamps must be installed using a Watts CinchClamp
Tool and in accordance with all installation guidelines.
– Make sure the WaterPEX has a clean, square cut end.
– Slide the CinchClamp over the WaterPEX.
– Insert fitting and position CinchClamp, allowing for approxi-
mately
– Position the open jaws of the CinchClamp™ Tool over the
tabs of the CinchClamp and squeeze. Allow the tool to ratchet to the next position. Repeat until the white indicator is
completely visible in the view hole (approximately seven
times).
– To release the CinchClamp Tool rotate the release lever on the
side. It is very important to complete the cinch process
before releasing the tool.
If connections are made in temperatures below 30°F,
caution must be taken to pause between ratchets, allowing the WaterPEX to form a proper seal against the barb.
Do not use the Ratcheting CinchClamp Tool to remove
CinchClamps. This will cause damage to the tool,
resulting in improper connections.
1
⁄2", 5⁄8", 3⁄4", 1" (15, 18, 20, 25mm)
®
cross-linked polyethylene pipe.
1
⁄8" clearance between clamp and fitting.
Contractor
Approval
Contractor’s P.O. No.
Representative
Gauge
Pouch
Ratcheting CinchClamp™ Tool with work pouch and calibration gauge.
Calibration gauge is located in side pouch.
––––––––––––––––––––––––––––––––––––––––––––
–––––––––––––––––––––––––––––––––––––––––––––
–––––––––––––––––––––––––––––––––––
––––––––––––––––––––––––––––––––––––––––
Release Lever
Holster
Gauge
Model WPCCT-6
CinchClamp™ Tool
Standards
– Watts CinchClamps are manufactured in accordance with the
American Society for Testing and Materials (ASTM) F-2098.
– Watts fittings are manufactured in accordance with the
American Society for Testing and Materials (ASTM) F-1807,
F-2159, and F-2434.
Ratcheting
View Hole
MODEL DESCRIPTION
WPCCT-6 Ratcheting CinchClamp™ Tool
Watts product specifications in U.S. customary units and metric are approximate and are provided for reference only. For precise measurements,
please contact Watts Technical Service. Watts reserves the right to change or modify product design, construction, specifications, or materials without prior notice and without incurring any obligation to make such changes and modifications on Watts products previously or subsequently sold.
Page 2
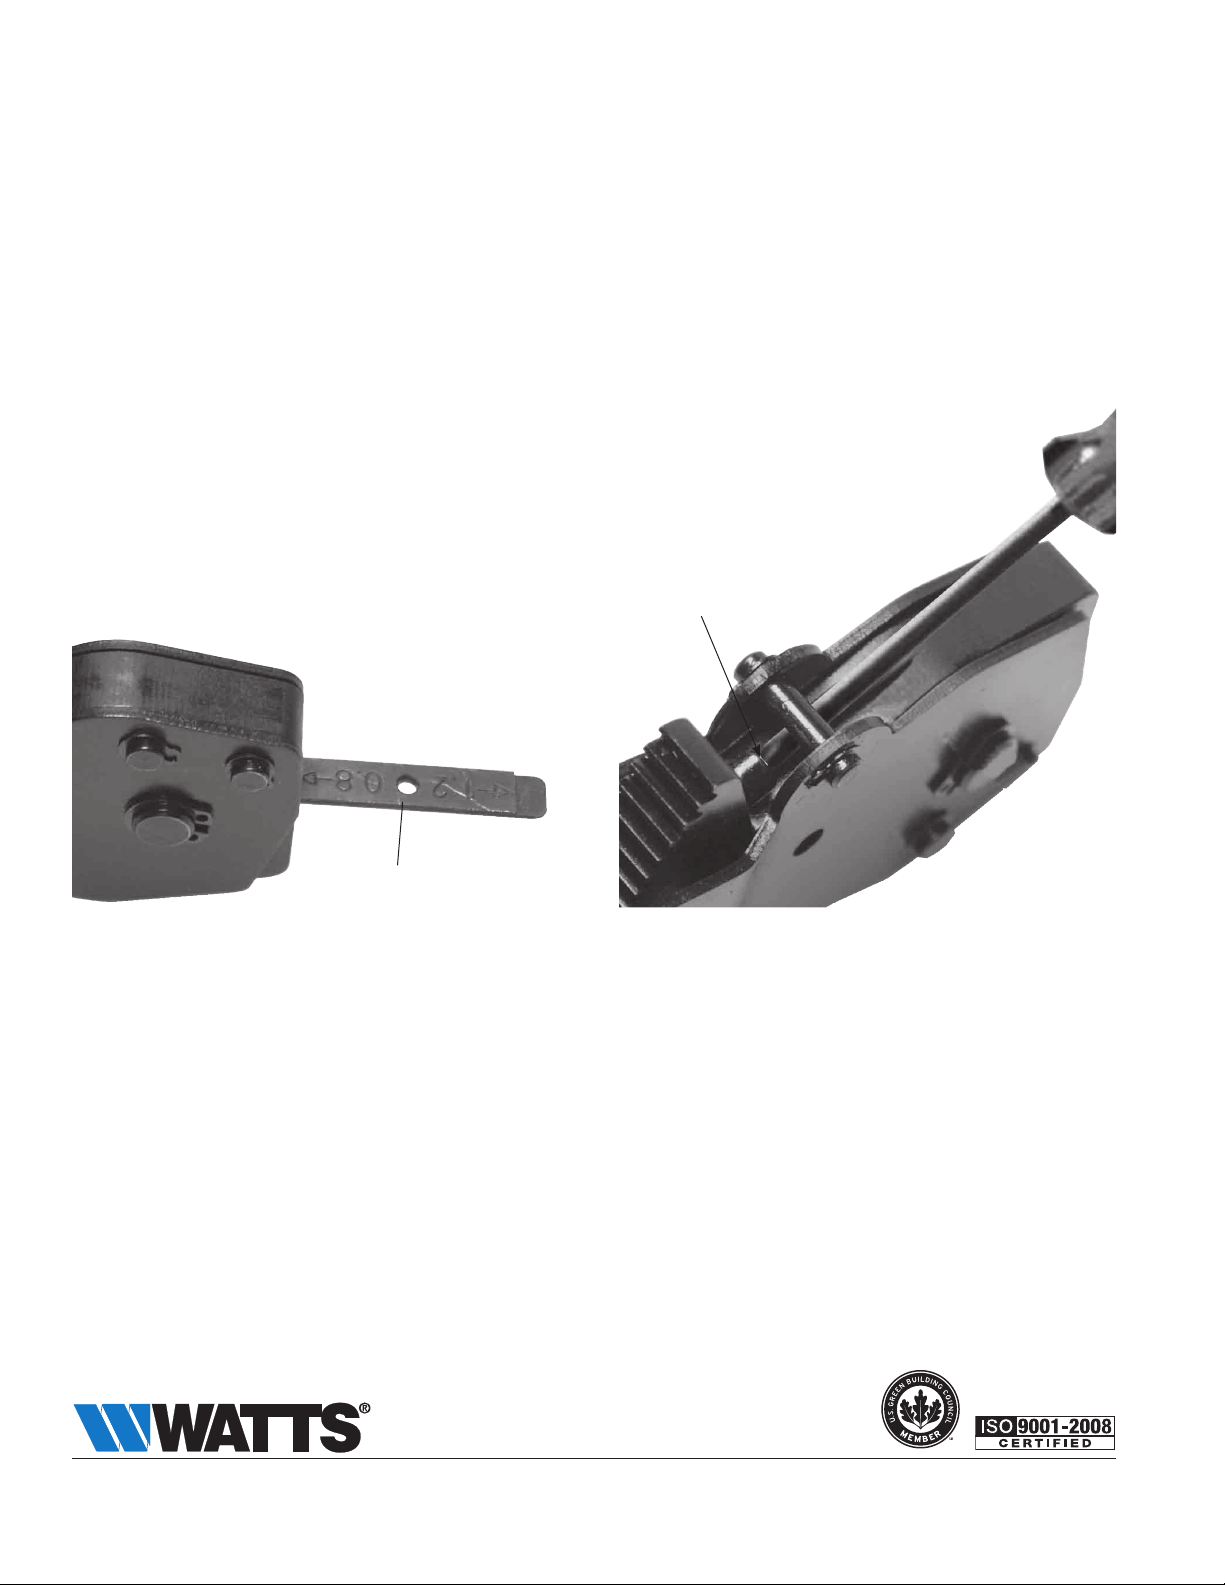
Calibration
Do not use the Ratcheting CinchClamp™ Tool if it has
been damaged as this may result in an improper cinch.
After repeated use of the CinchClamp Tool, it may
require calibration. A calibration gauge is provided in the
tool pouch. Follow these steps when calibrating a Watts
Ratcheting CinchClamp Tool.
1. Ratchet the Ratcheting CinchClamp Tool to the closed position and hold. Use the calibration tool to gauge the jaw gap.
Ideally, the jaw gap should be between 1.5mm and 1.7mm.
If the 1.7 mm side of the gauge slides into the gap, then the
jaw space is too large. If the 1.5 mm side of the gauge can
not slide into the gap, then the jaw space is too narrow.
2. To adjust the jaw gap, turn the Ratcheting CinchClamp™
Tool on its side and locate the Phillips screw positioned on
the ratchet arm. Use a standard Phillips screwdriver to raise
or lower the screw. Raising the screw (counter-clockwise
turn) will cause the jaw gap to increase. Lowering the screw
(clockwise turn) will decrease the jaw gap.
Adjustment Screw
Gauge
A Watts Water Technologies Company
ES-WP-WPCCT-6 1323 © 2013 Watts
USA: Tel: (978) 688-1811 • Fax: (978) 794-1848 • www.watts.com
Canada: Tel: (905) 332-4090 • Fax: (905) 332-7068 • www.watts.ca
 Loading...