

Page 1

6. Tenant Override
Program
WCC III
6. Tenant Override
Program
Page 2

T ABLE OF CONTENTS
SECTION 6:
TENANT O VERRIDE PROGRAM
WCC III Installation Software -
DM1WC011-01X ...........................................6-1
WCC III Tenant Override Installation
Software - DM1WC013-01X ......................... 6-3
How to Start or Run the
TenantOverride.exe Program .....................6-4
Tenant Override Request ............................6-5
Page 3
SECTION 6:
TENANT O VERRIDE PROGRAM
(SS5024)
____________________________________________________
The Tenant Override Program provides a means for an end user,
or Tenant to override specifi c WCC III control point(s) via the
internet with a very simplistic interface that WattMaster Controls
has developed.
This is mainly used for after hours billing of equipment usage, and
the timed usage of said equipment is then kept track for each and
every tenant in this manner. A separate secure program is then used
to retrieve this data.
6. TENANT OVERRIDE PROGRAM
Installing the Program
Please note: That there are two possible ways of installing
the T enant Override software—from the main WCC III
installation CD installation disk – WM part # DM1W C0 11 01 X and from the Standalone Tenant Override CD installation
disk – WM part # DM1 W C0 1 3-01X. The WM part # denotes
the software version for the installation CD and is typically A
to Z. The standalone version (WM part # DM1W C0 1 3-01 X)
allows the Building Contractor or build management company
to distribute this Tenant Override Installation software to the
end user/tenant for unassisted overrides.
WCC III Installation Software DM1WC011-01X
Please note: Your user name must hav e
suffi cient rights to install these WCC III programs
onto your computer’s hard drive.
Step 1:
01X) into your computer’s CDROM/DVD drive.
Insert the WCC III Program Setup CD (DM1WC011-
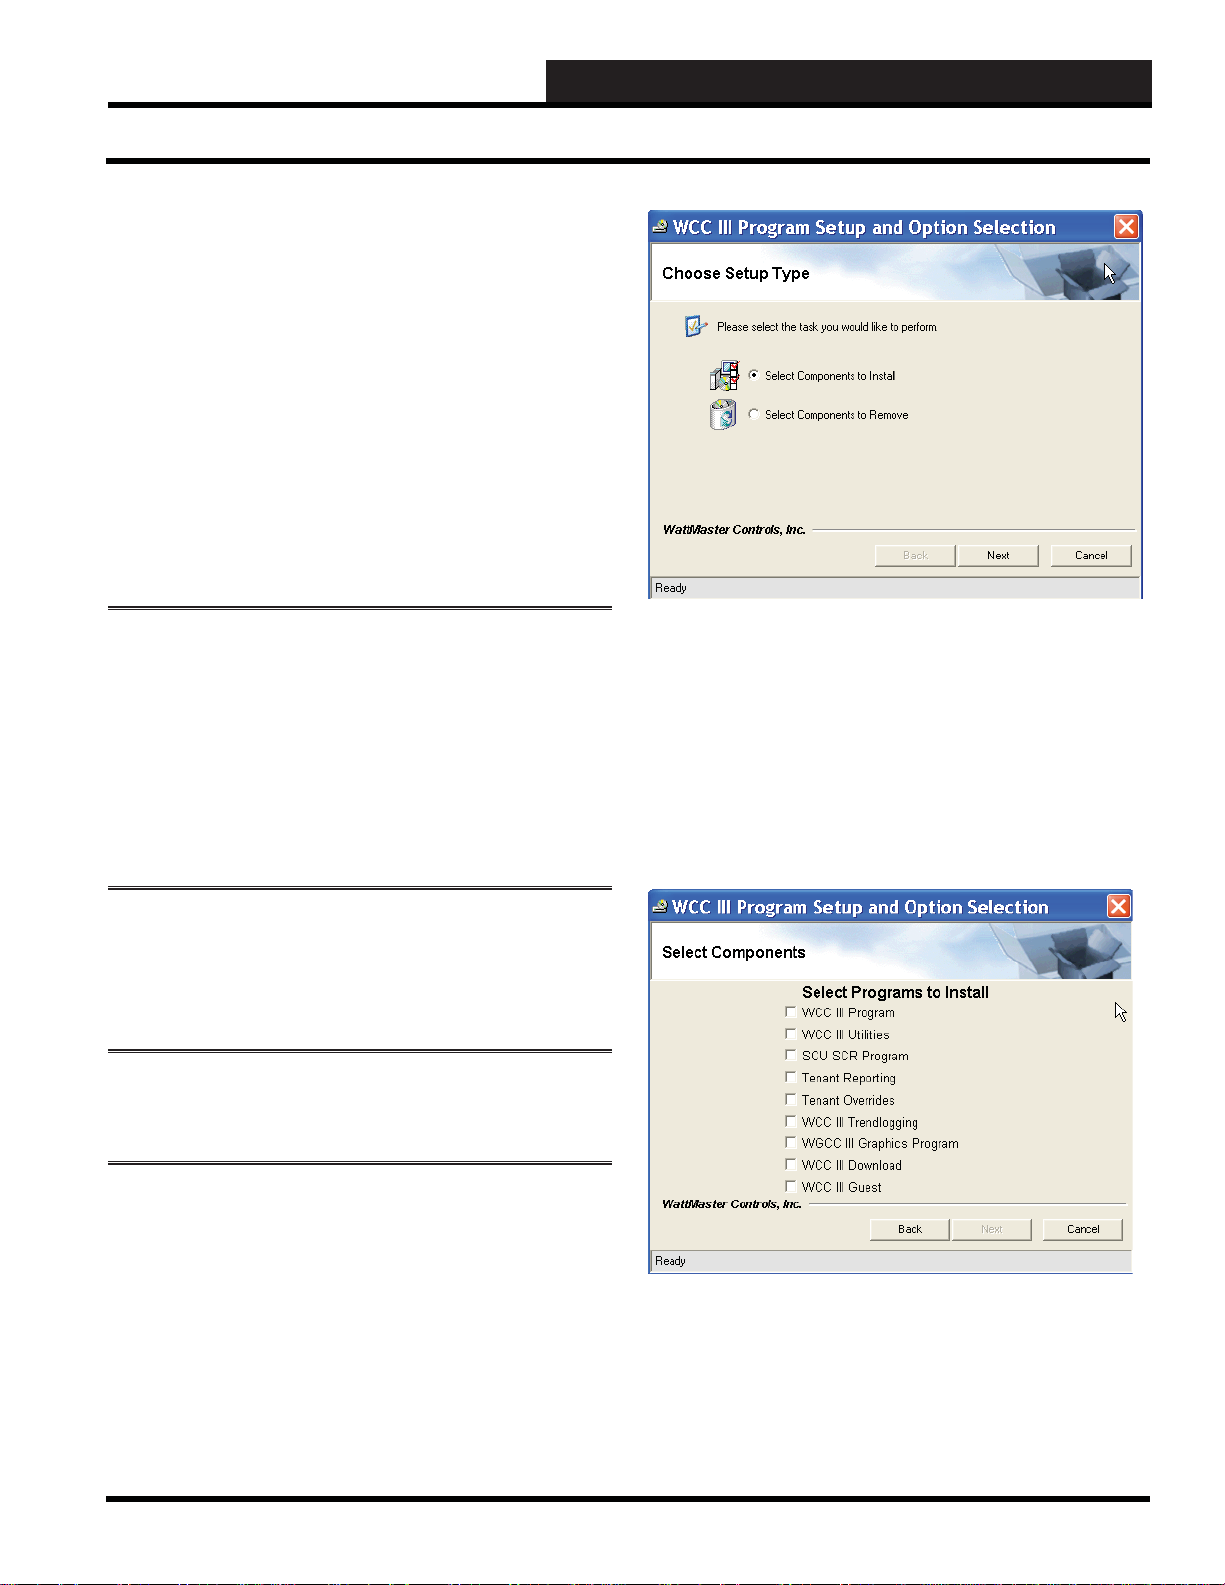
Step 3: Choose either “Select Components to Install” and
click <Next> to continue with the WCC III program installation
or choose “Select Components to Remove” and click <Next> to
continue with the WCC III program removal process.
The <Back> button will take you back one screen and the
<Cancel> button will allow you to cancel the WCC III Program
Setup installation. The instructions that follow describe the
installation process. The removal process closely follows the
installation procedure, but instead of installing the various WCC
III component programs, it will uninstall them.
Step 2: This disk should “autorun” and start the installation
process and then display the WCC III Program Setup and Option
Selection Screen. The WCC III Program Setup and Option
Selection Screen will allow you to select the installation or removal
of the various WCC III component programs on to the WCC III
front end computer’s hard drive.
WCC III Technical Guide
Step 4: Select the desired check boxes to the left of the Tenant
Override programs and any other programs you wish to install
and then click <Next> to continue with the installation of these
program(s) onto the WCC III Front end computer’s hard drive.
6-1
Page 4
6. TENANT OVERRIDE PROGRAM
Installing the Program
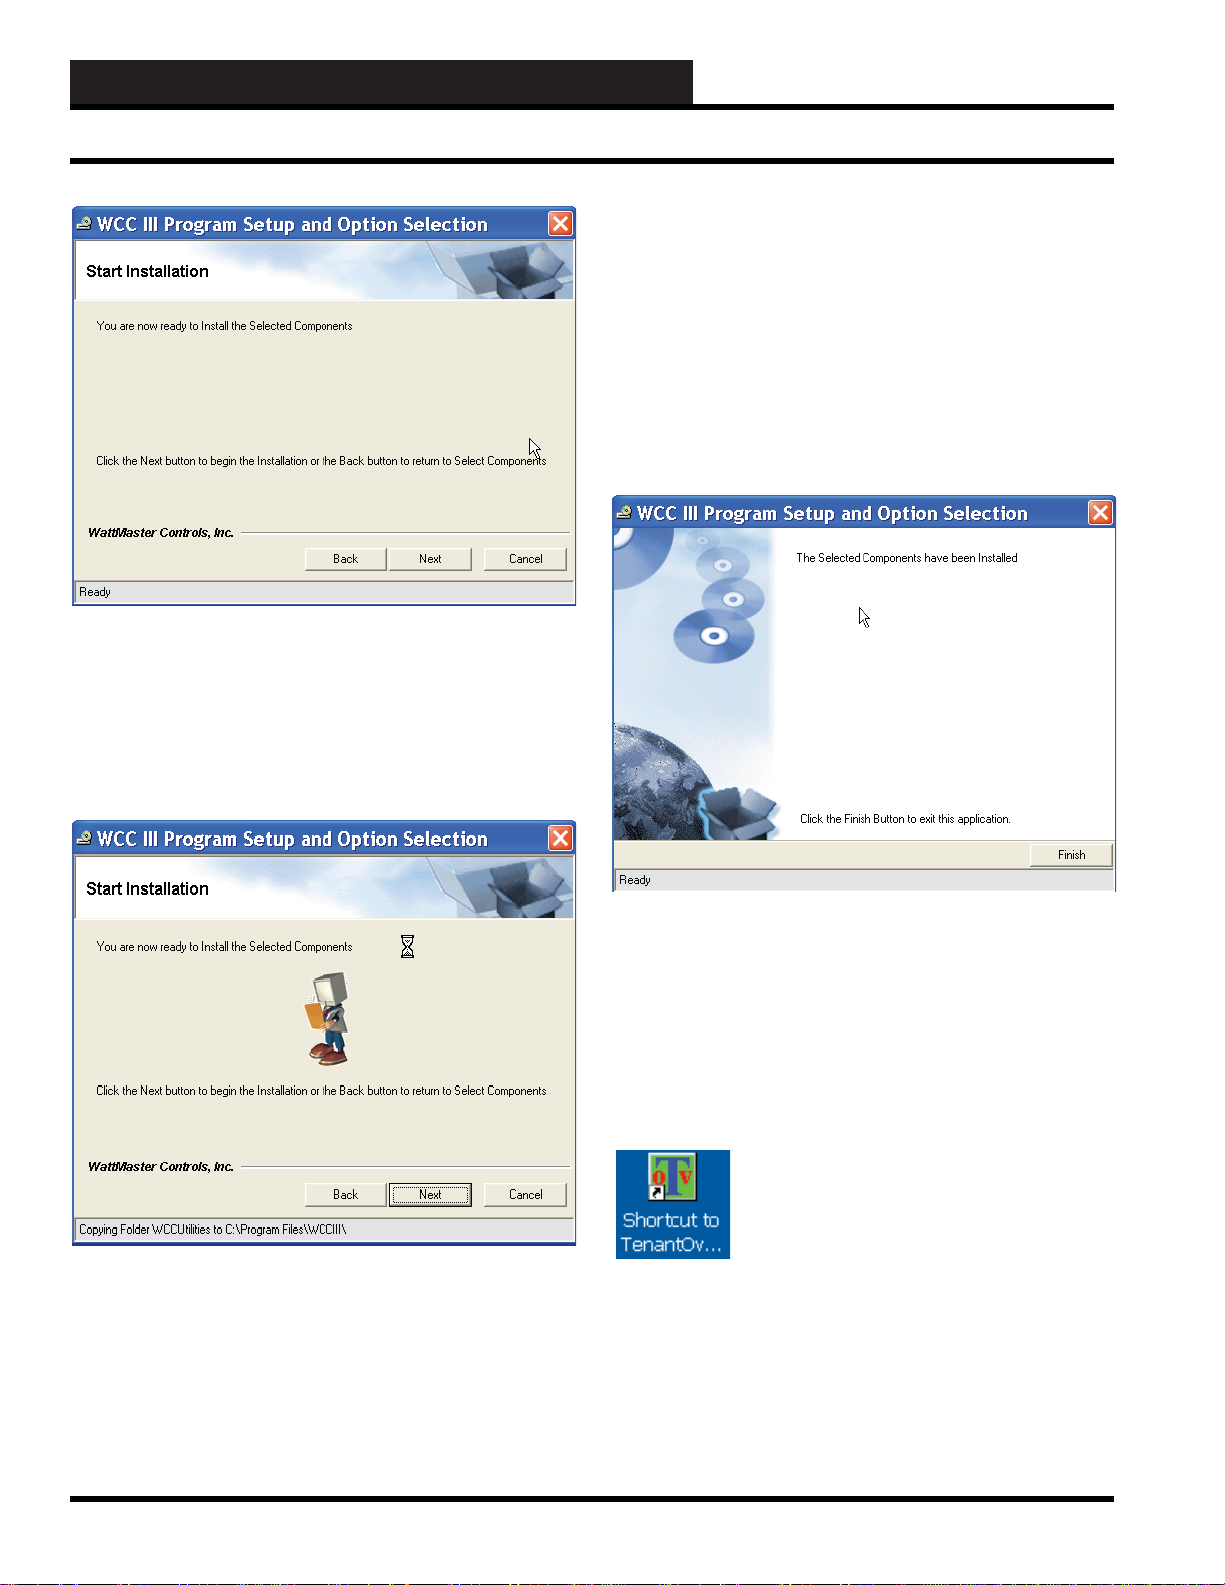
Step 5: The screen will ask you to click the <Next> button to
begin installation. After again verifying that you really want to
install these WCC III programs, click <Next>.
ProgramFiles\WCCIII subdirector(ies), depending on the selected
programs to be installed. Listed below is only the Tenant Override
subdirectory:
C:\ProgramFiles\WCCIII\T enant OVR\
The <Back> button should take you back one screen, but at this
point it is too late in the installation process to go back one screen.
The <Cancel> button should allow you to cancel the WCC III
Program Setup installation, but at this point it is too late to cancel
the installation process.
The <Back> button will take you back one screen and the
<Cancel> button will allow you to cancel the WCC III Program
Setup installation.
Step 6: The mouse cursor will turn to an hourglass-shaped cursor to
indicate that the WCC III installation process is still continuing. The
“Ready” fi eld at the bottom of this screen will show the progress of
the WCC III programs that were selected for installation. (Copying
various subdirectories and fi les). The WCC III installation program
will create (or copy over existing subdirectories) the following
subdirectories on the WCC III Front end computer’s local disk C:\
Step 7: After the installation is complete, the screen shown above
will be displayed. Please left-click the <Finish> button to exit the
WCC III program setup installation process.
The shortcut icon below and other icons should now be on your
Windows Desktop screen, depending on your WCC III program
installation selections:
6-2
WCC III Technical Guide
Page 5

6. TENANT OVERRIDE PROGRAM
Installing the Program
WCC III T enant Override Installation
Software - DM1WC013-01X
Please note: Your user name must hav e suffi cient
rights to install the WCC III Tenant Override Program
onto your computer’s hard drive.
Step 1: Insert the WCC III Tenant Override Program Setup CD
(DM1WC013-01X) into your computer’s CDROM/DVD drive.
Step 2: This disk should “autorun” and start the installation
process and then display the WCC III Tenant Override Program
Installation Screen.
Step 4: The mouse cursor will turn to an hourglass-shaped cursor
to indicate that the WCC III T enant Override installation process is
still continuing. The “Ready” fi eld at the bottom of this screen will
show the progress of the WCC III T enant Override program that was
selected for installation. The WCC III Tenant Override installation
program will create (or copy over existing subdirectories) the
following subdirectory on the end user customer computer’s local
disk: C:\ProgramFiles\WCCIII\T enantOverride.
The <Cancel> button should allow you to cancel the WCC III
Program Setup installation, but at this point it is too late to cancel
the installation process.
Step 3: Click <Next> to continue with the program installation.
The <Cancel> button will allow you to cancel the WCC III Tenant
Override program installation.
WCC III Technical Guide
Step 5: After the installation is complete, the screen shown above
will be displayed. Please left-click the <Finish> button to exit the
WCC III Tenant Override program installation process.
There should now be a Tenant Override shortcut icon on your
Windows Desktop screen.
6-3
Page 6
6. TENANT OVERRIDE PROGRAM
Running the Program
How to Start or Run the
T enantOverride.exe Program
(SS5024)
The TenantOverride.exe shortcut icon should have been installed
on your WCC III Front end computer desktop using either the
WCC III Installation Software CD (Part # DM1WC011-01X)
or the WCC III Tenant Override Installation Software CD (Part
# DM1WC013-01X). To start the TenantOverride.exe program,
double click the left mouse button on the Shortcut Icon on the
Windows desktop.
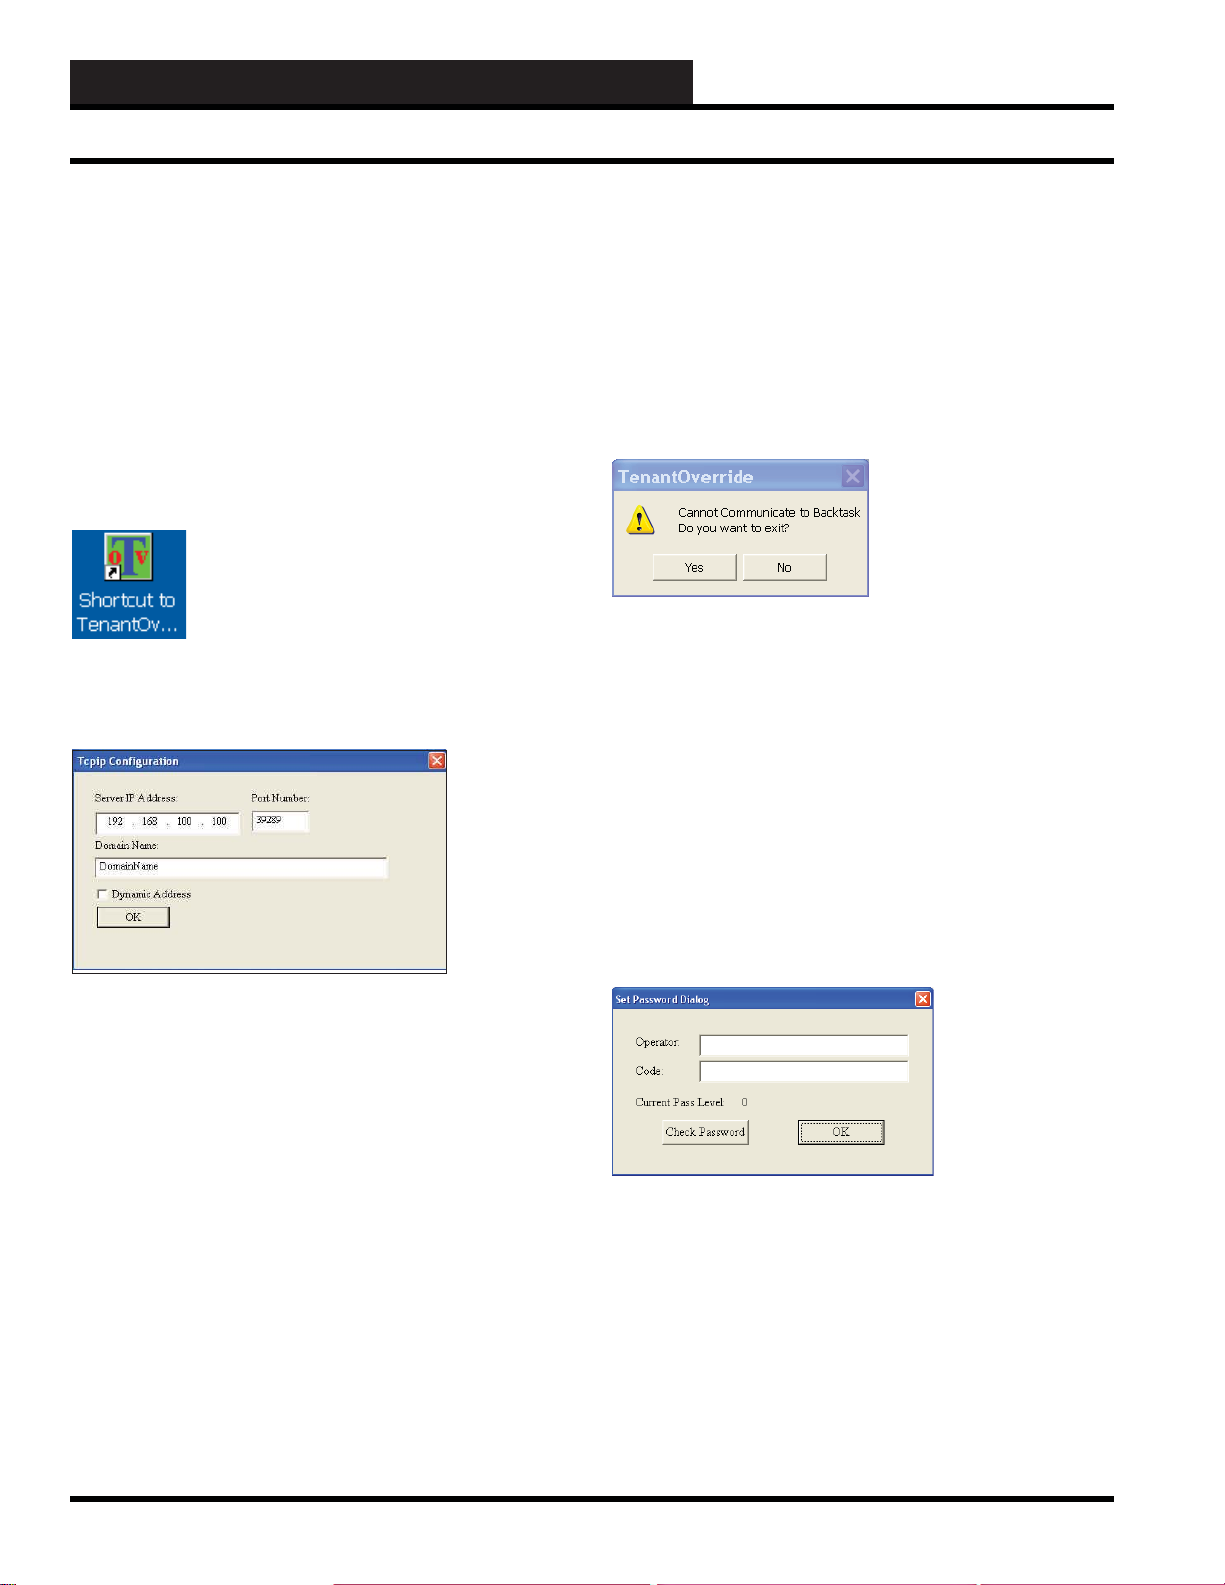
After a short period of time, and this time period is dependent upon
the CPU speed of your Windows-based computer and the speed of
your IP connection to the internet, the Tenant Override Connection
Dialog Box will appear.
connection is done on a higher address port number than normal
(WCC III connection is port number 39289) to help reduce the risk
of computer hacking.
By selecting <OK>, the TenantOverride.exe program will now
start to connect to the selected WCC III – MCD via this selected
IP address connection. It should bring up the Tenant Override
Set Password Dialog Screen within a new window. If the IP
address connection fails to connect to the WCC III – MCD, then
another small dialog box window will appear. This is the Cannot
Communicate to Backtask Dialog Box.
If you click <Yes>, you will exit the TenantOverride.exe program.
You will have to fi gure out why you cannot connect to the WCC
III – MCD via the IP address connection.
If you click <No>, you will not exit the Tenant Override.
exe program, but instead you will be connected to the Tenant
Override Set Password Dialog Screen within a new window. This
connection to the Tenant Override Set Password Dialog Screen is
not an actual IP connection, but rather a “dummy” Tenant Override
Set Password Dialog screen. Once you click <OK>, you will be
connected to the WCC III T enant Override Scr een. This connection
to the WCC III - MCD is not an actual IP connection, but rather a
“dummy” Tenant Override Screen with no values. This “dummy”
Tenant Override Screen will allow you to view and see what the
actual TenantOverride.exe screen will look like – minus any data.
Server IP Address:
This is the static IP address of the WCC III – MCD. An IP Address
is like a phone number on the world wide web. The IP address for
the WCC III – MCD must be Static (does not change) as opposed
to Dynamic (constantly changing). This static IP address must be
provided by your internet service provider. (A static IP address
is the preferred IP connection method for the WCC III system to
function.) If you actually know the static IP address of the WCC
III – MCD that you wish to connect to, please enter it here in the
Server IP Address fi eld.
You can use a Dynamic IP Address with the WCC III – MCD,
but you must then have what is called a static “Host Name”. This
static “Host name” must then be provided by your internet service
provider and is limited to 58 total characters.
Port Number:
The TenantOverride.exe program opens a two-way, secure
communications port that then allows for communication between
WCC III – MCD and the TenantOverride.exe program that is
running on the WCC III Front end computer. This IP Address
6-4
In the Set Password Dialog Screen, enter an “Operator:”
identifi cation and a “Code:” or password equal to at least a pass level
0 that has been previously set up on the WCCIII System Parameter
– Operator Code Screen. (See the Operator Code Screen of the
System Parameter Screen in Section 3 for information on setting
up Operator Codes.) Click
Pass Level:” stays at 0 or higher (1, 2, or 3), then click <OK>. By
selecting <OK>, >, the T enant Override.exe program will now start
to connect to the selected WCC III – MCD via this selected IP
address connection. It should bring up the Tenant Override Screen
within a new window. If the “Current Pass Level:” changes to –1
then you do not have access to the WCCIII – MCD. If you do not
<Check Password>. If the “Current
WCC III Technical Guide
Page 7
6. TENANT OVERRIDE PROGRAM
T enant Override Rquest
have access to the WCCIII – MCD and you click <OK> then this
connection to the Tenant Override.exe program is not an actual IP
connection, but rather a “dummy” T enant Override screen window
with no values.
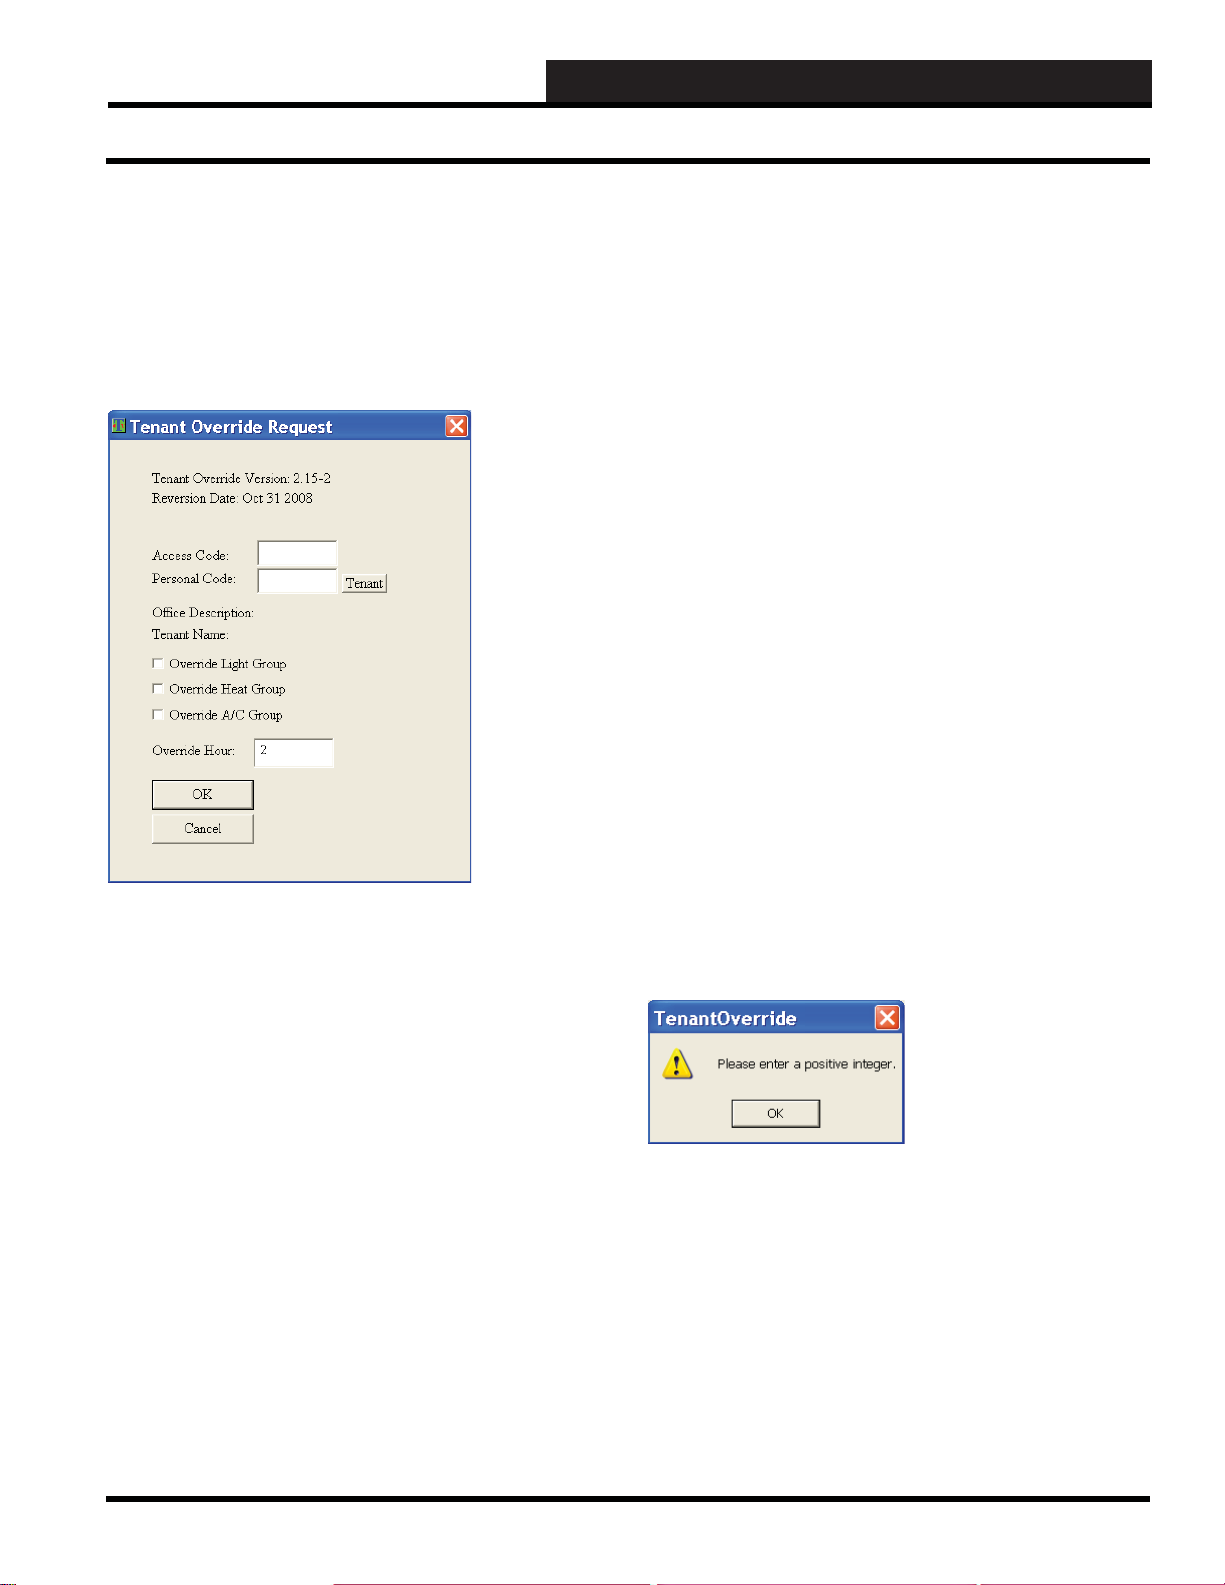
T enant Override Request
The Tenant Override Request Screen is a simple to use interface
screen that allows the end user to override predefi ned control
points with in the WCC III system. The WCC III System can keep
track of the override periods and that generally allows for after
hours tenant billing of the used equipment.
Selecting an Override
An override is accomplished by selecting the check box that
is located next to the desired override group and then clicking
<OK>.
There are three possible selectable overrides: Override Light
Group, Override Heat Group, and Override A/C Group. These
overrides must fi rst be pre-programmed by the Controls Contractor
and/or the building management company to override the desired
WCC III control point(s). Each Override Group can override a
single WCC III control point or up to fi ve WCC III control points
with this Tenant Override program.
Override Hour
There is but one duration time for the all three overrides on this
screen.
If you wanted to override the A/C group for 4 hours and the
Light Group for 6 hours, it is possible. First you would log into
the Tenant Override program with the correct Access Code and
Personal Code and then select the Override A/C group check box
with a time duration for 4 hours in the Override Hour Time box.
You would then select the <OK> button to active the Override
A/C Group and then exit the WCC III Tenant Override program.
Then you would immediately log in again to the Tenant Override
program with the correct Access Code and Personal Code and then
select the Override Light Group check box with a time duration for
6 hours in the Override Hour Time box, select <OK> to active the
Override Light Group and then exit the WCC III Tenant Override
program.
Tenant Ov erride Error Message Window
Access Code
This is a numerical password for individuals to use to gain access
to override control points on the WCC III system.
Personal Code
This is a secondary numerical password for individuals to use to
gain access to override control points on the WCC III system.
The Tenant Button
The <Tenant> button is used to bring back text information from
the WCC III – MCD concerning the Offi ce Description and Tenant
Name, provided that they were programmed into the WCC III
Tenant Override Setup Screen by the Controls Contractor and/or
the building management company.
WCC III Technical Guide
If you incorrectly enter a non-valid number in any of the available
fi elds on the Tenant Override Screen, this message would be
displayed.
6-5
Page 8

6. TENANT OVERRIDE PROGRAM
Notes
6-6
WCC III Technical Guide
 Loading...