

WaterFurnace TPCM32U03, TPCM32U04 Instruction Manual
Instruction Guide:
Elite Communicating Thermostats
TPCM32U03/TPCM32U04
Thermostat Operation
NOTE: These communicating thermostats communicate via a
4-wire Modbus protocol and will only operate with the Aurora
Control System. TPCM32U03 is not applicable to variable speed
compressor equipment.
Adjusting Temperature
(Temporary Override in Programmable models)
1. Before you can adjust the temperature, a MODE must be
selected. If you are already in a Heating or Cooling mode,
then skip to step 5.
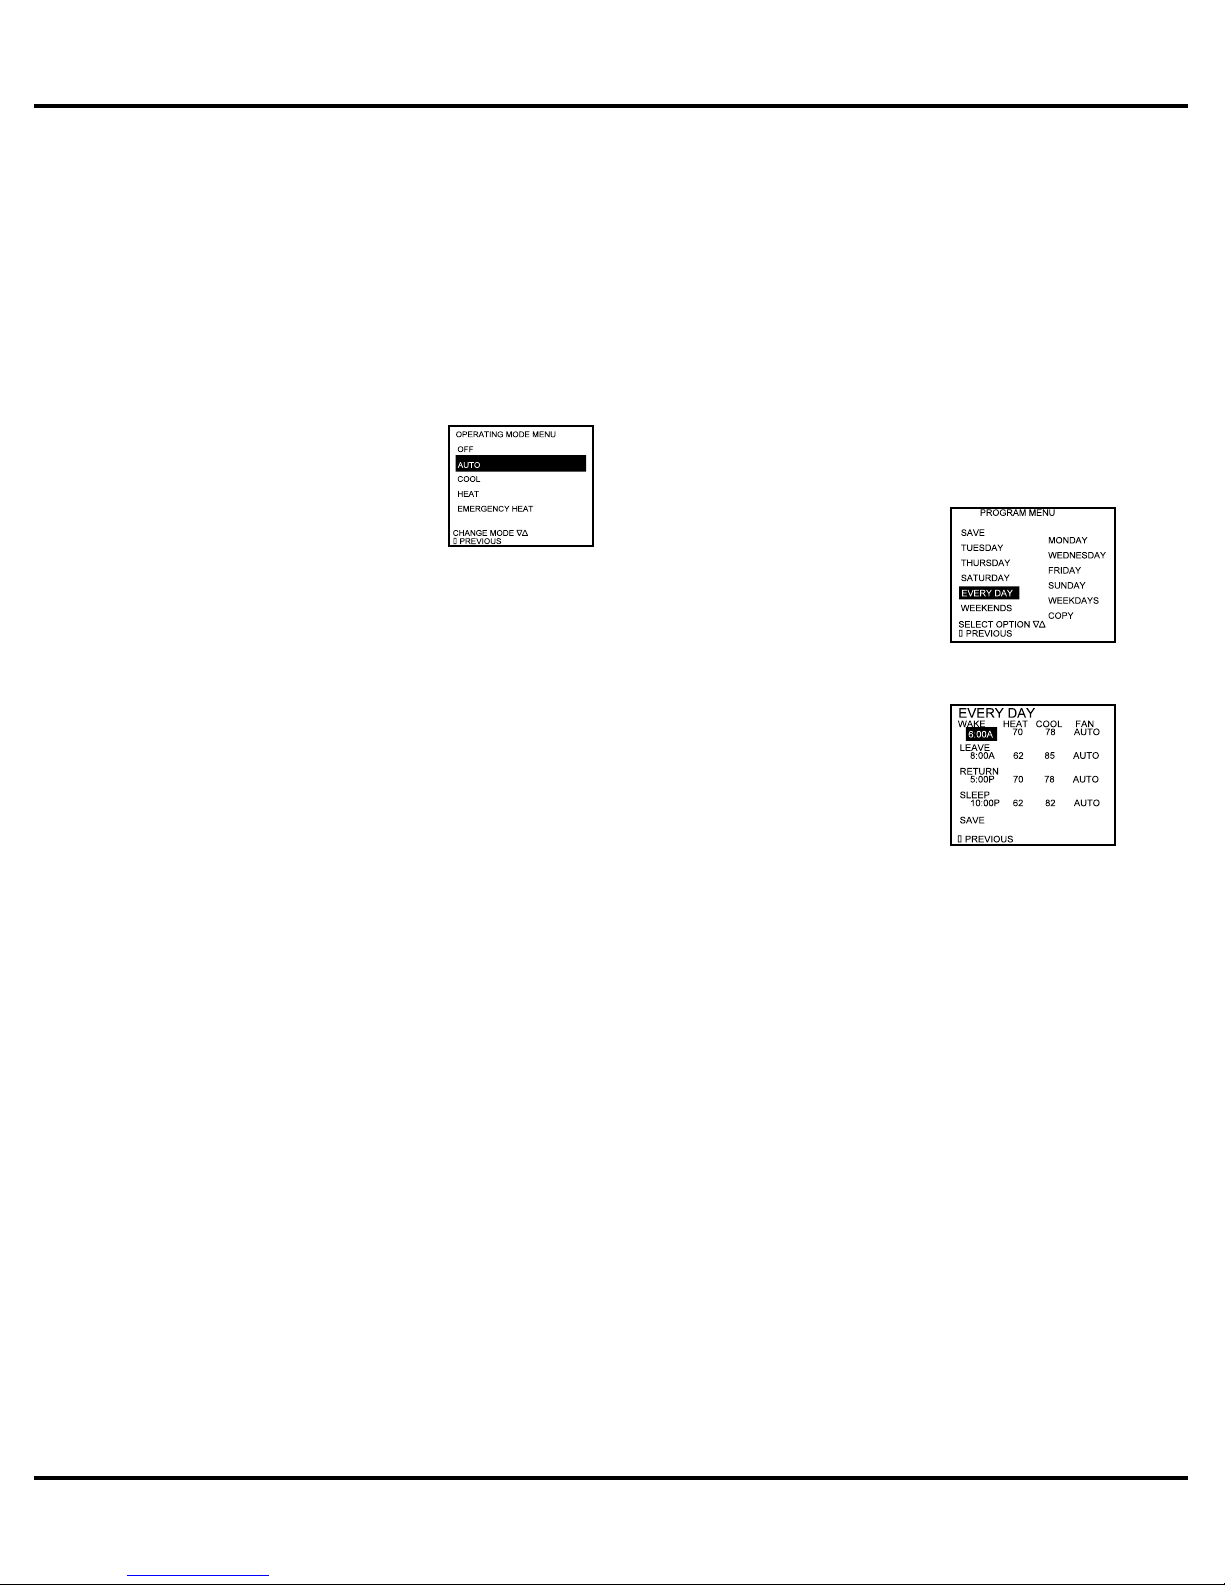
2. To select a MODE, use the keypad
arrows to scroll to MODE, and then
press the center button on the key
pad to enter the operating mode
menu.
3. Select the desired mode by
scrolling up or down, with the
arrows, and then press the center
button on the keypad to enter into that mode.
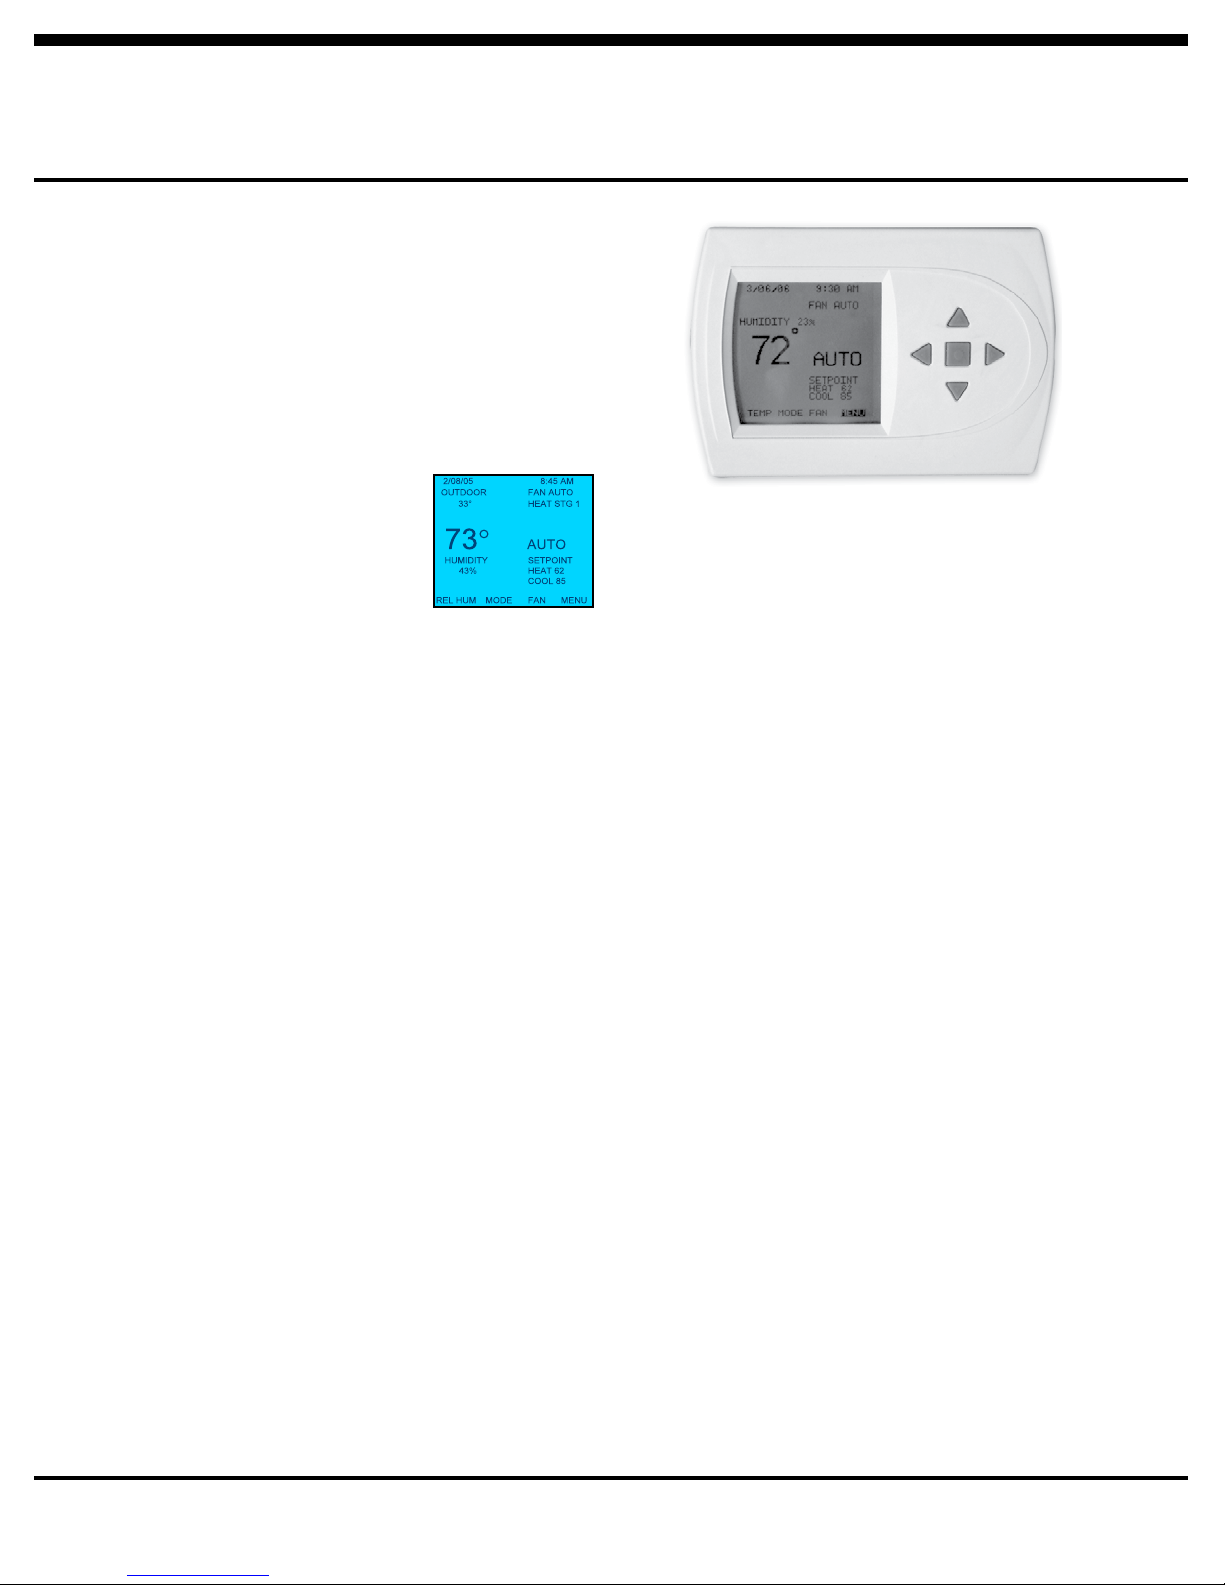
4. You are now returned to the Main Menu and Figure 1 is a
similar view. NOTE: Outdoor temperature is only displayed
if an outdoor sensor is installed.
5. To increase the temperature set point, use the arrow up
button. To decrease the set point, use the arrow down
button. Press the center button on the key pad for the new
set point to be effective
Setting Date And Time
1. From the Main Menu, scroll to MENU and press the center
button ■ on the keypad.
2. Select SET DATE AND TIME
3. If your area observes daylight savings time, select AUTO
DAYLIGHT SAVING, scroll to ON, then press the center
button ■ to save. You will be returned to the select SET
DATE AND TIME menu. Scroll to SET DATE AND TIME
and press the center button ■ on the keypad.
4. SET MONTH by using the up and down arrows ▲▼, and then
press the center button on the keypad to save the month.
5. SET DAY by using the up and down arrows ▲▼, and then
press the center button on the keypad to save the day.
6. SET YEAR by using the up and down arrows ▲▼, and then
press the center button on the keypad to save the year.
7. SET HOUR by using the up and down arrows ▲▼, and then
press the center button on the keypad to save the hour.
8. SET MINUTE by using the up and down arrows ▲▼, and
then press the center button ■ on the keypad to save the
minute.
9. Date and Time are now set. You can return to the Main
Menu by pressing the left arrow key to return to the
previous menu.
Hold Setting
Vacation and Permanent (Programmable models only)
This section describes the HOLD functions. You can program
the thermostat to hold the temperature for a period of time.
Figure 1
INSTRUCTION GUIDE: ELITE COMMUNICATING THERMOSTAT
Elite Communicating Thermostats
TPCM32U03/TPCM32U04
If you want to hold the temperature for a few hours or a few
weeks, your thermostat can accommodate your schedule.
Vacation Hold
(Programmable models only)
1. From the Main Menu, scroll to MENU and press the center
button ■ on the keypad.
2. Select HOLD → VACATION
3. First, the thermostat prompts you for a temperature to hold.
If you are in AUTO MODE you will be prompted for both
a heat setting and a cool setting. Use the up and down
arrows keys ▲▼ to select the desired temperature and
press the center button on the keypad.
4. Next it will prompt you for a date and time that you wish
to return to programmed operation. Returning to the Main
Screen, you will notice that in the upper part of the screen
is alternating HOLD TIL *date and time you specified* and
the actual date and time.
5. To cancel this hold, scroll to CANCEL HOLD from the Main
Menu and press the center button ■.
Permanent Hold
(Programmable models only)
1. From the Main Menu, scroll to MENU and press the center
button ■ on the keypad.
2. Select HOLD → PERMANENT
3. First, the thermostat prompts you for a temperature to hold.
If you are in AUTO MODE you will be prompted for both
a heat setting and a cool setting. Use the up and down
arrows keys ▲▼ to select the desired temperature and
press the center button on the keypad.
4. Returning to the Main Screen, you will notice that in the
upper part of the screen is alternating PERMANENT HOLD
and the actual date and time.
5. You can adjust to permanent hold temperature at will, and
the temperature you select will remain until the permanent
hold is canceled.
6. To cancel this hold, scroll to CANCEL HOLD from the Main
Menu and press the center button ■. This will revert to the
programmed settings.
IG1602EW 06/12
1
INSTRUCTION GUIDE: ELITE COMMUNICATING THERMOSTAT
Fan Operation
The thermostat can operate the fan in four ways:
AUTO (on only during heating and cooling calls)
ON (always on)
INTERMITTENT (cycles fan) Pg. 3
PROGRAMMED FAN (fan follows the program set in the
program menu screen) (programmable models only) Pg. 3
1. From the Main Menu, scroll to (FAN) and press the center
button on the keypad ■.
2. Select the operation you desire as described above.
Changing Modes
1. From the main screen select MODE.
2. Select the operating mode you need
and press the center button ■.
NOTE: If selecting EMERGENCY HEAT,
the backlight color will change from
blue to red indicating that auxiliary heat
is operating instead of the heat pump
compressor. Auxiliary/emergency heat is significantly more
expensive to operate than the heat pump compressor, and
should not be selected unless the heat pump compressor is not
operational.
Fahrenheit or Celsius
1. From the Main Menu, scroll to MENU and press the center
button ■ on the keypad.
2. Select SETINGS → SCREEN SETTINGS → FAHRENHEIT
OR CELSIUS
3. Select which scale you prefer.
12 or 24 Hour Clock
Within this menu option, you can change the time displayed by
your thermostat to 24 Hour time (Military Time).
1. From the Main Menu, scroll to MENU and press the center
button ■ on the keypad.
2. Select SETINGS → SCREEN SETTINGS → 12 OR 24
HOUR CLOCK
3. Select which time base you prefer.
Contrast Adjustment
You can change the contrast level of your thermostat screen to
be displayed to your preference.
1. From the Main Menu, scroll to MENU and press the center
button on the keypad.
2. Select SETINGS → SCREEN SETTINGS →CONTRAST
3. Use the up and down arrows ▲▼ to increase or decrease
the contrast level.
4. Press the center button to accept the new setting.
Backlight ON Time
This thermostat has a two color backlight feature. Anytime
a button is pressed, the blue backlight stays on for a certain
amount of time. A red backlight is visible if you are selecting
Emergency Heat mode. You can adjust the amount of time the
backlight stays on in the menu options.
1. From the Main Menu, scroll to MENU and press the center
button ■ on the keypad.
2. Select SETINGS → SCREEN SETTINGS →BACKLIGHT
ON TIME
3. You can change the backlight on time by using the up and
down arrows ▲▼. 30, 60, 90, 120, and ON (all the time)
are your choices. Press the center button to save the new
backlight on time.
Programming Your Thermostat
(programmable models only)
Preset Programming
Preset options will step you through the programming. Simply
select the temperatures and then view the completed program.
Programming a Day or a Series of Days
After selecting the programming
screen, you have the option of
programming everyday, weekdays,
weekends, or individual days. Once
you’ve selected a certain day to
program, a screen appears that allows
you to set the time, heat setting, cool
setting, and fan operation for each
event.
1. From the Main Menu, scroll to
MENU and press the center button
■ on the keypad.
2. Select PROGRAM
3. You can program each day
differently by going through each
day and personalizing them.
Or, you can program everyday the same by scrolling
to EVERYDAY. Or, you can program the weekdays or
weekends the same by selecting the appropriate menu item.
4. To program everyday the same, select EVERYDAY and
then press the center button ■.
5. Using the right arrow button ►, highlight the WAKE time,
and change to desired time by using the up and down
arrow ▲▼ buttons. Move to the next entry by using the
right arrow button ►. To change the HEAT set point, use
the up and down arrows. Continue this process until all
settings are to your liking.
6. To save these settings, scroll to SAVE, and press the center
button ■.
Copying A Program From One Day To Another
In the PROGRAM menu, there is an option to COPY. The option
can be used to copy the program from one day to another day.
After COPY is selected, the thermostat will prompt you for which
day to copy from. Next, it will prompt you for which day to copy
the program to. After these selections, it will then confirm what
is being copied to where. At this point you have the option of
canceling the copy process, by pressing ◄ to return to the copy
menu, or saving what you have by pressing the center button ■.
The SAVED screen will appear returning you to the copy menu.
Pressing ◄ will return you to the PROGRAM menu. Pressing ◄
again will return you to the MAIN MENU.
IG1602EW 06/12
2
INSTRUCTION GUIDE: ELITE COMMUNICATING THERMOSTAT
Advanced Settings
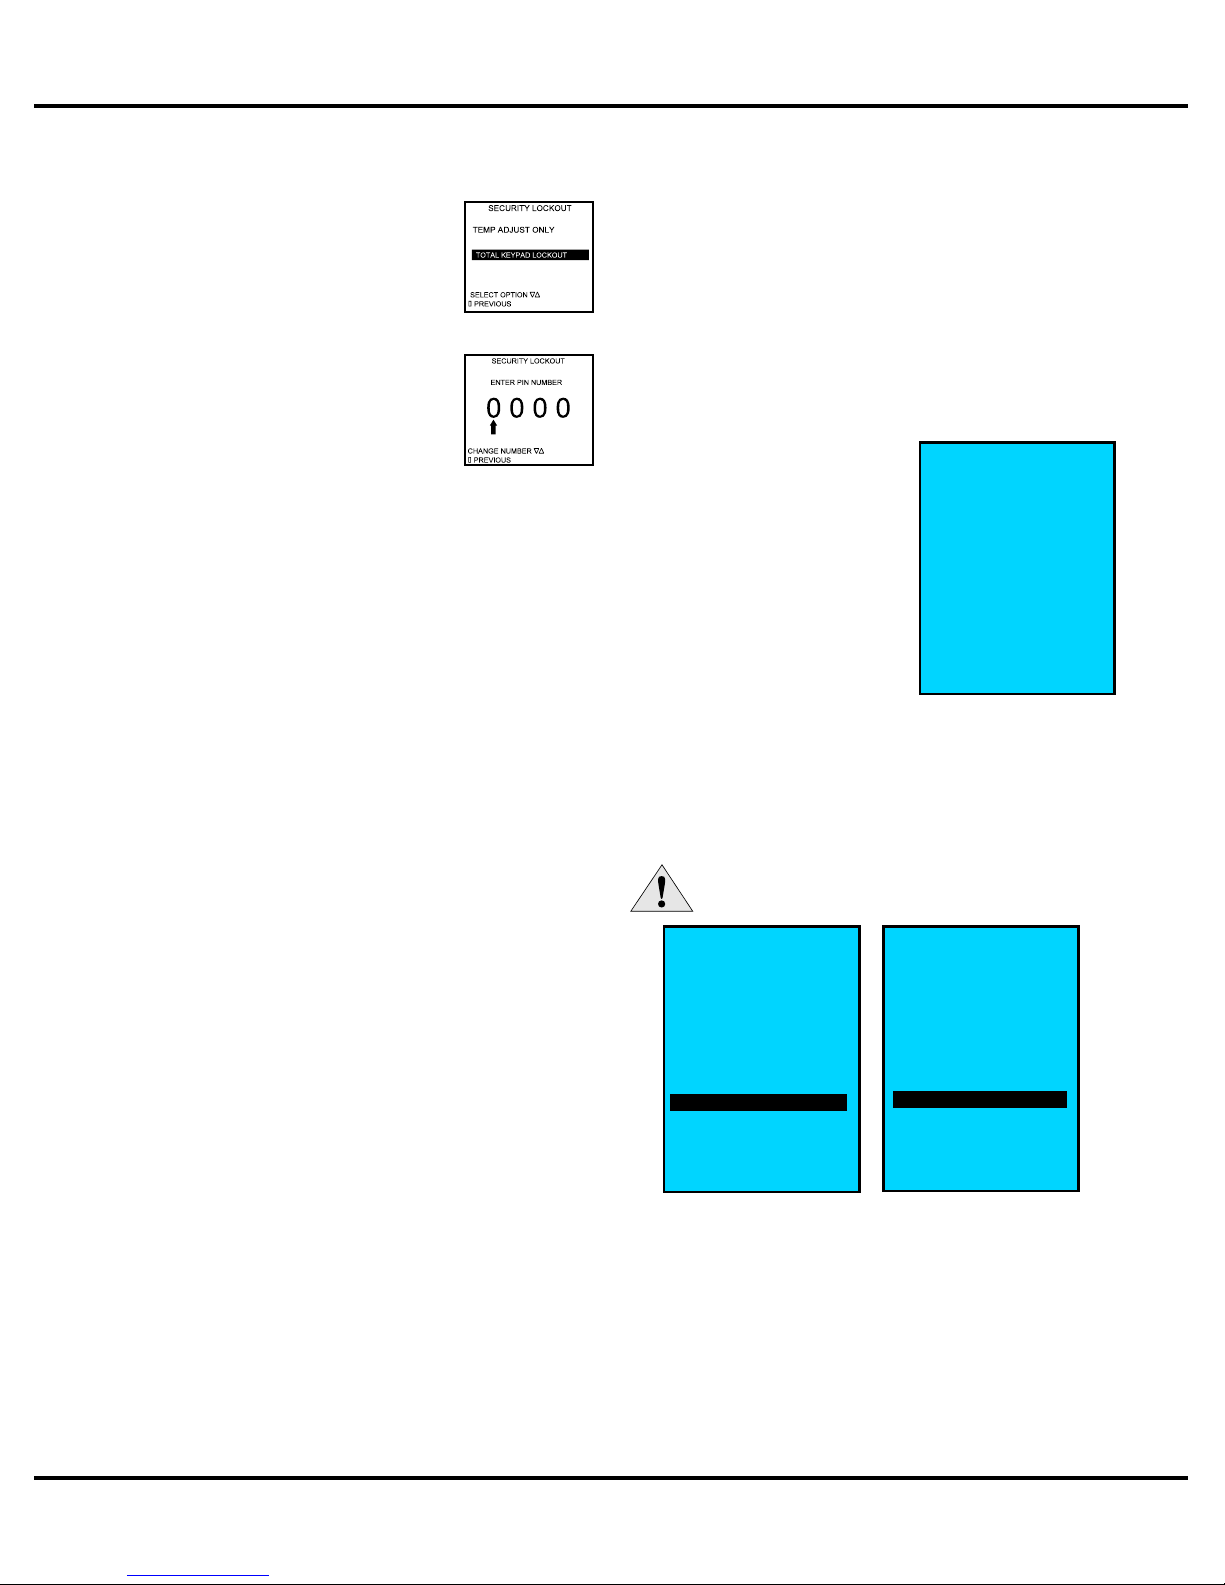
Security Lockout
This thermostat has the option to set
security features to lockout everything but
the adjustment of the temperature or a total
keypad lockout.
1. From the Main Menu, scroll to MENU
and press the center button ■ on the
keypad.
2. Select SECURITY LOCKOUT.
3. Select whether you want to lockout
everything but TEMP ADJUST ONLY or
TOTAL KEYPAD LOCKOUT.
4. Either selection will bring you to the
Enter Pin Number screen.
5. Using the up and down arrows ▲▼, select a pin number
to lock out the thermostat. The right arrow ► moves you to
the next pin digit.
6. Once you’ve entered the 4-digit pin number, press the
center button ■ to save the pin. The screen will display
LOCKED and return to the main Screen.
7. Once you return to the Main Screen, in the upper left of the
screen will alternate between LOCKED and the date and
time.
8. If you selected TEMP ADJUST ONLY, you will only be able
to adjust the set point temperature. Any other operation will
require the pin number to unlock the thermostat.
9. Once unlocked, you’ll have to set a pin number again to
lockout the thermostat again.
10. In the event pin number is lost default is 9999.
Offsets
1. MENU → SETTINGS → OFFSETS
Temperature Offsets
This option allows calibration (or deliberate
miscalibration) of the room temperature sensor(s). There
are various reasons why the displayed temperature
would be adjusted to a higher or lower value. NOTE: Do
not adjust for 30 minutes after installation because board
may be heated by handling. The selected number is the
number of degrees, plus or minus, which will be added to
actual temperature. The numbers can range between -5˚
and +5˚. Default values are set to 0˚ offset.
Temperature Offset
Remote Indoor Offset (if sensor is attached)
Outdoor Offset (if sensor is attached)
Humidity Offset
This option allows calibration of the humidity sensor.
Adjustments can range between -10% and +10%. Default
is 0% offset.
Auto Changeover
With auto changeover, the thermostat automatically switches itself
from heating to cooling, or vise versa, based on the setpoints.
When setting up the thermostat you have to enter both a cooling
setpoint and a heating setpoint. The thermostat will also prevent
the user from setting the cooling setpoint lower than the heating
setpoint. Mode is set to AUTO for this operation to work.
MENU → SETTINGS → AUTO CHANGEOVER
Auto Changeover Time – This setting sets the minimum off time
before the thermostat can change from one mode to
another. Default is 5 minutes. Range is from 0-120
minutes in 15 minute increments.
Auto or Manual Change – Default is AUTO. If MANUAL is
chosen, you will need to change from heating to
cooling or vise versa. When MANUAL is set, AUTO is
removed from the MODE screen as a choice.
Instantaneous Energy Monitoring
Instantaneous Energy Monitoring
can be found under the main menu,
if the energy monitoring option has
been enabled on the Aurora Control
System. The screen displays energy
usage in real time, the current mode
of the heat pump, and the outdoor air
temperature (if installed).
INST ENERGY MONITOR
MODE: STANDBY
BLOWER 0 W
COMPRESSOR 0 W
ELEC HT 0 W
PUMP 0 W
TOTAL 0 W
OUTDOOR AIR NA
◄ BACK
Superboost (Variable Speed Heat Pumps ONLY)
Superboost can be found under the main menu. The Superboost
option temporarily enables a larger cooling capacity range. The
screen will allow the homeowner to turn on or off the Superboost
option. The option will enable by default for a 24 hour period of
time and then will automatically be disabled.
WARNING: OVERUSE OF THIS OPTION MAY
CAUSE OVERHEATING OF LOOPS.
SUPERBOOST
STATUS:
OFF
TURN ON SUPERBOOST
◄ BACK
SUPERBOOST
STATUS:
ON
TURNING OFF IN:
23HRS 15MIN
TURN OFF SUPERBOOST
◄ BACK
Intermittent Fan
Temperature conditions can vary widely between the thermostat
location and extremities of the space the thermostat serves.
This air stratification problem can be especially pronounced
during mild outdoor conditions when long periods elapse
between space conditioning demands from the thermostat. This
intermittent fan operation can also improve the performance of
air cleaning or special filtration systems that locate the cleaning
or filtration media at the return air side of the fan.
IG1602EW 06/12
3
 Loading...