

Water Factory Systems CoolerMATE Owner's Manual

© 2001 CUNO Incorporated
98-9100 1101
W
Owner's Manual
This Manual is for the Installation, Operation,
and Maintenance of the
ATER FACTORY SYSTEMS
CoolerMATE
Drinking Water Appliances

Table of Contents
I. Installation Requirements ......................................................................................3
II. Water Supply Requirements ..................................................................................3
III. Installation Procedure ..........................................................................................3
A. Water Supply Connection ..................................................................................3
B. Mounting the System ..........................................................................................3
C. Tubing Connections ............................................................................................4
D. System Startup ..................................................................................................4
IV. System Maintenance ............................................................................................4
A. Replacing Filter Cartridges ................................................................................4
Installation Diagram ..............................................................................................5
CM-1 CTO/CM-2 CTO/CM-2 Lead Plus..................................................................5
CMF-350 DWS ........................................................................................................6
CMR-350 DWS........................................................................................................6
“Push-In” Connectors ..............................................................................................7
2
*Not performance tested or certified by NSF.
I. Installation Requirements
CoolerMate®filter systems can be used with any point-of-use or converted bottled water cooler. It connects to
any potable cold water supply using 1/4" plastic tubing and a saddle tapping valve or other suitable connector.
The cooler must have a float control mechanism, either mechanical or electro-mechanical, to shut off the flow of
water when the tank fills.
It is recommended that the cooler tank and tank lid be effectively disinfected using a suitable solution of 5.25%
bleach or 3% hydrogen peroxide, as specified by the manufacturer. Also, the tank lid(s) should be equipped with air
filters to protect the water from airborne contamination.
II. Water Supply Requirements
The CoolerMate system must be connected to a potable cold water supply providing 25-100 psi (172-690 kPa)
pressure. Do not connect to a hot water supply or damage could result.
IMPORTANT: Do not use where water is microbiologically unsafe, or with water of unknown quality without adequate
disinfection before or after the system. Systems certified for cyst reduction may be used on disinfected waters that
may contain filterable cysts. EPA Establishment Number 070595-CT-001.
III. Installation Procedure (See installation diagram corresponding to your model)
A. Water Supply Connection (Important: See installation diagrams for list of states that prohibit the use of
saddle type valves.)
Using self piercing saddle valve or other suitable assembly, connect to the nearest cold water supply. Refer to
enclosed instructions for saddle valve if necessary.
B. Mounting The System
The CoolerMate filter system can be mounted to the back of most free standing, converted bottled water coolers
or inside specially designed POU coolers. If necessary, the filter system can be mounted remotely from the cooler in
a cabinet or closet. Installation must comply with applicable state and local plumbing codes.
Mounting method #1 - Double Sided Adhesive Tape
1) Make sure that the cooler has a rear flat surface that can accommodate the CoolerMate bracket. Mark the
location for the system.
2) Cut the special double-sided adhesive tape to fit the back of the mounting bracket.
3) Remove the backing from one side of the tape and apply it firmly to the back of the CoolerMate bracket. Bracket
must be clean of oil and fingerprints and perfectly dry. If necessary wipe clean with window cleaner, alcohol or
suitable residue-free cleaner. Do not use a petroleum based solvent.
4) Remove remaining protective backing from adhesive tape, line up position and firmly press CoolerMate into position.
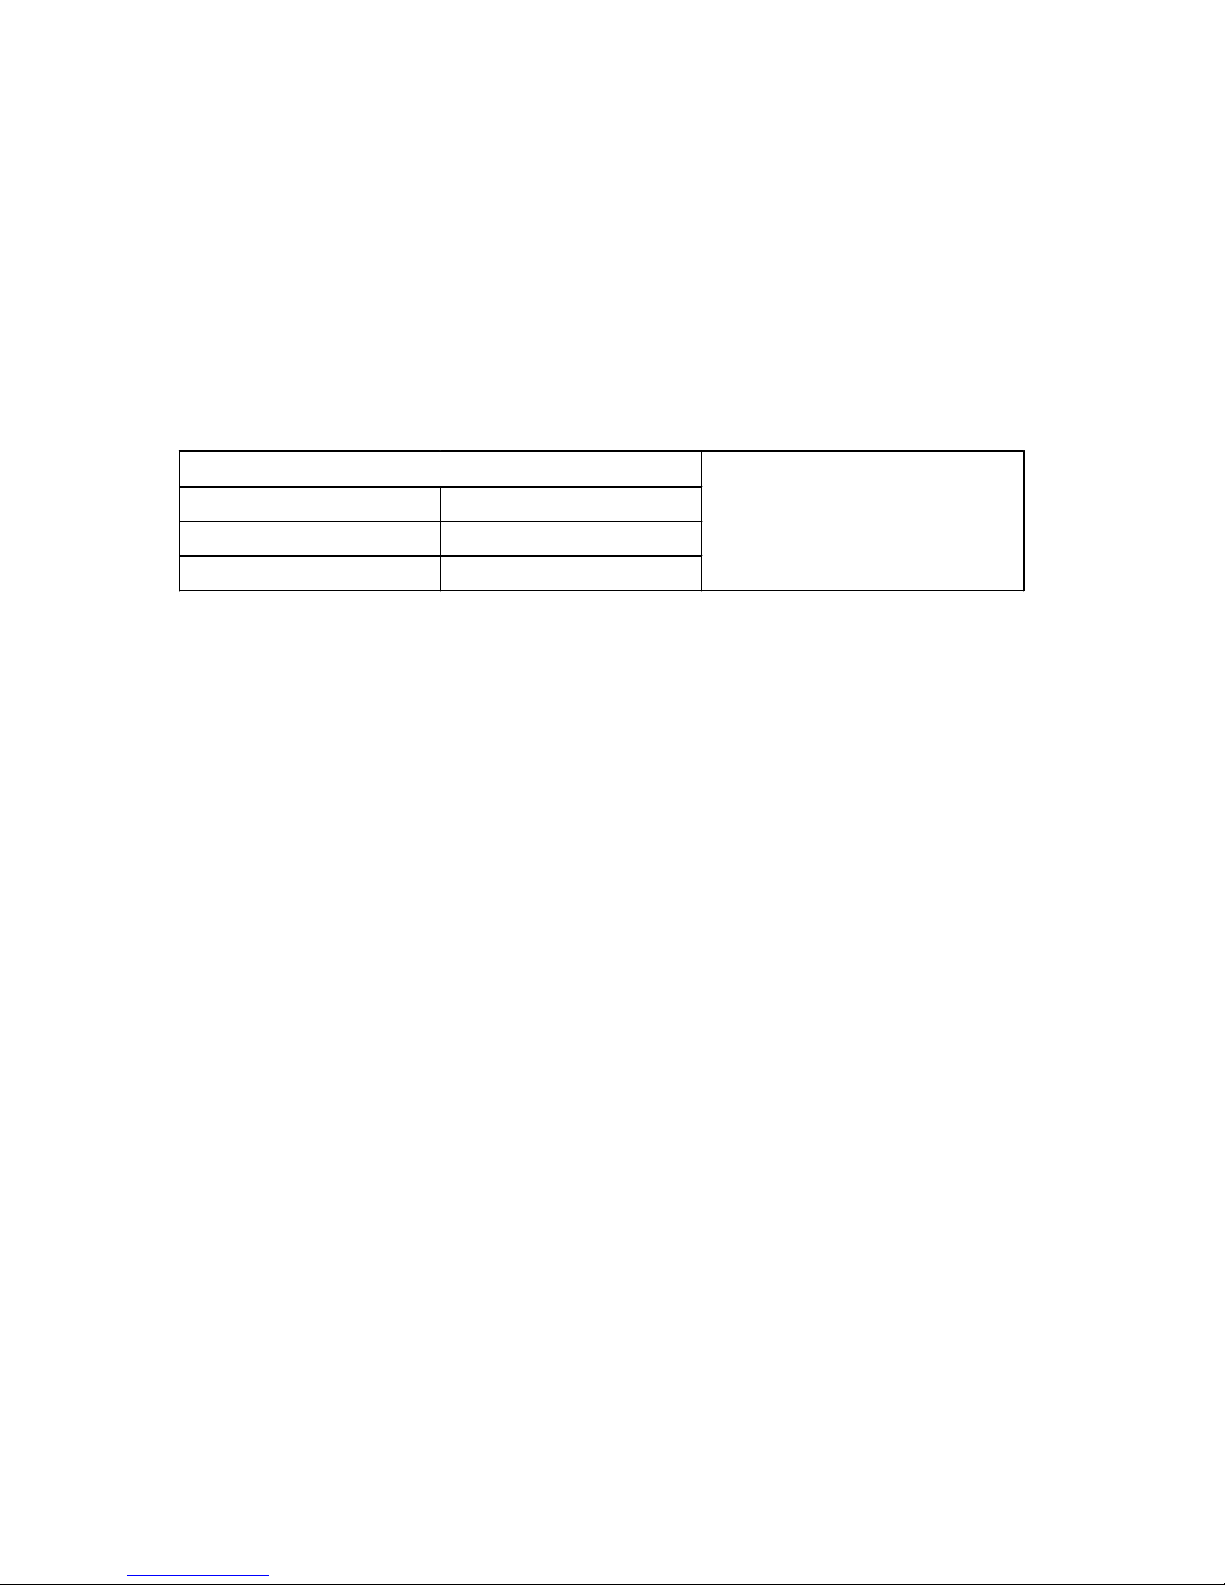
Water Pressure 25-100 psi (172-690 kPa)
Water Temperature * 40-100°F (4.4-38°C)
Service Flow 0.6 gpm (2.3 lpm)
Application Guidelines/Water Supply Parameters
It is essential that operational,
maintenance and filter
replacment be carried out for
this product to perform as
advertised.
* For cold water use only.
3
 Loading...