

Page 1
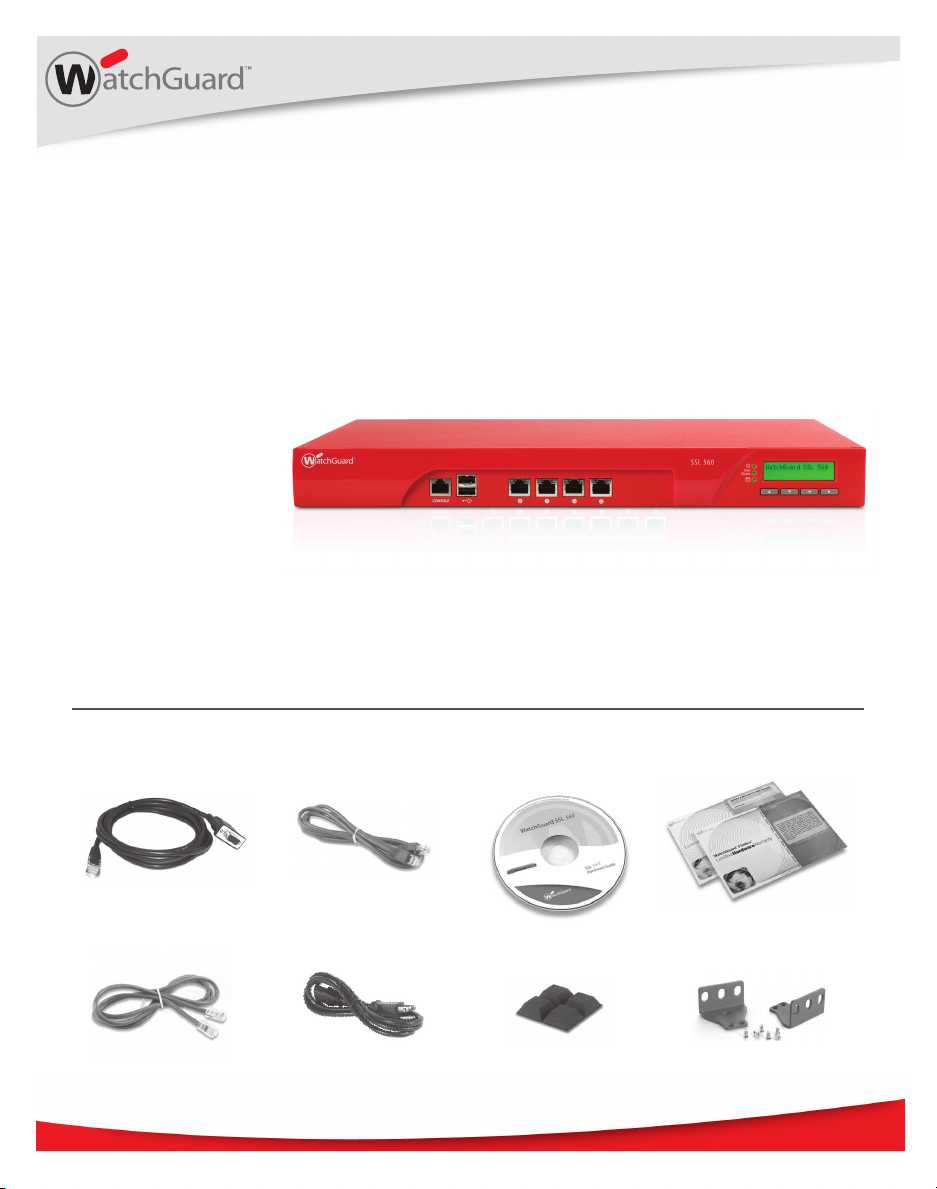
Quick Start Guide
WatchGuard® SSL 560
WatchGuard® Technologies, Inc.
Page 2
Getting Started
Register with LiveSecurity® Service
1
• Find the serial number on your device and record it.
• Go to http://www.watchguard.com/activate
• Log in.
NOTE: If you are new to WatchGuard, follow the instructions to create a prole.
• Follow the instructions on the screen.
• It is a good idea to download and extract your WatchGuard SSL
feature key during activation. Extract the feature key on to the computer you will use
to congure your WatchGuard SSL 560.
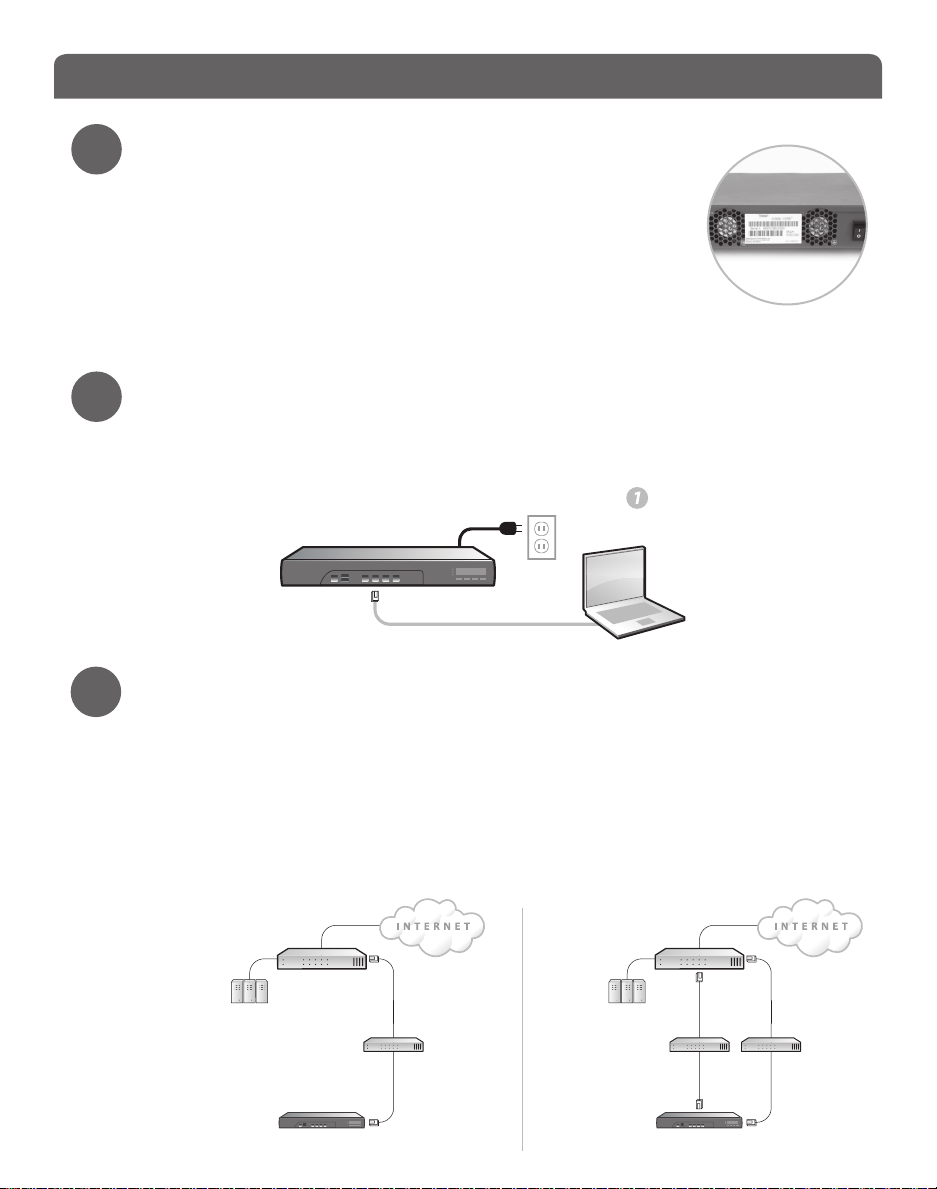
Connect your WatchGuard SSL 560
2
• Make sure your computer is congured with a static IP address on the
192.168.111.0/24 network.
NOTE: The default IP address on the WatchGuard SSL 560 is 192.168.111.1.
• Connect the Ethernet interface on your computer to the interface (Eth1) on your
WatchGuard SSL device.
• Power on the WatchGuard SSL 560.
Eth 1
Run the Quick Setup Wizard
3
• Open a web browser and type: https://192.168.111.1:8443. Follow the directions in the
wizard to set up your WatchGuard SSL device.
NOTE: Because the WatchGuard SSL 560 uses a self-signed certicate, you may see a certicate warning in
your browser. It is safe to ignore the warning (Internet Explorer) or to add a certicate exception (Mozilla
Firefox).
• In the wizard, you must decide on the conguration mode that best suits your
network. These diagrams show the two conguration modes. For more information on
how to deploy the SSL device, see the online help.
Single
Interface
Mode
Firewall
DMZ 1
Trusted Resources
switch
Eth 0
WatchGuard SSL 560
Dual
Interface
Mode
Firewall
DMZ 2
Trusted Resources
Eth 1
WatchGuard SSL 560
DMZ 1
switchswitch
Eth 0
Page 3

Next Steps
Congratulations! You have nished basic network setup of your WatchGuard SSL 560.
You can now put the WatchGuard SSL 560 in your network and use the WatchGuard SSL
Web UI to continue conguration, management, and monitoring tasks.
English
If you congured your WatchGuard
SSL in Single Interface mode…
• When you put the WatchGuard SSL
in your network, make sure you
connect to Eth0. Eth1 is available
only during the Quick Setup
Wizard.
• Reset the IP address on your
computer.
• To connect to the WatchGuard
SSL Web UI, open a web browser
and type: https://[Eth0 IP
address]:8443
If you did not upload your feature key in the wizard, you can get your feature key at
https://www.watchguard.com/archive/getcredentials.asp. From the Web UI, go to Monitor
System > Feature Key to upload it.
If you congured your WatchGuard
SSL in Dual Interface mode…
• When you put the WatchGuard SSL
in your network, make sure you
connect both Eth0 and Eth1.
• Reset the IP address on your
computer.
• To connect to the WatchGuard
SSL Web UI, open a web browser
and type: https://[Eth1 IP
address]:8443
Download and Install Latest Software
• Go to www.watchguard.com/archive/softwarecenter.asp
• Find and download the latest version of WG SSL OS.
• From the Web UI, go to Manage System > Device Update.
For more information about how to congure your WatchGuard SSL 560, go to
www.watchguard.com/help/documentation and open the current help system.
Page 4

WATCHGUARD TECHNICAL SUPPORT
1.877.232.3531 +1.206.613.0456 www.watchguard.com/support
(U.S. and Canada) (all other countries)
ADDRESS: 505 Fifth Avenue South, Suite 500, Seattle, WA 98104
WEB: www.watchguard.com • U.S. SALES: 1.800.734.9905 • INTERNATIONAL SALES: +1.206.613.0895
© 2010 WatchGuard Technologies, Inc. All rights reserved. WatchGuard and the WatchGuard Logo are
either trademarks or registered trademarks of WatchGuard Technologies, Inc. in the United States and/
or other countries. All other trademarks and tradenames are the property of their respective owners.
P.N. 352-3643-001 042210
 Loading...