

Page 1
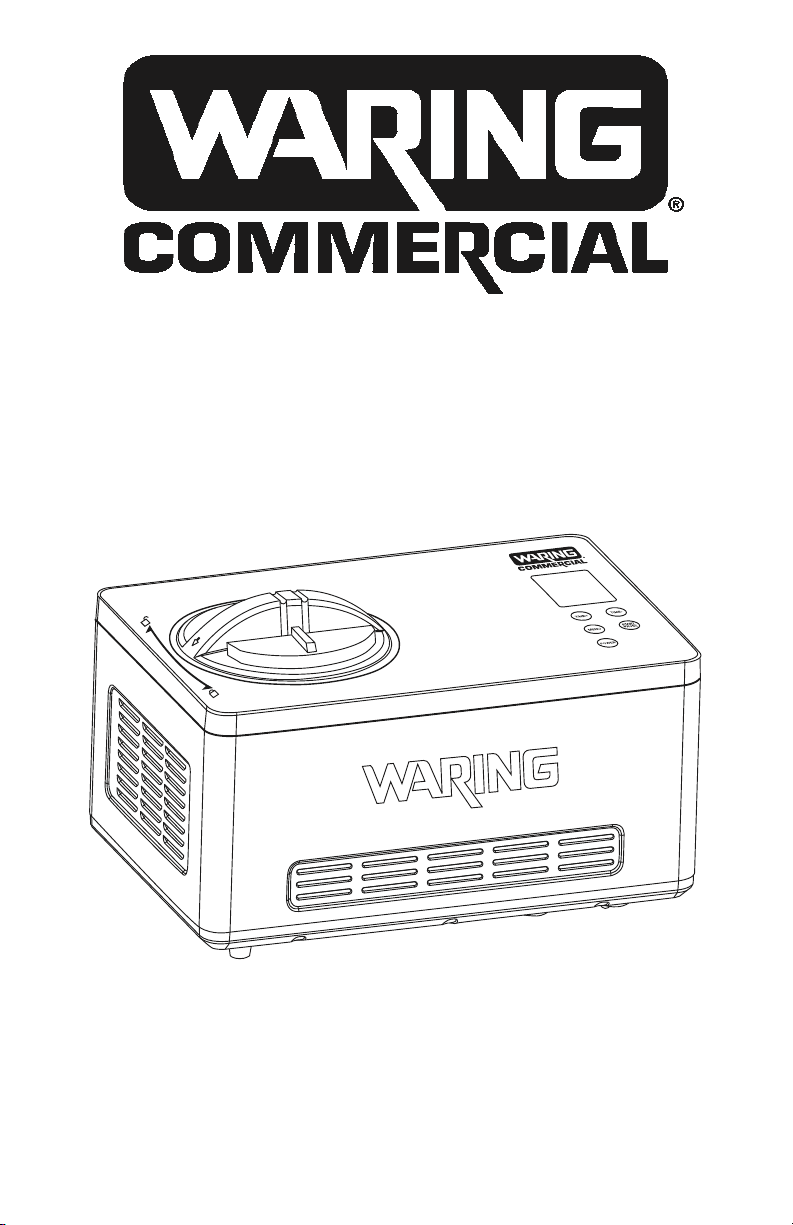
2-Quart Compressor Ice Cream Maker
Máquina para hacer helados
de 1.9 L con compresor
Turbine à glace de 1.9 L
WCIC2 0
For your safety and continued enjoyment of this product,
always read the instruction book carefully before using.
Para su seguridad y para disfrutar plenamente de este producto, siempre lea
cuidadosamente las instrucciones antes de usarlo.
An que votre appareil vous procure en toute sécurité beaucoup de satisfaction,
lire attentivement le mode d’emploi avant de l’utiliser.
Page 2

IMPORTANT SAFEGUARDS
When using an electrical appliance, basic safety precautions should
always be followed to reduce the risk of re, electric shock, and/or
injury, including the following:
1.
READ ALL INSTRUCTIONS BEFORE
USING.
Always unplug from outlet when not in use, before putting on or
taking off parts, and before cleaning.
2. Ensure the voltage is compliant with the voltage range stated on
the rating label, and ensure the socket is in good condition.
3. If the supply cord is damaged, it must be replaced by the
manufacturer or its service agent or a similarly qualied person
in order to avoid a hazard.
4. To protect against risk of electric shock, do not pour water on
cord, plug or ventilation, immerse the appliance in water or any
other liquids.
5. Unplug the appliance after using or before cleaning.
6. Do not use accessories that are not recommended by the
manufacturer.
7. This appliance can be used by persons with reduced physical,
sensory or mental capabilities or lack of experience and
knowledge only if they are supervised or have been instructed
on the safe use of the appliance and understand the hazards
involved. Cleaning and user maintenance must not be done by
any of the persons listed above without supervision.
8. Do not use the appliance close to open ames, hot plates or
stoves.
9. Do not press START/PAUSE prior to installing the removable
bowl or mixing paddle.
10. Do not remove the removable bowl or paddle when the
appliance is on.
11. Do not use outdoors.
12. Never clean any parts with scouring powders or sharp objects.
13. Do not use the removable bowl of this appliance to store
processed foods or beverages.
14. This product is intended to be used only in commercial
applications.
2
Page 3

15. Do not place ngers inside bowl when “Mix In” ingredient lid is
removed and unit is running.
16. Do not upend this product or incline it over a 45˚ angle.
17. Keep the appliance at least 3 inches from other objects to
ensure motor ventilation.
18. Do not operate your appliance in an appliance garage or under
a wall cabinet.
When storing in an appliance garage always unplug the unit
from the electrical outlet. Not doing so could create a risk of re,
especially if the appliance touches the walls of the garage or the
door touches the unit as it closes.
19. Keep hands and utensils out of mixing bowl while in use to
reduce the risk of injury to persons or to the appliance itself.
DO NOT USE SHARP OBJECTS OR UTENSILS INSIDE THE
MIXING BOWL! Sharp objects will scratch and damage the
inside of the bowl. A rubber spatula or wooden spoon may be
used when the appliance is in the off position.
20. Do not let cord hang over edge of table or counter, or touch
hot surfaces.
21. Avoid contact with moving parts. Keep hands, hair, clothing,
as well as spatulas and other utensils away from unit during
operation to reduce the risk of injury and/or damage to the
appliance.
22. Do not switch on the power button frequently (ensure 5 min.
interval at least) to avoid the damage of compressor.
23. Metal sheet or other electric objects are not allowed to be
inserted into the appliance to avoid re and short circuit.
24. When removing the ice cream, be careful to not damage the
batch bowl edge.
25. Do not switch the power on prior to installing the batch bowl
and paddle.
26. The initial temperature of the ingredients should be between
77˚F (25˚C) and 41˚F (-5˚C). Do not place ingredients into the
freezer to pre-freeze, as this will increase the chances of
ingredients to reach ideal consistency without the appropriate
amount of air incorporated.
SAVE THESE INSTRUCTIONS
3
Page 4

APPROVED FOR
COMMERCIAL USE
SPECIFICATIONS
Model: WCIC20
Capacity: 2 Quarts
Voltage: 120VAC/60Hz
Power Consumption: 180W
Unit Dimensions: 16.7L X 12.2W X 10.3H inches
(42.5 X 30.9 X 26.2cm)
Packing Dimensions: 20.0L X 14.57W X 12.8H inches
N.W: 26.5 lbs. (12.03kg)
G.W: 30.5 lbs. (13.85kg)
WARNING:
Do not store explosive substances such as aerosol cans with a
ammable propellant in this appliance. Keep ventilation openings,
in the appliance enclosure or in the built-in structure, clear of
obstruction. Do not damage the refrigerant circuit.
4
Page 5
PARTS AND ACCESSORIES
1.
1a.
5.
2.
3.
7.
4.
8.
1. Batch Bowl Lid (dishwasher safe)
1a. “Mix Ins” ingredient lid (dishwasher safe)
2. Mixing paddle (dishwasher safe)
3. Removable bowl (handwash only)
4. Stainless steel housing
5. Freezing chamber
6. Touch controls
7. LCD display
8. Housing Vents (located on front, side and rear of unit)
5
6.
Page 6
TOUCH CONTROLS
POWER Control: After plugging the unit in, the
machine will enter Standby mode and the LCD
will display 00. Touch the POWER control to
enter the programming mode.
MENU Control: By touching this control, the
user has 3 modes to choose from: ICE CREAM
(which mixes and cools), COOLING ONLY (which
mixes intermittently 2-3 times per minute), and
MIXING ONLY.
NOTE: To switch to a different mode at any time during the process
(except “KEEP COOL” mode), press/hold MENU for 3 seconds.
TIME+ Control: Touch TIME+ control once to increase time by
1 minute. Touching the control for 2 seconds will increase time more
rapidly. The maximum run time is 60 minutes.
TIME– Control: Touch TIME– control once to decrease time by
1 minute. Touching the control for 2 seconds will decrease time more
rapidly. The minimum run time is 5 minutes.
START/PAUSE Control: After setting the MENU and TIME, touch
this control to start operation. Touching this control during operation
will pause both operation and the time countdown. All touch control
buttons are accessible during processing except MENU. To access
the MENU during processing, touch POWER to turn off, touch
POWER again to turn back on, then touch MENU.
DISPLAY ICONS
The mixing icon rotates while mixing is in operation.
The snowake icon changes shape while cooling is
in operation.
All touch control buttons are accessible during processing except
MENU. To access the MENU during processing, touch POWER to
turn off, touch POWER again to turn back on, then touch MENU.
BEFORE FIRST USE
Thoroughly clean and sanitize all parts that will come into contact
with ice cream, including the removable bowl, mixing paddle and lids.
See Sanitizing instructions.
6
Page 7

Warning: Be sure the power cord is unplugged during this process.
Important: Always place the Ice Cream Maker upright on a at and
level surface for 24 hours prior to use to ensure the compressor
provides optimum performance.
GENERAL OPERATION
When the Ice Cream, Sorbet, or Gelato is ready and has
reached ideal consistency for dispensing from the mixing bowl
the dasher paddle will stop to avoid over churning but it will
continue to chill for the duration of the timer setting chosen.
Plug in the unit. The LCD will ash 00. The unit is now in standby
mode.
Touch POWER. The LCD will show 3 programming mode choices.
When you touch MENU, you can select the mode you prefer: ICE
CREAM, COOLING ONLY or MIXING ONLY. Once you’ve made your
selection, the default processing time for that mode will display, along
with the appropriate icon for mixing and/or cooling. At this point and
during processing, you can adjust your processing time by touching
TIME+ or TIME–.
When processing is complete, 00:00 will appear in the display and
3 audible alert will beep.
The unit will enter the COOL mode if no control has been touched
within 10 minutes following the completion of processing. This
ensures the product in the removable bowl stays cool. In the COOL
mode, all touchpad controls except POWER will become inactive.
After an additional 10 minutes, if no other function has been selected,
the unit will go into standby mode (LCD displays 00).
For optimum consistency, chill all mixtures for a minimum of 2 hours,
or up to 3 days. Always re-whisk the mixture after chilling to be sure
all ingredients are well combined. While chilling the mixture is not
required, this step will prevent any “ice” or “fat” crystals from forming
during the freezing process for resting it in a chilled environment
helps bind the ingredients together.
If a rmer consistency is desired, transfer to an airtight container
and place in freezer for about 2 hours. Remove from freezer about
15 minutes before serving.
Motor Protection Function
To help protect the machine’s motor from overheating or damage,
the unit will stop mixing when the motor temperature reaches about
115°C/239°F. The unit will automatically reset itself once the motor
temperature drops below 115°C/239°F. You are not required to unplug
or turn off the machine.
7
Page 8
COMPRESSOR PROTECTION FUNCTION
If Cooling mode is paused or turned off, there will be a 3 minute
delay for the compressor to turn back on and begin cooling again.
The cooling icon will still be displayed but no cooling will be taking
place.Thisdelay protects the compressor from damage and ensures
optimum performance..
Controlling the Volume of the Ingredients
To avoid overow and waste, keep ingredients about ¼" under the
top of the mixing paddle. Ice cream expands to different degrees
depending on the recipe as it’s processing.
The Differences Among the Three Working Modes
1. ICE CREAM MODE: The default working time is 45 minutes. In
this mode, ice cream, sorbet and frozen yogurt are processed
via mixing and cooling.
2. COOLING ONLY MODE: The default working time is
30 minutes. In this mode, the unit keeps the contents cold,
with intermittent mixing. (2-3 times per minute)
3. MIXING ONLY MODE: The default working time is 10 minutes.
This mode is used to mix ingredients,
with no cooling.
MAKING ICE CREAM
Step 1. Prepare ingredients using your favorite
recipe. Note: You do not need to freeze the
removable bowl in advance. This machine has
a BUILT-IN COMPRESSOR that freezes the
ingredients for you.
Step 2. Place the removable bowl into
the freezing chamber, and press down rmly.
Step 3. Place the mixing paddle into the
removable bowl, being sure to engage
the bottom hole in the mixing paddle
with the motor axis.
8
LOCK
-
TIME
+
TIME
START
PAUSE
MENU
POWER
Page 9

Step 4. Pour the ingredients into the removable bowl. Keep
ingredients about ¼" under the top of the mixing paddle. Place the lid
onto the machine and turn it counterclockwise to lock into place.
Step 5. Touch POWER to turn unit on.
Step 6. Touch MENU to choose the desired mode.
Step 7. Touch TIME+ or TIME– to set the processing time.
Step 8. Touch START/PAUSE to start processing.
Step 9. Remove Ingredient Lid to add ingredients and replace lid
when done.
Step 10. When processing is complete, an alert will beep. Turn
off the machine by touching POWER, remove lid, then lift out the
removable bowl.
Step 11. Remove the mixing paddle and use a plastic scoop or
wooden spoon to remove nished ice cream and place it in another
container for storage. Do not use a metal scoop, which could scratch
the inside of the removable bowl.
Step 12. If a rmer consistency is desired, transfer to an airtight
container and place in freezer for about 2 hours. Remove from freezer
about 15 minutes before serving.
CLEANING AND SANITIZING
CAUTION: THE POWER CORD MUST BE UNPLUGGED BEFORE
PROCEEDING TO AVOID ELECTRIC SHOCK.
TO CLEAN AND SANITIZE REMOVABLE BOWL, PADDLE
AND LIDS
The removable bowl, mixing paddle, and lid must be cleaned and
sanitized before initial use and after each use, unless unit is going
to be used again within one hour. Failure to do so may allow residue
of processed material to collect on the internal seals of the drive
assembly, rendering them ineffective.
NOTE: In repetitive batch-processing applications, cleaning the
removable bowl between batches will prolong the life of the drive
assembly.
9
Page 10

WASH
Use only low-foaming powdered detergents formulated for cleaning
dishware and cooking utensils. These products can be purchased
from restaurant and commercial food service suppliers. Follow the
detergent manufacturer’s instructions.
1. Remove lids, removable bowl and paddle from unit.
2. Hand-wash the removable bowl with detergent. Do not put
removable bowl in the dishwasher.
3. The lids and mixing paddle can be washed by hand or in a
commercial dishwasher. Use the brush to clean inside the
bottom hole of the mixing paddle before placing in the dish
washer.
4. Pre-clean stubborn food deposits with brush and presoak in the
detergent solution if necessary.
Any other servicing should be performed by an authorized service
representative.
RINSE
Use only water to rinse.
SANITIZE
Use regular, unscented bleach diluted with water between 50°F
and 120ºF. The sanitizing dilutions are based on the hypochlorite
concentration of the bleach. The dilutes for 2 commonly available
bleach concentrations are:
• Hypochlorite: 5.25%–3 teaspoons bleach per gallon of water
• Hypochlorite 8.25%–2 teaspoons bleach per gallon of water
1. Wet a soft cloth or sponge with a bleach dilution listed above.
2. Wipe down interior and exterior of lids, removable bowl and
mixing paddle.
3. Place removable bowl into freezing chamber, install paddle and
ll with sanitizing solution to above the mixing paddle. Cover
with lids (to prevent splashing) and run on MIXING ONLY for
2 minutes. Empty removable bowl.
4. Immerse lids in sanitizing solution and soak for 2 minutes.
10
Page 11

AIR-DRY
Do not rinse after sanitizing is completed. Drain sanitizing solution
and allow parts to air-dry.
TO CLEAN AND SANITIZE HOUSING BASE
AND FREEZING CHAMBER
The housing base and freezing chamber must be cleaned and
sanitized before rst use, and whenever unit has come into contact
with food. Remove the vent cover on the rear of the unit.
1. To clean: Wipe down exterior housing and freezing chamber
with wet cloth. Remove and clean under the vent cover if
necessary.
2. To sanitize; Wipe entire exterior housing and freezing chamber
with a soft cloth or sponge that has been dampened with
sanitizing solution* and wrung out to avoid any excess solution
running into housing vents in base. DO NOT IMMERSE
HOUSING BASE IN WASHING SOLUTION, RINSE WATER OR
SANITIZING SOLUTION.
3. Allow to air-dry.
4. Reinstall the vent cover on the rear of the unit.
*Use only sanitizing solutions recommended above.
LIMITED ONE YEAR WARRANTY
Waring warrants every new Waring® Commercial Ice Cream Maker
to be free from defects in material and workmanship for a period
of one year from the date of purchase when used with foodstuffs,
nonabrasive liquids (other than detergents) and nonabrasive
semiliquids, provided it has not been subject to loads in excess of
the indicated rating. In addition, the motor in this appliance has a full
three-year warranty. Under this warranty, the Waring Commercial
Division will repair or replace any part that, upon our examination,
is defective in materials or workmanship, provided the product is
delivered prepaid to the Waring Service Center at: 314 Ella T. Grasso
Ave., Torrington, CT 06790, or any Factory Approved Service Center.
This warranty does not: a) apply to any product that has become
worn, defective, damaged or broken due to use or due to repairs
11
Page 12

or servicing by other than the Waring Service Center or a Factory
Approved Service Center, or due to abuse, misuse, overloading or
tampering; or b) cover incidental or consequential damages of any
kind.
The one-year warranty is applicable only to appliances used in the
United States or Canada; this supersedes all other express product
warranty or warranty statements. For Waring products sold outside
of the U.S. and Canada, the warranty is the responsibility of the local
importer or distributor. This warranty may vary according to local
regulations. Warning: This warranty is void if appliance is used on
Direct Current (DC).
SERVICE
Should service on this product in USA or Canada be required at any
time, call or write to:
Waring Service Center • P.O. Box 3201 • 314 Ella T. Grasso Ave.
• Torrington, CT 06790
Tel. 1-800-492-7464 • FAX (860) 496-9017 or nearest Authorized
Service Center replacement parts for Waring out-of-warranty repairs
are obtainable at the above address.
12
Page 13

MEDIDAS DE SEGURIDAD IMPORTANTES
Al usar aparatos eléctricos, siempre debe tomar precauciones
básicas de seguridad para reducir el riesgo de incendio,
electrocución o heridas, incluso las siguientes:
1.
LEA TODAS LAS INSTRUCCIONES
ANTES DE USARLO.
Desconecte el aparato cuando no está en uso, antes de
instalar/sacar piezas y antes de limpiarlo.
2. Cerciórese de que el voltaje y la frecuencia de la toma de
corriente coincidan con el voltaje y la frecuencia indicados en la
placa de especificaciones técnicas del aparato y de que la toma
de corriente esté en buen estado.
3. Para su seguridad, el cable debe ser reemplazado por el
fabricante, un centro de servicio autorizado u otra persona
calificada.
4. Para reducir el riesgo de electrocución, no moje el cable, la
clavija ni las ventilaciones, ni sumerja el cuerpo del aparato en
agua u otro líquido.
5. Siempre desconecte el aparato después del uso y antes de
limpiarlo.
6. Solo use los accesorios/aditamentos recomendados por el
fabricante.
7. Este aparato puede ser usado por personas que carecen
de la experiencia o de los conocimientos necesarios
para manipularlo, o personas cuyas capacidades físicas,
sensoriales o mentales están limitadas, siempre que una
persona responsable por su seguridad le haya explicado el
funcionamiento y los riesgos o supervise el uso del aparato.
La limpieza y el mantenimiento no deben ser llevados a cabo
por aquellas personas nombradas anteriormente, a menos que
sean supervisadas.
8. No utilice el aparato cerca de llamas, hornillos o estufas.
9. No presione el botón START/PAUSE a menos que el bol y la
paleta mezcladora están debidamente instalados.
10. No retire el bol removible ni la paleta mezcladora durante el
funcionamiento.
11. No lo utilice en exteriores.
13
Page 14

12. Nunca limpie el aparato con productos/materiales abrasivos o
utensilios punzantes/afilados.
13. No guarde alimentos o líquidos en el bol.
14. Este aparato ha sido diseñado para uso comercial.
15. No meta los dedos en el bol ni en la boca de llenado durante el
funcionamiento.
16. No vuelque ni incline el aparato a un ángulo superior a 45˚.
17. Mantenga el aparato a una distancia mínima de 3pulgadas
(8cm) de otros objetos para asegurar una ventilación adecuada
del motor.
18. No haga funcionar el aparato debajo o dentro de un armario/
gabinete.
Siempre desconecte el aparato antes de guardarlo en un
armario/gabinete. Dejar el aparato conectado presenta un
riesgo de incendio, especialmente si este toca las paredes o la
puerta del armario/gabinete cuando cierra.
19. Para reducir el riesgo de heridas o daños a la máquina,
mantenga las manos y utensilios lejos del tazón durante
el funcionamiento. ¡NUNCA INTRODUZCA OBJETOS O
UTENSILIOS PUNZANTES EN EL BOL! Estos podrían rayar y
dañarlo. Puede utilizar una espátula de goma o una cuchara de
madera, siempre que la máquina esté apagada.
20. No permita que el cable cuelgue del borde de la encimera o de
la mesa, ni que haga contacto con superficies calientes.
21. Evite el contacto con las piezas móviles. Para evitar el riesgo de
heridas y/o daños a la máquina, mantenga los dedos, cabello,
ropa, espátulas y otros utensilios lejos del aparato durante el
funcionamiento.
22. Después de apagar el aparato, espere por 5 minutos antes de
encenderlo otra vez para evitar los daños al compresor.
23. Para evitar el riesgo de incendio o cortocircuito, no introduzca
objetos de metálicos o eléctricos en el aparato.
24. Tenga cuidado de no dañar el bol al sacar el helado del mismo.
25. No encienda la máquina antes de haber instalado el bol y la
paleta mezcladora.
26. La temperatura inicial de los alimentos debe estar entre 77°F
(25°C) y 41°F (-5°C). No congele los alimentos antes de la
preparación; esto puede bloquear la paleta mezcladora y
afectar el resultado.
14
Page 15

GUARDE ESTAS INSTRUCCIONES
APROBADO PARA
USO COMERCIAL
ESPECIFICACIONES TÉCNICAS
Modelo: WCIC20
Capacidad: 2 cuartos de galón (1.9 L)
Voltaje: 120 V AC, 60Hz
Consumo de energía: 180W
Dimensiones de la unidad: 16.7 x 12.2 x 10.3 pulgadas
Dimensiones de la caja:
Peso neto: 26.5 lb. (12kg)
Peso bruto: 30.5 lb. (13.85kg)
ADVERTENCIA: no guarde sustancias explosivas, tales como
latas de aerosol que contengan un agente propulsor inflamable, en
este aparato. Mantenga las ventilaciones de aire internas y externas
libres de obstrucciones. No utilice ningún dispositivo mecánico
u otros medios, excepto los recomendados por el fabricante,
para acelerar el proceso de descongelación. No dañe el circuito
refrigerante. No utilice ningún aparato eléctrico dentro del tazón, a
menos que sean aparatos recomendados por el fabricante.
15
Page 16

PIEZAS Y CARACTERÍSTICAS
1.
1a.
5.
2.
3.
7.
4.
8.
1. Tapa del bol (apta para lavavajillas)
1a. Tapa de la boca de llenado (apta para lavavajillas)
2. Paleta mezcladora (apta para lavavajillas)
3. Bol removible (lavable a mano solamente)
4. Carcasa de acero inoxidable
5. Cámara de enfriamiento
6. Panel de control electrónico
7. Pantalla LCD
8. Ventilaciones (en frente, en el costado y en la parte trasera)
16
6.
Page 17

PANEL DE CONTROL
ELECTRÓNICO
Botón POWER: después de conectar el cable
a la toma de corriente, la máquina ingresará
automáticamente al modo de espera y “00”
aparecerá en la pantalla. Presione el botón
POWER para poner el aparato bajo tensión.
Botón MENU: permite elegir entre 3 programas:
• ICE CREAM (helado), que mezcla y enfría
• COOLING ONLY (enfriamiento), que enfría y mezcla 2–3 veces
por minuto
• MIXING ONLY (mezcla), que mezcla solamente
NOTA: para cambiar el programa durante el ciclo de preparación,
mantenga oprimido el botón MENU por 3 segundos.
Botón TIME+: presiónelo para aumentar el tiempo en incrementos
de 1 minuto. Manténgalo oprimido para aumentar el tiempo más
rápido. El tiempo máximo es de 60 minutos.
Botón TIME–: presiónelo para disminuir el tiempo en incrementos de
1 minuto. Manténgalo oprimido para disminuir el tiempo más rápido.
El tiempo mínimo es de 5 minutos.
Botón START/PAUSE: empieza el ciclo de preparación después de
haber elegido el programa y programado el tiempo. También permite
apagar el aparato y el temporizador. Nota: todos los botones están
operacionales durante el funcionamiento, excepto el botón MENU.
Para acceder al menú una vez empezado el ciclo de preparación,
deberá apagar y volver a encender la unidad (presionando el botón
POWER), y luego presionar el botón MENU.
ICONOS
Este icono indica que el modo “mezcla” está activo.
Este icono indica que el modo “enfriamiento” está activo.
Nota: todos los botones están operacionales durante el
funcionamiento, excepto el botón MENU. Para acceder al menú una
vez empezado el ciclo de preparación, deberá apagar y volver a
encender la unidad (presionando el botón POWER), y luego presionar
el botón MENU.
17
Page 18

ANTES DEL PRIMER USO
Lave y sanee el bol removible, la paleta mezcladora y las tapas
(véase la sección “Limpieza y desinfección”).
Advertencia: asegúrese de que el aparato esté desconectado.
Importante: deje la máquina sobre una superficie llana y estable
por 24 horas antes de enchufar el aparato para asegurar el buen
funcionamiento del compresor.
FUNCIONAMIENTO BÁSICO
Nota: cuando el helado, el sorbete o el helado haya alcanzado
su consistencia final, la paleta mezcladora dejará de girar
pero el ciclo de enfriamiento continuará hasta el final tiempo
programado.
1. Conecte el cable a una toma de corriente. “00” aparecerá en
la pantalla, lo que signica que la unidad está en el modo de
espera.
2. Presione el botón POWER. Los tres programas aparecerán en
la pantalla.
3. Presione el botón MENU para elegir el programa deseado: ICE
CREAM (helado), COOLING ONLY (enfriamiento) o MIXING
ONLY (mezcla). El tiempo por defecto del programa y el icono
correspondiente aparecerán en la pantalla.
4. Presione el botón TIME+ o TIME– para aumentar/disminuir el
tiempo si desea.
Al nal del ciclo de preparación “00:00” aparecerá en la pantalla y la
unidad emitirá 3 pitidos.
Después de 10 minutos sin presionar ningún botón, el modo
“enfriamiento” se activará automáticamente para conservar la
consistencia del producto. Cuando la unidad esté en el modo de
enfriamiento, todos los botones están operacionales excepto el
botón POWER. Después de 10 minutos más sin presionar ningún
botón, la unidad regresará al modo de espera y la pantalla
mostrará “00”.
Para obtener una consistencia óptima, congele la mezcla durante 2
horas o más (hasta 3 días) antes de empezar la preparación. Siempre
revuelva la mezcla antes de empezar la preparación. Nota: aunque
congelar la mezcla antes de la preparación no es necesario, esto
ayuda a mantener los ingredientes unidos, lo que evita la formación
de cristales de hielo o de grasa durante la preparación.
18
Page 19

Si desea que el helado sea más rme, póngalo en un recipiente
hermético y congelélo por aproximadamente 2 horas. Retírelo del
congelador 15 minutos antes de servir.
Protección antisobrecalentamiento
El aparato está equipado con un dispositivo de protección
antisobrecalentamiento que apaga el motor si este alcanza 115°C
(239°F). La unidad se reiniciará automáticamente cuando la
temperatura del motor baje bajo 115°C (239°F). No es necesario
desenchufar el aparato.
FUNCIÓN DE PROTECCIÓN DEL COMPRESOR
Después de pausar o apagar el modo de enfriamiento, el compresor
demorará 3 minutos antes de volver a ponerse en marcha. El icono
del modo de enfriamiento permanecerá en la pantalla, pero el
compresor no empezará a refrigerar antes del final de la pausa.Esta
pausa de seguridad protege el compresor de los daños y asegura un
rendimiento óptimo.
Capacidad máxima
Para evitar los derrames, no llene el bol hasta más allá de ¼ de
pulgada (0.5cm) de la parte superior de la paleta mezcladora. Los
ingredientes se dilatan durante la preparación; el volumen final varía
según la receta.
Diferencias entre los programas
1. ICE CREAM (helado): el tiempo por defecto del ciclo de
preparación es de 45 minutos. El modo “mezcla” y el modo
“enfriamiento” están activados.
2. COOLING ONLY (enfriamiento): el tiempo por defecto del
ciclo de preparación es de 30 minutos. el modo “enfriamiento”
está activado y el modo “mezcla” se activa por intermitencia, a
intervalos de 2–3 veces por minuto.
3. MIXING ONLY (mezcla): el tiempo por defecto del ciclo de
preparación es de 10 minutos. Solamente el modo “mezcla”
está activado.
19
Page 20

MODO DE EMPLEO
Paso 1. Preparar los ingredientes de la
receta. Nota: no es necesario congelar
el bol. La máquina está equipada con un
COMPRESOR INTEGRADO que congela
los ingredientes.
Paso 2. Coloque el bol en la cámara de
enfriamiento, presionando firmemente.
Paso 3. Instale la paleta mezcladora en
el bol, cerciorándose de introducirla
sobre el eje del motor.
Paso 4. Eche los ingredientes en el bol
removible, cerciorándose de no llenar
este hasta más allá de ¼ de pulgada
(0.5cm) de la parte superior de la paleta
mezcladora. Cierre la tapa, girando en
sentido antihorario para sujetarla.
Paso 5. Presione el botón POWER para
poner el aparato bajo tensión.
CERRAR
-
TIME
+
TIME
START
PAUSE
MENU
POWER
Paso 6. Presione el botón MENU y elija
el programa deseado.
Paso 7. Presione el botón TIME+ o TIME– para aumentar/disminuir
el tiempo si desea.
Paso 8. Presione el botón START/PAUSE para encender la máquina.
Paso 9. Para agregar ingredientes durante la preparación, retire la
tapa de la boca de llenado; vuelva a cerrarla inmediatamente.
Paso 10. Al final del tiempo, la unidad emitirá un pitido. Presione el
botón POWER para apagar, saque la tapa y retirar el bol removible.
Paso 11. Retire la paleta mezcladora del bol, saque el helado con
una cuchara de plástico o de madera y póngalo en otro recipiente.
No utilice utensilios de metal; esto puede rayar el bol.
Paso 12. Si desea que el helado sea más firme, ponerlo en un
recipiente hermético y congelarlo por aproximadamente 2 horas.
Retirarlo del congelador 15 minutos antes de servir.
20
Page 21

LIMPIEZA Y DESINFECCIÓN
PRECAUCIÓN: PARA REDUCIR EL RIESGO DE ELECTROCUCIÓN,
SIEMPRE DESCONECTE EL APARATO ANTES DE LIMPIARLO/
DESINFECTARLO.
LIMPIEZA Y DESINFECCIÓN DEL BOL REMOVIBLE, DE LA
PALETA MEZCLADORA Y DE LAS TAPAS
Lave el bol removible, la paleta mezcladora y las tapas antes del
primer uso y después de cada uso, a menos que vuelva a utilizarlo
dentro de la hora siguiente El incumplimiento de estas instrucciones
puede causar una acumulación de residuos sobre el mecanismo
interno, perjudicando su buen funcionamiento.
NOTA: limpiar el bol frecuentemente incrementará la vida útil del
mecanismo interno.
PARA LAVAR
Utilice solamente detergentes en polvo bajos en espuma y
especialmente formulados para lavar la vajilla y los utensilios de
cocina (disponibles en los proveedores de material para restaurantes
y otros establecimientos de comida). Siga las instrucciones del
fabricante.
1. Retire las tapas, el bol removible y la paleta mezcladora de la
unidad.
2. Lave el bol removible a mano. No lo meta al lavavajillas.
3. Lave las tapas y la paleta mezcladora a mano o en el
lavavajillas. Use un cepillo para limpiar el orificio abajo de la
paleta mezcladora antes de meterla al lavavajillas.
4. Si es necesario, restriegue los residuos difíciles y deje remojar
las piezas antes de lavarlas.
Cualquier otro servicio debe ser realizado por un técnico autorizado.
PARA ENJUAGAR
Solamente use agua para enjuagar.
PARA SANEAR
Utilice cloro regular, diluido en agua entre 50°F (10°C) y 120°F (50°C).
La proporción exacta de agua/cloro dependerá de la concentración
de hipoclorito en el cloro. Proporciones para los productos más
comunes:
21
Page 22

• 5.25 % de hipoclorito: 3 cucharaditas (15 ml) de cloro por
galón (3.8 L) de agua
• 8.25 % de hipoclorito: 2 cucharaditas (10 ml) de cloro por
galón (3.8 L) de agua
1. Empape un paño suave o una esponja en solución
desinfectante.
2. Limpie el interior y el exterior de las tapas, del bol removible y
de la paleta mezcladora.
3. Coloque el bol removible en la cámara de enfriamiento, instale
la paleta mezcladora y llene el bol hasta arriba de la paleta con
solución desinfectante. Cierre las tapas y encienda la máquina
por 2 minutos, usando el programa MIXING ONLY. Vacíe el bol
removible.
4. Remoje las tapas en la solución desinfectante por 2 minutos.
PARA SECAR
No enjuague las piezas después de haberlas desinfectadas. Escurra
las piezas y permita que se sequen al aire libre.
LIMPIEZA Y DESINFECCIÓN DE LA BASE Y DE LA
CÁMARA DE ENFRIAMIENTO
Limpie la base y la cámara de enfriamiento antes del primer uso y
después de cada uso. Quite la tapa de ventilación trasera.
1. Para limpiar: limpie el exterior de la carcasa y el interior de la
cámara de enfriamiento con un paño humedecido. Retire y
limpie las ventilaciones si es necesario.
2. Para sanear: limpie el exterior de la carcasa y el interior de
la cámara de enfriamiento con un paño suave o una esponja
humedecidos en solución desinfectante* (estruje el paño/la
esponja para evitar que líquido penetre en las ventilaciones). NO
SUMERJA LA CARCASA EN SOLUCIÓN LIMPIADORA, AGUA
O SOLUCIÓN DESINFECTANTE.
3. Permita que se seque al aire libre.
4. Vuelva a instalar la tapa de ventilación trasera.
*Utilice solamente las soluciones desinfectantes recomendadas más
arriba.
22
Page 23

GARANTÍA LIMITADA DE UN AÑO
Waring garantiza toda nueva malteadora Waring® Commercial contra
todo defecto de materiales o fabricación durante un año a partir de
la fecha de compra, siempre que haya sido usada con alimentos,
líquidos no abrasivos (a excepción de detergentes) y semi-líquidos
no abrasivos, y que no haya sido sujeta a cargas que excedan su
máxima capacidad. Por otra parte, el motor de este aparato tiene
una garantía completa de tres años. Bajo esta garantía, Waring
Commercial reparará o reemplazará toda pieza que, tras estar
inspeccionada por nuestro servicio posventa, demuestre defectos de
materiales o fabricación, siempre que el producto se entregue con
franqueo pagado a: 314 Ella T. Grasso Ave., Torrington, CT 06790, o
a cualquier centro de servicio aprobado.
Esta garantía: a) no se aplica a ningún producto desgastado,
defectuoso, dañado o roto debido a uso, reparaciones/servicio
realizados por personas no autorizadas, o abuso, mal uso,
sobrecarga o daños intencionales; b) no cubre daños incidentales o
consecuentes de ningún tipo.
Esta garantía es válida solamente para los aparatos comprados
en los Estados Unidos y el Canadá y reemplaza todas las demás
declaraciones expresas de garantía. La garantía de los productos
Waring adquiridos fuera de los Estados Unidos y del Canadá es la
responsabilidad del importador/distribuidor local. Los derechos de
garantía pueden variar según las regulaciones locales. Advertencia:
utilizar este aparato con corriente continua (C.C./DC) invalidará la
garantía.
SERVICIO POSTVENTA
Para servicio en los Estados Unidos o Canadá, comuníquese con:
Waring Service Center
P.O. Box 3201
314 Ella T. Grasso Ave.
Torrington, CT 06790
Tel.: 1-800-492-7464 • Fax: (860) 496-9017
Piezas de repuesto para reparaciones “fuera de garantía” están
disponibles en la misma dirección.
23
Page 24

IMPORTANTES CONSIGNES DE SÉCURITÉ
L'utilisation d'appareils électriques requiert la prise de précautions
élémentaires an de réduire le risque de brûlures, d’électrocution,
d’incendie ou de blessures, parmi lesquelles les suivantes :
1.
LIRE TOUTES LES INSTRUCTIONS
AVANT D'UTILISER L'APPAREIL.
Toujours débrancher l'appareil après usage et avant toute
manipulation ou entretien.
2. Veiller à brancher l'appareil dans une prise électrique
correspondant aux spécications électriques indiquées sur sa
plaque signalétique et vérier que la prise de courant est en bon
état.
3. En cas de dommage, le cordon électrique ne doit être remplacé
que par le fabricant, un technicien autorisé ou un électricien
professionnel.
4. An de réduire le risque d’électrocution, ne pas mouiller le
cordon d'alimentation, la che électrique ou les évents, et ne
pas submerger le boîtier dans l'eau ou tout autre liquide.
5. Débrancher l’appareil après utilisation et avant de le nettoyer.
6. Utiliser uniquement les accessoires recommandés par le
fabricant.
7. Cet appareil ne devrait pas être utilisé par des personnes
atteintes de certains handicaps physiques, mentaux ou
sensoriels, ou qui ne disposent pas des connaissances ou de
l'expérience nécessaires, à moins qu'une personne responsable
de leur sécurité leur en ait expliqué le fonctionnement et les
risques, ou bien les encadre. Le nettoyage et l'entretien ne
devraient pas être effectués par les personnes mentionnées cidessus, à moins qu'elles ne soient encadrées.
8. Ne pas utiliser l'appareil à proximités de ammes nues, de
plaques électriques ou de cuisinières.
9. N'appuyer sur le bouton START/PAUSE qu'une fois que le bol et
l'agitateur sont en place.
10. Ne pas retirer le bol ni l'agitateur alors que l'appareil est allumé.
11. Ne pas utiliser l'appareil à l'air libre.
12. Ne pas utiliser de poudre à récurer ou d'objets pointus/
tranchants pour nettoyer l'appareil.
24
Page 25

13. Ne pas garder d'aliments ou de liquides dans la cuve.
14. Cet appareil est à usage commercial.
15. Ne pas introduire les doigts dans la cuve ni dans l'ouverture
d'alimentation pendant le fonctionnement.
16. Ne pas mettre l'appareil à l'envers ou l'incliner à un angle
supérieur à 45 degrés.
17. Placer l'appareil à une distance d'au moins 3po. (8 cm) de tout
autre objet an d'assurer la ventilation adéquate du moteur.
18. Ne pas faire fonctionner l'appareil sous ou à l'intérieur d'un
placard.
Veiller à débrancher l'appareil avant de le ranger dans un
placard. Laisser l'appareil branché pourrait présenter un risque
d'incendie, surtout si l'appareil touche les murs du placard ou
que la porte du placard touche l'appareil en se refermant.
19. Garder les mains et les ustensiles éloignés de la cuve
pendant l'utilisation an d'éviter tout risque de blessure
ou de dommages. NE PAS INTRODUIRE D'OBJETS OU
D'USTENSILES TRANCHANTS DANS LA CUVE! Cela
peut rayer ou endommager l'intérieur de la cuve. Une fois
l'appareil éteint, utiliser une spatule en caoutchouc ou en bois
uniquement.
20. Ne pas laisser le cordon pendre au bord d'une table ou d'un
plan de travail, ni entrer en contact avec des surfaces chaudes.
21. Éviter tout contact avec les éléments en mouvement. An
d'éviter tout risque de blessure ou de dommage, garder les
mains, les cheveux, les vêtements et les ustensiles éloignés de
l'appareil pendant l'utilisation.
22. Une fois l'appareil éteint, attendre 5 minutes avant de la rallumer
an d'éviter les dommages au compresseur.
23. An d'éviter les risques d'incendie ou de court-circuit, ne pas
introduire d'objets en métal ou électriques dans l'appareil.
24. Faire attention de ne pas abîmer la cuve en retirant la glace de
celle-ci.
25. Ne pas allumer l'appareil avant d'avoir installé la cuve et le
mélangeur.
26. La température initiale des ingrédient devrait être entre 77°F
(25°C) et 41°F (-5°C).. Ne pas congeler les ingrédients avant
la préparation; cela risquerait de bloquer le mélangeur et
d'affecter le résultat.
25
Page 26

GARDER CES INSTRUCTIONS
USAGE COMMERCIAL AUTORISÉ
SPÉCIFICATIONS TECHNIQUES
Modèle: WCIC20
Capacité: 1.9 L
Tension: 120V AC/60Hz
Consommation: 180W
Dimensions du produit: 16,7 po. x 12,2 po. x 10.3 po.
Dimensions de l'emballage: 20 po. x 14,57 po. x 12,8 po.
Poids net: 26,5 lb. (12 kg)
Poids brut: 30.5 lb. (13,85kg)
AVERTISSEMENT :
Ne pas stocker de substances explosives, telles que des bombes
aérosol contenant un agent propulseur inammable, dans cet
appareil. Maintenir les ouvertures de ventilation internes et externes
libres de toute obstruction. Ne pas utiliser de dispositifs mécaniques
ou autres moyens pour accélérer le processus de dégivrage, autres
que ceux recommandés par le fabricant. Ne pas endommager le
circuit frigorique. Ne pas utiliser d'appareils électriques à l'intérieur
de la cuve, à moins que ceux-ci ne soient recommandés par le
fabricant.
26
Page 27

PIÈCES ET CARACTÉRISTIQUES
1.
1a.
5.
2.
3.
7.
4.
8.
1. Couvercle de la cuve (lavable au lave-vaisselle)
1a. Couvercle de l'ouverture d'alimentation (lavable au lave-
vaisselle)
2. Mélangeur (lavable au lave-vaisselle)
3. Cuve amovible (lavable à la main uniquement)
4. Boîtier en acier inoxydable
5. Chambre de refroidissement
6. Paneau de contrôle électronique
7. Écran LCD
8. Évents (à l'avant, sur le côté et à l'arrière du boîtier)
27
6.
Page 28

PANEAU DE CONTRÔLE
ÉLECTRONIQUE
Touche POWER: une fois branché, l'appareil se
met automatiquement en mode veille et l'écran
afche “00”. Presser la touche POWER mettre
l'appareil sous tension.
Touche MENU: permet de choisir entre trois
programmes:
• ICE CREAM (crème glacée), qui mélange et
refroidit
• COOLING ONLY (réfrigération), qui refroidit et mélange 2–3 fois
par minute
• MIXING ONLY (mélange), qui ne fait que mélanger
REMARQUE: pour changer de programme pendant le cycle de
préparation, appuyer sur la touche MENU pendant 3 secondes.
Touche TIME+: permet d'augmenter le temps en incréments d'une
minute. Garder appuyée pour augmenter le temps plus rapidement.
La durée maximum est de 60 minutes.
Touche TIME–: permet de diminuer le temps en incréments d'une
minute. Garder appuyée pour diminuer le temps plus rapidement. La
durée minimum est de 5 minutes.
Touche START/PAUSE: commence le cycle de préparation une
fois le programme choisi et le temps programmé. Permet également
d'arrêter l'appareil et la minuterie. Remarque: toutes les touches sont
opérationnelles pendant le fonctionnement, sauf la touche MENU.
Pour accéder au menu une fois le cycle de préparation commencé, il
vous faudra éteindre et rallumer l'appareil (en appuyant deux fois de
suite sur la touche POWER), puis appuyer sur la touche MENU.
ICÔNES
Cet icône indique que le mélange est en cours.
Cet icône indique que la réfrigération est en cours.
Remarque: toutes les touches sont opérationnelles pendant le
fonctionnement, sauf la touche MENU. Pour accéder au menu une
fois le cycle de préparation commencé, il vous faudra éteindre,
puis rallumer l'appareil (en appuyant encore une fois sur la touche
POWER), et appuyer sur la touche MENU.
28
Page 29

AVANT LA PREMIÈRE UTILISATION
Laver et désinfecter la cuve, le mélangeur et les couvercles (voir la
section “Nettoyage et désinfection”).
Avertissement : veiller à débrancher l'appareil avant de le nettoyer.
Important: laisser l'appareil sur une surface plate et stable pendant
24 heures avant de le brancher an d'assurer le bon fonctionnement
du compresseur.
FONCTIONNEMENT DE BASE
Remarque: une fois que la crème glacée, le sorbet ou le gelato
aura atteint sa consistance finale, le mélangeur s'arrêtera
automatiquement de tourner mais le cycle de refroidissement
continuera jusqu'à la fin du temps programmé.
1. Brancher l'appareil dans une prise de courant. “00” clignotera
sur l'écran, ce qui signie que l'appareil est en mode veille.
2. Appuyer sur la toucher POWER. Les trois programmes
apparaîtront sur l'écran.
3. Appuyer sur la touche MENU pour choisir le programme voulu:
ICE CREAM (crème glacée), COOLING ONLY (réfrigération) ou
MIXING ONLY (mélange). La durée par défaut du programme et
l'icône correspondant apparaîtront sur l'écran.
4. Appuyer sur la touche TIME+ ou TIME– pour augmenter/
diminuer le temps au besoin.
À la n du cycle de préparation, “00:00” apparaîtra sur l'écran et
l'appareil sonnera trois fois.
Au bout de 10 minutes sans activité, l'appareil se mettra
automatiquement en mode refroidissement pour préserver la
consistance de la crème glacée. Lorsque l'appareil est en mode de
refroidissement, aucune touche n'est opérationnelle, sauf la touche
POWER. Après 10 minutes de plus sans activité, l'appareil se mettra
en mode veille et l'écran afchera “00”.
Pour une consistance optimale, réfrigérer le mélange pendant
2 heures ou plus (jusqu’à 3 jours) avant la préparation. Toujours
fouetter le mélange avant la préparation. Remarque : réfrigérer le
mélange avant la préparation n’est pas obligatoire, mais cela lie les
ingrédients, ce qui évite que des cristaux de glace ou de graisse ne
se forment pendant la préparation.
Si vous souhaitez que la glace ait une consistance plus ferme, la
transvaser dans un récipient hermétique et la congeler pendant
environ 2 heures. La sortir du congélateur environ 15 minutes avant
de servir.
29
Page 30

Protection anti-surchauffe
L'appareil est équipé d'un dispositif de protection anti-surchauffe
qui arrête automatiquement le moteur si sa température atteint
115°C (239°F). L'appareil se réinitialisera automatiquement une fois la
température du moteur descendue en dessous de 115°C (239°F) ; il
n'est pas nécessaire de le débrancher.
FONCTION DE PROTECTION DU COMPRESSEUR
Après avoir arrêté ou éteint le mode “réfrigération”, le compresseur
marquera une pause de 3 minutes avant de se remettre en
marche. L'icône du mode “réfrigération” restera sur l'écran, mais le
compresseur ne commencera pas le refroidissement avant la n de
la pause.Cette pause protège le compresseur des dommages et
assure un rendement optimal.
Capacité maximale
An d'éviter les débordements, ne pas remplir la cuve plus
d´un quart de pouce (0.5cm) au-delà du haut du mélangeur. Les
ingrédients se dilatent pendant la préparation; le volume nal varie
suivant les recettes.
Différences entre les programmes
1. ICE CREAM (crème glacée): la durée par défaut du cycle
de préparation est de 45 minutes. Les modes “mélange” et
“réfrigération” sont tous les deux activés.
2. COOLING ONLY (réfrigération): la durée par défaut du cycle
de préparation est de 30 minutes. Le mode “réfrigération”
est activé et le mode “mélange” s'active par intermittence, à
intervalle de 2–3 fois/minute.
3. MIXING ONLY (mélange): la durée par défaut du cycle de
préparation est de 10 minutes. Seul le mode “mélange” est
activé.
30
Page 31

MODE D'EMPLOI
Étape 1. Préparer les ingrédients de la
recette. Remarque: il n'est pas
nécessaire de congeler la cuve
amovible. L'appareil est équipé d'un
COMPRESSEUR INTÉGRÉ qui
congèle les ingrédients.
Étape 2. Placer la cuve amovible dans
la chambre de refroidissement, en
appuyant fermement.
Étape 3. Installer le mélangeur dans la
cuve, en vous assurant de l'introduire
sur l'axe du moteur.
VERROUILLER
-
TIME
+
TIME
START
PAUSE
MENU
POWER
Étape 4. Verser les ingrédients dans la cuve amovible, en veillant à
ne pas remplir cette-dernière plus d´un quart de pouce (0.5cm) audelà du haut du mélangeur. Fermer le couvercle et tourner dans le
sens inverse des aiguilles d'une montre pour bloquer.
Étape 5. Appuyer sur la touche POWER pour mettre l'appareil sous
tension.
Étape 6. Appuyer sur la touche MENU et choisir le programme
voulu.
Étap e 7. Appuyer sur la touche TIME+ ou TIME– pour modier le
temps si désiré.
Étape 8. Appuyer sur la touche START/PAUSE pour mettre l'appareil
en marche.
31
Page 32

Étape 9. Pour ajouter des ingrédients pendant la préparation, retirer
le couvercle de l'ouverture d'alimentation ; le refermer aussitôt
terminé.
Étape 10. À la n du cycle de préparation, l'appareil sonnera.
Appuyer sur la touche POWER pour éteindre, ouvrir le couvercle et
retirer la cuve amovible.
Étape 11. Retirer le mélangeur de la cuve, vider la glace à l'aide d'une
cuillère/spatule en plastique ou en bois et la conserver dans un autre
récipient. Ne pas utiliser d'ustensiles en métal ; cela pourrait rayer la
cuve.
Étape 12. Si vous souhaitez que la glace ait une consistance plus
ferme, la transvaser dans un récipient hermétique et la congeler
pendant environ 2 heures. La sortir du congélateur environ 15
minutes avant de servir.
NETTOYAGE ET DÉSINFECTION
ATTENTION: AFIN D'ÉVITER LES RISQUES D'ÉLECTROCUTION,
TOUJOURS DÉBRANCHER L'APPAREIL AVANT DE LE NETTOYER/
DÉSINFECTER.
NETTOYAGE ET DÉSINFECTION DE LA CUVE AMOVIBLE,
DU MÉLANGEUR ET DES COUVERCLES
Laver et désinfecter la cuve amovible, le mélangeur et les couvercles
avant la première utilisation et après chaque utilisation, à moins que
vous ne réutilisiez l'appareil dans l'heure qui suit. Le non-respect de
ces instructions peut entraîner une accumulation de résidus sur le
mécanisme d'entraînement, nuisant à son bon fonctionnement.
REMARQUE: le nettoyage régulier de la cuve amovible augmentera
la durée de vie du mécanisme d'entraînement.
LAVAGE
Utiliser uniquement des détergents en poudre peu moussant
spécialement formulés pour laver la vaisselle et les ustensiles de
cuisine (disponibles auprès des fournisseurs de restaurants et autres
établissements de cuisine). Suivre les consignes du fabricant.
1. Retirer les couvercles, la cuve amovible et le mélangeur de
l'appareil.
2. Laver la cuve à la main. Ne pas mettre la cuve amovible au lavevaisselle.
32
Page 33

3. Laver les couvercles et le mélangeur à la main ou au lavevaisselle. Nettoyer l'orice en bas du mélangeur à l'aide d'une
brosse avant de le mettre au lave-vaisselle.
4. Si nécessaire, éliminer les résidus tenaces à la brosse et laisser
tremper avant de laver.
Toute autre opération d'entretien ou de réparation doit être effectuée
par un service après-vente autorisé.
RINÇAGE
Rincer à l'eau uniquement.
DÉSINFECTION
Utiliser de l'eau de javel ordinaire, diluée dans de l'eau entre 50°F
(10°C) et 120°F (50°C). La proportion exacte d'eau/eau de javel
dépendra de la concentration d'hypochlorite dans l'eau de javel.
Proportions pour les produits les plus courants :
• 5.25 % d'hypochlorite: 3 c. à thé (15 ml) d'eau de javel par
gallon (3.8 L) d'eau.
• 8.25 % d'hypochlorite: 2 c. à thé (10 ml) d'eau de javel par
gallon (3.8 L) d'eau.
1. Imprégner un linge doux ou une éponge de solution
désinfectante.
2. Essuyer l'intérieur et l'extérieur des couvercles, de la cuve
amovible et du mélangeur.
3. Mettre la cuve amovible dans la chambre de refroidissement,
installer le mélangeur et remplir la cuve de solution
désinfectante jusqu'au-dessus du mélangeur. Fermer le
couvercle et faire fonctionner l'appareil en mode MIXING ONLY
pendant 2 minutes. Vider la cuve amovible.
4. Plonger les couvercles dans la solution désinfectante pendant 2
minutes.
SÉCHAGE
Ne pas rincer les pièces après les avoir désinfectées. Égoutter les
pièces et les laisser sécher à l'air libre.
33
Page 34

NETTOYAGE ET DÉSINFECTION DU BOÎTIER ET DE LA
CHAMBRE DE REFROIDISSEMENT
Nettoyer et désinfecter le boîtier et la chambre de refroidissement
avant la première utilisation et après chaque utilisation. Retirer le
couvercle de ventilation arrière.
1. Nettoyage: essuyer l'extérieur du boîtier et l'intérieur de la
chambre de refroidissement à l'aide d'un linge humide. Retirer
les grilles de ventilation et nettoyer en dessous si nécessaire.
2. Désinfection: essuyer l'extérieur du boîtier et l'intérieur de la
chambre de refroidissement à l’aide d’un linge doux ou d’une
éponge imprégnée de solution désinfectante* (essorer le linge/
l'éponge an d'éviter que le liquide ne pénètre dans les évents).
NE PAS SUBMERGER LE BOÎTIER DANS LA SOLUTION DE
NETTOYAGE, L'EAU OU LA SOLUTION DÉSINFECTANTE.
3. Laisser sécher à l'air libre.
4. Remettre le couvercle de ventilation arrière.
*N'utiliser que les solutions désinfectantes recommandées ci-dessus.
GARANTIE LIMITÉE D'UN AN
Waring garantit tout nouvel appareil Waring® Commercial contre
tout vice de matière ou de fabrication pendant une période d'un an
suivant sa date d’achat, à condition qu’il ait été utilisé uniquement
avec des produits alimentaires, des liquides non-abrasifs (autres que
des détergents) et des semi-liquides non-abrasifs, à condition que
l'appareil n'ait pas été soumis à des charges excédant sa capacité
maximale. Le moteur de l'appareil est sous garantie totale pendant
une période de trois ans. Au titre de cette garantie, la division Waring
Commercial réparera ou remplacera toute pièce nous paraissant
afcher un vice de matière ou de fabrication. Pour un service au titre
de cette garantie, envoyez l'appareil, port payé, à : 314 Ella T. Grasso
Ave., Torrington, CT 06790 ou à n'importe quel centre de réparation
agréé.
Cette garantie a) n’est pas valable si l’appareil est endommagé,
cassé, détérioré ou s’il afche un vice ou défaut résultant de
l’utilisation, de l’entretien ou de la réparation par des personnes
non autorisées, ou consécutif à l’usage abusif ou inapproprié, à la
surcharge ou à la modication de l'appareil ; b) ne couvre aucun
dommage accessoire ou indirect.
34
Page 35

Cette garantie d’un an n’est valable que sur les appareils utilisés
aux États-Unis et au Canada et abroge toute autre garantie formelle
ou tout autre accord de garantie. La garantie des produits Waring
vendus en dehors des États-Unis et du Canada est à la charge de
l'importateur ou du distributeur local. Les droits de garantie peuvent
varier d’un pays ou d’une région à l’autre. Avertissement : Brancher
cet appareil sur courant continu (C.C./DC) annulera la garantie.
SERVICE APRÈS-VENTE:
An de faire réparer ou de remplacer cet appareil aux États-Unis
ou au Canada, contactez:
Waring Service Center
P.O. Box 3201
314 Ella T. Grasso Ave.
Torrington, CT 06790
Tel.: 1-800-492-7464 • Fax: (860) 496-9017
Les pièces détachées pour réparations “hors garantie” sont
également disponibles à l’adresse ci-dessus.
35
Page 36

Trademarks or service marks of third parties used herein are
the trademarks or service marks of their respective owners.
Todas las marcas registradas, comerciales o de servicio mencionadas
en este documento pertenecen a sus titulares respectivos.
Toutes les marques déposées, commerciales ou de service
ci-incluses appartiennent à leurs propriétaires respectifs.
©2016 Waring Commercial
314 Ella T. Grasso Ave.
Torrington, CT 06790
www.waringcommercialproducts.com
Printed in China
Impreso en China
Imprimé en Chine
WCIC20 IB
16WC020325
IB -13 430
 Loading...