

Page 1
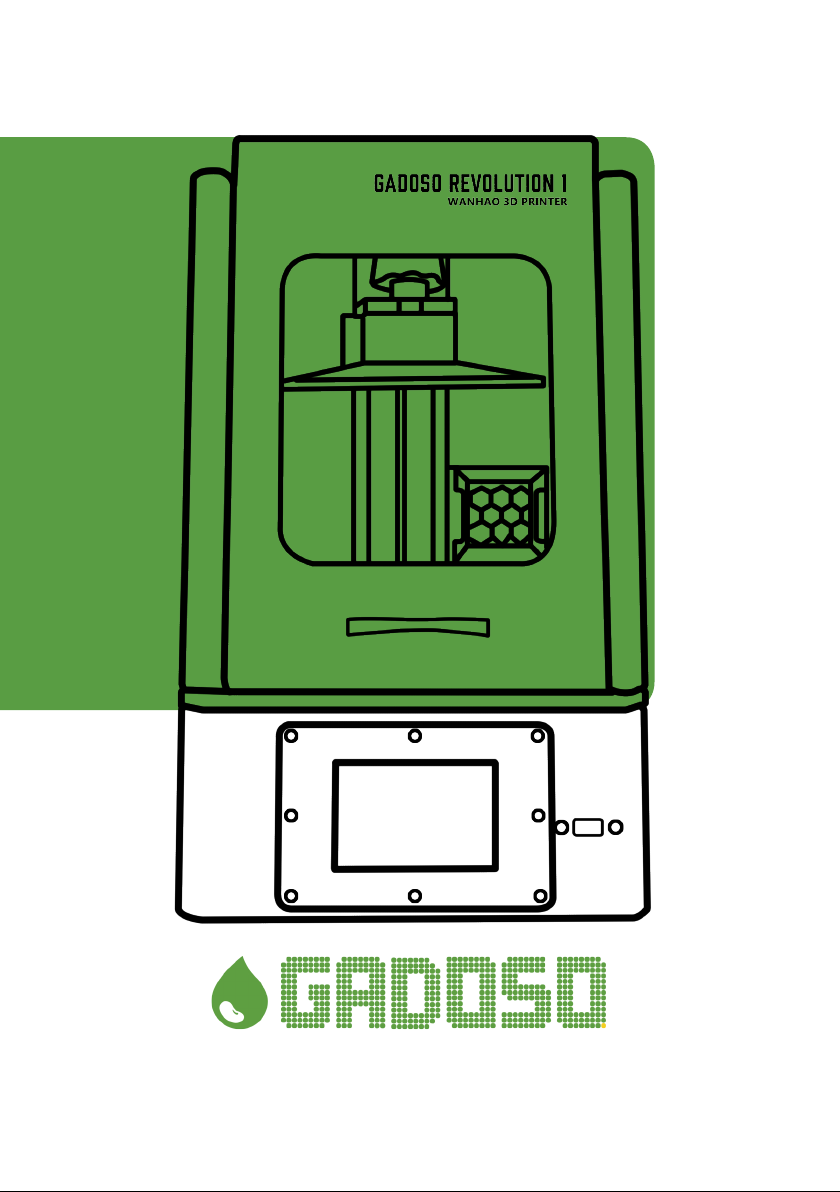
GR1
user
manual
Precision light cure printer
Page 2

contents
Page 3

Important
1
Warranty Details
Safety Information
Congratulations
The Box Contains
Technical Specications
1.0 Using GR1 Workshop
2.0 Software Detailed
3.0 Introduction To Software Keys
4.0 Prepair GR1 For Printing
Re-Leveling The Building Plate
2
3
6
7
8
9
11
14
16
17
Some 3d models and other materials
are referenced from the following
20
Page 4

IMPORTANT
How to get the most out of your 3D printer
Read this manual carefully
You will be able to set up with ease
Visit our website for tutorial videos and guides
www.wanhao3dprinter.com
Join Wanhao Google forum for online support
Google Forum
https://groups.google.com/forum/#!forum/wanhao-printer-3d
Email us! We’re always happy to hear from you
Technical support: support@wanhao3dprinter.com
Product feedback and partnerships: hello@wanhao3dprinter.
com Purchase orders: sales@wanhao3dprinter.com
Warranty Notice
If the product is not performing up to your expectations or you experience any
issues, please contact us before returning the item.
We are experienced in resolving problems through phone and email, or you can
reach us through your local distributor.
Phone: +86-571-6337-9578 (Hours: Mon to Sat from 8:30 AM to 5:00 PM China
Time)
Email: support@wanhao3dprinter.com
Website: www.wanhao3dprinter.com
1
Page 5

3D Printer
WARRANTY DETAILS
The pre-assembled WANHAO GR1 printer is covered by a 12-month warranty for USER over the
world.
The GR1 provides a 12-month warranty on the functionality of individual parts for end-users
over the world.
Wear and tear category components and consumables are excluded from this warranty. The
warranty period begins with the day when the customer receives the goods.
WARNING: The exposure display and the FEP foil fall into the category of normal wear and
tear components, which are not covered by our standard warranty. Instead, the warranty of
the exposure display covers a maximum of 500 hours of printing - the SLA 3D printing process
on the GR1 is considered the standard way of using and wearing the original display. The
warranty of the FEP foil covers 10 cycles (print jobs). When used properly in accordance with
the instructions in the ofcial guides (such as this handbook), the life expectancy of the FEP foil
is several times longer.
Neither the Seller's liability for defective products nor the quality warranty applies to printers or
parts damaged by handling, which is in conict with the instructions and recommendations in
the ofcial manuals and guides, or improper handling caused by unofcial modications, such
as modications to hardware or software.
If at any time you are unsatised with how your repair is handled, you may escalate your
complaint to WANHAO. Please contact us via:
Phone: +86-571-6337-9578
(Hours: Mon to Sat from 8:30 AM to 5:00 PM CST China Time)
Mail: ZHEJIANG WEIBIN 3D TECHNOLOGY CO.,LTD
No. 18 Zhen Shan Road, Chang Kou Town, Fuyang District, Hangzhou
City, Zhejiang Province, China
Email: support@wanhao3dprinter.com
Website: www.wanhao3dprinter.com
AFTER SALES SUPPORT
86-571-63379578
support@wanhao3dprinter.com
2
Page 6

SAFETY
INFORMATION
Read the instructions carefully. Keep this docu-ment for
future reference. Follow all warnings and instructions
marked on the product. Observe the following guidelines
when connecting and discon-necting power to the
external power supply unit:
- Install the power supply unit before connecting
the power cord to the AC power outlet.
- Unplug the power cord before removing the
power supply unit from the printer.
- Operate on a table or at, stable surface,
ensu-ring that the machine cannot fall and is level.
- Do not operate outdoors.
- Do not allow resin or any liquids to get inside
the chassis, wipe up any liquid spills immedia tely.
- Do not use solvents to clean the printer as
they may damage the screen. Use a little
detergent and warm water to clean any resin spills.
- Disconnect the printer from AC before storage
or when not used for a long period of time.
This 3D printer is connected to the electrical
network with an input of 110 or 240 V AC,
50/60 Hz, and has an operational voltage of 24V.
- Do not allow anything to rest on the power
cord. Do not locate this product where people
will walk on the cord.
- If an extension cord is used with this product,
make sure that the total ampere rating of the
equipment plugged into the extension cord
does not exceed the extension cord ampere
rating. Also, make sure that the total rating of
all products plugged into the wall outlet does
not exceed the fuse rating.
- Use the product only with the supplied power
supply cord set. If you need to replace the
power cord set, make sure that the new power
cord meets the following requirements: deta-
chable type, UL listed/CSA certied, VDE ap-
proved or its equivalent, 4.5 meters (15 feet)
maximum.
- In case of malfunction, disconnect the printer
immediately from network.
- Do not attempt to x this product by yourself,
as opening or removing covers may expose.
you to dangerous voltage points or other risks.
Refer all repairs to qualied service personnel.
Please send an email to your national supplier
or contact techincal service at:
support@wanhao3dprinter.com
Unplug this product from the wall outlet and refer
servicing to a qualied service personnel:
- The power cord or plug is damaged, cut or fra-yed.
- Liquid has been spilled in the machine.
- The machine was exposed to rain or water.
- The machine has been dropped or the case has
been damaged.
- The machine does not operate normally after
following the operating instructions.
DISPOSAL
INSTRUCTIONS
Do not throw this electronic device into the waste
when discarding. To minimise pollution and ensure
protection of the environment, please
recycle or return to Photocentric for recycling.
3
Page 7

SAFETY
GUIDELINES
- Keep the printer and resins out of the reach of
children.
- The resin is an irritant to skin and eyes. Always
wear gloves when coming into contact with
the liquid resin. Always use in a well ventialed
room.
- Resins are classied as irritants, not harmful,
but in exceptional circumstances people can
be sensitive to the resin and develop a skin
irritation or rash. Avoid this possibility by always
wearing gloves and avoid breathing fumes.
- The printer should be operated on a stable
and level surface, preferably away from direct
ambient light.
Please notice that the latest instructions will always
be available from:
www.wanhao3dprinter.com
IRRITANT
4
Page 8
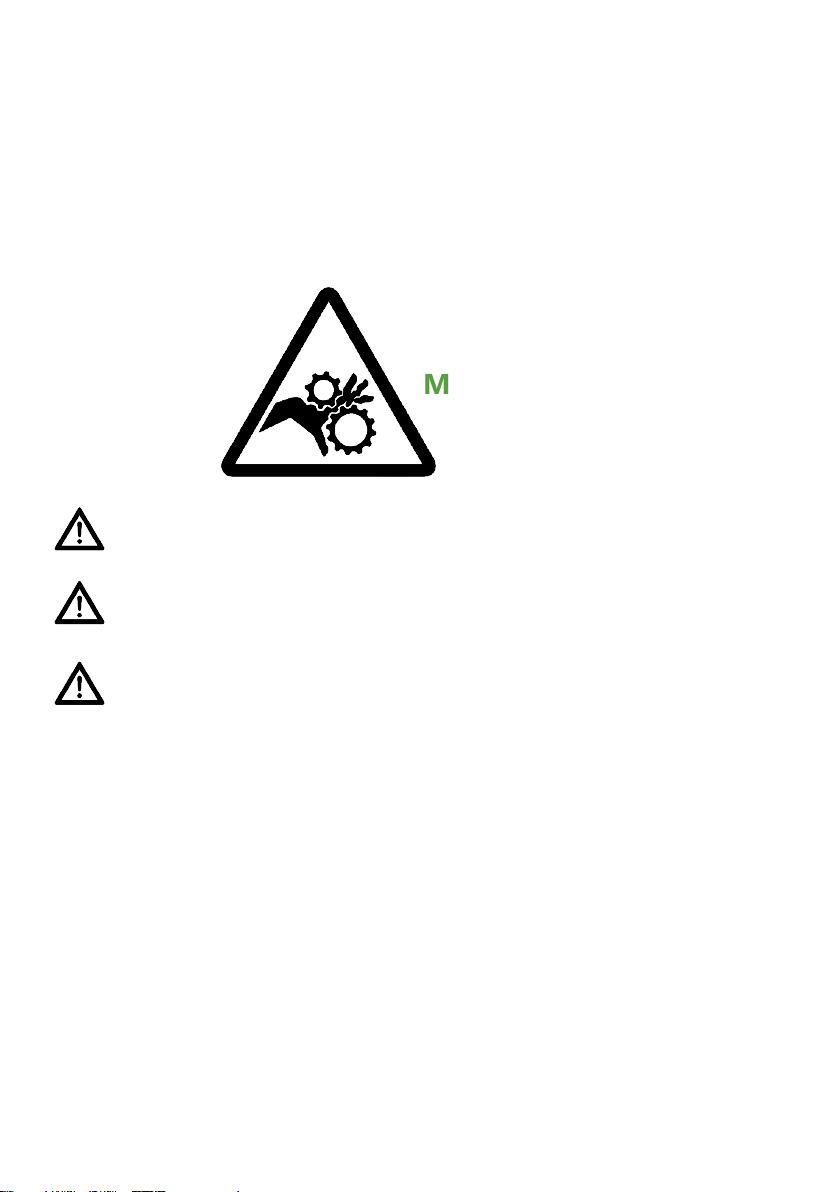
SAFETY INSTRUCTIONS
Before you get started, please read these safety instructions.
CAUTION : WANHAO 3D Printers include moving parts that can cause injury. Never reach inside
the WANHAO 3D Printer while it is in operation, and allow time for the printer to cool down after
operation.
MOVING PARTS
Do not leave the WANHAO 3D Printer unattended during operation.
Always wear gloves while handling resin or printed objects.
Always be careful when using the scraper. Never direct the scraper towards your ngers.
In case of emergency turn off the 3D printer by unplugging the power outlet.
• The printer must not be exposed to water or rain, or the printer will be damaged.
• The printer is designed to be used in ambient temperatures, ranging from 15°C to 30°C.
• The printer is designed to be used in humidity levels ranging from 20% to 50%.
• Operating the printer outside the recommended temperatures and humidity levels
may result in low quality print models.
• Eye protection during cleaning or sanding of the printed models is recommended
to protect your eyes from small airborne particles.
5
Page 9

CONGRATULATIONS
You have just purchased a new and innovative Direct UV-Light Printing (DUP) technology
based 3D printer. The direct UV method of printing uses LCD display panel as a matrix of
pixels that hardens the liquid in the resin vat with the light from the UV light source. UV-
LEDs at the bottom is used as background lighting.
Bulld Plate
Resin
Resin Vat
Light beam
UV LED
This revolutionary system is a new way of printing that uses normal UV light as the energy
source to provide initiation of free radicals polymerization that is necessary to change the
liquid imagepac resin into your solid hardened object.
LCD Panel/
Display
Working Principles of
DUP 3D Printers
There are two amazing advantages of DUP technology:
1. High resolution can be achieved through affordable and accessible LCD screens.
These screens are the same as the widely available screens of mobile phones and
tablets, so phenomenal value for money is passed directly on to you.
2. Energy used by GR1 is an order of magnitude lower
than comparable systems. This is not only good news for your energy bills and
the environment, but also performance advantage due to avoiding unnecessary
creation of excess energy that leads to over-curing. The problem of over-curing
is common among Digital Light Projector (DLP) and laser systems.
6
Page 10

The box
CON
contains
TENTS
POWER CABLE
WANHAO RESIN
(0.25KG)
GR1 3D PRINTER
FEP FILM PVC SHOVEL HEXAGON WRENCH
GLOVES
4G U DISK
DISPOSAL INSTRUCTIONS
• Extra gloves.
• Paper towels.
• Access to a sink with hot water to clean the object.
• Liquid soap (detergent) to clean the object.
• Soft brush or sponge to clean the object.
• Glass or clear plastic container to post expose the object in.
• WANHAO cleaner (Optional)
PRINT PLATFORM
A MODEL
7
Page 11

Technical Specifications
Machine Type DLP (Digital Light Processing) 3D Printer
Light Source 405-410nm Wavelength UV Lamp
With Cover or Not Tilt Hood with Transparent Cover UV Safe
Max Print Area 140*78*200 mm
Max Print Speed Up to 30mm/hour
Software GR1 Workshop , all .stl Files
Material Support 405-410nm Wavelength Resin
Case Material Steel Case
LCD Screen Size 6.33 Inch
Packing Size 34.5*37*52cm
Accuracy X:140/2560=0.055 mm
Y:78/1440=0.055 mm
Z:0.035~0.1mm
Layer Thickness 35-100 micron
Net Weight(kg)
Gross Weight(kg)
Certication
Platform Holder 1 Bolt Adjusting System
Power Supply Unit Inside 110 AND 220V(Auto Switch), 50/60Hz,
Typical application • Prototyping, Modeling, Jewelry, Dentistry,
12.5kg
14.5kg
CE,CB, FCC
4.5A (input), and takes standard IEC Cable
Gaming and Art.
• Great for Professional use or DIY hobbyists.
GaDOSO revolution 1
Intelligent printing function,
more advantages waiting your exploration.
8
Page 12

1.0 Using
GR1 workshop
GR1 workshop is software that prepares 3D models for 3D printing and copy to ash disk to
be printed by your GR1 3D Printer.
Download and
Install GR1 workshop
a.
Insert the WANHAO ash disk into your
computer and run the compatible Windows or
OS GR1 installation program.
b.
Enter the URL
download
GR1 installer for your operating system.
software and download the correct
wanhao3dprinter.com/
software operation
1.
Click on Import and import a model to the
building surface.
2
. By Clicking on Conguration and Setting
you can set up your resin’s Settings such as
curing time and Layer Thickness.
The Movable picture on the right top of the
Resin Settings Windows is a good guide of
understanding how you can set your Life and
sequence section.
9
Page 13

3.
In Supports you can add supports to
your model Automatically and Manually.
4.
In Preview menu you can See the
Model in different ways the the software
gives you few options for that.
5.
When you Model is ready Click on
*.GR1 and save the model. Software starts
to Render and Generate Gcode of your model.
10
Page 14

2.0 Software Detailed
Scene View
The Scene View allows you to manipulate
various aspects of the scene.
In Object menu you can Select and
visible or invisible the model. This is very
useful tool in case you have few models
in the platform and you want to analyze
other models.
In Copy Section You can duplicate your
model as many as you want but ensure
that all models would place on the
platform. Software will automatically
arrange and align models for you. You
can set the number of the Copies you
want to duplicate the model.
In Tools Menu you can Move,
Rotate,Orient
ad Scale your model.
Scale
A model can be scaled (reduced or
increased) by selecting it, and using the
‘Scale’ view to enter in a new scaler value.
11
Page 15

Rotating
Rotating a model works in a similar way to
moving a model. Simply select the model
you want to work with, and use the X/Y/ Z
+/- buttons to rotate the model by your
specied degrees.
Move
The Move function allows you to move
objects on the build platform along the
x:y:z axis by the distance entered.
Orientation to plate
You can place the model all over the
building surface and by double clicking on
it the model rotates in different angel.
Supports
Supports are sometime required to properly
attach a model to the build space. Because
of the nature of DPP the lower layers must
be supported by the supports unless it has a
wide surface in the rst layers.
In supports section you can add supports to
your model Manually and Automatically. You
can adjust the settings in this section based
on the model and your preference. You are
also able to add Brace to your supports.
12
Page 16

You can Show and Hide the added
supports on your model. The software
only shows you the supports Tips
You can add Raft to your model. You
are able to adjust the Raft settings as
well. There are different types of Rafts
that you can choose based on your
preferences.
.
You can preview you model before the print.
By sliding the the bar on the right side of the
software you can see the layers of your model
that are going to print.
If you hollow your model software also
allows you to make a hole into your model.
It is recommended that make the hole
somewhere that is no visible after printing
process is nished.
Hollow
The Hollow feature of GR1 Workshop
helps you to save time and resin.
you can adjust the Wall thickness
after hollowing it. Not every model
have to be hollowed.
13
Page 17

3.0 Introduction
to software keys
1
2
12
3
4
5
6
11
7
8
9
10
SETTINGS:
Opens a menu that allows
you to change layer thickness,
curing time, printing speed etc..
Copy:
To duplicate the model in
expected quantity.
14 15 16
13
17
18
19
Objects:
Click the object button or hit the model
to go into Look mode. In this mode,
or choose to view to not view the model.
Tools
Move:
click and drag with your mouse
to move the model. In this mode,
click and drag with your mouse to
move an object around the plate.
Use the arrow at the side of the
selected Move button to open the
Change Position submenu and
move an object by a specied
distance and direction.
On Plate:
Double click the object to auto
place the model in suitable printing
orientation.
Rotate:
In this mode, click and drag with your
mouse to rotate the object. Use the
arrow at the side of the selected Turn
button to open the Change Rotation
submenu and rotate an object by a
specied angle and direction.
O2O:
This function enable one object to move to
connect to the 2nd one in any direction.
14
Page 18

Scale:
Click the Scale button or hit Ojbect
to go into Scale mode. In this mode,
click and drag with your mouse to
enlarge or shrink your object. Use the
arrow at the side of the selected Scale
button to open the Change Dimensions
submenu and scale by a percentage or
to a specic measurement.
Mirror:
The Mirror view allows you to
mirror the selected object on
the specied axis.
Measure:
This measure enable you to
check the specic dimension
between 2 points of model.
Import:
Click this button to add an object
to your build plate. You can add
as many objects as you can t
on the plate.
supports:
Select this to have your object
include easily removable support
structures for overhanging parts
of the object.
Export:
Various 3D le format export
options. And you can export to
printing slices le.
Orthographic:
views separation method of multiviews for 3D reconstruction
Arrange:
Click to auto arrange the
models onto the building plate.
Layout:
visual display
Preview:
provide 4 kinds of visual image.
Split view, Object view, Slice view,
Picture view, hollow view.
Home:
Resets GR1 workshop to the
default view of the object.
.
Status:
Indicate the basic
conguration for printing.
15
Page 19

4.0 PREPAIR GR1
FUNCTION CHECKING
FOR PRINTING
UNPACK AND CONNECT CABLES
Connect the power supply to printer and
turn on the switch behind the printer.
Open the cover and software and load
the objet (LSTL/STL/OBJ).
Click to import the 3D le( STL, OBJ),
You can add support, change direction etc.
Then Click to slice the object into
GR1 le. Copy the le into the ash disk.
Open the packing. Put the printer onto
one flat table. Pull open the front cover
and take out tool box. The building plate
is inside the tool box. Loose the 2 VAT
locking screw to take out the VAT and
protection Foam.
Click the
on the touching screen. The WANHAO
logo shall project on the printing display.
Install the VAT onto the printer. Make sure
the 2 locking screw well secure the VAT
from moving up and down.
NOTE:
Tool -- Detection --
VAT window side toward you.
Protect foam
Tool box
16
Page 20

Loose the knob on the building plate.
Insert the building plate into the holder
slot. Tighten the knob to secure the
building plate. Note: The printer has been
calibrated before dispatching. In case
you are not satised with the current
calibration. Please read Re-calibration on
User Manual.)
Raise the building plate and pour the resin
inside until the resin level reach the Min scale.
RE-LEVELING
THE BUILDING PLATE
1. To use the 1.5mm hex wrench to
Loose the 4 locking set screw by turning
screws Anti-clockwise.
2. To use 2.5mm hex wrench to loose 4
leveling set screws by turning the screw
Anti-clockwise.
Hang on the front cover. Insert the Flash
disk. Go to
Note:
please print when you see the Preview
displayed.
Print— Choose the le — Print.
loading le may take few seconds,
17
3. Take off the building plate. Put one paper
onto the LCD screen. Then HOME the Z axis
by click MOVE Z AXIS — HOME.
Page 21

4. Install the building plate onto the
holder slot. In case there’s not enough
space to install the plate. Please raise the
building plate by clicking by
0.1mm or 1mm, until it can be installed.
5. Please drag the A4 paper back and forth
until you can feel the obvious resistance
between the building plate and screen which
means the building plate is ne leveled. In
case still too much distance, you may need
to click and to lower or raise
the building plate for obvious friction from the
dragging paper.
Important Notice: Please click the lower
button once a time to avoid continuous
clicking cause the breakage of screen.
6. Now we need to ne tune the top locking
screw of building plate. By adjusting the top
set screws, until you get even force back
from all direction of paper. Finally lock the set
screw from the 4 side set screws.
Important Notice: Building plate need to be
parallel touching the screen. If the building
plate tilt to the screen, the leveling need to be
re-tuned.
For Video Instruction, please visit URL
WANHAO3DPRINTER.COM/VIDEO
7. After ne-tuned leveling, Please click OK
calibration to memorize the current setting.
WWW.
18
Page 22

POST PROCESSING
Place the platform to WANHAO Washer. Remove the objects by sliding the
scraper in at their base. Wash off any liquid polymer in alcohol container. You can
gently clean it with a soft brush or sponge, take care not to damage it, it will not
achieve full hardness until after post exposing in UV light. A WANHAO Washer
will clean your objects without the possibility of damaging them.
Alcohol
Check your object is thoroughly clean as resin cannot be easily removed afterwards and
then leave it under water in sunlight for about 3 days. Or in the WANHAO CURING
BOX for 20 minutes. The longer you leave it under water the darker the colour will get,
some colour change is inevitable. When it is completely post-exposed it will be strong
and have a dry surface. Empty the contents of the vat back into the bottle by pouring
through a sieve with the vat on a at surface wipe the inside thoroughly
with absorbent paper. Replace the lm when damaged.
19
Page 23

SOME 3D MODELS AND OTHER MATERIALS
ARE REFERENCED FROM THE FOLLOWING
Human Jaw by gebrin
WEBSITE
www.thingiverse.com/thing:968975
Aug 14, 2015
20
Page 24

THE NEXT
GENERATION
OF 3D PRINTING
IS HERE
DISPOSAL INSTRUCTIONS
Do not throw this electronic device into the waste
when discarding. To minimize pollution and ensure
utmost protection of the global environment, please
recycle or return to Photocentric for recycling.
ZHEJIANG WEIBIN 3D TECHNOLOGY CO.,LTD
No. 18 Zhen Shan Road, Chang Kou Town, Fuyang
District, Hangzhou
City, Zhejiang Province, China
Page 25

GR1
user
manual
Precision light cure printer
 Loading...