

Page 1
VZUG LTD
Dishwasher
Integrated Adora N
Operating instructions
Page 2

Dear V-ZUG Customer
Thank you for choosing to buy one of our products.
Your appliance is made to high standards and is easy to use. Nevertheless, please
take the time to read these operating instructions in order to familiarize yourself with
the appliance and get the best use out of it.
Please follow the safety precautions.
Modifications
Text, diagrams and data correspond to the technical standard of the appliance at the
time these operating instructions went to press. The right to make technical modifications for the purpose of the further development of the appliance is reserved.
Symbols used
Denotes important safety precautions. Failure to observe
said precautions can result in injury or damage to the appli
ance or fittings!
A Indicates step-by-step instructions.
– Describes how the appliance reacts to the steps taken.
䡲 Indicates a list.
Denotes useful tips for the user.
Validity
The model number corresponds to the first three digits on the identification plate. These
operating instructions apply to the following models:
Model Type Model no. Norm
Adora 55 N GS55N-Gi/-c 174 SMS 55
Adora 55 N GS55Ni/-c 178 SMS 55
Adora 60 N GS60N-Gi/-c 176 EURO 60
Adora 60 N GS60Ni/-c 180 EURO 60
© V-ZUG LTD, CH-6301 Zug, 2005
2
Page 3

Contents
Safety precautions 5
Before using for the first time . . . . . . . . . . . . . . . . . . . . . . 5
Correct use . . . . . . . . . . . . . . . . . . . . . . . . . . . . . . . . . . 6
Children in the home . . . . . . . . . . . . . . . . . . . . . . . . . . . . 7
Note on use . . . . . . . . . . . . . . . . . . . . . . . . . . . . . . . . . 8
Your appliance 10
Appliance description . . . . . . . . . . . . . . . . . . . . . . . . . . 10
Construction . . . . . . . . . . . . . . . . . . . . . . . . . . . . . . . . . 11
Operating and display elements . . . . . . . . . . . . . . . . . . . 12
Programme overview 14
User settings 16
Water hardness . . . . . . . . . . . . . . . . . . . . . . . . . . . . . . 16
Operation 18
Preparing the appliance . . . . . . . . . . . . . . . . . . . . . . . . . 18
Loading the appliance . . . . . . . . . . . . . . . . . . . . . . . . . . 19
Loading tips for the upper basket . . . . . . . . . . . . . . . . . . . 20
Loading tips for the lower basket . . . . . . . . . . . . . . . . . . . 24
Adding detergent . . . . . . . . . . . . . . . . . . . . . . . . . . . . . 26
Programme selection . . . . . . . . . . . . . . . . . . . . . . . . . . . 28
Interrupting a programme . . . . . . . . . . . . . . . . . . . . . . . . 29
Aborting a programme . . . . . . . . . . . . . . . . . . . . . . . . . 29
End of programme . . . . . . . . . . . . . . . . . . . . . . . . . . . . 30
Care and maintenance 31
General cleaning . . . . . . . . . . . . . . . . . . . . . . . . . . . . . 31
Cleaning the exterior of the appliance . . . . . . . . . . . . . . . 31
Cleaning the filters . . . . . . . . . . . . . . . . . . . . . . . . . . . . 32
Cleaning the spray arms . . . . . . . . . . . . . . . . . . . . . . . . 33
Cleaning the water inlet filter . . . . . . . . . . . . . . . . . . . . . . 34
Filling with regeneration salt . . . . . . . . . . . . . . . . . . . . . . 35
Filling with rinse agent . . . . . . . . . . . . . . . . . . . . . . . . . . 36
3
Page 4

… Contents
Troubleshooting 38
What to do if … . . . . . . . . . . . . . . . . . . . . . . . . . . . . . . 38
Interruption in power supply / Appliance stops
during programme . . . . . . . . . . . . . . . . . . . . . . . . . . . . 41
Dishwashing tips 42
Technical data 43
Accessories and spare parts . . . . . . . . . . . . . . . . . . . . . . 44
Note for testing institutes . . . . . . . . . . . . . . . . . . . . . . . . . 45
Disposal 48
Index 49
Repair service 51
Quick instructions 52
4
Page 5

Safety precautions
The appliance corresponds to recognised technology stand
ards and the relevant safety regulations. Proper use of the
appliance is however essential to avoid damage and acci
dents. Please therefore follow the precautions given in these
operating instructions.
In accordance with the requirements of IEC 60335-1:
䡲 This appliance is not intended for use by persons (including children) with reduced
physical, sensory or mental capabilities, or lack of experience and knowledge, unless supervised or unless they have been given instruction concerning the use of the
appliance by a person responsible for their safety.
Before using for the first time
䡲 The appliance must be installed and connected to the electricity supply in accord-
ance with the separate installation instructions. The necessary work should be carried out by a qualified fitter or electrician.
䡲 Fill the salt reservoir of the water softener with approximately 1.5 l water and 1 kg
regeneration salt.
䡲 Mix the salt solution well using a wooden spoon.
For hygiene reasons, regeneration salt is also recommended for use with low
water hardness and 3in1detergents.
䡲 It is advisable to run a wash programme without any dishes ( programme with
detergent) in order to remove traces of grease left behind from the manufacturing
process.
The appliance was tested with water before being shipped. There may therefore still be traces of water left in the appliance.
5
Page 6

… Safety precautions
Correct use
䡲 The appliance is only suitable for washing household dishes and cutlery with water
and standard dishwasher detergent. It is designed for use in the home and the
above-mentioned purpose only. No liability is assumed for any damage caused
by improper or incorrect use.
䡲 Any repairs, modifications or manipulations to the appliance, especially any elec-
trical parts, should only be carried out by the manufacturer, its Customer Services
or similarly qualified persons. Repairs if carried out incorrectly may cause serious
injury, damage to the appliance and fittings, as well as affect the functioning of
the appliance. If the appliance is not working properly or in case of a repair order,
follow the instructions given in the 'Repair service' section. If necessary, please contact Customer Services.
䡲 Use original accessories and spare parts only.
䡲 Retain these operating instructions for future reference. If you sell or pass the appli-
ance on to a third party, please ensure these operating instructions accompany the
appliance, together with the instructions on installation. In this way, the new owner
can inform themselves about how to use the appliance correctly and read the pertinent safety precautions.
6
Page 7

… Safety precautions
Children in the home
䡲 Packaging material (e.g. plastic, polystyrene) can be dangerous for children. Dan-
ger of suffocation! Keep packaging material away from children.
䡲 The appliance is designed for use by adults who are familiar with these operating
instructions. Children are often unable to recognise the danger of electrical appliances. Ensure proper supervision and do not allow children to play with the appliance – there is a danger that children could get locked inside.
䡲 The water in the appliance is not to be used as drinking water. Detergent residue
in the appliance could cause eye or skin irritation! Keep children away from open
appliance.
䡲 Detergents can irritate the eyes, mouth and throat and even cause choking! Keep
detergents, regeneration salt and rinse agents out of the reach of children.
䡲 Use the childproof locking facility.
7
Page 8

… Safety precautions
Note on use
Switching off the power to the appliance disables the builtin
overflow protection system.
䡲 Do not use the appliance if visibly damaged or any of the connections are dam-
aged. Contact Customer Services.
䡲 In the event of any defects or faults, contact Customer Services.
䡲 If the appliance is not operating properly, turn off the water tap and disconnect the
appliance from the electricity supply immediately.
䡲 Do not sit or lean on the appliance door. After loading or unloading the appliance,
do not leave the appliance door open as it can pose a risk – danger of tripping
and bruising!
䡲 Due to risk of injury, place knives and cutlery with sharp edges or points into the
cutlery basket in such a way that they do not stick out (points facing downwards).
Knives and cutlery may also be placed horizontally in the upper basket.
䡲 Do not lean on the upper basket – risk of accident!
䡲 Keep animals away from the appliance.
䡲 To protect your dishes and cutlery, read the 'Dishwashing tips' section.
䡲 Only use detergent, rinse agent and regeneration salt explicitly recommended for
use with your appliance by the manufacturer in the operating instructions. Follow
the directions for use carefully.
䡲 Do not use the appliance without any or too little detergent – risk of causing dam-
age to the appliance.
䡲 Do not use washing-up liquid as it can cause excessive foaming, causing your ap-
pliance to malfunction.
䡲 Store detergent and regeneration salt in a cool, dry place. Lumpy detergent can
cause problems. Please follow the safety warnings issued by the detergent and
rinse agent manufacturers carefully.
8
Page 9

… Safety precautions
䡲 Never fill the rinse agent reservoir or the regeneration salt reservoir with detergent.
If this were to happen, however, do not operate the appliance under any circumstances, as this could cause expensive damage to it. Please contact our service
centre, which can be found in the 'Repair service' section.
䡲 After filling the salt reservoir, run the «Pre-rinsing» programme.
䡲 Do not wash objects that are soiled with inflammable or corrosive solvent, paint,
wax, chemicals (acids or bases) or iron chippings or that can shed fibres in the
appliance.
䡲 Do not use solvents (e.g. turpentine, benzine) instead of, or in addition to, water
in the appliance – fire or explosion hazard!
䡲 Before closing the appliance door and starting a programme ensure that there are
no foreign objects or pets in the appliance. Foreign objects which can rust, such
as nails and paper clips, can damage parts of the appliance as well as the dishes.
䡲 Avoid opening the appliance door during operation. The dishes and water may
be hot – scalding hazard! The steam that escapes can damage wood combination fascias. Spectacles can steam up, impairing your vision.
䡲 Do not leave the premises for a longer period of time when the appliance is in
operation.
䡲 During longer absences, always turn off the water tap before cutting the power
going to the appliance by pulling out the plug or switching off the fuse. Never pull
the plug out of the mains socket by the cable. The mains socket and the water connection are generally located in the cabinet adjacent to the appliance (under the
kitchen sink, behind the waste bin).
䡲 Do not spray the outside of the appliance with water. Do not use a steam cleaner.
䡲 From time to time, check the drain hose for tears, kinks, twists, bends, etc.
9
Page 10

Your appliance
Appliance description
䡲 Capacity: 12 place settings
䡲 5 programmes
«Daily»
«Short/Glass»
«Intensive»
«Pre-rinsing»
«Norm/Standard»
䡲 Overflow protection
10
Page 11

… Your appliance
Construction
4
11
5
11
6
8
1 Door handle
2 Operating and display elements
3 Appliance door
4 Baskets
5 Salt reservoir
6 Coarse and fine filters
7 Rinse agent reservoir
8 Detergent dispenser
9 Quick programme guide
10 Cutlery basket
11 Spray arms
4
10
7
9
9
1
2
3
11
Page 12
… Your appliance
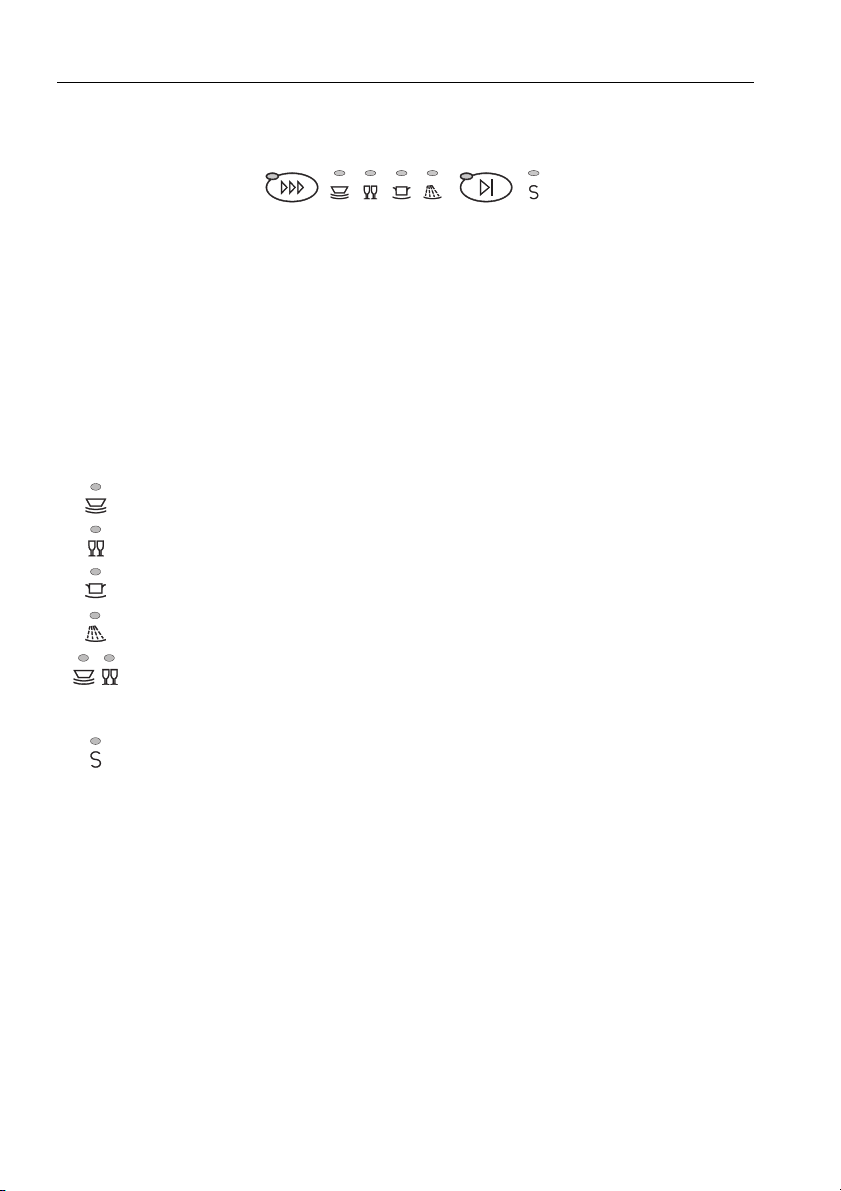
Operating and display elements
13 42
Programme selection buttons
1 Programme selection with indicator light
2 End of programme with indicator light
Programme and indicator symbols with indicator lights
3 Display for:
Daily
Short/Glass
Intensive
Pre-rinsing
Norm/Standard
4 Display for:
Salt refill indicator
12
Page 13

… Your appliance
Indicator lights
Indicator lights flash:
Select programme(s) or function(s).
Indicator light for «End of programme» flashes:
The programme has finished.
Indicator lights are illuminated:
Programme(s) or function(s) is (are) active.
Indicator lights are not illuminated:
Programme(s) or function(s) is (are) inactive.
13
Page 14
Programme overview
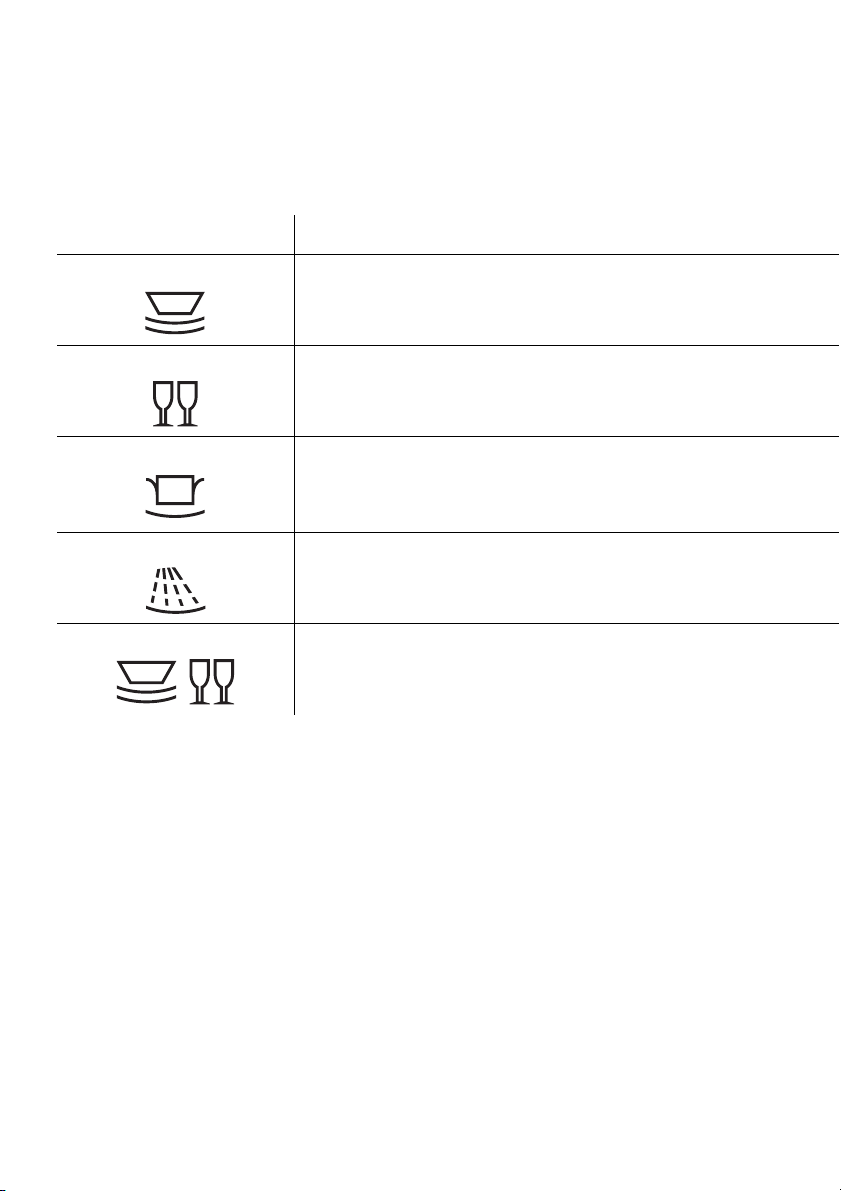
Programme/Symbol Type of soiling
Daily
For normal soiling. Not suitable for burned- or dried-on soiling.
Short/Glass
Intensive
Pre-rinsing
Norm/Standard
For light soiling, aperitif dishware and coffee cups. Not suitable for slowly dissolving tabs.
For heavy soiling as well as pots, pans and gratin dishes with dried- or burnedon soiling. Particularly suitable for dried-on starchy soiling (e.g. rice, mashed
potato, etc.).
To prevent food drying on if intending to start a wash programme later.
Declaration programme for heavy soiling.
14
Page 15

… Programme overview
Programme sequence/Consumption data
Pre-
rinsing
Cleaning
Intermed.
rinsing
Rinsing
with agent
Drying Duration Water Energy
Yes 55 °C Yes 70 °C Yes 1h10 14 l 1.25 kWh
No 45 °C Yes 65 °C Yes 0h45 12 l 0.95 kWh
35 °C 65 °C Yes 70 °C Yes 1h30 23 l 1.60 kWh
Yes No No No No 0h07 4 l 0.05 kWh
No 50 °C Yes 65 °C Yes 2h35 12 l 1.05 kWh
15
Page 16
User settings
Water hardness
The built-in water softener removes limescale from the water, enabling problem-free
cleaning. Automatic regeneration occurs at regular intervals, thus guaranteeing its effectiveness. After regeneration, the next programme starts by rinsing out the water softener by pumping water through it and draining simultaneously.
For hygiene reasons, regeneration salt is also recommended for use with low water
hardness and 3in1 detergents.
The water hardness setting should agree with the local conditions. The water hardness
level is set at «Hardness level 2» at the factory. There are 5 water hardness levels
available.
For information on the level of water hardness in your area, visit
www.trinkwasser.ch or contact your local water authority.
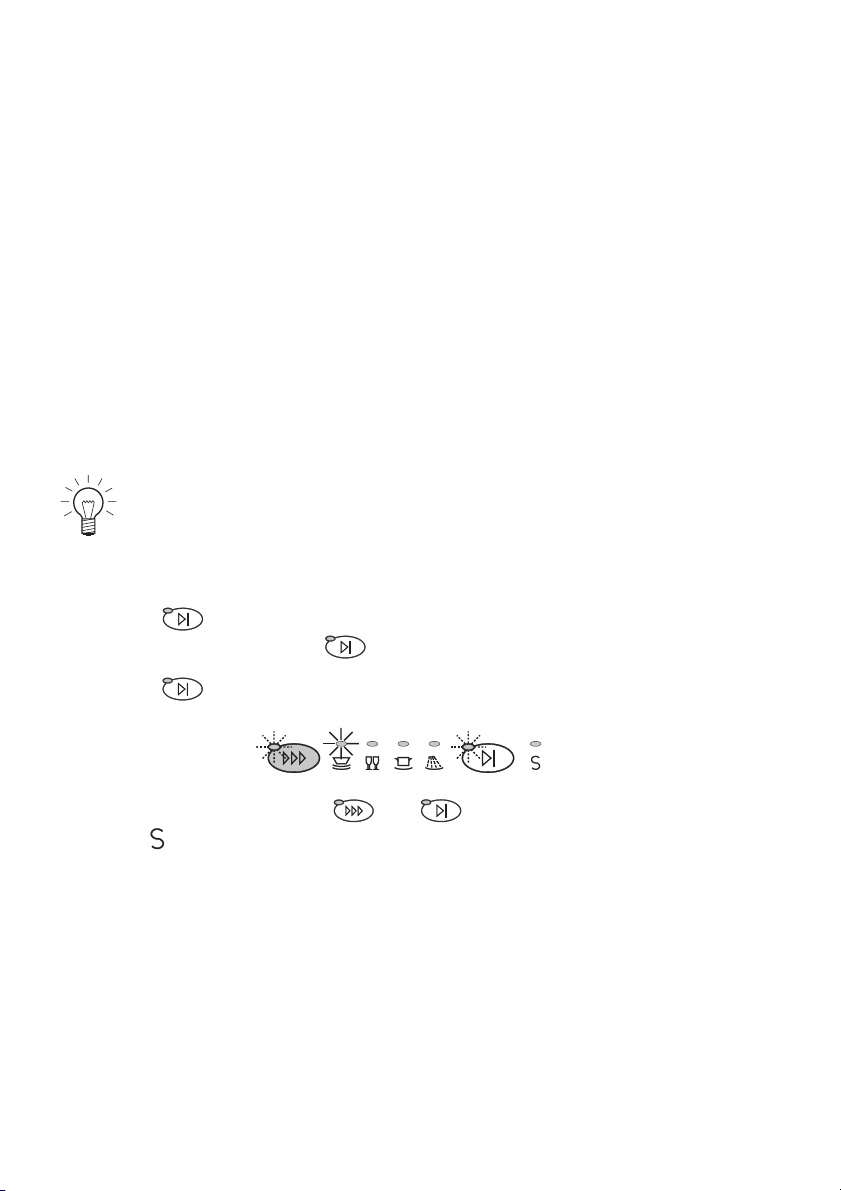
Changing the water hardness level setting
A Hold the button depressed for 5 seconds (to enter the configuration mode).
– The indicator light for the button flashes.
A Press the button 1×.
– The indicator lights for the and buttons flash.
– The salt refill indicator illuminates.
16
Page 17

… User settings
A Press the button to change the setting.
Hardness level 0 0–9 °fH
Hardness level 1 10–19 °fH
Hardness level 2 20–29 °fH
Hardness level 3 30–39 °fH
Hardness level 4 >40 °fH
Setting the level of water hardness to «Hardness level 0» deactivates the water
softener.
Saving the setting
If no button is pressed within 15 seconds, the displays will go out. The setting
is saved.
A Press the button.
– The setting is saved.
17
Page 18

Operation
Preparing the appliance
Open the appliance door
A Pull the handle towards you.
– Any programme that is running will be
automatically interrupted.
Before using for the first time
A Turn the power on.
A Turn the water tap on.
A Fill the salt reservoir with approximately 1.5 l water and 1 kg regeneration salt.
A Stir the salt solution well using a wooden spoon.
For hygiene reasons, regeneration salt is also recommended for use with low
water hardness and 3in1 detergents.
A Wipe away any salt spilt around the outside of the salt reservoir.
A Fill the rinse agent reservoir with rinse agent.
A Run the programme to prevent any spilt salt corroding your appliance.
On initial use, the salt refill indicator can remain illuminated for several wash
cycles. The indicator light will go out when the salt concentration in the reservoir is evenly distributed (after running about 10 wash programmes).
18
Page 19

… Operation
Loading the appliance
Not all dishes and cutlery are dishwashersafe: Follow the
tips and advice in the 'Dishwashing tips' section.
䡲 Remove any large or hard pieces of food or foreign objects left on the dishes or
cutlery.
䡲 Make sure no toothpicks get into the appliance. Toothpicks can clog up the
coarse/fine filter.
䡲 Dishes, pots and pans with heavily burned-on food stuck to them should be soaked
in water first.
䡲 In the following you will find some loading tips to help you get the best results from
your appliance.
19
Page 20

… Operation
Loading tips for the upper basket
A Slide the upper basket out as far as possible and load with smaller items such as
saucers, glasses, cups and dishes.
䡲 If using the foldable racks, stagger the items so that the water can reach the
dirty surfaces better.
䡲 Place salad servers, spatulas, etc. in the upper basket
䡲 Rest wine glasses on the glass holder 1. For best results, turn the glass holder
facing upwards.
䡲 To prevent water spots, load glasses so that at their lowest point they touch the
basket shelf as in 2.
1
20
2
Page 21

… Operation
Glass holder
The height of the glass holder 2 in the upper
basket is adjustable.
The bar can also be pivoted.
The glass holder can be put in one of three
standard rest positions. For optimal drying
results, pivot the glass holder into the uppermost position.
If the rack 1 is folded down and the glass
holder 2 is in the uppermost position, this increases the loading area for e.g. muesli
dishes.
Racks
There are two pivoting racks 1 in the upper
basket.
The stopper enables the racks to be used as
glass supports.
2
1
2
1
21
Page 22

… Operation
Easy prongs
The easy prongs 1 can be placed over the
prongs anywhere in the upper basket.
By using the easy prongs, standard drinking
glasses, baby bottles, sports bottles, vases
and carafes can be placed anywhere in the
basket.
Use two easy prongs for larger objects.
Easy prongs when not in use can be put over the basket prongs 2.
22
Page 23

… Operation
Adjustable upper basket
The height of the upper basket can be adjusted on both sides or just on one side by
approximately 4 cm.
Raising the upper basket
A Hold the upper basket around the height
adjustment lever 1. Place thumbs on the
1
height adjustment levers.
A Lightly grip your hands.
– The upper basket thereupon rises and
slots into the upper position.
A To get the upper basket at an angle, al-
ter the height adjustment either at the leftor right-hand side.
Lowering the upper basket
A With one hand, hold the upper basket at
the side.
A With the other hand, press the height
adjustment lever 1 slightly outwards.
– Using a little pressure, the upper bas-
ket can be brought into the lower
position.
– When loaded the upper basket is
lowered by force of its own weight.
1
23
Page 24

… Operation
Loading tips for the lower basket
A Slide the lower basket out as far as possible and load.
䡲 Load larger items such as plates, bowls, platters, pots and pans.
䡲 Stack soup plates 1 in the rack at the back.
䡲 Very large plates 2 can be loaded diagonally.
2
1
Put plastic bowls in the upper basket. If loaded into the lower basket, they
could be lifted by the pressure of the water and could come into contact with
the revolving spray arm.
24
Page 25

… Operation
Easy prongs
The easy prongs can be placed over the
prongs anywhere in the lower basket.
By using the easy prongs, standard drinking
glasses, baby bottles, sports bottles, vases
and carafes can be placed anywhere in the
basket.
Use two easy prongs for larger objects.
Cutlery basket
Due to risk of injury, place knives and cutlery with sharp
edges or points into the cutlery basket in such a way that
they do not stick out (points facing downwards).
Knives and cutlery with sharp edges or points may also be placed horizontally
in the upper basket.
A Put cutlery loosely in the cutlery basket, with
handles pointing down. Make sure no
spoons are sticking together.
䡲 The inserts 1 prevent items of cutlery
sticking together, water spots during drying, and smaller items (e.g. mocca
spoons) slipping through the basket. The
inserts can be easily clipped on.
1
25
Page 26

… Operation
M
Adding detergent
Powder
A Open the detergent dispenser by press-
ing the latch in the direction of the arrow.
A Add the detergent to the detergent
compartment.
䡲 For dosage, follow the detergent
manufacturer’s instructions.
䡲 Observe the «MIN/MAX» mark.
A Close the cover.
AX
MIN
MAX
MIN
A For heavier soiling, place about a table-
spoon of detergent onto the cover 1.
Tabs
A Place the tablet 2 flat in the detergent
compartment.
26
1
2
MAX
MIN
Page 27

… Operation
Choice of detergent
Do not use washingup liquid as it can cause excessive
foaming, causing your appliance to malfunction.
Follow the instructions printed on the detergent package
carefully. Using too little detergent can cause damage to the
appliance.
䡲 Only use detergent specially formulated for dishwashers.
䡲 The detergent manufacturer’s advice centre will gladly help with any problems
(e.g. detergent dosage).
䡲 Tabs may not dissolve properly at a wash temperature of 55 °C or lower, affecting
the cleaning performance of the appliance.
Using combination cleaning products (3in1 tabs/powder)
If using so-called combination cleaning products, which should render the use of rinse
agent and regeneration salt superfluous, please observe the following tips:
䡲 If the refill indicator illuminates, the salt reservoir should still be filled.
䡲 Combination cleaning products are often made to work best with a particular pro-
gramme. If you would like to use such products, select the programme. With
very short programmes and intensive programmes they may sometimes fail to provide the desired cleaning effect.
䡲 Cleaning products that do not require the use of regeneration salt can only be used
within a certain range of water hardness.
䡲 Under certain conditions, the use of such products can leave whitish streaks or a
film on the dishes and rust marks on the cutlery. The drying result may be affected.
For complaints, please contact the detergent manufacturer.
䡲 If the washing and drying results are not satisfactory, use conventional cleaning
products. Refill the salt and rinse agent reservoirs.
䡲 We can provide no guarantee for any complaints in connection with the use of
such products.
27
Page 28

… Operation
Programme selection
A Close the appliance door.
– The indicator lights for the and buttons flash.
If no programme is selected within 15 seconds of closing the appliance door,
the displays go out. It is necessary to make a new programme selection.
Selection of programmes
A Press the button repeatedly until the desired programme appears.
– The indicator light for the programme selected illuminates.
– The indicator lights for the and buttons flash.
– The programme starts 15 seconds after the last button was pressed.
Press the button at any time to cancel the programme selected.
28
Page 29

… Operation
Interrupting a programme
The dishes and the water may be hot – scalding hazard!
A Press the button.
– This interrupts the programme.
A Open the appliance door.
– The corresponding displays flash.
When the appliance door is closed – if the water temperature is higher than
40 °C – noise from the pump switching on and off up to five times may be
heard. During this phase, temperature equalisation takes place.
If the appliance door is not opened within the next 5 seconds, the programme is
resumed.
Aborting a programme
The dishes and the water may be hot – scalding hazard!
A Hold the button depressed for 2 seconds.
– The water is pumped off.
– The corresponding displays go out.
A Unload the appliance.
29
Page 30

… Operation
End of programme
When the programme has finished, the corresponding indicator light remains illuminated. The indicator light for the button flashes.
Unloading
A Once the programme has finished, ideally wait about 30 minutes for the dishes to
cool down before unloading.
A Open the appliance door.
A Unload the dishes or alternatively leave them in the appliance until next needed.
Unload the lower basket first.
A From time to time, check the coarse/fine filter and clean if necessary.
30
Page 31

Care and maintenance
General cleaning
Using the correct dosage of detergent will automatically clean the inside of the appliance. We recommend that the appliance be cleaned twice a year using dishwasher
cleaner, see the 'Accessories' section.
Follow the directions for use for dishwasher cleaner carefully. Most dishwasher cleaners work more effectively at higher temperatures. We therefore recommend using the programme for cleaning the appliance.
Cleaning the exterior of the appliance
Immediately wipe away any dirt or traces of detergent. Use a soft cloth dampened
with water and a little washing-up liquid to clean the surface (with metal surfaces rub
in the direction of the polish lines). Polish dry with a soft cloth. Avoid cleaning the surface of the appliance with abrasive or highly «acidic» detergent, stainless steel cleaner, all-purpose scouring pads, wire wool, etc. Doing so could damage the surface.
Do not leave any traces of cleaner or detergent on the surface.
A Using a damp cloth, clean the appliance door and operating panel and then
polish dry.
䡲 Washing-up liquid or glass cleaner are suitable for this purpose.
A From time to time, clean the seal and the edges of the appliance door.
31
Page 32

… Care and maintenance
Cleaning the filters
The filter system is comprised of a filter plate 1, a
coarse filter with a foreign body trap 2 and a fine
filter 3. A blocked filter prevents the water from
draining away and triggers a corresponding fault
message, which is described in the 'What to do
if...' section. Therefore, periodically check and, if
necessary, clean the filters.
open close
2
A Open the appliance door and remove the lower
basket.
A Clean the filter plate 1 with water and a brush.
Do not remove the screws!
A Turn the coarse filter with the foreign body trap
2 anti-clockwise and remove.
A Separate the coarse filter with the foreign body trap 2 from the fine filter 3 and
clean under running water using a brush.
A Remove any dirt or debris in the appliance.
A Replace the coarse filter with the foreign body trap 2 along with the fine filter 3
and tighten, turning half to maximum one full revolution clockwise.
3
2
1
32
Page 33

… Care and maintenance
Cleaning the spray arms
If the cleaning performance is unsatisfactory or if dishwasher detergent is being left
behind, then the nozzles in the spray arms may be clogged.
Upper spray arm
A Remove the upper basket.
A Turn the nut 1 anti-clockwise and remove.
A Remove the spray arm 2 from the shaft and rinse
well under running water.
A Check the nozzles.
Lower spray arm
A Hold the spray arm 3 in the middle and pull
hard upwards.
A Rinse the spray arm well under running water.
A Check the nozzles.
Clean the coarse filter with the foreign body trap 4 at the same time as the
spray arms.
1
2
3
4
33
Page 34

… Care and maintenance
Cleaning the water inlet filter
This should only be carried out by an expert. If carried out
incorrectly, there is a risk of flooding!
The built-in water inlet filter can become blocked by limescale deposits, rust or foreign
objects. This can trigger a corresponding fault message, which is described in the
'What to do if ...' section.
A Turn off the water tap.
A Unscrew the connection 1 using water pump
pliers.
A Remove the water inlet filter 2 using pointed pliers
and then clean or change.
A Clean the seal 3.
A Replace the water inlet filter 2 and seal 3. Tighten
the connection 1 on the water tap.
A Turn on the water tap and check for leaks.
3
2
1
34
Page 35

… Care and maintenance
Filling with regeneration salt
Never fill the salt reservoir with detergent!
– When the supply of regeneration salt is exhausted, the refill indicator flashes.
A Open the appliance door and pull out or remove
the lower basket.
A Open the salt reservoir by lifting up the grip.
A Open the cover as far as it will go. At the same time,
a funnel to aid the filling of the salt reservoir
appears.
A Before using for the first time, fill with approximately
1.5 l water. Then fill with 1 kg standard regeneration salt. The drain pump may come on briefly.
A Wipe away excess salt on the edge of the salt
reservoir.
Regeneration salt
1 kg
A Close the cover and engage the latch.
A Run the programme to protect the appliance from corrosion from any excess
salt.
On initial use, the salt refill indicator can remain illuminated for several
wash cycles. Stir the salt solution well using a wooden spoon. The indicator
will go out when the salt concentration in the reservoir is evenly distributed
(after running about 10 wash programmes).
Approximate consumption of regeneration salt:
Hardness level 01234
1 kg salt suffices for ca. cycles – 160 90 42 14
35
Page 36

… Care and maintenance
Filling with rinse agent
Never fill the rinse agent reservoir with detergent. Wipe
away any spilt rinse agent (risk of foaming and of appliance
malfunctioning). Always follow the manufacturer’s safety
warnings.
Rinse agent prevents water spotting after final rinsing (rinsing with agent). The correct
amount of rinse agent is dosed automatically from the reservoir in the appliance door.
– When the supply of rinse agent is exhausted, just a small black point is visible in
the sight glass 1.
A Open the rinse agent reservoir by turn-
ing the cover 2 one quarter of a turn in
an anti-clockwise direction.
A Fill with rinse agent up to the «Max.»
mark (1.3 dl suffices for around 45
cycles at the medium dosage
setting «3»).
A Replace the cover 2 and turn it one
quarter of a turn in a clockwise direction to close.
A Wipe away any spilt rinse agent.
To replace the cover 2, the different sized notches in the cover 3 must be lined
up with the corresponding notches in the reservoir neck. Observe the arrows
on the cover and on the rinse agent reservoir.
¾ full
at least ¼ full
empty
max. 1.3 dl
3
2
1
3
2
4
ax
1
5
6
3
2
4
ax
1
5
6
36
Page 37

… Care and maintenance
Setting the rinse agent dosage
The dosing device is in the neck of the rinse agent reservoir. At the factory, the rinse
agent dosage is set at «3» for medium. The higher the number, the higher the dosage
of rinse agent. Too much rinse agent can cause smears, streaks, milky spots or a bluish
sheen on glasses. Too little rinse agent can leave water marks or whitish grey residue.
A Open the rinse agent reservoir.
A Using the handle of a piece of cutlery, turn
the arrow on the black disc to the desired
dosage level.
A Replace and close the cover.
6
5
4
3
2
1
3
2
4
ax
1
5
6
37
Page 38

Troubleshooting
What to do if …
… the indicator lights for the programme selected and the
button flash or all the indicator lights are
illuminated
Water outlet
Possible cause Solution
䡲 Coarse/fine filter is
clogged.
䡲 Drain hose is bent or
kinked.
䡲 Drain pump or siphon is
A Fix the problem.
A Cancel the error message by pressing the
button.
A Restart the programme.
blocked.
䡲 Excessive foaming due to
rinse agent spillage.
Water inlet
Possible cause Solution
䡲 Water tap is closed.
䡲 Water inlet filter is clogged.
䡲 Interruption in the water
supply.
䡲 Water pressure is too low.
A Fix the problem or wait until the water supply is
restored.
A Cancel the error message by pressing the
button.
A Restart the programme.
38
Page 39

… Trouble-shooting
… the indicator lights flash illuminate and flash alternately
Possible cause Solution
䡲 Various situations can lead
to such an error message.
A Cancel the error message by pressing the
button.
If the error message cannot be cancelled, then:
A Switch the power supply off for about 1 minute.
A Switch the power supply back on.
A Restart the programme.
If the indicator lights flash again, this indicates there
is a malfunction that our Customer Services needs
to resolve.
A Turn off the water supply and the power supply.
A Report the malfunction to Customer Services.
… the appliance does not start
A Close the appliance door.
A Insert the plug into the mains socket.
A Check the fuses.
… the dishes are not clean
A Select a more powerful programme.
A Load the baskets differently, avoiding blind spots.
A Clean the coarse and fine filters and re-insert correctly.
A Check whether the spray arms are clogged or dirty.
A Use the correct amount of detergent or use a different kind of detergent.
A Check the water hardness setting.
A Refill the salt reservoir with regeneration salt.
39
Page 40

… Trouble-shooting
… there is a white film on the dishes
A Fill or top-up the salt reservoir with regeneration salt and then start the pro-
gramme without any dishes in the appliance.
A Use the correct amount of detergent or use a different kind of detergent.
A Fill or top-up the rinse agent.
A Increase the rinse agent dosage setting.
… there are smears, streaks or milky spots on the dishes
A Reduce the rinse agent dosage setting.
… the dishes are wet and dull or have water marks on them
A Fill or top-up the rinse agent.
A Increase the rinse agent dosage setting.
A Do not open the appliance door too early.
… there are rust stains on the items being washed
A Fill or top-up the salt reservoir with regeneration salt and then start the pro-
gramme without any dishes in it.
䡲 The rust stems from another source e.g. the cutlery, pans, water pipe, etc. (the ap-
pliance is made of rust-free steel).
… the detergent is not fully dissolved
A Check to see whether the spray arms are clogged or dirty.
A Use a different kind of detergent.
A Check the detergent dispenser cover.
40
Page 41

… Trouble-shooting
… there is discolouring of the baskets and plastic parts inside the
appliance
䡲 Dishes were washed that still had discolouring food leftovers on them (e.g. tomato
or curry sauce). The discolouration may fade after a few wash cycles.
… an unpleasant smell is coming from the appliance
A Clean the filters.
A Tend to select a more powerful programme.
A Always be sure to add enough regeneration salt.
Interruption in power supply / Appliance stops during programme
An interruption in the power supply causes:
– The programme that is currently running to stop. After the cause of the interruption
in the power supply has been resolved, the programme will be resumed.
– The fault indication system to be interrupted.
41
Page 42

Dishwashing tips
Table and kitchenware
Not all table and kitchenware are dishwasher safe.
䡲 Handcrafted objects and wooden or plastic parts that are sensitive to heat or de-
tergent suds should be cleaned by hand.
䡲 Decorative glass objects are not dishwasher safe – the decoration will wear off
over time.
䡲 Handcrafted pottery has a tendency to crack or chip.
䡲 Objects made of silver, copper and tin have a tendency to discolour, turning
brown or black.
䡲 Stress and tension in thick cut crystal glasses and dishes can cause cracking.
䡲 Depending on the type of glassware and the detergent being used, permanent
clouding may result. Check with your glassware supplier as to whether your glassware is dishwasher safe.
䡲 Spots tend to form on aluminium. This can affect other items being washed (spots
on porcelain). Aluminium should therefore ideally be washed separately.
General tips
䡲 When loading, ensure glasses do not touch (prevents damage to the glasses and
water spots).
䡲 Do not overload the baskets.
䡲 Load beverage and food containers such as cups, glasses, pots, etc. with the
opening facing downwards so that the water can drain off easily.
䡲 Save energy, water and detergent by loading the appliance to capacity.
䡲 When washing range hood grease filters use the maximum amount of detergent.
Select the programme.
42
Page 43

Technical data
Dimensions
SMS 55 EURO 60
Height (with slide plate): 76 cm 76 cm
Height (with plinth): – 80–88.5 cm
Width: 54.6 cm 59.6 cm
Depth: 57.1 cm 57.1 cm
Weight: 40 kg 40 kg
Plumbing
Cold or warm water up to 60 °C: G¾“
Permitted pressure of water supply: 0.1–0.6 MPa (1–6 bar)
Max. pumping height: 1.2 m
Electrical connection
Voltage: 230 V~ 50 Hz
Rated load: 2200 W
Electrical fuse: 10 A
Safety concept
Provided power is going to the appliance, the electronic control unit monitors the appliance. Any malfunction is indicated by fault and error messages.
Overflow protection
In the event of a power failure, the overflow protection sys
tem is rendered ineffective. Hence, the water tap should be
turned off during longer periods of nonuse.
The electronic control unit monitors the water level in the appliance. In the event of a
malfunction, the drain pump turns on, stopping the supply of water to the appliance.
43
Page 44

… Technical data
Accessories and spare parts
Please give model number and exact description when ordering parts.
Accessories
Cutlery basket «small element»
Cup rack
Spray head for baking trays
Vario cutlery basket insert
Rack
Set of 4 easy prongs
Spare parts
Seal / Water inlet filter for Aqua-Stop
Coarse filter
Fine filter
44
Page 45

… Technical data
Note for testing institutes
Capacity: 12 place settings
Loading: See diagrams below
Detergent dosage: 30 g reference detergent in the detergent dispenser
Rinse agent dosage: «Level 6»
Declaration programme: Norm/Standard
Upper basket
A Lower the basket.
A Fold down the glass holder 2 and load
the glasses and dishes. Place the basket at rest in the upper position.
1
A Place the cups 3 on the lower rack on
the right-hand side so that they touch –
but not sit on – the wire running lengthways. In this way, the maximum tilting
position is achieved.
A Place the dessert plates 1 beneath the
large dish.
Lower basket
A 4 six dessert plates, soiled with
spinach
A 5 saucers
A 6 plates, soiled with egg
A 7 plates, soiled with meat
A Load the soiled plates alternately.
3
2
6
7
4
5
45
Page 46

… Technical data
Cutlery basket
SLF = Soup spoon
TLF = Tea spoon
DLF = Dessert spoon
M = Knife
G = Fork
A = Serving spoon (2×)
B = Serving fork (1×)
C = Sauce spoon (1×)
A Arrange cutlery vertically and so
that it is not touching.
A, B and C must be placed
diagonally in the cutlery basket.
46
GG
G
G
G
SLF
TLF
DLF
TLF
DLF
TLF
SLF
M
M
MM
G
DLF
DLF
TFL
DLF
TLF
DLF
TLF
M
M
SLF
SLF
B
SLF
SLF
GG
G
SLF
SLF
CA
A
SLF
SLF
G
G
G
DLF
SLF
DLF
TLF
TLF
DLF
DLF
TLF
TLF
DLF
DLF
TLF
TLF
SLF
M
M
M
M
MM
Page 47

… Technical data
Noise measurement
The measurement is to be carried out in accordance with the European Norm
EN 60704-2-3, section 6.1.3.
Please note the installation instructions accompanying the appliance.
A The appliance is to be installed in accordance with the accompanying installation-
instructions. In particular, for certain models it is important to secure the slide plate
to the floor.
A Feed the inlet and drain hose, as shown in the installation instructions, into the ad-
jacent niche.
A A 19 mm thick chipboard (density: > 750 kg/m³) is to be fitted as a decorative
plate on the door of the appliance in accordance with the accompanying installation instructions. The decorative plate should reach down to the floor, with a gap
of 1–2 mm for ventilation.
A To level out any unevenness between the test cabinet and the floor, seal any gaps
between the test cabinet and the floor. This will improve the reproducibility of the
measurement.
A Before conducting a noise emission test, the appliance door must be opened wide
and then closed again.
A As described in the norm, the measurement is to be carried out without detergent
and rinse agent. Rinse agent dosage should therefore be set to «1».
A Fill the salt reservoir with regeneration salt and then fill up with water.
A Set the water hardness setting in accordance with the operating instructions.
47
Page 48

Disposal
Packaging
䡲 All packaging materials (cardboard, plastic film (PE) and polystyrene (EPS)) are
marked accordingly and should, if possible, be collected for recycling and disposed of in an environmentally friendly way.
Disconnection
䡲 Disconnect the appliance from the mains. With a fixed appliance, this is to be car-
ried out by a qualified electrician!
Safety
䡲 To prevent accidents caused by improper use, especially through children playing,
disable the appliance.
䡲 Pull the plug out of the mains socket or have the appliance disconnected from the
mains by a qualified electrician. Then cut the mains cable.
䡲 Remove or disable the lock on the appliance door.
Disposal
䡲 The old appliance should not be discarded as worthless rubbish. If disposed of
correctly, the raw materials can be recovered for recycling.
䡲 The symbol on the identification plate warns that the appliance may not be
disposed of in normal household waste.
䡲 The appliance must be disposed of in accordance with local regulations on waste
disposal.
For more information on the handling, disposal and recycling of this product,
please contact the local authorities, the local recycling facilities for household
waste or the retailer from whom you purchased this appliance.
48
Page 49

Index
A
Accessories 44
Ordering 51
Appliance
Stops running during
programme 41
Unloading 30
Appliance description 10
C
Care 31
Children in the home 7
Cleaning 31
Exterior of appliance 31
Filters 32
Spray arms 33
Cleaning products 3in1 27
Construction 11
Consumption data 15
Cutlery basket 25
D
Detergent
Adding 26
Digital displays 12
Dimensions 43
Disconnection 48
Dishwashing tips 42
Display elements 12
Disposal 48
E
Easy prongs 22, 25
Electrical connection 43
End of programme 30
F
Filters
Cleaning 32
G
Glass holder 21
I
Identification plate 51
Indicator lights 12, 13
L
Loading tips for lower basket
Cutlery basket 25
Easy prongs 25
Loading 24
Loading tips for upper basket
Adjusting height 23
Easy prongs 22
Glass holder 21
Loading 20
Racks 21
Lower basket
Loading 24
M
Maintenance 31
Malfunction 51
N
Noise measurement 47
Note for testing institutes 45
O
Operating elements 12
Orders 51
Overflow protection 43
49
Page 50

… Index
P
Packaging 48
Plumbing 43
Power supply interruption 9, 41
Programme
Aborting 29
Interrupting 29
Selecting 28
Programme overview 14
Programme selection buttons 12
Programme sequence 15
Q
Queries 51
Quick instructions 52
R
Racks 21
Regeneration salt
Refilling reservoir 35
Repair service 51
Rinse agent
Dosage 37
Refilling reservoir 36, 37
S
Safety 48
Safety concept 43
Safety precautions
Children in the home 7
Correct use 6
Note on use 8
Using for the first time 5
Service agreements 51
Service centre 51
Spare parts 44
Ordering 51
Spray arms
Cleaning 33
Symbols 2
T
Tabs 26
Technical data 43
Trouble-shooting 38
Type of soiling 14
U
Unloading 30
Upper basket
Adjusting height 23
Loading 20
Using for the first time 5
50
W
Water connection 9
Water hardness 16
Page 51

Repair service
The 'Troubleshooting' section will help you to carry out small
repairs yourself, saving you the time and trouble of calling
out a service engineer and the cost that goes along with it.
Whether you contact us for repairs or orders, please always state the serial number
(FN) and the name of the appliance. Enter these details below and also on the service
sticker which comes with the appliance. Stick it in a conspicuous place or in your telephone or address book.
FN
You will also find the same details on the certificate of guarantee, the original sales
invoice and the identification plate of the appliance.
A Open the appliance door.
– The identification plate is located on the left-hand side on edge of the tub.
If the appliance is not working properly, contact your nearest V-ZUG LTD service centre
using freephone 0800 850 850 and stand in close proximity to the appliance.
Queries, orders, service agreements
For administrative or technical queries or problems, as well as for ordering spare parts
and accessories, please contact our head office in Zug on tel. 041 767 67 67.
As regards the maintenance of all our products, when the warranty expires you have
the option of taking out a service agreement. We will be happy to send you the necessary forms.
Appliance
51
Page 52

Quick instructions
Please first read the safety precautions in these operating
instructions!
A Open the appliance door
A Load the appliance
A Add the detergent
A Close the appliance door
A Select programme
A Appliance starts in 15 seconds
A Unload appliance 30 minutes after end of programme
VZUG LTD
Industriestrasse 66, 6301 Zug
Tel. 041 767 67 67, Fax 041 767 61 61
vzug@vzug.ch, www.vzug.ch
Service Centre: Tel. 0800 850 850
J178.13-0
 Loading...