

Vulcan-Hart FLASHBAKE VFBMW2, ML- 126807, FLASHBAKE VFBMW3, FLASHBAKE ML-126807 Installation & Operation Manual
Page 1
INSTALLATION &
OPERATION MANUAL
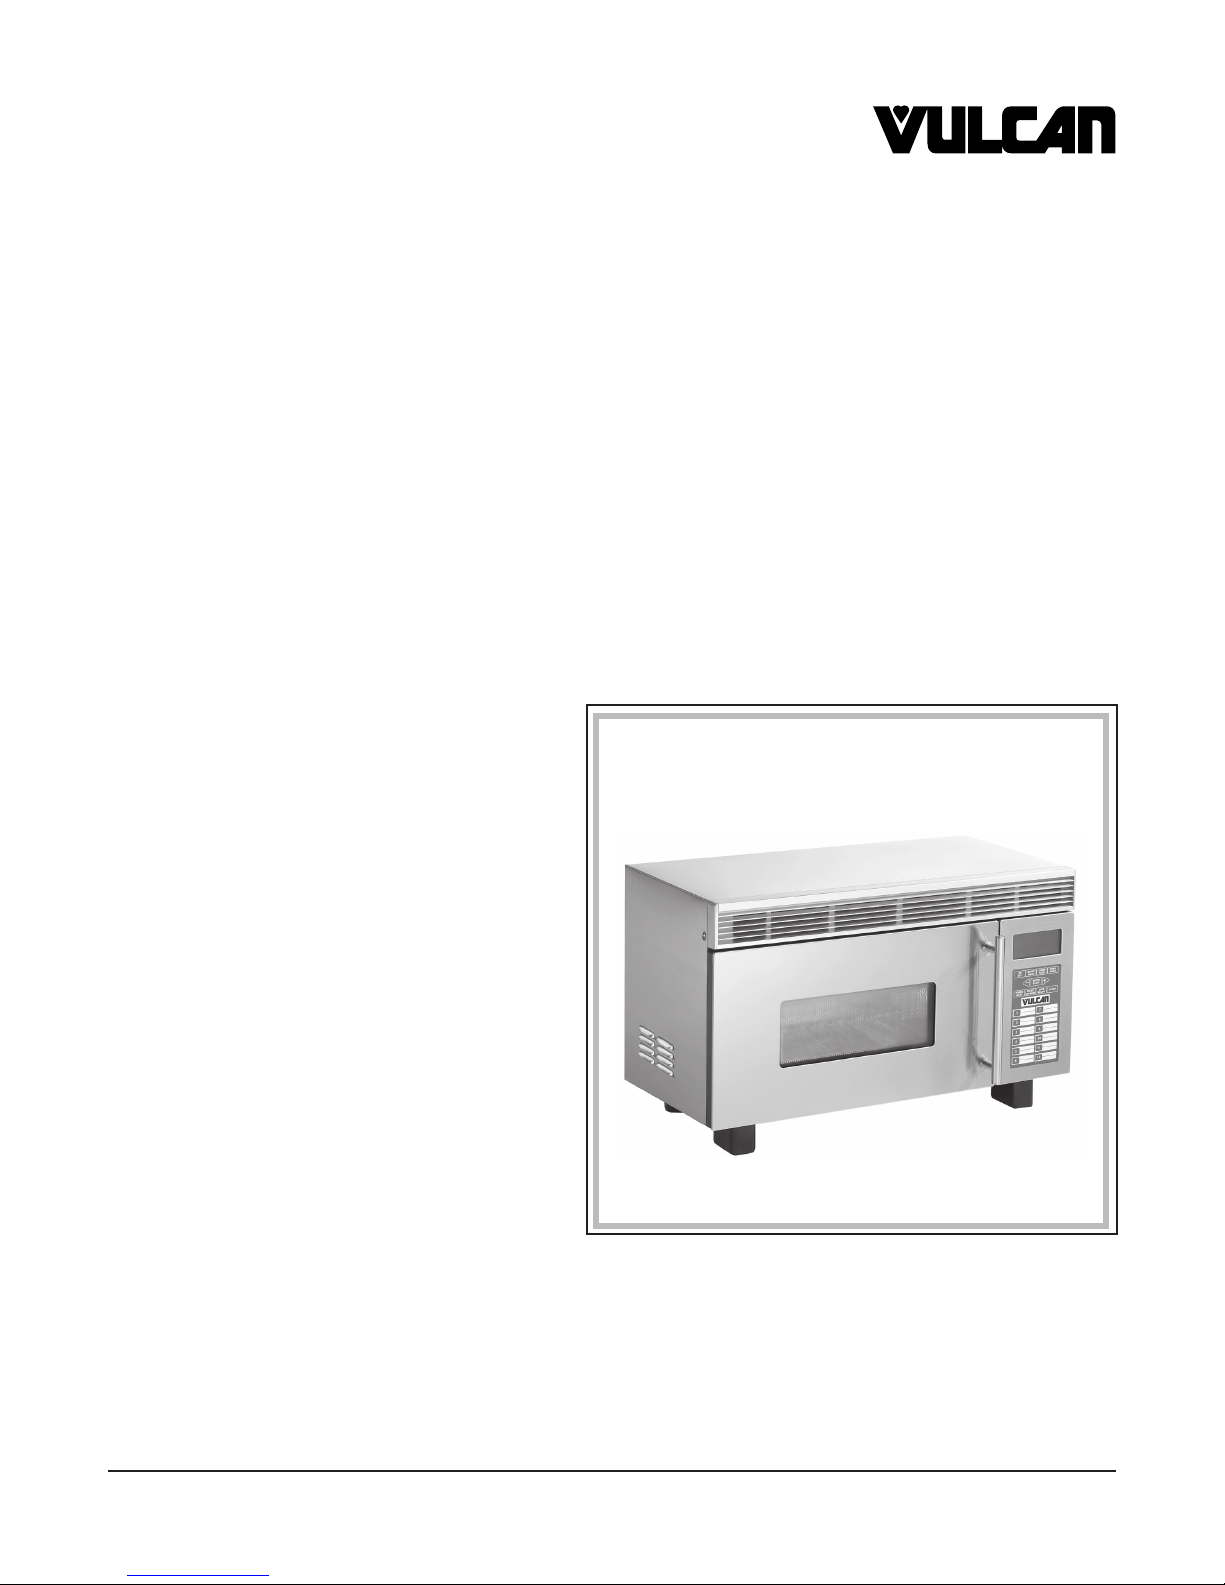
VFBMW SERIES FLASHBAKE
MICROWAVE OVENS
MODELS
VFBMW2 ML- 126807
VFBMW3
®
VULCAN-HART COMPANY, P.O. BOX 696, LOUISVILLE, KY 40201-0696, TEL. (502) 778-2791
FORM 31174 (Nov. 2000) www.vulcanhart.com
Model VFBMW
P/N. 3828W5A1831
Page 2

IMPORTANT SAFETY INSTRUCTIONS
When using electrical appliances, basic safety precautions must be followed, including the following:
WARNING: TO REDUCE THE RISK OF BURNS, ELECTRIC SHOCK, FIRE, INJURY TO PERSONS,
OR EXPOSURE TO EXCESSIVE MICROWAVE ENERGY:
1. Do not use metal utensils in this oven.
2. Read all instructions before using oven.
3. Read and follow the “Precautions to Avoid Possible Exposure to Excessive Microwave Energy”
on the next page.
4. This oven must be grounded. Connect only to a properly grounded outlet. See ELECTRICAL
CONNECTIONS.
5. Locate or install this oven only in accordance with the instructions provided.
6. Some items, such as whole eggs or sealed containers, may explode and should not be heated
in this oven. Example: Closed glass jars.
7. Use this oven only for its intended use as described in this manual. Do not use corrosive
chemicals or vapors in this oven. This type of oven is specifically designed to heat, cook, or dry
food. It is not designed for industrial or lab use.
8. As with any appliance, close supervision is necessary when used by children.
9. Do not operate this oven if it has a damaged cord or plug, if it is not working properly, or if it has
been damaged or dropped.
10. This oven should be serviced only by qualified service personnel. Contact your local authorized
Vulcan-Hart servicer for examination, repair or adjustment.
11. Do not cover or block any openings on the oven.
12. Do not use this oven outdoors. Do not use this oven near water.
13. Do not immerse cord or plug in water.
14. Keep cord away from heated surfaces.
15. Do not let cord hang over edge of table or counter.
16. When cleaning, use only mild, nonabrasive soap or detergent applied with a sponge or soft cloth.
Refer to the CLEANING section in this manual.
17. To reduce the risk of fire in the oven cavity:
a. Do not overcook food.
b. If materials inside the oven should ignite, keep oven door closed, turn oven off, and disconnect
the power cord, or shut off power at the fuse or circuit breaker panel.
c. Do not use the cavity for storage purposes. Do not leave paper products, cooking utensils, or
food in the cavity when not in use.
d. Remove wire twist-ties from paper or plastic bags before placing in oven.
PLEASE KEEP THIS MANUAL FOR FUTURE REFERENCE
– 2 –
Page 3

PRECAUTIONS
TO AVOID POSSIBLE EXPOSURE
TO EXCESSIVE MICROWAVE ENERGY
1. Do not attempt to operate this oven with the door open since open-door operation can result
in harmful exposure to microwave energy. It is important not to defeat or tamper with the safety
interlocks.
2. Do not place any object between the oven front face and the door.
3. Do not operate the oven if it is damaged. It is particularly important that the oven door close
properly and that there is no damage to the:
a. Door (bent).
b. Hinges and latches (broken or loosened).
c. Door seals and sealing surfaces.
4. The oven should not be adjusted or repaired by anyone except properly qualified service
personnel.
CAUTION
1. Do not attempt to tamper with or make any adjustments or repairs to the door, control panel
housing, safety interlock switches or any other part of the oven. Do NOT remove outer panel from
oven. Repairs should only be done by a qualified service person.
2. Do not operate the oven when it is empty. The microwave energy will reflect continuously
throughout the oven if no food or water is present to absorb energy.
3. If a fire occurs in the oven, press the ON/OFF key to shut the oven off. LEAVE THE DOOR
CLOSED. Disconnect the power cord, or shut off power at the fuse or circuit breaker panel.
4. Do not attempt to dry clothes, newspapers or other materials in the oven. They may catch fire.
5. Do not use recycled paper products, as they may contain impurities which may cause sparks
and/or fires.
6. Do not use newspapers or paper bags for cooking.
7. Do not hit or strike control panel. Damage to controls may occur.
8. Cooking trays and containers can become hot, oven mitts or pot holders should be used.
9. Do not store flammable materials next to, on top of, or in the oven. It could be a fire hazard.
10. Do not use the inside surfaces of the oven for direct food contact. Always use approved
utensils and cookware.
11. Before removing a tray or container from the oven, prepare a place to put it. Do not place
the hot tray on wood, plastic, formica, or other burnable surfaces.
– 3 –
Page 4

TABLE OF CONTENTS
GENERAL. . . . . . . . . . . . . . . . . . . . . . . . . . . . . . . . . . . . . . . . . . . . . . . . . . . . . . . . . . . . . . . . . . . . . . . 5
INSTALLATION . . . . . . . . . . . . . . . . . . . . . . . . . . . . . . . . . . . . . . . . . . . . . . . . . . . . . . . . . . . . . . . . . . 5
Unpacking . . . . . . . . . . . . . . . . . . . . . . . . . . . . . . . . . . . . . . . . . . . . . . . . . . . . . . . . . . . . . . . . . 5
Location . . . . . . . . . . . . . . . . . . . . . . . . . . . . . . . . . . . . . . . . . . . . . . . . . . . . . . . . . . . . . . . . . . 5
Tip Bracket . . . . . . . . . . . . . . . . . . . . . . . . . . . . . . . . . . . . . . . . . . . . . . . . . . . . . . . . . . . . . . . . . 6
Installation Codes and Standards . . . . . . . . . . . . . . . . . . . . . . . . . . . . . . . . . . . . . . . . . . . . . . 6
Electrical Connections . . . . . . . . . . . . . . . . . . . . . . . . . . . . . . . . . . . . . . . . . . . . . . . . . . . . . . . 7
OPERATION . . . . . . . . . . . . . . . . . . . . . . . . . . . . . . . . . . . . . . . . . . . . . . . . . . . . . . . . . . . . . . . . . . . . 8
Controls . . . . . . . . . . . . . . . . . . . . . . . . . . . . . . . . . . . . . . . . . . . . . . . . . . . . . . . . . . . . . . . . . . 8
Setting the Clock . . . . . . . . . . . . . . . . . . . . . . . . . . . . . . . . . . . . . . . . . . . . . . . . . . . . . . . . . . . . 9
Start Cooking . . . . . . . . . . . . . . . . . . . . . . . . . . . . . . . . . . . . . . . . . . . . . . . . . . . . . . . . . . . . . . 9
Cooking Features . . . . . . . . . . . . . . . . . . . . . . . . . . . . . . . . . . . . . . . . . . . . . . . . . . . . . . . . . . 11
Repeat Last . . . . . . . . . . . . . . . . . . . . . . . . . . . . . . . . . . . . . . . . . . . . . . . . . . . . . . . . . 11
Resume . . . . . . . . . . . . . . . . . . . . . . . . . . . . . . . . . . . . . . . . . . . . . . . . . . . . . . . . . . . . . 11
Power Levels . . . . . . . . . . . . . . . . . . . . . . . . . . . . . . . . . . . . . . . . . . . . . . . . . . . . . . . 11
Recipe Options . . . . . . . . . . . . . . . . . . . . . . . . . . . . . . . . . . . . . . . . . . . . . . . . . . . . . . . . . . . . 13
Combi Cook . . . . . . . . . . . . . . . . . . . . . . . . . . . . . . . . . . . . . . . . . . . . . . . . . . . . . . . . . . . . . . 14
Microwave Cooking . . . . . . . . . . . . . . . . . . . . . . . . . . . . . . . . . . . . . . . . . . . . . . . . . . . . . . . . 15
Microwave Cooking Features . . . . . . . . . . . . . . . . . . . . . . . . . . . . . . . . . . . . . . . . . . . . . . . . 15
Timed Cooking . . . . . . . . . . . . . . . . . . . . . . . . . . . . . . . . . . . . . . . . . . . . . . . . . . . . . . . 15
Micro Express . . . . . . . . . . . . . . . . . . . . . . . . . . . . . . . . . . . . . . . . . . . . . . . . . . . . . . . . 15
Power Level . . . . . . . . . . . . . . . . . . . . . . . . . . . . . . . . . . . . . . . . . . . . . . . . . . . . . . . . . 16
Recipe Options . . . . . . . . . . . . . . . . . . . . . . . . . . . . . . . . . . . . . . . . . . . . . . . . . . . . . . . . . . . . . 16
Defrosting . . . . . . . . . . . . . . . . . . . . . . . . . . . . . . . . . . . . . . . . . . . . . . . . . . . . . . . . . . . . . . . . . 18
Cleaning . . . . . . . . . . . . . . . . . . . . . . . . . . . . . . . . . . . . . . . . . . . . . . . . . . . . . . . . . . . . . . . . . . 20
MAINTENANCE . . . . . . . . . . . . . . . . . . . . . . . . . . . . . . . . . . . . . . . . . . . . . . . . . . . . . . . . . . . . . . . . . 22
TROUBLESHOOTING . . . . . . . . . . . . . . . . . . . . . . . . . . . . . . . . . . . . . . . . . . . . . . . . . . . . . . . . . . . . 23
FLASHBAKE OVEN FOOD PRODUCT GUIDELINES . . . . . . . . . . . . . . . . . . . . . . . . . . . . . . . . . . . 24
– 4 –
Page 5

INSTALLATION, OPERATION AND CARE OF
MODEL VFBMW FLASHBAKE
®
MICROWAVE OVEN
GENERAL
Your Vulcan FlashBake® Microwave oven is a versatile oven that employs a revolutionary high quality,
high-speed cooking technology. This new technology cooks the outside of foods, while also penetrating
the surface so the inside cooks simultaneously. Foods cook evenly and fast, retaining their natural
moisture. Bread products brown and become crisp while vegetables retain their color and texture.
While halogen light is the primary source of power, a "microwave boost" is automatically added with
certain foods. The oven can also be used solely as a 950 watt microwave oven.
It is suggested that you thoroughly read this manual and carefully follow all of the instructions provided.
INSTALLATION
UNPACKING
Immediately after unpacking the oven, check for possible shipping damage. If this oven is found to be
damaged, save the packaging material and contact the carrier within 15 days of delivery.
Prior to installation, verify that the electrical supply agrees with the specifications on the data plate
located on the back of the oven. If the supply and service requirements do not agree, call your
authorized Vulcan-Hart sevicer immediately.
Peel the protective shipping film from the exterior of the oven before installation or use.
LOCATION
Locate the oven on a smooth, flat and stable surface. Do not place the oven in a hot or damp area, i.e.,
near a gas or electric range. The oven must not be located above or next to sources of excessive heat
or greasy air. There must be a 3" (76 mm) clearance on the sides and back of the oven for free air flow.
It is recommended that the oven be located so the housing can be removed for service. The housing
should NOT be removed by anyone except qualified service personnel.
Locate oven on a level counter surface. The counter must be 36
of supporting the 80 lb. (36 kg) ovenload.
Radio Interference
1
/2" (916 mm) or higher and capable
There is possibility of a small amount of interference with weak broadcast signals if the oven is too close
to a radio or TV or similar equipment. If interference is present, it may be reduced by:
1. Cleaning the door and sealing surface of the oven.
2. Increasing the separation of the oven from the receiving device.
3. Using an antenna to obtain stronger signal reception for the receiving device.
– 5 –
Page 6

Tip Bracket
The tip bracket is a safety feature designed to help keep the oven stable when the door is open. Proper
installation is important!
• Position the oven in its final location.
• As you are looking at the back of the oven, position the tip bracket on the bottom back right side
of the oven (Fig. 1).
• Use the existing hole on the back of the oven to secure the tip bracket to the oven back.
• Anchor the bracket to the counter surface.
Oven Back
Screw(Tip Bracket to
Counter Surface)
Tip Bracket
Screw(Tip Bracket to oven)
PL-53582
Fig. 1
INSTALLATION CODES AND STANDARDS
The oven must be installed in accordance with:
In the United States of America:
1. State and local codes.
2. National Electrical Code, ANSI/NFPA-70 (latest edition). Copies may be obtained from The
National Fire Protection Association, Batterymarch Park, Quincy, MA 02269.
In Canada:
1. Local codes.
2. Canadian Electric Code, CSA C22.2 (latest edition). Copies may be obtained from The Canadian
Standard Association, 178 Rexdale Blvd., Etobicoke, Ontario, Canada M9W 1R3.
– 6 –
Page 7

ELECTRICAL CONNECTIONS
WARNING: ELECTRICAL AND GROUNDING CONNECTIONS MUST COMPLY WITH THE
APPLICABLE PORTIONS OF THE NATIONAL ELECTRICAL CODE AND/OR OTHER LOCAL
ELECTRICAL CODES.
WARNING: DISCONNECT ELECTRICAL POWER SUPPLY AND PLACE A TAG AT THE DISCONNECT
SWITCH TO INDICATE YOU ARE WORKING ON THE CIRCUIT.
WARNING: APPLIANCES EQUIPPED WITH A FLEXIBLE ELECTRIC SUPPLY CORD ARE PROVIDED
WITH A FOUR-PRONG GROUNDING PLUG. IT IS IMPERATIVE THAT THIS PLUG BE CONNECTED
INTO A PROPERLY GROUNDED FOUR-PRONG RECEPTACLE. IF THE RECEPTACLE IS NOT
THE PROPER GROUNDING TYPE, CONTACT AN ELECTRICIAN. DO NOT REMOVE THE
GROUNDING PRONG FROM THIS PLUG.
The electrical diagram is located in an envelope behind the control panel.
For Hard-Wired Ovens
Have a qualified electrician wire the oven into a properly rated dedicated circuit, connecting to the wires
and conduit provided. Use appropriate conduit, strain relief, wire and connectors. Care should be
taken not to damage the wire when applying setscrew type connectors. If connecting to aluminum
wiring, properly installed connections listed for use with aluminum and copper wiring must be used.
For Cord-Connected Ovens
A short power supply cord is provided to reduce the risks resulting from becoming entangled in or
tripping over a longer cord. Do not use an extension cord.
Plug the oven into a dedicated circuit outlet of the appropriate NEMA style and rating. The wall outlet
receptacle recommended for this appliance is NEMA 14 - 30R.
NOTE: Both hot legs must measure 120V to neutral. Do not connect this oven to a source using a
stinger
or
wild leg
.
Single Phase 4 Wire Ground with Neutral
ELECTRICAL DATA
Voltage Amp KW Cycles Phase
120/208-240 30 6.5 60 1
NEMA 14 - 30R Wall receptacle
30 Amp
– 7 –
Page 8
OPERATION
CLEAR
EXPRESS
MICRO
RECIPE
SAVE
LEVEL
POWER
WARNING: THE OVEN AND ITS PARTS ARE HOT. USE CARE WHEN OPERATING,
CLEANING, OR SERVICING THE OVEN.
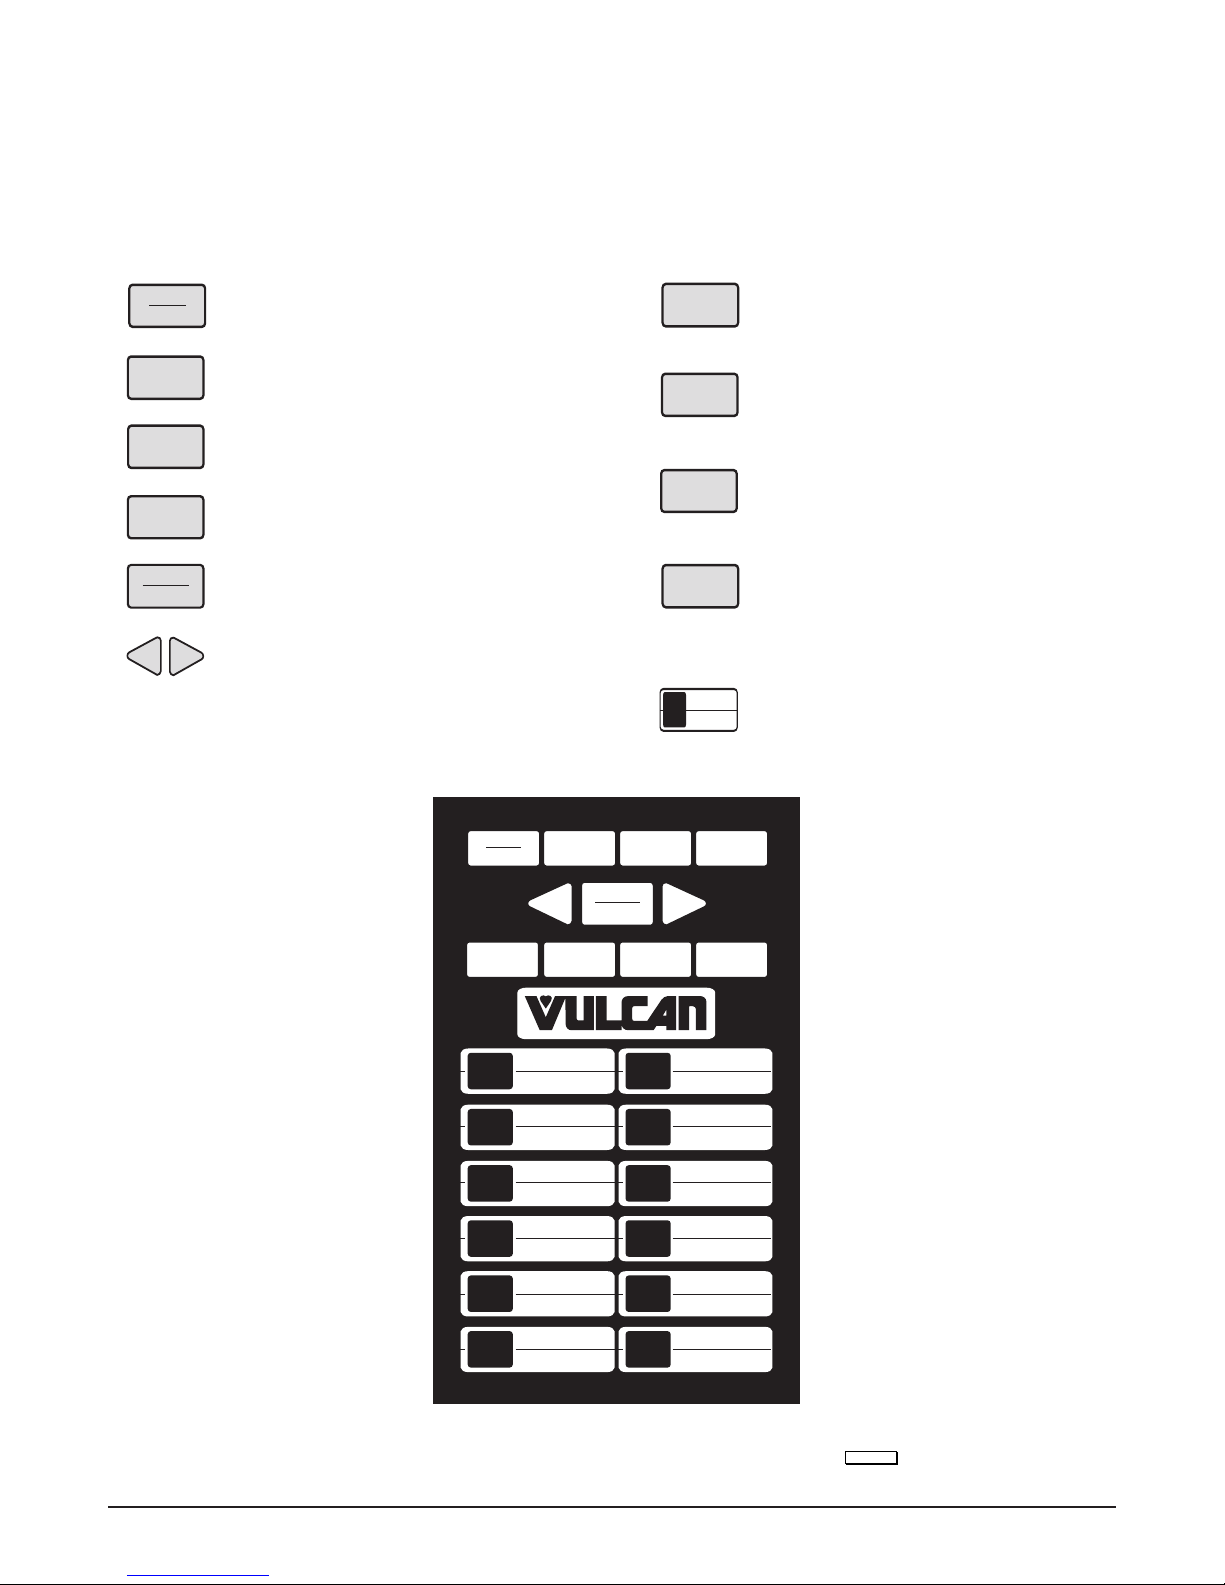
CONTROLS (Fig. 2)
ON
OFF
MICRO
WAVE
COMBI
COOK
MENU
COOK
ENTER
START
-- +
Press to turn the oven control pad on
and off.
Press to operate the microwave
cooking mode.
Press to set your own cooking
program.
Press to access the preset cooking
menu.
Press to enter food selections and
start cooking.
Press to scroll through menu
categories. Press to increase or
decrease cooking times and power
levels.
ON
OFF
MICRO
WAVE
COMBI
COOK
Press to change cooking power levels.
Press repeatedly for 30 second
increments of microwave cooking
time. The oven starts immediately.
Press to store custom recipes from
the COMBI COOK feature to the key
pad for one touch cooking.
Press during cooking to immediately
shut off all cooking power. Press to
clear out of cooking programs and go
back to the clock screen.
1
Press to quickly access custom
recipes for one touch cooking. Keys
1 through 12.
MENU
COOK
POWER
LEVEL
1
2
3
4
5
6
--
MICRO
EXPRESS
ENTER
START
Fig. 2
SAVE
RECIPE
7
8
9
10
11
12
+
CLEAR
PL-53573
– 8 –
Page 9
SETTING THE CLOCK
When the oven is plugged in, the display will prompt you to set the clock. The clock must be set before
using the oven for the first time.
1. Press to set the hour. Press to enter selection.
2. Press to set the minutes. Press to enter selection.
3. Press to set AM or PM. Press to enter selection.
-- +
-- +
-- +
ENTER
START
ENTER
START
ENTER
START
4. The clock is set.
5. To change to clock setting, the oven must be unplugged then plugged back in.
START COOKING
Step 1: Press on the control pad.
Step 2: Press to select the type of food category you want. Press to enter selection.
Step 3: Press to select the specific food. Press to enter selection.
Step 4: Press to select amount, size, and/or doneness. Press after each selection.
Step 5: When the display reads ADJUST TIME or START, press to start cooking.
MENU
COOK
-- +
-- +
-- +
ENTER
START
ENTER
START
ENTER
START
ENTER
START
• If the door is opened during cooking, the oven will stop and PAUSE will appear in the
display. Close the door and press to resume cooking.
ENTER
START
• To adjust cook time during cooking, press to increase or decrease the time.
• To clear out of any function or program and go back to the clock screen, press .
• To review settings during cooking, press during cooking process.
• To stop the oven anytime during the cooking process press .
-- +
ENTER
START
CLEAR
CLEAR
• At the end of the cooking cycle, YOUR FOOD IS READY appears on the display.
• At the end of the cooking cycle, the automatic fan will continue to run for a short time to cool
internal components.
Preset Food Selections
For a detailed review of food selections and recipes, see the VFBMW FLASHBAKE
®
OVEN FOOD
PRODUCT GUIDLINES section starting on page 24.
• Appetizers and Snacks • Chicken • Pasta • Sandwiches
• Baked Goods • Fish & Seafood • Pizza • Side Dishes
• Breakfast • Meats • Recipe
– 9 –
Page 10
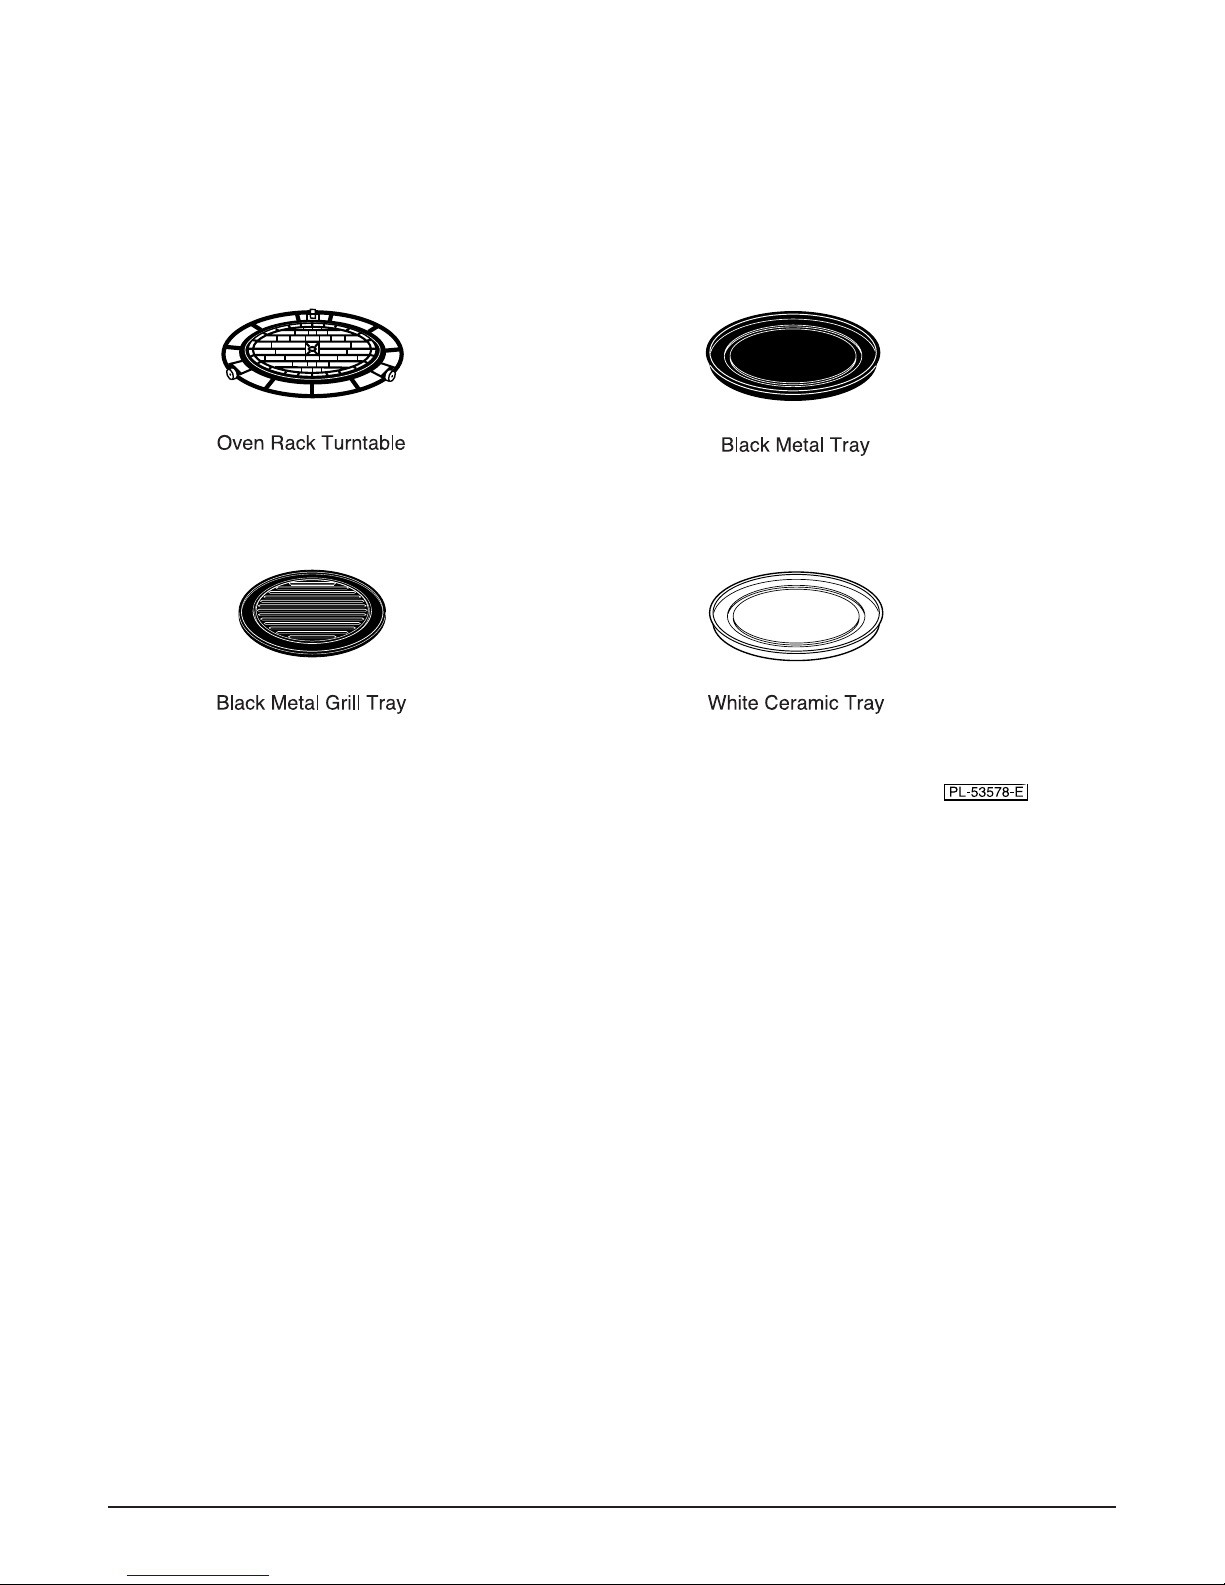
Cooking Trays (Fig. 3)
®
The VFBMW FlashBake
Microwave Oven is supplied with three cooking trays which are specifically
designed for use in this oven.
Fig. 3
• The oven rack turntable must be in place for all cooking. Be sure it seats securely over the square
spindle in the center of the oven.
• Place the selected tray or cookware directly on the oven rack turntable.
• Cooking trays and containers can become hot. Oven mitts or pot holders should be used.
• Food should be placed directly on the trays when cooking.
• Use the black metal flat tray in the same way you would use a shallow baking pan or baking tray.
• Use the black grill tray for foods that you would normally cook on the grill, such as steaks, fish
and poultry.
• Place the white ceramic tray on the oven rack turntable when using the microwave features.
Place food or microwave safe cookware directly on the tray.
• In addition to the cooking trays provided, you can use non-metal casserole dishes, pie plates and
other heat safe cookware. Make sure to select a size that will rotate easily.
• Do not use cookware or coverings made of paper, plastic, or foil.
– 10 –
Page 11

COOKING FEATURES
Repeat Last
Use this feature for cooking repetitive items like cookies or appetizers. The last program is stored for
two hours.
1. Press and hold for about 3 seconds.
MENU
COOK
2. The last preset food will be displayed.
3. Press to start cooking.
ENTER
START
Resume
For cooking foods longer than the programed time.
1. After a cooking program has timed out, press or open and close the oven door.
2. Press . RESUME COOKING will be displayed.
ENTER
START
CLEAR
3. The oven will restart and resume the cooking program at 10% of the original time.
4. The program stays in memory for 10 minutes. After that you will need to start the program again.
Power Levels
The VFBMW FlashBake
®
oven uses upper and lower halogen lamps with microwaves to cook food from
the top, bottom and interior simultaneously. Power levels on the lamps and microwave can be adjusted
separately.
When using the preset menu foods, the power levels are already selected for you. However, power
levels can be adjusted on both preset menu foods and custom recipes.
To adjust power levels before cooking:
1. Press and select food category, specific food and amount (see Quick Start).
2. When display reads ADJUST TIME or START, press .
MENU
COOK
POWER
LEVEL
3. The oven will prompt you to adjust power levels.
4. Press to increase or decrease the upper, lower and micro power levels. Press
-- +
after each selection.
5. If you do not wish to change a setting, press to move to the next selection.
6. When display reads ADJUST TIME or START, press to start cooking.
ENTER
START
ENTER
START
To adjust power levels during cooking:
1. Press at any time during the cooking process.
POWER
LEVEL
2. The oven will prompt you to adjust power levels.
3. Press to increase or decrease the upper, lower and micro power levels. Press
-- +
after each selection.
4. The power levels are adjusted.
ENTER
START
ENTER
START
– 11 –
Page 12

Power Level Guidelines
Each power level gives you halogen lamp power and microwave energy for a certain percentage of the
time.
For example:
• U=07 Upper halogen lamp on 70% of the time.
• L=07 Lower halogen lamp on 70% of the time.
• M=05 Microwave on 50% of the time.
Follow these general standards when selecting the best upper, lower and micro power settings. Be
careful when adjusting power levels so that you do not over or undercook your food.
(U=) UPPER HALOGEN LAMP
• Select a higher setting for foods requiring a golden brown top (example: fish fillets, toast,
boneless chicken breasts).
• Select a lower setting for thicker foods and foods with high sugar or fat content (examples:
cakes, roasts).
(L=) LOWER HALOGEN LAMP
• Select a higher setting for thick or dense foods that may not cook quickly in the center (example:
casseroles).
• Select a lower setting for thin foods (example: cookies) and foods containing high fat or sugar
content (example: pastry, cakes).
(M=) MICROWAVE
• Select a higher setting to shorten cooking time for dense or heavy foods (example: casseroles,
whole chicken).
• Select a lower setting for delicate foods (examples: cakes, breads, souffles) or foods requiring
longer cook times for tender results (example: stew, pot roast).
– 12 –
Page 13

RECIPE OPTIONS
Create and store up to 30 custom recipes, or customize an existing recipe.
Entering and Saving a Recipe
1. Press on the control pad.
2. Press until RECIPE appears on the display. Press to enter selection.
3. SELECT CUSTOM RECIPE appears on the display. Press to select a blank entry to
store recipe. Press to enter selection.
MENU
COOK
-- +
ENTER
START
ENTER
START
-- +
4. The oven will ask you to select COOKING TIME, UPPER, LOWER and MICRO power levels.
Press to select values. Press after each selection to enter.
-- +
5. SPELL THE FOOD NAME appears on the display. Press to spell out food name. Press
ENTER
after each letter selected. Press to end.
START
6. PRESS START TO RUN appears on the display. Press to cook recipe. To store the recipe
without cooking, press .
CLEAR
ENTER
START
SAVE
RECIPE
ENTER
START
-- +
Finding and Using a Recipe
1. Press on the control pad.
2. Press until RECIPE appears on the display. Press to enter selection.
MENU
COOK
-- +
ENTER
START
3. SELECT CUSTOM RECIPE appears on the display.
4. Press until the recipe you want is displayed. Press to enter selection.
-- +
5. When the display reads ADJUST TIME or START, Press to start cooking.
ENTER
START
ENTER
START
Adjusting or Changing a Recipe
1. Press on the control pad.
2. Press until RECIPE appears on the display. Press to enter selection.
MENU
COOK
-- +
ENTER
START
3. SELECT CUSTOM RECIPE appears on the display.
4. Press until the recipe you want to change is displayed. Press to enter
-- +
ENTER
START
selection.
5. When the display reads ADJUST TIME or START, press .
COMBI
COOK
6. The oven will ask you to select COOKING TIME, UPPER, LOWER and MICRO power levels.
Press to select values. Press after each selection to enter.
-- +
7. SPELL THE FOOD NAME appears on the display. Press to spell out food name. Press
ENTER
after each letter selected. Press to end.
START
8. RECIPE #_ MODIFIED appears on the display. Press to cook recipe. To store the recipe
without cooking, press .
CLEAR
ENTER
START
SAVE
RECIPE
ENTER
START
-- +
– 13 –
Page 14

Deleting a Recipe
1. Press on the control pad.
2. Press until RECIPE appears on the display. Press to enter selection.
MENU
COOK
-- +
ENTER
START
3. SELECT CUSTOM RECIPE appears on the display.
4. Press until the recipe you want to change is displayed. Press to enter
-- +
ENTER
START
selection.
COMBI
5. When the display reads ADJUST TIME or START, press and hold for 3 seconds. This
COOK
deletes the recipe. SELECT COOK TIME appears on the display. You may now enter and save
a new recipe or press to go back to the clock screen.
CLEAR
COMBI COOK
Use this feature to quickly cook items not found in the preset food selections. You can also customize
your own cooking recipes and store them to the key pad for a one-touch control to quickly cook food.
Creating a Recipe in Combi Cook
1. Press on the control pad.
COMBI
COOK
2. The oven will ask you to select COOKING TIME, UPPER, LOWER and MICRO power levels.
Press to select values. Press after each selection to enter.
-- +
3. When the display reads ADJUST TIME or START, press to start cooking.
ENTER
START
ENTER
START
Saving Recipes to the Keypad
1. After you have selected the cooking time and power levels in the COMBI COOK mode, press
SAVE
.
RECIPE
2. SELECT LOCATION will appear on the display.
3. Press a number on the key pad where you want the recipe stored (1 - 12) . The oven will store
two recipes at each number. Press the number once to store the recipe at the first location (A),
and twice to store it at the second location (B).
4. If another recipe is stored at that location, the display will read CELLFULL OVERRIDE? Press
(1) to override the previous saved recipe or (2) to decline and choose another location.
5. To use the key pad for quick cooking, press the number corresponding to the desired recipe. To
cook from the second saved recipe, press the number twice. The oven immediately starts
cooking.
Note: You can also save recipes to the key pad from the preset programs found under MENU COOK.
Simply copy the information from the desired recipe and manually enter it in the COMBI COOK mode.
– 14 –
Page 15

MICROWAVE COOKING
• Be sure to follow all precautions on page 2 and 3 of this manual.
• Make sure the oven rack turntable and white ceramic tray are in place.
Step 1: Press on the control pad.
Step 2: Press to select the type of food you want. Press to enter selection.
Step 3: Press
Step 4: When the display reads ADJUST TIME or START, press to start cooking.
MICRO
WAVE
-- +
to select amount and weight. Press to enter each selection.
-- +
ENTER
START
ENTER
START
ENTER
START
• If the door is opened during cooking, the oven will stop and PAUSE will appear in the display.
Close the door and press to resume cooking.
• To adjust cook time during cooking, press to increase or decrease time.
• To clear out of any function or program and go back to the clock screen, press .
• To review settings during cooking, press during cooking process.
• To stop the oven anytime during the cooking process, press .
ENTER
START
-- +
ENTER
START
CLEAR
CLEAR
Microwave Preset Food Selections
• Bacon • Defrost (Auto and Time) • Vegetables (Fresh, Frozen, Canned)
• Recipe • Time cook
MICROWAVE COOKING FEATURES
Timed Cooking
Use this to microwave food that is not in the recipe section.
1. Press on the control pad.
2. Press until TIME COOK appears on the display. Press to enter selection.
3. Press to set the time. Press to enter selection.
4. When the display reads ADJUST TIME or START, press to start cooking.
MICRO
WAVE
-- +
-- +
ENTER
START
ENTER
START
ENTER
START
Micro Express
Use this one touch feature to quickly microwave food.
1. Place food in oven.
2. Press . Oven starts immediately for 30 seconds of microwave cooking time.
3. To increase time, press repeatedly. Time increases in 30 second increments.
MICRO
EXPRESS
MICRO
EXPRESS
– 15 –
Page 16

Power Level
The power level is automatically set on high or 10. You can change the power level before or during
a cooking program (except when using MICRO EXPRESS).
To adjust power level before cooking:
1. Press and select food category, amount and weight. Press after each selection.
2. When the display reads ADJUST TIME or START, press .
MICRO
WAVE
POWER
LEVEL
ENTER
START
3. SELECT MICRO POWER appears on the display.
4. Press to increase or decrease power level. Press to enter selection.
-- +
5. When the display reads ADJUST TIME or START, press to start cooking.
ENTER
START
ENTER
START
To adjust power levels during cooking:
1. Press any time during the cooking process.
2. SELECT MICRO POWER appears on the display. Press to increase or decrease power
level. Press to enter selection.
POWER
LEVEL
ENTER
START
-- +
3. The power level is adjusted.
Power Level Guide Lines
• High 10: Fish, bacon, vegetables, boiling liquids.
• Med-High 7: Gentle cooking of meat and poultry: baking casseroles and reheating.
• Medium 5: Slow cooking and tenderizing for stews and less tender cuts of meats.
• Low 2 or 3: Defrosting; simmering; delicate sauces.
• Warm 1: Keeping food warm; softening butter.
RECIPE OPTIONS
Use this feature to create up to 10 custom recipes, or customize an existing recipe.
Enter and Saving a Recipe
1. Press on the control pad.
2. Press until RECIPE appears on the display. Press to enter selection.
3. SELECT CUSTOM RECIPE appears on the display. Press to select blank line to store
recipe. Press to enter selection.
4. The oven will ask you to select COOKING TIME and MICRO power level. Press to select
values. Press after each selection to enter.
5. SPELL THE FOOD NAME appears on the display. Press to spell out food name. Press
ENTER
START
6. PRESS START TO RUN appears on the display. Press to cook recipe. To store the recipe
without cooking, press .
MICRO
WAVE
-- +
ENTER
START
ENTER
START
after each letter selected. Press to end.
CLEAR
SAVE
RECIPE
ENTER
START
ENTER
START
-- +
-- +
-- +
– 16 –
Page 17

Finding and Using a Recipe
1. Press on the control pad.
2. Press until RECIPE appears on the display. Press to enter selection.
MICRO
WAVE
-- +
ENTER
START
3. SELECT CUSTOM RECIPE appears on the display.
4. Press until the recipe you want is displayed. Press to enter selection.
-- +
5. When the display reads ADJUST TIME or START, press to start cooking.
ENTER
START
ENTER
START
Adjusting or Changing a Recipe
1. Press on the control pad.
2. Press until RECIPE appears on the display. Press to enter selection.
MICRO
WAVE
-- +
ENTER
START
3. SELECT CUSTOM RECIPE appears on the display.
4. Press until the recipe you want to change is displayed. Press to enter selection.
5. When the display reads ADJUST TIME or START, press .
-- +
COMBI
COOK
6. The oven will ask you to select COOKING TIME and MICRO power level. Press to select
values. Press after each selection to enter.
7. SPELL THE FOOD NAME appears on the display. Press to spell out food name. Press
ENTER
after each letter selected. Press to end.
START
8. RECIPE #_ MODIFIED appears on the display. Press to cook recipe. To store the recipe
without cooking, press .
ENTER
START
CLEAR
SAVE
RECIPE
ENTER
START
-- +
ENTER
START
-- +
Deleting a Recipe
1. Press on the control pad.
2. Press until RECIPE appears on the display. Press to enter selection.
MICRO
WAVE
-- +
ENTER
START
3. SELECT CUSTOM RECIPE appears on the display.
4. Press until the recipe you want to change is displayed. Press to enter selection.
-- +
5. When the display reads ADJUST TIME or START. Press and hold for 3 seconds. This
ENTER
START
COMBI
COOK
deletes the recipe. SELECT COOK TIME appears on the display. You may now enter and save
a new recipe or press to go back to the clock screen.
CLEAR
– 17 –
Page 18

DEFROSTING
Auto Defrost
Automatically sets the defrosting times and power levels to give even defrosting results for meats,
poultry and fish weighing up to six pounds.
1. Remove food from the package and place it on a microwave safe dish.
2. Press on the control pad.
3. Press until DEFROST (AUTO) appears on the display. Press to enter selection.
4. SELECT FOOD WEIGHT appears on the display. Press to increase or decrease food
weight (see Conversion Guide). Press to enter selection.
5. When the display reads ADJUST TIME or START, press to start defrosting.
MICRO
WAVE
-- +
ENTER
START
-- +
ENTER
START
ENTER
START
6. Turn the food over when the oven signals TURN FOOD OVER.
CONVERSION GUIDE
If the weight of the food is stated in pounds and ounces, the ounces must be converted to tenths (.1)
of a pound.
secnuOnidooFfothgieW )dnuopafoshtnet(thgieWdooFretnE
2-11.
32.
5-43.
7-64.
85.
01-96.
117.
31-218.
51-419.
– 18 –
Page 19

Time Defrost
Use this feature to defrost for a selected length of time.
1. Remove food from the package and place it on a microwave safe dish.
2. Press on the control pad.
3. Press until DEFROST (TIME) appears on the display. Press to enter selection.
4. SELECT DEFROST TIME appears on the display. Press to increase or decrease defrost
time. Press to enter selection.
5. When the display reads ADJUST TIME or START, press to start defrosting.
MICRO
WAVE
-- +
ENTER
START
-- +
ENTER
START
ENTER
START
6. Turn the food over when the oven display reads TURN FOOD OVER.
Defrosting Tips
During DEFROST (TIME), the power level is automatically set at 3, but can be changed. To change
power levels, see the Microwave Power Level section.
You can defrost small items quickly by raising the power level after entering the time. Power level 7
cuts the total defrosting time in half; power level 10 cuts the time to about a third. When defrosting at
higher power levels, food will need more frequent attention.
Foods that spoil easily should not be allowed to sit out for more than one hour after defrosting.
For more even defrosting of larger foods, such as roasts, use DEFROST (AUTO). Be sure large meats
are completely defrosted before cooking.
DEFROST (TIME) can be used for foods frozen in paper or plastic packages, but foods should be taken
out of the packagse when using DEFROST (AUTO). Closed packages should be slit AFTER food has
partially defrosted. Plastic containers should be partially uncovered.
– 19 –
Page 20

CLEANING
WARNING: DISCONNECT (UNPLUG) ELECTRICAL POWER SUPPLY BEFORE CLEANING.
WARNING: THE OVEN AND ITS PARTS ARE HOT. USE CARE WHEN OPERATING, CLEANING
AND SERVICING THE OVEN.
The interior cleanliness of the VFBMW oven is essential to ensure maximum cooking efficiency.
Keeping the oven clean and free of food debris will minimize the possibility of smoke and odors from
food stuck on the lamp shields and interior walls.
The interior of the oven cavity SHOULD NOT, under any circumstances, be cleaned with abrasive
materials or chemicals other than those recommended below. Certain cleaners can etch and scratch
the cavity, causing a loss in cooking efficiency.
CAUTION: Do not use oven cleaners to clean the oven. Do not use abrasives or sharp objects on the
oven walls or window.
Cleaners
• Mild dish soap - Use any mild food service type dish soap for the interior cleaning. Be sure that
the soap is non-caustic.
• FDA food quality sanitizer for cooking surfaces.
• Vinegar and water solution.
• Baking soda and water solution.
Cleaning Tools
• Terry cloth towel - Food service quality.
• Nonabrasive pad - Institutional quality - certified nonabrasive.
Note: Always rinse cleaned surfaces to ensure all the soap and chemicals have been removed, then
wipe dry with a soft clean cloth.
– 20 –
Page 21

Cleaning Procedures
It is recommended that you clean the oven after each shift. If your operation is extremely busy, it may
be necessary to wipe out the oven
during
a shift until you are able to perform the detailed cleaning.
1. Allow the oven to cool before starting the cleaning process.
2. Open the door.
3. Remove the oven rack turntable and wash carefully in warm, sudsy water.
4. Use a cloth dampened with one of the recommended cleaners. Be sure that the soap is noncaustic. Wipe the food debris out of the oven, working from the back forward.
5. Do not pour cleaning liquids into the oven. Always use a cloth dampened with the cleaning fluids.
6. You can use a rubber or plastic scraper or a nonabrasive pad to loosen any residual food
remaining on the upper and lower halogen lamp glass covers. Do not remove the lamp covers
or touch the cooking lamps. Skin oils on the lamps could lead to premature lamp failure.
7. Both halogen lamp glass covers must be kept free of grease and food splattering in order to
operate effectively.
8. Clean the interior surface of the front door with a terry cloth towel and recommended cleaner.
9. Clean the inside of the oven door window with a cloth dampened with window cleaner.
10. With a clean cloth dampened with a food quality sanitizer, wipe the entire interior cavity of the
oven, working from the back forward.
11. Clean the exterior of the oven with a soft cloth dampened sparingly with a commercial stainless
steel cleaner. Do not use steel wool. The outside of the oven door window may be cleaned with
a cloth dampened with window cleaner.
– 21 –
Page 22

MAINTENANCE
WARNING: THE OVEN AND ITS PARTS ARE HOT. USE CARE WHEN OPERATING, CLEANING
AND SERVICING THE OVEN.
WARNING: DISCONNECT (UNPLUG) THE ELECTRICAL SUPPLY BEFORE PERFORMING ANY
MAINTENANCE ON THE OVEN.
Do not remove the oven covers or attempt to open the control cabinet. Doing so will void the warranty.
There are no user serviceable parts inside.
INSPECTING THE OVEN
At least once each day, when the oven is cool, visually inspect the inside of the oven. Make sure there
are no obvious signs of damaged, worn or broken parts.
Do not operate the oven if the upper or lower halogen lamp covers are cracked or broken. Contact your
local authorized Vulcan-Hart servicer.
LAMP REPLACEMENT
All lamps MUST be replaced by your local authorized Vulcan-Hart servicer.
SERVICE AND PARTS INFORMATION
Contact your local authorized Vulcan-Hart servicer.
– 22 –
Page 23

TROUBLESHOOTING
melborPsesuaCelbissoPoDottahW
.knalbsiyalpsidehT
.ffodenrut
neebsahdaplortnocehT
.nodap
lortnocehtnrutotFFO/NOsserP
nevoteydethgilsiyalpsidlortnoC
.tratstonlliw
.testonsikcolC.kcolcehtteS
.desolcylerucestonsirooD.ylerucesesolcdnaroodehtnepO
retfadesserptonTRATS/RETNE
.noitcelesgnikoocgniretne
.TRATS/RETNEsserP
deretneydaerlasinoitcelesrehtonA
tonsawRAELCdnadaplortnocno
.RAELCsserP
.desserp
tonemitgnikoocro,ytitnauq,eziS
gnitcelesretfaderetne
,NEZORF,HSERF(SELBATEGEV
TSORFED,NOCAB,)DENNAC
deretneevahuoyerusekaM
.gnitcelesretfaemitgnikooc
.)KOOCEMIT(ro)EMIT(
.yltnediccadesserpsawraelC
.TRATS/RETNE
retfaderetnetonthgiewdooF
.)OTUA(TSORFEDgnitceles
leefnevoehtfoedisnidnaroodehT
.toh
esnetniecudorpspmaltaehehT
.ecapsllamsanitaeh
.)OTUA(
sserpdnamargorpgnikoocteseR
doofderetneevahuoyerusekaM
TSORFEDgnitcelesretfathgiew
otsttimnevoesU.lamronsisihT
.ydaernehwdoofevomer
.tratstonlliwnevO
.deppirtebyamrekaerbtiucricehT.rekaerbtiucricteseR
.egrusrewoP
.nikcabti
otnidetresniylluftongulP
.teltuollaw
If these actions do not reset the oven and allow the cooking cycle to begin, contact your local authorized
Vulcan-Hart servicer.
gulpneht,nevoehtgulpnU
sinevoehtnogulpehterusekaM
.teltuollawotnidetresniylluf
– 23 –
Page 24

VFBMW FLASHBAKE
Preset Food Selections
®
OVEN FOOD PRODUCT
GUIDELINES
The VFBMW FlashBake
®
oven is already preset to cook over 100 popular dishes. Use this guide as a
quick reference.
• Appetizers and Snacks • Chicken • Pasta • Sandwiches
• Baked Goods • Fish & Seafood • Pizza • Side Dishes
• Breakfast • Meats • Recipe
Circular pattern
(Example: biscuits, cookies)
PL-53579-E
Spoke pattern
(Example: crescent rolls, breadsticks)
Circular pattern
(Example: biscuits, cookies, meats)
Single layer
(Example: appetizers)
(Example: biscuits, cookies)
Fig. 4
(Example: biscuits, cookies, meats)
Cooking Tips
• To ensure consistent and even browning when cooking foods directly on the black metal tray,
arrange food as shown (Fig. 4). Foods can touch but should not overlap.
• Fresh meat, chicken, fish or seafood that has been frozen should be thawed before cooking (the
microwave defrost feature can be used). For other frozen prepackaged foods, follow package
directions.
• Always check food for doneness at minimum time. Check doneness of meat and poultry with a
meat thermometer. Check cakes by inserting a toothpick near the center.
• Select appropriate thickness for steaks.
• To determine the weight of each piece of chicken, divide the package weight by the number of
pieces.
• Add toppings, such as cheese or crumbs, and sauces, such as barbecue, during the last 2 to 3
minutes of cooking time.
• Remember that the quantity of food affects cooking time. Larger quantities or sizes will increase
cooking time; smaller amounts will cook in less time.
– 24 –
Page 25

SKCANS&SREZITEPPA
dooF sgnitteS emiT seceiP erutarepmeT naP
skcitSeseehC
sregniFnekcihC
sredneTnekcihC
sgniW
slloRggE
sreppoPonepalaJ
30=M,30=L,01=U
30=M,30=L,01=U
30=M,30=L,01=U
30=M,30=L,01=U
50=M,30=L,01=U
50=M,30=L,01=U
01=M,40=L,50=U
01=M,40=L,50=U
80=M,10=L,01=U
80=M,10=L,01=U
30=M,30=L,01=U
30=M,30=L,01=U
03:4
03:6
00:4
00:6
00:6
00:8
00:4
00:8
03:3
00:5
03:4
03:6
8
42
8
42
4-3
6-5
8
42
2-1
6
8
42
dekoocerP,nezorF
dekoocerP,nezorF
dekoocerP,nezorF
dekoocerP,nezorF
waR,dewahT
waR,dewahT
dekoocerP,nezorF
dekoocerP,nezorF
dekoocerP,nezorF
dekoocerP,nezorF
dekoocerP,nezorF
dekoocerP,nezorF
sohcaN 30=M,30=L,01=U 00:2 dewahT,dradnatS naPkcalB
sgniRnoinO 50=M,60=L,01=U 00:5 01 dekoocerP,nezorF naPkcalB
snikSotatoP 40=M,30=L,70=U 00:5 5 dekoocerP,nezorF naPkcalB
slezterPtfoS
01=M,01=L,01=U
01=M,01=L,01=U
00:1
03:1
2-1
4-3
dekoocerP,nezorF
dekoocerP,nezorF
naPkcalB
naPkcalB
naPkcalB
naPkcalB
naPkcalB
naPkcalB
naPkcalB
naPkcalB
naPkcalB
naPkcalB
naPkcalB
naPkcalB
naPkcalB
naPkcalB
deffutS
smoorhsuM
30=M,30=L,01=U
30=M,30=L,01=U
03:4
03:6
8
42
SDOOGDEKAB
taeheRlegaB 00=M,01=L,01=U 00:2 4-2 dewahT naPkcalB
stiucsiB
slloRnomanniC
20=M,40=L,80=U
20=M,40=L,70=U
20=M,30=L,80=U
20=M,30=L,70=U
54:5
54:6
54:4
00:7
llamS8
egraL8
llamS5
egraL8
dewahT
dewahT
dewahT
dewahT
hguoDeikooC 10=M,10=L,70=U 03:7 nezorF naPkcalB
taeheRyrtsaP
srevonruT
50=M,01=L,01=U
50=M,01=L,01=U
20=M,10=L,60=U
20=M,10=L,60=U
03:3
00:1
00:01
00:21
3-1
5-4
2
4
dewahT
dewahT
nezorF
nezorF
dekoocerP,nezorF
dekoocerP,nezorF
naPkcalB
naPkcalB
naPkcalB
naPkcalB
naPkcalB
naPkcalB
naPkcalB
naPkcalB
naPkcalB
naPkcalB
– 25 –
Page 26

TSAFKAERB
dooF sgnitteS emiT seceiP erutarepmeT naP
otirruBtsafkaerB
azziPtsafkaerB
tsafkaerB
hciwdnaS
tsaoThcnerF
sekacnaP
skniLegasuaS
90=M,80=L,01=U
90=M,80=L,01=U
50=M,40=L,01=U
50=M,40=L,01=U
01=M,60=L,80=U
01=M,60=L,80=U
80=M,50=L,01=U
80=M,50=L,01=U
80=M,50=L,01=U
80=M,50=L,01=U
30=M,01=L,01=U
50=M,50=L,01=U
00:2
00:3
03:3
00:6
03:2
03:3
03:2
03:3
00:1
03:1
00:6
00:3
1
3
1
4
1
3
2-1
4-3
2
5-3
6-4
04
nezorF
nezorF
nezorF
nezorF
nezorF
nezorF
nezorF
nezorF
nezorF
nezorF
nezorF
nezorF
naPkcalB
naPkcalB
naPkcalB
naPkcalB
naPkcalB
naPkcalB
naPkcalB
naPkcalB
naPkcalB
naPkcalB
naPkcalB
naPkcalB
NEKCIHC
nekcihC
)nienoB(
stsaerBsselenoB
)zo+5(
01=M,50=L,01=U
01=M,50=L,01=U
01=M,50=L,01=U
20=M,01=L,01=U
20=M,01=L,01=U
00:6
00:8
00:41
00:8
00:9
3-2
5-4
8
2-1
4-3
waR,dewahT
waR,dewahT
waR,dewahT
waR,dewahT
waR,dewahT
naPkcalB
naPkcalB
naPkcalB
naPkcalB
naPkcalB
dedaerB
50=M,30=L,01=U
50=M,30=L,01=U
01=M,50=L,01=U
nekcihCdeirF
01=M,50=L,01=U
01=M,50=L,01=U
01=M,50=L,01=U
tsaerBdeffutS
)zo+5(
70=M,20=L,80=U 00:01 2-1 waR,nezorF naPkcalB
00:5
00:6
00:3
00:4
03:4
03:7
2-1
4-3
2
3
5-4
8-6
dekoocerP,nezorF
dekoocerP,nezorF
dekoocerP,nezorF
dekoocerP,nezorF
dekoocerP,nezorF
dekoocerP,nezorF
naPkcalB
naPkcalB
naPkcalB
naPkcalB
naPkcalB
naPkcalB
nekcihCelohW
.sbl3ot2
.sbl5ot4
01=M,50=L,50=U
01=M,50=L,50=U
00:02
00:52
1
1
waR,dewahT
waR,dewahT
hsiDssalG
hsiDssalG
– 26 –
Page 27

DOOFAES&HSIF
dooF sgnitteS emiT seceiP erutarepmeT naP
hsiFdedaerB
skaetSnomlaS
30=M,50=L,01=U
30=M,50=L,01=U
50=M,01=L,01=U
50=M,01=L,01=U
03:3
00:6
00:5
00:9
1
4
1 dewahT
4
nezorF
nezorF
naPkcalB
naPkcalB
naPkcalB
dewahT
naPkcalB
hsiFllehS
spollacSyaB
spollacSaeS
pmirhS
00=M,01=L,01=U
00=M,01=L,01=U
01=M,01=L,01=U
01=M,01=L,01=U
00:6
00:7
03:1
00:2
1
/2 .bl
puC1
.tC01
.bl1
dewahT
dewahT
dewahT
dewahT
naPkcalB
naPkcalB
naPkcalB
naPkcalB
skaetSanuT
1
/2 kciht"
00=M,01=L,01=U
00=M,01=L,01=U
00:4
00:5
1
2
waR,dewahT
waR,dewahT
naPkcalB
naPkcalB
kciht"1
00=M,01=L,01=U
00=M,01=L,01=U
00:6
00:9
1
3
waR,dewahT
waR,dewahT
naPkcalB
naPkcalB
stelliFhsifetihW
telliFmuideM
00=M,01=L,01=U
00=M,01=L,01=U
00:5
00:6
1
2
waR,dewahT
waR,dewahT
naPkcalB
naPkcalB
telliFegraL
00=M,01=L,01=U
00=M,01=L,01=U
00:7
00:8
1
2
waR,dewahT
waR,dewahT
naPkcalB
naPkcalB
– 27 –
Page 28

STAEM
dooF sgnitteS emiT seceiP erutarepmeT naP
nongiMteliF
muideM"1
enoDlleW"1
30=M,01=L,01=U
50=M,01=L,01=U
00:5
03:4
2-1
2-1
waR,dewahT naPkcalB
1
1
1
1
3
3
3
3
11/
1
11/
1
11/
1
11/
1
/
2
/
2
/
2
/
2
/
4
/
4
/
4
/
4
muideM"1
enoDlleW"1
muideM"1
enoDlleW"1
2
1
/
2
2
1
/
2
2
1
/
2
2
1
/
2
muideM"
enoDlleW"
muideM"
enoDlleW"
muideM"
enoDlleW"
muideM"
enoDlleW"
regrubmaH
30=M,01=L,01=U
50=M,01=L,01=U
30=M,01=L,01=U
50=M,01=L,01=U
50=M,01=L,01=U
50=M,01=L,01=U
50=M,01=L,01=U
50=M,01=L,01=U
50=M,01=L,01=U
50=M,01=L,01=U
50=M,01=L,01=U
50=M,01=L,01=U
01=M,01=L,01=U
01=M,01=L,01=U
51:5
00:6
03:6
00:7
00:7
00:8
00:8
03:8
00:9
00:01
00:01
00:21
03:2
03:3
3
3
4
4
1
1
2
2
3
3
4
4
1
3-2
waR,dewahT naPkcalB
waR,dewahT naPkcalB
waR,dewahT naPkcalB
waR,dewahT naPkcalB
waR,dewahT naPkcalB
waR,dewahT naPkcalB
dekoocerP,nezorF naPkcalB
eyebiR-skaetS
muideM"
enoDlleW"
muideM"
enoDlleW"
muideM"
enoDlleW"
muideM"
enoDlleW"
50=M,01=L,01=U
50=M,01=L,01=U
50=M,01=L,01=U
50=M,01=L,01=U
50=M,01=L,01=U
50=M,01=L,01=U
50=M,01=L,01=U
50=M,01=L,01=U
00:4
00:5
00:5
00:6
00:5
00:6
00:6
00:7
1
1
2
2
1
1
2
2
waR,dewahT naPkcalB
waR,dewahT naPkcalB
waR,dewahT naPkcalB
waR,dewahT naPkcalB
muideM"1
enoDlleW"1
muideM"1
enoDlleW"1
50=M,01=L,01=U
50=M,01=L,01=U
50=M,01=L,01=U
50=M,01=L,01=U
00:6
00:7
00:7
00:9
1
1
2
2
waR,dewahT naPkcalB
waR,dewahT naPkcalB
– 28 –
Page 29

STAEM
dooF sgnitteS emiT seceiP erutarepmeT naP
niolriS
1
/
2
1
/
2
1
/
2
1
/
2
3
/
4
3
/
4
3
/
4
3
/
4
muideM"
enoDlleW"
muideM"
enoDlleW"
muideM"
enoDlleW"
muideM"
enoDlleW"
00=M,01=L,01=U
00=M,01=L,01=U
00=M,01=L,01=U
00=M,01=L,01=U
00=M,01=L,01=U
00=M,01=L,01=U
00=M,01=L,01=U
00=M,01=L,01=U
00:4
00:5
00:5
00:6
00:6
00:7
00:8
00:9
1
1
2
2
1
1
2
2
waR,dewahT naPkcalB
waR,dewahT naPkcalB
waR,dewahT naPkcalB
waR,dewahT naPkcalB
muideM"1
enoDlleW"1
muideM"1
enoDlleW"1
30=M,01=L,01=U
30=M,01=L,01=U
30=M,01=L,01=U
30=M,01=L,01=U
00:8
00:9
00:9
00:01
1
1
2
2
waR,dewahT naPkcalB
waR,dewahT naPkcalB
pirtS
1
/
2
1
/
2
1
/
2
1
/
2
3
/
4
3
/
4
3
/
4
3
/
4
muideM"
enoDlleW"
muideM"
enoDlleW"
muideM"
enoDlleW"
muideM"
enoDlleW"
muideM"1
enoDlleW"1
muideM"1
enoDlleW"1
00=M,01=L,01=U
00=M,01=L,01=U
00=M,01=L,01=U
00=M,01=L,01=U
50=M,01=L,01=U
50=M,01=L,01=U
50=M,01=L,01=U
50=M,01=L,01=U
50=M,01=L,01=U
50=M,01=L,01=U
50=M,01=L,01=U
50=M,01=L,01=U
00:5
00:6
00:5
00:6
00:5
00:6
00:6
00:7
00:7
00:8
00:8
00:9
1
1
2
2
1
1
2
2
1
1
2
2
waR,dewahT naPkcalB
waR,dewahT naPkcalB
waR,dewahT naPkcalB
waR,dewahT naPkcalB
waR,dewahT naPkcalB
waR,dewahT naPkcalB
– 29 –
Page 30

STAEM
dooF sgnitteS emiT seceiP erutarepmeT naP
enoB-T
1
/
2
1
/
2
1
/
2
1
/
2
3
/
4
3
/
4
3
/
4
3
/
4
muideM"
enoDlleW"
muideM"
enoDlleW"
muideM"
enoDlleW"
muideM"
enoDlleW"
50=M,01=L,01=U
50=M,01=L,01=U
50=M,01=L,01=U
50=M,01=L,01=U
50=M,01=L,01=U
50=M,01=L,01=U
50=M,01=L,01=U
50=M,01=L,01=U
00:6
00:7
00:7
00:8
00:9
00:01
00:01
00:11
1
1
2
2
1
1
2
2
waR,dewahT naPkcalB
waR,dewahT naPkcalB
waR,dewahT naPkcalB
waR,dewahT naPkcalB
muideM"1
enoDlleW"1
muideM"1
enoDlleW"1
50=M,01=L,01=U
50=M,01=L,01=U
50=M,01=L,01=U
50=M,01=L,01=U
00:9
00:01
00:11
00:21
1
1
2
2
waR,dewahT naPkcalB
waR,dewahT naPkcalB
ATSAP
01=M,30=L,5=U
angasaL
12:00
01=M,30=L,01=U
03:6
21
.zo
nezorF
dewahT
hsiDcimareC
hsiDcimareC
AZZIP
"5hsiDpeeD
dekab-raP
tsurC"6
dekab-raP
tsurC"21
tsurCgnisiR
50=M,40=L,01=U
50=M,40=L,01=U
20=M,30=L,80=U
20=M,30=L,80=U
20=M,40=L,80=U
20=M,40=L,80=U
20=M,70=L,80=U
20=M,70=L,80=U
00:5
00:6
03:5
03:6
00:8
03:01
00:8
00:11
2-1
4-3
1
2
ralugeR
yvaeH
"8llamS
"21egraL
nezorF
nezorF
dewahT
dewahT
dewahT
dewahT
dewahT
dewahT
naPkcalB
naPkcalB
naPkcalB
naPkcalB
naPkcalB
naPkcalB
naPkcalB
naPkcalB
– 30 –
Page 31

SEHCIWDNAS
dooF sgnitteS emiT seceiP erutarepmeT naP
sotirruB
nuB®rubmaH
sgoDnroC
taeMdellirG
eseehC
buStoH
tekcoP
sehciwdnaS
01=M,00=L,01=U
01=M,00=L,01=U
01=M,60=L,80=U
01=M,60=L,80=U
30=M,10=L,01=U
30=M,10=L,01=U
00=M,80=L,80=U
00=M,80=L,80=U
30=M,60=L,01=U
30=M,60=L,01=U
80=M,30=L,70=U
80=M,30=L,70=U
03:3
00:8
03:2
03:3
00:4
00:6
51:4
51:5
51:1
00:2
51:2
54:4
1
4
1
3
1
4
1 dewahT
4
1
4
1
4
nezorF
nezorF
nezorF
nezorF
nezorF
nezorF
naPkcalB
naPkcalB
naPkcalB
naPkcalB
naPkcalB
naPkcalB
naPkcalB
dewahT
dewahT
dewahT
nezorF
nezorF
naPkcalB
naPkcalB
naPkcalB
naPkcalB
naPkcalB
SEHSIDEDIS
seotatoPdekaB
.deM.zo9-7
.deM.zo9-7
.gL.zo+01
.gL.zo+01
01=M,50=L,01=U
01=M,50=L,01=U
01=M,50=L,01=U
01=M,50=L,01=U
00:6
00:01
00:8
00:11
1
4
1
4
dewahT
dewahT
dewahT
dewahT
naPkcalB
naPkcalB
naPkcalB
naPkcalB
skcitsdaerB 20=M,30=L,80=U 03:6 6-4 dewahT naPkcalB
seirFhcnerF
)ralugeR(
seirFkaetS
tsaoTsaxeT
70=M,10=L,90=U
70=M,10=L,90=U
30=M,40=L,01=U
30=M,40=L,01=U
30=M,80=L,80=U
30=M,80=L,80=U
03:4
03:7
00:7
00:9
00:3
03:5
gnivreS-1
gnivreS-4
gnivreS-1
gnivreS-4
1
4-3
nezorF
nezorF
nezorF
nezorF
nezorF
nezorF
naPkcalB
naPkcalB
naPkcalB
naPkcalB
naPkcalB
naPkcalB
– 31 –
Page 32

NOTES
FORM 31174 (Nov. 2000)
– 32 –
 Loading...