

Page 1
User's manual
Model:
CL6527A
hkphones.vtech.com
Page 2

TABLE OF CONTENT
Important safety instructions 7
What’s in the box 11
Getting started 12
Location 12
Handset Overview 13
Base Overview 16
Display Icons Overview 19
Main Menu Structure 21
Connect 23
Install the Handset Battery 25
Charge the Batteries 26
Keystroke Table 26
Navigating the Handset Menu 26
Telephone operation 27
Make a Call 27
Call from the Phonebook 27
Speakerphone 28
Volume Boost 28
Search Alphabetically for Phonebook Entries 28
Call from the Call Log 29
2
Page 3

Call from the Redial List 29
Answer a Call 29
Adjust Earpiece and Speakerphone Volume 29
Temporary Ringer Silencing 30
End a Call 30
Call Timer 30
Redial 31
Chain Dialing 32
Find the Handset (Paging) 33
Internal Calls 34
Power Fail Back-up 36
Telephone settings 38
Date and Time Settings 38
Handset Settings 39
Base Settings 42
Call log 45
View the Call Log 45
Store a Call Log Number into the Phonebook 46
Delete an Entry in the Call Log 46
Delete All Entries of the Call Log 46
View the Details of a Call Entry 46
Phonebook 47
Store a Number Entry in the Phonebook 47
3
Page 4

Entering Names 48
Writing Tips 48
Review an Entry 48
Dial an Entry 48
Search a Phonebook Entry Alphabetically 49
Edit a Phonebook Entry 49
Delete a Phonebook Entry 49
Delete All Phonebook Entries 49
Check phonebook capacity 50
Speed dial 51
Assign a Speed Dial Number from the Directory 51
VIP list 52
Call Guard 53
Call Guard Announce 53
Outgoing Message for Calls without Number 53
Set Block Mode 54
Block Private or Unavailable Calls 54
Add a Block List Entry 55
Review Block List Entries 55
Edit a Block List Entry 55
Delete a Block List Entry 56
Delete all Block List Entries 56
4
Page 5

Answering system 57
Answer On/O 57
Message Playback 58
Delete All Messages 59
Record, Play, or Delete Memos 59
Announcement 60
Number of Rings 61
Recording Time 61
Remote Access Setting 62
Change Remote Access PIN Code 62
Call Screening 63
Call Intercept 63
Remote Access 64
Direct Memory Keys 65
Base photo Speed Dial Keys 66
SOS Emergency Calls 67
Reminder Alarm 70
Talking Digits 71
Device setup 72
Add a New Device 74
Test Device Signal Strength 75
5
Page 6

Sensor operations 76
Sensor mode 76
Arm/Disarm the sensor alert system 77
Sensor Arm/Disarm PIN protection 78
Specic device operations 79
Doorbell 79
Extension Ringer 82
Device Monitoring 83
General product care 84
Frequently asked questions 85
Technical specications 86
6
Page 7

IMPORT ANT SAFETY INSTRUCTIONS
When using your telephone equipment, basic safety
precautions should always be followed to reduce the risk
of fire, electric shock and injury, including the following:
1. Read and understand all instructions.
2. Follow all warnings and instructions marked on the
product.
3. Unplug this product from the wall outlet before
cleaning. Do not use liquid or aerosol cleaners. Use a
damp cloth for cleaning.
4. Do not use this product near water such as near a
bath tub, wash bowl, kitchen sink, laundry tub or a
swimming pool, or in a wet basement or shower.
5. Do not place this product on an unstable table, shelf,
stand or other unstable surfaces.
6. Avoid placing the telephone system in places with
extreme temperature, direct sunlight, or other
electrical devices. Protect your phone from moisture,
dust, corrosive liquids and fumes.
7. Slots and openings in the back or bottom of the
telephone base and handset are provided for
ventilation. To protect them from overheating, these
openings must not be blocked by placing the product
on a soft surface such as a bed, sofa or rug. This
product should never be placed near or over a radiator
or heat register. This product should not be placed in
any area where proper ventilation is not provided.
8. This product should be operated only from the type
of power source indicated on the marking label. If you
7
Page 8

are not sure of the type of power supply in your home
or office, consult your dealer or local power company.
9. Do not allow anything to rest on the power cord. Do
not install this product where the cord may be walked
on.
10. Never push objects of any kind into this product
through the slots in the telephone base or handset
because they may touch dangerous voltage points or
create a short circuit. Never spill liquid of any kind on
the product.
11. To reduce the risk of electric shock, do not disassemble
this product, but take it to an authorized service facility.
Opening or removing parts of the telephone base or
handset other than specified access doors may expose
you to dangerous voltages or other risks. Incorrect
reassembling can cause electric shock when the
product is subsequently used.
12. Do not overload wall outlets and extension cords.
13. Unplug this product from the wall outlet and refer
servicing to an authorized service facility under the
following conditions:
• When the power supply cord or plug is damaged or
frayed.
• If liquid has been spilled onto the product.
• If the product has been exposed to rain or water.
• If the product does not operate normally by
following the operating instructions. Adjust only
those controls that are covered by the operation
instructions. Improper adjustment of other controls
may result in damage and often requires extensive
work by an authorized technician to restore the
product to normal operation.
8
Page 9

• If the product has been dropped and the telephone
base and/or handset has been damaged.
• If the product exhibits a distinct change in
performance.
14. Avoid using a telephone (other than cordless) during
an electrical storm. There is a remote risk of electric
shock from lightning.
15. Do not use the telephone to report a gas leak in the
vicinity of the leak. Under certain circumstances, a
spark may be created when the adapter is plugged
into the power outlet, or when the handset is replaced
in its cradle. This is a common event associated with
the closing of any electrical circuit. The user should not
plug the phone into a power outlet, and should not
put a charged handset into the cradle, if the phone is
located in an environment containing concentrations
of flammable or flame-supporting gases, unless
there is adequate ventilation. A spark in such an
environment could create a fire or explosion. Such
environments might include: medical use of oxygen
without adequate ventilation; industrial gases (cleaning
solvents; gasoline vapours; etc.); a leak of natural gas;
etc.
16. Only put the handset of your telephone next to your
ear when it is in normal talk mode.
17. Use only the adapters included with this product.
Incorrect adapter polarity or voltage can seriously
damage the product.
Base unit adapter: Input 100-240V AC 50/60Hz;
Output: 6V DC 800mA;
Handset charger adapter: Input 100-240V AC 50/60Hz;
Output: 6V DC 450mA
9
Page 10

18. The power adapter is intended to be correctly
oriented in a vertical or floor mount position. The
prongs are not designed to hold the plug in place if
it is plugged into a ceiling, under-the-table or cabinet
outlet.
19. For pluggable equipment, the socket-outlet shall
be installed near the equipment and shall be easily
accessible.
20. Telephone receivers produce magnetic fields that can
attract small metallic objects such as pins or staples.
To avoid injury, do not place the handset where such
objects can be picked up.
SAVE THESE INSTRUCTIONS
Battery
• CAUTION: Use Only Supplied Batteries.
• Do not dispose of the batteries in a fire. Check with
local waste management codes for special disposal
instructions.
• Do not open or mutilate the batteries. Released electrolyte
is corrosive and may cause burns or injury to the eyes or
skin. The electrolyte may be toxic if swallowed.
• Exercise care in handling batteries in order not to create
a short circuit with conductive materials.
• Charge the batteries provided with or identified for
use with this product only in accordance with the
instructions and limitations specified in this manual.
10
Page 11

WHAT’S IN THE BOX
The package contains the following items:
• Handset
• Telephone base
• Power adaptor
• Telephone line cord
• Battery compartment cover
• 3 x AAA rechargeable batteries
• User guide
• Warranty card
11
Page 12

GETTING STARTED
LOCATION
Place your CL6527A within 2 metres of the mains power
socket and telephone socket so that the cables will reach.
Make sure it is at least 1 metre away from other electrical
appliances to avoid interference. Your CL6527A works by
sending radio signals between the base and handset. The
strength of the signal depends on where you locate the
base. Putting it as high as possible ensures the best signal.
The maximum range between the base station and the
handset is approximately 300 metres.
12
Page 13
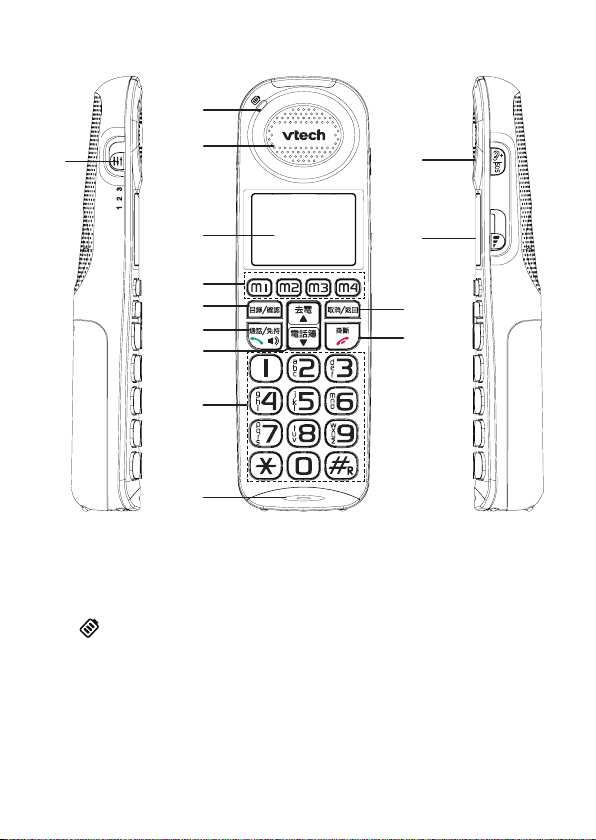
HANDSET OVERVIEW
a
n
b
c
d
e
f
g
h
i
1 – CHARGE light
• On when the handset is charging.
2 – Handset earpiece
j
k
l
m
3 – LCD display
4 – Direct memory keys (M1/M2/M3/M4)
13
Page 14
• When idle, press to dial a preset memory number
stored on the respective key.
5 – MENUOK
• Show the menu.
• While in a menu, press to select an item, or save an
entry or setting.
6 – TALK/SPEAKER
• Make or answer a call.
• During a call, press to switch between earpiece and
speakerphone mode.
7 –
CALLS LIST
• Review the redial list when the handset is not in use.
• Scroll up while in a menu, or in the phonebook, call
log, call block list or redial list.
• Move the cursor to the left when entering numbers
or names.
PHONEBOOK
• Review the phonebook when the handset is not in use.
• Scroll down while in a menu, or in the phonebook,
call log, or redial list.
• Move the cursor to the right when entering
numbers or names.
8 –
ALPHANUMERICAL KEYPAD
• Press to enter when dialing or inputing numbers.
14
Page 15
• Press to enter when dialing or inputing numbers.
9 –
SPEAKERPHONE
10 – / SOS
• Press to enhance the clarity and loudness of the
caller’s voice during a call.
• When idle, press and hold to start calling the SOS
numbers according to Emergency calling sequence
set.
• While in SOS calling mode, press to cancel the SOS
call.
11 –
• Slide to adjust the listening volume during a call.
12 – CANCEL/BACK
• Delete digits or characters while editing numbers or
names.
• Return to the previous menu.
13 – OFF
• Hang up a call.
• Silence the ringer temporarily while the handset is
ringing.
•
Press and hold to erase the missed call indicator
while the phone is not in use.
• Press to return to idle mode.
14 – EQUALIZER
• Switch to toggle between three equalizer levels.
15
Page 16
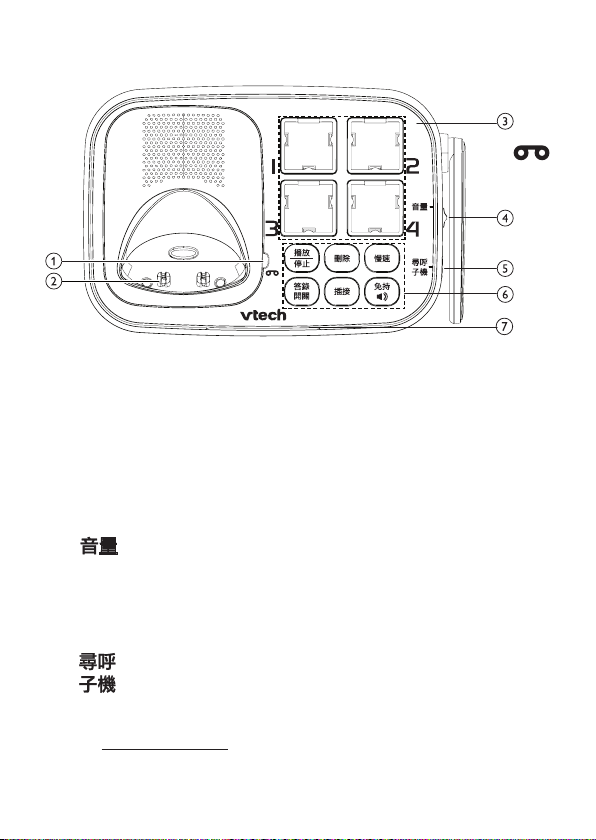
BASE OVERVIEW
ANS ON/OFF LIGHT
• On when the answering system is turned on.
2 – CHARGING CRADLE
3 – PHOTO SPEED DIAL KEYS (1/2/3/4)
• When idle, press to dial a preset memory number
stored on the respective key.
4 –
• Slide to adjust the volume during message playback.
•
Slide to adjust the telephone base ringer volume
when the phone is not in use.
1 –
5 – HANDSET LOCATOR
• Press to page all system handsets.
• Press and hold for 5 seconds, it will start pairing with
other device.
16
Page 17
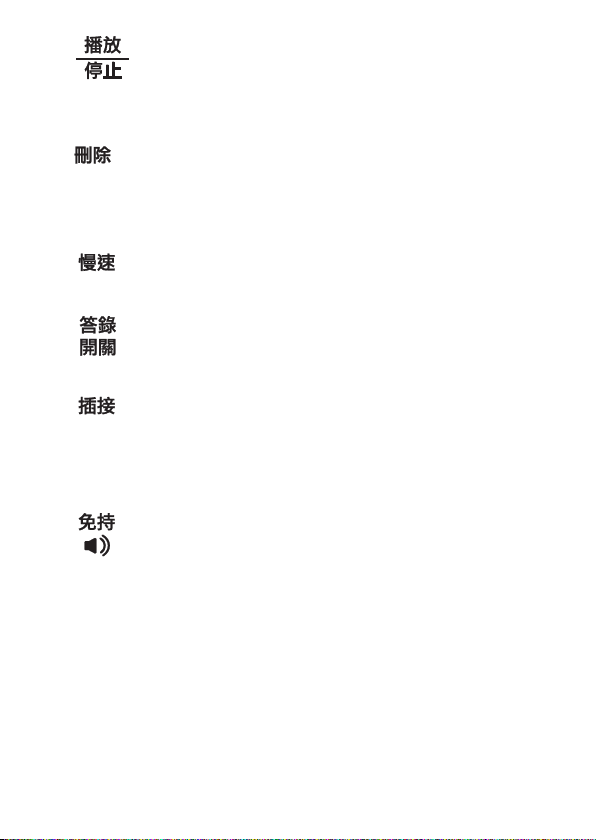
6 – PLAY/STO P
• P
ress to play messages.
• P
ress to stop message playback.
DELETE
• Press to delete the playing message.
• When the phone is not in use, press twice to delete
all old messages.
SLOW
• Press to slow down the answering system message.
ANS ON
• Press to turn the answering system on or off.
FLASH
• During a call: Press to insert a flash for use with
Telephone Network Services such as Call Waiting
during a call.
SPEAKER
• When idle, press to make or answer a call with
speaker.
• During a call, press the end the call.
• During a call with the handset, press to join the call.
17
Page 18

7 – VISUAL RINGER INDICATOR
•
Steadily on during registration, when the base
speakerphone mode is on, or when the handset is on
a call.
•
Flashes according to the incoming ring pattern
during an incoming call.
•
Flashes at a rate of half-second on half-second off for
2 minutes during handset paging.
•
Beeps during handset or device registration.
18
Page 19

DISPLAY ICONS OVERVIEW
Handset display icons
displays when there the signal strength is
strong.
displays when there the signal strength is
moderate.
displays when there the signal strength is
weak.
On when the home line is in use or there is an
incoming home call.
Flashes when there is an incoming home
waiting call.
The handset ringer is off.
On when the speaker mode is on during a
call.
On when any call guard, block mode, or calls
without number is enabled.
Display in the call log for the blocked call entry.
On when audio booster is activated
(in earpiece mode).
Off when audio booster is deactivated.
19
Page 20
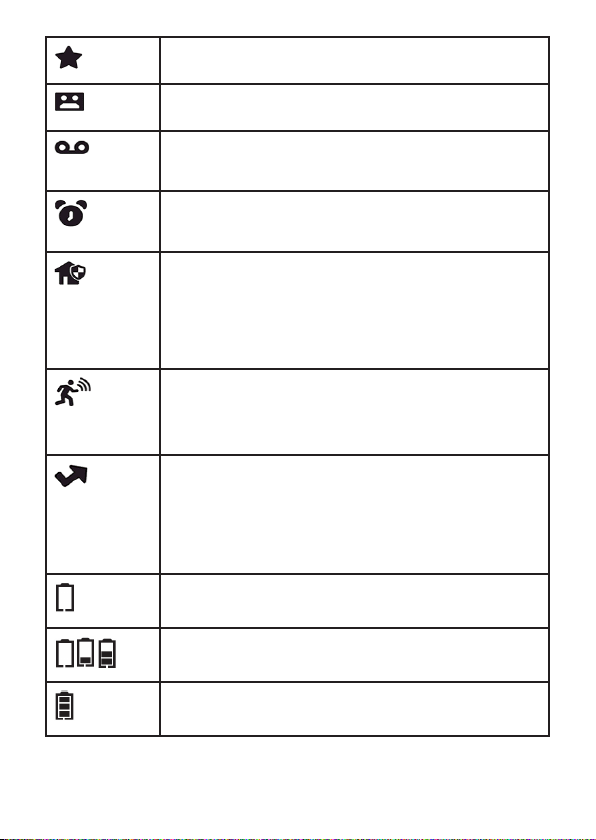
There are new Call log entries.
The answering system is turned on.
There are new voicemail received from your
telephone service provider.
On when a reminder is set.
Flashes when a reminder set is reached.
Only applicable when you registered sensor(s)
to the telephone base:
On when armed in local mode.
Off when disarmed in local mode.
Only applicable when you registered Motion
Sensor (VC7003A) to the telephone base:
On when motion is detected.
Only applicable when you registered sensor(s)
to the telephone base:
On when armed in remote mode.
Off when disarmed in remote mode.
The battery icon flashes when the battery is
low and needs charging.
The battery icon animates when the battery is
charging.
The battery icon becomes solid when the
battery is fully charged.
20
Page 21
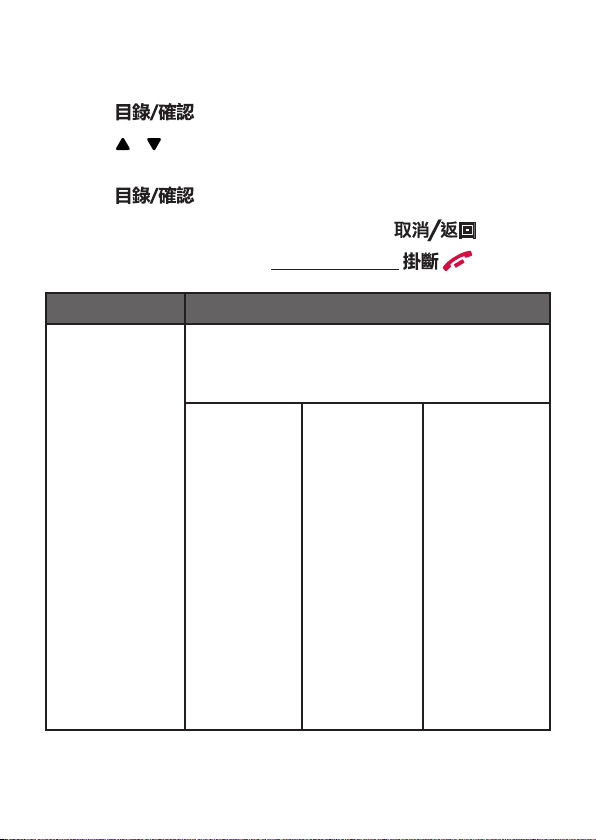
MAIN MENU STRUCTURE
When the handset is switched on and in idle mode:
1. Press when the handset is not in use.
2. Press / until the screen displays the desired feature
menu.
3. Press to enter that menu.
• To return to the previous menu, press .
• To return to idle mode, press and hold .
CALL LOG PHONEBOOK
Under a entry:
DETAILS
ADD TO PB
ADD TO BL
DELETE
DELETE ALL
ALL
SPEED DIAL
VIP
Under ALL:
Under an
entry:
ADD
VIEW
EDIT
DELETE
DELETE ALL
ADD VIP
ADD TO SD
STATUS
Under SPEED
DIAL:
Under an
entry:
ADD
EDIT
DELETE
Under VIP:
Under an
entry:
DELETE
DELETE ALL
STATUS
21
Page 22

CALL BLOCK INTERCOM (for
BS SETTING
multi-handset
packs only)
BLACK LIST
SETTINGS
CALL GUARD
BLOCK MODE
NO NUMBER
[Handset list]
BASE
ALL
BS RINGER
RING VOL
VOICE LANG
DIAL MODE
FLASH TIME
HS SETTING ANS. SYSTEM DIRECT MEM
RING SETUP
TONE SETUP
LANGUAGE
DATE & TIME
AUTO ANS.
PLAYBACK
DELETE OLD
MEMO
TAM ON/OFF
SET TAM
M1
M2
M3
M4
REGISTRATION
DEFAULT
SET SOS REMINDER TALKING DIGIT
INTERNAL
SOS NUMBER
REMINDER 1~
REMINDER 10
OFF
ON
SOS MSG
SET DEVICE DEVICES SENSOR ALERT
CHK SIGNAL [Device list] SENSOR MODE
ARM/DISARM
22
Page 23
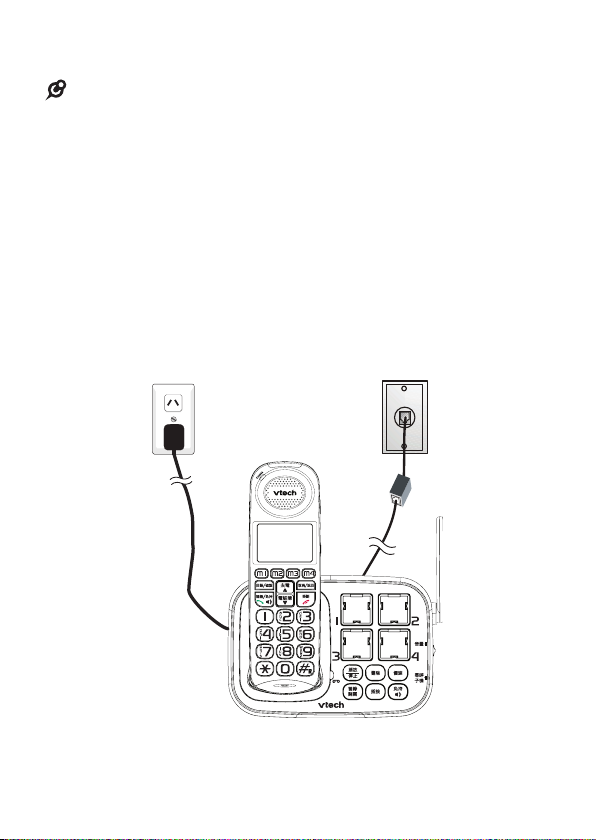
CONNECT
S
NOTE
• Use only the adaptors provided.
• Make sure the electrical outlets are not controlled by wall
switches.
• The adaptors are intended to be correctly oriented in a
vertical or floor mount position. The prongs are not designed
to hold the plug in place if it is plugged into a ceiling, underthe-table or cabinet outlet.
Connect the telephone base
23
Page 24
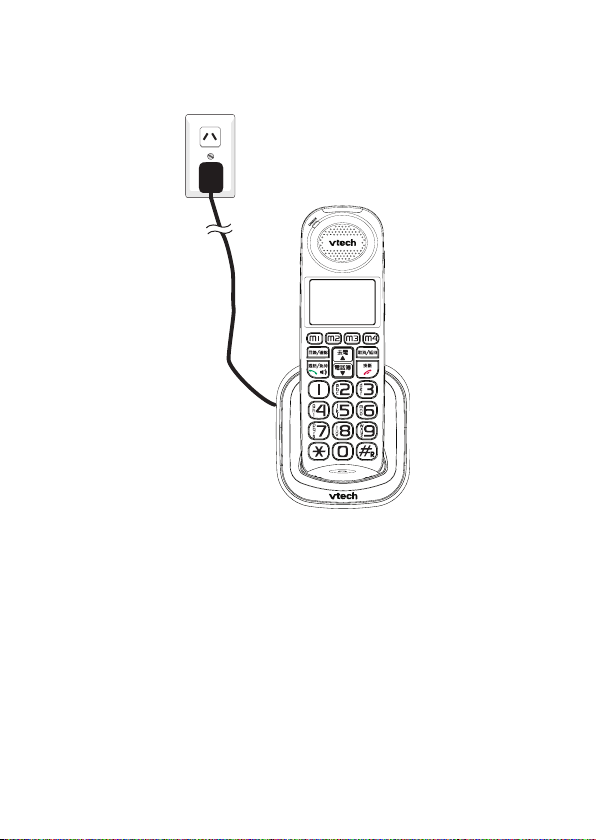
Connect the handset charger
(for multi-handset packs only)
24
Page 25
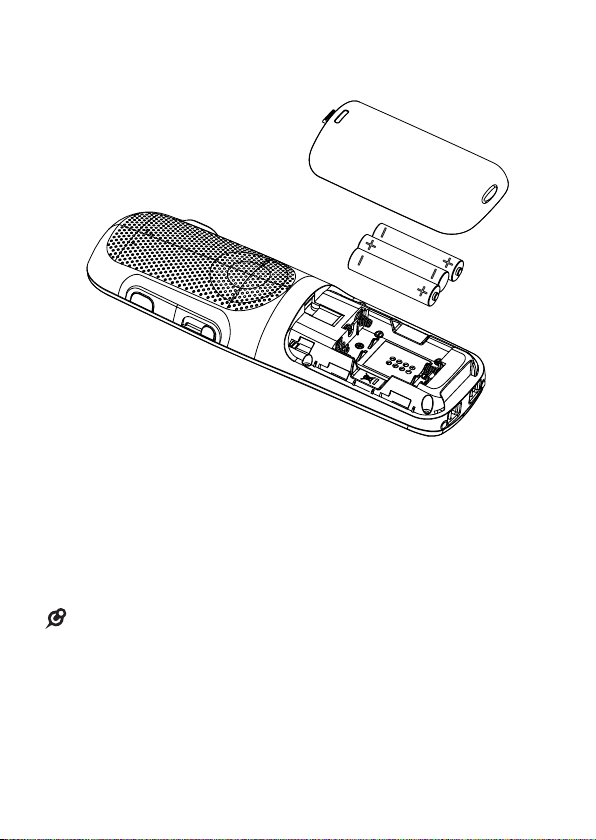
INSTALL THE HANDSET BATTERY
S
1. Slide open the battery compartment cover.
2. One by one, insert 3 AAA batteries into the battery
compartment, according to the polarity.
3. Slide the battery compartment cover back into place,
until you hear a click sound.
NOTE
• Use only the batteries provided.
• Charge the batteries provided with this product only in
accordance with the instructions and limitations specified in
this manual.
• If the handset will not be used for a long time, disconnect and
remove the batteries to prevent possible leakage.
25
Page 26
CHARGE THE BATTERIES
Place the handset in the telephone base to charge.
KEYSTROKE TABLE
1 1 . - ‘ ( ) * # & /
2 A B C 2 a b c
3 D E F 3 d e f
4 G H I 4 g h i
5 J K L 5 j k l
6 M N O 6 m n o
7 P Q R S 7 p q r s
8 T U V 8 t u v
9 W X Y Z 9 w x y z
0 0 space
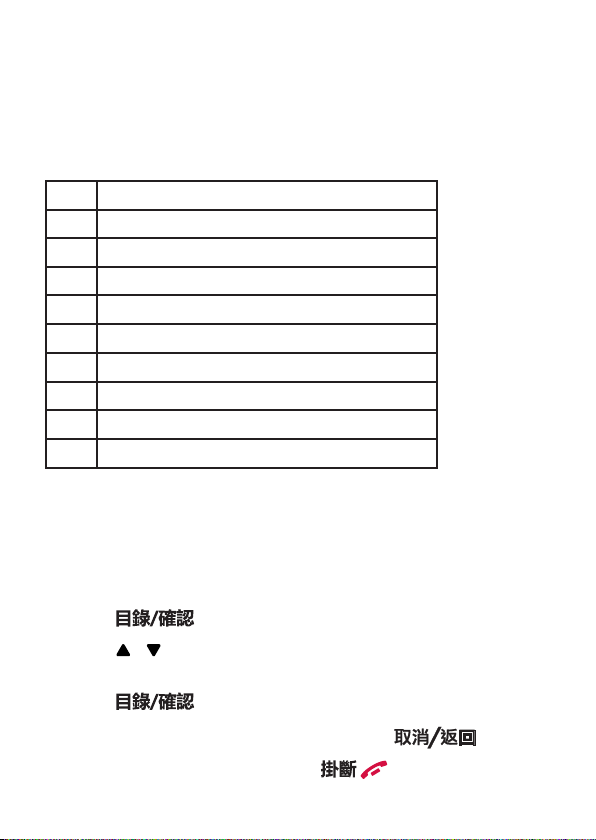
NAVIGATING THE HANDSET MENU
You can use the telephone base or a cordless handset to
change your telephone settings.
1. Press when the phone is not in use.
2. Press / until the screen displays the desired feature
menu.
3. Press to enter that menu.
• To return to the previous menu, press .
• To return to idle mode, press .
26
Page 27
TELEPHONE OPERATION
NOTE
MAKE A CALL
Preparatory dialing
1. Enter the phone number. If you make a mistake, press
to delete the last digit.
2. Press to dial the number.
Direct dialing
1. Press to take the line.
2. Enter the phone number to dial.
CALL FROM THE PHONEBOOK
1. Press then / to select PHONEBOOK. Press
.
2. Press / to select ALL, SPEED DIAL, or VIP.
Press .
• The first phonebook entry will be displayed. If there is no entry
in the phonebook, it will show “EMPTY”.
3. Press / to select the desired phonebook entry.
4. Press to dial the number.
27
Page 28

SPEAKERPHONE
During a call, press to switch between
speakerphone and normal handset use. When the
speakerphone is active, the handset displays SPEAKER ON
and .
VOLUME BOOST
Use the volume boost feature to enhance the loudness of
the voice on handset earpiece.
To turn on volume boost on the handset:
• While you are on a call using the handset earpiece, press
on the handset.
• Press again to turn off.
SEARCH ALPHABETICALLY FOR PHONEBOOK
ENTRIES
1. Press then / to select PHONEBOOK. Press
.
2. Press / to select ALL, SPEED DIAL, or VIP.
Press .
3. Press the numeric key containing the first letter of the
name you want. For example, pressing 2 will show the
entries starting with A. Pressing 2 again will show the
entries starting with B, etc.
28
Page 29

CALL FROM THE CALL LOG
NOTE
1. Press twice to select CALL LOG.
• The first entry in the call log will be displayed. If there is no
entry in the call log, it will show “EMPTY”.
2. Press then / to select desired call log.
3. Press to dial the number.
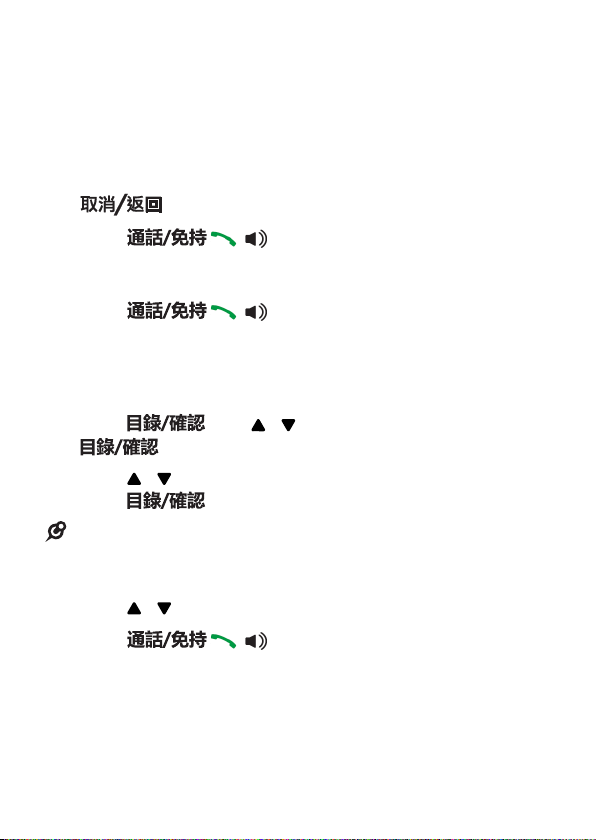
CALL FROM THE REDIAL LIST
1. Press to access the redial list and press / to select
the desired redial number.
2. Press to dial out to the selected redial
number.
ANSWER A CALL
If the handset is not on the charging cradle:
When the phone rings, press to answer a
call.
ADJUST EARPIECE AND SPEAKERPHONE
VOLUME
During a call, slide the knob to adjust the listening volume.
29
Page 30

TEMPORARY RINGER SILENCING
When the telephone is ringing, you can temporarily silence
the ringer of the handset or the telephone base without
disconnecting the call. The next call rings normally at the
preset volume.
To silence the ringer temporary on a handset:
Press .
To silence the ringer temporary at the base:
Each handset and the base ring when there is an incoming
call unless the ringer volume of that device is turned off.
END A CALL
During a call connection, press to end the call.
OR
Put the handset on the base or charger to end the call.
CALL TIMER
Your handset automatically times the duration of every call.
The call timer will display for a few seconds after the call
has been made. It is shown in hours, minutes and seconds
format (HH:MM:SS).
30
Page 31

REDIAL
NOTE
You can redial up to 5 of the last numbers called. The most
recent last number will display at the top of the redial list.
Redial a Number from the Redial List
1. When idle mode, press to access the redial list.
2 Press / to browse the redial list.
3. Press to dial to the selected redial
number.
• If there are no numbers in the redial list, the display shows
“EMPTY”.
Store a Redial Number into the Phonebook
1. Follow Steps 1 and 2 in the section of Redial a Number
from the Redial List.
2. Press to select ADD TO PB.
3. Press and use the keypad to edit the number
if necessary.
4. Press and use the keypad to enter the name.
5. Press to confirm.
Delete a Redial Number
1. Follow Steps 1 and 2 in the section of Redial a Number
from the Redial List.
2. Press and / to select DELETE.
3. Press , and then press again to
confirm.
31
Page 32

Delete the Entire Redial List
1. Follow Steps 1 and 2 in the section of Redial a Number
from the Redial List.
2. Press and / to select DELETE ALL.
3. Press , and then press again to
confirm.
CHAIN DIALING
Use this feature on the cordless handsets to initiate a dialing
sequence from numbers stored in the phonebook, call log
or redial list while you are on a call.
To access a number in the directory:
1. Press while on a call.
2. Press / to select PHONEBOOK.
3. Press / to select ALL, SPEED DIAL, or VIP.
Press .
4. Press and / to scroll to desired entry.
5. Press to dial the displayed number.
To access a number in the call log:
1. Press while on a call.
2. Press / to select CALL LOG.
3. Press and / to scroll to desired entry.
4. Press to dial the displayed number.
32
Page 33
To access a number on the redial list:
NOTE
1. Press while on a call.
2. Press / to select REDIAL.
3. Press and / to scroll to desired entry.
4. Press to dial the displayed number.
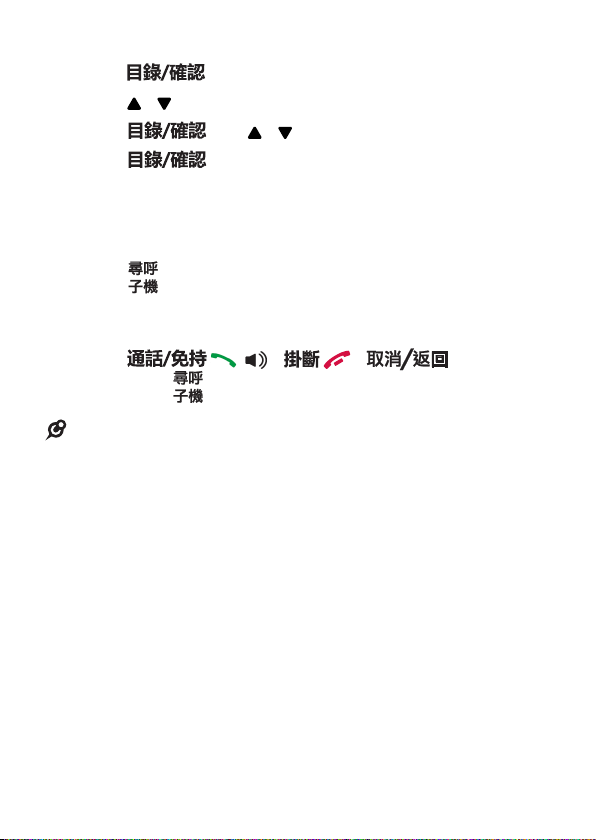
FIND THE HANDSET PAGING
Paging is a useful way for finding lost handset(s).
1. Press on the base station. All the registered and
available handsets will produce the paging tone and
“PAGING” is displayed on the LCD.
2. Press / / on any
handset or on the base station again to stop paging.
• If there is an incoming call during paging, the phone will ring
with the incoming call instead of paging.
33
Page 34

INTERNAL CALLS
This feature is only applicable when there are at least two
registered handsets. It allows you to make internal calls,
transfer external calls from one handset to another handset
and make conference calls. If the called handset is not
answered within 60 seconds, the called handset will stop
ringing and the calling handset will return to standby mode.
Call Another Handset
1. When idle mode, press and the screen
displays all registered handsets except the calling
handset.
2. Enter the desired handset number to intercom with.
3. The called handset rings and press on
the called handset to establish the internal call.
Call All Handsets
1. When idle, press and the screen displays all
registered handsets.
2. Press / to select ALL, and then press to
ring to all registered handsets.
34
Page 35

Transfer an External Call to Another Handset
NOTE
During an external call:
1. Press and / to select INTERCOM.
2. Press and / to select the desired handset
to intercom with.
3. The external call is put on hold automatically and the
called handset rings.
4. Press on the called handset to establish
an internal call.
5. Press on the calling handset or put the calling
handset on the charging cradle to end the current call
with the external party.
6. The external call is transferred to the called handset.
Make a 3-way Conference Call
The conference call feature allows one external call to be
shared with two handsets (in intercom). The three parties
can share the conversation and no network subscription is
required.
During an external call:
1. Follow Steps 1 to 4 in the section of Transfer an External
Call to Another Handset.
2. Press and hold on the calling handset to establish the
3-way conference call.
• Any internal party hangs up during a conference call will leave
the other one still in connection with the external call.
35
Page 36

POWER FAIL BACKUP
S
S
The Power Fail back-up system lets you make calls during a
mains power interruption with your cordless phone. During
a mains power interruption, you can supply the power
stored in your handset battery to the base unit, so you can
make calls even when the power is out.
NOTE
• Power Fail Back-Up mode will not work if the handset battery
power is not sufficient (usually not lower than level 2).
• Do not pick up the power supplying handset from base when
Power Fail Back-Up mode is activated.
• Do not touch the charging contacts of the power supplying
handset during Power Fail Back-Up mode.
• In Power Fail Back-Up mode none of the base functions,
including the answering machine will operate.
• It may take up to 90 seconds to transition through the Power
Fail Back-Up activation process as the base and handset(s)
synchronise with each other.
Make a call using Power Fail Back-Up mode
If there is only one handset registered to the base:
• Once the handset is placed onto the main base
unit, enter the telephone number, and then press
. The speakerphone will be turned on
automatically and call is made.
NOTE
• If there is more than one handset registered to the base, the
handset on the main base unit should be left as a power supply
of the base and you can use the other handset(s) to make calls
like normal.
• The handset should always remain on the main base unit for the
entire length of the call.
36
Page 37

To answer a call using Power Fail Back-Up mode
S
If there is only one handset registered to the base:
1. When the phone rings, keep the handset on the main
base unit and press to answer the call.
The speakerphone will be turned on automatically and
call is made.
2. To end the call, press .
NOTE
• If there is more than one handset registered to the base, the
handset on the main base unit should be left as a power supply
of the base and you can use the other handset(s) to receive calls
like normal.
• The power supplying handset should always be placed on the
main base unit for the entire length of the call.
• The range of the base unit is limited during Power Fail Back-Up
mode. Keep the handset close to the base unit.
37
Page 38

TELEPHONE SETTINGS
Your phone comes with a selection of settings that you can
change to personalize your phone the way you like it to
work.
DATE AND TIME SETTINGS
You will need to set the correct time and date so that you
know when you received answering machine (applicable to
model with answering machine) or call log entries.
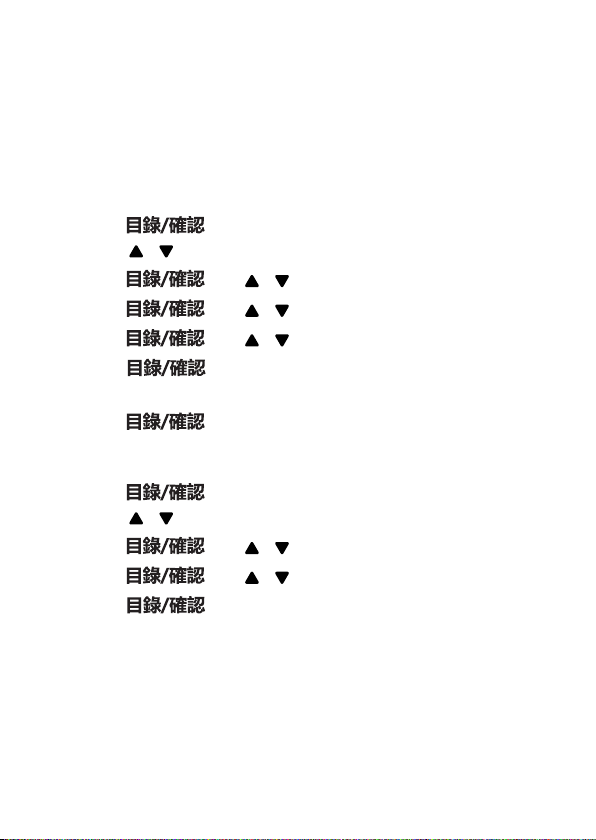
Set the Date Format
1. Press and / to select HS SETTING.
2. Press and / to select DATE & TIME.
3. Press and / to select DATE FORMAT.
4. Press and / to select your desired date
format (DD-MM-YY or MM-DD-YY).
5. Press to confirm.
Set the Time Format
1. Press and / to select HS SETTING.
2. Press and / to select DATE & TIME.
3. Press and / to select TIME FORMAT.
4. Press and / to select your desired time
format (12 HR or 24 HR).
5. Press to confirm.
38
Page 39

Set the Date and time
NOTE
1. Press and / to select HS SETTING.
2. Press and / to select DATE & TIME.
3. Press and / to select SET DATE.
4. Press then enter the date according to DD-
MM-YY or MM-DD-YY format. The date will be in the
format you set.
5. Press then enter the time information
according to 12 HR or 24 HR format. The time will be in
the format you set.
6. Press to confirm.
HANDSET SETTINGS
Set the Ringer Melody for External Calls
You can set the melody to personalize your internal ringer. A
total of 10 melodies are provided for your selection.
1. Press and / to select HS SETTING.
2. Press and / to select RING SETUP.
3. Press and / to select EXT. RING.
4. Press and / to select the desired ringer
melody.
• The respective ringer melody will be played while you are
scrolling through the melody list.
5. Press to confirm.
39
Page 40

Set the Ringer Melody for Internal Calls
NOTE
NOTE
You can set the melody to personalize your external ringer. A
total of 10 melodies are provided for your selection.
1. Press and / to select HS SETTING.
2. Press and / to select RING SETUP.
3. Press and / to select INT. RING.
4. Press and / to select the desired ringer
melody.
• The respective ringer melody will be played while you are
scrolling through the melody list.
5. Press to confirm.
Set the Ringer Volume
You can set the ringer volume level. A total of 6 ringer
volume levels including VOLUME OFF are provided for your
selection.
1. Press and / to select HS SETTING.
2. Press and / to select RING SETUP.
3. Press and / to select RING VOL.
4. Press and / to select the ringer volume.
• The respective ringer volume will be played during your
selection.
5. Press to confirm.
40
Page 41

Set Alert Tones
A single beep is emitted when you press a key. You can
turn on or off the key tone. You can also turn on the alert
tones when low battery and out of range are detected. Low
battery tone will be emitted while you are talking with the
phone to alert you that you need to charge your battery.
1. Press then / to select HS SETTING.
2. Press then / to select TONE SETUP.
3. Press then / to select KEY TONE, BATT
TONE or RANGE TONE.
4. Press then / to turn on or off these tones.
5. Press to confirm.
Set LCD Language
You can select English or Traditional Chinese to be used in all
screen displays.
1. Press then / to select HS SETTING.
2. Press then / to select LANGUAGE.
3. Press then / to select ENGLISH or
.
4. Press then / to turn on or off these tones.
5. Press to confirm.
41
Page 42

Set Auto Answer
You can turn this feature on or off. If you turn the auto
answer feature on, the handset automatically answers an
incoming call whenever you pick up the handset from the
telephone base or a charger.
1. Press then / to select HS SETTING.
2. Press then / to select AUTO ANS..
3. Press then / to select ON or OFF.
4. Press then / to turn on or off these tones.
5. Press to confirm.
BASE SETTINGS
Ringer Melody
1. Press then / to select BS SETTING.
2. Press then / to select BS RINGER.
3. Press then / to the desired ringer melody
(a total of 5 melodies for your selection).
4. Press to confirm.
Ringer Volume
1. Press then / to select BS SETTING.
2. Press then / to select RING VOL.
3. Press then / to the desired ringer volume
level (a total of 6 levels for your selection, including
VOLUME OFF).
4. Press to confirm.
42
Page 43

Set the Voice Language
You can select Cantonese, Mandarin, or English to be used
for the voice prompts in your answering system and sensor
alert sytem.
1. Press and / to select BS SETTING.
2. Press and / to select VOICE LANG.
3. Press and / to select CANTONESE,
MANDARIN, or PULSE.
4. Press to confirm.
Set the Dial mode
The dial mode settings is country dependent. Please contact
your local service provider for the correct settings.
1. Press and / to select BS SETTING.
2. Press and / to select FLASH TIME.
3. Press and / to select TONE or PULSE.
4. Press to confirm.
Set the Flash Time
The flash time settings is country dependent. Please contact
your local service provider for the correct settings.
1. Press and / to select BS SETTING.
2. Press and / to select FLASH TIME.
3. Press and / to select SHORT, MEDIUM or
LONG.
4. Press to confirm.
43
Page 44
Reset Your Phone
NOTE
You can reset your phone to the default settings. After
reset, all your personal settings, call log entries and redial
list entries will be deleted, but your phonebook remains
unchanged.
1. Press and / to select HS SETTING.
2. Press and / to select DEFAULT.
3. Press , and then press again to
confirm.
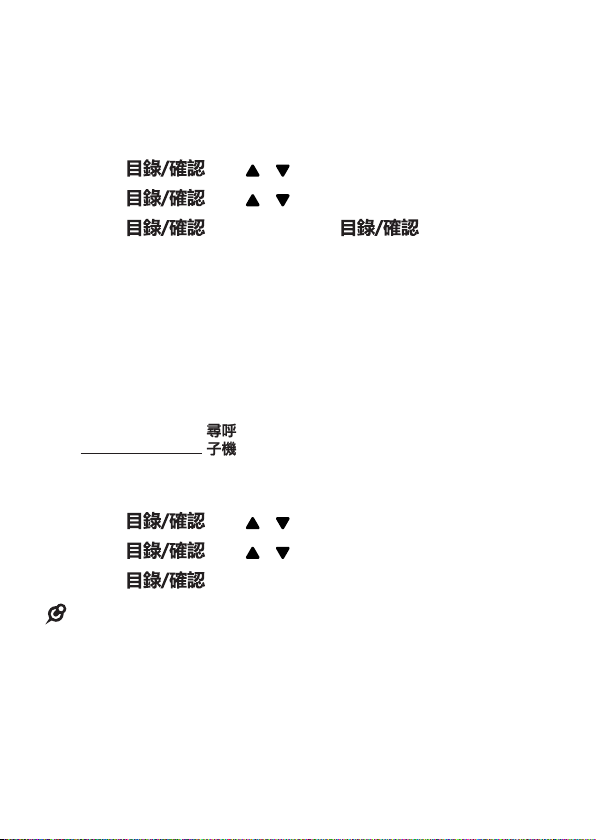
Register a Handset
Your handset is pre-registered to the base station.
If for some reason, the handset is not registered to the base
station, REGISTRATION will display on the handset screen.
Register your handset following the process below.
1. Press and hold on the base station for about five
seconds, the base station is entered into registration
mode.
2. Press and / to select HS SETTING.
3. Press and / to select REGISTRATION.
4. Press to initiate the registration.
• If the handset registration is successful, the handset will
automatically be allocated the next available handset number.
This handset number is shown in the handset display in standby
mode.
44
Page 45

CALL LOG
This feature is available if you have subscribed to the Calling
Number Display service from your telephone company.
Your phone can store up to 30 received calls with date/time
information in the Call Log. The number will be shown on
the LCD when the phone is ringing. If the number matches
exactly with one of the entries in your phonebook, the
caller’s name stored in the phonebook will be displayed
with the number. If a melody has been programmed,
the handset will ring with the melody associated with that
phonebook entry.
VIEW THE CALL LOG
All received calls are saved in Call Log with the latest call
putting at the top of the list. When the call log is full, the
oldest call will be replaced by a new call. The unanswered
call which has not been read is marked with a at the
centre of the top line of the display.
1. Press and / to select CALL LOG. Press
.
2. Press / to select the desired entry.
45
Page 46

STORE A CALL LOG NUMBER INTO THE
PHONEBOOK
1. Follow Steps 1 and 2 in the section of View the Call Log.
2. Press and / to select ADD TO PB.
3. Press and the selected call log number is
displayed.
4. Edit the number if necessary.
5. Press to enter the name.
6. Press and / to select the melody, and
to confirm.
DELETE AN ENTRY IN THE CALL LOG
1. Follow Steps 1 and 2 in the section of View the Call Log.
2. Press and / to select DELETE.
3. Press to confirm.
DELETE ALL ENTRIES OF THE CALL LOG
1. Follow Steps 1 and 2 in the section of View the Call Log.
2. Press and / to select DELETE ALL.
3. Press , and then press again to
confirm.
VIEW THE DETAILS OF A CALL ENTRY
1. Follow Steps 1 and 2 in the section of View the Call Log.
2. Press and / to select DETAILS.
3. Press , and the date and time of the desired
entry is displayed.
46
Page 47

PHONEBOOK
NOTE
Your phone can store up to 100 phonebook entries with
names and numbers. Each phonebook entry can have
a maximum of 20 digits for the phone number and 10
characters for the name. You can also select different
melodies for your phonebook entries. The entries are store
alphabetically.
The entries are shared across all handsets when more than
one handset is registered to your CL6527A base.
STORE A NUMBER ENTRY IN THE
PHONEBOOK
1. When idle, press to access the phonebook.
OR
Press and / to select PHONEBOOK. Press
.
• The first entry in the phonebook will be displayed. If there is no
entry stored in the phonebook, it will show “EMPTY” .
2. Press twice to select ADD.
3. Press and enter the number.
4. Press and enter the name.
5. Press to save.
47
Page 48

ENTERING NAMES
Use the keypad letters to enter names, e.g. to store Tom:
Press 8 once to enter T.
Press 6 three times to enter o .
Press 6 once to enter m .
WRITING TIPS
Press to delete the last character or digit.
Press and hold to delete all characters or digits.
Press / to move backward or forward through the
characters / digits.
Press and hold 0 to insert to pause (will appear as P) enter
entering numbers.
REVIEW AN ENTRY
1. When idle, press . The first entry in the phonebook will
be displayed.
2. Press / to browse the phonebook entries.
3. Press then / to select VIEW.
4. Press to review the details of the selected
entry.
DIAL AN ENTRY
While in the phonebook list, press / to select the entry
you want, or search alphabetically using the alphanumeric
keypad.
• Press to dial the selected entry.
48
Page 49

SEARCH A PHONEBOOK ENTRY
ALPHABETICALLY
1. When idle, press to access the phonebook.
2. Enter the first character of the name by multi-tap.
EDIT A PHONEBOOK ENTRY
1. When idle, press to access the phonebook.
2. Press / to select the entry you want to edit.
3. Press then / to select EDIT.
4. Press then use the keypad to edit the number
(if applicable).
5. Press then use the keypad to edit the name (if
applicable).
6. Press to save.
DELETE A PHONEBOOK ENTRY
1. When idle, press to access the phonebook.
2. Press / to select the desired phonebook entry.
3. Press and / to select DELETE.
4. Press , and then press again to
confirm.
DELETE ALL PHONEBOOK ENTRIES
1. When idle, press to access the phonebook.
2. Press and / to select DELETE ALL.
3. Press , and then press again to
confirm.
49
Page 50

CHECK PHONEBOOK CAPACITY
You can check how many entries have been occupied in
your VIP list and how many are available for further entry
storage.
1. When idle, press then / to select
PHONEBOOK.
2. Press then / to select ALL.
3. Press then / to select STATUS.
4. Press to view the memory status (If one out of
100 phonebook entries is stored, the display will show
01/100 USED).
50
Page 51

SPEED DIAL
You can store six directory entries to the speed dial locations
(1-9). The speed dial numbers can be shared by all handsets.
Numbers assigned to the speed dial location must be
selected from the directory.
ASSIGN A SPEED DIAL NUMBER FROM THE
DIRECTORY
1. Press and / to select PHONEBOOK.
2. Press and / to select SPEED DIAL.
3. Press then / to select an empty speed dial
location.
4. Press to choose ADD.
5. Press and enter the number.
6. Press and enter the name.
7. Press to save.
51
Page 52

VIP LIST
You can add 50 numbers to the VIP list, so that you can
choose to allow incoming calls of the numbers in the VIP
list to be exempted from being blocked in the call block
settings.
Add a Number in the VIP List
1. When idle, press to access the phonebook.
2. Press / to select the desired phonebook entry.
3. Press and / to select ADD VIP.
4. Press to save.
52
Page 53

CALL GUARD
If you have subscribed to a Calling Number Display service,
you can use the call guard feature to reject certain calls
automatically. This is achieved by adding up to 50 numbers
into the block list, and/or programming the phone to reject
all calls without number.
When there is a call from a number saved in the block list,
the call will be disconnected.
• Blocked calls are treated as new call log entries, the
name in the call log will be replaced with BLOCKED
CALL.
CALL GUARD ANNOUNCE
You can set this feature to screen incoming calls without
number.
1. Press when the telephone is not in use.
2. Press / to scroll to CALL BLOCK.
3. Press and / to scroll to SETTINGS.
4. Press to choose CALL GUARD.
5. Press and / to scroll to ON or OFF.
6. Press to save.
OUTGOING MESSAGE FOR CALLS WITHOUT
NUMBER
The preset outgoing message for calls without numbers is
a greeting that answers calls with “Hello, please leave your
name after the tone” .
53
Page 54

SET BLOCK MODE
You can set the block mode to determine whether all types
of calls are to be blocked.
1. Press when the telephone is not in use.
2. Press / to scroll to CALL BLOCK.
3. Press and / to scroll to SETTINGS.
4. Press and / to scroll to BLOCK MODE.
5. Press and / to scroll to BLOCK ALL,
ALLOW VIP or OFF.
6. Press to save.
BLOCK PRIVATE OR UNAVAILABLE CALLS
You can choose to block private calls (without name and
number), or unavailable calls (without number).
1. Press when the telephone is not in use.
2. Press / to scroll to CALL BLOCK.
3. Press and / to scroll to SETTINGS.
4. Press and / to scroll to NO NUMBER.
5. Press and / to scroll to PRIVATE or
UNAVAIL.
6. Press and / to scroll to BLOCK or
UNBLOCK.
54
Page 55

ADD A BLOCK LIST ENTRY
NOTE
1. Press when the telephone is not in use.
2. Press / to select CALL BLOCK.
3. Press to choose BLACK LIST.
4. Press to choose ADD.
5. Press , and the use the dialing keys to enter a
telephone number.
6. Press , and the use the dialing keys to enter a
name.
7. Press to confirm. You hear a confirmation tone.
REVIEW BLOCK LIST ENTRIES
Block list entries appear alphabetically.
1. Press when the telephone is not in use.
2. Press / to scroll to CALL BLOCK.
3. Press twice to select BLACK LIST to browse.
• When the block list is empty, the screens display EMPTY.
EDIT A BLOCK LIST ENTRY
1. Press when the telephone is not in use.
2. Press / to scroll to CALL BLOCK.
3. Press to select BLACK LIST.
55
Page 56

4. Press / to scroll to the desired entry.
NOTE
5. Press and / to scroll to EDIT.
6. Press , and the use the dialing keys to enter a
telephone number.
7. Press , and the use the dialing keys to enter a
name.
8. Press to confirm. You hear a confirmation tone.
DELETE A BLOCK LIST ENTRY
1. Press when the telephone is not in use.
2. Press / to scroll to CALL BLOCK.
3. Press to select BLACK LIST.
4. Press / to scroll to the desired entry.
5. Press and / to scroll to DELETE.
6. Press , and then press again to
confirm.
• Once a block list entry is deleted, it cannot not be retrieved.
DELETE ALL BLOCK LIST ENTRIES
1. Press when the telephone is not in use.
2. Press / to scroll to CALL BLOCK.
3. Press to select BLACK LIST.
4. Press / to scroll to the desired entry.
5. Press and / to scroll to DELETE ALL.
6. Press , and then press again to
confirm.
56
Page 57

ANSWERING SYSTEM
NOTE
The total storage time for outgoing message, messages
and memos is about 20 minutes. Use the answering system
menu of a cordless handset to turn on or off the answering
system or call screening, set up the announcement
message, or change the number of rings, message
recording time, remote access code, or system PIN.
You may also turn on or off the answering system at the
telephone base.
• Your answering system will answer call after 14 rings even when
it is turned off. This is to allow the remote access feature to work.
ANSWER ON/OFF
The answering system must be turned on to answer and
record messages.
When the answering system is turned on, the icon
displays on the handset.
To turn on or off with the telephone base:
• Press to turn the built-in answering system on or off
when the phone is not in use.
To turn on or off with a handset:
1. Press when the phone is not in use.
2. Press / to scroll to ANS. SYSTEM, and then press
.
3. Press / to scroll to TAM ON/OFF, and then press
.
4. Press / to choose ON or OFF, and then press
to confirm your selection.
57
Page 58

MESSAGE PLAYBACK
If you have new messages, the telephone plays the new
messages automatically.
If there are no new messages, the telephone plays back all
messages (oldest first).
To play messages at the telephone base:
Press when the telephone is not in use.
Options during playback:
• Slide key to adjust the speaker volume.
• Press to slow down the message playback.
• Press to delete the playing message.
• Press to stop the playback.
To play messages with a handset:
1. Press when the telephone is not in use. Then,
press / to scroll to ANS. SYSTEM. Press
and / to scroll to PLAYBACK.
2. Press .
• When there is no message in the answering system, the
handset prompts “NO MESSAGE”.
58
Page 59

DELETE ALL MESSAGES
You can only delete old (reviewed) messages. You cannot
delete new messages until you review them. You cannot
retrieve deleted messages.
To delete all messages with a handset:
1. Press when the phone is not in use. Then,
press / to scroll to ANS. SYSTEM.
2. Press and / to scroll to DELETE OLD.
3. Press . The handset displays CONFIRM?.
4. Press to confirm your selection.
RECORD, PLAY, OR DELETE MEMOS
Memos are your own recorded messages used as reminders
for yourself or others using the same answering system. You
can record your own memos using the handset. Playback
and delete them in the same way as incoming messages.
To record a memo:
1. Press when the phone is not in use. Then,
press / to scroll to ANS. SYSTEM.
2. Press and / to scroll to MEMO.
3. Press and the handset displays RECORDING....
Now speak into handset to record your message.
4. Press to confirm.
59
Page 60
ANNOUNCEMENT
The announcement is the message a caller first hear when
the answering machine answers their call. There is a prerecorded announcement message or you can record your
own.
To record your own announcement:
1. Press when the phone is not in use. Then,
press / to scroll to ANS. SYSTEM.
2. Press and / to scroll to SET TAM.
3. Press and / to scroll to TAM MSG.
4. Press and / to scroll to RECORD.
5. Press . The handset displays RECORDING....
Now speak into handset to record your message.
6. Press to confirm your selection.
To play the announcement:
1. Press when the phone is not in use. Then,
press / to scroll to ANS. SYSTEM.
2. Press and / to scroll to SET TAM.
3. Press and / to scroll to TAM MSG.
4. Press twice. The handset displays
PLAYING ANNC....
60
Page 61

NUMBER OF RINGS
You can set the answering system to answer an incoming
call after four, six, eight, or ten rings; or toll save. With toll
save selected, the answering system answers after two rings
when you have new messages, or after four rings when
you have no new messages. This enables you to check for
new messages and avoid paying unnecessary long distance
charges if you are calling from outside your local area.
1. Press when the phone is not in use. Then,
press / to scroll to ANS. SYSTEM.
2. Press and / to scroll to SET TAM.
3. Press and / to scroll to ANS. DELAY.
4. Press and / to choose 2 RINGS, 4 RINGS,
6 RINGS, 8 RINGS, 10 RINGS or TOLLSAVER.
5. Press to confirm your selection.
RECORDING TIME
You can set the recording time limit for each incoming
message.
1. Press when the phone is not in use. Then,
press / to scroll to ANS. SYSTEM.
2. Press and / to scroll to SET TAM.
3. Press and / to scroll to TIME.
4. Press and / to choose 60s, 120s,
or 180s.
5. Press to confirm your selection.
61
Page 62

REMOTE ACCESS SETTING
You can turn on or off the remote access feature.
1. Press when the phone is not in use. Then,
press / to scroll to ANS. SYSTEM.
2. Press and / to scroll to SET TAM.
3. Press and / to scroll to REMOTE ACC.
4. Press and / to choose ON or OFF.
5. Press to confirm your selection.
CHANGE REMOTE ACCESS PIN CODE
1. Press when the phone is not in use. Then,
press / to scroll to ANS. SYSTEM.
2. Press and / to scroll to SET TAM.
3. Press and / to scroll to CHANGE PIN.
4. Press and enter the new remote access PIN
code (default: 00).
5. Press to confirm.
62
Page 63

CALL SCREENING
To screen a call at a handset:
If the answering system is on and your answering system is
recording a message, the handset displays SCREENING ?.
Press to screen the call on your handset.
Options while a message is being recorded:
• Press / to adjust the call screening volume.
• Press to switch between the handset
speakerphone and the handset earpiece.
CALL INTERCEPT
If you want to talk to the person whose message is being
recorded, press on the handset.
63
Page 64

REMOTE ACCESS
NOTE
S
A two-digit security code is required to access the answering
system remotely from any touch-tone telephone. The
default code is 00.
• Remote access can only be used if this function is activated.
1. Dial your telephone number from any touch-tone
telephone.
2. When the answering system answers, press * and then
enter the two-digit remote access code.
3. Then you can enter one of the following remote
commands.
Command Description
2 Delete message.
4 Repeat the current message.
44 Return to the previous message.
5 Play or stop playing the current message.
6 Skip to the next message.
7 Turn on the answering system.
9 Turn off the answering system.
NOTE
• After 5 seconds of key inactivity, the answering machine
automatically cuts off communication.
• When the answering machine is turned off, the telephone
answers after 14 rings, and plays the recording corresponding
to the answering machine only mode.
64
Page 65

DIRECT MEMORY KEYS
There are four direct memory keys on both the handset and
the base - M1, M2, M3, and M4 on the handset and their
corresponding photo speed dial keys 1, 2, 3, and 4 on the
base.
You can store a number into each of these keys and dial
them directly from idle mode.
To set the direct memory keys:
1. Press when the phone is not in use, and then
press / to scroll to DIRECT MEM.
2. Press and / to scroll to M1, M2, M3, or M4.
3. Press twice to ADD.
4. Enter the direct memory number, and then press
.
5. Enter the name for the direct memory entry, and then
press .
To dial the memory number:
When idle, press M1, M2, M3, or M4 to dial out the direct
memory key number.
65
Page 66

BASE PHOTO SPEED DIAL KEYS
There are four photo speed dial memory keys 1, 2, 3, and 4
on the right side of the telephone base, which synchronize
with the numbers set in M1, M2, M3, and M4 slots on the
handset.
After a number is stored in any of these memory keys, you
can simply press once on one of these memory keys to dial
out to the number stored in it directly.
To insert a photo:
You can insert a desired photo into the compartment of the
three photo speed dial memory keys 1, 2, 3, and 4, or write
the contact name on the photo speed dial card.
1. Crop your desired photo to the size of the photo speed
dial keys.
2. Put the cropped photo into the photo speed dial
compartment. Then flip down the photo speed dial
compartment cover.
66
Page 67

SOS EMERGENCY CALLS
Do not solely rely on the SOS feature for emergency
purpose. The SOS mode functionality is dependent on the
phone settings and network availability.
You need to program the SOS numbers before you can
make SOS Emergency Calls. Make sure you program all the
five SOS numbers to maximize the possibility of receiving
response from others when you make an emergency call.
To program the SOS numbers:
1. Press when the phone is not in use, and then
press / to scroll to SET SOS.
2. Press and / to scroll to SOS NUMBER.
3. Press and / to scroll to SOS 1, SOS 2, SOS 3,
SOS 4, or SOS 5.
4. Press twice to select ADD.
5. Enter the SOS emergency number, and then press
.
6. Enter the name for the SOS emergency number, and
then press .
To enable or disable internal SOS calls:
If the internal SOS call feature is set to DISABLE or no SOS
number is set, SOS emergency calls will not function.
1. Press when the phone is not in use, and then
press / to scroll to SET SOS.
2. Press and / to scroll to INTERNAL.
3. Press and / to scroll to ENABLE or
DISABLE.
4. Press to save.
67
Page 68

Record, Play, or Delete SOS Messages
The SOS message is your own recorded message to be
played directly when you make an emergency call. The
default SOS message is “This is an emergency call. Please
press any number key to start the conversation.” Yo u
can record your own message using the handset. Make sure
your SOS message recorded includes your name, the SOS
message, and a request to the far-end caller on pressing any
number key to start the conversation. You can also playback
and listen to your SOS message or delete it.
To record an SOS Messages:
1. Press when the phone is not in use, and then
press / to scroll to SET SOS.
2. Press and / to scroll to SOS MSG.
3. Press and / to scroll to RECORD.
4. Press . The handset displays RECORDING....
Now speak into handset to record your message.
5. Press to confirm.
To playback an SOS Messages:
1. Press when the phone is not in use, and then
press / to scroll to SET SOS.
2. Press and / to scroll to SOS MSG.
3. Press twice to select PLAY to start the SOS
message playback.
To delete an SOS Messages:
1. Press when the phone is not in use, and then
press / to scroll to SET SOS.
2. Press and / to scroll to SOS MSG.
3. Press and / to scroll to DELETE.
4. Press to delete the SOS message.
68
Page 69

To make the SOS Emergency Calls:
S
• Press and hold SOS button on handset (or press SOS
button on SOS pendant if one paired).
SOS call can be cancelled internally by pressing:
Handset – , or SOS key;
Base – key;
Pendant (if one paired) – CANCEL button
• If SOS call is not cancelled internally within 20 seconds,
the telephone will automatically call out in sequence to
programmed SOS numbers; on handset speakerphone
if the SOS button was pressed on the handset; on the
base speakerphone if the SOS button was pressed on the
pendant.
• If SOS call is answered by a person they will hear the SOS
message.
• Once a number key is pressed by SOS call receiver then
2-way communication is open; on handset speakerphone
if the SOS button was pressed on the handset; on the
base speakerphone if the SOS button was pressed on the
pendant.
NOTE
• If SOS call is answered by answering machine / voicemail call will
terminate and after 60 seconds will dial to next SOS number in
sequence.
• If none of the programmed SOS numbers answer in the first
cycle then cycle will re-commence at first SOS number. The
complete SOS call cycle to all programmed SOS numbers will
repeat 3 times.
69
Page 70

REMINDER ALARM
You can set reminder alarms that could remind you at the
time intervals you have set.
Set the reminder alarm:
1. Press when the phone is not in use, and then
press / to scroll to REMINDER.
2. Press and / to scroll to your desired alarm.
3. Press to choose ON / OFF.
4. Press and / to scroll to ON.
5. Press and use the dialing keys to enter time.
6. Press and / to scroll to ONCE, DAILY,
MON-FRI or SAT-SUN.
7. Press to save.
Set the reminder alarm melody:
1. Press when the phone is not in use, and then
press / to scroll to REMINDER.
2. Press and / to scroll to your desired alarm.
3. Press and / to scroll to MELODY.
4. Press and / to scroll to your desired
melody.
5. Press to save.
70
Page 71

TALKING DIGITS
You can choose whether the digits are to be announced
whenever you press the number keys.
To turn the Talking Digits on or off:
1. Press when the phone is not in use, and then
press / to scroll to TALKING DIGIT.
2. Press and / to scroll to ON or OFF.
3. Press to save.
71
Page 72

DEVICE SETUP
You can add new Contact Sensor (VC7002A), Motion Sensor
(VC7003A), Water Leakage Sensor (VC7006A), Extension
Ringer (VC7014A), Audio Doorbell (VC7021A), and SOS
pendant (VC7022A) to your CL6527A telephone system (all
purchased separately).
The VC7002A Contact Sensor lets you know if anything you
care about is open or closed with these magnetic sensors,
like a window, door or medicine cabinet.
The VC7003A Motion Sensor lets you stay on top of
movement around your home, whether unwanted visitors,
or even the kids coming and going.
The VC7006A Water Leakage Sensor lets you know when
there is a is a flood indicating potential water leakage
detection, or when the sensor is being tampered off.
The VC7014A Extension Ringer to allows to have an extra
ringer and/or flashing lights in addition to your handset and
base.
The VC7021A Audio Doorbell lets you know when a visitor
arrived your home.
The VC7022A SOS pendant to allows to have a handy
pendant to enter the SOS emergency mode in no time, in
addition to your handset and base.
72
Page 73

The CL6527A is capable of registering the following number
of devices:
• Up to 5 handsets, and no VC7002A, VC7003A, VC7006A,
VC7014A, VC7021A or VC7022A; or
• Up to 4 handsets, 1 VC7021A, and no VC7002A,
VC7003A, VC7006A, VC7014A, or VC7022A; or
• Up to 4 handsets, no VC7021A, and as many VC7002A,
VC7003A, VC7006A, VC7014A, or VC7022A as you like
(max. 30); or
• Up to 3 handsets, 1 VC7021A, and as many VC7002A,
VC7003A, VC7006A, VC7014A, or VC7022A as you like
(max. 30).
Once there is at least one of these devices registered to the
CL6527A telephone base, the SET DEVICE menu option will
appear in the handset menu.
73
Page 74

ADD A NEW DEVICE
After you have purchased new Contact Sensor (VC7002A),
Motion Sensor (VC7003A), Water Leakage Sensor (VC7006A),
Extension Ringer (VC7014A), Audio Doorbell (VC7021A), and
SOS pendant (VC7022A) to your CL6527A telephone system,
you need to registered each of them to your telephone
system before use.
1. Press and hold on the base station for about five
seconds, the base station is entered into registration
mode.
To enter the registration mode on your device,
press and hold the pair button on the Contact Sensor
(VC7002A), Motion Sensor (VC7003A), Water Leakage
Sensor (VC7006A), or Audio Doorbell (VC7021A);
or press and hold the button, Extension Ringer
(VC7014A) for 10 seconds; or press and hold the
CANCEL button on the SOS pendant (VC7022A) for 10
seconds.
74
Page 75

TEST DEVICE SIGNAL STRENGTH
Before you mount any of your devices, follow the
instructions below to check the signal strength between the
device and the telephone base. Make sure you mount the
device in a location where the signal strength is good.
1. Press when the phone is not in use, and then
press / to scroll to SET DEVICE.
2. Press to choose CHK SIGNAL.
3. Press and then press / to scroll to the
device you want to test.
4. Press The handset screen displays TESTING
SIGNAL, followed by AWAITING SIGNAL. Trigger your
device (refer to the user's manual of your respective
device).
• If the handset screen displays NO SIGNAL,
press , and then return to step 2 to
test again.
• If the handset screen displays WEAK,
move the device closer to the base, and
then adjust the device’s location to improve the
signal. Press , and then return to
step 2 to test again.
5. When the handset screen displays GOOD, press
. The testing is complete.
75
Page 76

SENSOR OPERATIONS
NOTES
SENSOR MODE
You can choose LOCAL mode to receive alerts at the
telephone system, or REMOTE - CALL mode to receive calls
at other numbers you have specified. This allows you to get
notified even when you are away from home. The preset
sensor mode is LOCAL.
In REMOTE - CALL mode, when you receive the remote alert
call, you will hear the alert message and then you can choose
to listen to the sound in your house; or you can choose to
speak through the handset to the visitor or intruder.
1. Press when the phone is not in use, and then
press / to scroll to SENSOR MODE.
2. Press and then press / to scroll to
LOCAL or REMOTE - CALL.
• When REMOTE - CALL is chosen, and no
telephone number has been previously set, you
will be prompted to set the telephone numbers
for remote calls.
• In REMOTE - CALL mode, the stored telephone numbers will ring
in sequence. If the first telephone number is busy or does not
pick up the remote call, the telephone system will call the second
telephone number, and so on.
76
Page 77

ARM/DISARM THE SENSOR ALERT SYSTEM
S
You can arm (turn on) or disarm (turn off) the sensor alerts
system.
1. Press when the phone is not in use, and then
press / to scroll to SENSOR MODE.
2. Press and then press / to scroll to
ARM/DISARM.
3. Press to select STATUS.
4. Press and then press / to scroll to ARM or
DISARM.
5. Press to save.
NOTE
• When you arm your system in REMOTE - CALL mode it will let
you know if any of your VC7002A Contact Sensor is open. You can
either choose to ignore this status by pressing or close
the sensor
• When you arm your system in REMOTE - CALL mode you will
have 60 seconds to exit or enter before alarms will trigger for
activated sensors.
77
Page 78

SENSOR ARM/DISARM PIN PROTECTION
You can set whether you can to enter the PIN each time
before you change the Arm/Disarm setting. The default PIN
is 0000.
To enable or disable Arm/Disarm PIN protection:
1. Press when the phone is not in use, and then
press / to scroll to SENSOR MODE.
2. Press and then press / to scroll to
ARM/DISARM.
3. Press and then press / to scroll to
PIN PROTECT.
4. Press and then press / to scroll to
ENABLE or DISABLE.
5. Press to save.
78
Page 79

SPECIFIC DEVICE OPERATIONS
DOORBELL
After you have registered an Audio Doorbell (VC7021A)
to your CL6527A telephone base, you can follow the
instructions below to configure your doorbell.
The doorbell helps you get notified at your telephone
system upon visitors’ arrival. When the doorbell is chimed,
it sends an alert to your telephone. Both the base and
handsets will play the chime tone.
Under Device Setup menu, you can change the doorbell
chime volume and tone, and configure the call divert settings.
Chime Volume
1. Press when the phone is not in use, and then
press / to scroll to SET DEVICE.
2. Press to select DOORBELL.
3. Press to choose CHIME.
4. Press to choose CHIME VOLUME.
5. Press and then press / to adjust the chime
volume.
6. Press to save.
79
Page 80

Chime Tone
You can choose from different chime tones for the
telephone base or handset.
1. Press when the phone is not in use, and then
press / to scroll to SET DEVICE.
2. Press to select DOORBELL.
3. Press to choose CHIME.
4. Press and then press / to scroll to CHIME
TONE.
5. Press and then press / to choose the
chime tone.
6. Press to save.
Call Divert
You can divert a doorbell call to a preset external number.
The telephone base will call directly to the destination
number during doorbell ringing.
To set the preset divert number:
1. Press when the phone is not in use, and then
press / to scroll to SET DEVICE.
2. Press to select DOORBELL.
3. Press and then press / to scroll to DBELL
DVRT.
4. Press and then press / to scroll to PRESET
NUM.
5. Press and then enter the destination number
that to which you wish to divert the call.
6. Press to save.
80
Page 81

To turn on or off the auto call divert:
1. Press when the phone is not in use, and then
press / to scroll to SET DEVICE.
2. Press to select DOORBELL.
3. Press and then press / to scroll to DBELL
DVRT.
4. Press and then press / to scroll to AUTO
DVRT.
5. Press and then press / to scroll to
ON or OFF.
6. Press to save.
You can also set up an auto call divert to a preset divert
number, only when you pressed REJECT at your handset to
reject the doorbell call.
To turn on or off the auto call divert when the doorbell call
is rejected at your handset:
1. Press when the phone is not in use, and then
press / to scroll to SET DEVICE.
2. Press to select DOORBELL.
3. Press and then press / to scroll to DBELL
DVRT.
4. Press and then press / to scroll to DECL
DRVT.
5. Press and then press / to scroll to
ON or OFF.
6. Press to save.
81
Page 82

EXTENSION RINGER
After you have registered an Extension Ringer (VC7014A)
to your CL6527A telephone base, it allows to have an extra
ringer and/or flashing lights in addition to your handset and
base.
You can follow the instructions below to turn on or off your
of extension ringer at any time.
Set Alert Schedule
1. Press when the phone is not in use, and then
press / to scroll to SET DEVICE.
2. Press to select ALERTER.
3. Press and then press / to scroll to ON or
OFF.
4. Press to save.
82
Page 83

DEVICE MONITORING
You can add new Contact Sensor (VC7002A), Motion Sensor
(VC7003A), Water Leakage Sensor (VC7006A), Extension
Ringer (VC7014A), Audio Doorbell (VC7021A), and SOS
pendant (VC7022A) to your CL6527A telephone system (all
purchased separately). Once there is at least one of these
devices registered to the CL6527A telephone base, the
DEVICE menu option will appear in the handset menu.
View Device’s Current Status
You can view the current status of each of the registered
device on whether it is active, inactive, or with low battery.
1. Press when the phone is not in use, and then
press / to scroll to DEVICE.
2. Press to select the desired device.
3. Press twice to select STATUS and view the
current status of your desired device.
View Devices Status Log
You can view the status log of each of the registered device.
1. Press when the phone is not in use, and then
press / to scroll to DEVICE.
2. Press to select the desired device.
3. Press and then press / to scroll to LOG.
4. Press to view the status log of your desired
device.
83
Page 84

GENERAL PRODUCT CARE
Taking care of your telephone
Your cordless telephone contains sophisticated electronic parts,
so it must be treated with care.
Avoid rough treatment
Place the handset down gently. Save the original packing
materials to protect your telephone if you ever need to ship it.
Avoid water
Your telephone can be damaged if it gets wet. Do not use the
handset outdoors in the rain, or handle it with wet hands. Do not
install the telephone base near a sink, bathtub or shower.
Electrical storms
Electrical storms can sometimes cause power surges harmful to
electronic equipment. For your own safety, take caution when using
electrical appliances during storms.
Cleaning your telephone
Your telephone has a durable plastic casing that should retain its
luster for many years. Clean it only with a dry non-abrasive cloth. Do
not use dampened cloth or cleaning solvents of any kind.
84
Page 85

FREQUENTLY ASKED QUESTIONS
Below are the questions most frequently asked about the cordless
telephone.
Problem Solutions
My telephone
does not work
at all.
Low battery
shows on
screen.
The handset
batteries do
not accept
charge.
• Make sure the batteries are installed and charged
correctly. For optimum daily performance, return the
handset to the telephone base after use.
• Make sure the power adapter is securely plugged
into an outlet not controlled by a wall switch.
• Make sure the telephone line cord is plugged firmly
into the telephone base and the telephone wall jack.
• Unplug the electrical power to the telephone base.
Wait for approximately 15 seconds, then plug it
back in. Allow up to one minute for the handset and
telephone base to synchronize.
• Remove and re-insert the batteries. If that still does not
work, it might be necessary to purchase new batteries.
• Disconnect the telephone base from the telephone
wall jack and plug in a working telephone. If the
other telephone does not work, the problem is
probably in the wiring or the telephone service. Call
your telephone service provider.
• Place the handset in the telephone base for
recharging.
• Remove and re-install the batteries and use it until
fully depleted, then recharge the handset in the
base.
• If the above measures do not solve the problem,
replace the batteries.
• Make sure the handset is placed in the telephone
base correctly.
• Remove and reinstall the batteries, then charge for
up to 16 hours.
• Purchase new batteries.
85
Page 86

TECHNICAL SPECIFICATIONS
Frequency control Crystal controlled PLL synthesizer
Transmit
frequency
Channels 10
Power
requirement
Memory Phonebook: 100 memory locations;
1.88GHz to 1.9GHz
Handset: 1.2V, 500mAh, 3 x A AA Ni-MH battery
Telephone base: 6V DC @ 800mA
up to 20 digits and 10 characters
Caller ID log: 30 memory locations;
up to 20 digits and 10 characters
Call block: 100 entries
86
Page 87

VTECH TELECOMMUNICATIONS LTD.
A member of THE VTECH GROUP OF COMPANIES.
© 2020 VTech Telecommunications Ltd.
All Rights Reserved. V5.0. 06/20
 Loading...