

Page 1
ABC Phonics Pals
F.P.O
Printed in China
91-002362-000-000
TM
2008 VTech
Page 2
To learn more about the Preschool Learning™ and other VTech® toys, visit www.vtechkids.com
Page 3

INTRODUCTION
Thank you for purchasing the VTech® ABC Phonics Pals™!
Introduce your children to some new friends! The ABC Phonics
Pals have fun with writing, and they want your kids to join them as
they play with their favorite toys – the letters of the alphabet. In the
process, your children will learn alphabetical order, phonics, and
letter stroke order, step by step. Then they can test their knowledge
by playing fun writing games, or relax and trace their way through
some simple mazes. As your children play with their Phonics Pals,
they’ll do more than make a few new friends; they’ll begin a lifelong
relationship with writing.
LED Mouth
26 Letter
Buttons
Repeat
Button
Non-electronic
Writing Stylus
On/Off Button
LCD Screen
Writing Pad
Non-electronic
Sliding Bar
3 Activity Buttons
Introduction
2
Page 4
INCLUDED IN THIS PACKAGE
One VTech® ABC Phonics Pals™
•
One instruction manual
•
WARNING: All packing materials such as tape, plastic sheets,
wire ties and tags are not part of this toy, and should be discarded
for your child’s safety.
GETTING STARTED
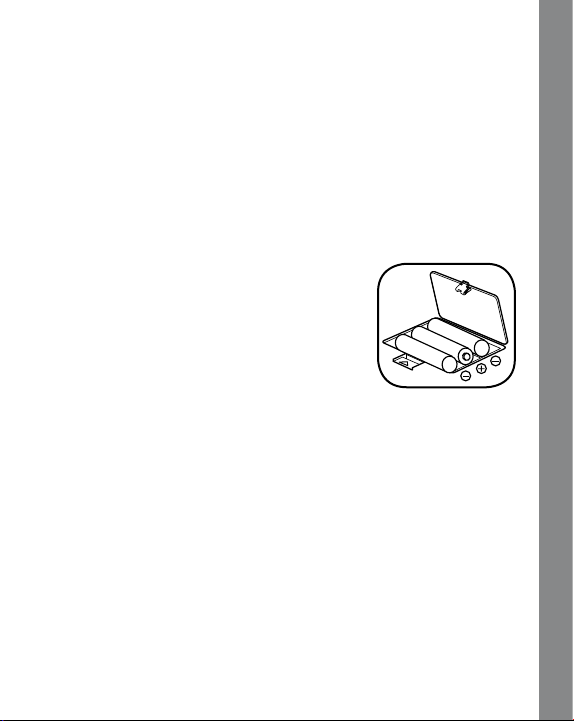
BATTERY INSTALLATION
Make sure the unit is OFF.
1.
Locate the battery cover on the bottom of
2.
the unit.
Open the battery cover.
3.
Install 3 new “AA” (UM-3/LR6) batteries into
4.
the compartment as illustrated. (The use of
new, alkaline batteries is recommended
for maximum performance.)
Replace the battery cover.
5.
BATTERY NOTICE
Install batteries correctly observing the polarity (+,-) signs to
•
avoid leakage.
Do not mix old and new batteries.
•
Do not use batteries of different types.
•
Remove exhausted or new batteries from the unit when the unit
•
will not be used for an extended period of time.
Do not dispose of batteries in fire.
•
Do not attempt to recharge ordinary batteries.
•
The supply terminals are not to be short-circuited.
•
Only batteries of the same and equivalent type as recommended
•
are to be used.
Getting Started
3
Page 5

WE DO NOT RECOMMEND THE USE OF RECHARGEABLE
BATTERIES.
REMOVE DEMO TAG
The demo tag should be removed immediately when the product is
taken out of the packaging. If the demo tag is still in position when you
begin play, please remove it from the bottom of the unit to activate
normal play mode.
PRODUCT FEATURES
1. On/Off BUTTON
To turn the unit on, press the On/Off
BUTTON.
Press the
the unit off.
2.
ACTIVITY BUTTONS
Press one of the three activity buttons to
select an activity.
3. LETTER BUTTONS
Before choosing an activity, you can
press a letter button to learn
letter names, sounds, and related objects.
Within an activity, use the letter buttons
to answer a question or to choose a letter
for writing instruction.
On/Off BUTTON again to turn
Product Features
4
Page 6

4. REPEAT BUTTON
Press this button to hear the instructions
repeated.
5. Writing Pad
As you move the stylus on the writing
pad, you will see your writing appear on
the screen. Press the “ ” mark on the
writing pad to confirm that you have
finished writing, or press the “ ” mark to
erase your writing from the screen and
start over again.
6.
Non-electronic Sliding Bar
Move the sliding bar to clear your writing
from the writing pad.
7. AUTOMATIC SHUT-OFF
To preserve battery life, the
turn off after several minutes without input. The unit can be
turned on again by pressing the On/Off BUTTON.
The unit will also auto power off when
your batteries are very low. A warning
will be displayed on screen as a
reminder to change your batteries.
ABC Phonics Pals™ will automatically
Product Features
5
Page 7

IMPORTANT NOTE
To get the best results from your ABC Phonics Pals™ please follow
these important instructions:
WRITING RECOGNITION FEATURE
The writing pad is specially designed to
teach children to write using VTech’s Writing
Recognition Technology. This special space
teaches you to write the entire alphabet.
Please focus your writing directly in this
space!
For proper recognition, try to refrain from placing extra pressure on
the writing pad while writing.
FOR BEST RESULTS, WE RECOMMEND THE USE OF THE NONELECTRONIC WRITING STYLUS PROVIDED WITH THIS PRODUCT
TO PLAY THE ACTIVITIES.
NON-ELECTRONIC SLIDING BAR
While writing or drawing on the writing pad,
the sliding bar needs to be positioned at
either end of the writing pad; otherwise,
it will affect the writing recognition.
Important Note
6
Page 8

ACTIVITIES:
1. Smart Writer
This activity teaches you how to write uppercase letters step by step.
Letter Stroke Order lessons in this activity are based on the
Zaner-Bloser method.
Failure to follow the stroke order presented in the instructions
will count as a wrong answer.
Press the “Smart Writer” button to
1.
choose this activity.
Choose a letter by pressing a letter
2.
button. If you don’t make your selection
within a few seconds, the unit will
automatically choose a letter for you.
On the screen, you will see the letter strokes taught step by step.
3.
Watch the screen carefully as it shows you the proper steps in
forming a letter. Practice writing that
letter on the writing pad. If you have
written the letter correctly, you will
hear a positive response followed by a
word that begins with that letter. Press
another letter button to learn some
Activities
7
Page 9

more. If you do not write a letter correctly after three tries, you
will be asked to try a different letter.
As you practice your writing, you can press the Repeat button
4.
to view the instructions on how to write the letter again. Or, if
you make a mistake, you can press the “ ” mark to erase your
writing from the screen and start over again. When you’re finished
writing, press the “ ” mark on the writing pad to register your
answer.
You can practice writing on your own without any instructions. To
5.
do this, start writing before pressing a letter button. If you’ve written
the letter correctly, the unit will tell you what you’ve written.
2. Writing Review
Test your knowledge of letters and writing with the fun and fast-paced
questions in this activity.
Press the “Writing Review” button to
1.
choose this activity.
One of three types of questions (testing
2.
knowle dge of letter i denti fi catio n,
alphabetical order, and letters at the
beginning of words) will be randomly
displayed on screen. Players must press
the letter buttons or write on the writing
pad to answer within the time limit. After
five questions, you will receive a score.
Activities
After a correct answer, you will hear a positive response, and
3.
the game will proceed to the next question. If you do not answer
8
Page 10

correctly within the time limit, the answer and the correct stroke
order of the letter will be given.
If you make a mistake in writing a letter, you can press the “ ”
4.
mark to erase your writing from the screen and start over again.
When you’re finished writing, press the “ ” mark on the writing
pad to register your answer.
3. Maze Craze
In this activity, you can learn to draw by tracing your way through
mazes shaped like simple objects.
Press the “Maze Craze” button to choose
1.
this activity.
Use the stylus to move the arrow cursor
2.
until it touches the ball located at the
starting point. Then drag the ball through
the maze.
Be careful not to hit the wall, or you’ll lose a turn. You have three
3.
chances to complete the maze before it moves on to another
one.
When you reach the end, the maze will
4.
turn into an object!
Activities
While playing, you can press the Repeat button to see the correct
5.
path through the maze.
9
Page 11

CARE & MAINTENANCE
Keep the unit clean by wiping it with a slightly damp cloth.
1.
If the writing pad gets anything on it, wipe it with a tissue or damp
2.
cloth. Do not scrub the writing pad as it could cause damage.
Do not use sharp-ended objects to write on the writing pad.
3.
Avoid using excess pressure on the writing pad while writing.
4.
Keep the unit out of direct sunlight and away from any direct heat
5.
sources.
Remove the batteries when the unit is not in use for an extended
6.
period of time.
Do not drop the unit on a hard surface and do not expose the unit
7.
to excess moisture.
TROUBLESHOOTING
If for some reason the program/activity stops working, then please
follow these steps:
Turn the unit OFF.
1.
Interrupt the power supply by removing the batteries.
2.
Let the unit stand for a few minutes, then replace the batteries.
3.
Turn the unit back ON. The unit will now be ready to play again.
4.
If the unit still does not work, replace with an entire set of new
5.
batteries.
If the problem persists, please call our Consumer Services Department
at 1-800-521-2010 in the U.S. or 1-877-352-8697 in Canada, and a
service representative will be happy to help you.
Care & Maintenance/Troubleshooting
10
Page 12

IMPORTANT NOTE:
Creating and developing Preschool Learning™ products is
accompanied by a responsibility that we at VTech® take very
seriously. We make every effort to ensure the accuracy of the
information which forms the value of our products. However, errors
sometimes can occur. It is important for you to know that we stand
behind our products and encourage you to call our Consumer
Services Department at 1-800-521-2010 in the U.S. or 1-877-3528697 in Canada with any problems and/or suggestions that you
might have. A service representative will be happy to help you.
NOTE:
This equipment has been tested and found to comply with the limits
for a Class B digital device, pursuant to Part 15 of the FCC Rules.
These limits are designed to provide reasonable protection against
harmful interference in a residential installation. This equipment
generates, uses and can radiate radio frequency energy and, if not
installed and used in accordance with the instructions, may cause
harmful interference to radio communications. However, there is no
guarantee that interference will not occur in a particular installation.
If this equipment does cause harmful interference to radio or television
reception,which can be determined by turning the equipment off and
on, the user is encouraged to try to correct the interference by one or
more of the following measures:
Reorient or relocate the receiving antenna.
•
Increase the separation between the equipment and receiver.
•
Connect the equipment into an outlet on a circuit different from
•
that to which the receiver is connected.
Consult the dealer or an experienced radio/TV technician for
•
help.
Caution : changes or modifications not expressly approved by the
party responsible for compliance could void the user’s authority to
operate the equipment.
Important Note
11
 Loading...