

Page 1

User’s manual
w w w . v t e c h p h o n e s . c o m
Model: 6032
Page 2

www.vtechphones.com
i
The ENERGY STAR® program (www.energystar.gov) recognizes and encourages
the use of products that save energy and help protect our environment. We are
proud to mark this product with the ENERGY STAR
®
label indicating it meets the
latest energy efficiency guidelines.
This manual has all the feature operations and troubleshooting necessary to install
and operate your new VTech telephone. Please review this manual thoroughly to
ensure proper installation and operation of this innovative and feature rich VTech
product. For support, shopping, and everything new at VTech, visit our website at
www.vtechphones.com. In Canada, please visit www.vtechcanada.com.
Congratulations
on purchasing your new VTech product.
Before using this telephone, please read the
Important safety instructions
on page 38 of this manual.
Page 3

www.vtechphones.com
ii
Installation . . . . . . . . . . . . . . . . . . . . . . . . 1
Parts checklist . . . . . . . . . . . . . . . . . . . . . . 1
Install handset battery . . . . . . . . . . . . . . . . . . 2
Telephone base installation . . . . . . . . . . . . . . . 3
Desk/table bracket installation . . . . . . . . . . . . . . 4
Dial type . . . . . . . . . . . . . . . . . . . . . . . . . 4
DSL lter . . . . . . . . . . . . . . . . . . . . . . . . . 5
Telephone settings . . . . . . . . . . . . . . . . . . . . 6
Handset layout . . . . . . . . . . . . . . . . . . . . . . 6
Telephone base layout . . . . . . . . . . . . . . . . . . 7
Date and time . . . . . . . . . . . . . . . . . . . . . . . 8
Ring melody . . . . . . . . . . . . . . . . . . . . . . . 8
Ring volume . . . . . . . . . . . . . . . . . . . . . . . 9
Battery low tone . . . . . . . . . . . . . . . . . . . . . 9
Out of range tone . . . . . . . . . . . . . . . . . . . . 10
Key tone . . . . . . . . . . . . . . . . . . . . . . . . 10
Edit handset name . . . . . . . . . . . . . . . . . . . 11
Language . . . . . . . . . . . . . . . . . . . . . . . . 11
Dial type . . . . . . . . . . . . . . . . . . . . . . . . 12
Clear voicemail . . . . . . . . . . . . . . . . . . . . . 12
Reset to default settings . . . . . . . . . . . . . . . . 13
Basic operation . . . . . . . . . . . . . . . . . . . . . 14
Make, answer and end calls . . . . . . . . . . . . . . 14
Options while on calls . . . . . . . . . . . . . . . . . 14
Speakerphone . . . . . . . . . . . . . . . . . . . . . 14
Mute . . . . . . . . . . . . . . . . . . . . . . . . . . 14
Call waiting . . . . . . . . . . . . . . . . . . . . . . . 14
Find handset . . . . . . . . . . . . . . . . . . . . . . 15
Advanced operation . . . . . . . . . . . . . . . . . . 16
Director y . . . . . . . . . . . . . . . . . . . . . . . . 16
Review the directory . . . . . . . . . . . . . . . . . . 16
Search the directory . . . . . . . . . . . . . . . . . . 16
Character of chart . . . . . . . . . . . . . . . . . . . 17
Store a directory entry . . . . . . . . . . . . . . . . . 18
Dial a directory entry . . . . . . . . . . . . . . . . . . 18
Edit a directory entry . . . . . . . . . . . . . . . . . . 19
Delete from the directory . . . . . . . . . . . . . . . 19
Caller ID . . . . . . . . . . . . . . . . . . . . . . . . 20
Call log . . . . . . . . . . . . . . . . . . . . . . . . . 21
Review the call log . . . . . . . . . . . . . . . . . . . 21
Dial a call log number . . . . . . . . . . . . . . . . . 22
Store a call log number . . . . . . . . . . . . . . . . . 22
Delete from the call log . . . . . . . . . . . . . . . . . 23
Redial . . . . . . . . . . . . . . . . . . . . . . . . . 24
Review redial . . . . . . . . . . . . . . . . . . . . . . 24
Store a redial number to the directory . . . . . . . . . 24
Dial from redial . . . . . . . . . . . . . . . . . . . . . 25
Delete from redial. . . . . . . . . . . . . . . . . . . . 25
Answering system operation . . . . . . . . . . . . . . 26
Message capacity . . . . . . . . . . . . . . . . . . . 26
Table of contents
Page 4

www.vtechphones.com
iii
Table of contents
Activate the answering system . . . . . . . . . . . . . 27
Set number of rings. . . . . . . . . . . . . . . . . . . 27
Set telephone base date and time . . . . . . . . . . . 27
Set telephone base melody . . . . . . . . . . . . . . 28
Set telephone base ringer volume . . . . . . . . . . . 28
Personal identication number (PIN). . . . . . . . . . 29
Outgoing announcements . . . . . . . . . . . . . . . 30
Play the announcement . . . . . . . . . . . . . . . . 30
Record your own announcement . . . . . . . . . . . 30
Delete your announcement. . . . . . . . . . . . . . . 30
Message playback . . . . . . . . . . . . . . . . . . . 31
Options during playback . . . . . . . . . . . . . . . . 31
Delete all messages . . . . . . . . . . . . . . . . . . 31
Remote access . . . . . . . . . . . . . . . . . . . . . 32
Message window displays . . . . . . . . . . . . . . . 33
Handset and telephone base indicators . . . . . . . . 34
Handset light . . . . . . . . . . . . . . . . . . . . . . 34
Telephone base lights . . . . . . . . . . . . . . . . . 34
Handset icons . . . . . . . . . . . . . . . . . . . . . 34
Handset display screen messages. . . . . . . . . . . 35
Call log display screen messages . . . . . . . . . . . 36
Battery . . . . . . . . . . . . . . . . . . . . . . . . . 37
Important safety instructions . . . . . . . . . . . . . . 38
Troubleshooting . . . . . . . . . . . . . . . . . . . . 39
Operating range . . . . . . . . . . . . . . . . . . . . 49
Maintenance . . . . . . . . . . . . . . . . . . . . . . 49
About cordless telephones . . . . . . . . . . . . . . . 50
Warranty . . . . . . . . . . . . . . . . . . . . . . . . 50
FCC, ACTA and IC regulations . . . . . . . . . . . . . 52
The RBRC® seal . . . . . . . . . . . . . . . . . . . . 54
Technical specications . . . . . . . . . . . . . . . . 55
Index . . . . . . . . . . . . . . . . . . . . . . . . . . 56
Page 5

www.vtechphones.com
1
Installation
Basic operation
Installation
Parts checklist
Remember to save your sales receipt and original packaging in case it is necessary to ship your
telephone for warranty ser vice. Check to make sure the telephone package includes the following:
To purchase
re placement
ba tteries or obtain
a replacement
power adapter,
vi sit our website
at www.
vt echphones.
com or call 1
(800) 595-9511.
In Canada go to
www.vtechcanada.
com or dial 1 (800)
267-7377.
•
4. User’s manual
1. Quick start guide
2. Handset
3. Telephone base
5. Base power adapter
8. Telephone line cord
6. Battery
1. Quick start guide
2. Handset
3. Telephone base
4. User’s manual
5. Base power adapter
6. Batter y
7. Battery compartment cover
8. Telephone line cord
7. Battery compartment cover
Page 6

www.vtechphones.com
2
Install handset battery
• Remove battery compar tment cover by pressing on the indentation and sliding downwards.
• Align the two holes in the plug with the socket pins according to the color-coded label in the battery
compartment, then snap the plug into place.
• Place the battery into the compartment.
•
Position the battery compartment cover and slide it upwards until it clicks into place.
• Put the handset in the telephone base to charge the new battery for at least 16 hours.
You can keep the battery charged by returning the handset to the telephone base after each use.
When the battery power is fully depleted, a full recharge takes about 16 hours.
For further information on batteries, please see the
Battery section on page 37.
Installation
color-coded label
If the handset will
not be used for a
long period of time,
remove the bat tery
to prevent possible
leakage.
To purchase
re placement
ba tteries, vi si t our
website at www.
vt echphones .
com or call 1
(800) 595-9511.
In Canada go to
www.vtechcanada.
com or dial 1 (800)
267-7377.
•
•
Page 7
www.vtechphones.com
3
Installation
Basic operation
Installation
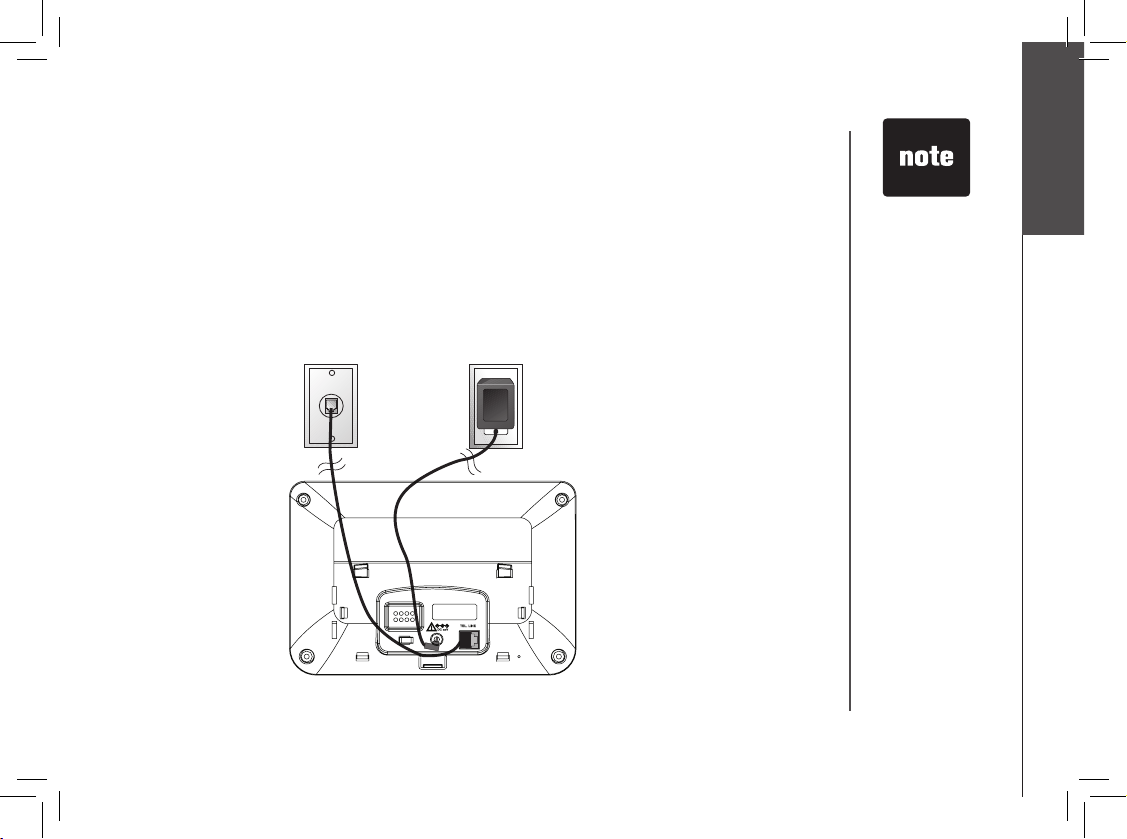
Install the telephone base and the charger as shown below. Choose a location away from any electronic
equipment and appliances such as personal computers, computer routers, television sets, microwave
ovens and refrigerators. Avoid excessive heat, cold, dust or moisture.
Use only the
VTech batteries
and power
adapters (or
equivalent)
supplied with
this telephone.
To obtain a
replacement, visit
our website at
www.vtechphones.
com or call 1
(800) 595-9511.
In Canada go to
www.vtechcanada.
com or dial 1
(800) 267-7377.
This power unit
is intended to be
correctly oriented
in a vertical or oor
mount position.
The prongs are not
designed to hold
the plug in place if
it is plugged into a
ceiling, under-thetable or cabinet
outlet.
•
•
2. Plug power adapter into an electrical
outlet not controlled by a wall switch.
1. Plug the telephone line cord
into a telephone wall jack.
Telephone base installation
Page 8
www.vtechphones.com
4
Dial type
If you have touch-tone service, your telephone is ready to use as soon as the battery is charged. If
you have pulse (rotary) service, the dial type must be changed. To change the dial type, refer to the
Dial type section on page 12.
Installation
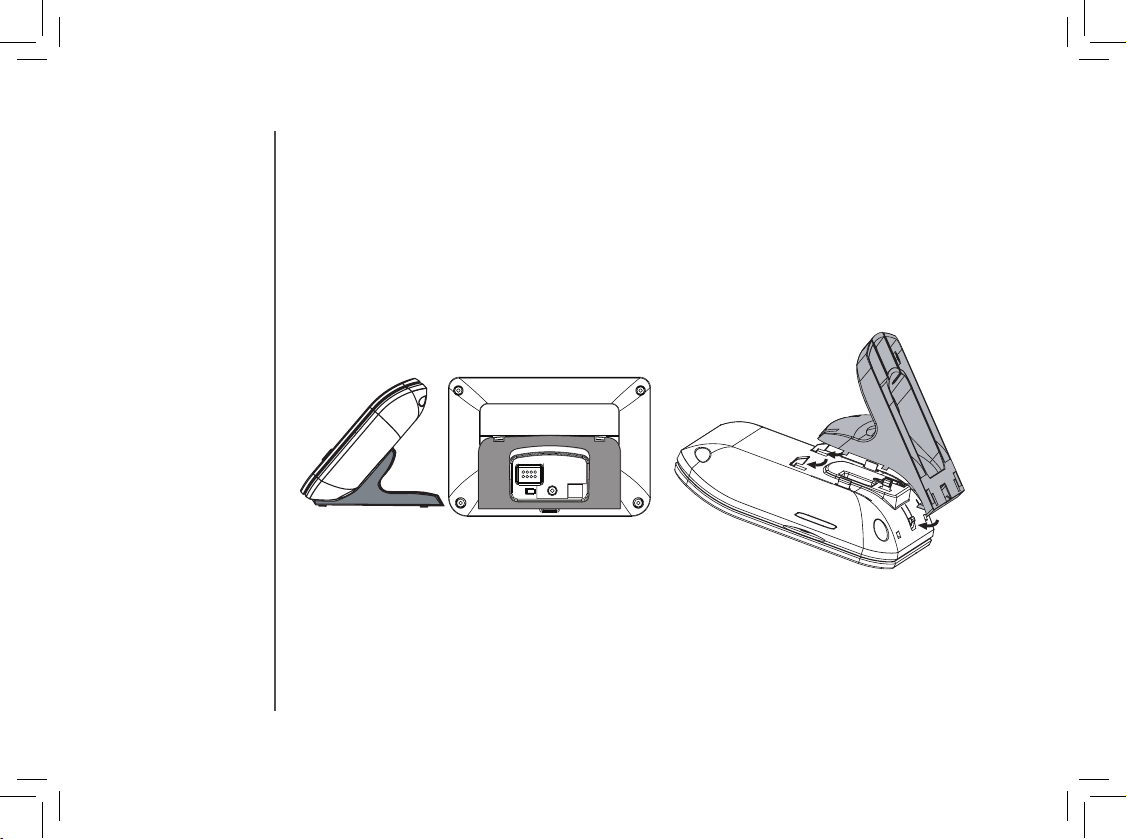
Desk/table bracket installation
To place the telephone base on a desk or table, insert the desk/table bracket as shown below.
• Position the bracket on the bottom of the telephone base and slide it up towards the tabs on the
telephone base until it clicks into place.
• Remove the bracket by pulling the bracket down with both hands away from the telephone base.
Page 9

www.vtechphones.com
5
Installation
Basic operation
DSL lter (for
DSL users)
To single telephone jack (RJ11C) Telephone line cord
If you subscribe to DSL service
If you receive high speed internet through your telephone line (commonly referred to as DSL), and
you are experiencing interference during telephone conversations and/or your caller ID features are
not functioning properly, install a DSL lter to the telephone line between the telephone base and
the telephone wall jack. Contact your DSL provider for a DSL lter.
Installation
Page 10
www.vtechphones.com
6
Telephone settings
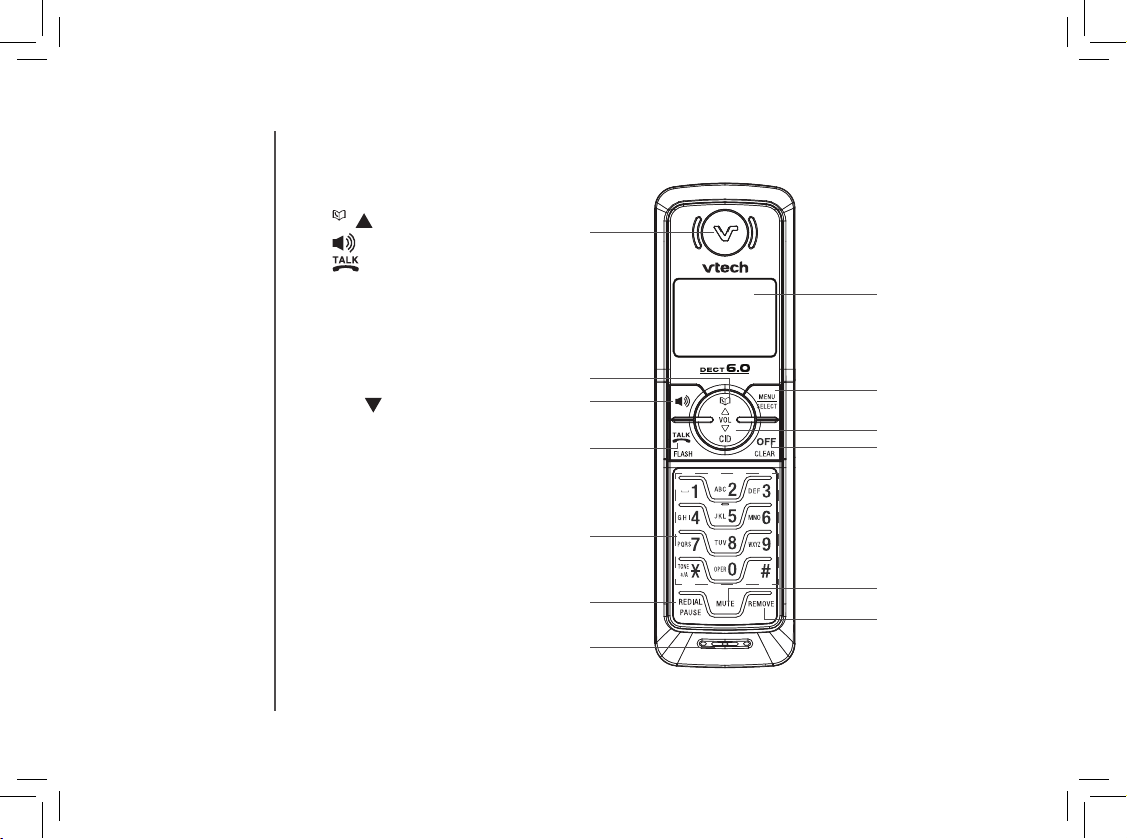
Handset layout
1. Earpiece
2.
/ (directory/volume)
3.
(speakerphone)
4.
/FLASH
5. Dialing keys (0-9, *, #)
6. REDIAL/PAUSE
7. Microphone
8. Handset display
9. MENU/SELECT
10. CID/
(caller ID/volume)
11. OFF/CLEAR
12. MUTE
13. REMOVE
1
2
4
5
3
7
8
10
9
11
12
13
6
Page 11
www.vtechphones.com
7
Basic operation
Telephone settings
Telephone settings
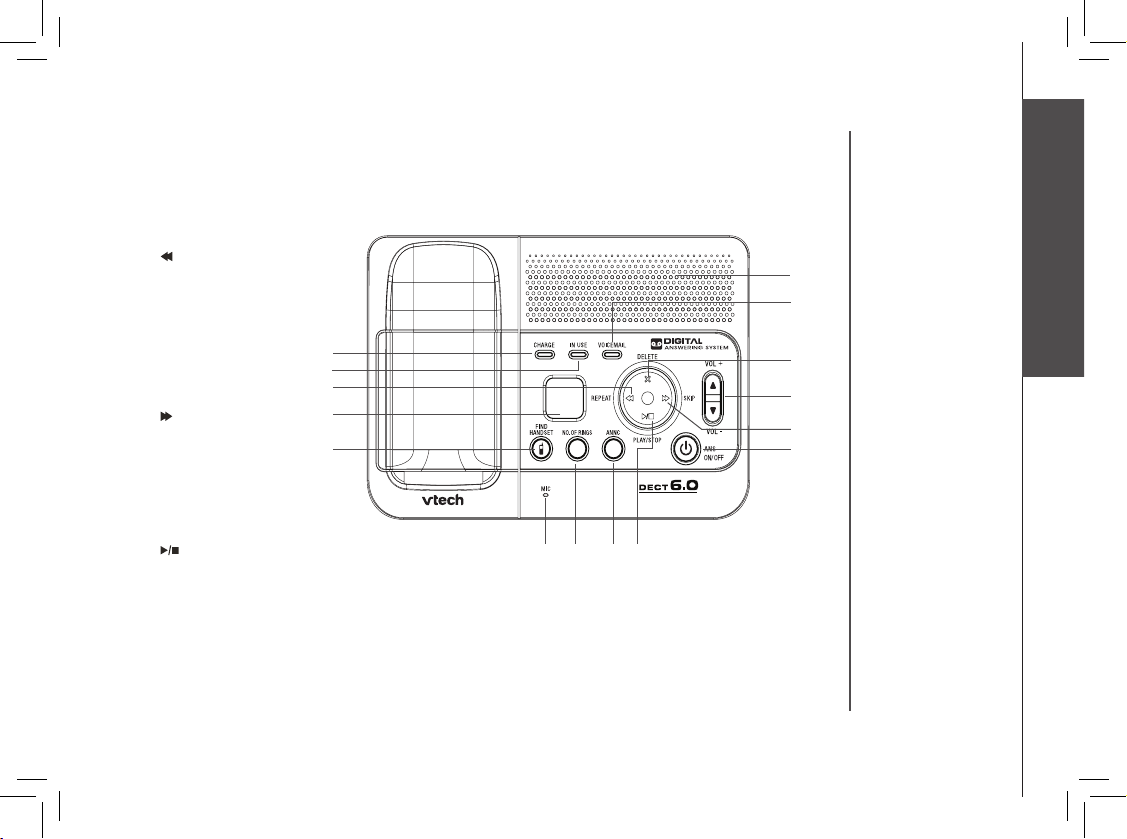
Telephone base layout
1. CHARGE light
2. IN USE light
3.
/REPEAT
4. Message window
5. FIND HANDSET
6. Speaker
7. VOICEMAIL light
8. X/DELETE
9. VOLUME +/-
10.
/SKIP
11. ANS ON/OFF
(answer on/off)
12. Microphone
13. NO. OF RINGS
14. ANNC (announcement)
15.
/PLAY/STOP
9
4
3
7
14
1
2
6
8
5
12
13
10
11
15
Page 12
www.vtechphones.com
8
Telephone settings
Date and time
• Press MENU/SELECT to display menu when in idle mode.
• Press
or to reach DATE/TIME. Press MENU/SELECT.
• Use the keypad to set the year. Press
MENU/SELECT.
• Use the keypad to set the date. Press
MENU/SELECT.
•
Use the keypad to set the time. Press or to select a.m. or p.m.
Press MENU/SELECT.
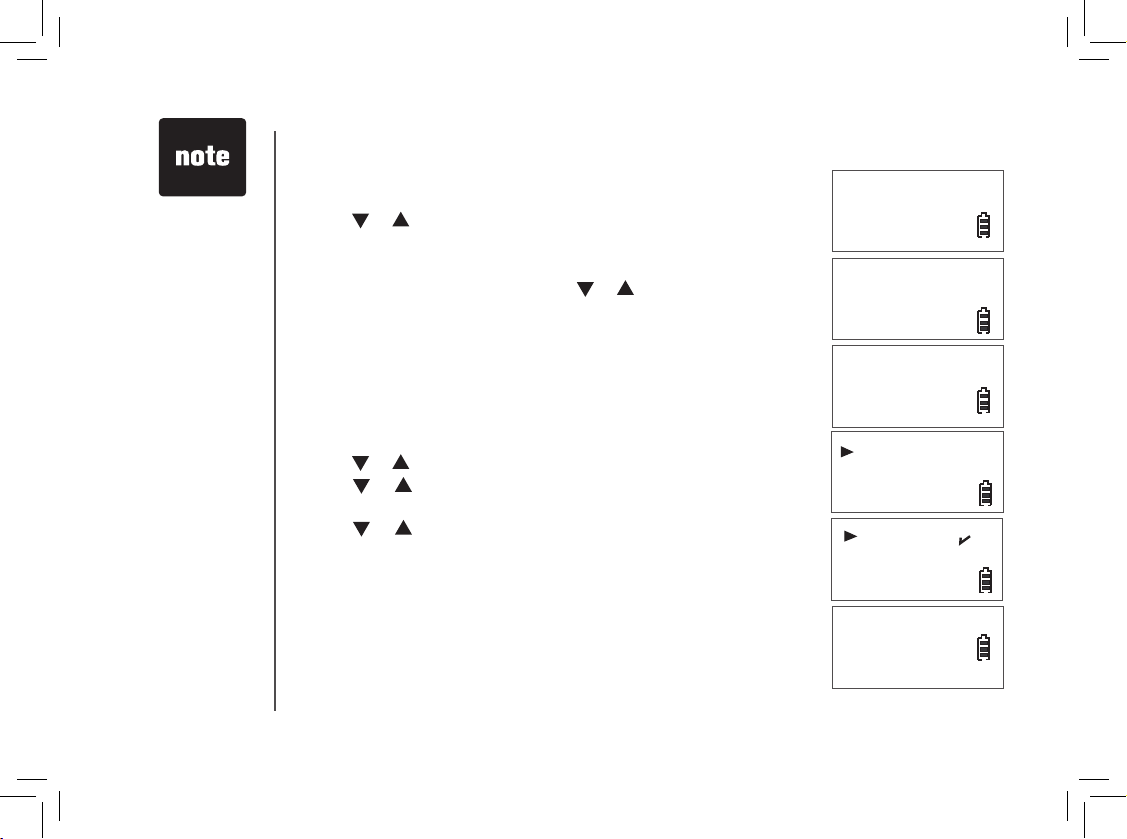
• The screen displays STORED
and you’ll hear a conrmation beep
(if KEY TONE is on).
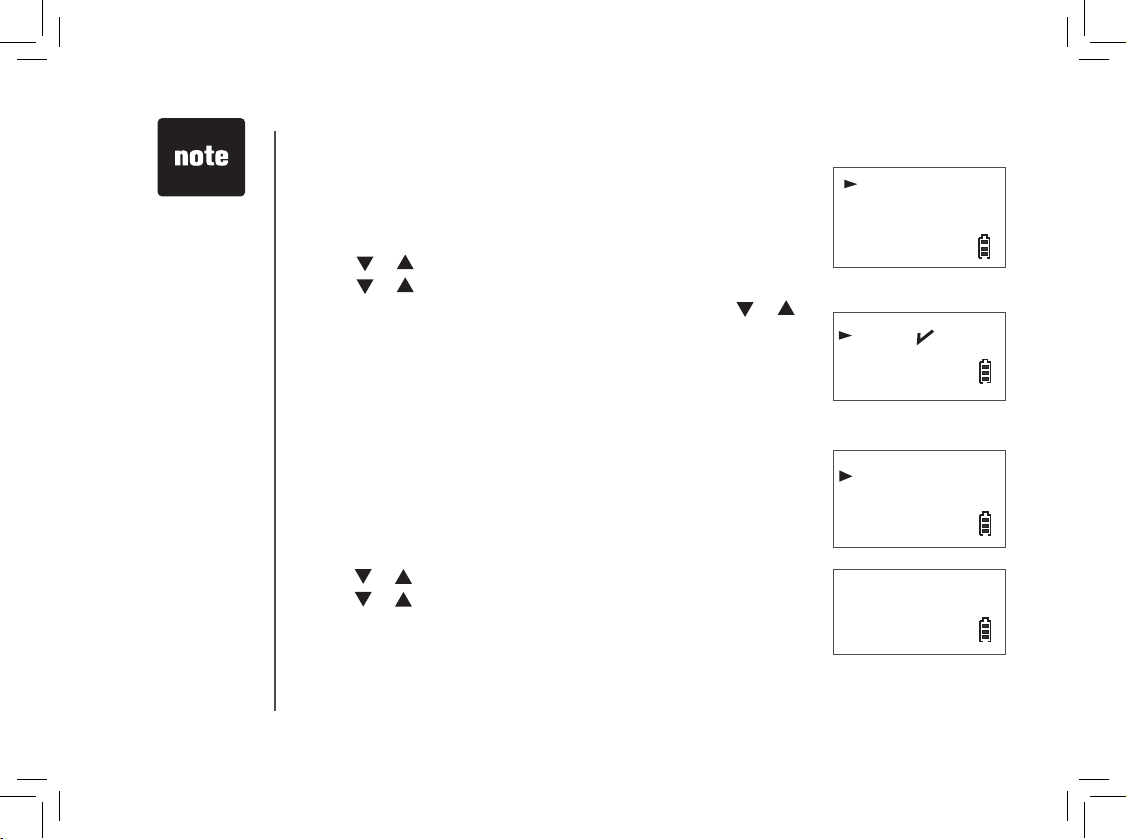
Ring melody
There are ten handset ringer melodies to choose from.
• Press
MENU/SELECT to display menu when in idle mode.
• Press
or to reach SETUP HS. Press MENU/SELECT.
• Press
or to reach RING MELODY. Press MENU/SELECT, a
checkmark is shown next to the current ring melody.
• Press
or to scroll through the choices and a sample of each
ring melody will be played. Press MENU/SELECT.
• The screen displays STORED
and you’ll hear a conrmation beep
(if KEY TONE is on).
Stored
YeAr 20\7
dAte \1/01
tIMe \2:12AM
MelodY 1
MelodY 2
rING MelodY
rING voluMe
When entering
the date or time, if
the digit is single,
a zero must be
entered rst (i.e.
if the time is 6:08,
you must enter
zero, six, zero,
eight).
•
The ring melody
for the telephone
base is set
separately from
the handset ring
melody. See
page 28 to set the
telephone base
melody.
•
Page 13
www.vtechphones.com
9
Basic operation
Telephone settings
The handset will
not ring when the
ringer volume is at
the lowest setting.
A ringer off icon
will be displayed.
While the
telephone is
ringing, you
can temporarily
silence the ringer
by pressing
OFF/CLEAR
or
MUTE. The ringer
off icon
will
be displayed. The
next call will ring
normally.
•
•
Battery low tone
The handset will beep to alert you when the battery level is low. If you
wish to change this setting:
• Press
MENU/SELECT to display the menu when in idle mode.
• Press
or to reach SETUP HS. Press MENU/SELECT.
• Press
or to reach TONES. Press MENU/SELECT.
• Press
or to reach BATTERY LOW. Press MENU/SELECT.
• A checkmark is shown next to the current selection. Press
or
to choose ON or OFF. Press MENU/SELECT.
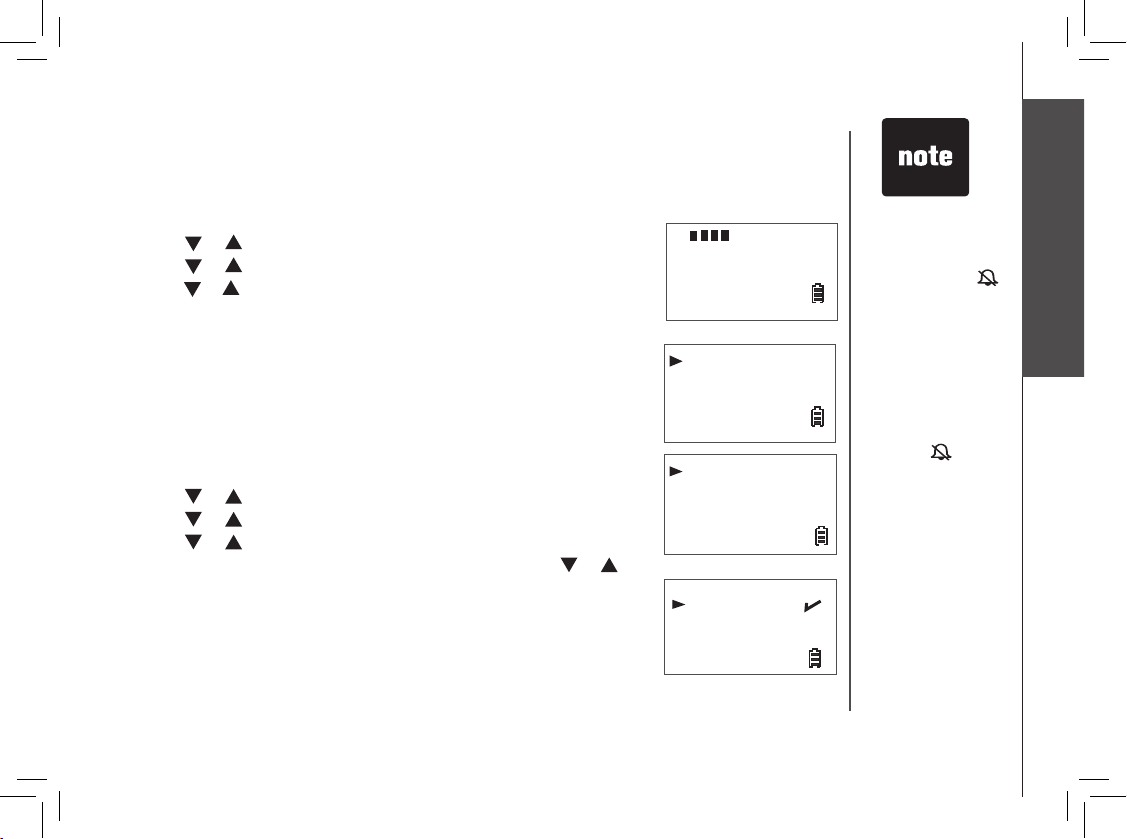
• The screen displays STORED
and you’ll hear a conrmation beep (if
KEY TONE is on).
BAtterY low
out of rANGe
oN
off
Ring volume
The handset ringer volume can be adjusted from ve levels.
• Press
MENU/SELECT to display menu when in idle mode.
• Press
or to reach SETUP HS. Press MENU/SELECT.
• Press
or to reach RING VOLUME. Press MENU/SELECT.
• Press
or to scroll through the choices and a sample of each ring
volume will be played. Press MENU/SELECT to conrm.
• The screen displays STORED
and you’ll hear a conrmation beep (if
KEY TONE is on).
toNeS
HANdSet NAMe
Telephone settings
The volume of
the telephone
base ringer is set
separately from
the handset ringer.
See page 28 to set
the telephone base
ringer volume.
•
Page 14
www.vtechphones.com
10
Out of range tone
The handset will beep during a conversation when it is out of range from
the telephone base. This tone is preset to ON.
• Press
MENU/SELECT to display the menu when in idle mode.
• Press
or to reach SETUP HS. Press MENU/SELECT.
• Press
or to reach TONES. Press MENU/SELECT.
• Press
or to reach OUT OF RANGE. Press MENU/SELECT.
• A checkmark is shown next to the current selection. Press
or
to choose ON or OFF. Press MENU/SELECT.
• The screen displays STORED
and you’ll hear a conrmation beep (if
KEY TONE is on).
Key tone
The handset is preset to beep whenever any button is pressed. If you
wish to change this setting:
• Press
MENU/SELECT to display the menu when in idle mode.
• Press
or to reach SETUP HS. Press MENU/SELECT.
• Press
or to reach TONES. Press MENU/SELECT.
• Press
or to reach KEY BEEPS. Press MENU/SELECT.
• A checkmark is shown next to the current selection. Press
or to
select ON or OFF. Press MENU/SELECT.
• The screen displays STORED
and you’ll hear a conrmation beep (if
KEY TONE is on).
Telephone settings
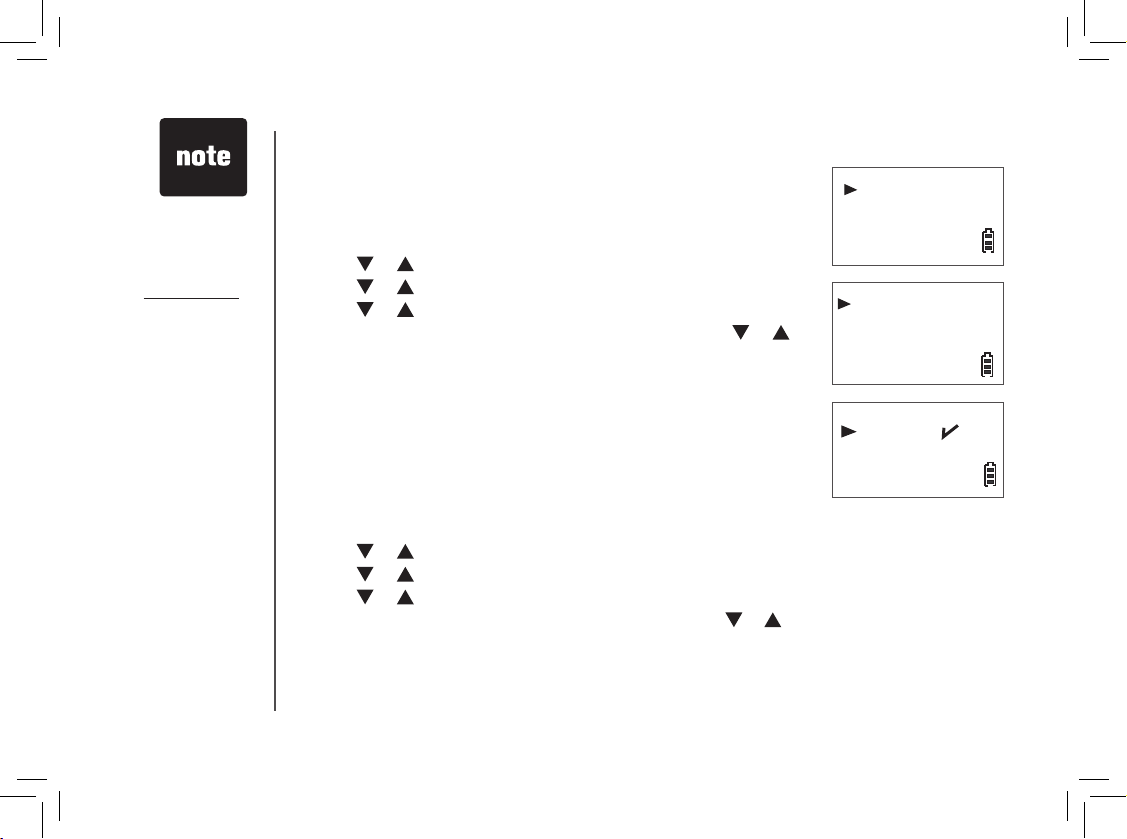
out of rANGe
KeY BeePS
oN
off
toNeS
HANdSet NAMe
Press and hold
OFF/CLEAR
at
anytime to exit the
menu.
•
Press OFF/CLEAR
at anytime to
return to previous
screen.
•
Page 15
www.vtechphones.com
11
Basic operation
Telephone settings
Telephone settings
Edit handset name
• Press MENU/SELECT to display the menu when in idle mode.
• Press
or to reach SETUP HS. Press MENU/SELECT.
• Press
or to reach HANDSET NAME. Press MENU/SELECT.
Press REMOVE to backspace and erase characters.
• Use the keypad to enter characters (see the chart on page 17). Press
MENU/SELECT.
• The screen displays STORED
and you’ll hear a conrmation beep
(if KEY TONE is on).
•
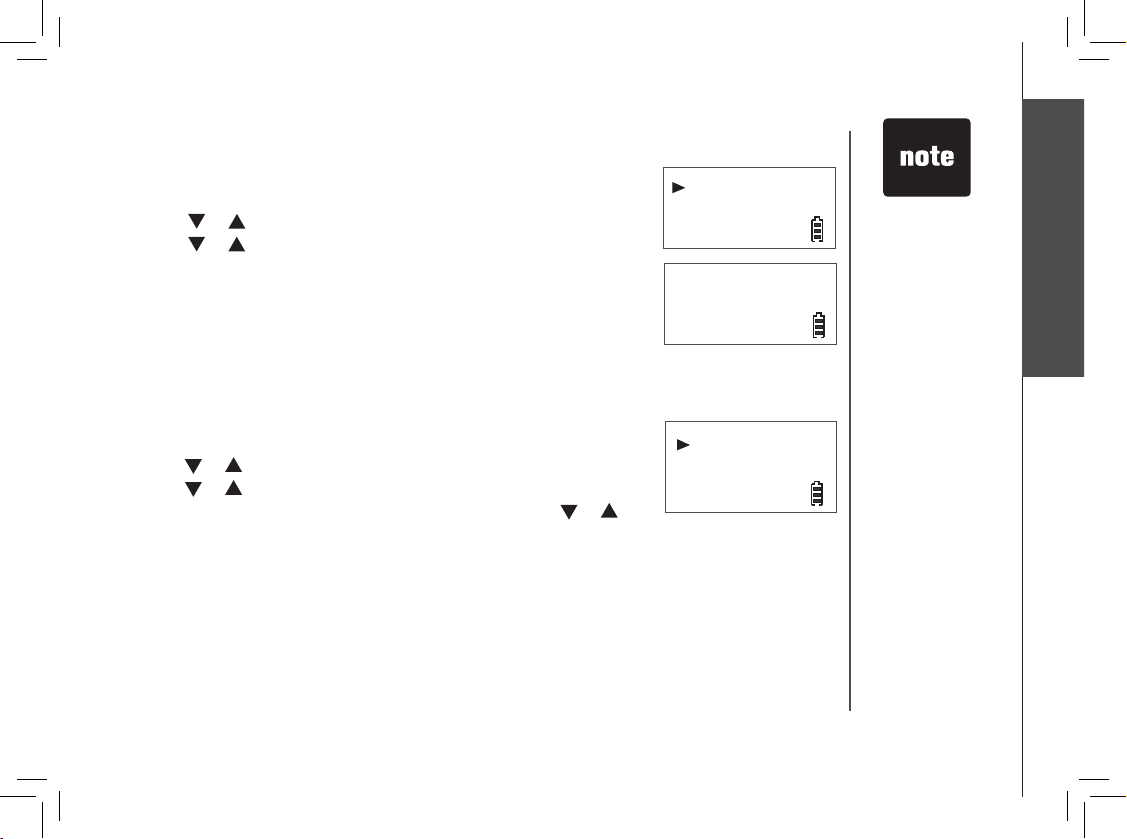
HANdSet NAMe
lANGuAGe
eNter NAMe
HANdSet
\
a
Language
To change the language for all screen displays:
• Press
MENU/SELECT to display menu when in idle mode.
• Press
or to reach SETUP HS. Press MENU/SELECT.
• Press
or to reach LANGUAGE. Press MENU/SELECT.
• A checkmark is shown next to the current selection. Press
or
to choose the desired language. Press MENU/SELECT.
• The screen displays STORED
and you’ll hear a conrmation beep (if
KEY TONE is on).
lANGuAGe
reSet
Your handset
name can be up
to 14 characters.
Only handset
display screens
are affected by
the language
setting.
•
•
Page 16
www.vtechphones.com
12
Clear voicemail
If you subscribe to voicemail services provided by your local telephone
company, NEW VOICEMAIL will appear on the handset display and
the VOICEMAIL light on the telephone base will ash when you have
a new voicemail message. This feature allows you to turn off these
indicators.
• Press
MENU/SELECT to display the menu when in idle mode.
• Press
or to reach SETUP BS. Press MENU/SELECT.
• Press
or to reach CLR VOICEMAIL. Press MENU/SELECT.
• The screen displays INDICATOR OFF?
Press MENU/SELECT.
• The screen displays STORED
and you’ll hear a conrmation beep (if
KEY TONE is on).
INdIcAtor off?
clr voIceMAIl
reSet
Telephone settings
Dial type
The dial type is preset to touch tone. If you have pulse (rotary) service,
the dial type must be changed.
• Press MENU/SELECT to display menu when in idle mode.
• Press
or to reach SETUP BS. Press MENU/SELECT.
• Press
or to reach DIAL TYPE. Press MENU/SELECT.
• A checkmark is shown next to the current selection. Press
or
to choose between TONE and PULSE. Press MENU/SELECT.
• The screen displays STORED
and you’ll hear a conrmation beep (if
KEY TONE is on).
toNe
PulSe
dIAl tYPe
clr voIceMAIl
The clear voicemail
feature only turns
off the displayed
NEW VOICEMAIL
message and
VOICEMAIL light
on the telephone
base. It does not
delete your voicemail
message(s). Use
this feature when the
telephone indicates
there is voicemail
when you have none
or you have accessed
your voicemail from a
remote location (while
away from home). If
there is actually a new
voicemail message,
your local telephone
company will continue
to send a signal
which will cause the
NEW VOICEMAIL
message in the
handset and the
telephone base
VOICEMAIL light to
ash.
•
Page 17

www.vtechphones.com
13
Basic operation
Telephone settings
Telephone settings
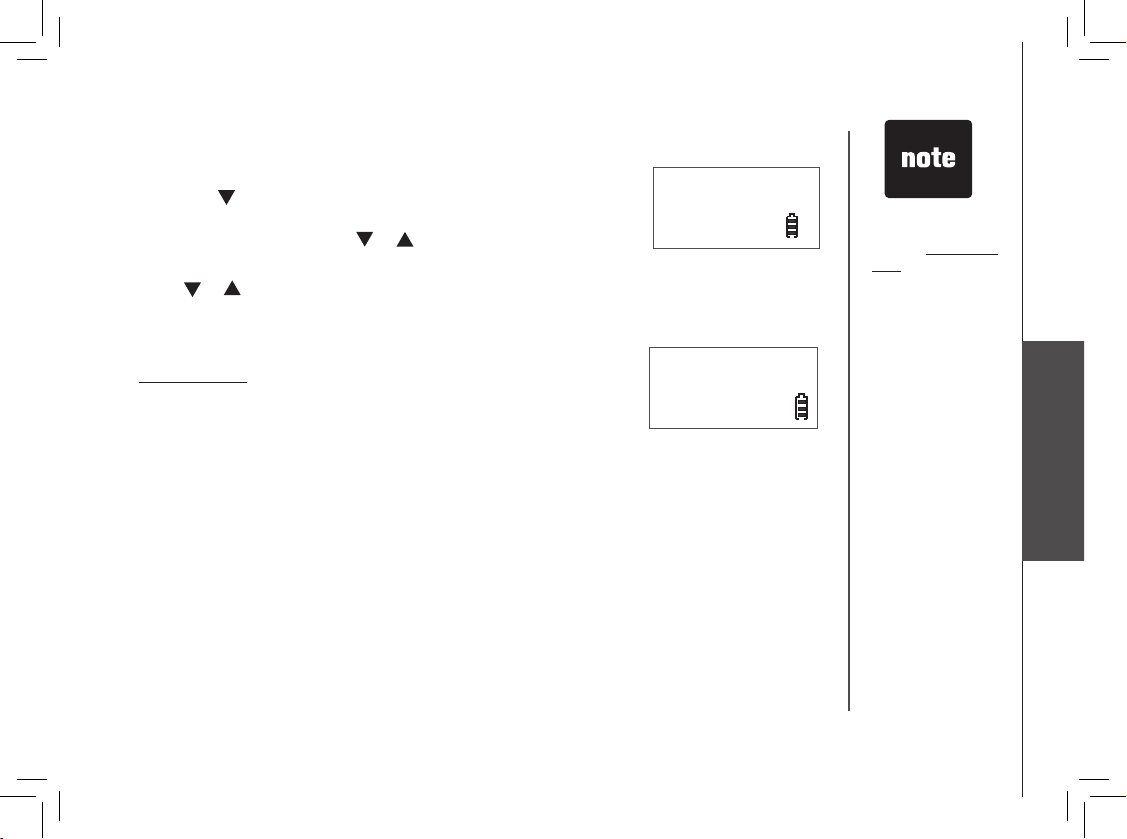
Reset to default settings
The handset and the telephone base can be individually reset to their
default settings by selecting RESET in the SETUP HS or SETUP BS
menus respectively.
• Press
MENU/SELECT to display menu when in idle mode.
• Press
or to reach SETUP HS or SETUP BS. Press
MENU/SELECT.
• Press or to reach RESET. Press MENU/SELECT.
• The screen displays RESET?
Press MENU/SELECT to conrm or
OFF/CLEAR to exit to previous menu.
• If selection is conrmed, the screen displays STORED
and you’ll
hear a conrmation beep (if KEY TONE is on).
reSet
rING MelodY
reSet?
Once the default
settings are
reset, all the
previously saved
settings cannot be
retrieved.
•
Page 18
www.vtechphones.com
14
Basic operation
Options while on calls
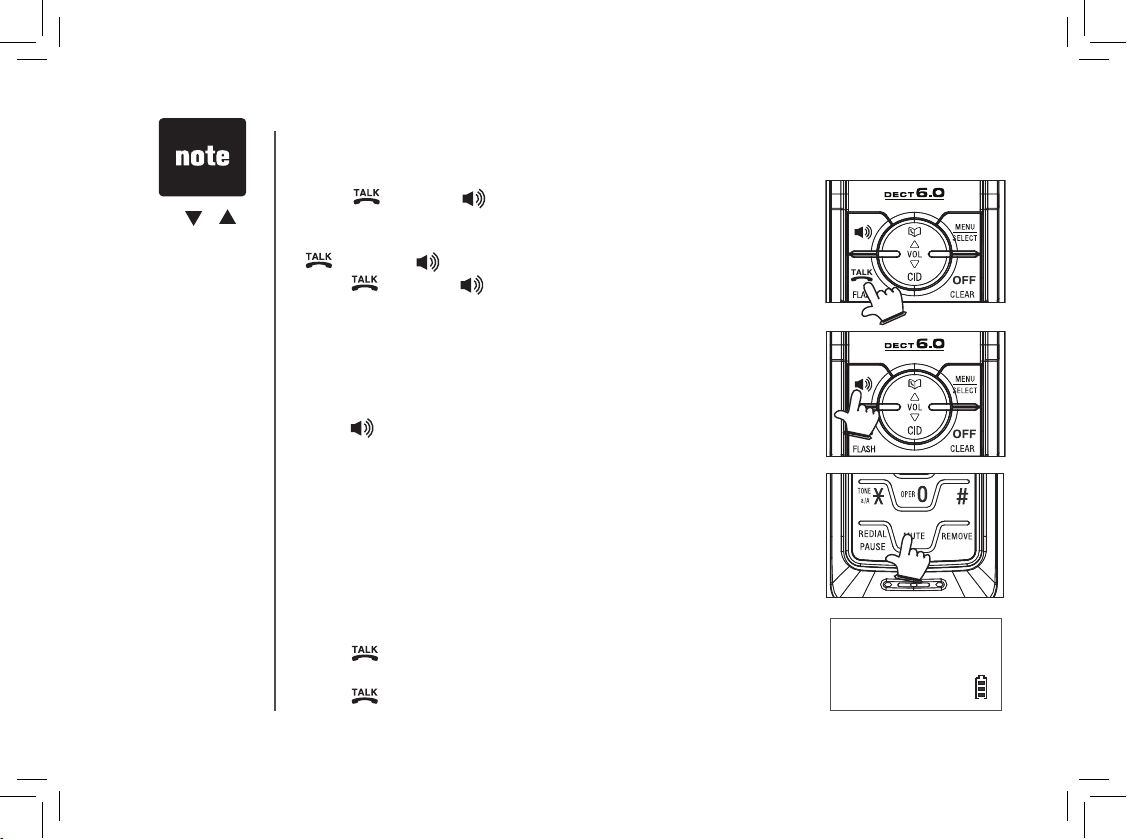
Speakerphone
•
Press to alternate between speakerphone and normal handset use.
Mute
•
Press M UT E on the handset to silence the microp ho ne during a
conversation. You can still hear the caller but the caller cannot hear you.
• The screen displays MUTE.
• Press
MUTE again to resume conversation.
Make, answer and end calls
• Press /FLASH or , then use the keypad to dial a number.
-OR-
•
Dial a number (press REMOVE to make corrections) and then press
/FLASH or .
• Press /FLASH or to answer an incoming call.
• Press OFF/CLEAR or put the handset back in the telephone base to
end a call.
• The call timer will be activated during a call to show call duration.
PHoNe 00:00:10
595-9511
MUTE
Press or to
adjust the listening
volume during a
conversation.
•
Call waiting
If you subscribe to call waiting service and you are on a call when a new call
comes in, you will hear a beep. The caller ID information will be displayed
if you subscribe to caller ID service from your local telephone company.
• Press
/FLASH on the handset to answer the incoming call and put
the current call on hold.
• Press
/FLASH at anytime to alternate between calls.
Page 19

www.vtechphones.com
15
Basic operation
Press and hold
FIND HANDSET
to page the
handset while
listening to
messages.
•
Find handset
• Press FIND HANDSET on the telephone base to locate the handset when
in idle mode. The handset will ring and PAGING will ash on its screen.
•
Press FIND HANDSET again or put the handset back to the telephone
base to stop the paging tone.
Basic operation
PAGING
Page 20

www.vtechphones.com
16
Advanced operation
eMPtY
vtecH
1-595-9511
Directory
The directory can store up to 50 entries. Each entry may consist of a
number up to 24 digits and a name up to 15 characters.
• The screen displays EMPTY if there are no records in the directory.
• The screen displays FULL
if the directory is full.
Review the directory
• Press / to enter the directory.
• Press
or to browse and press OFF/CLEAR to exit.
-OR-
• Press
MENU/SELECT to display menu when in idle mode.
• Press
or to reach DIRECTORY. Press MENU/SELECT.
• Press
or to reach REVIEW. Press MENU/SELECT.
• Press
or to browse and press OFF/CLEAR to exit.
Search the directory
Entries are sorted alphabetically and names beginning with numbers
are listed rst.
An alphabetical search can be done after entering the directory. Enter
the rst letter of the name using the chart on page 17. The rst name
beginning with that letter will be displayed.
For example, press 5 (JKL) once to nd Jenny, twice to nd Kristen, or
three times to nd Linda.
-OR-
You can search the directory by pressing
or on the handset.
revIew
Store
dIrectorY
cAll loG
Page 21

www.vtechphones.com
17
Advanced operation
Advanced operation
Character of chart
Use the keypad and the chart below to enter a name (up to 15 characters). Each press of a particular
key causes characters to be displayed in the following order:
• Press REMOVE to backspace and erase a single character.
•
Press and hold REMOVE to delete the entire entry.
•
Press and hold REDIAL/PAUSE to insert a dialing pause (P will be displayed) when entering a
telephone number.
Press
*
repeatedly
to alternate
between upper
and lower case
when entering
characters.
•
Number key
Characters by number of key presses
1 2 3 4 5 6 7 8 9
1 space 1 * ? ! / ( )
2 A B C 2
3 D E F 3
4 G H I 4
5 J K L 5
6 M N O 6
7 P Q R S 7
8 T U V 8
9 W X Y Z 9
0 0
* U ppercase/lowercase
# #
,
, - . &
Page 22

www.vtechphones.com
18
Advanced operation
Store a directory entry
• Press MENU/SELECT twice to enter the DIRECTORY.
• Press
or to reach STORE and then press MENU/SELECT.
• The screen displays ENTER NUMBER
. Use the keypad to enter the
number and then press MENU/SELECT.
• The screen displays ENTER
NAME. Use the keypad to enter the
characters and then press MENU/SELECT.
• The screen displays STORED
and you’ll hear a conrmation beep (if
KEY TONE is on).
Dial a directory entry
• Press / to enter the directory.
• Press or to scroll to the desired entry, or use the alphabetical
search to nd it.
• Press
/FLASH or to dial.
-OR-
• Press
MENU/SELECT to display menu when in idle mode.
• Press
or to reach DIRECTORY. Press MENU/SELECT.
• Press
or to reach REVIEW. Press MENU/SELECT.
• Press
or to scroll to the desired entry, or use the alphabetical
search to nd it.
• Press
/FLASH or to dial.
eNter NuMBer
eNter NAMe
Store
revIew
Stored
a
Page 23

www.vtechphones.com
19
Advanced operation
Advanced operation
Delete from the directory
• Press / or MENU/SELECT three times to enter the directory.
• Press
or to scroll to the desired entry and then press MENU/
SELECT.
To delete one entry
• Press REMOVE
.
• The screen displays DELETED
and you’ll hear a conrmation beep (if
KEY TONE is on).
To delete all entries
•
Press and hold REMOVE.
• The screen displays DELETE ALL?
Press MENU/SELECT.
• The screen displays DELETED
and you’ll hear a conrmation beep (if
KEY TONE is on).
Edit a directory entry
• Press / or MENU/SELECT three times to enter the directory.
• Press or to scroll to the desired entry or use the alphabetical
search to nd the number. Press MENU/SELECT.
•
The screen displays ENTER NUMBER. Use REMOVE and the keypad
to edit the number and press MENU/SELECT.
• The screen displays ENTER NAME. Use REMOVE and the keypad to
edit the name and then press MENU/SELECT.
• The screen displays STORED
and you’ll hear a conrmation beep (if
KEY TONE is on).
delete All?
deleted
eNter NuMBer
eNter NAMe
Stored
a
Press OFF/CLEAR
to return to previous
screen. Press and
hold OFF/CLEAR
to exit the menu
if you do not want
to delete all the
entries.
•
Page 24

www.vtechphones.com
20
About caller ID
If you subscribe to caller ID service from your local telephone company, this feature displays the
name and telephone number of the caller before answering a call (even when you are on another
call). The caller ID features of this product will work only if you subscribe to caller ID service and
both you and the caller are in areas offering caller ID ser vice, and if both telephone companies use
compatible equipment.
Contact your local telephone company if:
•
you have both caller ID and call waiting, but as separate services (you may need combined service),
• you have only caller ID service, or only call waiting service,
• you do not subscribe to caller ID or call waiting services but wish to try them.
There may be fees for these services, and they may not be available in all areas.
This product can be used without subscribing to either caller ID or combined caller ID with call waiting
service, although the caller ID features of this product will not function.
Advanced operation
Page 25

www.vtechphones.com
21
Advanced operation
Advanced operation
Call log
The information of the caller will be displayed if you subscribe to caller
ID service from your local telephone company.
• The call log can store up to 50 entries.
• Entries are displayed in chronological order with the most recent entry
rst.
• When the call log is full, the oldest entry will be deleted to make room
for new incoming call information.
• The screen displays EMPTY if there are no records in the call log.
• The screen displays NEW if there are new call log entries (missed and
unread calls).
• Duplicate or anonymous calls (no caller ID information) will be stored
in the call log.
Review the call log
• Press CID/ to enter the call log.
-OR-
Press MENU/SELECT. Press or to select CALL LOG.
• Press
MENU/SELECT and then pres s or to brow se th e
entries.
• The name (if available), number, date and time of the incoming call
are displayed on the screen.
•
Due to regional
service
differences,
the caller ID
information
may not be
available for
every incoming
call. In addition,
the callers may
intentionally
block their name
and/or telephone
number.
•
The time is
automatically set
and updated with
incoming caller ID
information if you
subscribe to this
service.
•
JoHNNY fu
2-345-6789
New
05:27PM 11/23
eMPtY
Page 26

www.vtechphones.com
22
Advanced operation
Store a call log number
• Press CID/ to enter the call log.
-OR-
Press MENU/SELECT. Press or to select CALL LOG.
• Press
MENU/SELECT and then press or to scroll to the desired
entry
.
• Press MENU/SELECT and the screen displays ENTER NAME.
• Use the keypad to enter the name and then press
MENU/SELECT.
• The screen displays STORED
and you’ll hear a conrmation beep (if
KEY TONE is on).
•
While reviewing
the call log, press
# repeatedly to
display the other
dialing options.
The available
options are: (1
+ area code +
number, area code
+ number, 1 +
number, number
only). The various
dialing options are:
•
eNter NAMe
Stored
595-9511
1-595-9511
800-595-9511
1-800-595-9511
Dial a call log number
• Press CID/ to enter the call log.
-OR-
Press MENU/SELECT. Press or to select CALL LOG.
• Press
MENU/SELECT and then press or to scroll to the desired
entry.
• Press
/FLASH or to dial.
•
a
Page 27
www.vtechphones.com
23
Advanced operation
Advanced operation
Delete from the call log
• Press CID/ to enter the call log.
-ORPress MENU/SELECT. Press or to select CALL LOG.
To delete one entry
•
Press or to scroll to the desired entry and then press REMOVE
.
• The screen displays DELETED
and you’ll hear a conrmation beep (if
KEY TONE is on).
To delete all entries
•
Press and hold REMOVE when in the CALL LOG.
• The screen displays DELETE ALL?
Press MENU/SELECT.
• The screen displays DELETED
and you’ll hear a conrmation beep (if
KEY TONE is on).
•
deleted
delete All?
Press OFF/CLEAR
to return to previous
screen. Press and
hold OFF/CLEAR
to exit the menu
if you do not want
to delete all the
entries.
•
Page 28

www.vtechphones.com
24
Advanced operation
Redial
The redial list can store up to 10 of the most recently dialed numbers.
• When there are already 10 entries in the redial list, the oldest entry
will be deleted to make room for newly dialed numbers.
• The screen displays EMPTY if there is no record on the list.
Review redial
• Press REDIAL/PAUSE to enter the redial list.
• Press
or to browse the entries.
Store a redial number to the directory
• Press REDIAL/PAUSE to enter the redial list.
• Press
or to scroll to the desired entry. Press MENU/SELECT.
• The screen displays ENTER NAME
.
• Use the keypad to enter the name and then press
MENU/SELECT.
• The screen displays STORED
and you’ll hear a conrmation beep (if
KEY TONE is on).
Page 29

www.vtechphones.com
25
Advanced operation
Dial from redial
• Press REDIAL/PAUSE to enter the redial list.
• Press
or to scroll to the desired entry.
• Press
/FLASH or to dial.
Delete from redial
• Press REDIAL/PAUSE to enter the redial list.
To delete one entry
•
Press or to scroll to the desired entry and then press REMOVE.
• The screen displays DELETED and you’ll hear a conrmation beep
(if KEY TONE is on).
To delete all entries
•
Press and hold REMOVE.
• The screen displays DELETE ALL?
Press MENU/SELECT.
• The screen displays DELETED
and you’ll hear a conrmation beep
(if KEY TONE is on).
delete All?
deleted
Advanced operation
Press OFF/CLEAR
to return to
previous screen.
Press and hold
OFF/CLEAR to exit
the menu if you do
not want to delete
all the entries.
•
Page 30

www.vtechphones.com
26
Answering system operation
Message capacity
The answering system can record up to 99 messages, depending on the length of each message.
The total maximum recording time is 15 minutes. Message will remain available for replay until they
are deleted.
X/DELETE
Press to de lete curren t message playing.
When idl e,
press an d hold to dele te all
messag es (page 31).
/PLAY/STOP
Press to play or s top playing
messag es (page 31).
/REPE AT
Press to repeat a message
(page 31).
Message window
Shows the status and
number of messages
(page 33).
ANNC
Press to play or record the outgoing
announ cement (page 30).
ANS ON /OFF
Press to turn on or off th e
answeri ng system (pag e 27).
/ /VOLUM E+/-
Pr es s to ad jus t vo lum e
during p layback (page 31).
/SKIP
Press to sk ip to next
messag e (page 31).
Page 31

www.vtechphones.com
27
Advanced operation
Answering system operation
Activate the answering system
The ANS ON/OFF must be on (the button light will be on) in order for the
machine to answer calls and record messages. If the button light is off
then calls will not be answered.
To turn on/off the answering system, press ANS ON/OFF
to choose
between on and off.
Use the volume control button on the telephone base to adjust the volume
at anytime during the setup procedure.
When ANS ON/OFF
is turned off, your
telephone will ring
10 times before
answering and
prompting for the
remote access
code.
•
Set number of rings
This feature allows you to select how many times the telephone rings before the answering system
answers. You can choose from two, four, six, eight rings or toll saver. When toll saver is activated, the
answering system answers after two rings when there are new messages, and after six rings when
there are no new messages.
• Press NO. OF RINGS when in idle mode and the system announces the current setting.
• The system announces
“To change the setting, press number of rings again.”
• Press NO. OF RINGS repeatedly until the desired setting is announced. If you do not press the
ANNC
button for about two seconds, the setting will be saved and there is a conrmation beep.
Set telephone base date and time
The answering system announces the day and time the message was received before playing each
message. Set the date and time before using the answering system so all messages are dated correctly.
Setting of handset date and time will simultaneously update the telephone base date and time.
The system will announce
“Please set the handset clock” before message playback if you do not set
the date and time before using this system.
Page 32

www.vtechphones.com
28
Answering system operation
BS MelodY
BS rINGer vol
MelodY 1
MelodY 2
SetuP BS
dAte/tIMe
Set telephone base melody
There are six ring melodies to choose from.
• Press
MENU/SELECT on handset to display menu when in idle
mode.
• Press
or to reach SETUP BS. Press MENU/SELECT.
• Press
or to reach BS MELODY. Press MENU/SELECT and a
checkmark is shown next to the current melody.
• Press
or to scroll through the choices and a sample of each
melody will be played at the telephone base.
• Press
MENU/SELECT to conrm selection.
• The screen displays STORED
and you’ll hear a conrmation beep
(if KEY TONE is on).
Set telephone base ringer volume
You can adjust the telephone base ringer volume to one of eight
different levels, or turn the telephone base ringer off.
• Press
MENU/SELECT on the handset in idle mode.
• Press
or to reach SETUP BS. Press MENU/SELECT.
• Press
or to reach BS RINGER VOL. Press MENU/SELECT.
• Press
or to scroll through the choices and a sample of each
ring volume will be played at the telephone base.
• Press
MENU/SELECT to conrm selection.
The screen displays STORED
and you’ll hear a conrmation beep
(if KEY TONE is on).
•
The ring melody
for the handset
is set separately
from the telephone
base ring melody.
See page 8 to set
the handset ringer
melody.
The volume of the
handset ringer
is set separately
from the telephone
base ringer. See
page 9 to change
the handset ringer
volume.
•
•
Page 33

www.vtechphones.com
29
Advanced operation
Answering system operation
Personal identication number (PIN)
A four-digit security code is required for remote access to the answering
system from any touch tone telephone. The factory default code is 0000.
To change the PIN on your telephone:
• Press
MENU/SELECT on the handset in idle mode.
• Press or to reach SETUP BS. Press MENU/SELECT.
•
Press or to reach CHANGE ITAD PIN. Press MENU/SELECT.
• The screen displays ENTER PIN.
• Enter the PIN (default
0000) and press MENU/SELECT.
• The screen displays NEW PIN
.
• Enter the desired PIN and press
MENU/SELECT.
• The screen displays REPEAT PIN
.
• Enter the new PIN again and press
MENU/SELECT.
• The screen displays STORED
and you’ll hear a conrmation beep
(if KEY TONE is on).
If a wrong PIN is entered, the screen displays WRONG PIN
, retry
after two seconds.
•
cHANGe ItAd PIN
dIAl tYPe
eNter PIN
eNter PIN
****
New PIN
rePeAt PIN
Page 34

www.vtechphones.com
30
Answering system operation
Outgoing announcements
An outgoing announcement is the message callers hear when calls are
answered by the answering system.
The telephone is preset with an announcement that answers calls with
“Hello, please leave a message after the tone.” You can use this default
announcement, or replace it with your own.
The
announcement
can be up to 90
seconds
in length.
When your
own recorded
announcement
is deleted, calls
will be answered
with the preset
announcement.
•
•
Play the announcement
•
Press ANNC in idle mode. The system announces “Announcement, press
PLAY or press ANNC again to record a new announcement.”
• Press / PLAY/STOP and the announcement will be played.
Record your own announcement
•
Press ANNC in idle mode, and the system announces “Announcement,
press
PLAY
or press
ANNC
again to record a new announcement.”
• Press ANNC again and the system announces “Record after the tone,
press stoP when you are done.”
• After the tone, speak towards the microphone at the bottom front of the
telephone base from about nine inches away.
• Press / PLAY/STOP when nished.
•
The answering system will automatically playback the newly recorded
announcement. Press /PLAY/STOP to stop the playback at any time.
Delete your announcement
•
Press ANNC in idle mode, and the system announces “Announcement,
press
PLAY
or press
ANNC
again to record a new announcement.”
• Press /PLAY/STOP and then press DELETE when the system
is playing the outg oing announcement. The system announc es
“Announcement deleted.”
Page 35

www.vtechphones.com
31
Advanced operation
Answering system operation
Messages can
only be deleted
after they are
played.
If volume on
the telephone
base is set to
0,
call screening
is off, i.e. you
cannot hear the
message left by
the caller during
the recording
process.
•
•
Message playback
• Press /PLAY/STOP to listen to messages. Press /PLAY/STOP
again to stop playback.
• If there are new messages, the system will announce the number of
new and old messages then play the new messages (oldest rst). If
there are no new messages, the system will announce the number of
old messages and playback all messages (oldest rst).
• Before each message is played, the day and time it was received will
be announced.
Options during playback
• Press / /VOLUME to adjust the speaker volume.
• Press
/SKIP to skip to the next message.
• Press
/REPEAT to repeat the message currently playing.
• Press
X/DELETE to delete the current message. The system will
advance to the next message.
Delete all messages
• Press and hold X/DELETE when in idle mode.
• The system announces “
All old messages deleted.”
Page 36

www.vtechphones.com
32
Answering system operation
During remote
access, if no key
is pressed within
eight seconds,
the remote
access call is
automatically
disconnected.
•
Remote access
You can access many features of your answering system remotely from any touch tone telephone.
A four-digit security code is required to access the system and the factory default code is 0000; see
page 29 if you wish to change it. To enter remote access:
• Dial your telephone number from any touch tone telephone.
• When the system answers and plays the outgoing announcement, press
*
to prompt for PIN. The
system announces “Please enter your remote access code.”
• After entering the remote access code, the system will play any new messages and then play the
menu of commands.
0 To end the call
1 To play all messages
2 To play new messages
3 To delete the message
33 To delete all old messages
4 To repeat the previous message
5 To stop playing the message
6 To skip the message
7 To turn the answering system on
8 To turn the answering system off
9 To repeat help
Remote access commands:
Page 37

www.vtechphones.com
33
Advanced operation
Answering system operation
The message counter usually displays the total number of incoming messages.
See the list below for explanations of other displays in this window.
Message window displays
0 No messages.
0 (ashing) The clock needs to be set.
1-99 Total number of old message(s) recorded.
1-99 (ashing) Total number of message(s) recorded, at least one is new.
1-99 & F (alternating) Memory is full with total number of messages recorded.
1-90 (counting) Elapsed time while recording an announcement.
1-99 Current message number during message playback.
0-8 Current volume level while adjusting.
02, 04, 06, 08, tS Current number of rings while setting.
-- System is answering a call.
-- (ashing) System is being setup or initialized, or being accessed remotely.
Page 38

www.vtechphones.com
34
Handset and telephone base indicators
Handset icons
Telephone base lights
Handset light
• Ringer off.
(Battery indicator)
• Cycles (low, medium, and full) when handset battery is charging.
• On when the handset speakerphone is in use.
IN USE • Flashes when there is an incoming call.
• On when the handset is in use.
VOICEMAIL • Flashes when there is a new network message (a subscription service
from your local telephone company).
CHARGE • On when the handset is in the telephone base.
ANS ON/OFF • On when the answering system is on.
Page 39

www.vtechphones.com
35
Appendix
Handset display screen messages
Display: When:
cAll
There is an incoming call.
coNNectING...
The cordless handset is searching for the telephone base.
eMPtY
There are no entries in the call log, director y, or redial list.
eNded
You have just ended a call.
full
The directory is full.
Mute
The microphone is muted temporarily during a conversation.
New
There are un-reviewed calls in the call log.
New voIceMAIl
There is new voicemail message.
Not AvAIlABle
Access is denied when there is no line or the handset is out of range
from the telephone base.
No lINe
There is no telephone line connected.
Page 40

www.vtechphones.com
36
Handset display screen messages
Display: When:
PAGING
The handset locator has been acti vate d or the handset is being
paged.
PHoNe
The handset is in use.
wArNING
cHecK BAtterY!
The battery is not installed or not installed properly in the handset.
-OR-
The battery needs to be replaced.
-OR-
An incorrect battery has been installed by mistake. Use only the
supplied VTech battery, or equivalent.
Display: When:
PrIvAte NAMe
The caller is blocking name information.
PrIvAte NuMBer
The caller is blocking telephone number information.
PrIvAte cAller
The caller is blocking name and number information.
uNKNowN NAMe
This caller’s name is unavailable.
uNKNowN NuMBer
This caller’s number is unavailable.
uNKNowN cAller
No call information is available about this caller.
loNG dIStANce
or
l
(before caller’s number)
This is a long distance call.
Call log display screen messages
Page 41

www.vtechphones.com
37
Appendix
Battery
After the battery is fully charged for 16 hours, you can expect the following performance:
Operation Operating time
While in use (talking)
10 hours
While not in use (standby*)
100 hours
*Hands et is off the telephone b ase but not in u se.
The battery needs charging when:
• A new batter y is installed in the handset.
• Battery indicator on screen is empty.
CAUTION:
1. Use only the supplied battery (part number 89-1326-00-00) or equivalent. To order a replacement, visit our website at
www.vtechphones.com or call 1 (800) 595-9511. In Canada go to visit www.vtechcanada.com or dial 1 (800) 267-7377.
2. Do not dispose of the battery in a re. Check with local waste management codes for special disposal instructions.
3. Do not open or mutilate the battery(ies). Released electrolyte is corrosive and may cause burns or injury to the eyes or
skin. The electrolyte may be toxic if swallowed.
4. Exercise care in handling batteries in order not to create a short circuit by letting them come into contact with conductive
materials such as rings, bracelets, and keys. The battery and/or conductor may overheat and cause burns.
5. Charge the battery(ies) provided with or identied for use with this product only in accordance with the instructions and
limitations specied in this manual.
WARNING:
TO PREVENT FIRE OR SHOCK HAZARD, DO NOT EXPOSE THIS PRODUCT TO WATER OR ANY TYPE OF MOISTURE.
Page 42

www.vtechphones.com
38
Important safety instructions
When usi ng your teleph one equipm ent, basic s afety preca utions sho uld always be fol lowed:
1. Read and underst and all instr uctions .
2. Follow all warning s and instru ctions mar ked on the prod uct.
3. Unplug this prod uct from the w all outlet be fore cleani ng. Do not use li quid or aeros ol cleaner s. Use a damp cl oth for clean ing.
4. Do not use this prod uct near water (f or example, nea r a bathtub, kitc hen sink, or s wimming po ol).
5. Do not place this pr oduct on an un stable sur face such as a tabl e, shelf or stan d. This prod uct may fall, c ausing seri ous damage.
6. Slots and o penings in the back or bot tom of the tel ephone b ase and handset are provide d for ven tilation. To protect them fr om overhe ating, t hese ope nings m ust not be
blocke d by placing the prod uct on a soft sur face such as a bed, sof a or rug. This produ ct should never be pl aced near or over a radiat or or heat register. This pr oduct shou ld
not be plac ed in an area wh ere proper ven tilation is n ot provided .
7. This product shoul d be operated only fro m the type of power sour ce indicated on th e marking label . If you are not sure of the type of power supp ly in your home, consul t your
dealer or l ocal power c ompany.
8. Do not allow anyth ing to rest on th e power cord. D o not install t his produc t where the co rd may be walked o n.
9. Never push objects of any kind into this produc t through slots in the teleph one base or handset as they may touch danger ous voltage point s or create a short circ uit that could
result in a r isk of re or ele ctric sho ck. Never spi ll liquid of an y kind on the pr oduct.
10.
To reduce the risk of electr ic shock, do not disas semble this pro duct, but take it to an authorize d service faci lity. Opening or remov ing parts of the teleph one base or handset other
than spe cied acc ess doors m ay expose you to da ngerous vol tages or othe r risks. Inc orrect rea ssemblin g can cause el ectric sho ck when the p roduct is su bsequent ly used.
11. D o not overload w all outlets a nd extensio n cords as th is can result i n the risk of r e or electri c shock.
12. U nplug this p roduct fro m the wall outl et and refer ser vicing to an autho rized serv ice facili ty under th e following c ondition s:
A. When the power sup ply cord or pl ug is damaged o r frayed.
B. If liquid has been s pilled ont o the produc t.
C. I f the produc t has been exp osed to rain or w ater.
D. I f the produc t does not op erate normal ly by followi ng the operat ing instru ctions. Adj ust only tho se control s that are covere d by the operat ion instru ctions, as i mproper
adjustment of ot her control s may result in d amage and of ten requires ex tensive work by an aut horized tec hnician to re store the pro duct to norm al operatio n.
E. If the product ha s been dropp ed and the tel ephone bas e and/or hand set has been da maged.
F. If the produ ct exhibits a d istinct ch ange in per formance.
13. The power unit is intend ed to be correct ly oriente d in a ver tical o r oor mo unt posit ion. The prongs ar e not desi gned to h old the p lug in pl ace if it is plugg ed into a ceiling,
under-th e-table o r cabinet out let.
14. Avo id using a tel ephone (other t han cordle ss) during an el ectrica l storm. Ther e is a remote ris k of electri c shock from l ightning .
15. D o not use the tel ephone to re port a gas le ak in the vici nity of the l eak.
16. O nly put the ha ndset of your te lephone nex t to your ear whe n it is in normal t alk mode.
CAUTION: Use o nly the power ad apter provi ded with thi s product . To purchase, visi t our website at w ww.vtechph ones.com or c all 1 (800) 595 -9511. In Can ada go to
www.vtec hcanada .com or dial 1 (80 0) 267-7377.
SAVE THESE INSTRUCTIONS
Page 43

www.vtechphones.com
39
Appendix
Troubleshooting
Problem Suggestion
My telephone does not
work at all.
• Make sure the battery is installed and charged correctly (page 2). For optimum daily
performance, return the cordless handset to the telephone base after use.
• Make sure the power adapter is securely plugged into an outlet not controlled by a wall
switch.
•
Make sure the telephone line cord is plugged rmly into the telephone base and the wall jack.
• Unplug the unit’s electrical power. Wait for approximately 15 seconds, then plug it back in.
Allow up to one minute for the cordless handset and telephone base to synchronize.
• Charge the battery in the cordless handset for at least 16 hours.
• Remove and re-insert the battery. If that still does not work, it may be necessary to purchase
a new battery.
• Disconnect the telephone base from the jack and plug in a working telephone. If this telephone
does not work, the problem is probably in the wiring or the local ser vice. Call the local telephone
company.
LOW BATTERY is displayed on screen.
• Place the handset in the telephone base for recharging.
• Remove and re-install the battery and use it normally until fully discharged, then recharge the
handset on the telephone base for 16 hours.
• If the above measures do not correct the problem, the batter y may need to be replaced.
If you have difculty with your telephone, please try the suggestions below. For Customer Service, visit our website at www.
vtechphones.com, or call 1 (800) 595-9511; in Canada go to www.vtechcanada.com or dial 1 (800) 267-7377.
Page 44

www.vtechphones.com
40
Problem Suggestion
The battery does not
charge in the handset
or the handset battery
does not accept
charge.
• Make sure the handset is placed in the telephone base correctly. The CHARGE light on the
telephone base should be on.
• Remove the battery from the handset and then re-install it in the handset. Put the handset
back to the telephone base and charge for 16 hours.
• If the cordless handset is in the telephone base but the CHARGE light is not on, see
The
CHARGE light is off in this section.
• It may be necessary to purchase a new battery. Please see the Battery section of this user’s
manual (page 37).
• The telephone might be malfunctioning. Please see the Warranty section of this user’s manual
(page 50) for further instruction.
The CHARGE light is
off.
• Clean the charging contacts on the cordless handset(s) and telephone base each month using
a pencil eraser or a dry non-abrasive fabric.
•
Make sure the power adapter and telephone line cords are plugged in correctly and securely
.
• Unplug the power adapter. Wait for 15 seconds before plugging it back in. Allow up to one
minute for the cordless handset and telephone base to reset.
• The telephone might be malfunctioning. Please see to the Warranty section of this user’s
manual (page 50) for further instruction.
Troubleshooting
Page 45

www.vtechphones.com
41
Appendix
Troubleshooting
Problem Suggestion
There is no dial tone. • First, try all the above suggestions.
• Move the cordless handset closer to the telephone base. It might be out of range.
• The telephone line cord might be malfunctioning. Try installing a new telephone line cord.
• Disconnect the telephone base from the telephone jack and connect a different telephone. If
there is no dial tone on the other telephone either, the problem is in your wiring or local service.
Contact your local telephone company.
My ha ndset displays
CONNECTING...
Move the handset closer to the telephone base. You might have moved out of range.
•
Page 46

www.vtechphones.com
42
Troubleshooting
Problem Suggestion
The telephone does
not ring when there is
an incoming call.
• Make sure the ringer is on (see page 9 for handset and page 27 for telephone base).
• Make sure the telephone line cord and power adapter are plugged in properly (see page 3).
• The cordless handset may be too far from the telephone base. Move it closer to the telephone
base.
• There may be too many extension telephones on the telephone line to allow all of them to ring
simultaneously. Try unplugging some of them.
• If the other telephones in your home are having the same problem, the problem is in the wiring
or local service. Contact the local telephone company (charges may apply).
• Other electronic products can cause interference to your cordless telephone. Try installing your
telephone as far away as possible from the following electronic devices: wireless routers, radios,
radio towers, pager towers, cellular telephones, digital telephones, intercoms, room monitors,
televisions, VCRs, personal computers, kitchen appliances, and other cordless telephones.
•
Test a working telephone at the telephone jack. If another telephone has the same problem, the
problem is in the telephone jack. Contact your local telephone company (charges may apply)
.
• The telephone line cord might be malfunctioning. Try installing a new telephone line cord.
• Remove and re-insert the battery and place the cordless handset in the telephone base.
• Wait for the cordless handset to synchronize with the telephone base. Allow up to one minute
for this to take place.
Page 47

www.vtechphones.com
43
Appendix
Troubleshooting
Problem Suggestion
I cannot dial out. • First, try all the above suggestions.
• Make sure there is a dial tone before dialing. It is normal if the cordless handset takes a second
or two to synchronize with the telephone base before producing a dial tone. Wait an extra
second before dialing.
•
Make sure the telephone is set to the correct dial type (pulse dial or tone dial) for the service in
your area. See Dial type section on page 12 to set the dial type.
• If the other telephones in your home are having the same problem, the problem is in the wiring
or local service. Contact your local telephone company (charges may apply).
• Eliminate any background noise. Noise from a television, radio, or other appliances may cause
the telephone not to dial out properly. If you cannot eliminate the background noise, rst try
muting the cordless handset before dialing, or dialing from another room in your home with
less background noise.
Page 48

www.vtechphones.com
44
Troubleshooting
Problem Suggestion
There is noise
or interference
during a telephone
conversation.
My calls cut in and out
when I am using the
cordless handset.
• The handset may be out of range. Move it closer to the telephone base.
• Appliances or other cordless telephones plugged into the same circuit as the telephone base
can cause interference. Try moving the appliance or telephone base to another outlet.
• Other electronic products can cause interference to your cordless telephone. Try installing your
telephone as far away as possible fro+m the following electronic devices: wireless routers,
radios, radio towers, pager towers, cellular telephones, digital telephones, intercoms, room
monitors, televisions, VCRs, personal computers, kitchen appliances, and other cordless
telephones.
• Microwave ovens operate on the same frequency as your telephone. It is normal to experience
static on your telephone while the microwave oven is operating. Do not install this telephone
in the same outlet or near a microwave oven.
• If your telephone is plugged in with a modem or a surge protector, plug the telephone (or
modem/surge protector) into a different location. If this solves the problem, re-locate your
telephone or modem farther apart from each other, or use a different surge protector.
• The layout of your home or ofce might be limiting the operating range. Try moving the telephone
base to another location, preferably a higher location for better reception.
• Disconnect the telephone base from the modular jack and plug in a corded telephone. If calls
are still not clear, the problem is probably in the wiring or local service. Contact the local
telephone company (charges may apply).
• If the other telephones in your home are having the same problem, the problem is in the wiring
or local service. Contact the local telephone company (charges may apply).
• Do you have DSL service? If yes, you need to have a DSL lter installed at every telephone jack
that has a telephone connected to it. Contact your DSL service provider for lter information.
Page 49

www.vtechphones.com
45
Appendix
Troubleshooting
Problem Suggestion
I hear other calls when
using the telephone.
• Disconnect the telephone base from the telephone jack. Plug in a different telephone. If there are
still other calls, the problem is probably in the wiring or local service. Call your local telephone
company.
I hear noise in the
cordless handset, and
none of the keys or
buttons work.
• Make sure the telephone line cord is plugged in securely.
My caller ID features are
not working properly
• Caller ID is a subscription service. You must subscribe to this service from your local telephone
company for this feature to work on your telephone.
• The caller may not be calling from an area which supports caller ID.
• Both you and the caller’s telephone companies must use equipment which are compatible with
caller ID ser vice.
• If you subscribe to DSL service, install a DSL lter to the telephone line between the telephone
base and the telephone line jack. Contact your DSL service provider for lter information.
Page 50

www.vtechphones.com
46
Problem Suggestion
The system does
not receive caller ID
or the system does
not display caller ID
during call waiting.
• Make sure you subscribe to caller ID with call waiting features provided by the local telephone
company.
• The caller may not be calling from an area which supports caller ID.
• Both you and the caller’s telephone companies must use equipment which are compatible with
caller ID ser vice.
• If you subscribe to DSL service, install a DSL lter to the telephone line between the telephone
base and the telephone line jack. Contact your DSL service provider for lter information.
The answering system
does not answer after
the correct number of
rings.
• Make sure the answering system is on. When the answering system is on, the red light on the
ANSWER ON/OFF key should be lit.
• If toll saver is activated, the number of rings changes to two when there are new messages
waiting (page 27).
• If the memory is full or if the answering system is off, the system will answer after ten rings.
• In some cases, the answering system will be affected by the ringing system used by the local
telephone company.
The announcement
message is not clear.
• When recording the announcement, make sure you speak in a normal tone of voice about nine
inches from the telephone base.
• Make sure there is no background noise (television, music, trafc, etc.) when recording.
Troubleshooting
Page 51

www.vtechphones.com
47
Appendix
Problem Suggestion
The answering system
does not record
messages.
• Make sure the answering system is on.
The messages on the
answering system are
incomplete.
• If a caller leaves a very long message, part of it may be lost when the system disconnects the
call after four minutes.
• If the caller pauses for more than ve consecutive seconds, the system stops recording and
disconnects the call.
• If the memory on the system becomes full during a message, the system stops recording and
disconnects the call.
• If the caller’s voice is very soft, the system may stop recording and disconnect the call.
The messages on
the system are very
difcult to hear.
• Press / /VOLUME on the telephone base to increase the speaker volume.
The answering system
does not respond to
remote commands.
• Make sure your remote access code is correct (page 32).
• Make sure you are calling from a touch-tone telephone. When dialing a number, there should
be tones. If there are clicks, then it is not a touch-tone telephone and cannot activate the
answering system.
• The answering system may not detect the remote access code when the announcement is
playing. Wait until the announcement is over before entering the code.
• There may be interference on the telephone line you are using. Press the keypad keys rmly
when dialing.
Troubleshooting
Page 52

www.vtechphones.com
48
Troubleshooting
Problem Suggestion
My cordless handset
beeps and is not
performing normally.
• Make sure the power cord is securely plugged into the telephone base. Plug the unit into a
different working electrical outlet not controlled by a wall switch.
• Move the cordless handset closer to the telephone base. It may be out of range.
• Reset the telephone base by unplugging the unit’s electrical power. Wait for 15 seconds and
plug it back in again. Allow up to one minute for the cordless handset and the telephone base
to synchronize.
• Other electronic products can cause interference to your cordless telephone. Try installing
your telephone as far away from these electronic devices as possible: wireless routers, radios,
radio towers, pager towers, cellular telephones, intercoms, room monitors, televisions, personal
computers, kitchen appliances and other cordless telephones.
Common cure for
electronic equipment
• If the unit is not responding normally, try putting the cordless handset in the telephone base.
If it does not seem to respond, try the following (in the order listed):
• Disconnect the power to the telephone base.
• Disconnect the battery on the cordless handset.
• Wait a few minutes before connecting power to the telephone base.
• Re-install the battery and place the cordless handset into the telephone base.
• Wait for the cordless handset to synchronize its connection with the telephone base. Allow up
to one minute for this to take place.
Page 53

www.vtechphones.com
49
Appendix
Operating range
This cordless telephone operates with the maximum power allowed by the Federal Communications Commission (FCC). Even so, this handset and telephone base can
communicate over only a certain distance ----which can vary with the locations of the telephone base and handset, the weather, and the layout of your home or ofce.
When the handset is out of range, the handset will display CONNECTING. The user can access the handset directory, and certain parts of the menu system, i.e.
handset setting, but not the time setting and telephone base setting. NOT AVAILABLE will be displayed if access is denied.
If there is a call while the handset is out of range, it might not ring, or if it does ring, the call might not connect well when you press
/FLASH. Move closer to the
telephone base, then press /FLASH to answer the call.
If the handset moves out of range during a telephone conversation, there might be interference.
To improve reception, move closer to the telephone base.
Maintenance
Taking car e of your tele phone
Your cordless telepho ne contains sophist icated ele ctronic p arts, so it must be treate d with care.
Avoid roug h treatm ent
Place the handset down gently. Save th e original p acking materials to protect your tel ephone if yo u ever need to ship it.
Avoid wate r
Your teleph one can b e damage d if it gets wet. Do not use t he handset outdoors in the rain, or h andle it with wet h ands. Do not insta ll the telephone base near a
sink, bat htub or showe r.
Elect rical sto rms
Electr ical storms can somet imes cause p ower surges h armful to electroni c equipmen t. For your own safety, take caut ion when usi ng electr ic applia nces duri ng storms.
Clean ing your telephone
Your telephon e has a durable pl astic casing that shoul d retain its lus ter for many years. Clean it only wit h a soft cloth slightly dampened with water or a mild soap.
Do not use excess water or cleaning so lvents of any kind.
Remember that electrical appliances can cause serious injury if used when you are wet or standing in water. If the telephone base should fall into water, DO NOT
RETRIEVE IT UNTIL YOU UNPLUG THE POWER CORD AND TELEPHONE LINE CORDS FROM THE WALL. Then pull the unit out by the unplugged cords.
Page 54

www.vtechphones.com
50
About cordless telephones
Privacy: The same features that make a cordless telephone convenient create some limitations. Telephone calls are transmitted between the telephone base and
the cordless handset by radio waves, so there is a possibility that the c ordless teleph one conversations could be intercepted by radio receivin g equipment within
range of t he cordless handset . For this reason, you should not think of c ordless telephone conversations as bein g as private as t hose on cor ded teleph ones.
Elect rical Power: The telepho ne base of t his cordless telep hone must be connected to a working electrical outlet. The electri cal outlet should not be controlle d
by a wall swit ch. Calls ca nnot be made f rom the cor dless handset if the telephone ba se is unplugged or switched off, or if the electrical power is interrupted.
Potent ial TV I nterfe rence: S ome cord less tele phones operate at frequencies that may c ause inter ference to televis ions and VCRs. To minimize o r prevent
such inter ference, do not place the telephone base of the cordles s telephone near or on top of a TV or VCR. If interferenc e is experienced, moving the cordless
telephone farth er away from the T V or VCR will of ten reduce or eliminate t he interference.
Recha rgeabl e Batterie s: This product contains either Nickel -Cadmiu m or Nickel-Metal Hydri de rechargea ble batteries. Exercise care in handling batteries in
order not to create a short circui t with conductin g material such as rings, brace lets, and keys. The battery or conductor may overheat and cause harm. Obser ve
proper p olarity between th e battery a nd the battery charg er.
Nickel -Met al Hydride Recharge able Batteri es: Dispose o f these batter ies in a safe manner. Do not burn or pun cture. Like oth er batteries of this type, if
burned o r puncture d, they coul d release c austic material which could caus e injury.
•
•
•
•
•
Warranty
What do es this limited warranty cover ?
The manufacturer of this VTech Produ ct warrants to the holder of a valid proof of purchase (“Cons umer” or “you”) that the Product and all a ccessories prov ided
in t he sa les package (“Product”) are free from defects in mater ial an d workmanship, pursuant to th e foll owing terms and c onditio ns, wh en installed and used
normal ly and in ac cordance with th e Product operating instruc tions. Th is limited warranty extends o nly to the C onsumer for Products purchased and used in the
United States of Amer ica and Canada.
What wil l VTech do if th e Product i s not free fr om defec ts in mate rials and wo rkmanship during th e limited warranty p eriod (“Materia lly Defe ctive Prod uct”)?
During the limited warranty period, VTech’s authorized servi ce representative will repair or replace at V Tech’s opt ion, without charge, a Materially Defective Product. If
we repair the Product, we may use new or refurbi shed replaceme nt parts. If we c hoose to replace the Product, we may replace it with a new o r refurbished Produc t of
the same or similar design. We will retain defective parts, module s, or equipment. Repai r or replacement of the Product, at VTech’s option, is your exclusive remedy.
VTech will return repaired or replacement Products to you in working co ndition. You should expec t the repair o r replacement to take approximatel y 30 days.
How long i s the limited warranty period?
The limite d warranty peri od for the Product extends for ONE (1) YEAR from the date of purchase. If VTech repairs or replace s a Materially Defective Produc t under
the terms of this limited warranty, this li mited warran ty also applies to repaired or replace ment Produc t for a period of ei ther (a) 90 days from th e date the repair ed
or replacement Product is shipped to you or (b) th e time remai ning on the or iginal one-year warra nty; whic hever is long er.
What is not covered by t his limited warranty?
This lim ited warranty does not c over:
1. Produ ct that has b een sub jected to misu se, accident, shipping or other physical damage, improper insta llation, abnormal operation or handli ng, neg lect,
inundation, re, water or other liqu id intrusi on; or
2. Produ ct that has been damaged due to repair, alteration or mo dicati on by anyone other than an aut horized ser vice representat ive of VTech; or
3. Produ ct to the exte nt that the pr oblem experienced is caused by signal conditions, net work reli ability, or cable or anten na systems; or
Page 55

www.vtechphones.com
51
Appendix
Warranty
4. Produ ct to the exte nt that the pr oblem is cau sed by use wit h non-VTech ac cessori es; or
5. Produ ct whose war ranty/quality stickers, prod uct serial number plates or elect ronic serial number s have been removed, altered or rendered illegibl e; or
6. Produc t purchased, used, serviced, or shipped for repair from outside the United States of A merica or Canada, or u sed for c ommercial or institutio nal purposes
(inclu ding but not l imited to Pro ducts use d for rental p urposes); or
7. Produ ct returne d without va lid proof of p urchase (see item 2 below); or
8. Charg es for insta llation or set up, adjustm ent of custo mer contro ls, and inst allation o r repair of systems outside the unit.
How do you get warranty servi ce?
To obtain warranty ser vice in the United State s of Americ a, please call 1 (800) 595- 9511; In Canada , please call 1 (800) 267-7377. N OTE: Before calling for ser vice,
please r eview the user’s manual - a ch eck of the Pro duct con trols and features may save you a servic e call.
Except as prov ided by applicable law, you assume the risk of loss or dama ge during transit and transpor tation and are resp onsible for del ivery or handli ng charges
incurr ed in the trans port of the Pro duct(s) to the ser vice loc ation. VTech wil l return repai red or replac ed Product under this lim ited warrant y to you, transportati on,
deliver y or handlin g charges prepaid. VTech assumes no risk for damage or loss of the Product in transit. If the Product failure is not covered by this limited warranty,
or proof of pur chase does not meet the terms of this limited war ranty, VTech will notify you and wil l request that you authorize the cost of repair pr ior to any furth er
repair ac tivity. You must pay for the cost o f repair and re turn shipp ing costs f or the repair of Product s that are not covered by this limited warranty.
What must you return with the Product to ge t warrant y servic e?
1.
Return the entire ori ginal pack age and contents including the Product to the VTech servi ce locati on along with a descri ption of the m alfunction or dif culty; and
2. Include “valid proof of purchase” (sales receipt) identify ing the Prod uct purch ased (Product model) and the date of p urchase or r eceipt; an d
3. Provid e your name, co mplete and c orrect ma iling address, and telephone num ber.
Other Limitati ons
This warranty is the complete and exclusive ag reement between you and VTech. It supersedes all other wr itten o r oral c ommunic ations r elated to this Pr oduct.
VTech prov ides no oth er warranties for this Product. The warran ty exclusi vely desc ribes all of VTech’s respo nsibilities regar ding the Pr oduct. T here are no other
express w arranties . No one is authorized to make modications to this limited warranty and yo u should not r ely on any suc h modication.
State/ Provincia l Law Rights: This warran ty gives you s pecic legal right s, and you may also have other ri ghts, whic h vary from s tate to state or province to p rovince.
Limitations: Implied warrantie s, including those of tne ss for a par ticular purpos e and merchant ability (an unw ritten warrant y that the Product is t for ord inary
use) are li mited to one year from date of pur chase. Some states/provinces do not al low limit ations on how long an implied warranty lasts, so the above l imitatio n
may not apply to you. In no event shall VTech be li able for any indirect, speci al, inc idental, conse quential, or si milar damages ( including, but not limited to lost
prots o r revenue, inability to us e the Product or other as sociated e quipment , the cost of s ubstitute equipment, and claim s by third par ties) resulting from the use
of this Produc t. Some states/pr ovinces do not allow the exclusion or limit ation of incidental or c onseque ntial damages, so the above limitation or exclusion may
not appl y to you.
Please retain your original sales receipt as proof of purchase.
Page 56

www.vtechphones.com
52
FCC, ACTA and IC regulations
FCC Part 15
This equipment has been tested and found to comply with the requirements for a Class B digital device under Part 15 of the Federal Communications Commission
(FCC) rules. These requirements are intended to provide reasonable protection against harmful interference in a residential installation. This equipment generates, uses
and can radiate radio frequency energy and, if not installed and used in accordance with the instructions, may cause harmful interference to radio communications.
However, there is no guarantee that interference will not occur in a particular installation. If this equipment does cause harmful interference to radio or television recep
-
tion, which can be determined by turning the equipment off and on, the user is encouraged to try to correct the interference by one or more of the following measures:
Reorient or relocate the receiving antenna.
Increase the separation between the equipment and receiver.
Connect the equipment into an outlet on a circuit different from that to which the receiver is connected.
Consult the dealer or an experienced radio/TV technician for help.
Changes or modications to this equipment not expressly approved by the party responsible for compliance could void the user’s authority to operate the equipment.
To ensure safety of users, the FCC has established criteria for the amount of radio frequency energy that can be safely absorbed by a user or by
stander according to the intended usage of the product. This product has been tested and found to comply with the FCC criteria. The handset may be safely
held against the ear of the user. The telephone base shall be installed and used such that parts of the user’s body other than the hands are maintained at a
distance of approximately 20 cm (8 inches) or more. If you choose to use a clipping device, please make sure to only use the supplied VTech belt clip.
This device complies with part 15 of the FCC Rules. Operation is subject to the following two conditions: (1) This device may not cause harmful interference; and
(2) This device must accept any interference received, including interference that may cause undesired operation.
Privacy of communications may not be ensured when using this telephone.
FCC Part 68 and ACTA
This equipment complies with Part 68 of the FCC rules and with technical requirements adopted by the Administrative Council for Terminal Attachments (ACTA). The
label on the back or bottom of this equipment contains, among other things, a product identier in the format US:AAAEQ##TXXXX. This identier must be provided to
your local telephone company upon request.
The plug and jack used to connect this equipment to premises wiring and the telephone network must comply with applicable Part 68 rules and technical requirements
adopted by ACTA. A compliant telephone cord and modular plug is provided with this product. It is designed to be connected to a compatible modular jack that is also
compliant. An RJ11 jack should normally be used for connecting to a single line and an RJ14 jack for two lines. See Installation Instructions in the user’s manual.
The Ringer Equivalence Number (REN) is used to determine how many devices you may connect to your telephone line and still have them ring when you are called.
The REN for this product is encoded as the 6th and 7th characters following the US: in the product identier (e.g., if ## is 03, the REN is 0.3). In most, but not all areas,
the sum of all RENs should be ve (5.0) or less. For more information, please contact your local telephone company.
This equipment may not be used with Party Lines. If you have specially wired alarm dialing equipment connected to your telephone line, ensure the connection of this equip-
ment does not disable your alarm equipment. If you have questions about what will disable alarm equipment, consult your telephone company or a qualied installer.
If this equipment is malfunctioning, it must be unplugged from the modular jack until the problem has been corrected. Repairs to this telephone equipment can only
be made by the manufacturer or its authorized agents. For repair procedures, follow the instructions outlined under the Limited Warranty.
•
•
•
•
Page 57

www.vtechphones.com
53
Appendix
FCC, ACTA and IC regulations
If this equipment is causing harm to the telephone network, the telephone company may temporarily discontinue your telephone service. The telephone company is
required to notify you before interrupting service. If advance notice is not practical, you will be notied as soon as possible. You will be given the opportunity to correct
the problem and the telephone company is required to inform you of your right to le a complaint with the FCC. Your telephone company may make changes in its
facilities, equipment, operation, or procedures that could affect the proper functioning of this product. The telephone company is required to notify you if such changes
are planned.
If this product is equipped with a corded or cordless handset, it is hearing aid compatible.
If this product has memory dialing locations, you may choose to store emergency telephone numbers (e.g., police, re, medical) in these locations. If you do store or
test emergency numbers, please:
Remain on the line and briey explain the reason for the call before hanging up.
Perform such activities in off-peak hours, such as early morning or late evening.
Industry Canada
This equipment complies with regulations RSS-213 and CS-03 of Industry Canada. Operation is subject to the following two conditions: (1) this device may not cause
interference, and (2) this device must accept any interference, including interference that may cause undesired operation of the device.
The term ‘’IC: ‘’ before the certication/registration number only signies that the Industry Canada technical specications were met.
The Ringer Equivalence Number (REN) for this terminal equipment is 0.1. The REN is an indication of the maximum number of devices allowed to be connected to
a telephone interface. The termination on an interface may consist of any combination of devices subject only to the requirement that the sum of the RENs of all the
devices does not exceed ve.
This Class B digital apparatus complies with Canadian ICES-003.
•
•
Page 58

www.vtechphones.com
54
The RBRC® Seal on th e nickel-metal-hyd ride battery indi cates that V Tech Communic ations, In c. is volunt arily par ticipati ng in an
indus try program to colle ct and recycle these batteries at t he end of thei r useful live s, when taken o ut of serv ice within the
United S tates and Canada.
The RBRC
®
progra m provides a c onvenient alternative t o placing us ed nickel-metal- hydride bat teries into the trash or m unicipal
waste, wh ich may be ill egal in your ar ea.
VTech’s par ticipati on in RBRC® makes it ea sy for you to drop off the spe nt batter y at local ret ailers par ticipating in the RB RC® progra m
or at aut horized V Tech product s ervice centers. Please call 1- 800 -8- BATTERY TM for infor mation on Ni -MH battery recyc ling and
d isposal b ans/restriction s in your area. V Tech’s involveme nt in this pro gram is par t of its commitment to protecting ou r environment
a nd conser ving natural resources.
R BRC
®
is a regi stered t rademark of Recha rgeabl e Batter y Recycling Corporation.
The RBRC® seal
Page 59

www.vtechphones.com
55
Appendix
Technical specications
Frequency control Crystal controlled
PLL synthesizer
Transmit frequency
Handset: 1921.536-1928.448 MHz
Telephone base: 1921.536-1928.448MHz
Channels 5
Nominal effective range Maximum power allowed by FCC and IC. Actual operating range may vary according
to environmental conditions at the time of use.
Size
Handset: 170.9mm X 48.1mm X 25.8mm
Telephone base: 179.8mm X 123.8mm X 95.0mm
Weight Handset: 131.0 grams (including battery)
Telephone base: 296.8 grams
Power requirements Handset: 2.4V DC 600mAh NiMH battery
Telephone base: 6V DC @ 600mA
Memory Handset directory: 50 memory locations; up to 24 digits and 15 characters
Handset call log: 50 memory locations; up to 20 digits and 15 characters
Page 60

www.vtechphones.com
56
Index
A
About cordless telephones 50
Activate the answering system 27
Advanced operation 16
Answering system operation 26
B
Basic operation 14
Battery 9, 37
C
Caller ID 20
Call log 21, 36
Call waiting 14
Chart of characters 17
Clear voicemail 12
D
Date and time 8
Delete all messages 31
Delete from redial 25
Delete from the call log 23
Delete from the directory 19
Delete your announcement 30
Desk/table bracket installation 4
Dial a call log number 22
Dial a directory entry 18
Dial from redial 25
Dial type 4, 12
Director y 16
DSL lter 5
E
Edit a directory entry 19
Edit handset name 11
F
FCC, ACTA and IC regulations 52
Find Handset 15
H
Handset and telephone base indicators 34
Handset display screen messages 35
Handset icons 34
Handset layout 6
Handset light 34
I
Important safety instructions 38
Index 56
Installation 1
Install handset battery 2
K
Key tone 10
L
Language 11
M
Maintenance 49
Make, answer and end calls 14
Message capacity 26
Message playback 31
Message window displays 33
Mute 14
O
Operating range 49
Options during playback 31
Options while on calls 14
Outgoing announcements 30
Out of range tone 10
P
Parts checklist 1
Personal identication number
(PIN) 29
Play the announcement 30
Page 61

www.vtechphones.com
57
R
Record your own announcement 30
Redial 24
Remote access 32
Reset to default settings 13
Review redial 24
Review the call log 21
Review the directory 16
Ring melody 8
Ring volume 9
S
Search the directory 16
Set number of rings 27
Set telephone base date and time 27
Set telephone base melody 28
Set telephone base ringer volume 28
Speakerphone 14
Store an entry in the directory 18
Store a number from redial to the directory 24
Store a call log number 22
T
Technical specications 55
Telephone base 3, 7
Telephone base lights 34
Telephone settings 6
The RBRC® seal 54
Troubleshooting 39
V
Volume 9, 28
W
Warranty 50
Page 62

VTECH TELECOMMUNICATIONS LTD.
A member of THE VTECH GROUP OF COMPANIES.
Distributed in the U.S.A. by VTech Communications, Inc. Beaverton, Oregon
Distributed in Canada by VTech Telecommunications Canada, Ltd., Richmond, B.C.
Copyright ©2006 for VTECH TELECOMMUNICATIONS LTD.
Printed in China.
91-001156-030-100
 Loading...