

VOX Amplification Continental Upgrade Manual
EnglishFrançaisDeutschEspañol
Upgrade GuideUpgrade Guide
Upgrade Guide
Ver.2.0Ver.2.0Ver.2.0
1
E
• Ensemble sounds: brass ensemble, tape strings, synth pad,
etc.
• Bass sounds: acoustic bass, electric bass, synth bass
For details on how to select sounds, see page 8 of the “Owner’s
Manual.”
* Download the PDF from www.voxamps.com.
Split function
This function lets you divide the keyboard into high and low
regions, and play two of the four sound parts (ORGAN,
E.PIANO, PIANO, and KEY/LAYER) in these two regions. For
example, you could play organ with the right hand and bass
with the left hand.
The VOX Continental Ver.2.0 has evolved into an even more
complete stage keyboard by adding carefully selected new
sounds and convenient performance functions. The following
upgrades have been added.
• 58 versatile sounds have been added
• A split function has been added
• The damper effect can be enabled or disabled for each
sound part
• A scene set function has been added, and the number of
scenes has increased from 16 to 64
• The amount of noise that is characteristic of vintage organs
can be adjusted
• The tonal character of the PIANO part can be switched
using the bend lever
For details, refer to the explanations that follow.
Versatile added sounds
The following sounds have been added. For details, refer to
“VOX Continental Ver.2.0 Voice Name List” (PDF).
• Keyboard instrument sounds: small grand, upright piano,
historical instruments such as fortepiano and harpsichord,
electric piano and clavi with a variety of effect settings, FM
electric piano, etc.
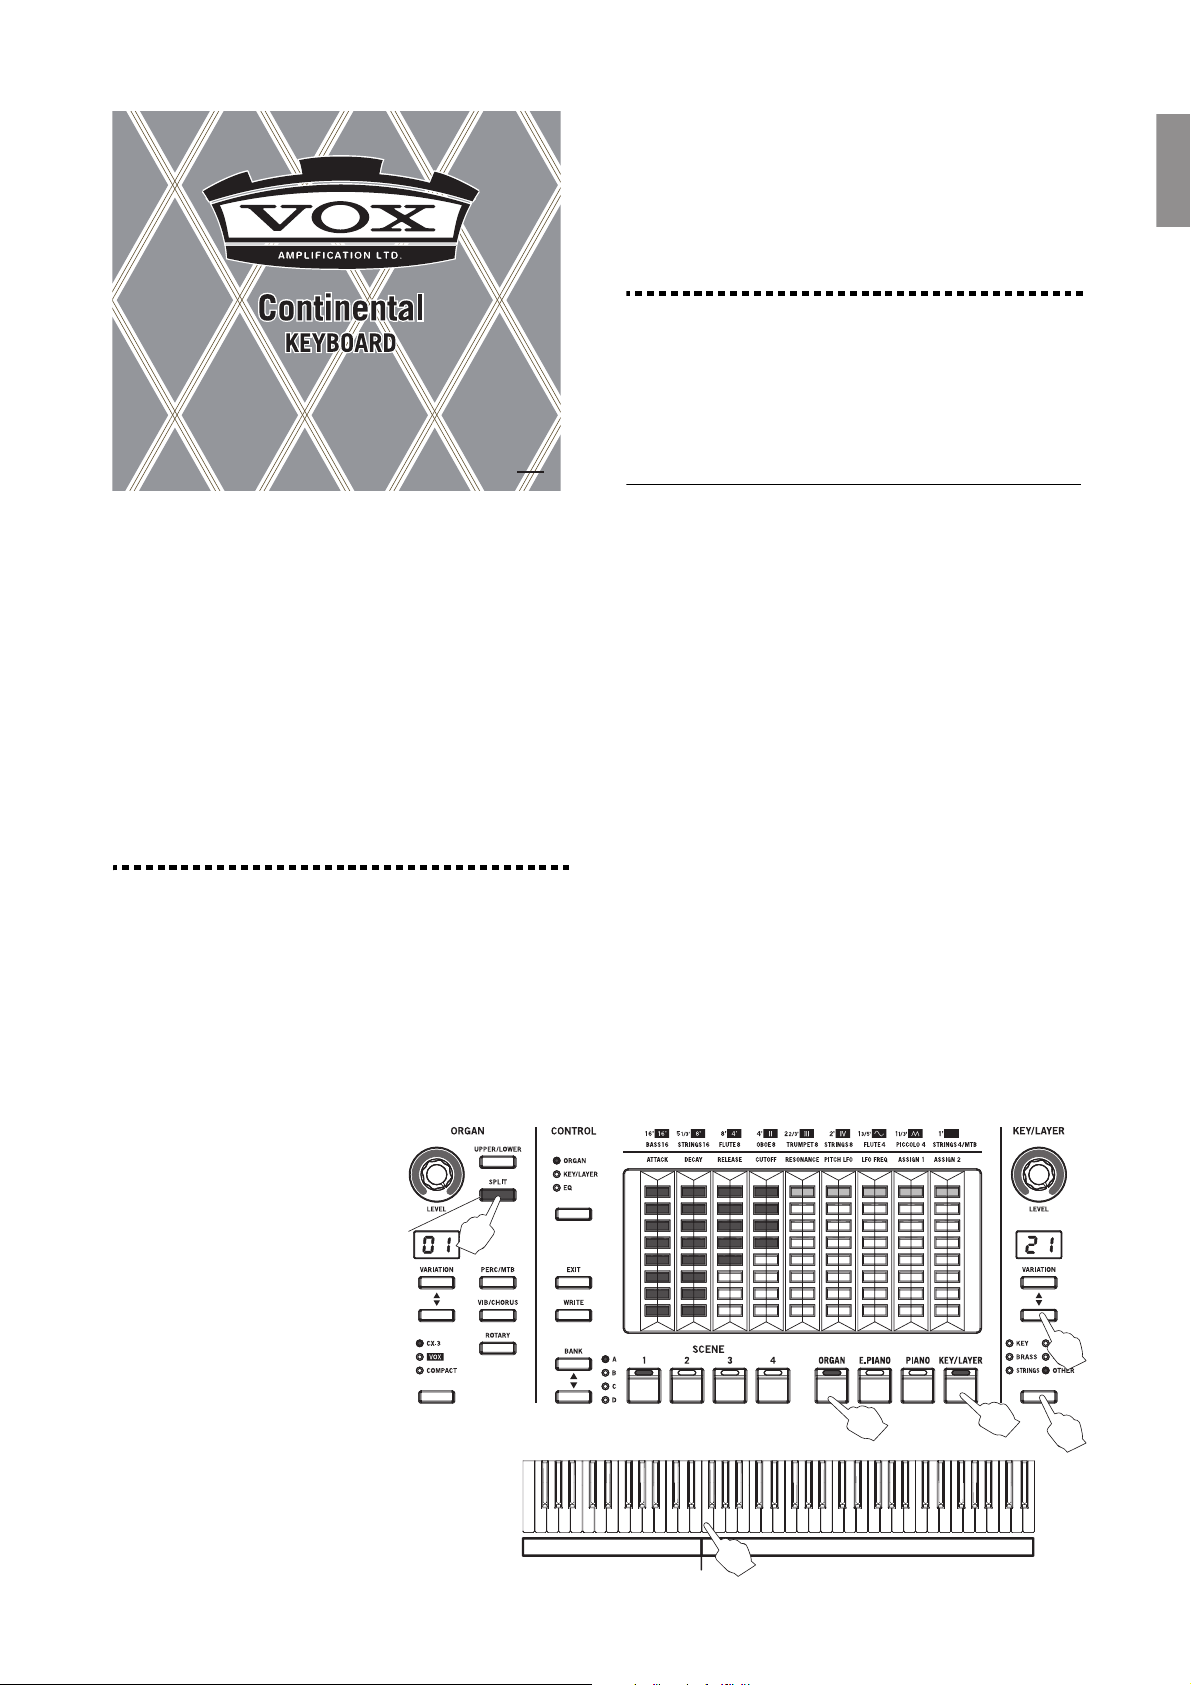
Setting the split function
1 Press a part select button (ORGAN, E.PIANO, PIANO,
KEY/LAYER) to select the sound part that you’ll play in the
upper region of the keyboard (the button is lit). ( See
illustration below)
2 Hold down the SPLIT button of the ORGAN part and
press one of the part select buttons (ORGAN, E.PIANO,
PIANO, KEY/LAYER) to select the sound part that you’ll
play in the lower region of the keyboard (the SPLIT button
blinks, and the part select button is lit).
3 Specify the split point (the point at which the keyboard is
divided).
Hold down the SPLIT button of the ORGAN part, and
press the key (on the keyboard) where you want the split
point to be. The key you press will be the lowest key of the
upper region.
4 Select a variation for the upper and lower sounds.
Use the type
to select a variation for that part.
• As necessary, use the LEVEL knobs to adjust the volume of
each part.
Note: If you want to save your settings, save them as a scene.
Refer to page 3 for details on saving.
Note: When using split, the knobs, switches, and controllers
affect the following parts.
and VARIATION , buttons of each part
SPLIT button
(73 keys)
2, 3
Part select
1
E1 E7
Split point
C4
3
ORGANKEY/LAYER
buttons
4
2
4
En-1
Affect both parts
1, 3
1
2
Scene Set 1
- A1, A2, A3, A4
- B1, B2, B3, B4
- C1, C2, C3, C4
- D1, D2, D3, D4
16
16
16
16
64
SCENE BANK
buttons
SCENE 1–4
buttons
2 1
3
• EFFECTS, master controls, CONTROL pedal
Affect one part
• Bend lever (priority order: 1. ORGAN, 2. E.PIANO,
3. PIANO, 4. KEY/LAYER)
Tip : The split point is set to C4 by factory default. If a scene
had already been saved, the setting of that scene is followed.
This is set separately from the split point for organ.
Tip : The SPLIT button blinks when split (for two parts) is on. It
is lit when organ split is on. Split between parts cannot be used
simultaneously with organ split. For details on organ split, see
page 13 of the “Owner’s Manual.”
Canceling the split function
• Press the ORGAN part’s SPLIT button which is blinking.
Another way to do this:
• Press one of the part select buttons (ORGAN, E.PIANO,
PIANO, KEY/LAYER).
The SPLIT button goes dark, and the split function is
canceled.
Damper setting for each sound part
For each of the four sound parts ORGAN, E.PIANO, PIANO,
and KEY/LAYER, you can specify whether the damper effect is
enabled (On) or disabled (Off).
For example when using split settings with a piano and bass,
you could enable the damper function for the PIANO part and
disable it for the KEY/LAYER part, so that when you press the
damper pedal the damper effect applies only to the piano sound.
Enabling/disabling the damper effect
1 Hold down the EXIT button and press the EFFECT TYPE
button.
The VARIATION display of each part indicates On or Off.
oF
(2 digits), F (1 digit):
The damper function is disabled (Off).
on
(2 digits), n (1 digit):
The damper function is enabled (On).
2 Use each part's VARIATION , buttons to enable or
disable the function.
3 Press the EXIT button to complete the setting.
Note: If you want to save your settings, save them as a scene.
Refer to page 3 for details on saving.
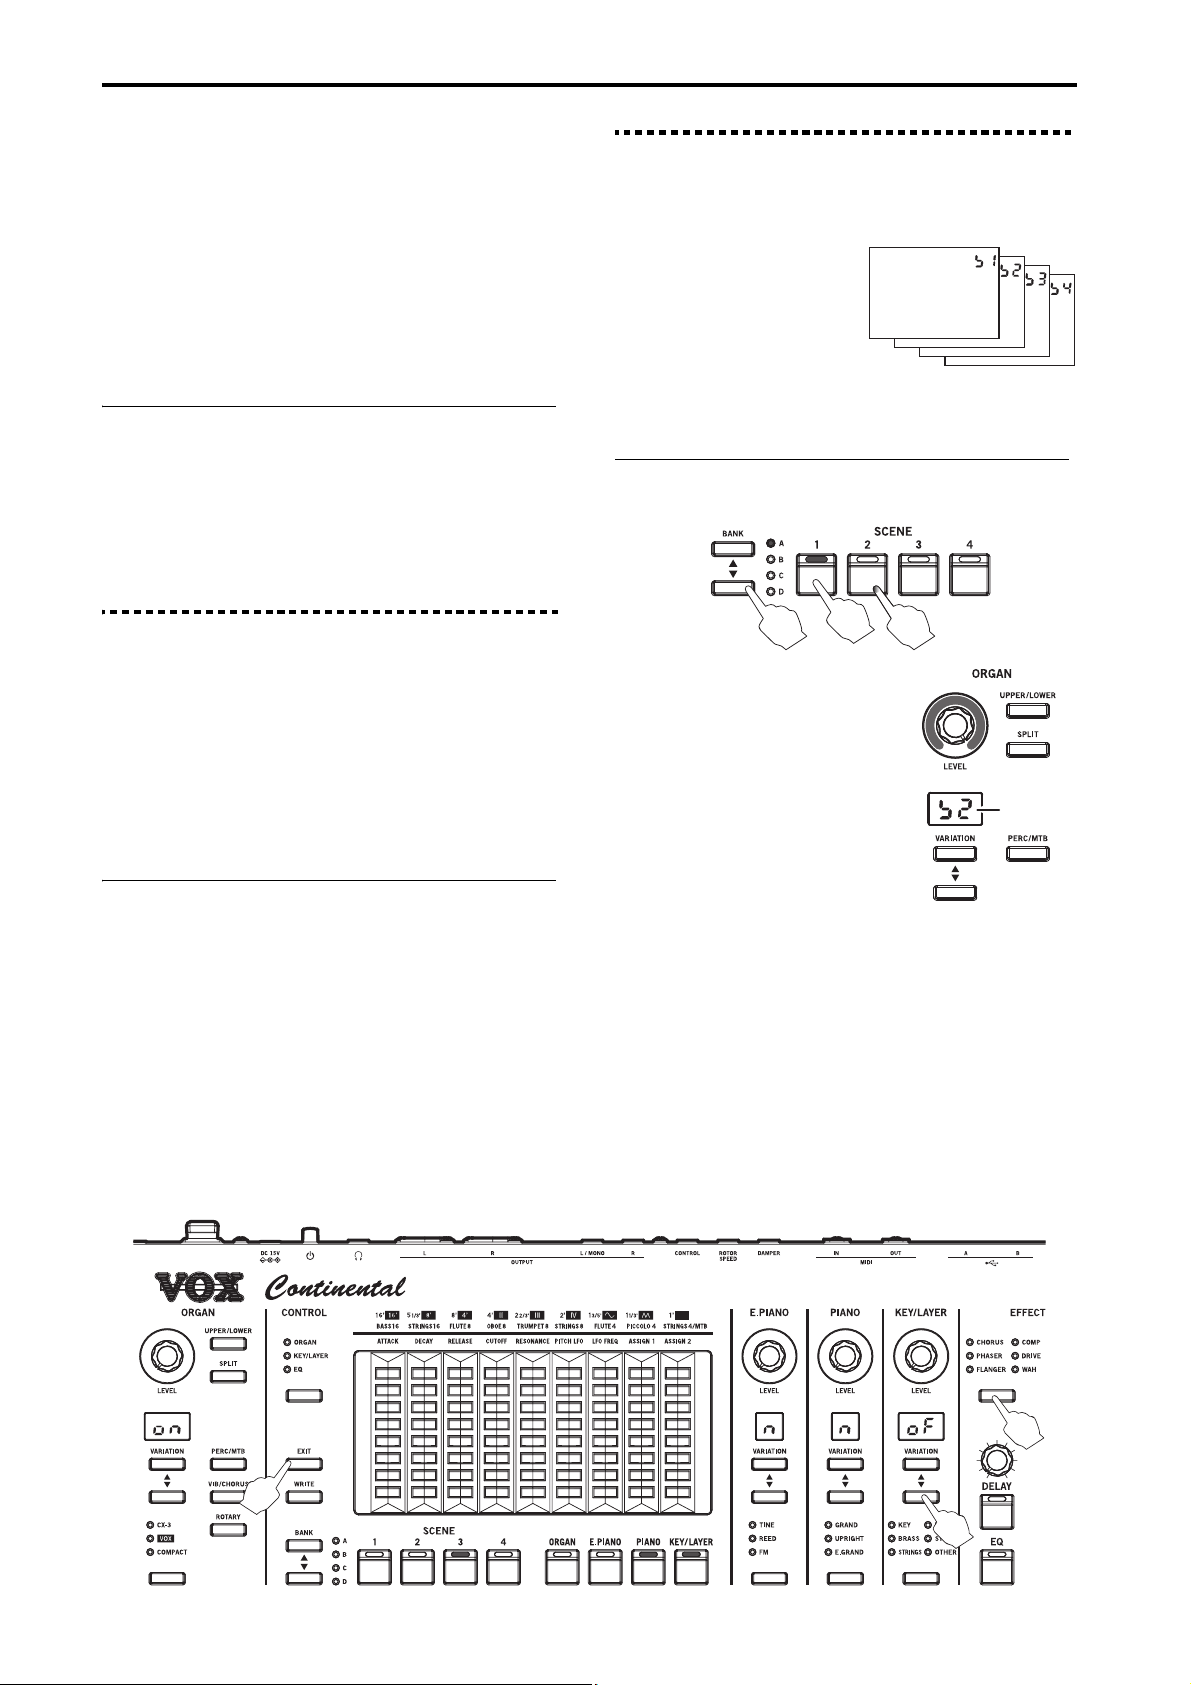
Selecting and saving a scene
Scenes are used to store your favorite variations or effect
settings and instantly recall them.
A scene set is a collection of 16
scenes: A1–A4, B1–B4, C1–C4,
and D1–D4.
There are four scene sets, scene
set 1 (S1) through scene set 4 (S4),
so a total of 64 scenes can be
saved internally.
Tip : When the unit is shipped from the factory, settings are
already saved in scene set 1. You can overwrite these scenes.
Selecting the scene
1 Long-press a SCENE 1–4 button to select a scene set.
The ORGAN part’s VARIATION
display indicates the scene set S1–
S4, and then returns to indicating
the variation number.
2 Press the BANK , buttons to
select a bank (from A to D).
(The LEDs on banks A–D will
light)
3 Press a button from SCENE 1–4 to
select a scene (from 1 to 4).
The saved scene will be recalled,
allowing you to play the sound.
Note: If you change the part variation, effect, octave and other
settings saved in a scene, the currently selected SCENE button
will blink. Press the blinking SCENE button to undo the
changes and revert to the saved state.
Scene Set
No.
En-2
 Loading...