

Page 1

OWNER'S MANUAL
Page 2

Page 3

VÄLKOMMEN!
We hope you will enjoy many years of driving pleasure in your Volvo. The
car has been designed for the safety and comfort of you and your passengers. Volvo is one of the world's safest passenger vehicles. Your
Volvo is also designed to meet applicable safety and environmental
requirements.
In order to increase your enjoyment of your Volvo, we recommend that
you read the instructions and maintenance information in this owner's
manual. The owner's manual is also available as a mobile app (Volvo
Manual) and on the Volvo Cars support site (support.volvocars.com).
Page 4

2
INTRODUCTION
This is how you find owner's information
14
Digital owner's manual in the car
15
Navigating in the digital owner's manual
16
Owner's Manual in mobile devices
18
Volvo Cars support site
19
Reading the owner's manual
19
Recording data
22
Important information on accessories, extra equipment and diagnostic
socket
23
Volvo ID
23
Drive-E - cleaner driving pleasure
25
IntelliSafe-driver support
28
Sensus - online connectivity and
entertainment
29
Windows, glass and mirrors
32
Overview of the centre display
33
Operating the centre display
36
Navigating in the centre display's views
40
Symbols in the centre display's status bar
45
Change settings for the centre display
46
Function view with buttons for car
functions
47
Using the keyboard in the centre display
49
Writing characters/words by hand on
the screen
53
General information about Twin Engine
55
SAFETY
Safety
60
Safety during pregnancy
60
Whiplash Protection System
61
Pedestrian Protection System
62
Seatbelt
63
Seatbelt tensioner
64
Fastening/unfastening a seatbelt
65
Door and seatbelt reminder
66
Airbags
67
Driver and passenger airbags
68
Activating/deactivating the passenger airbag*
70
Side airbag
72
Inflatable curtain
73
Safety mode
74
Starting/moving the car after safety
mode
74
Child safety
75
Child seats
76
Upper mounting points for child seats
78
Lower mounting points for child seats
78
Table for location of child seats
using the car's seatbelts
80
i-Size/ISOFIX mounting points
82
Table for location of ISOFIX child seats
83
TABLE OF CONTENTS
Page 5

3
Table for location of i-Size child seats
86
Integrated child seat*
87
Folding up the integrated child seat
cushion*
88
Folding down the integrated child
seat cushion*
89
INSTRUMENTS AND CONTROLS
Instruments and controls, left-hand
drive car
92
Instruments and controls, right-hand
drive car
93
Driver display
96
Driver display settings
98
Hybrid related information in the
driver display
99
Indicator symbols in the driver display
101
Warning symbols in the driver display
103
Outside temperature gauge
104
Clock
105
Fuel gauge
105
License agreement for the driver display
106
Application menu in the driver display
111
Using the application menu in the
driver display
112
Messages in the driver display and
the centre display
113
Managing messages in the driver
display and the centre display
114
Managing messages saved from the
driver display and centre display
116
Head-up display*
117
Voice recognition
121
Using voice recognition
121
Settings for voice recognition
122
Voice recognition control of the phone
123
Voice recognition control of radio
and media
124
Voice recognition control of climate
control
124
Voice recognition and map navigation
125
Manual front seat
126
Power front seat*
127
Adjusting the power front seat*
127
Using the memory function in the
power front seat*
128
Multi-functional front seat*
129
Adjusting functions in the multi-functional front seat*
130
Adjusting the passenger seat from
the driver's seat*
131
Adjusting the head restraints in the
rear seat
132
Lowering the backrests in the rear seat*
133
Steering wheel
135
Adjusting the steering wheel
136
Lighting control
137
Position lamps
138
Daytime running lights
139
Dipped beam
140
Activating/deactivating main beam
140
Page 6

4
Active bending lights*
143
Rear fog lamp
143
Brake lights
144
Hazard warning flashers
144
Using direction indicators
145
Passenger compartment lighting
146
Home safe light duration
148
Approach light duration
149
Using windscreen wipers
149
Activating/deactivating the rain sensor
150
Windscreen and headlamp washers
151
Power windows
151
Operating power windows
152
Using the sun blind*
153
Adjusting the door mirrors
154
Interior rearview mirror
156
Compass*
157
Calibrating the compass*
158
Sunroof*
159
Operating the sunroof*
160
HomeLink®*
162
Programming HomeLink®*
163
Trip computer
165
Show trip data in the driver display
167
Show trip statistics in the centre display
169
Settings in the centre display
170
Categories in the settings menu
171
Changing system settings in the settings menu
172
Resetting settings in the settings menu
173
Driver profiles
174
Selecting driver profile
175
Editing a driver profile
175
Linking remote control key to driver
profile
176
Changing settings for apps
177
Resetting user data for change of
ownership
178
CLIMATE CONTROL
Climate control
180
Climate control - sensors
180
Perceived temperature
181
Air quality
181
Passenger compartment filter
182
Clean Zone Interior Package*
183
Interior Air Quality System*
183
Climate controls
184
Climate controls in the centre display
184
Climate controls at the rear of the
tunnel console
186
Auto-regulating the climate
187
Activating/deactivating air conditioning
187
Regulating the temperature
188
Regulating the fan level
190
Activating/deactivating defrost of
windows and door mirrors
192
Activating/deactivating air recirculation
194
Air distribution
194
Changing the air distribution
195
Opening/closing and aiming the air vents
196
Table of air distribution options
198
Activating/deactivating heating of
the seats*
200
Activating/deactivating ventilation of
the seats*
201
Page 7

5
Activating/deactivating heating of
steering wheel*
202
Parking climate
203
Starting/stopping preconditioning
204
Timer for preconditioning
206
Setting the timer for preconditioning
206
Activating/deactivating the timer for
preconditioning
208
Starting/switching off climate comfort retention
208
Symbols and messages for parking
climate control
210
Heater
212
Parking heater
213
Additional heater
214
LOADING AND STORAGE
Passenger compartment interior
216
Tunnel console
216
Electrical sockets
218
Using the glovebox
222
Sun visors
223
Cargo area
223
Recommendations for loading
223
Load retaining eyelets
225
Bag hooks
225
Through-load hatch in the rear seat*
225
LOCKS AND ALARM
Remote control key
228
Remote control key range
230
Red Key - Restricted remote control key*
231
Antenna locations for the start and
lock system
232
Locking/unlocking from the outside
233
Indication on locking/unlocking the car
235
Locking/unlocking from the inside
237
Deadlocks*
239
Locking/unlocking the boot lid
240
Using private locking
242
Detachable key blade
243
Locking/unlocking with the detachable key blade
244
Power operated boot lid*
245
Opening/closing the boot lid with
foot movement*
247
Replacing the battery in the remote
control key
249
Immobiliser
252
Child safety locks
253
Alarm*
254
Automatic arming/rearming of the alarm*
256
Disarming the alarm* without working remote control key
256
Page 8

6
Type approval for the remote control
key system
257
DRIVER SUPPORT
Speed-dependent steering force
266
Electronic Stability Control ESC
266
Sport mode for electronic stability control
267
Symbols and messages for electronic stability control
269
Speed limiter*
271
Activating and starting the Speed limiter
272
Managing speed for the Speed limiter
272
Deactivating/reactivating the Speed
Limiter
273
Switching off the speed limiter
274
Automatic speed limiter*
275
Activating/deactivating the automatic
speed limiter
276
Changing the tolerance for the Automatic speed limiter
277
Cruise control
278
Activating and starting the Cruise control
279
Managing speed for the Cruise control
280
Deactivating/reactivating the cruise
control
281
Deactivating Cruise Control
282
Distance Warning*
283
Activating and setting the time interval for Distance warning*
284
Limitations of Distance Warning*
285
Adaptive cruise control*
286
Activating and starting the Adaptive
cruise control*
290
Managing the speed of the Adaptive
cruise control*
291
Setting the time interval for the
adaptive cruise control*
292
Deactivating/activating the Adaptive
cruise control*
294
Overtaking assistance with adaptive
cruise control* or Pilot Assist*
296
Change of target and automatic
braking with the Adaptive Cruise Control
297
Limitations of the adaptive cruise control*
298
Change between Cruise control and
adaptive cruise control*
299
Symbols and messages for the
Adaptive cruise control*
301
Pilot Assist*
303
Activating and starting the Pilot Assist*
307
Managing the speed for Pilot Assist*
309
Setting the time interval for Pilot Assist*
310
Deactivating/activating the Pilot Assist*
311
Change of target and automatic
braking with Pilot Assist*
313
Limitations of Pilot Assist*
315
Symbols and messages for Pilot Assist*
316
Page 9

7
Radar unit
318
Limitations of the radar unit
320
Type approval for radar units
324
Camera unit
328
Limitations of the camera unit
329
City Safety
332
Setting the warning distance for City
Safety
335
Detection of obstacles with City Safety
336
City Safety in cross traffic
338
City Safety when evasive manoeuvres are prevented
339
Limitations of City Safety
340
Messages for City Safety
343
Rear Collision Warning
344
BLIS*
344
Activate/deactivate BLIS*
346
Limitations of BLIS*
346
Cross Traffic Alert*
347
Activate/deactivate Cross Traffic Alert*
348
Limitations of Cross Traffic Alert
349
Messages for BLIS* and Cross
Traffic Alert*
351
Road Sign Information*
352
Sign display with Road Sign Information
353
Road Sign Information with Speed
Warning and Settings
355
Road Sign Information with Speed
Camera Information*
356
Limitations of Road Sign Information*
357
Driver Alert Control
358
Activate/deactivate Driver Alert Control
359
Limitations of Driver Alert Control
360
Lane Keeping Aid
360
Activate/deactivate Lane Keeping Aid
363
Symbols and messages for lane
assistance
364
Assistance upon risk of collision
366
Symbols and messages for assistance upon risk of collision
367
Steering assistance upon risk of lane
departure
368
Steering assistance upon risk of
head-on collision
370
Steering assistance upon risk of
rear-end collision*
371
Park Assist*
373
Activating/deactivating Park Assist Pilot*
375
Limitations of Park Assist Pilot*
376
Symbols and messages for Park
Assist Pilot*
378
Park assist camera*
379
Park assist lines and fields for the
park assist camera*
381
Starting the Park assist camera*
383
Limitations for park assist camera*
384
Symbols and messages for Park
assist camera*
386
Park Assist Pilot*
388
Parking with Park Assist Pilot*
389
Limitations of Park Assist Pilot*
392
Messages for Park Assist Pilot*
395
Page 10

8
STARTING AND DRIVING
Alcohol lock*
398
Bypass of the alcohol lock*
398
Before starting the engine with the
alcohol lock
398
Ignition positions
399
Starting the car
400
Switching off the car
402
Steering lock
402
Using jump starting with another battery
403
Gearbox
404
Gear positions for automatic gearbox
405
Gear shift indicator*
408
Gear selector inhibitor
408
Changing gear with steering wheel
paddles*
409
Drive systems
410
Drive modes
411
Maintain or increase the hybrid battery's state of charge while driving.
415
Level control* and shock absorption
416
All-wheel drive
417
Brake functions
417
Foot brake
417
Emergency brake lights
419
Brake assistance
420
Auto braking after a collision
420
Parking brake
421
Using the parking brake
421
In the event of a fault in the parking
brake
423
Hill start assist
424
Automatic braking when stationary
424
Driving in water
425
Overheating in the engine and drive
system
426
Overloading the starter battery
427
Preparations for a long trip
427
Winter driving
428
Opening/closing the fuel filler flap
and refuelling
429
Handling of fuel
430
Petrol
430
Economical driving
431
Starting and stopping the combustion engine in Twin Engine
433
Electric operation range in urban
environment
433
Towing bracket*
435
Extendable/retractable towing brackets*
435
Towing bracket specifications*
437
Driving with a trailer
438
Trailer lamps
440
Trailer Stability Assist*
441
Towing eye
442
Towing
443
Recovering the car
443
Charging the hybrid battery
444
Charging current
445
Charging cable
447
Status indication in the charging
cable's control unit
450
Ground fault breaker in the charging
cable
452
Temperature monitoring of the
charging cable
452
Preparation for charging the hybrid
battery
453
Start charging the hybrid battery
454
Charge status
456
Stop charging of hybrid battery
457
Long-term storage of vehicles with
hybrid batteries
458
Hybrid-related symbols and messages
460
Page 11

9
AUDIO AND MEDIA
Audio and media
464
Apps
464
Audio settings
465
Radio
466
Changing and searching radio stations
466
RDS radio
468
Digital radio
469
Linking between different radio
bands FM and DAB
469
Settings for radio
470
Media player
471
Media playback
471
Gracenote
®
474
Searching media
474
CD player*
475
Media via Bluetooth
®
475
Connecting a device via Bluetooth
®
476
Media via USB port
476
Connecting a device via USB port
476
video
477
Audio settings for media
477
TV*
478
Using the TV*
478
Apple CarPlay*
479
Using Apple CarPlay*
480
Settings for Apple CarPlay*
481
Android Auto*
481
Settings for Android Auto*
483
Technical specifications for media
483
Phone
485
Connect phone
486
Connecting/disconnecting the phone
487
Managing phone calls
488
Managing text messages
489
Managing the phone book
490
Settings for phone
491
Settings for text messages
491
Bluetooth® settings
491
Online car*
492
Connecting the car
492
Sharing Internet via Wi-Fi hotspot
494
No or poor connection
495
Remove Wi-Fi network
496
Wi-Fi technologies and security
496
Settings for car modem*
496
Downloading, updating and uninstalling apps
497
License agreement for audio and media
499
Terms and conditions for services
and Customer Privacy Policy
509
Page 12

10
WHEELS AND TYRES
Tyres
512
Tyres' rotation direction
513
Tread wear indicators on the tyres
514
Checking the tyre pressures
514
Tyre monitoring*
515
Checking tyre pressure with the tyre
monitoring system*
517
Rectifying low tyre pressure with tyre
monitoring*
518
Calibrating tyre monitoring*
519
Emergency puncture repair kit
520
Using the emergency puncture repair kit
521
Inflate tyres with the compressor
from the emergency puncture repair kit
524
When changing wheels
525
Removing a wheel
526
Fitting the wheels
527
Wheel bolts
528
Spare wheel*
528
Winter wheels
529
Tool kit
530
Warning triangle
530
Jack*
531
First aid kit
532
Dimension designation for wheel rim
532
Dimension designation for tyre
532
MAINTENANCE AND SERVICE
Volvo service programme
536
Car status
536
Book service and repair
537
Remote updates
539
System updates
539
Raise the car
541
Opening and closing the bonnet
543
Engine compartment overview
544
Engine oil
545
Checking and filling with engine oil
546
Topping up coolant
547
Servicing the climate control system
549
Bulb replacement
550
Bulb specifications
550
Wiper blades in service position
550
Replacing a wiper blade
551
Filling washer fluid
552
Starter battery
553
Symbols on the batteries
556
Hybrid battery
556
Fuses
557
Replacing a fuse
558
Fuses in engine compartment
559
Fuses under glovebox
563
Page 13

11
Fuses in cargo area
567
Cleaning the exterior
571
Polishing and waxing
574
Rustproofing
574
Cleaning the interior
575
Cleaning the centre display
576
Paint damage
577
Repairing paint damage
578
SPECIFICATIONS
Type designations
580
Dimensions
583
Weights
585
Towing capacity and towball load
586
Engine specifications
588
Engine oil — specifications
589
Adverse driving conditions for engine oil
590
Coolant — specifications
591
Transmission fluid — specifications
591
Brake fluid — specifications
591
Fuel tank - volume
592
Air conditioning — specifications
592
Fuel consumption and CO2 emissions
594
Approved tyre pressures
595
Performance
596
Hybrid battery — specifications
597
ALPHABETICAL INDEX
Alphabetical Index 599
Page 14

Page 15

INTRODUCTION
Page 16
INTRODUCTION
14
This is how you find owner's information
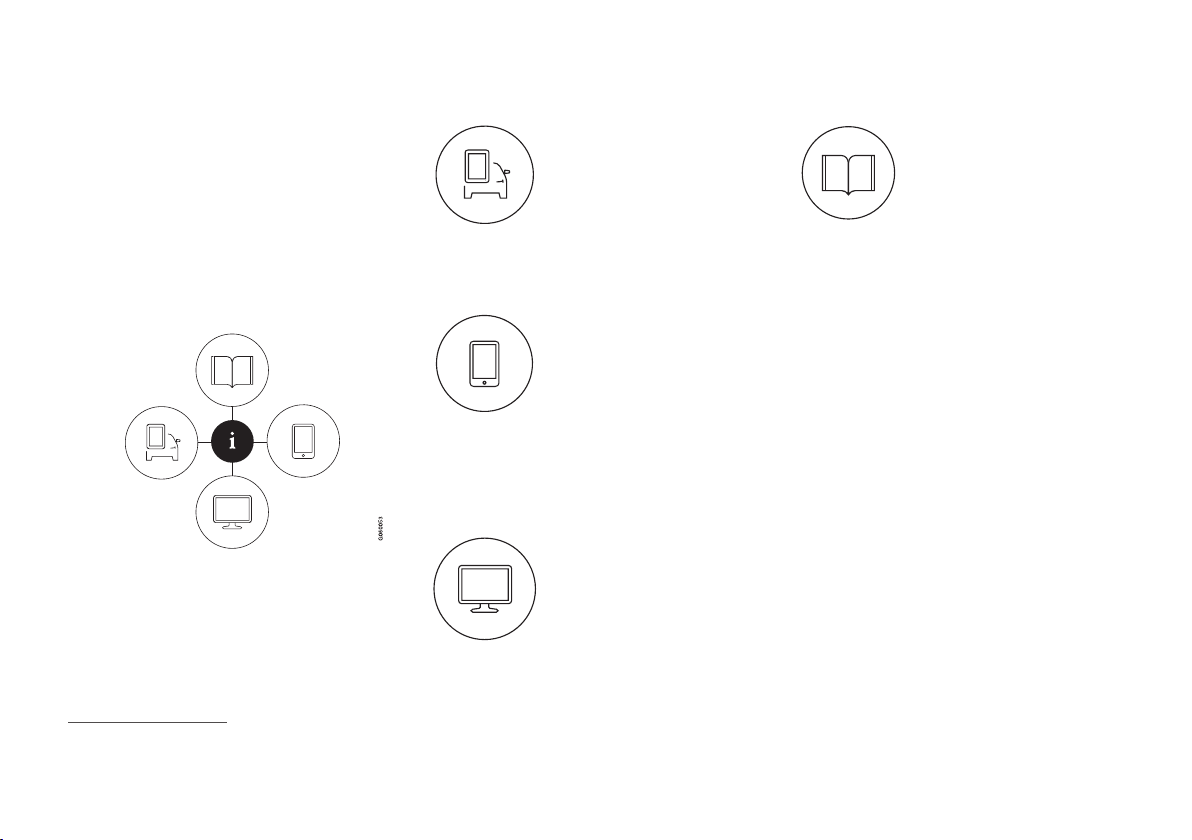
Owner's information is available in several different product formats, both digital and printed.
The owner's manual is available in the car's centre display, as a mobile app and on the Volvo
Cars support site. There is a Quick Guide and a
supplement to the owner's manual available in
the glovebox, with specifications and fuse information, amongst other things. A printed owner's
manual can be ordered.
The car's centre display
1
In the centre display, drag down
the top view and tap on
Owner's manual. Available
here are options for visual navigation with exterior and interior
images of the car. The information is searchable and is also
divided into categories.
Mobile app
In App Store or Google Play,
search for "Volvo Manual",
download the app to your
smartphone or tablet and select
the car. Available in the app are
video tutorials and options for
visual navigation with exterior
and interior images of the car. It is easy to navigate between the different sections in the
owner's manual and the content is searchable.
Volvo Cars support site
Go to support.volvocars.com
and select your country. Here
you can find owner's manuals,
both online and in PDF format.
On the Volvo Cars support site
there are also video tutorials
and further information and
help regarding your Volvo and your car ownership. The page is available for most markets.
Printed information
There is a supplement to the
owner's manual1 in the glovebox that contains information
on fuses and specifications, as
well as a summary of important
and practical information.
There is also a Quick Guide available in printed
format that helps you to get started with the most
commonly used functions in the car.
Depending on equipment level selected, market,
etc. additional owner's information may also be
available in printed format in the car.
A printed owner's manual and associated supplement can be ordered. Contact a Volvo dealer to
order.
Changing the language in the car's centre display
Changing the language in the centre display may
mean that some owner's information does not
correspond to national or local laws and regulations. Don't change to a language that's difficult
to understand, it may then be difficult to find your
way back in the structure on the screen.
1
A complete printed manual is included with the car for markets without owner's manual in the centre display.
Page 17
INTRODUCTION
}}
15
IMPORTANT
The driver is always responsible that the vehicle is driven safely in traffic and that applicable laws and regulations are followed. It is
also important that the car is maintained and
handled in accordance with Volvo's recommendations in the owner's information.
If there should be a difference between the
information in the centre display and the printed information then it is always the printed
information that applies.
Related information
•
Digital owner's manual in the car (p. 15)
•
Owner's Manual in mobile devices (p. 18)
•
Volvo Cars support site (p. 19)
•
Reading the owner's manual (p. 19)
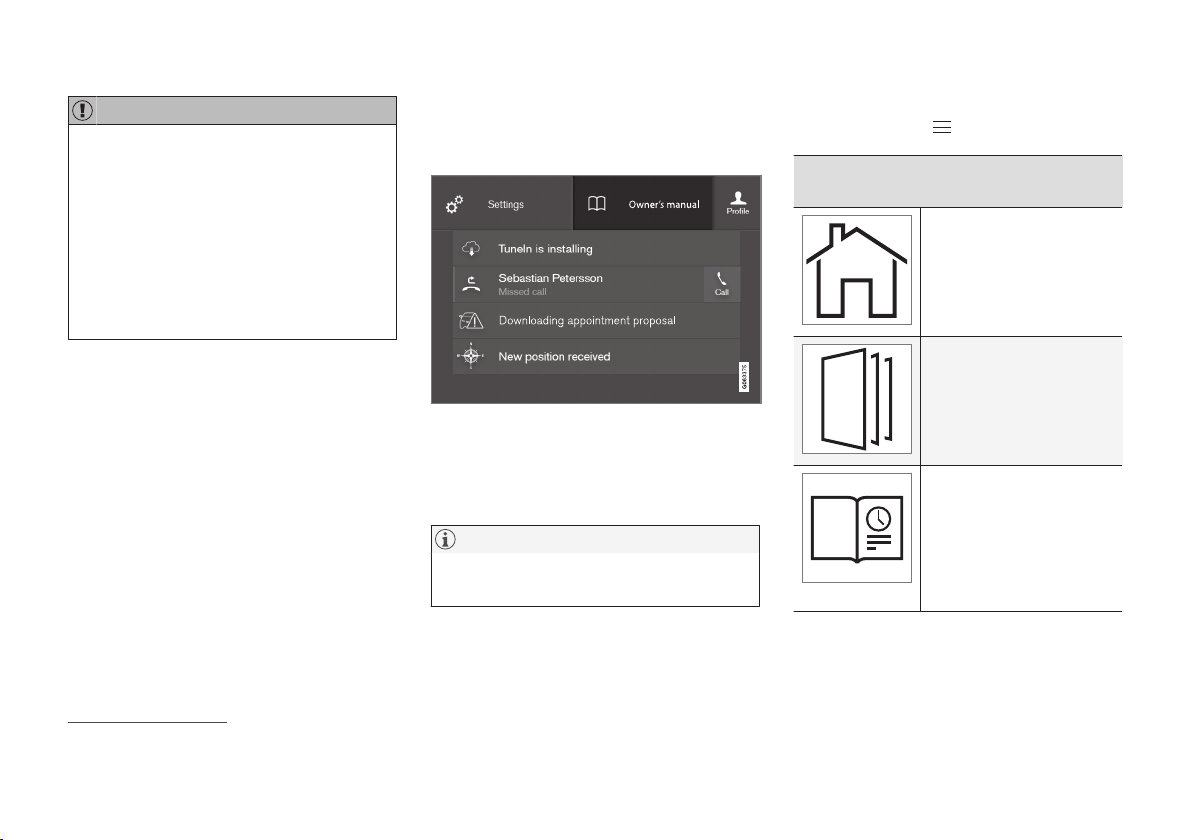
Digital owner's manual in the car
A digital2 version of the owner's manual is available in the car's centre display.
The digital owner's manual is accessed from the top
view.
To open the digital owner's manual - drag down
the top view in the centre display and tap on
Owner's manual.
NOTE
The digital owner's manual is not available
while driving.
There is a range of different options for finding
information in the digital owner's manual. The
options can be reached from the start page of
the owner's manual. One way is from the top
menu, with a tap on
.
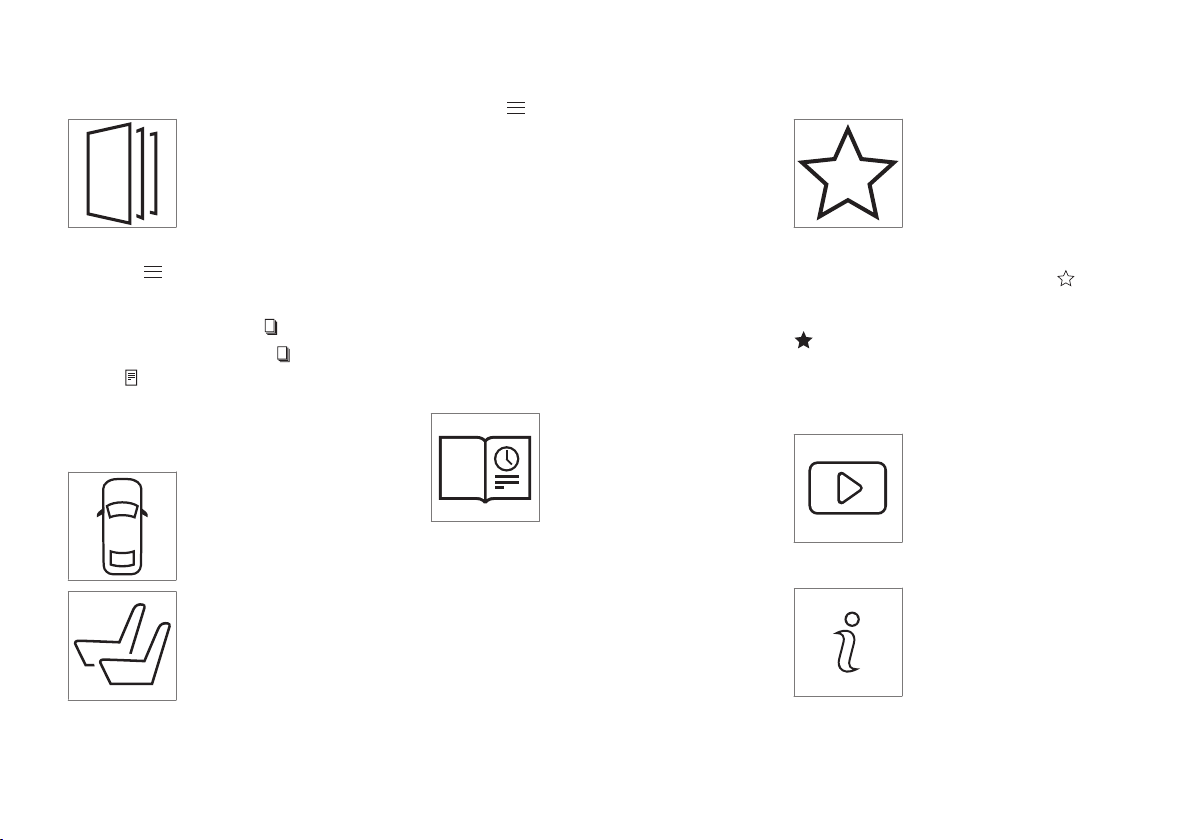
Symbols and their meaning in the owner's
manual menu
Leads to the start page of
the Owner's Manual.
Articles grouped by category. The same article may
appear in several categories.
Leads to a Quick Guide
page with links for a selection of articles that can be
particularly useful to read.
Provides answers to common questions about the
car.
2
Applies for most markets.
Page 18

||
INTRODUCTION
16
Symbols and their meaning in the owner's
manual menu
Exterior and interior overview images of the car. Different parts are designated
with hotspots that lead to
articles about those parts
of the car.
All articles that have been
favourited are compiled
here.
Symbols and their meaning in the owner's
manual menu
Leads to short video tutorials for different functions in
the car.
Indicates what version of
the Owner's Manual is
available in the car and provides other useful information.
Related information
•
Navigating in the digital owner's manual
(p. 16)
Navigating in the digital owner's manual
The digital owner's manual can be accessed
from the centre display in the car. The content is
searchable and it is easy to navigate between
different sections.
The digital owner's manual is accessed from the top
view.
Open the digital owner's manual
–
To open the digital owner's manual - drag
down the top view in the centre display and
tap on
Owner's manual.
There is a range of different options for finding
information in the digital owner's manual. To
access the owner's manual menu – press
in
the upper bar of the owner's manual.
Page 19
INTRODUCTION
}}
17
Searching using categories
The articles in the owner's
manual are structured into
main categories and subcategories. The same article can be
found in several appropriate
categories in order to be found
more easily.
1.
Press and then select Categories.
> The main categories are shown in a list.
2.
Tap on a main category (
).
>
A list of subcategories (
) and articles
(
) is shown.
3. Tap on an article to open it. To go back,
press the back arrow.
Hotspots for exterior and interior
Exterior and interior overview
images of the car. Different
parts are designated with hotspots that lead to articles about
those parts of the car.
1.
Press and then select Exterior/
Interior.
> Exterior/interior images are shown with
so-called hotspots in place. The hotspot
leads to articles about the corresponding
part of the car. Swipe horizontally over the
screen to browse among the images.
2. Tap on a hotspot.
> The title of the article about the area is
shown.
3. Tap on the title to open the article. To go
back, press the back arrow.
Learn about the car's most common functions with the Quick Guide
Leads to a page with links for a
selection of articles that can be
particularly useful to read in
order to get to know the most
common functions of the car.
The articles can also be
accessed via categories, but
are collected here for quick access. Tap on an
article in order to read it in its entirety.
Favourites
Located here are the articles
that have been saved as
favourites. Tap on an article in
order to read it in its entirety.
Saving/deleting articles as favourites
Save an article as favourite by pressing at the
top right when an article is open. When an article
has been saved as a favourite the star is filled in:
.
To remove an article as a favourite, press the star
again in the current article.
Video
Leads to short video tutorials
for different functions in the
car.
Information
Tap on the symbol to obtain
information about which version
of the owner's manual is available in the car as well as other
useful information.
Page 20
||
INTRODUCTION
18
Start page
Tap on the symbol to go back
to the start page in the owner's
manual.
Using the search function
1.
Tap on in the top menu of the owner's
manual. A keyboard appears in the lower part
of the screen.
2. Type in a keyword, such as "seatbelt".
> Suggestions for articles and categories
are shown while letters are being entered.
3. Tap on the article/category to access it.
Related information
•
Digital owner's manual in the car (p. 15)
•
Using the keyboard in the centre display
(p. 49)
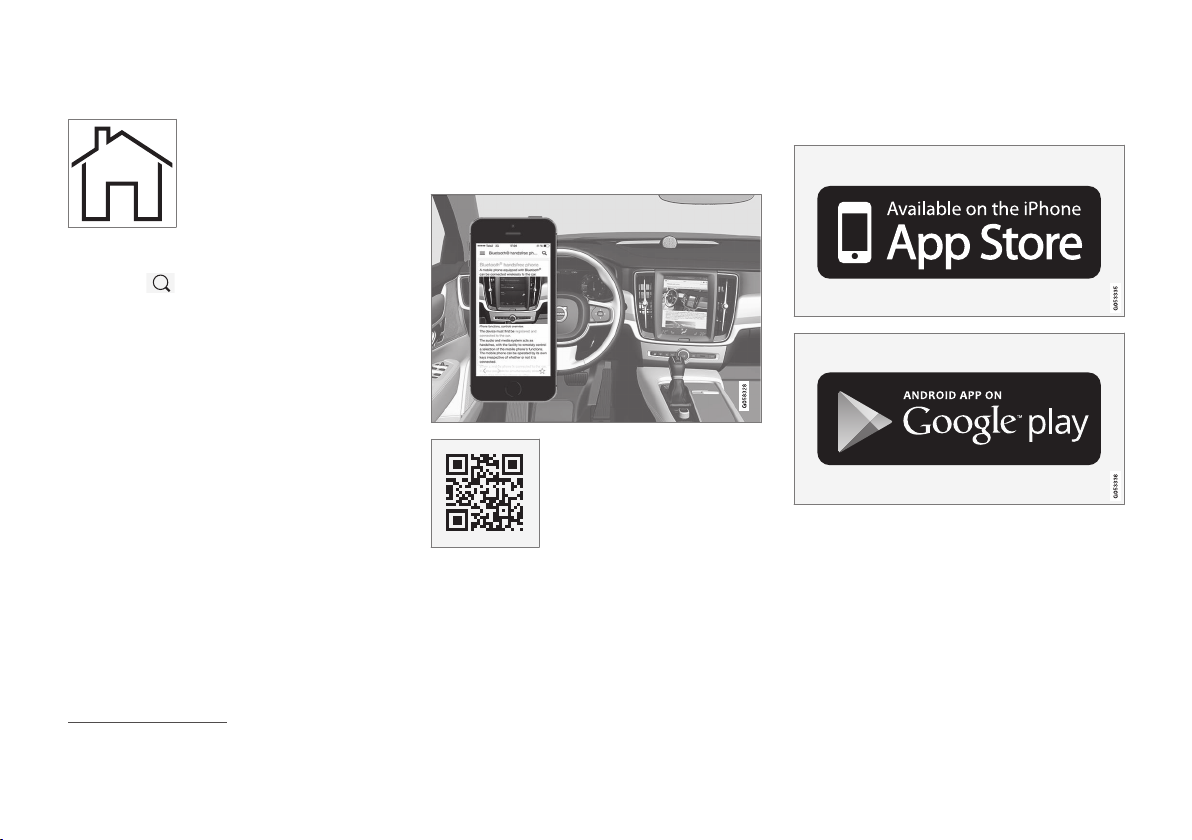
Owner's Manual in mobile devices
The owner's manual is available as a mobile
app3 from both the App Store and Google Play.
The app is adapted for smartphones and tablets.
The owner's manual can be
downloaded as a mobile app
from the App Store or Google
Play. The QR code provided
here takes you directly to the
app. Alternatively, you can
search for "Volvo manual" in
the App Store or Google Play.
The app contains a video along with exterior and
interior images where different parts of the car
are highlighted with so-called hotspots, which
lead to articles about the area in question. It is
easy to navigate between the different sections
in the owner's manual and the content is searchable.
The mobile app is available from both the App Store and
Google Play.
Related information
•
Reading the owner's manual (p. 19)
•
Volvo Cars support site (p. 19)
3
For certain mobile devices.
Page 21

INTRODUCTION
}}
* Option/accessory.
19
Volvo Cars support site
More information on your car is available on the
Volvo Cars website and support site.
Support on the Internet
Go to support.volvocars.com to visit the site. The
support site is available for most markets.
It contains support for functions such as webbased services and functions, Volvo On Call*, the
navigation system* and apps. Videos and stepby-step instructions explain different procedures,
e.g. how to connect the car to the Internet via a
mobile phone.
Downloadable information
Maps
For cars equipped with Sensus Navigation, there
is the facility to download maps from the support
page.
Owner's manuals as PDF
Owner's manuals are available for download in
PDF format. Select car model and model year to
download the manual as required.
Contact
The support site contains contact details to customer support and your nearest Volvo dealer.
Log in to Volvo Cars website
Create a personal Volvo ID and log in to
www.volvocars.com. When you have logged in it is
possible to get an overview of service, agree-
ments and warranties. Here there is also information about accessories and software adapted for
your car model.
Related information
•
Volvo ID (p. 23)
Reading the owner's manual
A good way of getting to know your new car is
to read the owner's manual, ideally before your
first journey.
Reading the owner's manual is a good way to
become familiar with new functions, get advice
on how best to handle the car in different situations and learn how to make the best use of all
the car's features. Please pay attention to the
safety instructions contained in the owner's manual.
Development work is constantly underway in
order to improve our product. Modifications may
mean that information, descriptions and illustrations in the owner's manual differ from the equipment in the car. We reserve the right to make
modifications without prior notice.
Do not remove this manual from the car - if problems should arise then the necessary information
about where and how to seek professional help
will be missing.
© Volvo Car Corporation
Options/accessories
In addition to standard equipment, the owner's
manual also describes options (factory fitted
equipment) and certain accessories (retrofitted
extra equipment).
All types of option/accessory are marked with an
asterisk: *.
Page 22
||
INTRODUCTION
20
The equipment described in the owner's manual
is not available in all cars - they have different
equipment depending on adaptations for the
needs of different markets and national or local
laws and regulations.
In the event of uncertainty over what is standard
or an option/accessory, contact a Volvo dealer.
Special texts
WARNING
Warning texts appear if there is a risk of
injury.
IMPORTANT
"Important" texts appear if there is a risk of
damage.
NOTE
NOTE texts give advice or tips that facilitate
the use of e.g. features and functions.
Footnote
The owner's manual contains information in certain locations in the form of a footnote at the bottom of the page or at the end of a table. This
information is an addition to the text that it refers
to via a number. If the footnote refers to text in a
table then letters are used instead of numbers
for referral.
Message texts
There are displays in the car that show menu and
message texts. In the owner's manual the
appearance of these texts differs from the normal
text. Examples of menu texts and message texts:
Phone, New message.
Decals
The car contains different types of decal which
are designed to convey important information in a
simple and clear manner. The decals in the car
have the following descending degree of importance for the warning/information.
Warning of personal injury
Black ISO symbols on yellow warning field, white
text/image on black message field. Used to indicate the presence of danger which, if the warning
is ignored, may result in serious personal injury or
fatality.
Risk of property damage
White ISO symbols and white text/image on
black or blue warning field and message field.
Used to indicate the presence of danger which, if
the warning is ignored, may result in damage to
property.
Page 23
INTRODUCTION
21
Information
White ISO symbols and white text/image on
black message field.
NOTE
It is not intended that the decals illustrated in
the owner's manual should be exact replicas
of those in the car. They are included to show
their approximate appearance and location in
the car. The information that applies to your
particular car is available on the respective
decals for your car.
Procedure lists
Procedures where action must be taken in a certain sequence are numbered in the owner's manual:
When there is a series of illustrations for
step-by-step instructions each step is num-
bered in the same way as the corresponding
illustration.
Lists of letters appear adjacent to the series
of illustrations where the order of the instructions is not significant.
Arrows appear numbered and unnumbered
and are used to illustrate a movement.
Arrows with letters are used to clarify a
movement when the relative order is of no
relevance.
If there is no series of illustrations for step-bystep instructions then the different steps are
numbered with normal numbers.
Position lists
Red circles containing a number are used in
overview images where different components
are pointed out. The number recurs in the
position list featured in connection with the
illustration that describes the item.
Bulleted lists
A bulleted list is used when there is a list of
points in the owner's manual.
Example:
•
Coolant
•
Engine oil
Related information
Related information refers to other articles containing closely associated information.
Images
Illustrations used in the owner's manual are
sometimes schematic and are intended to provide an overall picture or example of a certain
function. Illustrations may deviate from the car's
appearance depending on equipment level and
market.
To be continued
}} This symbol is located furthest down to the
right when an article continues on the following
page.
Continued from previous page
|| This symbol is located furthest up to the left
when an article continues from the previous
page.
Related information
•
Digital owner's manual in the car (p. 15)
•
Owner's Manual in mobile devices (p. 18)
•
Volvo Cars support site (p. 19)
Page 24

INTRODUCTION
22
Recording data
As part of Volvo's safety and quality assurance,
certain information about the vehicle's operation,
functionality and incidents are recorded in the
car.
This vehicle is equipped with an "Event Data
Recorder" (EDR). Its primary purpose is to register and record data related to traffic accidents or
collision-like situations, such as times when the
airbag deploys or the vehicle strikes an obstacle
in the road. The data is recorded in order to
increase understanding of how vehicle systems
work in these types of situations. The EDR is
designed to record data related to vehicle
dynamics and safety systems for a short time,
usually 30 seconds or less.
The EDR in this vehicle is designed to record
data related to the following in the event of traffic
accidents or collision-like situations:
•
How the various systems in the car worked
•
Whether the driver and passenger seatbelts
were fastened/tensioned
•
The driver's use of the accelerator or brake
pedal
•
The travel speed of the vehicle
This information can help us better understand
the circumstances in which traffic accidents, injuries and damage occur. The EDR only records
data when a non-trivial collision situation occurs.
The EDR does not record any data during normal
driving conditions. Similarly, the system never
registers who is driving the vehicle or the geographic location of the accident or near-miss situation. However, other parties, such as the police,
could use the recorded data in combination with
the type of personally identifiable information
routinely collected after a traffic accident. Special
equipment and access to either the vehicle or the
EDR is required to be able to interpret the registered data.
In addition to the EDR, the car is equipped with a
number of computers designed to continually
check and monitor the function of the car. They
can record data during normal driving conditions,
but in particular register faults affecting the vehicle's operation and functionality, or upon activation of the vehicle's driver support function (e.g.
City Safety and the auto brake function).
Some of the recorded data is required to enable
service and maintenance technicians to diagnose
and remedy any faults that occurred in the vehicle. The registered information is also needed to
enable Volvo to satisfy legal requirements laid out
in laws and by government authorities. Information registered in the vehicle is stored in its computer until the vehicle is serviced or repaired.
In addition to the above, the registered information can be used in aggregate form for research
and product development with the aim of continuously improving the safety and quality of Volvo
cars.
Volvo will not contribute to the above-described
information being disclosed to third parties without the vehicle owner's consent. To comply with
national legislation and regulations, Volvo may be
forced to disclose information of this nature to
the police or other authorities who may assert a
legal right to access such. Special technical
equipment which Volvo and workshops that have
entered into agreements with Volvo have access
to is required to be able to read and interpret the
recorded data. Volvo is responsible that the information, which is transferred to Volvo during servicing and maintenance, is securely stored and
managed and that its management complies with
relevant legal requirements. For further information - contact a Volvo dealer.
Page 25
INTRODUCTION
}}
* Option/accessory.
23
Important information on accessories, extra equipment and diagnostic socket
Incorrect connection and installation of accessories, extra equipment or software/diagnostic
tools may have a negative effect on the car's
electronic system.
Certain accessories only function when associated software is installed in the car's computer
system. Volvo therefore recommends always
making contact with an authorised Volvo workshop before the installation of accessories or
extra equipment that are connected to or affect
the electrical system.
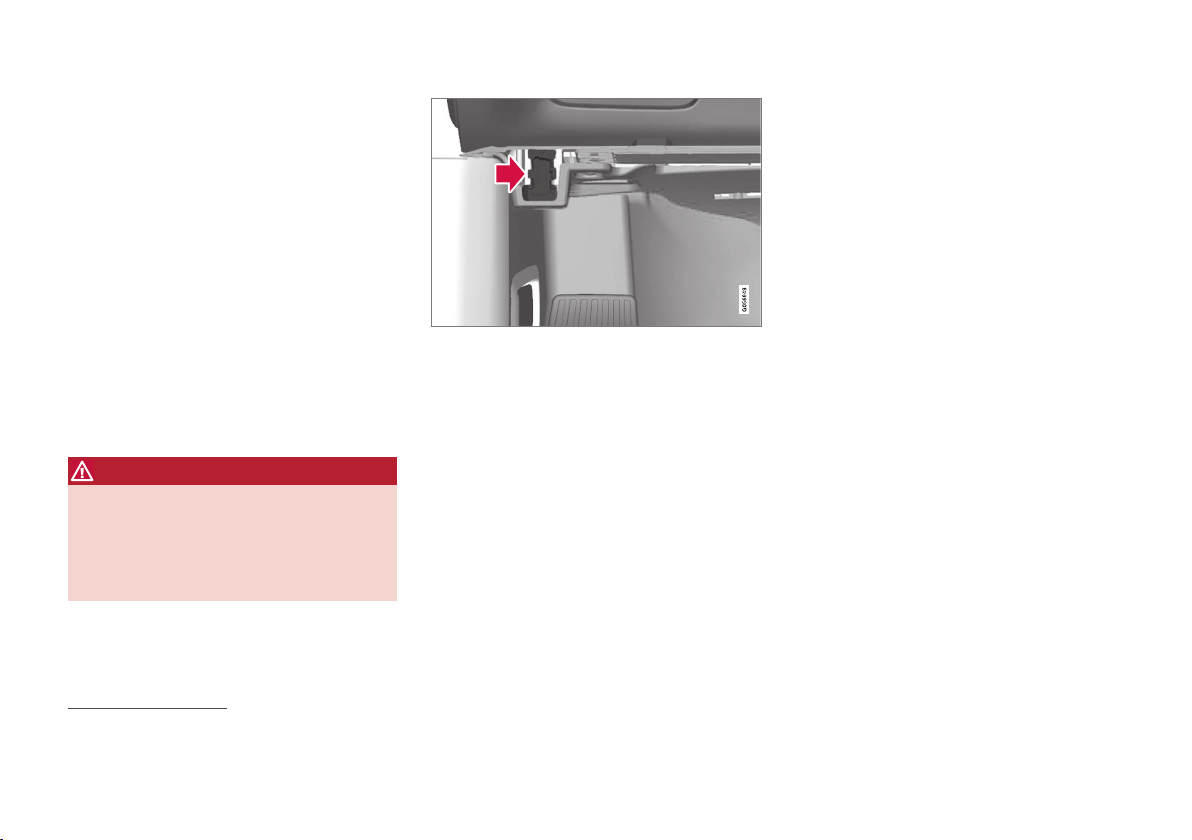
Connection of equipment to the car's diagnostic socket
WARNING
Volvo Cars accepts no liability for the consequences if unauthorised equipment is connected to the On-board Diagnostic socket
(OBDII). This socket should only be used by
trained and qualified Volvo service technicians.
Data link connector OBDII is under the instrument panel
on the driver's side
Volvo ID
Volvo ID provides access to a wide range of personalized Volvo services4 online.
It is possible to create a Volvo ID from the car,
volvocars.com or Volvo On Call app5. Certain
functions and services require that the car is registered to a personal Volvo ID. Registering the
Volvo ID to the car makes a wide range of Volvo
services available directly from the car.
Examples of services:
•
Volvo On Call* - Volvo ID is used when logging in to the Volvo On Call app.
•
Send to Car - Makes it possible to send an
address from an Internet map service directly
to the car.
•
Book Service and Repair - Register your preferred workshop/dealer at volvocars.com to
be able to book service directly from the car.
Creating a Volvo ID
It is possible to create a Volvo ID in different
ways. If the Volvo ID is created at volvocars.com
or with Volvo On Call app, the Volvo ID must also
be registered to the car to enable use of the various Volvo ID services.
4
The services available may vary over time and vary depending on equipment level and market.
5
If you have Volvo On Call*.
Page 26
||
INTRODUCTION
* Option/accessory.
24
With the Volvo ID app
1.
Download the Volvo ID app from
Download
Centre in the centre display's app view.
2. Start the app and register a personal email
address.
3. Follow the instructions that are automatically
sent to the specified email address.
> A Volvo ID has now been created and
automatically registered to the car.
Volvo ID services can now be used.
On Volvo Cars website
1. Go into www.volvocars.com and log in6 using
the icon at the top right. Select Create Volvo
ID.
2. Enter a personal email address.
3. Follow the instructions that are automatically
sent to the specified email address.
> A Volvo ID has now been created. Read
below to learn how to register the ID to
the car.
With Volvo On Call mobile app
7
1. Download the latest version of the Volvo On
Call app from a smartphone, via e.g. App
Store, Windows Phone or Google Play.
2. Choose to create a Volvo ID from the app's
start page and enter a personal email
address.
3. Follow the instructions that are automatically
sent to the specified email address.
> A Volvo ID has now been created. Read
below to learn how to register the ID to
the car.
Registering your Volvo ID to the car
If you created your Volvo ID via the web or the
Volvo On Call app, register it to your car as follows:
1. If not done already, download the Volvo ID
app from
Download Centre in the app view.
NOTE
To download apps, the car must be connected to the Internet.
2. Start the app and enter your Volvo ID/your
email address.
3. Follow the instructions that are automatically
sent to the email address linked to your
Volvo ID.
> Your Volvo ID is now registered to the car.
Volvo ID services can now be used.
Advantages of Volvo ID
•
One user name and one password to access
online services, i.e. only one username and
one password to remember.
•
If the username/password for a service (e.g.
Volvo On Call) is changed, then it is also
changed automatically for other services.
Related information
•
Downloading, updating and uninstalling apps
(p. 497)
•
Connecting the car (p. 492)
6
Available in certain markets.
7
If you have Volvo On Call*.
Page 27

INTRODUCTION
}}
25
Drive-E - cleaner driving pleasure
Volvo Car Corporation is constantly working on
the development of safer and more efficient
products and solutions in order to reduce the
negative impact on the environment.
Environmental care is one of Volvo Cars’ core values and influences all operations. The environmental work is based on the whole life cycle of
the car and takes into account the environmental
impact it has, from design to scrapping and recycling. Volvo Cars' basic principle is that every new
product developed must have less impact on the
environment than the product it replaces.
Volvo's environmental management work has
resulted in the development of more effective
and less polluting drivelines Drive-E. Personal
environment is also important to Volvo - the air
inside a Volvo is, for example, cleaner than the air
outside thanks to the climate control system.
Your Volvo complies with stringent international
environmental standards. All Volvo's manufacturing units must be ISO 14001 certified, and this
supports a systematic approach to the operation's environmental issues, which leads to continuous improvement with reduced environmental
impact. Holding the ISO certificate also means
that environmental laws and regulations in force
are complied with. Volvo also requires that its
partners must also meet these requirements.
Fuel consumption
Since a large part of a car's total environmental
impact stems from its use, the emphasis of Volvo
Cars' environmental work is on reducing fuel consumption, carbon dioxide emissions and other air
pollutants. Volvo cars have competitive fuel consumption in each of their respective classes.
Lower fuel consumption generally results in lower
emission of the greenhouse gas, carbon dioxide.
Page 28

||
INTRODUCTION
* Option/accessory.
26
Contributing to a better environment
An energy-efficient and fuel-efficient car not only
contributes to a reduced impact on the environment, but also means reduced costs for the
owner of the car. As the driver, it is easy to
reduce fuel consumption and thereby save
money and contribute to a better environment here is some advice:
•
Plan for an effective average speed. Speeds
above approx. 80 km/h (approx. 50 mph)
and below 50 km/h (approx. 30 mph) lead to
increased energy consumption.
•
Follow the Service and Warranty Booklet's
recommended intervals for service and maintenance of the car.
•
Avoid letting the engine idle - switch off the
engine when stationary for longer periods.
Pay attention to local regulations.
•
Plan the journey - a lot of unnecessary stops
and uneven speed contribute to increased
fuel consumption.
•
Use preconditioning - it improves the range
of the hybrid battery and reduces the energy
requirement while driving.
Also remember to always dispose of environmentally hazardous waste, such as batteries and oil, in
an environmentally safe manner. Consult a workshop in the event of uncertainty about how this
type of waste should be discarded - an authorised Volvo workshop is recommended.
Efficient emission control
Your Volvo is manufactured following the concept
"Clean inside and out" – a concept that encompasses a clean interior environment as well as
highly efficient emission control. In many cases
the exhaust emissions are well below the applicable standards.
Clean air in the passenger compartment
A passenger compartment filter prevents dust
and pollen from entering the passenger compartment via the air intake.
The Interior Air Quality System (IAQS)* ensures
that the incoming air is cleaner than the air in the
traffic outside.
The system cleans the air in the passenger compartment from contaminants such as particles,
hydrocarbons, nitrous oxides and ground-level
ozone. If the outside air is contaminated then the
air intake is closed and the air is recirculated.
Such a situation may arise in heavy traffic,
queues and tunnels for example.
IAQS is a part of the Clean Zone Interior Package (CZIP)*, which also includes a function that
allows the fan to start when the car is unlocked
with the remote control key.
Interior
The material used in the interior of a Volvo is
carefully selected and has been tested in order to
be pleasant and comfortable. Some of the details
are hand-made, such as the seams of the steering wheel that are sewn by hand. The interior is
monitored in order not to emit strong odours or
substances that cause discomfort in the event of
e.g. high heat and bright light.
Volvo workshops and the environment
Regular maintenance creates the conditions for a
long service life and low fuel consumption for
your car. In this way you also contribute to a
cleaner environment. When Volvo's workshops
are entrusted with the service and maintenance
of your car it becomes part of Volvo's system.
Volvo makes clear demands regarding the way in
which workshop premises shall be designed in
order to prevent spills and discharges into the
environment. The workshop staff have the knowledge and the tools required to guarantee good
environmental care.
Recycling
Since Volvo works from a life cycle perspective, it
is also important that the car is recycled in an
environmentally sound manner. Almost all of the
car can be recycled. The last owner of the car is
therefore requested to contact a dealer for referral to a certified/approved recycling facility.
Related information
•
Drive modes (p. 411)
•
Economical driving (p. 431)
Page 29

INTRODUCTION
27
•
Fuel consumption and CO2 emissions
(p. 594)
•
Air quality (p. 181)
Page 30

INTRODUCTION
* Option/accessory.
28
IntelliSafe-driver support
IntelliSafe is the Volvo Cars concept concerning
car safety. It comprises a number of systems,
both standard and optional, that contribute to
making a car journey safe, to the prevention of
injuries and to the protection of passengers and
other road users.
Support
There are systems incorporated in IntelliSafe that
help the driver to drive the car in a safe manner.
The driver support functions incorporated in the
car include e.g. adaptive cruise control*, which
ensures that a constant distance is held between
the car and the vehicle in front.
Pilot Assist* helps the driver to keep the car
between the lane's edge markings, combined
with maintaining a preset time interval to the
vehicle ahead.
Park Assist Pilot* helps the driver park the car by
sensing the area around it.
Other examples of systems that help the driver
are the Active main beam, Cross Traffic Alert
(CTA)* and Blind Spot Information (BLIS)* systems.
Prevention
An example of a function that helps to prevent
accidents is City Safety. The function warns the
driver of risks of collision with another vehicle,
pedestrians, cyclists or larger animals. If the driver
does not react to the warning and the risk of collision is imminent then City Safety can automatically brake the car.
Lane Keeping Aid (LKA)* is another example of a
function that helps to prevent accidents by warning the driver and giving corrective steering interventions if the car is about to cross a lane side
line.
Also available is the steering assistance function,
whose purpose is to reduce the risk of the car
unintentionally leaving the road and actively steer
the car back onto the road.
Protection
To protect the driver and passengers, the car is
equipped with seatbelt tensioners which can tension the seatbelts in critical situations and in collisions. It also has airbags and inflatable curtains,
as well as Whiplash Protection System (WHIPS)
which protects against whiplash injuries.
A Pedestrian Protection System (PPS) is also
available for mitigating a pedestrian's impact with
the car in the event of a frontal collision.
Related information
•
Adaptive cruise control* (p. 286)
•
Park Assist Pilot* (p. 388)
•
Activating/deactivating main beam (p. 140)
•
Activate/deactivate Cross Traffic Alert*
(p. 348)
•
BLIS* (p. 344)
•
City Safety (p. 332)
•
Lane Keeping Aid (p. 360)
•
Seatbelt (p. 63)
•
Safety (p. 60)
•
Airbags (p. 67)
•
Pilot Assist* (p. 303)
•
Steering assistance upon risk of lane departure (p. 368)
•
Whiplash Protection System (p. 61)
Page 31

INTRODUCTION
}}
* Option/accessory.
29
Sensus - online connectivity and entertainment
Sensus makes it possible to surf the Internet,
use different types of apps and make the car a
Wi-Fi hotspot.
This is Sensus
Sensus offers an intelligent interface and online
connectivity with the digital world. An intuitive
navigation structure makes it possible to receive
relevant support, information and entertainment
when it is necessary, without distracting the
driver.
Sensus covers all solutions in the car that are
connected with entertainment, online connectivity, navigation* and the user interface between
driver and car. It is Sensus that makes communication possible between you, the car and the outside world.
Information when it is needed, where it is needed
The different displays in the car provide information at the right time. The information is shown in
different locations based on how it should be prioritised by the driver.
Page 32

||
INTRODUCTION
* Option/accessory.
30
Different types of information are shown in different displays depending on how the information should be prioritised.
Head-up display*
The head-up display shows selected information
that the driver should deal with as soon as possible. Such information includes traffic warnings,
speed information and navigation* information.
Road Sign Information and incoming phone calls
are also shown in the head-up display. The display is operated via the right-hand steering wheel
keypad and via the centre display.
Driver display
The driver display shows information on speed
and e.g. incoming calls or song tracks being
Page 33

INTRODUCTION
* Option/accessory.
31
played. The display is operated via the two steering wheel keypads.
Centre display
Many of the main functions of the car are controlled from the centre display, a touch screen
which reacts to touch. The number of physical
buttons and controls in the car is therefore minimal. The screen can even be operated while
wearing gloves.
From here, for example, you can control the climate control system, the entertainment system
and seat position*. The information that is shown
in the centre display can be acted on by the
driver or someone else in the car when the
opportunity arises.
Voice recognition system
The voice recognition system
can be used without the driver
needing to take his/her hands
off the steering wheel. The system can understand natural
speech. Use voice recognition
to, for example, play back a
song, call someone, increase the temperature or
read out a text message.
For more information about all functions/
systems, see the relevant section in the owner's
manual or its supplement.
Related information
•
Operating the centre display (p. 36)
•
Navigating in the centre display's views
(p. 40)
•
Head-up display* (p. 117)
•
Driver display (p. 96)
•
Voice recognition (p. 121)
•
Online car* (p. 492)
•
Audio and media (p. 464)
Page 34

INTRODUCTION
* Option/accessory.
32
Windows, glass and mirrors
The car contains controls for windows, glass
and mirrors. Some of the windows in the car are
reinforced with lamination, which makes the passenger compartment more soundproof, amongst
other things.
Laminated glass
The windscreen and sunroof* have laminated
glass. The glass is reinforced, which provides better protection against break-ins and improved
sound insulation in the passenger compartment.
Laminated glass is available as an option for certain other glass surfaces.
The symbol is shown on the windows where the glass is
laminated8.
Related information
•
Sunroof* (p. 159)
•
Power windows (p. 151)
•
Activating/deactivating defrost of windows
and door mirrors (p. 192)
•
Using the sun blind* (p. 153)
•
Interior rearview mirror (p. 156)
•
Adjusting the door mirrors (p. 154)
•
Head-up display* (p. 117)
•
Using windscreen wipers (p. 149)
•
Windscreen and headlamp washers (p. 151)
8
Does not apply to the windscreen or sunroof* which are always laminated and thus do not have this symbol.
Page 35

INTRODUCTION
}}
33
Overview of the centre display
Many of the car's functions are controlled from
the centre display. Presented here is the centre
display and its options.
Page 36

||
INTRODUCTION
34
Three of the centre display's basic views. Swipe right or left to access the function or app view respectively9.
Function view - car functions that are activated/deactivated with a press. Certain func-
tions are also so-called trigger functions,
which means they open a window with set-
ting options. Examples of such are
Camera
and parking functions. Settings for the head-
9
The views are reversed for right-hand drive cars.
Page 37

INTRODUCTION
* Option/accessory.
35
up display* are also made from the function
view, but adjustments are made using the
steering wheel's right-hand keypad.
Home view - the first view that is shown
when the screen is started.
Application view (app view) - apps that have
been downloaded (third-party apps) and
apps for embedded functions, such as
FM
radio
. Tap on an app icon to open the app.
Status bar - the activities in the car are
shown right at the top of the screen. Network/connection information is shown on the
left-hand side of the status bar, while mediarelated information, the clock and indication
about on-going background activity are
shown on the right.
Top view - drag the tab down in order to
access the top view.
Settings, Owner's
manual
, Profile and the car's saved mes-
sages are accessed from here.
Navigation - leads to map navigation, with
e.g. Sensus Navigation*. Tap on the subview
to expand it.
Media - recently used apps associated with
media. Tap on the subview to expand it.
Phone - the phone function can be reached
from here. Tap on the subview to expand it.
Extra subview - recently used apps/car functions that do not belong in any of the other
subviews. Tap on the subview to expand it.
Climate row - information and direct interaction to set temperature, seat heating level*
and fan speed. Tap on the symbol in the centre of the climate row in order to open the
climate view with more setting options.
Related information
•
Operating the centre display (p. 36)
•
Navigating in the centre display's views
(p. 40)
•
Function view with buttons for car functions
(p. 47)
•
Changing settings for apps (p. 177)
•
Symbols in the centre display's status bar
(p. 45)
•
Settings in the centre display (p. 170)
•
Head-up display* (p. 117)
•
Media player (p. 471)
•
Phone (p. 485)
•
Climate controls in the centre display
(p. 184)
•
Cleaning the centre display (p. 576)
Page 38

INTRODUCTION
* Option/accessory.
36
Operating the centre display
Many of the car's functions are controlled and
regulated from the centre display. The centre
display is a touch screen that reacts to touch.
Using the touch screen functionality in the centre display
The screen reacts differently depending on
whether you press, drag or swipe across it.
Actions such as browsing between different
views, marking objects, scrolling in a list and moving apps can be performed by touching the
screen in different ways.
An infrared film enables the screen to detect a
finger that is just in front of the screen. This technology makes it possible to use the screen even
with gloves on.
Two people can interact with the screen at the
same time, e.g. to adjust the climate for the driver
and passenger side respectively.
IMPORTANT
Do not use sharp objects on the screen as
they may scratch it.
The table below presents the different procedures for operating the screen:
Procedure Execution Result
Press once. Highlights an object, confirms a selection or activates a function.
Press twice in quick succession.
Zooms in on a digital object, such as the map*.
Press and hold.
Grabs an object. Can be used to move apps or map points on the map*. Press and hold your finger against
the screen and at the same time drag the object to the desired location.
Tap once with two fingers.
Zooms out from a digital object, such as the map*.
Page 39

INTRODUCTION
}}
* Option/accessory.
37
Procedure Execution Result
Drag Changes between different views, scrolls a list, text or view. Hold depressed and drag in order to move
apps or map points on the map*. Drag horizontally or vertically across the screen.
Swipe/drag quickly Changes between different views, scrolls a list, text or view. Drag horizontally or vertically across the
screen.
Drag apart Zooms in.
Drag together Zooms out.
Page 40

||
INTRODUCTION
* Option/accessory.
38
Turn off the screen and reactivate it
Home button for the centre display.
When the centre display is switched off, the
screen is dimmed so as not to be disruptive
whilst driving. The climate row will still be visible,
and apps and other functions connected to the
screen will continue to run.
1. Give a long press on the physical home button below the screen.
> The screen goes dark except for the cli-
mate row, which continues to be shown.
All functions continue to run, such as climate control, audio, guiding* and apps. In
this mode, the screen can be cleaned with
the cloth supplied; see the section
"Cleaning the centre display".
2. Reactivate the screen - briefly tap on the
home button.
> The view that was displayed before the
screen was switched off will be shown
again.
NOTE
The screen cannot be deactivated when a
prompt to perform an action is shown on the
screen.
NOTE
The centre display deactivates automatically
when the engine is off and the driver's door is
opened.
Returning to home view from another view
1. Briefly press the home button.
> The last position of the home view is
shown.
2. Briefly press again.
> All subviews of the home view are set to
their default mode.
NOTE
In home view standard mode - briefly press
the home button. An animation that describes
access to the different views is shown on the
screen.
Moving apps and buttons for car functions
The apps and buttons for car functions in the app
view and function view respectively can be moved
and organised as desired.
1. Tap on an app/button and hold depressed.
> The app/button changes size and
becomes slightly transparent. It is then
possible to move it.
2. Drag the app/button to a vacant space in the
view.
The maximum number of rows available for use in
order to position apps/buttons is 48. To move an
app/button outside the visible view, drag it to the
bottom of the view. New rows are then added,
where the app/button can be located.
An app/button can thus be located further down
and is then not visible in the normal mode for the
view.
Swipe across the screen to scroll upward/downward in the view.
Page 41

INTRODUCTION
39
NOTE
Hide the apps that you rarely or never use by
moving them to the bottom, off the visible
screen. This way it will be easier to find the
apps you use more often.
Scrolling in a list, article or view
When a scroll indicator is visible in the screen, it
is possible to scroll downward or upward in the
view. Swipe downwards/upwards anywhere in the
view.
The scroll indicator appears in the centre display when it
is possible to scroll in the view.
Using the controls in the centre display
Temperature control.
The control is used for many of the car's functions. Regulate e.g. temperature by means of one
of the following:
•
drag the control to the desired temperature,
•
tap on
+/− in order to raise/lower the tem-
perature gradually, or
•
tap on the desired temperature on the control.
Related information
•
Navigating in the centre display's views
(p. 40)
•
Settings in the centre display (p. 170)
•
Sensus - online connectivity and entertainment (p. 29)
•
Remote control key range (p. 230)
•
Downloading, updating and uninstalling apps
(p. 497)
•
Using the keyboard in the centre display
(p. 49)
•
Change settings for the centre display
(p. 46)
Page 42

INTRODUCTION
40
Navigating in the centre display's views
There are five different basic views in the centre
display: home view, top view, climate view, application view (app view) and function view. The
screen is started automatically when the driver's
door is opened.
Home view
Home view is the view that is shown when the
screen is started. It consists of four subviews:
Navigation, Media, Phone and an extra sub-
view.
An app/car function selected from the app/function view starts in the respective subview of the
home view. For example
FM radio starts in the
Media subview.
The extra subview contains the last used app/car
function that is not associated with any of the
other three areas.
The subviews show brief information about each
different app.
NOTE
The first time the car is used, some of the
home view's subviews have no content.
NOTE
In home view standard mode - briefly press
the home button. An animation that describes
access to the different views is shown on the
screen.
Page 43

INTRODUCTION
}}
41
Expanding a subview from default mode
Standard mode and expanded mode of a subview in the centre display.
Page 44

||
INTRODUCTION
42
Expanding a subview:
–
For subview one, two and three: Press anywhere on the subview. When a subview is
expanded, the fourth subview in the home
view is temporarily forced away. The other
two are minimised and only certain information is shown. When the fourth sub view is
pressed, the other three subviews are minimised and only certain information is displayed.
The expanded view provides access to the
basic functions of the app.
Closing an expanded subview:
–
The subview can be closed in three different
ways.
•
Tap on the upper part of the expanded
subview.
•
Tap on another subview (that subview will
then open in expanded mode instead).
•
Briefly press the physical home button
below the centre display.
Opening/closing a subview in full screen mode
The extra subview and the subview for
Navigation can be opened out in full screen
mode, with even more information and more setting options.
When a new subview is opened in full-screen
mode, no information from the other subviews is
shown.
In expanded mode, open the
app in full screen - press on
the symbol.
Press on the symbol to go back
to the expanded mode, or press
the home button at the bottom
of the screen.
Home button for the centre display.
There is always the option to go back to home
view by pressing the home button. Go back to the
home view's standard view from full screen mode
- press twice on the home button.
Status bar
The activities in the car are shown at the top of
the screen. Network/connection information is
shown on the left-hand side of the status bar,
while media-related information, the clock and
indication that background activity is in progress
are shown on the right.
Top view
Top view dragged down.
A tab is located in the centre of the status bar at
the top of the screen. Open the top view by
pressing on the tab or by dragging/swiping from
the top downwards across the screen.
Page 45

INTRODUCTION
}}
43
In the top view, access is always available to:
•
Settings
•
Owner's manual
•
Profile
•
The car's saved messages.
In the top view, access is given to the following in
some cases:
•
Contextual setting (e.g.
Navigation
Settings)
•
Contextual owner's manual (e.g.
Navigation
Manual).
Exit the top view - press outside the top view, on
the home button or at the bottom of the top view
and drag upward. The underlying view is then visible and available for use again.
NOTE
The top view is not available during starting/
shutdown or when a message is shown on
the screen. It is also not available when climate view is shown.
Contextual setting and owner's manual
Drag the top view down when an app (e.g. navigation) is running:
•
When contextual setting is available, it is
shown to the right of
Settings in the top
view. Press on the contextual setting to
access settings that are related to the content that is shown on the screen. E.g. press
Navigation Settings - settings that are
related to navigation are shown.
•
When the contextual owner's manual is available, it is shown to the right of
Owner's
manual in the top view. Press on the con-
textual owner's manual to access articles in
the digital owner's manual that are related to
the content that is shown on the screen. E.g.
press Navigation Manual - an article that is
related to navigation opens.
This only applies to some of the apps in the car.
For third party apps that are downloaded, it is not
possible to access app-specific articles or settings, for example.
Climate view
The climate row is always visible at the bottom of
the screen. The most common climate settings
can be made directly there, such as setting temperature, seat heating and fan.
Press the symbol in the centre of the
climate row to open the climate view
and gain access to more climate settings.
Press the symbol to close the climate
view and return to the previous view.
Application view
Application view with the car's apps.
Swipe from right to left10 across the screen in
order to access the application view (app view)
from the home view. Apps that have been downloaded (third-party apps) and apps for embedded
functions, such as
FM radio, are found here. Cer-
tain apps show brief information directly in the
10
Applies to left-hand drive cars. For right-hand drive cars - swipe in the opposite direction.
Page 46

||
INTRODUCTION
* Option/accessory.
44
app view, such as the number of unread text
messages for
Messages.
Tap on an app to open it. It then opens in the
subview to which it belongs, such as
Media.
Depending on the amount of apps, it is possible
to scroll downward in the app view. Do this by
swiping/dragging from the bottom and up.
To move an app:
1. Tap on the app and hold depressed.
> The app becomes slightly transparent and
larger when it is ready to be moved.
2. Drag the app to the desired location.
NOTE
Apps and car function buttons cannot be
added to locations that are already occupied.
Go back to the home view again by swiping from
left to right10 across the screen, or by pressing
the home button.
Function view
The function view with buttons for different car functions.
Swipe from left to right10 across the screen in
order to access the function view from the home
view. From here you can activate/deactivate different car functions, e.g.
Lane Departure
Warning
, Lane Keeping Aid* and Park Assist*.
Depending on the amount of functions, it is also
possible here to scroll downward in the view. Do
this by swiping/dragging from the bottom and up.
Unlike in app view, where an app is opened with
a press, a function is activated/deactivated by
pressing the relevant function button. Some functions (trigger functions) open in a new window
when pressed.
Just as in app view, it is possible to move the
function buttons around and arrange them in the
desired order.
Related information
•
Operating the centre display (p. 36)
•
Overview of the centre display (p. 33)
•
Digital owner's manual in the car (p. 15)
•
Function view with buttons for car functions
(p. 47)
•
Changing settings for apps (p. 177)
•
Symbols in the centre display's status bar
(p. 45)
•
Climate controls in the centre display
(p. 184)
10
Applies to left-hand drive cars. For right-hand drive cars - swipe in the opposite direction.
Page 47

INTRODUCTION
45
Symbols in the centre display's status bar
Overview of the symbols that can be shown in
the centre display's status bar.
The status bar shows activities in progress and, in
some cases, their status. Not all symbols are
shown all the time due to the limited space in the
status bar.
Symbol Specification
Connected to the Internet.
Connection to the Internet failed.
Roaming activated.
Signal strength in mobile phone network.
Bluetooth device connected.
Bluetooth activated but no device
connected.
Information sent to and from GPS.
Connected to Wi-Fi network.
Tethering activated (Wi-Fi hotspot).
The car then shares the available
connection.
Symbol Specification
Car modem activated.
USB sharing active.
Process in progress.
Timer for preconditioning active.
Audio source being played back.
Audio source stopped.
Phone call in progress.
Audio source muted.
News is received from the radio
channel.
Traffic information is received.
Clock.
Related information
•
Messages in the driver display and the centre
display (p. 113)
•
Navigating in the centre display's views
(p. 40)
•
Messages in the driver display and the centre
display (p. 113)
Page 48

INTRODUCTION
46
Change settings for the centre display
The centre display is started automatically when
the driver's door is opened. The settings can be
changed for the centre display to personalise
sound and themes. The screen can be switched
off so as not to be disruptive whilst driving.
Switching off/changing the system sounds volume in the centre display.
The system sounds volume in the centre display
can be adjusted or switched off:
1.
Press
Settings in the top view in the centre
display.
2. Press
Sound System Volumes.
3.
Under
Touch Sounds, drag the control to
change the volume/switch off screen touch
sounds. Drag the control to the desired volume.
Changing the appearance of the screen
1.
Press
Settings in the top view.
2. Press
My Car Displays Display
Themes
.
3.
Then select theme, e.g.
Minimalistic or
Chrome Rings.
As a supplement to these appearances, it is possible to choose between
Normal and Bright.
With Normal, the screen background is dark and
the text is light. This alternative is the default for
all themes. A light variant can also be selected, in
which the background is light and the text is dark.
This alternative can be useful in e.g. strong daylight.
This alternative is always available for the user
and is not affected by the surrounding lighting.
Related information
•
Settings in the centre display (p. 170)
•
Sensus - online connectivity and entertainment (p. 29)
•
Cleaning the centre display (p. 576)
•
Operating the centre display (p. 36)
Page 49

INTRODUCTION
}}
47
Function view with buttons for car functions
All the buttons for car functions are located in
the function view, one of the centre display's
basic views. Navigate to the function view from
home view by swiping from left to right across
the screen11.
Different types of buttons
There are three different types of buttons for car
functions; see below:
Type of button Property Affects car function
Function buttons Have on/off positions.
When a function is running, an LED indicator illuminates to the left of the icon for the button.
Press the button to activate/deactivate a function.
Most buttons in function view are
function buttons.
Trigger buttons Do not have on/off positions.
When a trigger button is pressed, a window for the function opens. For example, it may be a
window for changing a seat's position.
•
Camera
•
Headrest fold
•
Head-up display adjustments
Parking buttons Have on, off and scan modes.
Similar to the function buttons but with an extra position for parking scanning.
•
Park In
•
Park Out
11
Applies to left-hand drive cars. For right-hand drive cars - swipe in the opposite direction.
Page 50

||
INTRODUCTION
48
The buttons' different modes
When the LED indicator illuminates in green on a
function or parking button, the function is activated. When a function is activated, extra text
with an explanation for certain functions is
shown. The text is shown for a few seconds and
then the button is shown with the LED indicator
illuminated.
For
Lane Keeping Aid, the text Works only at
certain speeds is shown, for example, when the
button is depressed.
Briefly tap on the button once in order to acti-
vate/deactivate the function.
The function is deactivated when the LED indicator is extinguished.
When a warning triangle is shown in the righthand section of the button there is something not
working as intended.
Related information
•
Overview of the centre display (p. 33)
•
Navigating in the centre display's views
(p. 40)
•
Categories in the settings menu (p. 171)
Page 51

INTRODUCTION
}}
49
Using the keyboard in the centre display
The centre display keyboard makes it possible
make entries using keys. It is also possible to
"draw in" letters and characters on the screen
by hand.
Making entries with the keyboard
The keyboard can be used to enter characters,
letters and numbers, e.g. to write text messages
from the car, enter passwords or search for articles in the digital owner's manual.
The keyboard is only shown when entries can be
made on the screen.
Page 52

||
INTRODUCTION
50
The image shows an overview of some of the buttons which may be shown in the keyboard. The appearance varies depending on language settings and the context in which the
keyboard is being used.
Page 53

INTRODUCTION
}}
51
Row of suggested words or characters12.
The suggested words are adjusted as new
letters are being entered. Browse among the
suggestions by pressing on the right and left
arrows. Tap on a suggestion to select it. Note
that this function is not supported by all language selections. If not available, the row will
not be shown on the keyboard.
The characters available on the keyboard
depend on which language was selected
(see point 7). Tap on a character to enter it.
The button works in different ways, depending on the context in which the keyboard is
used - either to enter @ (when an email
address is entered) or to create a new row
(for normal text input).
Hides the keyboard. If this is not possible, the
button is not shown.
Used to enter capital letters. Press again to
enter one capital letter and then continue
with lower-case letters. Another press makes
all letters capital letters. The next press
restores the keyboard to lower-case letters.
In this mode, the first letter after a full stop,
exclamation mark or question mark is a capital letter. The first letter in the text field is
also a capital letter. In text fields intended for
names or addresses, each word automatically
starts with a capital letter. In text fields for
password, web address or email address
entry, all letters are automatically lower case
unless otherwise set with the button.
Number entry. The keyboard (2) is then
shown with numbers. Press
, which in
number mode is shown instead of
, to
return to the letter keyboard, or
to
open the keyboard with special characters.
Changes text input language, e.g. EN. The
available characters and word suggestions
(1) vary depending on the selected language.
One long press opens a list of languages
and then tap on the language to be used. A
short press changes to the next language on
the list without showing the list. To add additional languages in the keyboard - see the
heading "Changing keyboard language"
below.
Space.
Undoes entered text. Press briefly to delete
one character at a time. Hold the button
depressed to delete characters more quickly.
Changes keyboard mode to write letters and
characters by hand instead. Read more in the
section "Writing characters/letters by hand
on the screen".
Press the confirmation button above the keyboard (not visible in the image) to confirm the
entered text. The appearance of the button differs depending on context.
Changing the keyboard language
To make it possible to switch between different
languages for the keyboard, the languages must
first be added under
Settings.
Adding/deleting languages in settings
The keyboard is automatically set to the same
languages as the system language. The keyboard
language can be manually adapted without
affecting the system language.
1.
Press
Settings in the top view.
2. Press
System System Languages and
Units
Keyboard Layouts.
3. Select one or more languages from the list.
> It is now possible to switch between the
selected languages directly from the keyboard for text input.
If no languages have been actively selected
under
Settings, the keyboard uses the same lan-
guage as the car's system language; see the
section "Changing system settings in the settings menu".
12
Applies to Asiatic languages.
Page 54

||
INTRODUCTION
52
Switching between different languages in the keyboard
When a number of languages
have been selected in
Settings, the keyboard button
(shown in context as number 7
in the illustration above) is used
to switch between different languages.
To change keyboard language with list:
1. One long press on the button (see image
above).
> A list opens.
2. Select the required language. If more than
four languages have been selected under
Settings, it is possible to scroll in the list
from the keyboard.
> The keyboard is adapted to the selected
language and other word suggestions are
given.
To change the keyboard language without displaying the list:
–
One short press of the button.
> The keyboard is adapted to the next lan-
guage in the list without displaying the list.
Variants of a letter or character
To enter a variant of a letter/character, e.g. é or
è:
1. Press and hold the letter/character.
> A box with possible variants of the letter/
character opens.
2. Press the required variant. If none of the variants are selected, the original letter/character is entered.
Related information
•
Writing characters/words by hand on the
screen (p. 53)
•
Settings in the centre display (p. 170)
•
Operating the centre display (p. 36)
•
Managing text messages (p. 489)
•
Changing system settings in the settings
menu (p. 172)
Page 55

INTRODUCTION
}}
53
Writing characters/words by hand on the screen
The centre display keyboard allows you to enter
characters, letters and words on the screen by
"drawing" by hand.
Press the button on the keyboard to change from typing
with the keys to entering letters
and characters by hand.
Area for writing characters/letters/words/
parts of word.
The text field where the characters or word
suggestions appear as they are written on
screen (1).
Suggestions for characters/letters/word/
part of word. It is possible to scroll through
the list.
Space. A space can also be created by
entering a dash (-) in the area for hand-written letters (1). See the heading "Entering a
space in the free text field with handwriting
recognition" below.
Undo entered text. Press briefly to delete
one character/one letter at a time. Wait a
moment before pressing again to delete the
next character/letter, etc.
Return to the keyboard with regular character input.
Switch off/on sound when entering.
Hide the keyboard. If this is not possible, the
button is not shown.
Change text input language.
Writing characters/letters/words by hand
1. Write a character, a letter, a word or parts of
a word in the area for hand-written letters
(1). Write a word or parts of a word above
each other or on a line.
> A number of suggested characters, letters
or words is shown (3). The most likely
choice is found at the top of the list.
IMPORTANT
Do not use sharp objects on the screen as
they may scratch it.
2. Enter the character/letters/word by waiting a
moment.
> The character/letter/word at the top of
the list is entered. It is also possible to
select a different character by pressing
the required character, letter or word in
the list.
Page 56

||
INTRODUCTION
54
Deleting/changing characters/letters written
by hand
Delete all characters in the text field (2) by swiping
across the handwriting field (1).
–
There are several options for deleting/
changing characters/letters:
•
Press the intended letter or word in the
list (3).
•
Press the text undo button (5) to delete
the letter and begin again.
•
Swipe horizontally from right to left13 over
the area for handwritten letters (1). Delete
multiple letters by swiping over the area
several times.
•
Pressing the X in the text field (2) deletes
all of the entered text.
Changing row in the free text field with
handwriting
Change row by hand by drawing the above character in
the handwriting field14.
Entering a space in the free text field with
handwriting recognition
Enter a space by drawing a dash from left to right15.
Related information
•
Using the keyboard in the centre display
(p. 49)
•
Managing text messages (p. 489)
•
Changing system settings in the settings
menu (p. 172)
13
For Arabic keyboard - swipe in the opposite direction. Swiping from right to left creates a space.
14
For Arabic keyboards - draw the same character, but reversed.
15
For Arabic keyboard - draw the dash from right to left.
Page 57

INTRODUCTION
}}
55
General information about Twin Engine
Twin Engine runs like a regular car, but certain
functions differ from a car that only runs on pet-
rol or diesel. The electric motor drives the car
mostly at low speeds, the petrol engine at higher
speeds, as well as during more active driving.
Page 58

||
INTRODUCTION
56
Overview
Page 59

INTRODUCTION
}}
57
Charging the hybrid battery, see section
"Preparation for charging the hybrid battery".
Electric motor with rear-wheel drive, see section "Starting the engine".
Hybrid battery, see section "Hybrid battery".
Drive modes, change with the drive mode
control in the tunnel console and in the centre display, see section "Drive modes".
Driver display with information unique to the
Twin Engine, see section "Hybrid related
symbols and messages" and "Hybrid related
information in the driver display".
Important to know
Car without power
Bear in mind that important functions such as the
brakes and power steering are inoperable when
the car is without power.
WARNING
In a de-energised car with the electric motor
and fuel-driven engine switched off it is not
possible to brake the car.
Towing not permitted
Towing the Twin Engine is not permitted since
this damages the electric motor. When moving
the car it must be transported raised up with all
the wheels on a recovery vehicle's platform.
Exterior engine noise
WARNING
Remember that the car does not emit any
engine noise when it is only powered by the
electric motor and may therefore be difficult
to notice by children, pedestrians, cyclists and
animals. This is especially true at low speeds,
such as in car parks.
High-voltage current
WARNING
Several components in the car work with
high-voltage current that could be dangerous
in the event of incorrect intervention. These
components, and all orange-coloured cables,
must only be handled by qualified personnel.
Do not touch anything that is not clearly described in the owner's manual, see section "Engine
compartment overview" for an overview of the
engine compartment's components.
Unique functions
Drive modes
It is possible to set the car in different drive
modes while driving, e.g. electric operation only
or, when power is required, both electric motor
and petrol engine. The car calculates an optimal
combination of driveability, driving experience,
environmental impact and fuel economy according to the drive mode selected. Read more in the
section "Drive modes".
Driver display
The driver display shows some information that is
unique to the Twin Engine - charging information,
selected drive mode, distance to empty battery as
well as the hybrid battery's charge level. Read
more in the sections "Hybrid related information
in the driver display" and "Drive modes".
Preconditioning
In order that the car should have optimal function
it is important that the hybrid battery with associated electrical drive systems, as well as the petrol
engine and its drive systems, have the correct
operating temperature. Battery capacity may be
reduced considerably if the battery is too cold or
too hot. Preconditioning prepares the car's drive
systems and the passenger compartment before
departure so that both wear and energy needs
during the journey are reduced. The range for the
hybrid battery increases. Read more in the section "Starting/stopping preconditioning".
Page 60

||
INTRODUCTION
58
Charging the hybrid battery
IMPORTANT
Never connect the charging cable when there
is a risk of thunderstorm or lightning strike.
The hybrid battery is the Lithium-ion type and can
be recharged in different ways:
•
A charging cable with control unit can be
connected between the car and a 230 VAC
socket16. Charging time depends on charging current. Read more in the section
"Charging the hybrid battery".
•
The hybrid battery is recharged during gentle
braking with the brake pedal. The car's
kinetic energy is then converted to electrical
energy, which is used to charge the hybrid
battery. The hybrid battery is also recharged
during engine braking in gear position B
when e.g. travelling downhill. Read more in
the sections "Gear positions for automatic
gearbox" and "Hybrid related information in
the driver display".
•
The hybrid battery can also be charged by
the car's engine.
Related information
•
Preparation for charging the hybrid battery
(p. 453)
•
Starting the car (p. 400)
•
Hybrid battery (p. 556)
•
Drive modes (p. 411)
•
Hybrid-related symbols and messages
(p. 460)
•
Hybrid related information in the driver display (p. 99)
•
Engine compartment overview (p. 544)
•
Starting/stopping preconditioning (p. 204)
•
Charging the hybrid battery (p. 444)
•
Gear positions for automatic gearbox
(p. 405)
16
The voltage in the socket may vary depending on market.
Page 61

SAFETY
Page 62

SAFETY
60
Safety
The vehicle is equipped with several safety systems that work together to protect the vehicle's
driver and passengers in the event of an accident.
The car is equipped with a number of sensors
that react in the event of an accident and activate
different safety systems, such as different types
of airbags and seatbelt tensioners. Depending on
the specific accident situation, such as collisions
at different angles, rollover or driving off the road,
the systems react in different ways to provide the
best protection.
There are also mechanical safety systems such
as Whiplash Protection System. The car is also
constructed so that a large part of the force of a
collision is distributed to beams, pillars, floor, roof
and other parts of the body.
The car's safety mode may be activated after a
collision if an important function in the car has
been damaged.
Warning symbol in driver display
The warning symbol is illuminated in
the driver display when the car's electrical system is set in ignition position
II. The symbol is extinguished after
approx. 6 seconds if the car's safety system is
fault-free.
WARNING
If the warning symbol remains illuminated or
is switched on during driving and the message
SRS airbag Service urgent Drive to
workshop is shown in the driver display, it
means that part of one of the safety systems
does not have full functionality. Volvo recommends that an authorised Volvo workshop
should be contacted as soon as possible.
WARNING
Never modify or repair the car's various safety
systems yourself. Defective work in one of the
systems can cause malfunction and result in
serious personal injury. Volvo recommends
that an authorised Volvo workshop should be
contacted.
If the specific warning symbol is broken
then the general warning symbol is illuminated instead and the driver display
shows the same message.
Related information
•
Safety during pregnancy (p. 60)
•
Seatbelt (p. 63)
•
Airbags (p. 67)
•
Whiplash Protection System (p. 61)
•
Pedestrian Protection System (p. 62)
•
Safety mode (p. 74)
•
Child safety (p. 75)
Safety during pregnancy
It is important that the seatbelt is used correctly
during pregnancy, and that pregnant drivers
adjust their seating position.
Seatbelt
The diagonal section should wrap over the shoulder then be routed between the breasts and to
the side of the abdomen.
The lap section should lay flat over the thighs and
as low as possible under the abdomen. – It must
never be allowed to ride upward. Remove the
slack from the seatbelt and ensure that it fits as
close to the body as possible. In addition, check
that there are no twists in the seatbelt.
Seating position
As the pregnancy progresses, pregnant drivers
must adjust the seat and steering wheel such
that they can easily maintain control of the vehi-
Page 63

SAFETY
}}
* Option/accessory.
61
cle as they drive (which means that they must be
able to easily operate the foot pedals and steering wheel). The aim should be to position the
seat with as large a distance as possible between
abdomen and steering wheel.
Related information
•
Safety (p. 60)
•
Seatbelt (p. 63)
•
Manual front seat (p. 126)
•
Power front seat* (p. 127)
Whiplash Protection System
Whiplash Protection System (WHIPS) reduces
the risk of whiplash injuries. The system consists
of energy-absorbing backrests and seat cushions, and specially designed head restraints in
the front seats.
WHIPS is deployed in the event of a rear-end
collision, where the angle and speed of the collision and the nature of the colliding vehicle all
have an influence.
When WHIPS is deployed, the front seat backrests are lowered backward and the seat cushions move downward to change the seating position of the driver and front seat passenger. Its
movement helps to absorb some of the forces
that can arise and cause whiplash.
WARNING
WHIPS is a supplement to the seatbelts.
Always use a seatbelt.
WARNING
Never modify or repair the seat or WHIPS
yourself. Volvo recommends that an authorised Volvo workshop should be contacted.
If the front seats have been subjected to a
major load, such as in conjunction with a collision, the seats must be replaced. Some of the
seats' protective properties may have been
lost even if they do not appear damaged.
Do not leave any objects on the floor behind or under
the front seats or in the rear seat that may prevent
WHIPS from functioning.
Page 64

||
SAFETY
* Option/accessory.
62
WARNING
Do not squeeze rigid objects between the
rear seat cushion and the front seat's backrest.
If a backrest in the rear seat is lowered then
any load must be secured to prevent it from
sliding up to the front seat backrest in the
event of a collision.
WARNING
If a backrest in the rear seat is lowered or a
rear-facing child seat is used in the rear seat,
the corresponding front seat must be moved
forward so that it does not make contact with
the lowered backrest or child seat.
Seating position
For optimum protection from WHIPS the driver
and passenger must have the correct seating
position and make sure that the system's function is not obstructed.
Set the correct seating position in the front seat
before driving starts.
Driver and front seat passenger should sit in the
centre of the seat with as little space as possible
between the head and the head restraint.
WHIPS and child seats
The protection provided by the car to children
seated in a child seat or on a booster cushion is
not diminished by WHIPS.
Related information
•
Safety (p. 60)
•
Manual front seat (p. 126)
•
Power front seat* (p. 127)
•
Rear Collision Warning (p. 344)
•
Child seats (p. 76)
Pedestrian Protection System
The Pedestrian Protection System (PPS) is a
system which, in certain frontal collisions, contributes to mitigating a pedestrian's impact with
the car.
In certain frontal collisions with a pedestrian, the
sensors in the front of the car react and the system is activated.
When PPS is activated, the following occur:
•
The rear section of the bonnet is raised.
•
An automatic alarm is sent via Volvo On Call*.
The sensors are active at a speed of approx.
25-50 km/h (15-30 mph).
The sensors are designed to detect a collision
with an object that has similar properties to those
of the human leg.
NOTE
There may be objects in the traffic environment that prompt a signal to the sensors that
is similar to a collision with a pedestrian. It is
possible that the system will be activated in
the event of a collision with such an object.
Page 65

SAFETY
63
WARNING
Do not fit any accessories or change anything
in the front. Incorrect intervention at the front
may cause incorrect function in the system
and lead to serious injury and damage to the
car.
Volvo recommends that genuine wiper arms
are used and that only genuine parts are used
for them.
WARNING
Volvo recommends contacting an authorised
Volvo workshop in the event of any damage to
the front of the car in order to ensure that the
system is intact.
Symbols in the driver display
Symbol Specification
PPS has been activated, or a fault
has occurred in the system. Follow
the recommendation given.
Related information
•
Safety (p. 60)
Seatbelt
Heavy braking can have serious consequences
if the seatbelts are not used.
It is important that the seatbelt lies against the
body so it can provide maximum protection. Do
not lean the backrest too far back. The seatbelt is
designed to protect in a normal seating position.
WARNING
Remember not to clip or hook the seatbelt to
hooks or other interior fittings, as this prevents the belt from tightening properly.
WARNING
The seatbelts and airbags interact. If a seatbelt is not used or is used incorrectly, this may
diminish the protection provided by the airbag
in the event of a collision.
WARNING
Never modify or repair the seatbelts yourself.
Volvo recommends that an authorised Volvo
workshop should be contacted.
If the seatbelt has been subjected to a major
load, such as in conjunction with a collision,
the entire seatbelt must be replaced. Some of
the seatbelt's protective properties may have
been lost even if the seatbelt does not appear
damaged. The seatbelt must also be replaced
if it shows signs of wear or damage. The new
seatbelt must be type-approved and designed
for installation at the same location as the
replaced seatbelt.
Related information
•
Safety (p. 60)
•
Seatbelt tensioner (p. 64)
•
Fastening/unfastening a seatbelt (p. 65)
•
Door and seatbelt reminder (p. 66)
Page 66

SAFETY
* Option/accessory.
64
Seatbelt tensioner
The car is fitted with pyrotechnic and electric
seatbelt tensioners that can tension the seatbelts in critical situations and collisions.
Seatbelt tensioner during collision
All the seatbelts are equipped with a pyrotechnic
seatbelt tensioner.
The pyrotechnic seatbelt tensioner tensions the
seatbelt in the event of a collision with sufficient
force in order to more effectively restrain the
occupant.
Seatbelt tensioner during critical situations
The driver and front passenger seatbelts are
equipped with an electric seatbelt tensioner.
The seatbelt tensioners work together and can
be activated together with the driver support systems City Safety and Rear Collision Warning. In
critical situations, such as panic braking, driving
off the road (e.g. the car rolls into a ditch, lifts off
the ground or hits something in the terrain), skidding, or risk of collision, the seatbelt can be tensioned by the seatbelt tensioner's electric motor.
The electric seatbelt tensioner adjusts the occupant to a better position, reducing the risk of
striking the car's interior and improving the effect
of safety systems, such as the car's airbags.
IMPORTANT
If the passenger airbag is deactivated, the
electric seatbelt tensioner on the passenger
side will also be deactivated.
Resetting the electric seatbelt tensioner
Once the critical situation has passed, the seatbelt and electric seatbelt tensioner are reset
automatically.
If the belt still remains tensioned:
1. Stop the car at a safe place.
2. Unfasten the seatbelt and then refasten it.
> The seatbelt and electric seatbelt ten-
sioner are reset.
WARNING
Never modify or repair the seatbelts yourself.
Volvo recommends that an authorised Volvo
workshop should be contacted.
If the seatbelt has been subjected to a major
load, such as in conjunction with a collision,
the entire seatbelt must be replaced. Some of
the seatbelt's protective properties may have
been lost even if the seatbelt does not appear
damaged. The seatbelt must also be replaced
if it shows signs of wear or damage. The new
seatbelt must be type-approved and designed
for installation at the same location as the
replaced seatbelt.
Related information
•
Seatbelt (p. 63)
•
Fastening/unfastening a seatbelt (p. 65)
•
Door and seatbelt reminder (p. 66)
•
City Safety (p. 332)
•
Rear Collision Warning (p. 344)
•
Activating/deactivating the passenger airbag* (p. 70)
Page 67

SAFETY
}}
65
Fastening/unfastening a seatbelt
Make sure that all passengers have fastened
their seatbelts before starting to drive.
Fastening a seatbelt
1. Pull out the seatbelt slowly and make sure it
is not twisted or damaged.
NOTE
The seatbelt locks and cannot be withdrawn:
•
if it is pulled out too quickly
•
during braking and acceleration
•
if the car leans heavily.
2. Lock the belt by inserting the locking tab in
the intended buckle.
> A loud "click" indicates that the belt has
locked.
WARNING
Always insert the tongue of the seatbelt into
the buckle on the correct side. The seatbelts
and buckles would otherwise possibly not
function as intended in the event of a collision. There is a risk of serous injury.
3. In the front seats the seatbelt can be
adjusted for height.
Press together the seat mounting and move
the seatbelt up or down.
Position the belt as high as possible without
it chafing against your throat.
The seatbelt must pass over the shoulder (not down over
the arm).
4. Tension the hip strap over the lap by pulling
the diagonal shoulder belt up towards the
shoulder.
The hip strap must be positioned low down (not over the
abdomen).
Page 68

||
SAFETY
66
WARNING
Each seatbelt is designed for only one person.
WARNING
Remember not to clip or hook the seatbelt to
hooks or other interior fittings, as this prevents the belt from tightening properly.
WARNING
Do not make any damages on seatbelts nor
insert any foreign objects into a buckle. The
seatbelts and buckles would then possibly not
function as intended in the event of a collision. There is a risk of serous injury.
Unfastening a seatbelt
1. Press the red button on the seatbelt buckle
and then let the belt retract.
2. If the seatbelt does not retract fully, feed it in
by hand so that it does not hang loose.
Related information
•
Seatbelt (p. 63)
•
Seatbelt tensioner (p. 64)
•
Door and seatbelt reminder (p. 66)
Door and seatbelt reminder
The system reminds unbelted occupants to wear
a seatbelt, and also warns about an open door,
bonnet, boot lid or fuel filler flap.
Driver display graphics
Graphics in the driver display with different types of
warnings. The warning colour on the door and boot lid is
dependent on the speed of the car.
The driver display's graphics show which seats in
the car are occupied by belted and unbelted passengers.
The same graphic also shows if the bonnet, boot
lid, fuel filler flap or any door is open.
The graphic can be acknowledged by pressing
the O button on the right-hand steering wheel
keypad.
Seatbelt reminder
Visual reminder in the roof console.
A visual reminder is given in the roof console and
by means of the warning symbol in the driver display.
The acoustic reminder is dependent on speed,
driving time and distance.
The belt status of the driver and passengers is
shown in the driver display graphics when a belt
is buckled or unbuckled.
Child seats are not covered by the seatbelt
reminder system.
Front seat
A visual and acoustic reminder remind the driver
and front seat passenger to use a seatbelt if
either of them is not wearing one.
Page 69

SAFETY
}}
67
Rear seat
The seatbelt reminder in the rear seat has two
subfunctions:
•
Provides information on which seatbelts are
being used in the rear seat. The driver display's graphics are shown when the seatbelts
are in use.
•
Reminding that a seatbelt in the rear seat is
unfastened during a journey by means of a
visual and acoustic reminder. The reminder
will cease once the seatbelt has been put on
again.
Reminder for doors, bonnet, boot lid and fuel filler flap
If the bonnet, boot lid, fuel filler flap or any door is
not closed properly, the graphic in the driver display shows what is open. Stop the car in a safe
place as soon as possible and close the source
of the warning.
If the car is driven at a speed lower
than approx. 10 km/h (6 mph) then the
driver display's information symbol illuminates.
If the car is driven at a speed higher
than approx. 10 km/h (6 mph) then the
driver display's warning symbol illuminates.
Related information
•
Seatbelt (p. 63)
•
Seatbelt tensioner (p. 64)
•
Fastening/unfastening a seatbelt (p. 65)
Airbags
The car is equipped with airbags and inflatable
curtains for driver and passengers.
WARNING
The airbag system's control module is located
in the centre console. If the centre console is
drenched with water or other liquid, disconnect the cables to the starter battery. Do not
attempt to start the car since the airbags may
deploy. Recovering the car. Volvo recommends that it is transported to an authorised
Volvo workshop.
Deployed airbags
If any of the airbags have deployed, the following
is recommended:
•
Recovering the car. Volvo recommends that it
is transported to an authorised Volvo workshop. Do not drive with deployed airbags.
•
Volvo recommends engaging an authorised
Volvo workshop to handle the replacement of
components in the car's safety systems.
•
Always contact a doctor.
Page 70

||
SAFETY
68
WARNING
Never drive with deployed airbags. They can
make steering difficult. Other safety systems
may also be damaged. The smoke and dust
created when the airbags are deployed can
cause skin and eye irritation/injury after intensive exposure. In case of irritation, wash with
cold water. The rapid deployment sequence
and airbag fabric may cause friction and skin
burns.
Related information
•
Safety (p. 60)
•
Driver and passenger airbags (p. 68)
•
Side airbag (p. 72)
•
Inflatable curtain (p. 73)
Driver and passenger airbags
As a supplement to the seatbelts, the vehicle is
equipped with airbags on the driver and passenger sides in the front seat.
Driver and passenger airbags1.
In the event of a frontal collision, the airbags help
to protect the head, face and chest of the driver
and passenger as well as the knees and legs1 of
the driver.
A sufficiently violent collision trips the sensors
and the airbag/airbags is inflated. The airbag
cushions the initial collision impact for the occupant. The airbag deflates when compressed by
the collision. When this occurs, smoke escapes
into the car. This is completely normal. The entire
process, including inflation and deflation of the
airbag, occurs within tenths of a second.
NOTE
The detectors react differently depending on
the nature of the collision and whether or not
the seatbelts are fastened. Applies to all belt
positions.
It is therefore possible that only one (or none)
of the airbags may inflate in a collision. The
detectors sense the force of the collision on
the vehicle and the action is adapted accordingly so that none, one or more airbags are
deployed.
WARNING
The seatbelts and airbags interact. If the belt
is not used or is used incorrectly, this may
diminish the protection provided by the airbag
in the event of a collision.
To minimise the risk of injury if the airbag
deploys, passengers must sit as upright as
possible with their feet on the floor and backs
against the backrest.
1
The car is only equipped with knee airbag in certain markets.
Page 71

SAFETY
}}
69
WARNING
Volvo recommends that an authorised Volvo
workshop should be contacted for repair.
Defective work in the airbag system could
cause malfunction and result in serious personal injury.
Driver airbags
Airbag in the steering wheel
This airbag is fitted into the centre of the steering
wheel. The steering wheel is marked AIRBAG.
Knee airbag
1
The airbag is folded up in the lower part of the
instrument panel on the driver's side. Its cover
panel is marked AIRBAG.
WARNING
Do not place or attach any object on the top
or front of the panel where the knee airbag is
stowed.
Passenger airbag
The airbag is folded up into a compartment
above the glovebox. Its cover panel is marked
AIRBAG.
WARNING
Do not put objects in front of or above the
dashboard where the passenger airbag is
located.
Label for passenger airbag
Label on the passenger side's sun visor.
Label on the passenger side's door pillar. The label
becomes visible when the passenger door is opened.
The warning label for the passenger airbag is
positioned as shown above.
WARNING
If the car is not equipped with a switch to activate/deactivate the passenger airbag, the airbag will always be activated.
1
The car is only equipped with knee airbag in certain markets.
Page 72

||
SAFETY
* Option/accessory.
70
WARNING
Never allow anybody to stand or sit in front of
the front passenger seat.
Never use a rear-facing child seat on the front
passenger seat if the airbag is activated.
Front-facing passengers (children and adults)
must never sit on the front passenger seat if
the passenger airbag is deactivated.
Failure to follow the advice given above can
endanger life or lead to serious personal
injury.
Related information
•
Airbags (p. 67)
•
Activating/deactivating the passenger airbag* (p. 70)
Activating/deactivating the passenger airbag*
The passenger airbag can be deactivated if the
car is equipped with a switch, Passenger Airbag
Cut Off Switch (PACOS).
Switch
The switch for the passenger airbag is located on
the passenger end of the instrument panel and is
accessible when the passenger door is open.
Check that the switch is in the required position.
ON - the airbag is activated and all front-facing passengers (children and adults) can sit
safely on the passenger seat.
OFF - The airbag is deactivated and children
in rear-facing child seats can sit safely on the
passenger seat.
WARNING
If the car is not equipped with a switch to activate/deactivate the passenger airbag, the airbag will always be activated.
Page 73

SAFETY
}}
71
Activating the passenger airbag
Pull the switch outward and turn from OFF
(B) to ON (A).
> The driver display shows the message
Passenger airbag on Please
acknowledge.
NOTE
If the passenger airbag has been activated/
deactivated with the car in ignition position I
or lower, a message is shown in the driver
display and the following indicator in the roof
console approx. 6 seconds after the car's
electrical system has been set in ignition
position II.
2. Confirm the message by pressing the righthand steering wheel keypad's O button.
> A text message and a warning symbol in
the roof console indicate that the airbag
for the front passenger seat is activated.
WARNING
Never use a rear-facing child seat on the front
passenger seat when the airbag is activated.
The passenger airbag must always be activated when front-facing passengers (children
and adults) are sitting in the front passenger
seat.
Failure to follow the advice given above can
endanger life or lead to serious personal
injury.
Deactivating the passenger airbag
Pull the switch outward and turn from ON
(A) to OFF (B).
> The driver display shows the message
Passenger airbag off Please
acknowledge.
NOTE
If the passenger airbag has been activated/
deactivated with the car in ignition position I
or lower, a message is shown in the driver
display and the following indicator in the roof
console approx. 6 seconds after the car's
electrical system has been set in ignition
position II.
Page 74

||
SAFETY
72
2. Confirm the message by pressing the righthand steering wheel keypad's O button.
> A text message and a symbol in the roof
console indicate that the airbag for the
front passenger seat is deactivated.
WARNING
Front-facing passengers (children and adults)
must never sit on the passenger seat when
the airbag is deactivated.
Failure to follow the advice given above can
endanger life or lead to serious personal
injury.
IMPORTANT
If the passenger airbag is deactivated, the
electric seatbelt tensioner on the passenger
side will also be deactivated.
Related information
•
Driver and passenger airbags (p. 68)
•
Seatbelt tensioner (p. 64)
•
Child seats (p. 76)
Side airbag
The side airbags on the driver and passenger
seats protect the chest and hip in the event of a
collision.
The side airbags are fitted in the outer backrest
frames of the front seats and help to protect the
driver and passengers in the front seat.
A sufficiently violent collision trips the sensors
and the side airbags are inflated. The airbag
inflates between the occupant and the door
panel and thereby cushions the initial impact. The
airbag deflates when compressed by the collision.
The side airbag is normally only deployed on the
side of the collision.
Page 75

SAFETY
73
WARNING
Volvo recommends that an authorised Volvo
workshop should be contacted for repair.
Defective work in the side airbag system
could cause malfunction and result in serious
personal injury.
WARNING
Do not put objects in the area between the
outside of the seat and the door panel, since
this area is required by the side airbag.
Volvo recommends the use only of car seat
covers approved by Volvo. Other seat covers
may impede the operation of the side airbags.
WARNING
Side airbags are a supplement the seatbelts.
Always use a seatbelt.
Side airbag and child seats
The protection provided by the car to children
seated in a child seat or on a booster cushion is
not diminished by the side airbag.
Related information
•
Airbags (p. 67)
•
Child seats (p. 76)
Inflatable curtain
The inflatable curtain, Inflatable Curtain (IC),
helps to prevent the driver and passengers from
striking their heads on the inside of the car during a collision.
The inflatable curtain is mounted along both
sides of the headlining and helps protect the
driver and outer seat passengers of the car. The
panels are labelled with IC AIRBAG.
A sufficiently violent collision trips the sensors
and the inflatable curtain is inflated.
WARNING
Volvo recommends that an authorised Volvo
workshop should be contacted for repair.
Defective work in the inflatable curtain system
can cause malfunction and result in serious
personal injury.
WARNING
Never hang or attach heavy items onto the
handles in the roof. The hooks are only
designed for light coats and jackets (not for
solid objects such as umbrellas).
Do not screw or install anything onto the car's
headlining, door pillars or side panels. This
could compromise the intended protection.
Volvo recommends only using Volvo genuine
parts that are approved for fitting within these
areas.
WARNING
Leave 10 cm (4 inches) space between the
load and the side windows if the car is loaded
to above the top edge of the door windows.
Otherwise, the intended protection of the
inflatable curtain, which is concealed in the
headlining, may be compromised.
WARNING
The inflatable curtain is a supplement to the
seatbelts. Always use a seatbelt.
Related information
•
Airbags (p. 67)
Page 76

SAFETY
74
Safety mode
Safety mode is a protective state that is triggered when a collision may have damaged any
of the car's vital functions, such as the fuel lines,
sensors for any of the safety systems, or the
brake system.
If the car has been in a collision, the message
Safety mode See Owner's manual may be
shown on the driver display with a warning symbol as long as the display is not damaged and the
car's electrical system is still in working order.
This message means that the car has reduced
functionality.
WARNING
Never, under any circumstances, attempt to
restart the car if it smells of fuel when the
Safety mode See Owner's manual mes-
sage is shown in the driver display. Leave the
car at once.
If the car is in safety mode, it is possible to
attempt to reset the system in order to start and
move the car for a short distance, if in a dangerous traffic situation for example.
WARNING
Never attempt to repair your car or reset the
electronics yourself if the car has been in
safety mode. This could result in personal
injury or the car not functioning as normal.
Volvo recommends that engaging an authorised Volvo workshop to check and restore the
car to normal status after
Safety mode See
Owner's manual has been shown.
WARNING
If the car is in safety mode it must not be
towed. It must be transported from its location. Volvo recommends that it is transported
to an authorised Volvo workshop.
Related information
•
Safety (p. 60)
•
Starting/moving the car after safety mode
(p. 74)
•
Recovering the car (p. 443)
Starting/moving the car after safety mode
If the car is in safety mode, it is possible to
attempt to reset the system in order to start and
move the car for a short distance, if in a dangerous traffic situation for example.
Starting the car after safety mode
1. Check the general damage situation of the
car and whether any fuel has been leaking.
There must be no smell of fuel either.
If there is only minor damage and a check
has revealed no fuel leaks, starting can be
attempted.
WARNING
Never, under any circumstances, attempt to
restart the car if it smells of fuel when the
Safety mode See Owner's manual mes-
sage is shown in the driver display. Leave the
car at once.
2. Turn the start knob clockwise to switch off
the car.
3. Then try to start the car.
> The driver's display shows the message
Car start System check, wait while the
car's electronics carry out a systems
check and then try to resume normal status. This can take up to one minute.
Page 77

SAFETY
* Option/accessory.
75
4. Then try to start the car again when the message
Car start System check, wait is no
longer shown in the driver's display.
IMPORTANT
If the message Safety mode See Owner's
manual is still shown on the display the car
must not be driven or towed but a vehicle
recovery service must then be used instead.
Even if the car appears to be driveable, hidden damage may make the car impossible to
control once moving.
Moving the car after safety mode
1. If the driver display shows the message
Normal mode The car is now in normal
mode after a start attempt, the car can be
carefully moved if standing in a dangerous
position.
2. Do not move the car further than necessary.
WARNING
If the car is in safety mode it must not be
towed. It must be transported from its location. Volvo recommends that it is transported
to an authorised Volvo workshop.
Related information
•
Safety mode (p. 74)
•
Recovering the car (p. 443)
Child safety
Volvo has child safety equipment (child seats,
booster cushions and attachment devices)
which is designed for fitting in this particular car.
Using Volvo's child safety equipment, the optimum conditions are obtained for the child to
travel safely in the car. In addition, the child safety
equipment fits well and is simple to use.
Children of all ages and sizes must always sit
correctly secured in the car. Never allow a child to
sit on the knee of a passenger.
Volvo recommends that children travel in rearfacing child seats until as late an age as possible,
at least up to 3-4 years of age, and then in frontfacing booster cushions/child seats until the
child is 140 cm tall.
NOTE
Legal provisions about the type of child seat
that must be used for children of different
ages and heights vary from country to country. Check what does apply.
NOTE
In the event of questions when fitting child
safety products, contact the manufacturer for
clearer instructions.
Related information
•
Safety (p. 60)
•
Child seats (p. 76)
•
Integrated child seat* (p. 87)
Page 78

SAFETY
76
Child seats
The position of a child in the car and the choice
of equipment are dictated by the child's weight
and size.
Children should sit comfortably and safely. Make
sure that the child seat is being used correctly.
Look in the installation instructions for the child
seat for the correct fitting.
NOTE
When using child safety products it is important to read the installation instructions
included.
NOTE
Never leave a child seat unsecured in the car.
Always secure it according to the instructions
for the child seat, even when it is not in use.
Location of child seats
Rear-facing child seat and airbag are not compatible.
Always fit rear-facing child seats in the rear seat
if the passenger airbag is activated. If a child is
sitting on the front passenger seat then he/she
could suffer serious injury if the airbag deploys.
If the passenger airbag is deactivated then rearfacing child seats can be fitted on the front passenger seat.
NOTE
Regulations regarding the placement of children in cars vary from country to country.
Check what does apply.
WARNING
Never allow anybody to stand or sit in front of
the front passenger seat.
Never use a rear-facing child seat on the front
passenger seat if the airbag is activated.
Front-facing passengers (children and adults)
must never sit on the front passenger seat if
the passenger airbag is deactivated.
Failure to follow the advice given above can
endanger life or lead to serious personal
injury.
Child seat installation
The following points are important to consider
when a child seat is being fitted in the car.
WARNING
Booster cushions/child seats with steel
braces or some other design that could rest
on the seatbelt buckle's opening button must
not be used, as they could cause the seatbelt
buckle to open accidentally.
Do not secure the straps for the child seat
into the seat's horizontal adjustment bar or in
springs, rails or beams under the seat. Sharp
edges may damage the straps.
Do not allow the upper section of the child
seat to rest against the windscreen.
Page 79

SAFETY
* Option/accessory.
77
Installation in the front seat
•
When fitting rear-facing child seats, check
that the passenger airbag is deactivated.
•
When fitting front-facing child seats, check
that the passenger airbag is activated.
•
Only use child seats that are recommended
by Volvo, are universally approved or are
semi-universal, and where the car is included
on the manufacturer's vehicle list.
•
ISOFIX child seats can only be fitted when
the car is equipped with the ISOFIX console
2
accessory.
•
If the child seat is equipped with lower
straps, Volvo recommends that the lower
mounting points are used with these2.
•
The ISOFIX guide can be used in order to
facilitate child seat installation.
Installation in the rear seat
•
Only use child seats that are recommended
by Volvo, are universally approved or are
semi-universal, and where the car is included
on the manufacturer's vehicle list.
•
A child seat with support legs must not be
fitted in the centre seat.
•
The outer seats are equipped with the
ISOFIX fixture system and are approved for iSize3.
•
The outer seats are equipped with upper
mounting points. Volvo recommends that
child seat's upper straps should be pulled
through the hole in the head restraint before
being tensioned at the mounting point. If this
is not possible, follow the recommendations
from the child seat manufacturer.
•
If the child seat is equipped with lower
straps, never adjust the position of the seat
in front after the straps have been fitted in
the lower mounting points. Always remember
to remove the lower straps when the child
seat is not installed.
Label for passenger airbag
Label on the passenger side's sun visor.
Label on the passenger side's door pillar. The label
becomes visible when the passenger door is opened.
The warning label for the passenger airbag is
positioned as shown above.
Related information
•
Child safety (p. 75)
•
Upper mounting points for child seats
(p. 78)
•
Lower mounting points for child seats
(p. 78)
•
i-Size/ISOFIX mounting points (p. 82)
•
Activating/deactivating the passenger airbag* (p. 70)
2
The accessory range varies depending on market.
3
Varies depending on market.
Page 80

SAFETY
* Option/accessory.
78
Upper mounting points for child seats
The car is equipped with upper mounting points
for child seats on the rear seat's outer seats.
The upper mounting points are primarily intended
for use with front-facing child seats.
Always follow the manufacturer's installation
instructions when connecting a child seat to the
upper mounting points.
The location of the mounting points
The location of the mounting points is indicated by symbols on the parcel shelf behind the rear seat.
The mounting points are located on the parcel
shelf behind the rear seat's outer seats.
WARNING
The child seat's upper straps must be routed
through the hole in the head restraint leg
before they are tensioned at the mounting
point. If this is not possible, follow the recommendations from the child seat manufacturer.
NOTE
Fold the head restraints in order to facilitate
fitting this type of child seat in cars with folding head restraints on the outer seats.
Related information
•
Child seats (p. 76)
•
Lower mounting points for child seats
(p. 78)
•
i-Size/ISOFIX mounting points (p. 82)
•
Table for location of child seats using the
car's seatbelts (p. 80)
Lower mounting points for child seats
The car is equipped with lower mounting points
for child seats in the front seat* and the rear
seat.
The lower mounting points are designed to be
used in conjunction with certain rear-facing child
seats.
Always follow the manufacturer's installation
instructions when connecting a child seat to the
lower mounting points.
The location of the mounting points
Mounting point locations in the front seat.
The mounting points in the front seat are located
on the sides of the passenger seat's legroom.
Page 81

SAFETY
* Option/accessory.
79
The mounting points in the front seat are only
mounted if the vehicle is equipped with a switch
to activate/deactivate the passenger airbag*.
Mounting point locations in the rear seat.
The mounting points in the rear seat are located
on the rear section of the front seat's floor rails.
Related information
•
Child seats (p. 76)
•
Upper mounting points for child seats (p. 78)
•
i-Size/ISOFIX mounting points (p. 82)
•
Table for location of child seats using the
car's seatbelts (p. 80)
•
Activating/deactivating the passenger airbag* (p. 70)
Page 82

SAFETY
* Option/accessory.
80
Table for location of child seats using the car's seatbelts
The table gives a recommendation for which
child seats suit which locations, and for what
size of child.
NOTE
Always read the section "Child seats" before
fitting a child seat in the car.
Weight Front seat (with deactivated airbag, only rear-facing
child seats)
Front seat (with activated airbag, only front-facing
child seats)
Outer rear seat Centre rear seat
Group 0
max 10 kg
U
A, B
X
U
B
U
B
Group 0+
max 13 kg
U
A, B
X
U
B
U
B
Group 1
9-18 kg
L
C
UF
A, D
U, L
C
U
Group 2
15-25 kg
L
C
UF
A
U
E, F
, B*
, G
, L
C
U
E
Page 83

SAFETY
* Option/accessory.
81
Weight Front seat (with deactivated airbag, only rear-facing
child seats)
Front seat (with activated airbag, only front-facing
child seats)
Outer rear seat Centre rear seat
Group 3
22-36 kg
X
UF
A
U
F, H
, B*
, G
U
H
U: Suitable for universal category restraints approved for use in this mass group.
UF: Suitable for front-facing universally approved child seats.
L: Suitable for particular child restraints. These restraints may be of the specific vehicle, restricted or semi-universal categories.
B: Built-in restraint approved for this mass group.
X: The seat is not suitable for children in this mass group.
A
Adjust the backrest to a more upright position.
B
Volvo recommends: Volvo infant seat (type approval E1 04301146).
C
Volvo recommends: Volvo reversible seat in the rear-facing position (type approval E5 04192); Volvo rear-facing seat (type approval E5 04212).
D
Volvo recommends rear-facing child seat for children in this mass group.
E
Volvo recommends: Volvo reversible seat in the front-facing position (type approval E5 04191); booster cushion with and without back (type approval E5 04216); Volvo booster cushion with backrest (type
approval E1 04301169); Volvo booster seat (type approval E1 04301312).
F
Volvo recommends: Römer KidFix XP (type approval E1 04301312).
G
Volvo recommends: Integrated child seat (type approval E5 04220).
H
Volvo recommends: booster cushion with and without back (type approval E5 04216); Volvo booster cushion with backrest (type approval E1 04301169).
WARNING
Never use a rear-facing child seat on the front
passenger seat if the passenger airbag is
activated.
Related information
•
Child seats (p. 76)
•
Upper mounting points for child seats (p. 78)
•
Table for location of ISOFIX child seats
(p. 83)
•
Table for location of i-Size child seats
(p. 86)
Page 84

SAFETY
82
i-Size/ISOFIX mounting points
The car is equipped with i-Size/ISOFIX4 mounting points for child seats in the rear seat.
i-Size/ISOFIX is a fixture system for car child
seats that is based on an international standard.
Always follow the manufacturer's installation
instructions when connecting a child seat to the
i-Size/ISOFIX mounting points.
The location of the mounting points
Mounting point locations are indicated by symbols4 on
the upholstery of the backrest.
The mounting points for i-Size/ISOFIX are
located behind covers in the lower section of the
rear seat's backrest, in the outer seats.
Lift the covers in order to access the mounting
points.
Related information
•
Child seats (p. 76)
•
Upper mounting points for child seats (p. 78)
•
Lower mounting points for child seats (p. 78)
•
Table for location of i-Size child seats
(p. 86)
•
Table for location of ISOFIX child seats
(p. 83)
4
Names and symbols change depending on market.
Page 85

SAFETY
}}
83
Table for location of ISOFIX child seats
The table gives a recommendation for which
ISOFIX child seats suit which locations, and for
what size of child.
The child seat must be approved in accordance
with UN Reg R44 and the car model must be
included in the manufacturer's vehicle list.
NOTE
Always read the section "Child seats" before
fitting a child seat in the car.
Weight
Size class
A
Type of child seat Front seat (with deactivated air-
bag, only rear-facing child
seats)
B
Front seat (with activated air-
bag, only front-facing child
seats)
B
Outer rear seat Centre rear seat
Group 0
max 10 kg
E Rear-facing infant seat
IL
B, C
, X
D
X
IL
C
X
Group 0+
max 13 kg
E Rear-facing infant seat
IL
B, C, E
, X
D
X
IL
C
XC Rear-facing child seat
D Rear-facing child seat
Page 86

||
SAFETY
84
Weight
Size class
A
Type of child seat Front seat (with deactivated air-
bag, only rear-facing child
seats)
B
Front seat (with activated air-
bag, only front-facing child
seats)
B
Outer rear seat Centre rear seat
Group 1
9-18 kg
A Front-facing child seat
X
IL
B, E, F
, X
D
ILF, IUF
F
XB Front-facing child seat
B1 Front-facing child seat
C Rear-facing child seat
IL
B, E
, X
D
X
IL
G
X
D Rear-facing child seat
IL: Suitable for particular ISOFIX child restraint systems. These child restraint systems are those of the specific vehicle, restricted or semi-universal categories.
IUF: Suitable for ISOFIX forward child restraint systems of universal category approved for use in the mass group.
X: Not suitable for ISOFIX child restraint systems.
A
For child seats with the ISOFIX fixture system there is a size classification to help users choose the right type of child seat. The size class can be read on the child seat's label.
B
Works for the installation of ISOFIX child seats that are semi-universally approved (IL) if the car is equipped with the ISOFIX console accessory (the accessory range varies depending on market).
C
Volvo recommends: Volvo infant seat secured using the ISOFIX fixture system (type approval E1 04301146).
D
Applicable if the car is not fitted with an ISOFIX bracket.
E
Adjust the backrest so that the head restraint does not touch the child seat.
F
Volvo recommends rear-facing child seat for children in this mass group.
G
Volvo recommends: BeSafe iZi Kid X3 ISOfix (type approval E5 04200).
WARNING
Never use a rear-facing child seat on the front
passenger seat if the passenger airbag is
activated.
NOTE
If an i-Size/ISOFIX child seat has no size
classification, the car model must be included
on the vehicle list for the child seat.
NOTE
Volvo recommends contacting an authorised
Volvo dealer for information about which iSize/ISOFIX child seats Volvo recommends.
Page 87

SAFETY
85
Related information
•
Child seats (p. 76)
•
i-Size/ISOFIX mounting points (p. 82)
•
Table for location of i-Size child seats
(p. 86)
•
Table for location of child seats using the
car's seatbelts (p. 80)
Page 88

SAFETY
86
Table for location of i-Size child seats
The table gives a recommendation for which iSize child seats suit which locations, and for
what size of child.
The child seat must be approved in accordance
with UN Reg R129.
NOTE
Always read the section "Child seats" before
fitting a child seat in the car.
Type of child seat Front seat (with deactivated airbag, only rear-
facing child seats)
Front seat (with activated airbag, only front-fac-
ing child seats)
Outer rear seat Centre rear seat
i-Size child seats X X
i-U
A
X
i-U: Suitable for i-Size "universal" child seat, front-facing and rear-facing.
X: Not suitable for universally approved child seats.
A
Volvo recommends rear-facing child seats for this group.
Related information
•
Child seats (p. 76)
•
i-Size/ISOFIX mounting points (p. 82)
•
Table for location of ISOFIX child seats
(p. 83)
•
Table for location of child seats using the
car's seatbelts (p. 80)
Page 89

SAFETY
* Option/accessory.
87
Integrated child seat*
The integrated child seats on the outer positions
in the rear seat allow children to sit comfortably
and safely.
The child seat is especially designed to provide
good safety for the child together with the car's
seatbelt. The seat cushion can be raised in two
positions depending on the weight of the child.
The child seat is approved for children weighing
between 15 and 36 kg and at least 95 cm tall.
Correct position, the seatbelt must pass over the shoulder.
Check before driving that:
•
the seat cushion is raised to the correct position for the child's weight
•
the seat cushion is locked in position
•
the seatbelt is in contact with the child's
body and is not slack or twisted
•
the seatbelt does not lie across the child's
throat or below the shoulder
•
the lap section of the seatbelt is positioned
low over the pelvis to provide optimal protection.
WARNING
Volvo recommends that repair or replacement
of the integrated child seat is only performed
by an authorised Volvo workshop. Do not
make any modifications or additions to the
child seat. If an integrated child seat has been
subjected to a heavy load, e.g. in connection
with a collision, then the seat cushion, seatbelt and backrest, or possibly the whole seat,
must be replaced. Even if the child seat
appears to be undamaged, it may not afford
the same level of protection. This also applies
if the seat cushion was in lowered position
during a collision or similar. The seat cushion
must also be replaced if it is heavily worn.
WARNING
If the instructions for the integrated child seat
are not followed then the child could sustain
serious injury in the event of an accident.
Related information
•
Child safety (p. 75)
•
Folding up the integrated child seat cushion*
(p. 88)
•
Folding down the integrated child seat cushion* (p. 89)
Page 90

SAFETY
* Option/accessory.
88
Folding up the integrated child seat cushion*
The seat cushion should always be folded up
when the integrated child seat is in use.
The seat cushion can be folded up in two positions. The position that should be used depends
on the weight of the child.
Lower position Upper position
Weight 22-36 kg 15-25 kg
Lower position:
Pull the handle forward and up in order to
release the seat cushion.
Press the seat cushion backwards to lock.
Upper position, start from the lower position:
Press the button to release the seat cushion.
Lift up the front of the seat cushion and
press it back against the backrest to lock.
WARNING
If the instructions for the integrated child seat
are not followed then the child could sustain
serious injury in the event of an accident.
NOTE
It is not possible to adjust the seat cushion
from the upper position to the lower position.
From the upper position, the seat cushion
must first be fully lowered into the rear seat,
and then folded up to the lower position.
Page 91

SAFETY
* Option/accessory.
89
Related information
•
Integrated child seat* (p. 87)
•
Folding down the integrated child seat cushion* (p. 89)
Folding down the integrated child seat cushion*
The seat cushion should be folded down into
the rear seat when the integrated child seat is
not being used.
NOTE
It is not possible to adjust the seat cushion
from the upper position to the lower position.
From the upper position, the seat cushion
must first be fully lowered into the rear seat,
and then folded up to the lower position.
Pull the handle forward in order to release
the seat cushion.
Press down with your hand in the centre of
the seat cushion in order to lock it.
IMPORTANT
Check that there are no loose objects (e.g.
toys) left behind in the space under the child
seat's seat cushion before lowering.
NOTE
Before the rear backrest is lowered, the child
seat's seat cushion must be lowered first.
Related information
•
Integrated child seat* (p. 87)
•
Folding up the integrated child seat cushion*
(p. 88)
Page 92

Page 93

INSTRUMENTS AND CONTROLS
Page 94

INSTRUMENTS AND CONTROLS
* Option/accessory.
92
Instruments and controls, left-hand drive car
The overviews show where the displays and
controls near the driver are located.
Display/function/control
Position lamps, daytime running lights,
dipped beam, main beam, direction indicators, rear fog lamp, resetting the trip
meter
Steering wheel paddles for manual gear
changing in an automatic gearbox*
Head-up display*
Driver display
Wipers and washing, rain sensor*
Display/function/control
Right-hand steering wheel keypad
Steering wheel adjustment
Horn
Left-hand steering wheel keypad
Bonnet opening
Display lighting, boot lid unlocking, boot
lid opening/closing*, halogen headlamp
levelling
Display/function/control
Front reading lamps and interior lighting
Panorama roof*
Display in roof console
Manual dimming of interior rearview mirror
Display/function/control
Centre display
Hazard warning flashers, max defroster/
heated windscreen*, media, glovebox
door opening
Gear selector
Page 95

INSTRUMENTS AND CONTROLS
}}
* Option/accessory.
93
Display/function/control
Start knob
Drive mode control
Parking brake
Automatic braking when stationary
Display/function/control
Memory for setup of:
•
Power front seat*
•
Door mirrors
•
Head-up display*
Door opening, locking/unlocking of side
doors and boot lid
Display/function/control
Power windows, door mirrors
Adjusting front seat
Related information
•
General information about Twin Engine
(p. 55)
•
Steering wheel (p. 135)
•
Manual front seat (p. 126)
•
Adjusting the power front seat* (p. 127)
•
Lighting control (p. 137)
•
Climate controls (p. 184)
•
Overview of the centre display (p. 33)
Instruments and controls, righthand drive car
The overviews show where the displays and
controls near the driver are located.
Display/function/control
Position lamps, daytime running lights,
dipped beam, main beam, direction indicators, rear fog lamp, resetting the trip
meter
Steering wheel paddles for manual gear
changing in an automatic gearbox*
Head-up display*
Driver display
Wipers and washing, rain sensor*
Page 96

||
INSTRUMENTS AND CONTROLS
* Option/accessory.
94
Display/function/control
Right-hand steering wheel keypad
Display lighting, unlocking the boot lid,
opening/closing the boot lid*
Bonnet opening
Horn
Steering wheel adjustment
Left-hand steering wheel keypad
Display/function/control
Front reading lamps and interior lighting
Panorama roof*
Display in roof console
Manual dimming of interior rearview mirror
Display/function/control
Centre display
Hazard warning flashers, max defroster/
heated windscreen*, media, glovebox
door opening
Gear selector
Display/function/control
Start knob
Drive mode control*
Parking brake
Automatic braking when stationary
Display/function/control
Memory for setup of:
•
Power front seat*
•
Door mirrors
•
Head-up display*
Door opening, locking/unlocking of side
doors and boot lid
Page 97

INSTRUMENTS AND CONTROLS
* Option/accessory.
95
Display/function/control
Power windows, door mirrors
Adjusting front seat
Related information
•
General information about Twin Engine
(p. 55)
•
Steering wheel (p. 135)
•
Manual front seat (p. 126)
•
Adjusting the power front seat* (p. 127)
•
Lighting control (p. 137)
•
Climate controls (p. 184)
•
Overview of the centre display (p. 33)
Page 98

INSTRUMENTS AND CONTROLS
* Option/accessory.
96
Driver display
The driver display shows information about the
car and driving.
The driver display contains gauges, indicators and
indicator and warning symbols. The content of
the driver display depends on the car's equipment, settings and which functions are active at
that time.
WARNING
In the event of a fault in the driver display the
information on e.g. brakes, airbags or other
safety systems may not be shown. In which
case, the driver cannot check the status of
the car's systems or receive current warnings
and information.
WARNING
If the driver display should extinguish, not illuminate on activation/start or be fully or partially illegible, the car must not be used. You
should visit a workshop immediately. Volvo
recommends an authorised Volvo workshop.
Location in the driver display:
On the left In the middle On the right
Speedometer Indicator and warning symbols
Tachometer/Hybrid gauge
A
Trip meter Outside temperature gauge Gear shift indicator
Odometer
B
Clock Drive mode
Cruise control and speed limiter information Messages, in some cases with graphics Fuel gauge
Road Sign Information*
Door and seatbelt information Hybrid battery gauge
– Charge status Distance to empty tank
Page 99

INSTRUMENTS AND CONTROLS
* Option/accessory.
97
On the left In the middle On the right
– Media player Distance to empty battery
–
Navigation map*
Instantaneous fuel consumption
– Phone App menu (activated via steering wheel keypad)
– Voice recognition –
A
Depends on drive mode selected.
B
Accumulated mileage.
Dynamic symbol
The dynamic symbol in its basic
form.
The centre of the driver display contains a
dynamic symbol that changes appearance for different types of message. It can show an indicator
or warning symbol, or consist of an image
sequence that starts from this position and is
then converted to a larger image to clarify information.
Example of indicator symbol in the 12-inch driver display.
Activating the driver display
The driver display is activated as soon as a door
is opened, i.e. in ignition position 0. The driver
display extinguishes after a while if it is not used.
To reactivate it, proceed with one of the following:
•
Depress the brake pedal.
•
Turn the ignition knob to ignition position to I.
•
Open one of the doors.
Related information
•
Driver display settings (p. 98)
•
Indicator symbols in the driver display
(p. 101)
•
Warning symbols in the driver display
(p. 103)
•
Application menu in the driver display
(p. 111)
•
Fuel gauge (p. 105)
•
License agreement for the driver display
(p. 106)
Page 100

INSTRUMENTS AND CONTROLS
* Option/accessory.
98
Driver display settings
Settings for the driver display can be made in
the driver display's application menu and in the
centre display's
Settings menu.
Settings in the app menu
In the app menu, you can choose which information is shown on the driver display from
•
trip computer
•
media player
•
phone
•
navigation system*.
The application menu in the driver display is
opened and navigated using the steering wheel's
right-hand keypad, see the section "Using the
application menu in the driver display".
Settings in the centre display
Selecting information type
1.
Tap on
Settings in the centre display's top
view.
2. Press
My Car Displays Driver
Display Information
.
3. Select what should be shown in the background:
•
Show no information in background
•
Show information for current playing
media
•
Show navigation even if no route is
set.
Selecting theme
1.
Tap on
Settings in the centre display's top
view.
2. Tap on
My Car Displays Display
Themes
3. Select a theme (appearance) for the driver
display:
•
Glass
•
Minimalistic
•
Performance
•
Chrome Rings.
Selecting language
1.
Tap on
Settings in the centre display's top
view.
2. Tap on
System System Languages and
Units
System Language to select lan-
guage.
> A change will affect the language in all
displays.
Related information
•
Driver display (p. 96)
•
Application menu in the driver display
(p. 111)
•
Settings in the centre display (p. 170)
 Loading...