

Volvo C30 2008, C30 2011A, C30 2010, C30 2009, C70 (06-) 2006 Installation Instructions Manual
...
S40 (04-) /
V50 / C70 (06-) /
C30
Section
Group
Weight(Kg/Pounds)
Year
Month
8
881
0.5 / 1
2006
06
C30 2007, C30 2008, C30 2009, C30 2010, C30 2011A, C70 (06
-)
2006, C70 (06
-)
2007, C70 (06
-)
2008, C70 (06
-)
2009, C70 (06
-)
2010, C70 (06
-)
2011A, S40 (04-) 2004, S40 (04-) 2005, S40 (04-) 2006, S40 (04-) 2007, S40 (04-) 2008, S40 (04-) 2009, S40 (04-) 2010, V50 2004, V50 2005,
V50 2006, V50 2007, V50 2008, V50 2009, V50 2010
J8504529
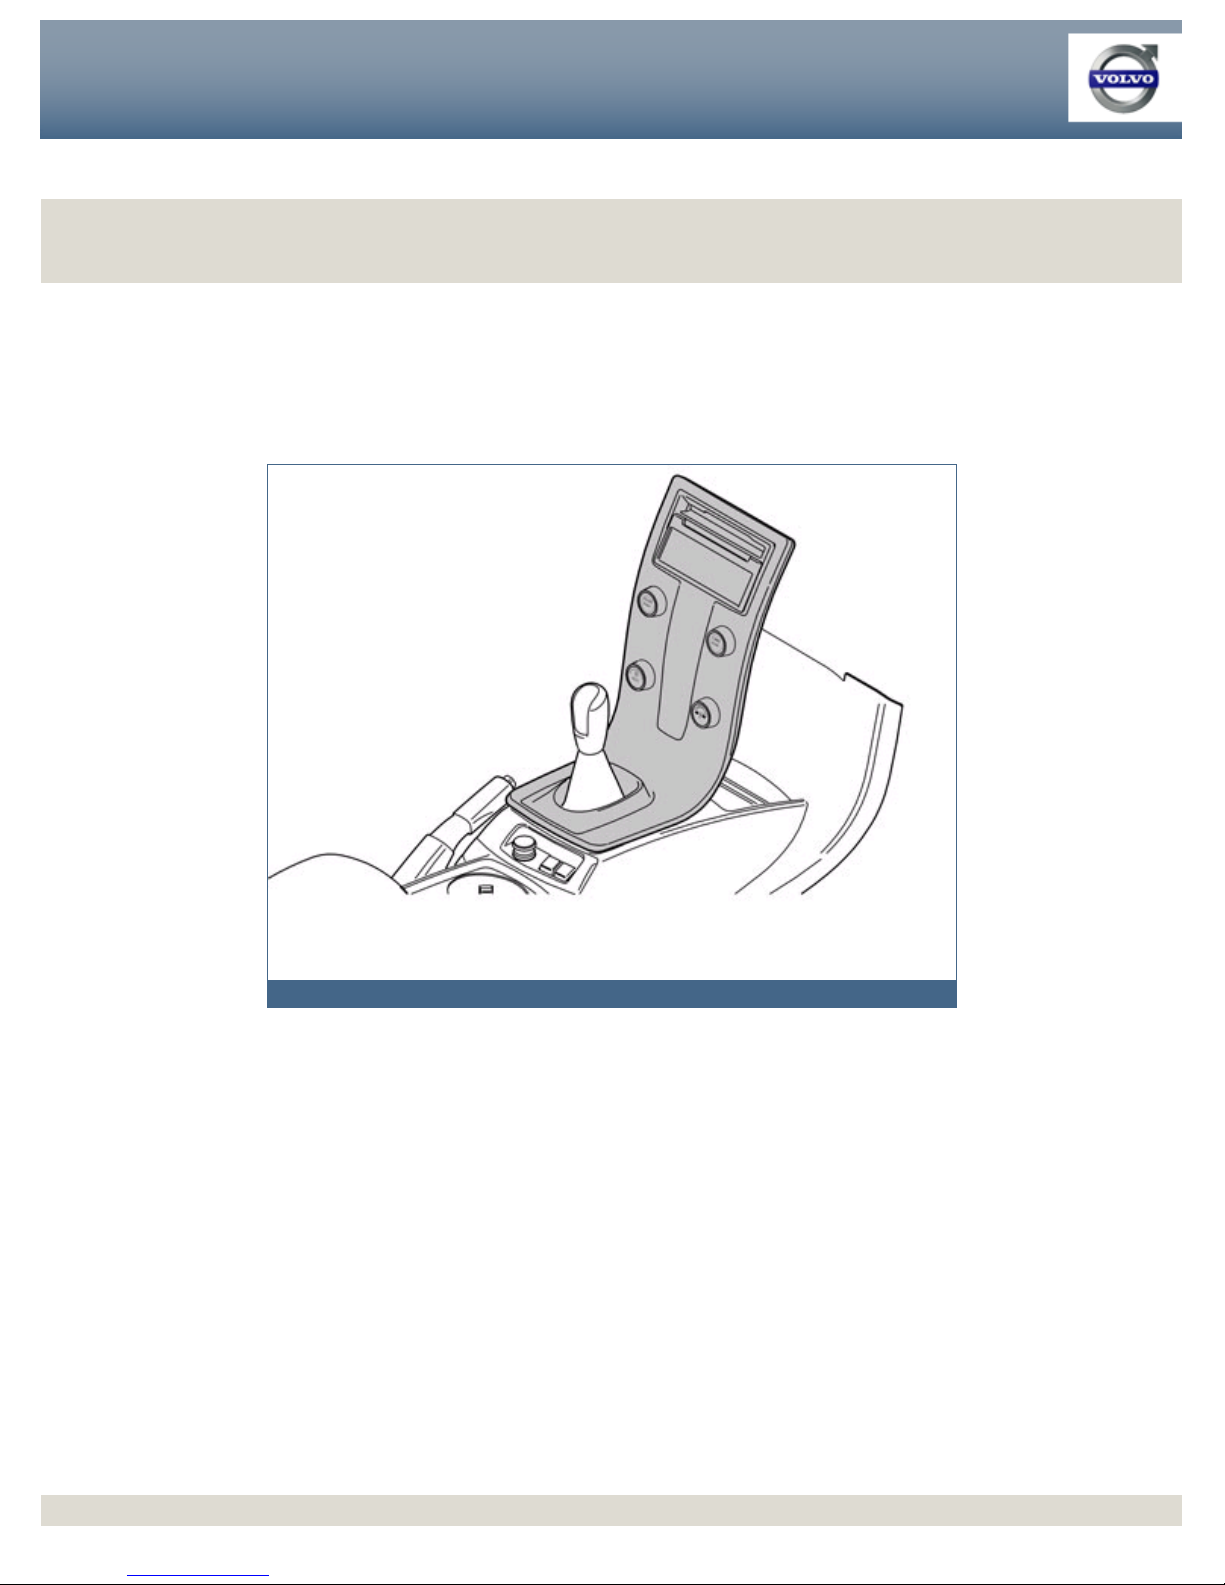
Installation instructions, accessories -
Trim panel centre stack
Volvo Car Corporation G
öteborg, Sweden
Installation instructions, accessories -
Trim panel centre stack
Volvo Car Corporation G
öteborg, Sweden
©
VolvoCar Corporation, 2006 Printed in Sweden
30766454
©
VolvoCar Corporation, 2006 Printed in Sweden
30766454
Page 1 of 7

Installation instructions, accessories -
Trim panel centre stack
Volvo Car Corporation G
öteborg, Sweden
Installation instructions, accessories -
Trim panel centre stack
Volvo Car Corporation G
öteborg, Sweden
©
VolvoCar Corporation, 2006 Printed in Sweden
30766454
©
VolvoCar Corporation, 2006 Printed in Sweden
30766454
Page 2 of 7
Required tools
A0000162
IMG
-213320
Installation instructions, accessories -
Trim panel centre stack
Volvo Car Corporation G
öteborg, Sweden
Installation instructions, accessories -
Trim panel centre stack
Volvo Car Corporation G
öteborg, Sweden
©
VolvoCar Corporation, 2006 Printed in Sweden
30766454
©
VolvoCar Corporation, 2006 Printed in Sweden
30766454
Page 3 of 7

INTRODUCTION
● NOTE! Read through the whole installation instruction
before starting the work.
● The front page gives the date of this edition and the edition it
replaces
● The second page shows the tools needed for the installation and
the contents of the installation kit
● The illustrations display the procedure in order of operation. The
order of operation is repeated in the text section
● Cut out the text page in order to follow the illustrations and text at
the same time.
Trim panel centre stack
Installation instructions, accessories -
Trim panel centre stack
Volvo Car Corporation G
öteborg, Sweden
Installation instructions, accessories -
Trim panel centre stack
Volvo Car Corporation G
öteborg, Sweden
©
VolvoCar Corporation, 2006 Printed in Sweden
30766454
©
VolvoCar Corporation, 2006 Printed in Sweden
30766454
Page 4 of 7

1
●
Turn the ignition key to position 0.
● Remove the ignition key from the ignition switch.
Note!
Wait at least five minutes before disassembling the connectors or removing
other electrical equipment.
2
J8504530
Detach the panel at the rear edge of the centre console:
● Use a plastic weatherstrip tool to pry loose the panel. The panel is secured by a
catch on each short side.
● Move the panel to the side, to access the two screws underneath.
3
J8504531
● Remove the two screws holding the centre console at the rear edge.
4
J8504532
Remove the panel on the rear of the centre console:
●
Open the glove compartment.
● Use a plastic weatherstrip tool to pry loose the panel. The panel is secured by
two catches on each long side.
● Pull the panel off downwards.
Installation instructions, accessories -
Trim panel centre stack
Volvo Car Corporation G
öteborg, Sweden
Installation instructions, accessories -
Trim panel centre stack
Volvo Car Corporation G
öteborg, Sweden
©
VolvoCar Corporation, 2006 Printed in Sweden
30766454
©
VolvoCar Corporation, 2006 Printed in Sweden
30766454
Page 5 of 7

5
J8504638
Remove the surround for the display and the CD player:
● Press in the catches in the edges of the CD player's cover with a small
screwdriver, fold the surround back and pull it up.
6
J8504534
● Press out the display from the rear of the centre console.
● Disconnect the two connectors. Put the display to one side.
7
J8504535
● Remove the two screws holding the centre console to the dashboard.
● Remove the connector on the reverse of the dashboard environment panel.
● Remove the centre console from the dashboard and tunnel console.
8
J8504537
● Remove the eight screws on the rear of the centre console. Remove the rear
section.
Installation instructions, accessories -
Trim panel centre stack
Volvo Car Corporation G
öteborg, Sweden
Installation instructions, accessories -
Trim panel centre stack
Volvo Car Corporation G
öteborg, Sweden
©
VolvoCar Corporation, 2006 Printed in Sweden
30766454
©
VolvoCar Corporation, 2006 Printed in Sweden
30766454
Page 6 of 7

9
J8504536
● Remove the four screws for the dashboard environment panel.
●
Remove the dashboard environment panel. Put it to one side.
● Remove the panel from the centre console. A new panel is in the kit.
10
Take the new panel. Reinstall:
● dashboard environment panel
● rear section
● the centre console for the dashboard and tunnel console
● the connector for the dashboard environment panel
● the connectors for the display
● the display
● the surround for the display and CD player
● the panel on the rear of the centre console
● the panel at the rear edge of the centre console.
Installation instructions, accessories -
Trim panel centre stack
Volvo Car Corporation G
öteborg, Sweden
Installation instructions, accessories -
Trim panel centre stack
Volvo Car Corporation G
öteborg, Sweden
©
VolvoCar Corporation, 2006 Printed in Sweden
30766454
©
VolvoCar Corporation, 2006 Printed in Sweden
30766454
Page 7 of 7
 Loading...