

Page 1
Operator’s Manual
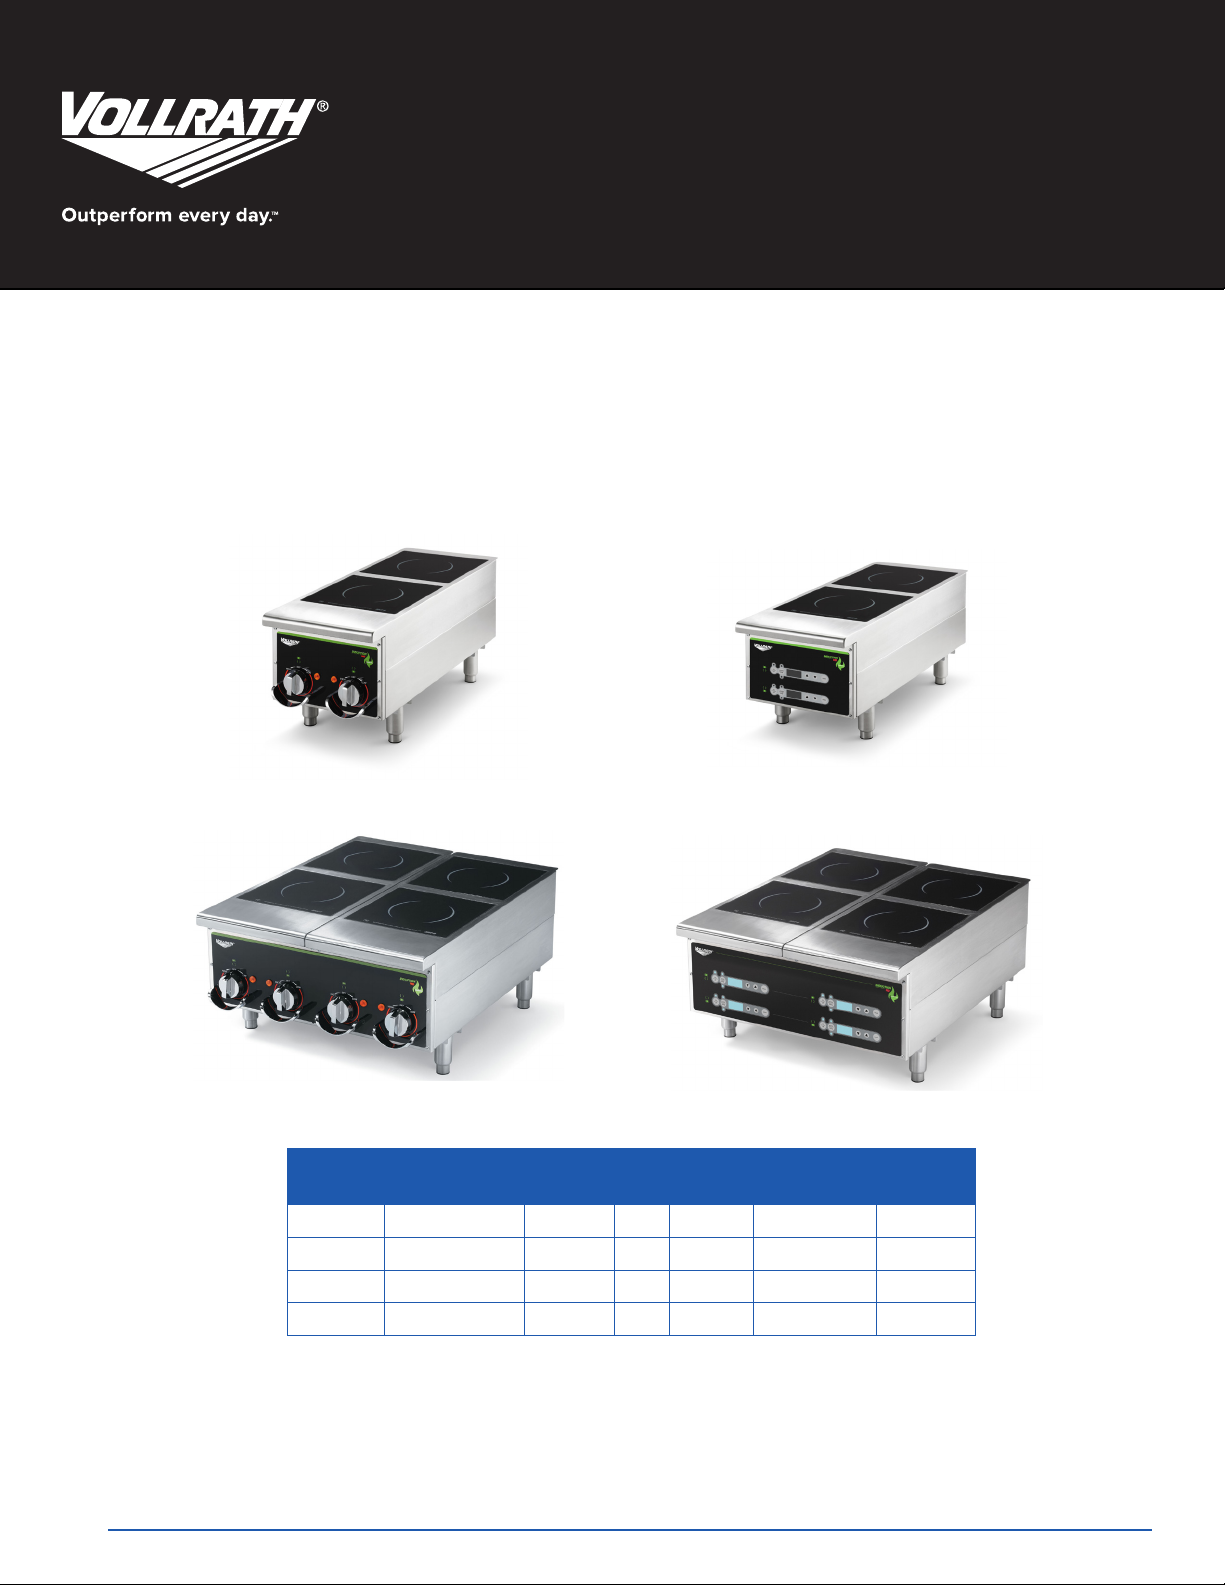
CAYENNE® HEAVY-DUTY INDUCTION RANGES
Watts per
Item Description Voltage HZ Amps
912HIMC Bench – 2 Hob 208 - 240 50/60 24.0 2,500 - 2,900 6-30P*
912HIDC Bench – 2 Hob 208 - 240 50/60 24.0 2,500 - 2,900 6-30P*
924HIMC Bench – 4 Hob 208 - 240 50/60 2 x 24.0 2,500 - 2,900 2 x 6-30P**
924HIDC Bench – 4 Hob 208 - 240 50/60 2 x 24.0 2,500 - 2,900 2 x 6-30P**
Hob Plug
*One (1) dedicated circuit with a single outlet is required per 2 hobs.
**Two separate dedicated circuits with a single outlet per 2 hobs is required.
Thank you for purchasing this Vollrath Induction Range. Before operating the unit, read and familiarize yourself with the following operating and safety
instructions. SAVE THE ORIGINAL BOX AND PACKAGING. Use this packaging to ship the unit if repairs are needed. SAVE THESE INSTRUCTIONS FOR
FUTURE REFERENCE.
Item No. 2350095-1 en Rev 8/15/18
Page 2
Cayenne® Heavy-Duty InDuCtIon Ranges
Safety PrecautionS
To ensure safe operation, read the following statements and understand
their meaning. This manual contains safety precautions which are
explained below. Please read carefully.
WARNING
Warning is used to indicate the presence of a hazard that can cause
severe personal injury, death, or substantial property damage if the
warning is ignored.
CAUTION
Caution is used to indicate the presence of a hazard that will or can
cause minor personal injury or property damage if the caution is
ignored.
NOTE
Note is used to notify people of installation, operation, or maintenance
information that is important but not hazard-related.
For Your Safety!
These precautions should be followed at all times. Failure to follow
these precautions could result in injury to yourself and others.
To reduce risk of injury or damage to the unit:
Plug only into grounded electrical outlets matching the nameplate
rated voltage. Each induction unit should have a separate circuit.
Do not use an extension cord with this equipment. Do not plug this
equipment into a power strip or multi-outlet power cord.
As a precaution, persons using a pacemaker should stand back
12” (30 cm) from an operating unit. Studies have shown that the
induction element will not disrupt a pacemaker.
Keep all credit cards, driver licences and other items with a magnetic
strip away from an operating unit. The unit’s magnetic eld will
damage the information on these strips.
The heating surface is made of a strong, non-porous material.
However, should it crack or break, stop using and immediately
unplug the unit.
Do not leave an empty pan on an operating unit.
Unit should only be used in a at, level position.
Unplug unit and let it cool before cleaning or moving.
Do not touch the cooking surface. It remains hot after the unit is
turned off.
Do not spray controls or outside of unit with liquids or cleaning
agents.
Unplug when not in use.
Keep unit and power cord away from open ames, electric burners
or excessive heat.
Do not heat sealed cans or containers as they may explode.
Do not operate unattended.
Closely supervise units operating in public areas and/or around
children.
Do not operate if unit has been damaged or is malfunctioning in any
way.
Do not place any objects inside the air intake or exhaust panels.
Do not place weight on the control knob or knob guard
FCC Statement ~ This product may cause interference to radio
equipment and should not be installed near maritime safety
communications equipment or other critical navigation or
communication equipment operating between 0.45-30 MHz .
function and PurPoSe
This unit is intended to be used with induction-ready cookware (see below)
with a at, ferrous base measuring 4-1/2” (11.4 cm) to 10-1/4” (26 cm) wide.
This unit is intended for use in commercial foodservice operations only. It is not
intended for household, industrial or laboratory use.
InDuCtIon ReaDy CookwaRe
Ferrous stainless steel
Iron
Cast iron
unsuItable CookwaRe
NOTICE: Equipment Damage Hazard
Not intended for use with aluminum pans with a metal disc
on the bottom. Under high heat, the metal disc will separate
from the pan. These pans may damage your unit and void
your warranty.
Cookware with a base less than 4-1/2” (11.4 cm)
Pottery, glass, aluminum, bronze or copper cookware
Cookware with any type of footed base
NOTE:
There must be a minimum of 4” (10 cm) between the induction range
and any surrounding surface to allow sufcient airow around the
unit. Blocking the airow could overheat the unit.
inStallation
1. Install and secure the legs to the base of the unit.
2. Place the induction range/warmer on a at stable surface at a suitable and
safe height.
3. Level the equipment using the adjustable feet.
NOTE:
This unit is not designed to be inclosed or built into any area.
There must be a minimum of 4” (10 cm) of space between the rear of
the induction warmer and any surrounding surface.
Sufcient airow must be allowed around the unit. Blocking the
airow could cause the unit to overheat.
4. Plug the power cord into a grounded electrical outlet with the matching
nameplate rated voltage.
NOTE: Using a voltage other than the nameplate rated voltage will
cause damage to the unit. Incorrect voltage, modication to the
power cord or electrical components can damage unit and will void
the warranty. Induction units are to use a separate dedicated circuit.
2
OperatOr’s Manual
Page 3

Cayenne® Heavy-Duty InDuCtIon Ranges
oPeration
WARNING
Electrical Shock Hazard.
Keep water and other liquids from entering the
inside of the unit. Liquid inside the unit could cause
an electrical shock.
If liquid spills or boils over onto the unit, immediately unplug the unit
and remove cookware. Wipe up any liquid with a padded cloth.
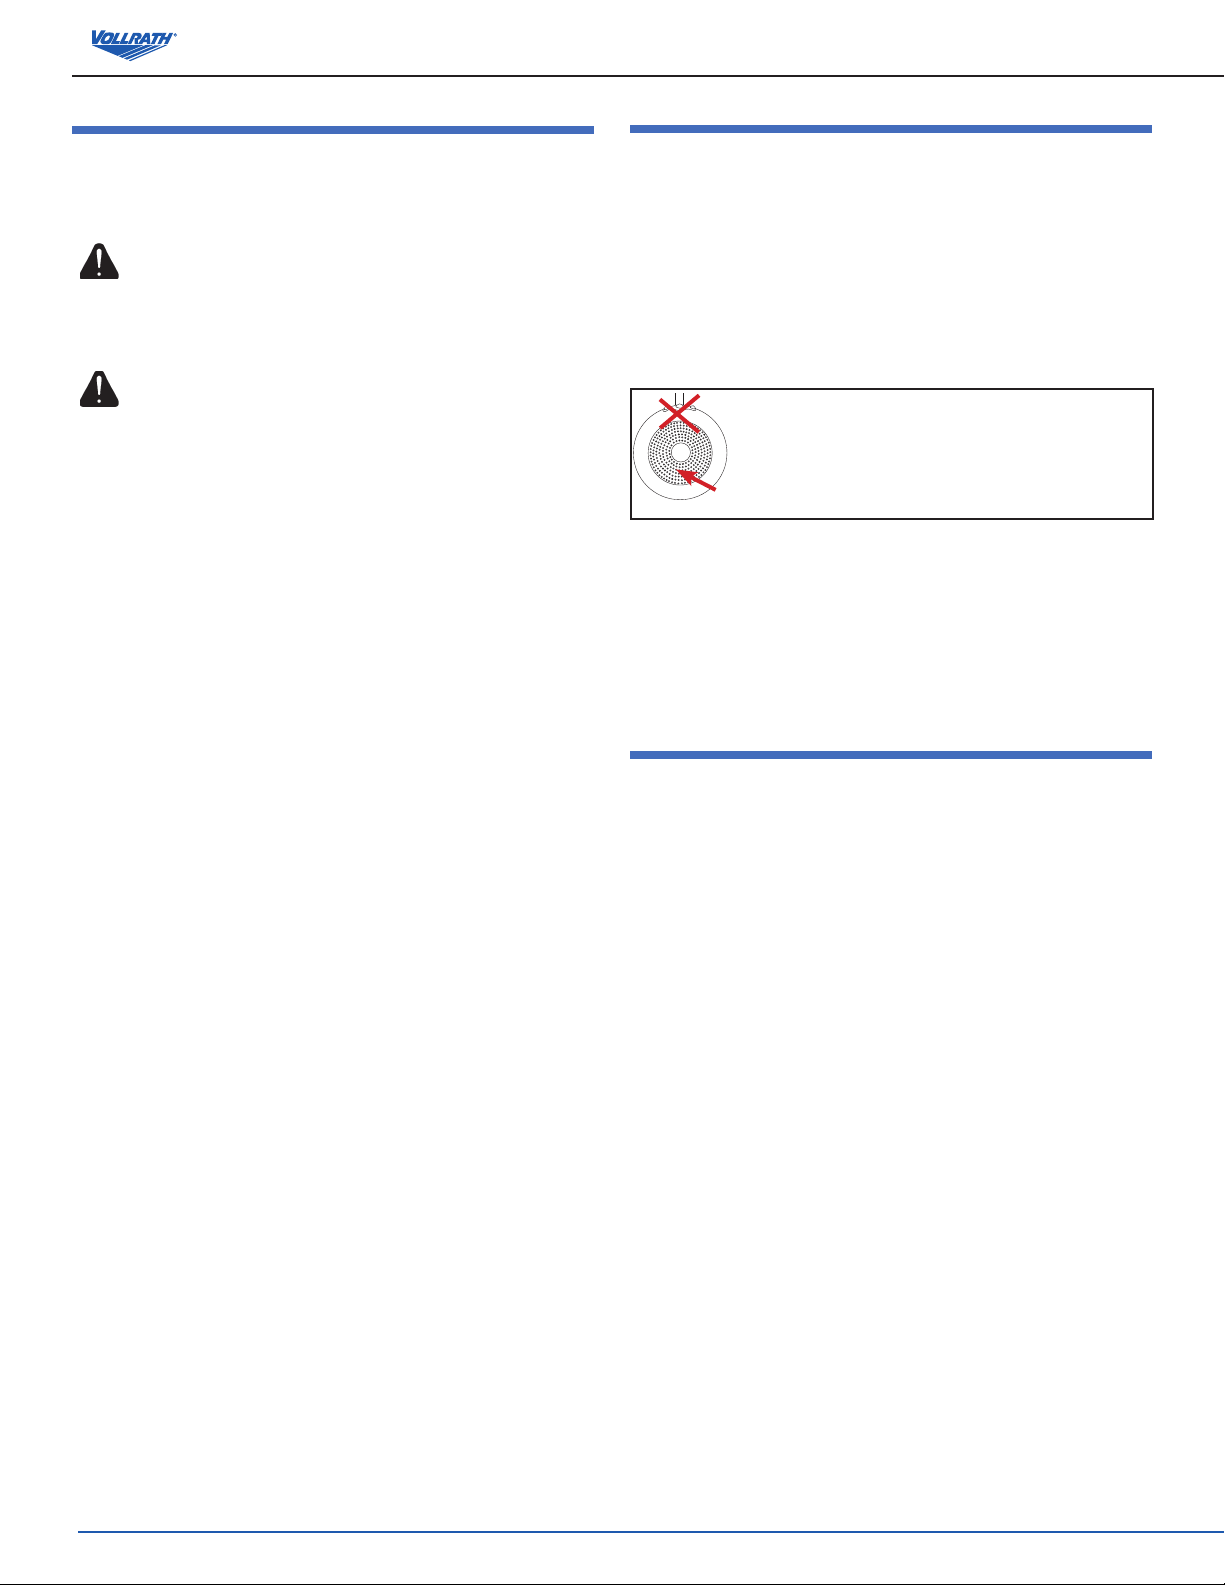
1. Place the induction-ready cookware containing food in the center position
of the hob(s) to be used.
1. Rotate the control knob (A) to the desired setting. See Figure 1. The
indicator led light (B) will illuminate
pan is on the hob and the control knob is set between the “low”
to “high” range. The indicator led light (B) blinks when no pan or
a non induction ready pan is on the hob and the control knob is
set between the “low” to “high” range.
2. When the cooking or heating is complete. Rotate the control know to
the “off” position and remove the cookware.
3. Clean the equipment after each use. Follow the CLEANING section in
this manual.
DIgItal ContRol MoDel
NOTE:
Do not pre-heat empty cookware. Because of the speed and
efciency of the induction range, cookware can very quickly
overheat and be damaged.
Do not drop cooking utensils or other objects onto the cooking
surface. The strong, non-porous surface will break. The warranty
does not cover this type of abuse.
J
WARNING
Burn Hazard.
Do not touch cookware, heating surface, food, or
liquid while heating.
Hot food and liquids can burn skin. Induction heating surfaces heat
very rapidly. Use caution when adding pre-heated oil, liquid or other
food already in the cookware.
Figure 2. Digital Model Control Panel
steady when an induction ready
B
A
power
on
temp
o
C
power
on
temp
o
F
D
E
G
H
timer
timer
I
ENGLISH
Manual ContRol MoDel
B
C
A
Figure 1. Manual Model Control Panel
A
CONTROL KNOB. Controls the amount of heat transferred to the
induction ready cookware.
B
INDICATOR LED light. Illuminates steady when an induction
ready pan is on the hob and the control knob is between the “low”
to high” range. Blinks 1 time per second when no pan or a non
induction ready pan is on the hob.
C
HOB LOCATION. Shows which hob the control is operating.
D
KNOB GUARD (not shown). Helps protect the control knob from
damage.
B
C
A
A
ON/OFF button. Press to turn unit on. An LED above the control
will illuminate when switched on.
B
ON LED light. Illuminates when the power is switched on.
C
POWER/TEMP button. Used to change the mode and display
panel from power to temperature.
D
POWER LED light. Illuminates when the unit is in the power
mode.
E
TEMPERATURE LED light. Illuminates when the unit is in the
temperature mode.
F
DISPLAY panel. Displays the power level or time depending
upon the mode selected and model.
G
UP button. Used to increase the power level or time depending
upon the mode selected and model.
H
DOWN button. Used to decrease the power level or time
depending upon the mode selected and model.
I
TIMER button. Used to switch on and start the timer function.
J
HOB LOCATION. Shows which hob the control is operating.
OperatOr’s Manual
3
Page 4

Cayenne® Heavy-Duty InDuCtIon Ranges
Adjusting the Power and Temperature
1. Press the on/off button (A) to turn on the hob on. See Figure 2. The on
led (B) will illuminate. When induction-ready cookware is placed on the
range, the display will remain “steady on” with a value. This indicates
the unit is heating. Models with two heating surfaces will have separate
ON/OFF buttons for each heating surface.
2. Press the power/temp button (C) to choose a cooking power level
(1 – 100) or an approximate temperature (100° – 400° F). The power
led light (D) will illuminate when the unit is in the power mode. The
temperature light (E) will illuminate when the unit is in the temperature
mode.
3. Press the up button (G) or the down button (H) to increase or decrease
the power level or temperature.
Activating the Timer
1. Press the timer button (I). The display will show “1” with a ashing dot
in the lower right corner.
2. Press the up button (G) or the down button (H) to set the timer from 1
to 180 minutes.
3. When the timer cycle is complete, the unit will turn off.
4. To cancel the timer, press the power/temp button (B). The timer will turn
off and the unit will return to the power or temperature mode.
cleaning
To maintain the appearance and increase the service life, clean your
induction range daily.
If liquid spills or boils over onto the unit, immediately unplug the unit
and remove cookware. Wipe up any liquid with a padded cloth.
Hot food and liquids can burn skin. Induction heating surfaces heat
very rapidly. Use caution when adding pre-heated oil, liquid or other
food already in the cookware.
1. Unplug the unit and let it completely cool.
2. Wipe the unit exterior with a clean damp cloth.
3. Do not use abrasive materials, scratching cleansers or souring pad to
clean the unit. These can damage the nish.
4. Thoroughly wipe off any mild soap or chemical cleaners. Residue
could corrode the surface of the unit.
WARNING
Electrical Shock Hazard.
Keep water and other liquids from entering the
inside of the unit. Liquid inside the unit could cause
an electrical shock.
WARNING
Burn Hazard.
Do not touch cookware, heating surface, food, or
liquid while heating.
4
OperatOr’s Manual
Page 5

Cayenne® Heavy-Duty InDuCtIon Ranges
troubleShooting
Manual Control Models:
When there is a problem with the hob the LED light will blink rapidly a specied number of times between pauses - dening a fault code.
“F9” - LED light Off for 2 seconds, then 9 blinks per second then repeat pattern
“F2” - LED light Off for 2 seconds, then 2 blinks per second then repeats pattern
“F8” - LED light Off for 2 seconds, then 8 blinks per second then repeat pattern
“F4” - LED light Off for 2 seconds, then 4 blinks per second then repeat pattern
“F5” - LED light Off for 2 seconds, then 5 blinks per second then repeat pattern
No Pan - LED Light blinks 1 time every second
All Models:
The unit is equipped with an “over-heating protection” feature. If the temperature of the cooking surface becomes too hot, the unit will turn off. The display
will ash “F2” to indicate the unit is in “over-heating protection” mode. After the unit has cooled, turn the cooking surface on and if “F2” is not displayed, then
cooking can resume.
Problem It might be caused by Course of Action
There is not a pot/pan on the induction range or the
The unit turned off after 10 minutes.
The unit is on, but not heating.
The digital display lights are ashing. The overheat-protection feature may have activated. Remove cookware. Let cooking surface cool.
The unit suddenly stopped working.
Flashing Message (F code) It might be caused by Course of Action
Add Pan (Add Pan)
Bad Pan (Bad Pan - F9)
TOO HOT (Too Hot - F2)
BAD FLO (Bad Flow - F8)
HT SNC (Heatsink - F4)
pot/pan is not induction-ready cookware. The induction
range turned off. This is normal.
The cookware may be too small or may not be
induction-ready.
The unit may be too close to an external heat source or
the air intake may be restricted.
No pan has been detected on the induction range.
The cookware may be too small or may not be
induction-ready.
The overheat-protection feature may have activated.
The unit may be too close to an external heat source or
the air intake may be restricted.
The overheat-protection feature may have activated.
Make sure the pot/pan is induction ready. See the
FUNCTION and PURPOSE Section of this manual.
Make sure the pot/pan is induction ready. See the
FUNCTION and PURPOSE of this manual.
Relocate the unit away from any external heat
source. Clear any obstructions to the air intake.
Place induction-ready cookware on the heating
surface.
Make sure the pot/pan is induction ready. See the
FUNCTION and PURPOSE of this manual.
Remove cookware. Let cooking surface cool. Clear
any obstructions to the air intake.
Relocate the unit away from any external heat
source. Clear any obstructions to the air intake.
Remove cookware. Let cooking surface cool. Clear
any obstructions to the air intake.
ENGLISH
HT TH (Heat Therm - F5)
HOT
The overheat-protection feature may have activated.
No defect. Indicates the cooking surface is hot after a
heating cycle has completed.
Remove cookware. Let cooking surface cool. Clear
any obstructions to the air intake.
Restart with pan on surface. Allow time for the
cooking surface to cool.
OperatOr’s Manual
5
Page 6

SerVice and rePair
There are no user serviceable parts within this appliance. To avoid serious injury or damage, never attempt to repair the unit or replace a damaged power cord
yourself. Do not send units directly to The Vollrath Company LLC. Please contact Vollrath Technical Service from the list below.
VOLLRATH Technical Service • 1-800-628-0832 • Email: techservicereps@vollrathco.com
When contacting Vollrath Technical Service, please be ready with the item number, model number (if applicable), serial number, and proof of purchase showing
the date the unit was purchased.
Warranty StateMent for the Vollrath co. l.l.c.
This warranty does not apply to products purchased for personal, family or household use, and The Vollrath Company LLC does not offer a written warranty to
purchasers for such uses.
The Vollrath Company LLC warrants the products it manufactures or distributes against defects in materials and workmanship for a period of one year, except
as speci cally described in our full warranty statement. In all cases, the warranty runs from the date of the end user’s original purchase date found on the
receipt. Any damages from improper use, abuse, modi cation or damage resulting from improper packaging during return shipment for warranty repair will not
be covered under warranty.
For complete warranty information, product registration and new product announcement, visit www.vollrath.com.
www.vollrathco.com
The Vollrath Company, L.L.C.
1236 North 18th Street
Sheboygan, WI 53081-3201
U.S.A.
Main Tel: 800.628.0830
Service Tel: 800.628.0832
FAX: 800.752.5620
Vollrath of Canada, Co.
Tel: 800.695.8560
FAX: 800.752.5620
© 2018 The Vollrath Company, L.L.C.
Item No. 2350095-1 en Rev 8/15/18
 Loading...