

Vodafone HG556a Installation Manual And User's Manual
User Manual
1
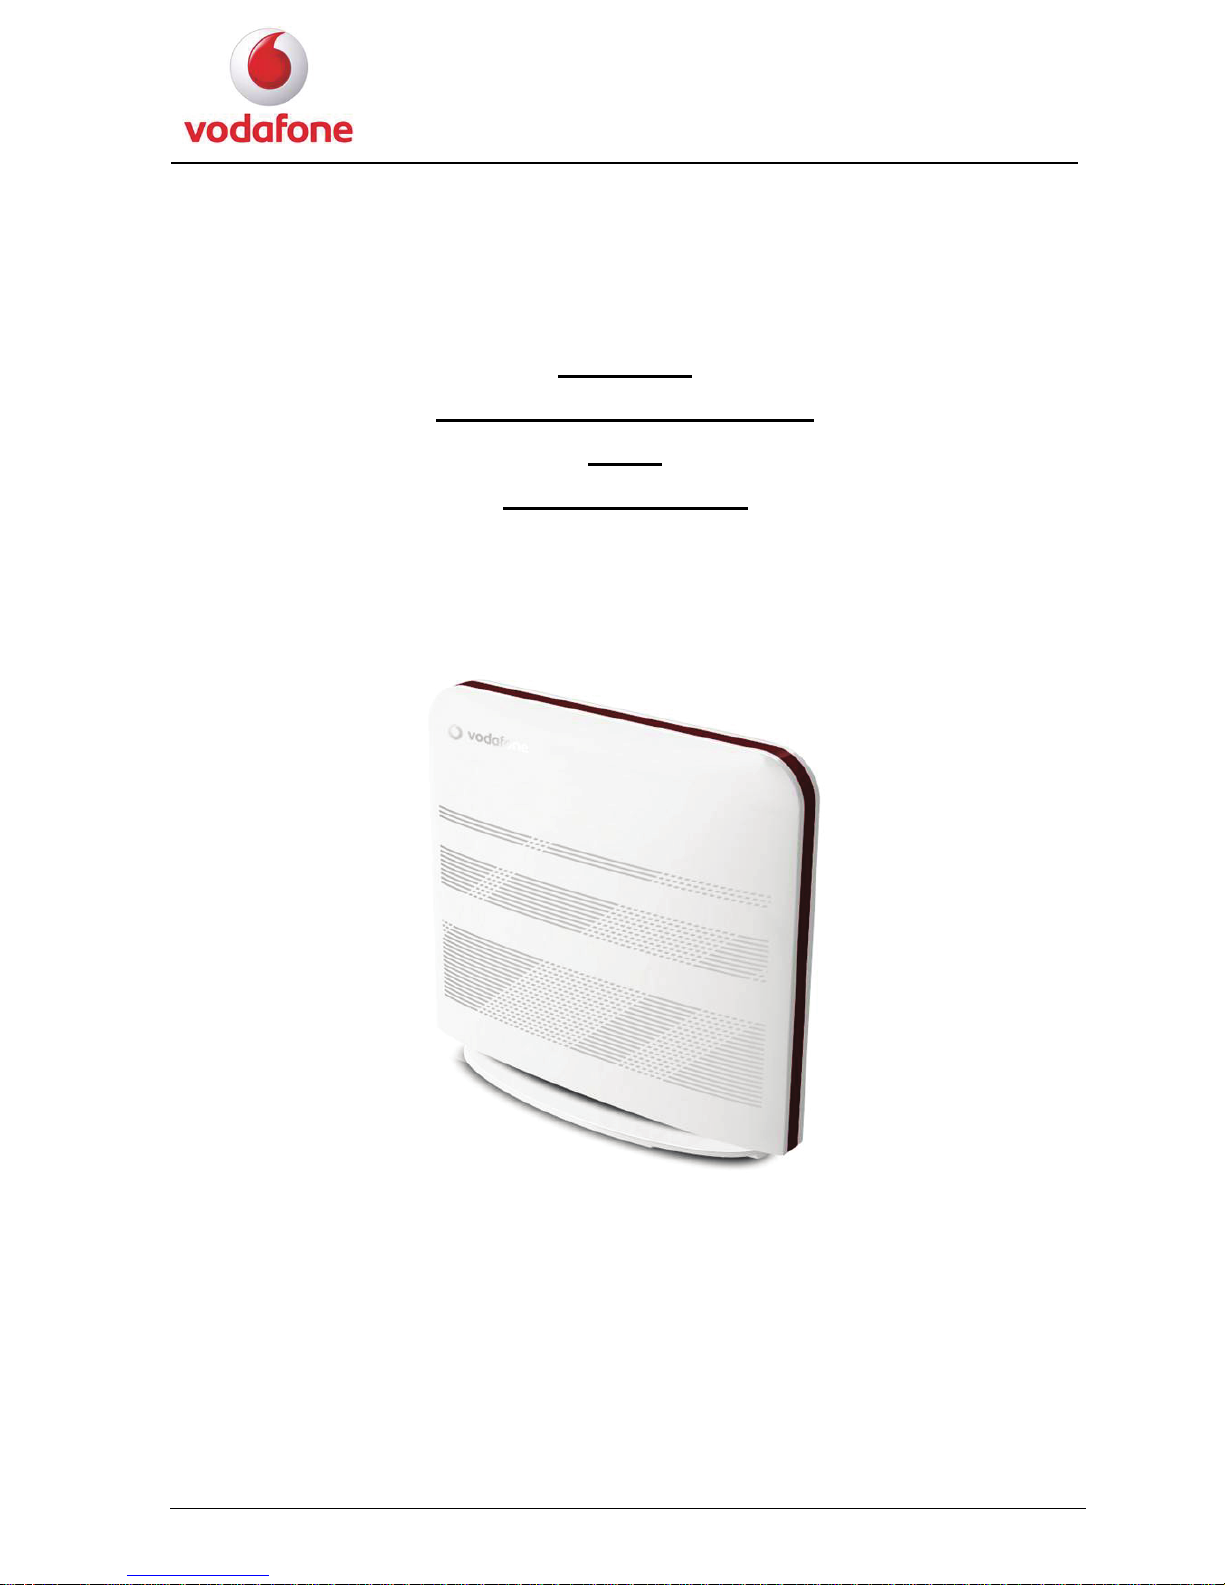
HG556a
INSTALLATION GUIDE
AND
USER MANUAL

User Manual
2
Contents
1 INTRODUCTION ...............................................................................3
1.1 Contents in the Package.......................................................................................................................................................... 3
1.2 The Front Panel of the HG556a.............................................................................................................................................. 4
1.3 The Rear and Side Panels of the HG556a............................................................................................................................... 5
1.4 Description of the Indicators on the Front and Rear Panels.................................................................................................... 6
2 Installation Guide................................................................................7
2.1 Connecting the Telephone...................................................................................................................................................... 7
2.2 Supplying Power to the HG556a ............................................................................................................................................ 8
2.3 Connecting the PC to the HG556a.......................................................................................................................................... 9
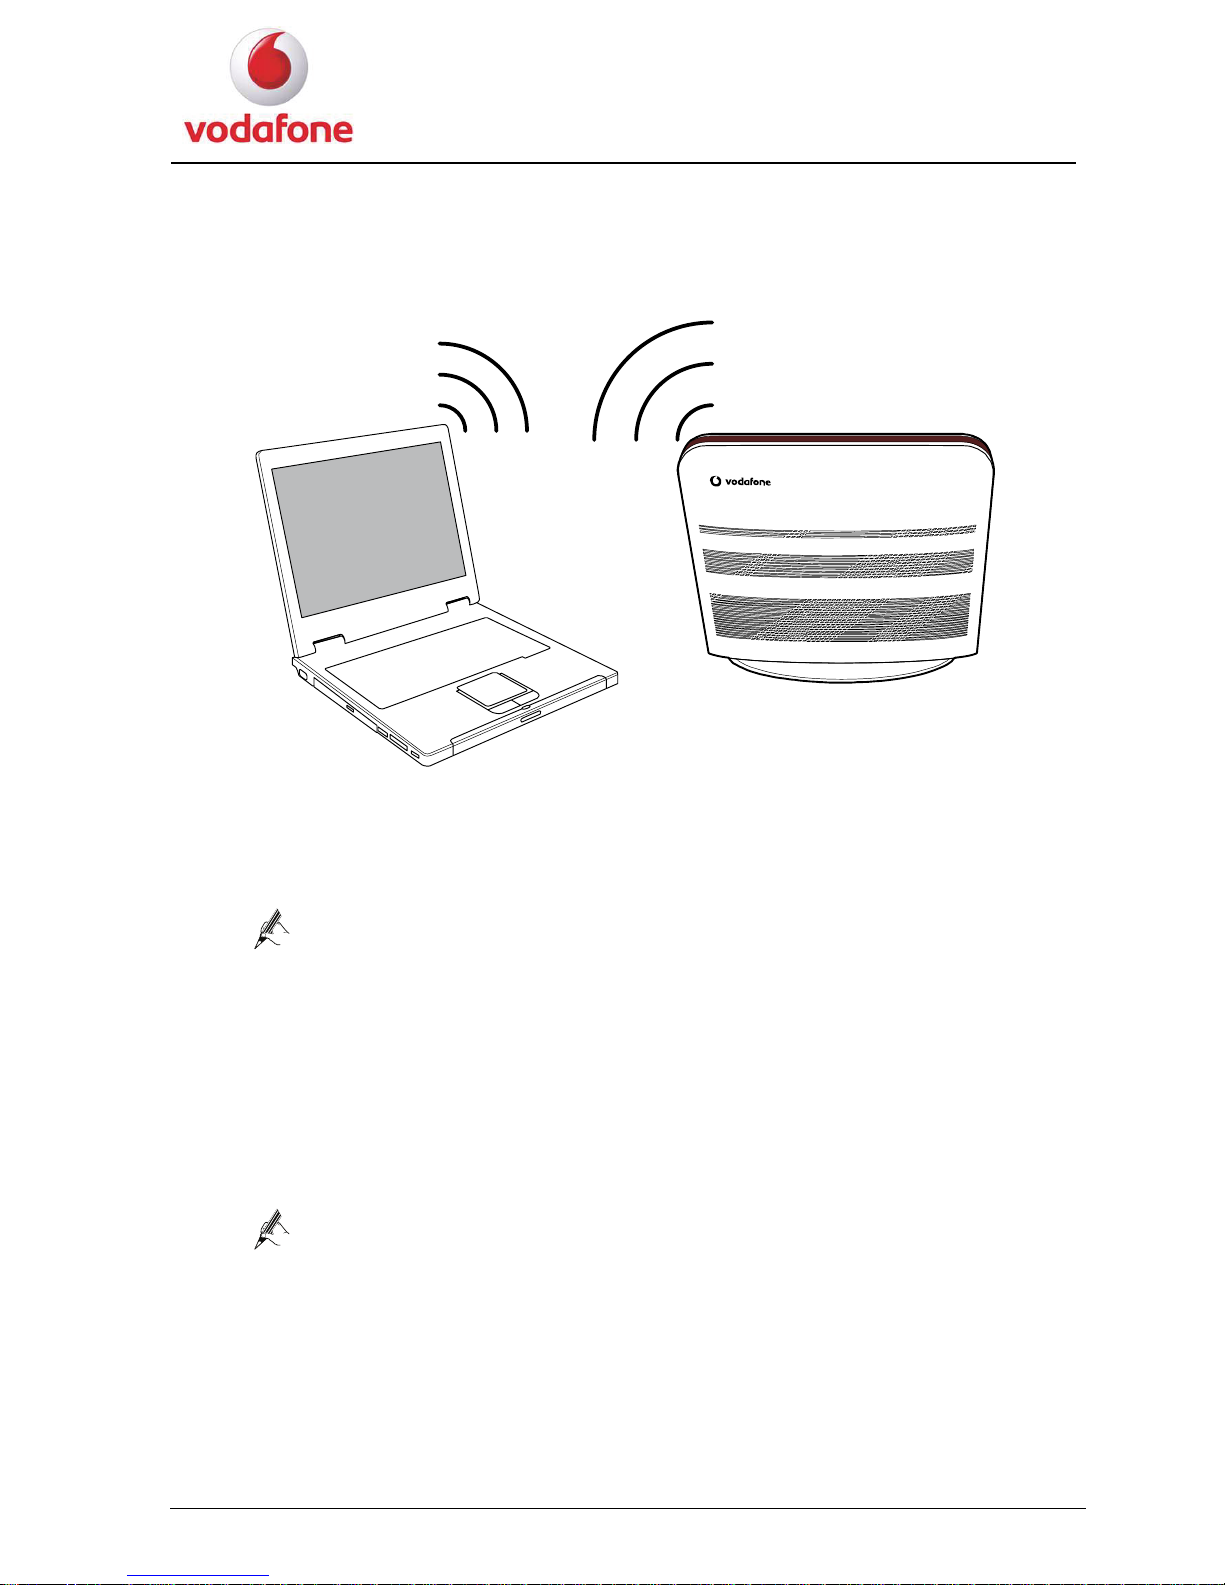
2.4 Connecting the PC to the HG556a Through Wi-Fi............................................................................................................... 10
2.5 Inserting the Vodafone Internet Key..................................................................................................................................... 11
3 User Manual........................................................................................12
3.1 Introduction .......................................................................................................................................................................... 12
3.2 Features of the HG556a........................................................................................................................................................ 12
3.3 Requirements of PC Configuration....................................................................................................................................... 13
3.4 Management of the HG556a................................................................................................................................................. 14
3.4.1 Home Page ............................................................................................................................................................... 14
3.4.2 Applications .............................................................................................................................................................15
3.4.3 Router....................................................................................................................................................................... 16
3.4.4 WiFi.......................................................................................................................................................................... 18
3.4.5 HSPA........................................................................................................................................................................ 19
3.4.6 Administration.......................................................................................................................................................... 20
3.4.7 Printer....................................................................................................................................................................... 20
3.4.8 FTP........................................................................................................................................................................... 21
3.4.9 Box Diagnostics .......................................................................................................................................................22
3.4.10 ADSL Statistics...................................................................................................................................................... 24
3.5 Functions .............................................................................................................................................................................. 25
3.5.1 Home Storage Function............................................................................................................................................ 25
3.5.2 USB Printer Function ............................................................................................................................................... 28
3.5.3 Wireless Function..................................................................................................................................................... 32
3.6 Troubleshooting.................................................................................................................................................................... 33
3.7 Glossary................................................................................................................................................................................ 34
User Manual
3
INTRODUCTION
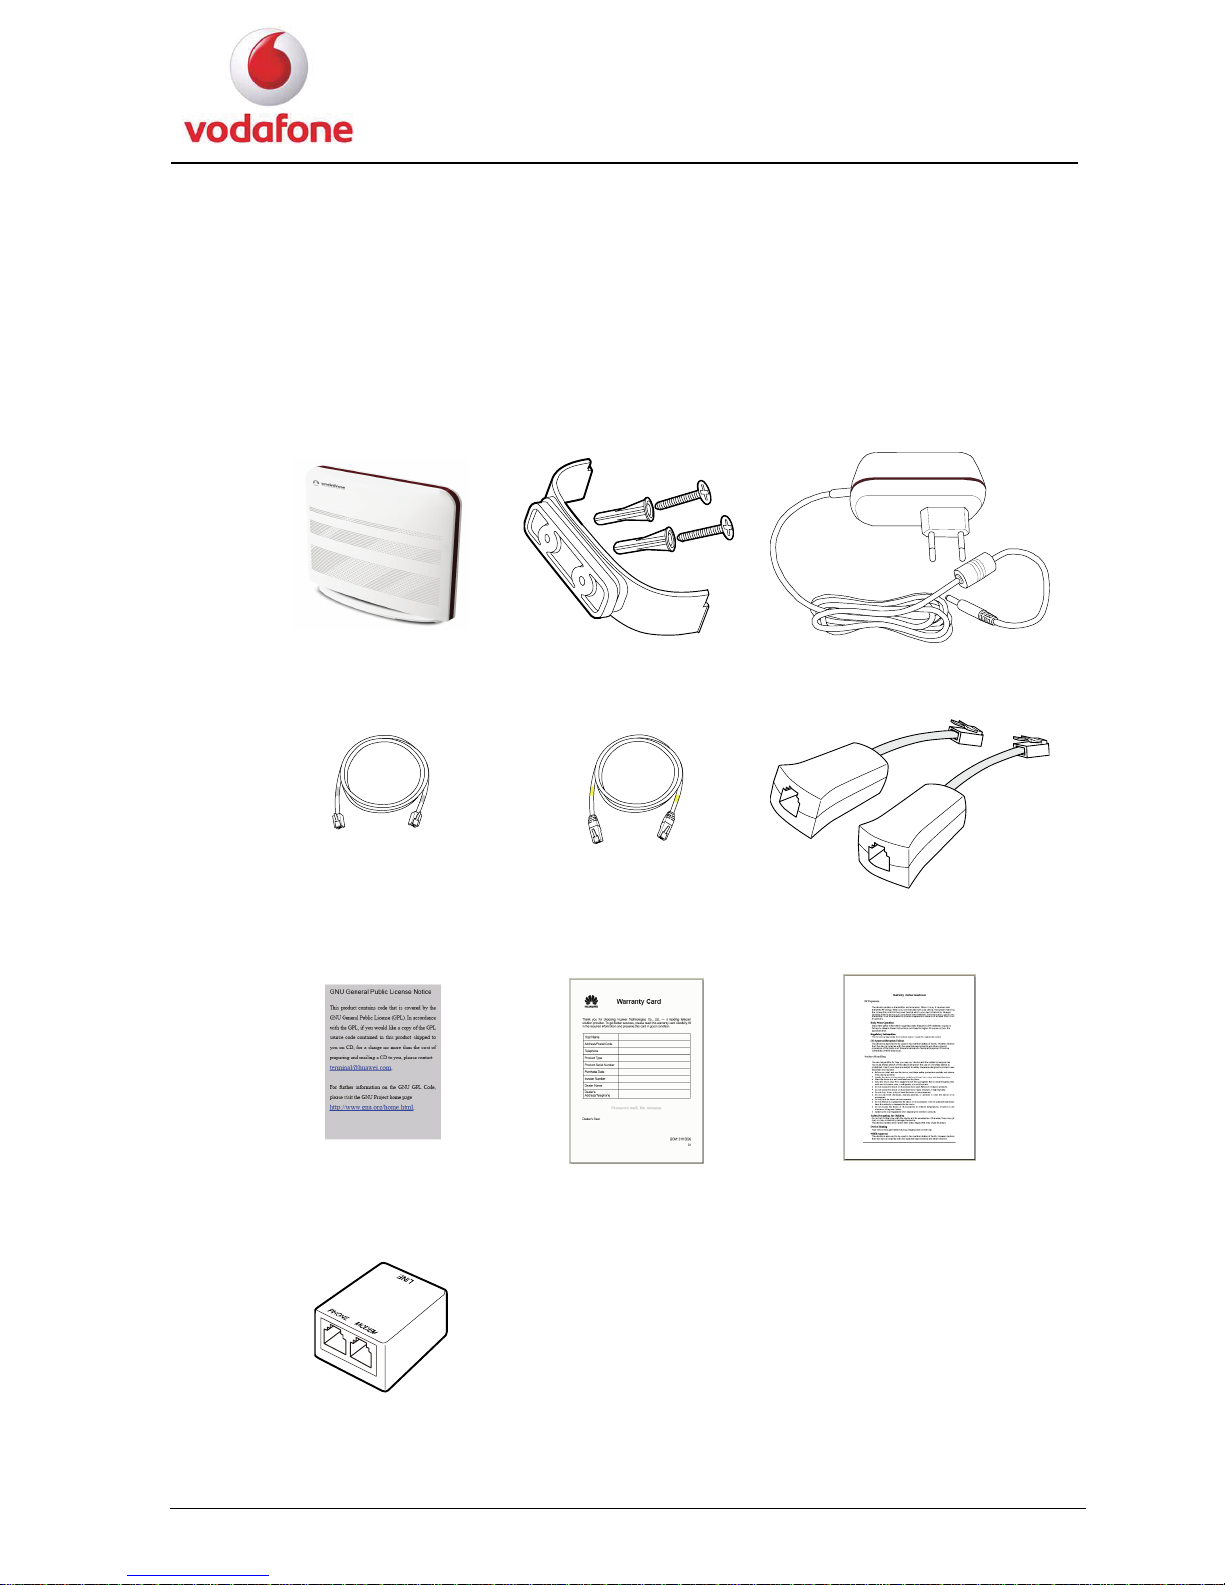
1.1 Contents in the Package
1
Vodafone Station Bracket and Screws Power adapter
DSL cable Ethernet cable Micro-filters
GPL Warranty Card Safety Information
Splitter
User Manual
4
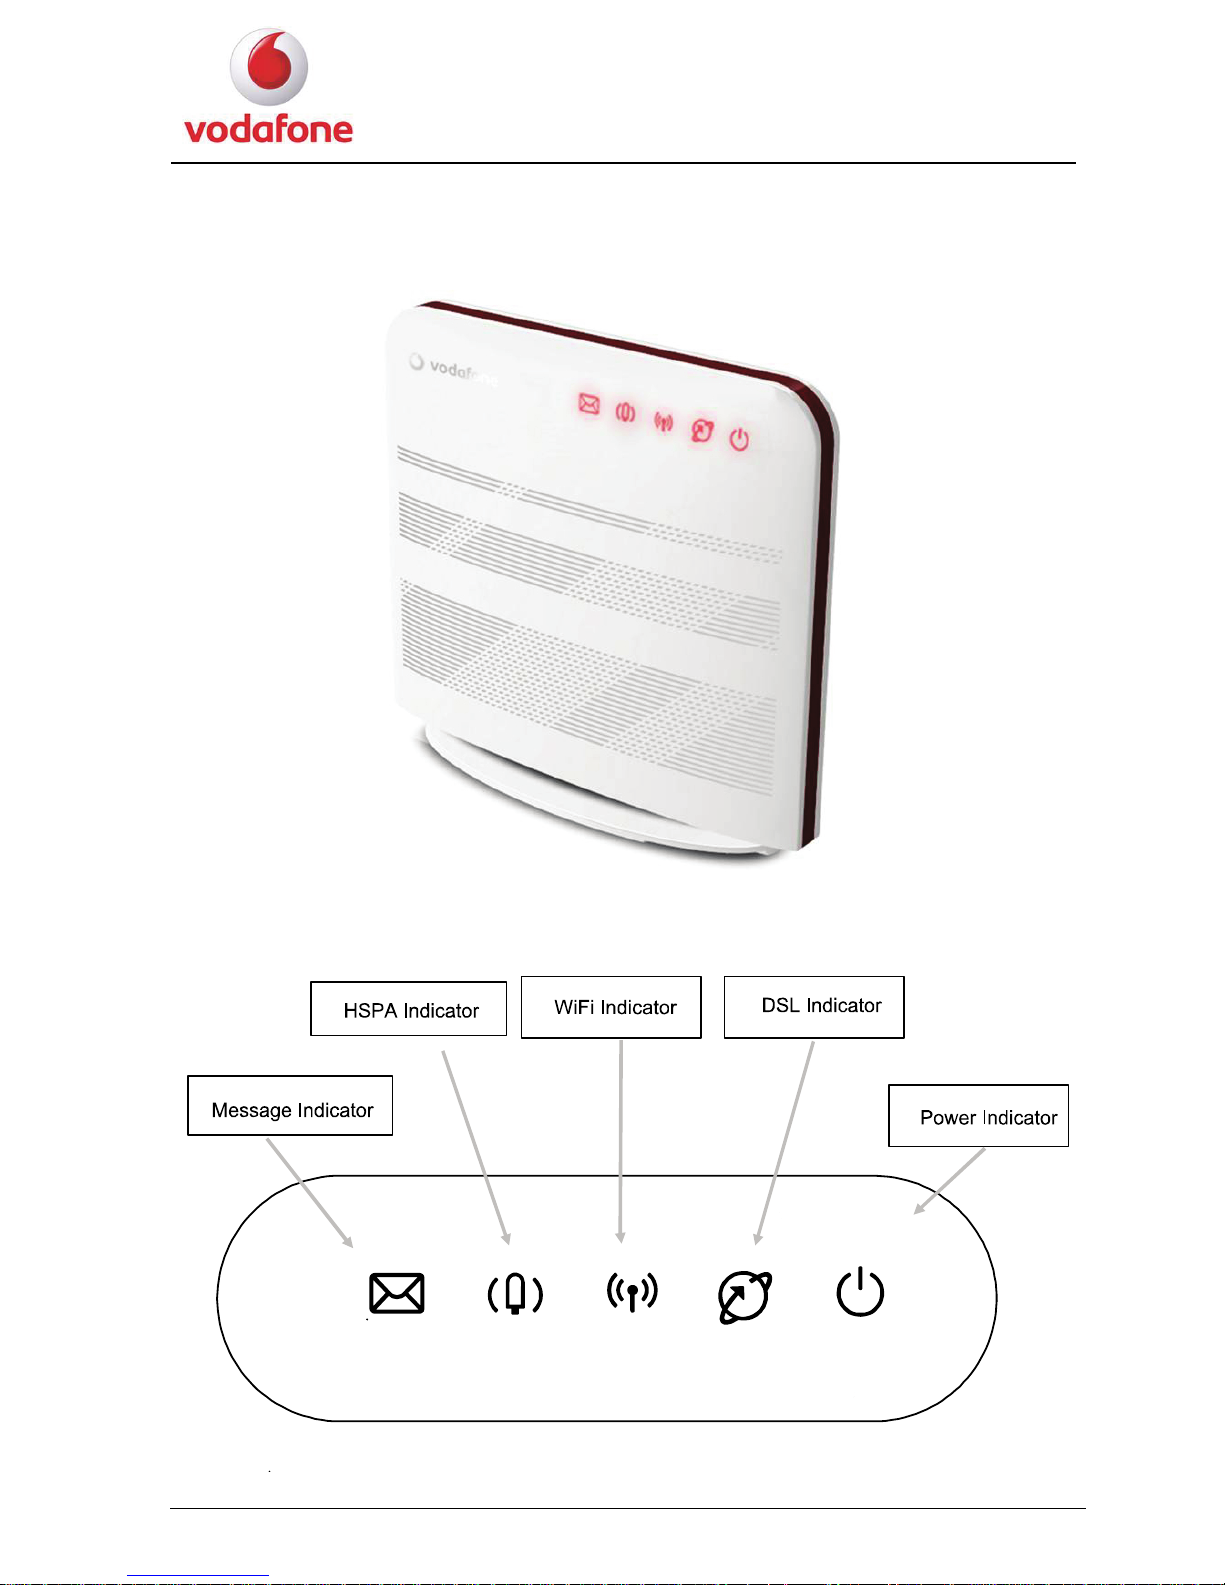
1.2 The Front Panel of the HG556a
Indicators on the front panel of the HG556a Figure 1-1
User Manual
5
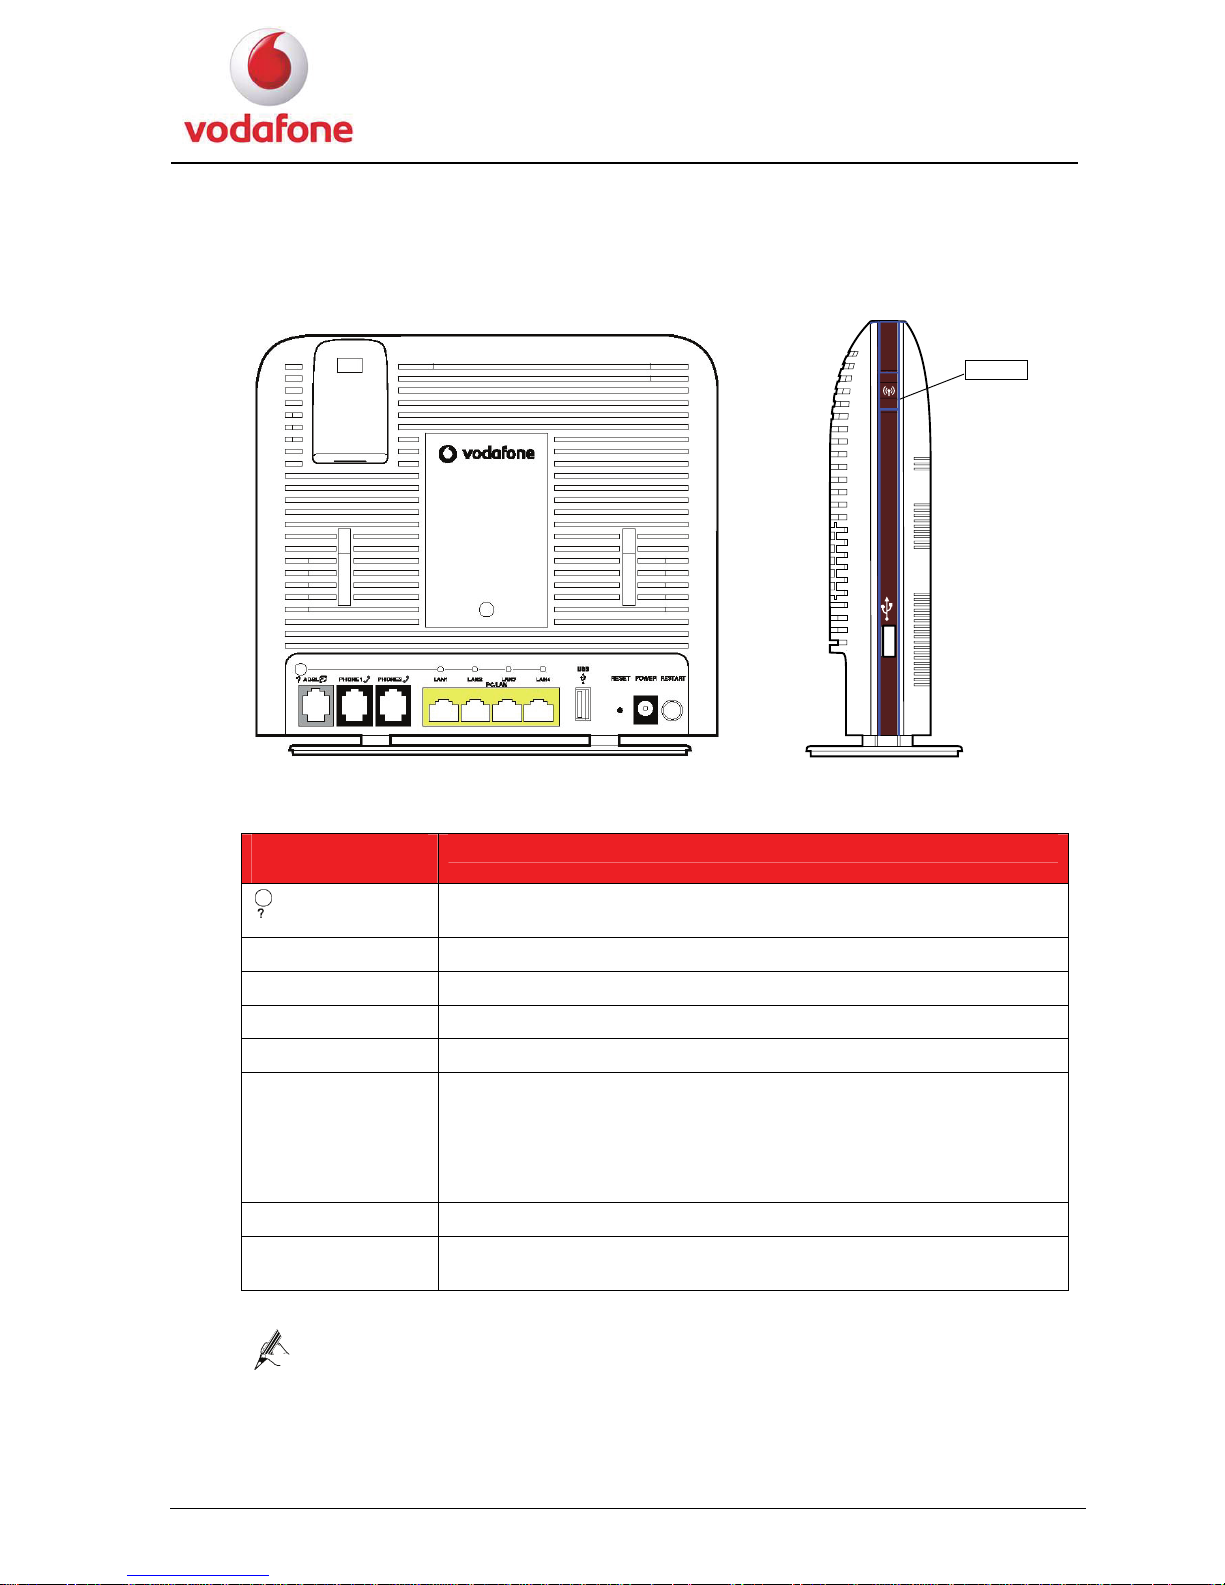
1.3 The Rear and Side Panels of the HG556a
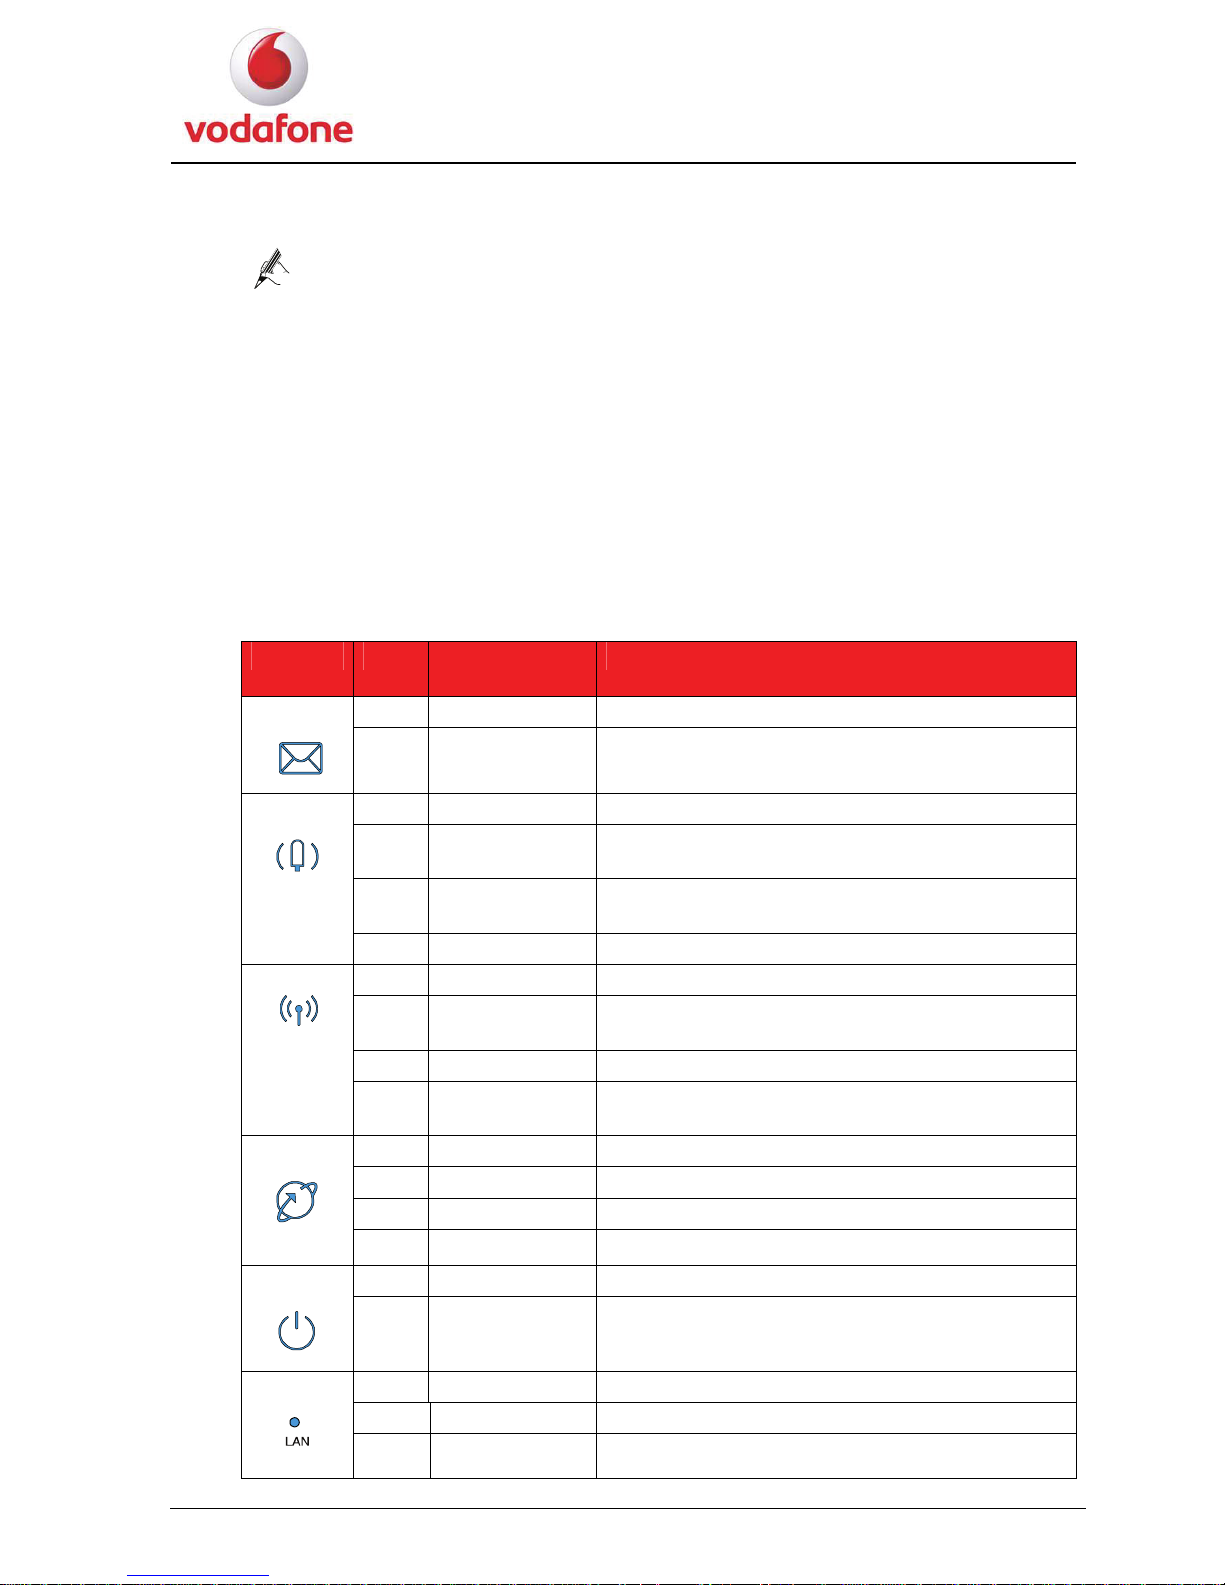
WiFi button
1. The rear panel of the HG556a provides the following interfaces and buttons:
Interface or
Button
Meaning
Diagnostic button, press this button to check the status of the
four LAN indicators.
ADSL Connects the telephone jack on the wall.
PHONE1, PHONE2 Connects a phone.
LAN1–LAN4 Connects PCs, switches, or other equipment.
USB Connects a USB storage device, such as a USB disk, a printer etc.
RESET
Restores the factory settings if this button is pressed and hold
more than 5 seconds.
NOTE
After you restore the factory settings, the customized data will be
lost. Therefore, press the RESET button with caution.
POWER Connects a power adapter.
RESTART
Restarts the HG556a if this button is pressed and hold more than
0.5 seconds.
Note for the four LAN indicators:
The four LAN indicators are normally off.
When the diagnostic button is pressed, the four LAN indicators turn red or
green, see
1.4 Description of the Indicators on the Front and Rear Panels.
User Manual
6
2. The side panel of the HG556a provides the following interface and button:
z
One Wi-Fi button:
Note for the Wi-Fi button:
The initial configuration for the Wi-Fi function of the HG556a is Enabled. Press
and hold the WiFi button for less than four seconds to disable the WiFi function.
Press and hold the Wi-Fi button for more than four seconds to enable the WPS
function.
More details about the Wi-Fi button, see 2.4 Connecting the PC to the HG556a Through
Wi-Fi
.
z
One USB interface: connects a USB storage device, such as a USB disk, a printer etc.
1.4 Description of the Indicators on the Front and Rear
Panels
Indicator Color Status Meaning
- Off There is no message. Message
Red On There is an incoming message.
- Off The HSPA module is not connected or used.
Red Blinking slowly
The HSPA connection is normal and data
connection is being established.
Red Blinking quickly
The HSPA connection is normal and voice
connection is being established.
HSPA
Red On The connected HSPA module works normally.
- Off The Wi-Fi network is not activated.
Red Blinking slowly
The Wi-Fi Protected Setup (WPS) process is in
progress.
Red On The Wi-Fi connection is in good condition.
Wi-Fi
Red Blinking quickly
The Wi-Fi connection is normal and data is being
transmitted on the link.
- Off The ADSL connection is not activated.
Red Blinking slowly The ADSL connection is in process.
Red On The ADSL connection is in good condition.
DSL
Red Blinking quickly
DSL synchronization is in progress.
- Off The HG556a is powered off. POWER
Red On The HG556a is powered on.
- Off There is no Ethernet connection.
Green On The Ethernet connection is in good condition.
LAN
Red On The LAN connection is not connected.
User Manual
7
Installation Guide
This chapter describes the procedure for installing the HG556a.
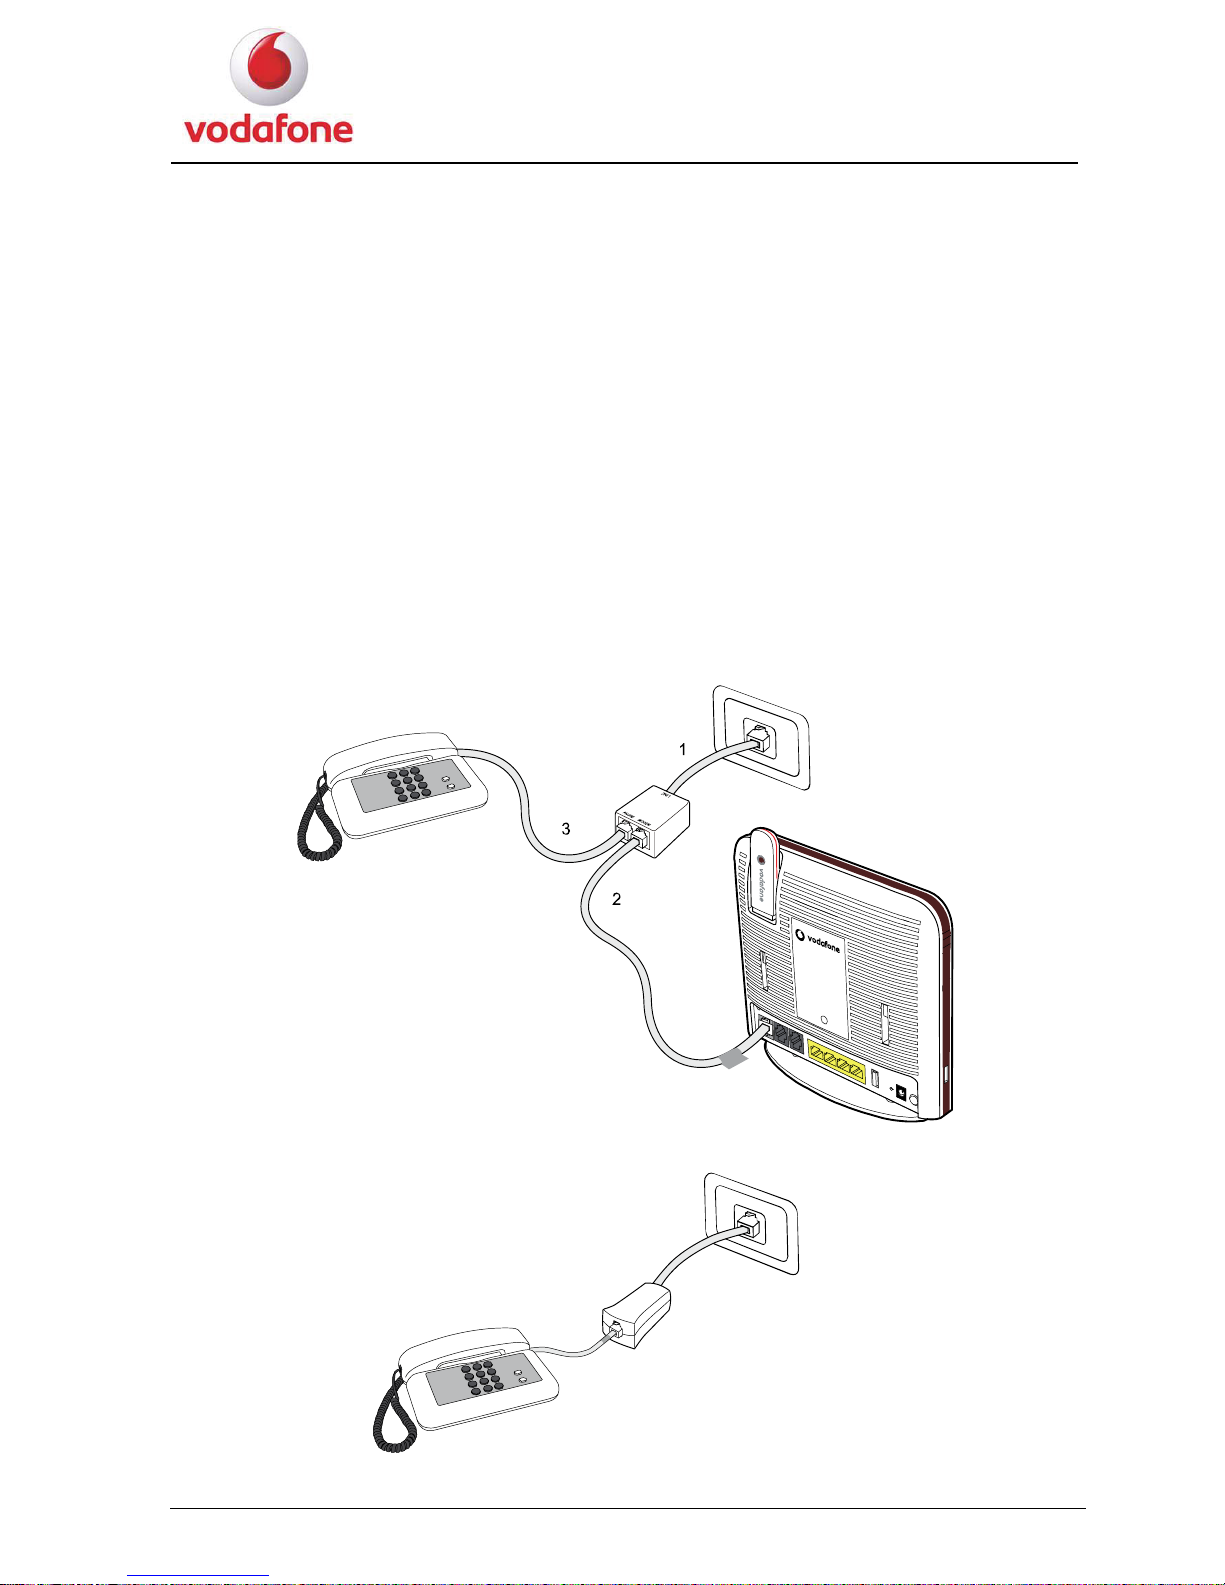
2.1 Connecting the Telephone
with
3. Con L cable.
2
1. Connect the telephone jack on the wall to the LINE interface on the splitter.
2. Connect the ADSL interface on the HG556a to the MODEM interface on the splitter
a DSL cable.
nect the telephone to the PHONE interface on the splitter with a DS
If you have ter to connect the telephone. another telephone, you can use the microfil
User Manual
8
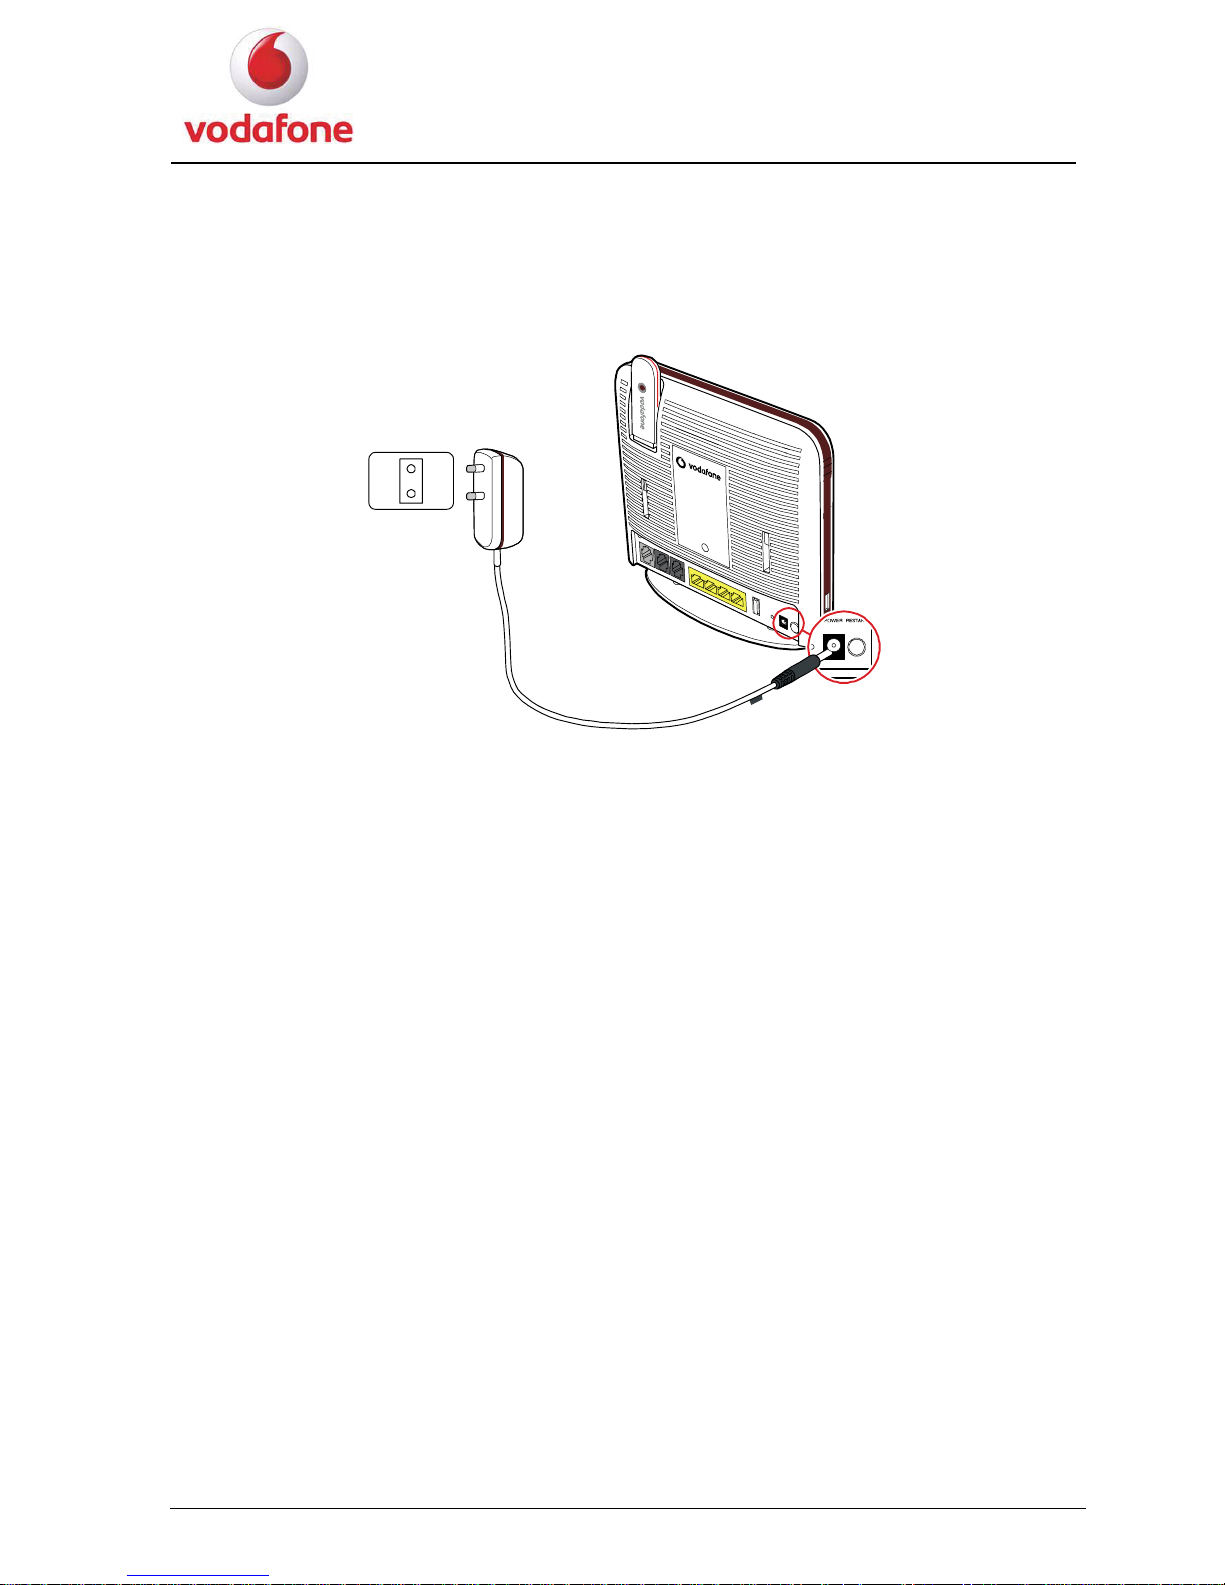
2.2 Supplying Power to the HG556a
1. Connect the power adapter to the power interface on the back of the device and plug
the power adapter into a wall outlet or a power strip.
P
O
W
E
R
2. After you finish the connection, the power indicator turns on, indicating that the
HG556a is being activated and working normally.
User Manual
9
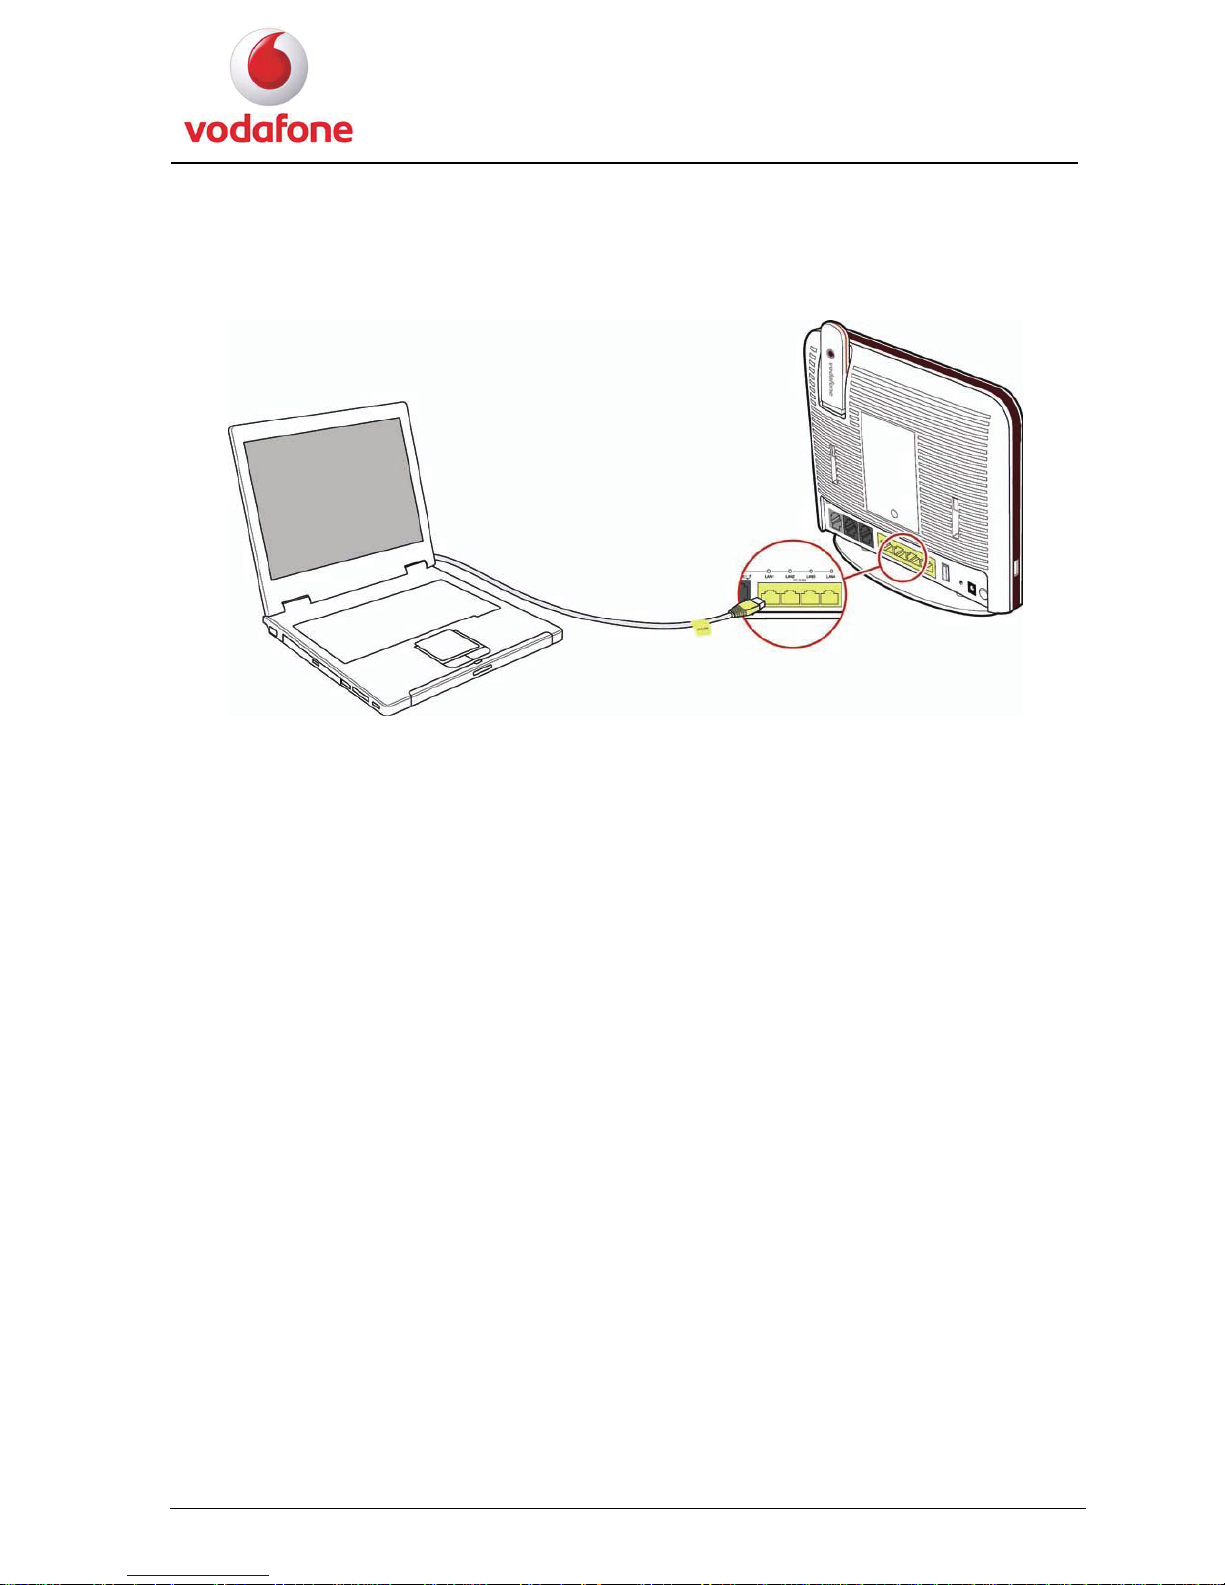
2.3 Connecting the PC to the HG556a
Use the provided Ethernet cable to connect the PC to any of the four LAN interfaces on the
rear panel of HG556a.
User Manual
10
2.4 Connecting the PC to the HG556a Through Wi-Fi
To configure the PC to the HG556a wirelessly, do as follows:
1. Enable the WPS function.
Press the Wi-Fi button on the side panel of the HG556a and hold it for more than four
seconds. The WPS function is then enabled.
Note for pressing the Wi-Fi button:
z Press and hold the Wi-Fi button for more than four seconds to enable the
WPS function.
z Once the button is pressed and held for more than four seconds, the Wi-Fi
indicator start to blink slowly in a few seconds.
2. Access the WLAN through the wireless network adapter on your PC.
After you install a wireless network adapter on your PC and enable the WPS negotiation
function, the wireless network adapter automatically searches for an available wireless
network.
3. Wait for a few seconds, and then you can see the wireless icon on the corner to the
right of the task bar of the PC.
Access the Internet through WLAN, you do not need to connect any Ethernet
cable.
User Manual
11
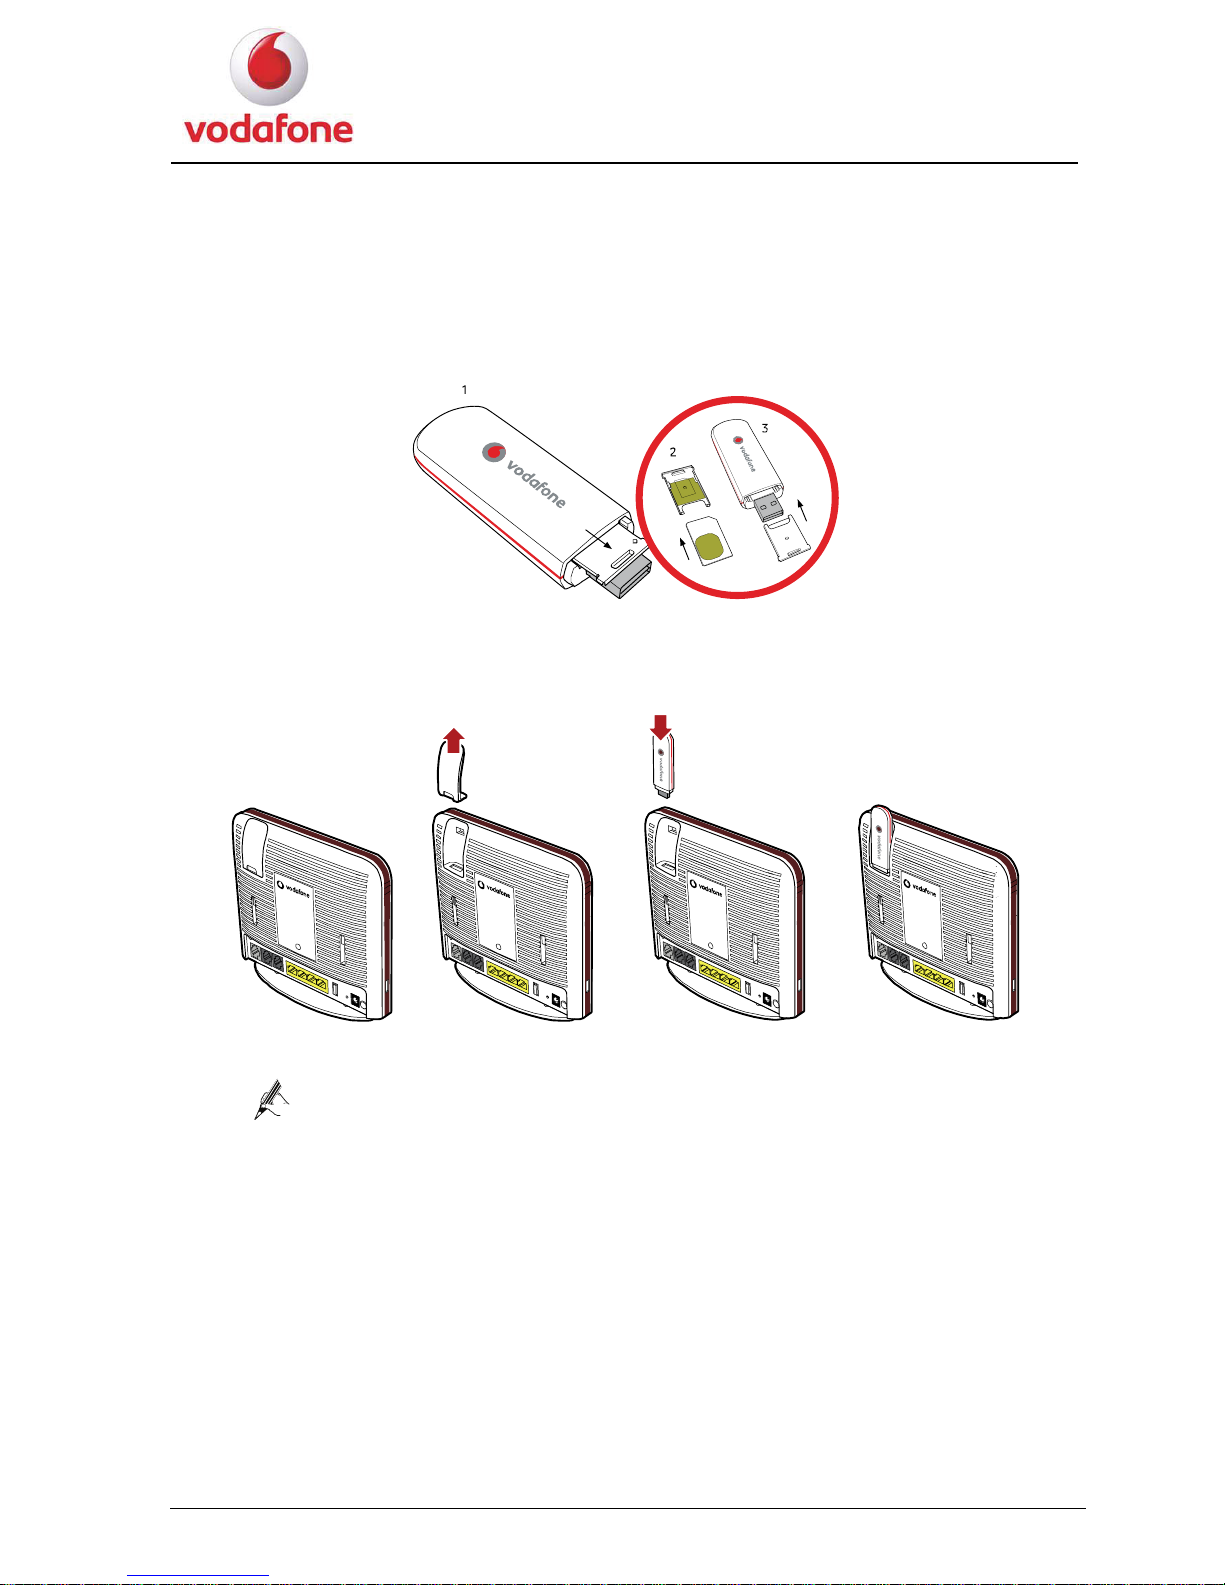
2.5 Inserting the Vodafone Internet Key
1. Remove the SIM card holder from the Vodafone Internet Key.
2. Insert the SIM card into the card holder.
3. Reinsert the SIM card holder into the Vodafone Internet Key.
4. Remove the lid on the back of the Vodafone Station and insert the Vodafone Internet
Key into the slot.
The previous Vodafone Internet Key is just the sample for reference, you
can choose other kind of Internet Key and use the same way to install.

User Manual
12
User Manual
3.1 Introduction
instructions that must be followed to protect the HG556a and the safety of the operator.
3.2 Features of the HG556a
e HG556a are as follows:
, G.992.3 ADSL2 (G.dmt.bis), and G.992.5 ADSL2+
z
Supports manual configuration of VPI/VCI parameters
L2+ uplink and USB port uplink
rage device
z
Supports USB printer
g Ethernet interfaces
z
Supports test of the Ethernet with the diagnostic button
g, and 802.11n
y authorization
3
This manual provides instructions on how to use the product properly. It also provides
The main features of th
1. ADSL2+ interface
z
Supports ITU G.992.1 (G.dmt)
Annex A (G.dmt.bitplus)
z
z
Supports Annex L (RE ADSL)
Supports ANSI T1.413 Issue 2
z
Supports the configuration of eight VPI/VCIs
2.
Supports USB 2.0 host port
USB port
z
Supports Huawei HSPA USB interface link driver
z
z
Supports mutual data backup of ADS
z
Supports USB mass sto
3.
Provides four 10/100 M auto-sensin
Ethernet interface
z
Supports Ethernetz switch function
z
Supports 802.3u
4.
Supports 802.11b, 802.11
Wi-Fi interface
z
Supports 32 connections
z
z
Supports SSID hiding
z
Supports channel selection
z
Supports Open System/Shared Ke
z
Supports WPS
 Loading...