

Page 1

Introduction
Thank you for purchasing the Vodafone 902SH.
^ For proper handset use, read this manual beforehand.
^ This manual was created exclusively for Vodafone 902SH handsets sold in Japan.
^ Keep this manual in a convenient place for reference.
^ Accessible Vodafone services may vary by service area, subscription, etc.
Note
^ Copying this manual in whole or part without authorisation is prohibited.
^ Manual content is subject to change without prior notice.
^
Efforts have been made to ensure the accuracy and clarity of this manual. Please contact
Customer Service, General Information (see
) concerning unclear or missing information.
P.16-32
Page 2
D
C
Symbols
In this manual, most operations are described with handset open (clamshell open: see P.1-13).
Sample screen shots, etc. are provided for reference only. Actual handset windows, menus, etc. may differ in appearance.
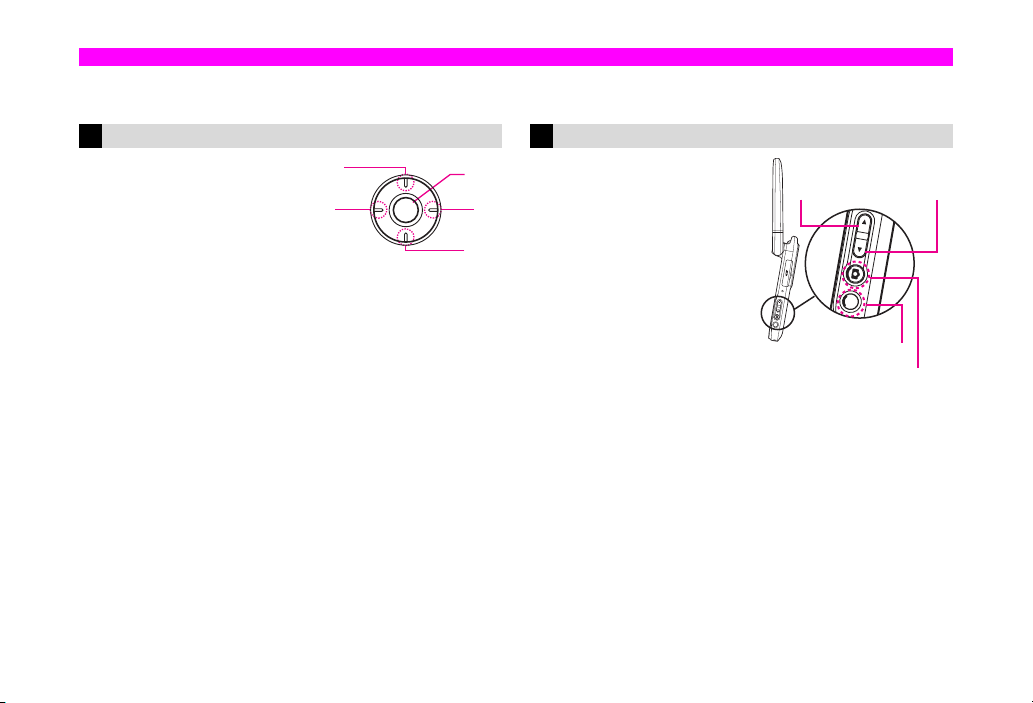
Multi Selector
Use Multi Selector to select
menu items, move cursor,
scroll, etc. In this manual, Multi
Selector operations are
indicated as shown to the right.
Basic Multi Selector Operations
B E: Press C or D
B F: Press B or A
B G: Press C, D, B or A
B
b
A
Side Keys
Use Side Keys when Display is
in Viewer position (see
In this manual, Side Keys are
indicated as shown to the right.
is not inscribed on the actual
c
Clear Key.
P.1-14
Zoom/Select Key
L
).
Clear Key
Shutter Key
M
c
h
i
Page 3
Handset Menu Operations
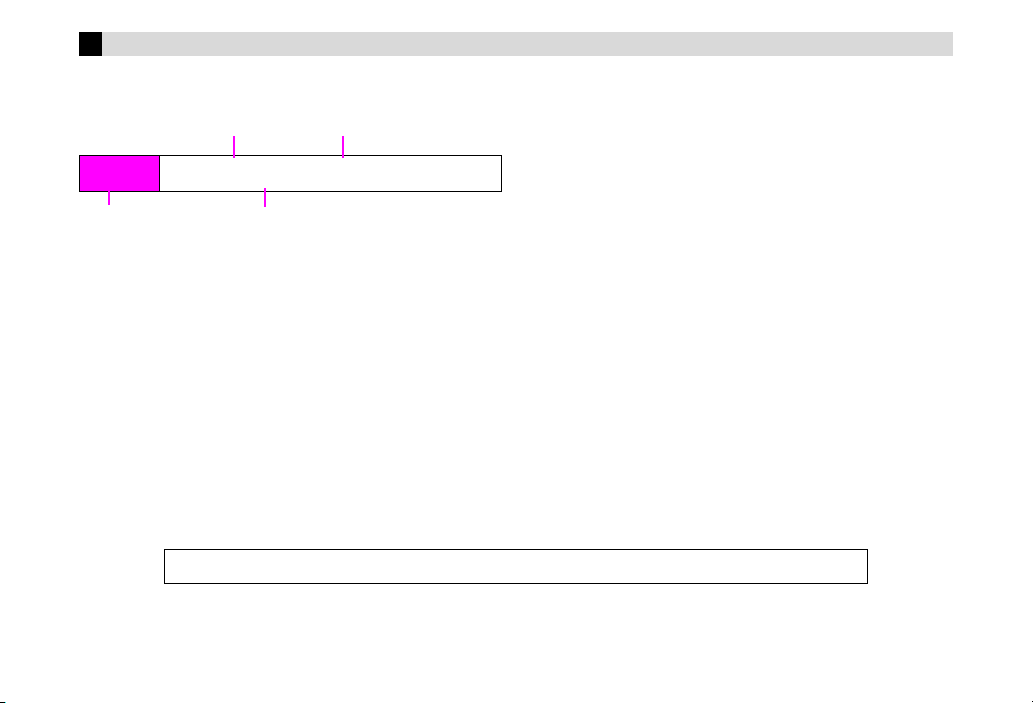
In this manual, menu operations are indicated as follows:
Operations such as selecting a file
Select menu item and press
H
Main Menu
b
Press
Menu Item A Handset Operation
A
Options (c/e)
In this Vodafone 902SH Instruction Manual, Vodafone 902SH is abbreviated as 902SH.
b
Press c or
e
ii
Page 4
Accessories
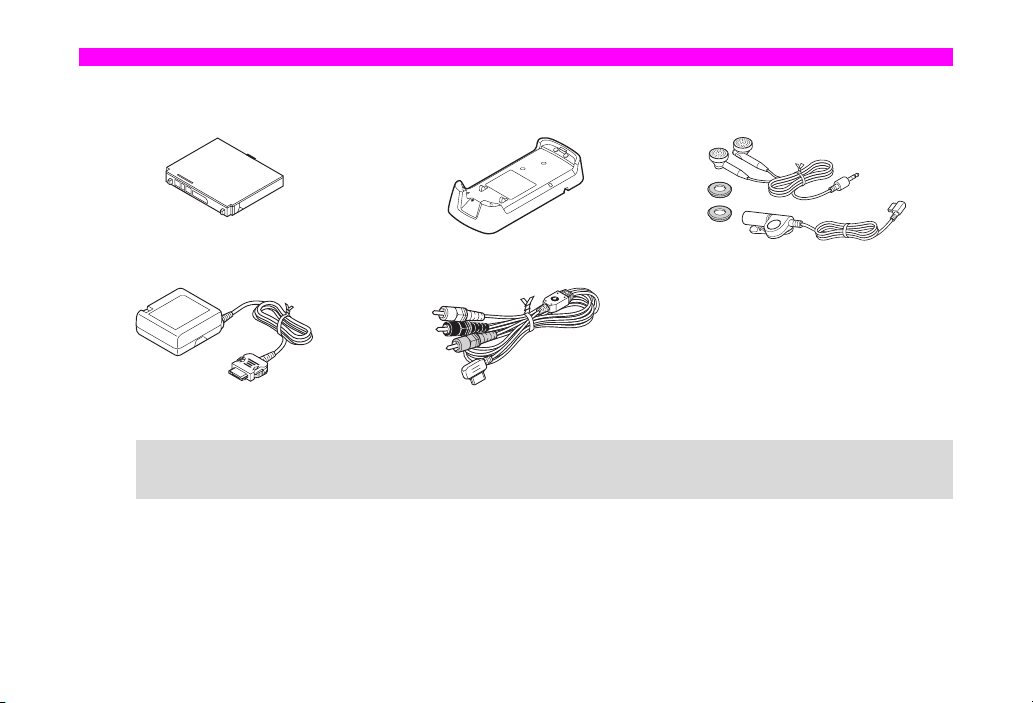
CBattery (SHBW01)
(Type 1 Lithium-ion Battery)
CAC Charger (SHCW01)
*May also be purchased separately.
For accessory-related information, please contact Vodafone Customer Centre, General Information (see
^
H
Tip
902SH is compatible with SD Memory Cards. SD Memory Card is not included in this package. Purchase SD Memory Card to
^
use Memory Card-related handset functions.
*
*
CDesktop Holder (SHEW01)
CVideo Cable (SHPU01)
*
*
CMulti Stereo Headphones
CUtility Software (CD-ROM)
).
P.16-32
iii
Page 5

Symbols ............................................................................................i
Accessories....................................................................................iii
Contents .........................................................................................iv
Safety Precautions........................................................................xv
General Notes.............................................................................. xxv
Contents
Basic Operations
Getting Started
1
Function & Feature Preview....................................................... 1-2
USIM Card.................................................................................... 1-4
General Information & Precautions ...................................... 1-4
C
Inserting & Removing USIM Card ........................................ 1-5
C
USIM PINs............................................................................ 1-7
C
Handset Parts & Functions ........................................................ 1-8
Handset................................................................................ 1-8
C
Display................................................................................ 1-11
C
Sub Display ........................................................................ 1-12
C
Display Positions & Keys ......................................................... 1-13
Display Positions ................................................................ 1-13
C
Key Press Methods ............................................................ 1-15
C
Side Key Assignments (Viewer) ......................................... 1-15
C
Battery & Charger ..................................................................... 1-16
Getting Started ................................................................... 1-16
C
Installing & Removing Battery ............................................ 1-20
C
AC Charger ........................................................................ 1-22
C
Desktop Holder................................................................... 1-23
C
In-Car Charger ................................................................... 1-24
C
Contents
Memory Card ............................................................................. 1-25
C
C
Handset Power On/Off.............................................................. 1-28
C
C
Handset Menus ......................................................................... 1-30
C
C
C
Security Codes .......................................................................... 1-33
C
C
C
2
Initiating a Voice Call (in Japan) ................................................ 2-2
C
Incoming Voice Call .................................................................... 2-5
C
Rejecting Incoming Calls ........................................................... 2-8
C
Precautions ........................................................................ 1-25
Inserting & Removing SD Memory Card ............................ 1-26
Keypad Lock....................................................................... 1-29
Pen Light ............................................................................ 1-29
Pen Light On/Off ............................................................ 1-29
0
Main Menu.......................................................................... 1-30
Soft Keys ............................................................................ 1-31
User Shortcuts.................................................................... 1-32
Assign ............................................................................ 1-32
0
Move .............................................................................. 1-32
0
Set to Default ................................................................. 1-32
0
Handset Code .................................................................... 1-33
Centre Access Code .......................................................... 1-33
Network Password ............................................................. 1-33
Basic Handset Operations
Viewer Position ................................................................ 2-3
0
Hold.................................................................................. 2-3
0
Mute Microphone ............................................................. 2-3
0
Redial ................................................................................... 2-4
Viewer Position ................................................................ 2-5
0
Calling from Received Calls ................................................. 2-7
Rejecting a Call .................................................................... 2-8
iv
Page 6

Engaged Call Operations ........................................................... 2-9
Earpiece Volume.................................................................. 2-9
C
Voice Memo ....................................................................... 2-10
C
Play................................................................................ 2-10
0
Call History ................................................................................ 2-11
Delete............................................................................. 2-11
0
Call Time .................................................................................... 2-12
Clear Timers .................................................................. 2-12
0
Call Charge ................................................................................ 2-13
Clear Costs .................................................................... 2-13
0
Max Cost........................................................................ 2-13
0
Cost Units ...................................................................... 2-13
0
Outside Japan (International Roaming) .................................. 2-14
Changing System Settings ................................................. 2-14
C
Select Network............................................................... 2-14
0
Calling from Outside Japan................................................ 2-15
C
Manner Mode............................................................................. 2-16
Minding Mobile Manners .................................................... 2-16
C
Activating/Cancelling Manner Mode................................... 2-17
C
Activating/Cancelling Off Line Mode .................................. 2-18
C
Multi Stereo Headphones ......................................................... 2-19
Initiating Calls..................................................................... 2-19
C
Answering Calls.................................................................. 2-19
C
Message Recorder .................................................................... 2-20
Activate/Deactivate............................................................. 2-20
C
Playing Messages .............................................................. 2-20
C
Text Entry
3
Characters ................................................................................... 3-2
Entry Modes ......................................................................... 3-2
C
Key Assignments.................................................................. 3-3
C
Entering Characters.................................................................... 3-5
Kanji, Hiragana & Katakana ................................................. 3-5
C
Entering Alphanumerics ....................................................... 3-7
C
Symbols, Pictographs & Emoticons ..................................... 3-7
C
Mail & Web Extensions ........................................................ 3-9
C
Character Code .................................................................... 3-9
C
Pager Code .......................................................................... 3-9
C
Conversion Methods (Japanese Only).................................... 3-11
Phonetic Conversion .......................................................... 3-11
C
One-Hiragana Conversion.................................................. 3-11
C
Hiragana to Katakana/Alphanumerics Conversion............. 3-12
C
Quick Conversion (for Hiragana)........................................ 3-12
C
Conversion Settings ........................................................... 3-13
C
Disable Predictive/Previous Usage................................ 3-13
0
Clear Conversion Log .................................................... 3-13
0
Editing Characters .................................................................... 3-14
Deleting .............................................................................. 3-14
C
Replacing ........................................................................... 3-14
C
Copy/Cut & Paste............................................................... 3-14
C
Deleting Text After Cursor .................................................. 3-15
C
Using Phone Book.............................................................. 3-15
C
Using Text Templates ........................................................ 3-15
C
Phone Book
4
Saving to Phone Book ................................................................ 4-2
Phone Book Entry Items....................................................... 4-2
C
New Phone Book Entries ..................................................... 4-3
C
Additional Settings................................................................ 4-4
C
Saving from Dialled Numbers/Received Calls...................... 4-6
C
Phone Book Memory Status................................................. 4-6
C
Group Settings ............................................................................ 4-7
Changing Group Name ........................................................ 4-7
C
Group Ringtone/Ringvideo ................................................... 4-7
C
Contents
v
Page 7

Using Phone Book ...................................................................... 4-8
Dialling from Phone Book..................................................... 4-8
C
By Reading Order ............................................................ 4-9
0
By Group.......................................................................... 4-9
0
By Katakana..................................................................... 4-9
0
Speed Dial.......................................................................... 4-10
C
Editing Phone Book .................................................................. 4-10
Contents
Correction/Change ............................................................. 4-10
C
Copying Phone Book Entries ............................................. 4-11
C
Deleting Phone Book Entries ............................................. 4-11
C
Speed Dial List .......................................................................... 4-12
Saving Phone Numbers ..................................................... 4-12
C
Deleting Phone Numbers ................................................... 4-12
C
Owner Profile............................................................................. 4-13
Edit................................................................................. 4-13
0
Delete............................................................................. 4-13
0
TV Call
5
Getting Started ............................................................................ 5-2
Initiating a TV Call ....................................................................... 5-3
Viewer Position ................................................................ 5-3
0
Answering a TV Call ................................................................... 5-3
Viewer Position ................................................................ 5-3
0
Engaged TV Call Operations...................................................... 5-4
Switch Cameras............................................................... 5-4
0
Swap Images ................................................................... 5-4
0
Send Alternative Image.................................................... 5-4
0
Mute ................................................................................. 5-4
0
Optical Zoom.................................................................... 5-4
0
vi
TV Call Settings........................................................................... 5-5
Default Image................................................................... 5-5
0
Setting Alternative Image................................................. 5-5
0
Loudspeaker .................................................................... 5-5
0
Picture Quality.................................................................. 5-5
0
Backlight .......................................................................... 5-5
0
Mute Microphone ............................................................. 5-5
0
Hold Guidance Pict .......................................................... 5-5
0
Camera
6
Getting Started ............................................................................ 6-2
Precaution ............................................................................ 6-2
C
Mobile Camera Basics ......................................................... 6-2
C
Viewfinder & Key Assignments ............................................ 6-4
C
Optical Zoom ........................................................................ 6-5
C
Auto Focus ........................................................................... 6-5
C
Still Images .................................................................................. 6-6
Photo Camera Mode ............................................................ 6-6
C
Capturing Still Images .......................................................... 6-7
C
Still Image Functions ............................................................ 6-8
C
Continuous Shoot................................................................. 6-9
C
Adding Frames................................................................... 6-11
C
Video .......................................................................................... 6-12
Video Camera Mode .......................................................... 6-12
C
Recording Video................................................................. 6-12
C
Video Recording Operations .............................................. 6-13
C
Camera Settings........................................................................ 6-14
Shooting Options................................................................ 6-14
C
Toggle Preview .............................................................. 6-14
0
Picture Size.................................................................... 6-15
0
Shutter Sound ................................................................ 6-15
0
Timer.............................................................................. 6-15
0
Mobile Light.................................................................... 6-16
0
Focus Setting ................................................................. 6-16
0
Optical Zoom.................................................................. 6-17
0
Page 8

Image Settings ................................................................... 6-17
C
Exposure........................................................................ 6-17
0
Picture Size.................................................................... 6-17
0
Scene............................................................................. 6-18
0
Picture Quality................................................................ 6-18
0
Record Time .................................................................. 6-18
0
Microphone .................................................................... 6-19
0
Video Encode................................................................. 6-19
0
Additional Settings.............................................................. 6-19
C
Help................................................................................ 6-19
0
Save to........................................................................... 6-19
0
Select Mode ................................................................... 6-20
0
Auto Save ...................................................................... 6-20
0
Opening Images & Playing Video ............................................ 6-20
Opening Still Images .......................................................... 6-20
C
Playing Video ..................................................................... 6-20
C
QVGA Size Images........................................................ 6-20
0
Sending Still Images & Video .................................................. 6-21
Still Images......................................................................... 6-21
C
Video Clips ......................................................................... 6-21
C
Media Player
7
Media Player ................................................................................ 7-2
Playing Music .............................................................................. 7-3
Playback............................................................................... 7-4
C
Playback Settings................................................................. 7-5
C
Tone Control .................................................................... 7-5
0
Playback Pattern.............................................................. 7-6
0
Playing Video .............................................................................. 7-6
Playback............................................................................... 7-7
C
Playback Settings................................................................. 7-7
C
Playback Pattern.............................................................. 7-7
0
Backlight .......................................................................... 7-7
0
Display Size ..................................................................... 7-7
0
Editing Video ............................................................................... 7-8
Selecting Start and End Points............................................. 7-8
C
Cropping Video Clips............................................................ 7-8
C
Editing Subtitles.................................................................... 7-9
C
Duration ........................................................................... 7-9
0
Display Position ............................................................... 7-9
0
Font Size.......................................................................... 7-9
0
Scrolling ......................................................................... 7-10
0
Background Colour ........................................................ 7-10
0
Font Colour .................................................................... 7-10
0
Highlight ......................................................................... 7-10
0
Blink ............................................................................... 7-10
0
Reset Effects.................................................................. 7-10
0
Deleting All Subtitles .......................................................... 7-11
C
Managing Video & Music Files................................................. 7-11
Adding New Playlist............................................................ 7-11
C
Adding Clips/Tracks ........................................................... 7-12
C
Deleting Files in SD VIDEO & SD AUDIO.......................... 7-12
C
Contents
vii
Page 9

Managing Files
8
Data Folder .................................................................................. 8-2
File Organisation .................................................................. 8-2
C
Sorting Files ......................................................................... 8-3
C
Opening Files .............................................................................. 8-4
SVG Files ............................................................................. 8-5
C
Contents
Using Files ................................................................................... 8-5
Wallpaper ............................................................................. 8-5
C
Phone Book Picture.............................................................. 8-5
C
Ringvideo & Ringtone........................................................... 8-6
C
Editing Images ............................................................................ 8-6
Changing Image Size ........................................................... 8-6
C
Enlarging/Reducing Image ................................................... 8-8
C
Visual Effects........................................................................ 8-8
C
Face Arrange........................................................................ 8-9
C
Panorama Images.............................................................. 8-11
C
Split Screen ........................................................................ 8-12
C
Additional Picture Effects ................................................... 8-13
C
Reformat file................................................................... 8-13
0
Add Frame ..................................................................... 8-13
0
Rotate ............................................................................ 8-13
0
Text Templates.......................................................................... 8-13
New Entry........................................................................... 8-13
C
Editing Templates............................................................... 8-13
C
Deleting Templates ............................................................ 8-13
C
Editing Files & Folders ............................................................. 8-14
Adding Folders ................................................................... 8-14
C
Changing File Names......................................................... 8-14
C
Deleting Files & Folders ..................................................... 8-14
C
Copying/Moving Files ......................................................... 8-15
C
Connectivity
9
Getting Started ............................................................................ 9-2
Bluetooth ..................................................................................... 9-3
Getting Started ..................................................................... 9-3
C
Bluetooth Operations............................................................ 9-5
C
Bluetooth Settings ................................................................ 9-8
C
Device Name ................................................................... 9-8
0
Bluetooth Timeout............................................................ 9-8
0
Handsfree Setting ............................................................ 9-8
0
Infrared......................................................................................... 9-9
Getting Started ..................................................................... 9-9
C
Transferring Files ............................................................... 9-10
C
PC Transmissions..................................................................... 9-12
Utility Software ................................................................... 9-13
C
3G/GSM GPRS Modem ..................................................... 9-13
C
Handset Manager............................................................... 9-14
C
Network Settings....................................................................... 9-14
Add, Edit & Delete.......................................................... 9-14
0
Set Preferred.................................................................. 9-15
0
Network Information....................................................... 9-15
0
Internet Setting.......................................................................... 9-15
Profile Contents.................................................................. 9-15
C
Settings .............................................................................. 9-17
C
Create New .................................................................... 9-17
0
Activate .......................................................................... 9-17
0
Edit................................................................................. 9-17
0
Copy............................................................................... 9-17
0
Delete............................................................................. 9-17
0
Create New .................................................................... 9-18
0
Edit................................................................................. 9-18
0
Copy............................................................................... 9-18
0
Delete............................................................................. 9-18
0
viii
Page 10

Additional Settings.............................................................. 9-18
C
Re-Provisioning.............................................................. 9-18
0
Clear DNS Cache .......................................................... 9-18
0
White List ....................................................................... 9-18
0
Backup & Restore ..................................................................... 9-19
Handset to Memory Card ................................................... 9-20
C
Memory Card to Handset ................................................... 9-20
C
10
Mode Settings ........................................................................... 10-2
Display ....................................................................................... 10-4
Additional Functions
Mode Settings................................................................ 10-2
0
Set to Default ................................................................. 10-2
0
Customising Incoming Communication Settings................ 10-2
C
Volume........................................................................... 10-2
0
Ringtone/Ringvideo........................................................ 10-2
0
Vibration......................................................................... 10-3
0
External Light ................................................................. 10-3
0
Any Key Answer............................................................. 10-3
0
Customising System Sounds ............................................. 10-3
C
Keypad Tones................................................................ 10-3
0
Warning Tone & Power On/Off Sound........................... 10-3
0
Display Settings.................................................................. 10-4
C
Wallpaper....................................................................... 10-4
0
System Graphics............................................................ 10-4
0
Clock & Calendar ........................................................... 10-5
0
Font Settings.................................................................. 10-5
0
Greeting Message.......................................................... 10-5
0
Show Operator Name .................................................... 10-5
0
Language....................................................................... 10-5
0
Light Settings...................................................................... 10-6
C
Backlight ........................................................................ 10-6
0
Brightness ...................................................................... 10-6
0
Display Saving ............................................................... 10-6
0
Sub Display Settings .......................................................... 10-6
C
Display On/Off................................................................ 10-6
0
Backlight ........................................................................ 10-6
0
Contrast ......................................................................... 10-6
0
Caller Display................................................................. 10-6
0
Viewing Images on Other Devices ..................................... 10-7
C
Sound Settings.......................................................................... 10-8
Surround ........................................................................ 10-8
0
Clock Settings ........................................................................... 10-9
Set Date/Time ................................................................ 10-9
0
Time/Date Format .......................................................... 10-9
0
Time Zone/Daylight Saving............................................ 10-9
0
Calendar Format ............................................................ 10-9
0
User Dictionary ....................................................................... 10-10
Entries (Partly Japanese Only)......................................... 10-10
C
New Entry .................................................................... 10-10
0
Edit/Delete ................................................................... 10-10
0
902SH Download Dictionary (Japanese Only) ................. 10-10
C
Acquire Dictionary........................................................ 10-10
0
Cancel.......................................................................... 10-10
0
Call Settings ............................................................................ 10-11
International Call .............................................................. 10-11
C
Int'l Prefix ..................................................................... 10-11
0
Country Codes ............................................................. 10-11
0
Additional Settings............................................................ 10-11
C
Display Call Info ........................................................... 10-11
0
Minute Minder .............................................................. 10-11
0
Display Call Timer........................................................ 10-11
0
Handset Security..................................................................... 10-12
PIN ................................................................................... 10-12
C
Switch On/Off............................................................... 10-12
0
Change PIN ................................................................. 10-12
0
Contents
ix
Page 11

Handset Locks.................................................................. 10-13
C
Phone Lock .................................................................. 10-13
0
Handset Lock ............................................................... 10-13
0
Phone Book Lock......................................................... 10-13
0
Secret Mode ..................................................................... 10-14
C
Show Secret Data ........................................................ 10-14
0
Changing Handset Code .................................................. 10-14
C
Contents
Change Handset Code ................................................ 10-14
0
Memory Settings ..................................................................... 10-15
Memory Status............................................................. 10-15
0
Format Card................................................................. 10-15
0
LBS (Location Based Service) Settings................................ 10-15
LBS URL Setting.......................................................... 10-15
0
Datum On/Off............................................................... 10-15
0
Reset ........................................................................................ 10-16
Reset Settings.............................................................. 10-16
0
Reset All....................................................................... 10-16
0
11
Calendar..................................................................................... 11-2
Tools
Opening Calendar .............................................................. 11-2
C
Saving Entries .................................................................... 11-2
C
Assign Tone ................................................................... 11-3
0
Assign Video .................................................................. 11-3
0
Duration ......................................................................... 11-3
0
Repeat ........................................................................... 11-4
0
Secret............................................................................. 11-4
0
Opening Entries.................................................................. 11-4
C
Editing Entries .................................................................... 11-4
C
Deleting Entries .................................................................. 11-4
C
This Appointment ........................................................... 11-4
0
All This Day.................................................................... 11-4
0
All This Month ................................................................ 11-5
0
Up to Last Month............................................................ 11-5
0
All Appointments ............................................................ 11-5
0
Alarm .......................................................................................... 11-5
Setting Alarm...................................................................... 11-5
C
Assign Alarm Tone......................................................... 11-6
0
Assign Alarm Video........................................................ 11-6
0
Snooze........................................................................... 11-6
0
Alarm Volume ................................................................ 11-7
0
Duration ......................................................................... 11-7
0
Vibration......................................................................... 11-7
0
Cancelling & Reactivating Alarm........................................ 11-7
C
Switch Off....................................................................... 11-7
0
Switch On....................................................................... 11-7
0
Deleting Alarm.................................................................... 11-7
C
Reset Alarm ................................................................... 11-7
0
Clear All ......................................................................... 11-7
0
Calculator .................................................................................. 11-8
Voice Recorder.......................................................................... 11-9
Recording Voice ................................................................. 11-9
C
Recording Settings ........................................................... 11-10
C
Record Time ................................................................ 11-10
0
Save Rec. to ................................................................ 11-10
0
Playback........................................................................... 11-10
C
Barcode.................................................................................... 11-11
Scanning during Text Entry.......................................... 11-13
0
Open Barcode.............................................................. 11-13
0
Scanned Results.......................................................... 11-13
0
Creating QR Codes ................................................................. 11-14
Phone Book ................................................................. 11-14
0
Text Input ..................................................................... 11-14
0
Data Folder .................................................................. 11-14
0
x
Page 12

Text Scanner ........................................................................... 11-15
Scanning during Text Entry.......................................... 11-16
0
Stopwatch................................................................................ 11-17
Tasks........................................................................................ 11-18
Saving Entries .................................................................. 11-18
C
Assign Tone ................................................................. 11-19
0
Assign Video ................................................................ 11-19
0
Duration ....................................................................... 11-19
0
Secret........................................................................... 11-19
0
Opening Entries................................................................ 11-19
C
Editing Entries .................................................................. 11-19
C
Deleting Entries ................................................................ 11-20
C
This Task ..................................................................... 11-20
0
All Completed Tasks .................................................... 11-20
0
All Tasks ...................................................................... 11-20
0
World Clock ............................................................................. 11-20
Countdown Timer ................................................................... 11-21
Expenses Memo...................................................................... 11-22
Add New Expense ....................................................... 11-22
0
Totals ........................................................................... 11-22
0
Edit Category ............................................................... 11-22
0
Digital Print Order Format (DPOF)......................................... 11-22
Selecting Images & Prints ................................................ 11-23
C
Print Settings .................................................................... 11-23
C
Add Date ...................................................................... 11-23
0
Index Print.................................................................... 11-23
0
Check Print Setting ...................................................... 11-23
0
Number of Copies ........................................................ 11-23
0
E-Books ................................................................................... 11-24
Reading Content .............................................................. 11-24
C
Using E-Book Images....................................................... 11-27
C
As Wallpaper................................................................ 11-27
0
Embedded Information................................................. 11-27
0
Using A Dictionary............................................................ 11-27
C
Look Up Word .............................................................. 11-27
0
Properties..................................................................... 11-27
0
Phone Help .............................................................................. 11-28
12
Optional Service Overview....................................................... 12-2
Call Forwarding ......................................................................... 12-2
Voice Mail .................................................................................. 12-4
Call Waiting ............................................................................... 12-5
Conference Call......................................................................... 12-6
Call Barring................................................................................ 12-7
Optional Services
Call Forwarding.............................................................. 12-3
0
Cancel Forwarding......................................................... 12-3
0
Status............................................................................. 12-3
0
Voice Mail ...................................................................... 12-4
0
Cancel Voice Mail .......................................................... 12-4
0
Status............................................................................. 12-4
0
Play Voice Mail .............................................................. 12-5
0
Start/Cancel Call Waiting ............................................... 12-5
0
Status............................................................................. 12-5
0
Incoming Calls ............................................................... 12-5
0
Dial New Number........................................................... 12-6
0
Switch Line..................................................................... 12-6
0
Conference Call ............................................................. 12-6
0
Restricting Outgoing Calls.................................................. 12-8
C
Set Restriction................................................................ 12-8
0
Cancel Restriction.......................................................... 12-8
0
Status............................................................................. 12-8
0
Restricting Incoming Calls.................................................. 12-9
C
Set/Cancel Restriction ................................................... 12-9
0
Contents
xi
Page 13

Rejecting Calls ................................................................... 12-9
C
Rejected Numbers ......................................................... 12-9
0
Set Reject Number......................................................... 12-9
0
Rejecting Calls without Caller ID ........................................ 12-9
C
Withheld Call.................................................................. 12-9
0
Changing Network Password ........................................... 12-10
C
Change N/W Password................................................ 12-10
Contents
0
Caller ID ................................................................................... 12-10
Show Your Number...................................................... 12-10
0
Status........................................................................... 12-10
0
Vodafone live!
13
Vodafone live! Basics ............................................................... 13-2
Getting Started .......................................................................... 13-5
Using Web ................................................................................. 13-6
Basic Operations ...................................................................... 13-8
Advanced Features................................................................. 13-10
Vodafone live! Overview
Vodafone live! Services...................................................... 13-2
C
Automatic Network Setup................................................... 13-4
C
Customising Handset Address........................................... 13-4
C
Opening Web Menu ........................................................... 13-6
C
Entering URLs Directly ....................................................... 13-7
C
Using URL Log................................................................... 13-7
C
Using Linked Info................................................................ 13-9
C
Saving to Data Folder....................................................... 13-10
C
Bookmarks & My Saved Page.......................................... 13-11
C
Editing Bookmarks & My Saved Page.............................. 13-13
C
Rename ....................................................................... 13-13
0
Delete........................................................................... 13-13
0
Edit URL (only for Bookmarks) .................................... 13-13
0
Bookmarks Folder........................................................ 13-13
0
Streaming ......................................................................... 13-14
C
Sub Menu Settings........................................................... 13-15
C
Reload Page ................................................................ 13-15
0
Send Page ................................................................... 13-15
0
Properties..................................................................... 13-15
0
Browser Data ............................................................... 13-16
0
Search This Page ........................................................ 13-16
0
Restart Browser ........................................................... 13-16
0
About............................................................................ 13-16
0
Uploading Files ............................................................ 13-16
0
Other Functions ...................................................................... 13-17
Basic Settings................................................................... 13-17
C
Cookies ........................................................................ 13-17
0
Downloads ................................................................... 13-17
0
IMEI Notification........................................................... 13-17
0
Scroll Step.................................................................... 13-17
0
Font Size...................................................................... 13-17
0
Download to ................................................................. 13-17
0
Security ............................................................................ 13-18
C
Secure Prompt ............................................................. 13-18
0
Certificates ................................................................... 13-18
0
Root Certificates .......................................................... 13-18
0
Authentication .............................................................. 13-18
0
14
Incoming Text Messages.......................................................... 14-2
Messaging
Opening New Messages .................................................... 14-2
C
Retrieving MMS Messages ................................................ 14-4
C
Using Received Messages................................................. 14-5
C
Reply.............................................................................. 14-5
0
Forward.......................................................................... 14-5
0
Call................................................................................. 14-5
0
xii
Page 14

Sending Text Messages ........................................................... 14-6
Overview ............................................................................ 14-6
C
Creating a Message ........................................................... 14-7
C
Entering Message Text ...................................................... 14-8
C
Attaching Images & Sounds ............................................... 14-9
C
Creating Slides................................................................. 14-11
C
Entering Recipient ............................................................ 14-12
C
Entering Subject ............................................................... 14-13
C
Setting Message Type...................................................... 14-14
C
Advanced Settings ........................................................... 14-14
C
Delivery Report ............................................................ 14-14
0
Expiry Time .................................................................. 14-14
0
Priority.......................................................................... 14-15
0
Delivery Time ............................................................... 14-15
0
Saving to Draft.................................................................. 14-15
C
Using Mail Templates....................................................... 14-16
C
Mail Box ................................................................................... 14-17
Mail Box Type................................................................... 14-17
C
Checking Messages ......................................................... 14-17
C
Personal Folders .............................................................. 14-20
C
Replying to Messages ...................................................... 14-23
C
Forwarding Messages ...................................................... 14-23
C
Sending from Draft ........................................................... 14-24
C
Protecting a Message....................................................... 14-24
C
Deleting Messages........................................................... 14-25
C
Linked Info........................................................................ 14-26
C
Saving Attachments to Data Folder.................................. 14-27
C
Mail Box List ..................................................................... 14-28
C
Message Details .......................................................... 14-28
0
Read/Unread................................................................ 14-28
0
Server Mail............................................................................... 14-29
Retrieving Mail List ........................................................... 14-29
C
Retrieving Selected Messages......................................... 14-30
C
Deleting Selected Messages............................................ 14-30
C
Forwarding Server Mail .................................................... 14-31
C
Mail Settings ............................................................................ 14-31
General Settings............................................................... 14-31
C
Home Download .......................................................... 14-31
0
Roam. Download ......................................................... 14-31
0
Delivery Report ............................................................ 14-31
0
Edit Signature .............................................................. 14-31
0
Delivery Rep. Allow...................................................... 14-32
0
Reply History................................................................ 14-32
0
SMS Settings.................................................................... 14-32
C
Message Centre........................................................... 14-32
0
Message Format .......................................................... 14-32
0
Reply Path ................................................................... 14-32
0
Text Optimisation ......................................................... 14-32
0
MMS Settings ................................................................... 14-33
C
Slide Duration .............................................................. 14-33
0
Max Message Size....................................................... 14-33
0
Memory Status ................................................................. 14-33
C
Contents
xiii
Page 15

15
V-application Basics ................................................................. 15-2
Using V-applications ................................................................ 15-7
Additional Functions ................................................................ 15-9
16
Function Menu .......................................................................... 16-2
Troubleshooting........................................................................ 16-4
Character Code List .................................................................. 16-9
Pictograph List ........................................................................ 16-15
Specifications.......................................................................... 16-21
Index......................................................................................... 16-23
Warranty & After-Sales Services ........................................... 16-31
Customer Service ................................................................... 16-32
V-applications
Getting Started ................................................................... 15-2
C
Downloading V-applications............................................... 15-4
C
Starting V-applications ....................................................... 15-5
C
Exit, Pause & Resume ....................................................... 15-6
C
Managing V-applications.................................................... 15-6
C
Properties....................................................................... 15-6
0
Move to Card ................................................................. 15-7
0
Delete............................................................................. 15-7
0
Setting Screensaver........................................................... 15-7
C
Setting Security Level......................................................... 15-8
C
V-application Operational Settings..................................... 15-9
C
Application Volume ........................................................ 15-9
0
Backlight ........................................................................ 15-9
0
Blink ............................................................................... 15-9
0
Vibration....................................................................... 15-10
0
Calls & Alarms ............................................................. 15-10
0
Surround ...................................................................... 15-10
0
Reset................................................................................ 15-10
C
Set to Default ............................................................... 15-10
0
Memory All Clear ......................................................... 15-10
0
Appendix
xiv
Page 16
Safety Precautions
^
Read safety precautions before using handset.
^
Observe precautions to avoid injury to self or others, or damage to property.
^
Vodafone is not liable for any damages resulting from use of this product.
Before Using Handset
CSymbols
Make sure you thoroughly understand these symbols before reading on.
Symbols and their meanings are described below:
!
!
!
CSymbols
DANGER
WARNING
CAUTION
Great risk of death or serious injury from improper use
Risk of death or serious injury from improper use
Risk of injury or damage to property from improper use
$(%+* #) !
Prohibited Actions Compulsory Actions Attention Required
xv
Page 17

!DANGER
Handset, Battery & Charger
Use only the specified battery, Charger or Holder
(see P.iii).
Using non-specified equipment may cause malfunctions, electric
shock or fire due to battery leakage, overheating or bursting.
Do not short-circuit Charger Terminals.
Keep metal objects away from Charger Terminals. Keep
handset away from necklaces, hairpins, etc.
Battery may leak, overheat, burst or ignite causing injury.
Use a case to carry handset.
#
$
Battery
Prevent injury from battery leakage, breakage or fire.
Do not:
Heat or dispose of battery in fire.
^
Disassemble, modify or break battery.
^
Damage or solder battery.
^
Use a damaged or deformed battery.
^
Use non-specified charger (see
^
Force battery into handset.
^
Charge or place battery near fire, heat sources or in
^
extreme heat.
Use battery for other equipment.
^
If battery fluid contacts eyes, do not rub them. Rinse
with clean water and consult a doctor immediately.
Eyes may be severely damaged.
P.iii
).
$
$
xvi
Page 18

Handset, Battery & Charger
!WARNING
Do not insert foreign objects into handset.
Do not place metal or flammable objects in handset,
Charger or Holder. This may cause fire or electric shock.
Keep handset out of the reach of children.
Keep handset out of rain or extreme humidity.
Fire or electric shock may occur.
Keep handset away from liquid-filled containers.
Keep handset, Charger and Holder away from chemicals/liquids.
Fire or electric shock may result.
Avoid sources of fire.
Prevent fire or explosion. Do not use handset in the
presence of gas or fine particles (coal, dust, metal, etc.).
Do not use Mobile Light near people's faces.
Eyesight may be temporarily affected leading to accidents.
$
%
$
$
$
Keep handset, Charger or Holder away from
microwave ovens.
Battery or handset may leak, burst, overheat or ignite and
cause accidents.
Do not disassemble or modify handset.
Do not open housing of handset, Charger or Holder; may
^
cause electric shock or injury.
Contact Vodafone Customer Centre, Customer
Assistance for repairs.
Do not modify handset, Charger or Holder. Fire or electric
^
shock may result.
If water or foreign matter is inside handset:
Discontinue handset use to prevent fire or electric shock.
Turn handset power off, remove battery, unplug Charger and
contact Vodafone Customer Centre, Customer Assistance.
$
(
)
xvii
Page 19

!WARNING
Handset, Battery & Charger
Do not subject handset to shocks.
Subjecting handset, Charger or Holder to shocks may
cause malfunction or injury.
Should the handset break, remove the battery and contact
Vodafone Customer Centre, Customer Assistance.
Discontinue handset use. Fire or electric shock may occur.
If an abnormality occurs:
Should there be unusual sound, smoke or odour,
discontinue handset use to avoid fire or electric shock. Turn
handset power off, remove battery and unplug Charger and
contact Vodafone Customer Centre, Customer Assistance.
$
)
Handset
Preventing accidents
For safety, never use handset while driving. Pull over
^
beforehand.
Mobile phone use while driving is prohibited by the revised
Road Traffic Law (effective from 1 November 2004).
Do not use Headphones while driving or riding a bicycle.
^
Accidents may result.
Moderate volume outside, especially at level/road
^
crossings to avoid accidents.
Do not swing handset by handstrap.
May result in injury or breakage.
Turn handset power off before boarding aircraft.
Using wireless devices aboard aircraft may cause
electronic malfunctions or endanger aircraft operation.
Adjusting vibration and Ringtone settings:
Select settings carefully if you have a heart condition or
pacemaker.
During lightning storms, turn power off and take shelter.
There is a risk of lightning strike or electric shock.
$
$
#
#
#
xviii
Page 20

Charger Care
!WARNING
Use only the specified voltage.
Non-specified voltage may cause fire or electric shock.
^
AC Charger: 100 - 240 VAC
Vodafone is not liable for problems caused by charging
B
handset abroad.
^
In-Car Charger: 12/24 VDC
Do not use commercially available transformers.
Use of AC Charger with commercially available
transformers may result in fire, electric shock or breakage.
Do not use In-Car Charger inside vehicles with a
positive earth.
Fire may result. Use In-Car Charger inside vehicles with a
negative earth only.
Charger Care
Do not touch blades with wet hands. Electric shock may occur.
^
Do not use multiple cords in one outlet. May generate
^
excess heat or fire.
Do not bend, twist, pull or set objects on cord. Exposed
^
wire may cause fire or electric shock.
$
$
$
+
$
Do not short-circuit Charger connector.
Keep metal away from connector.
May cause overheating, fire or electric shock.
Do not use Desktop Holder inside vehicles.
Extreme temperature or vibration may cause fire or breakage.
Preventing accidents
Secure In-Car Charger to avoid injury or accidents.
If Charger or In-Car Charger cord is damaged:
May cause fire or electric shock; Contact Vodafone
Customer Centre, Customer Assistance to replace.
During lightning storms:
Unplug Charger to avoid breakage, fire or electric shock.
Keep Charger & Desktop Holder out of the reach of
children.
Electric shock or injury may occur.
$
$
#
#
)
#
xix
Page 21

Battery
!WARNING
If battery does not charge properly, stop charging. Battery
^
may overheat, burst or ignite.
If there is leakage or abnormal odour, avoid fire sources.
^
It may catch fire or burst.
##
If there is abnormal odour, excessive heat, discolouration
or distortion, remove battery from handset.
It may leak, overheat or explode.
Handset Use & Electronic Medical Equipment
This section is based on "Guidelines on the Use of Radio Communications Equipment such as Cellular Telephones and Safeguards
for Electronic Medical Equipment" (Electromagnetic Compatibility Conference, April 1997) and "Report of Investigation of the Effects
of Radio Waves on Medical Equipment, etc." (Association of Radio Industries and Businesses, March 2001).
Persons with implanted pacemakers or defibrillators
should keep handset more than 22 cm away.
Implanted pacemakers or defibrillators may malfunction
due to radio waves.
Turn handset power off in crowded places such as
trains. People with implanted pacemakers or
defibrillators may be near.
Implanted pacemakers or defibrillators may malfunction
due to radio waves.
xx
#
#
Observe these rules when visiting medical institutions:
Do not take handset into operating rooms or Intensive or
^
Coronary Care Units.
Keep handset off in hospitals.
^
Keep handset off in hospital lobbies. Electronic
^
equipment may be near.
Obey rules regarding mobile phone use in medical institutions.
^
Consult manufacturer for radio wave effects on
electronic medical equipment.
#
#
Page 22

!CAUTION
Handset, Battery & Charger
Handset care
Place handset on stable surfaces to avoid malfunction or injury.
^
Keep handset away from oily smoke or steam. Fire or
^
accidents may result.
Cold air from air conditioners may condense, resulting in
^
leakage or burnout.
Keep handset away from direct sunlight (inside vehicles,
^
etc.) or heat sources.
Distortion, discolouration or fire may occur. Battery shape
may be affected.
Keep handset out of extremely cold places to avoid
^
malfunction or accidents.
Keep handset away from fire sources to avoid
^
malfunction or accidents.
Usage environment
Excessive dust may prevent heat release and cause
^
burnout or fire.
Avoid using handset on the beach.
^
Sand may cause malfunction or accidents.
Keep handset away from credit cards, phone cards, etc.
^
to avoid data loss.
!
!
Handset
Avoid leaving handset in extreme heat (inside vehicles,
etc.).
Handset may heat up and lead to burns.
Volume settings
Keep handset volume moderate.
Excessive volume may cause damage to your hearing.
Headphones & Video Cable
Do not unplug by pulling the cord. May cause damage to
^
the cord.
Keep plug clean to prevent noise and malfunction.
^
Inside vehicles:
Handset use may cause electronic equipment to malfunction.
$
!
!
!
xxi
Page 23
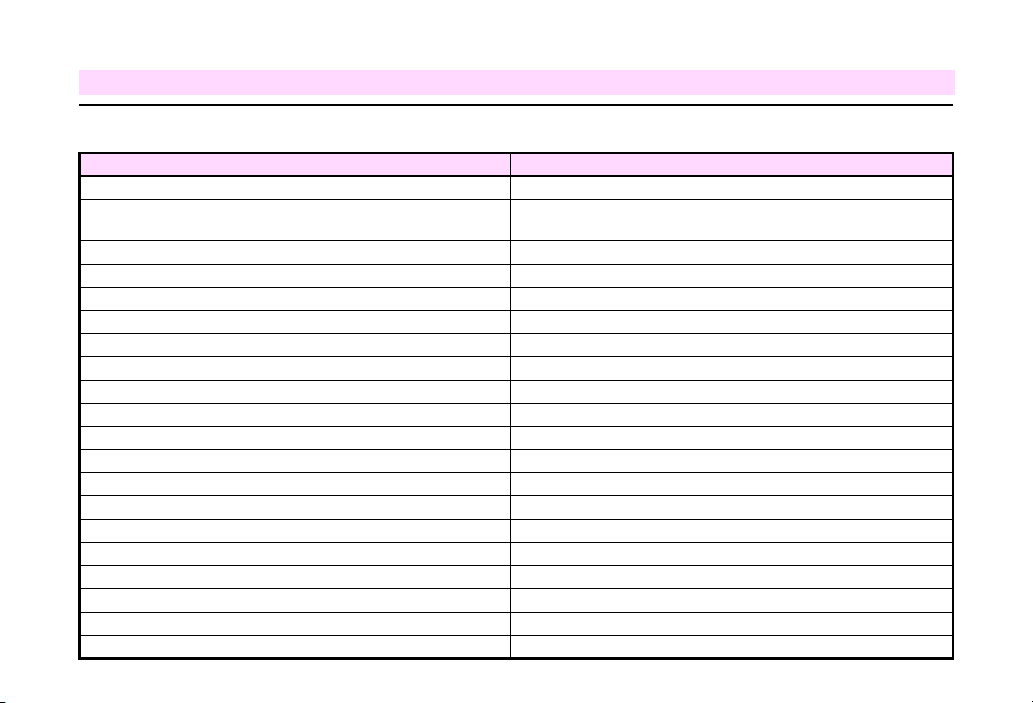
!CAUTION
Handset
Should skin irritation occur, discontinue handset use and consult a doctor.
See below for handset materials. They may cause skin irritation, rashes, or itchiness depending on your physical condition.
Parts Materials & Finishing
Housing (Main Display side) Magnesium alloy/Acrylic baking finish (sealer: epoxy baking finish)
Housing (Display back/bottom side, Keypad/Battery side),
Battery Cover, Memory Card Slot Cover, Outer Cover (Display side)
Display window, Sub Display window Acrylic resin
Logo badge 1, Logo badge 2 (below Keypad) UV curing resin
Lens cover Acrylic resin
Small Light window
Camera Ornament ABS resin (deposition/sealer: tin)/Acrylic UV curing painting
Screw cover (above Display/Keypad) Urethane resin
Screw cover (below Display) PET
Screw cover (hinge) UV curing resin
Side Keys ABS resin (chrome plating/sealer: nickel, copper)/PC resin
Multi Selector, Function Key, Left Soft Key, Right Soft Key ABS resin (chrome plating/sealer: nickel, copper)
Start Key, Power On/Off Key ABS resin (chrome plating/sealer: nickel, copper)/PC resin
Shortcuts & A/a Key, Clear Key, Multimedia/Text Key PC resin/Acrylic UV curing painting (sealer: acrylic painting)
Headphone Connector Cover, External Device Connector Cover Elastomeric resin
Battery PC resin
Charger Terminal Nylon 6T/Brass, Au plating (sealer: nickel, copper)
Screw (Display side, Keypad side) SWCH12A/Ni plating
SIM pin
SIM cover SUS
ABS resin/Acrylic UV curing painting (sealer: acrylic painting)
ABS resin/Chrome plating (sealer: nickel, copper)/PC resin/Acrylic resin
Phosphor bronze, nickel plating, palladium-nickel alloy plating, gold plating
#
xxii
Page 24
Charger Care
!CAUTION
Charger & In-Car Charger
Grasp plug (not cord) to disconnect Charger. May cause
^
fire/electric shock.
Keep cord away from heaters. Exposed wire may cause
^
fire or electric shock.
Stop use if plug is hot or improperly connected.
^
May cause fire/electric shock.
Keep In-Car Charger socket clean. May overheat and
^
cause injury.
Do not touch Desktop Holder while in use.
May cause burns.
Use only the specified fuse.
1A fuse for In-Car Charger.
Or may cause breakage/fire.
$
#
$
$
Always charge handset in a well-ventilated area.
Avoid covering/wrapping Charger/Desktop Holder.
May cause damage/fire.
Do not use In-Car Charger when engine is off.
Start engine before use. Or car battery may be weakened.
Long periods of disuse
Be sure to unplug Charger or In-Car Charger after use.
Handset maintenance
When cleaning, disconnect Charger/In-Car Charger to
prevent shock/injury.
Installing In-Car Charger
Properly position the cable for safe driving to avoid injury or
accidents.
$
$
)
)
!
xxiii
Page 25

Battery
!CAUTION
Do not throw or abuse battery.
Battery may overheat, burst or ignite.
Do not leave battery in direct sunlight or inside vehicles.
Overheating/fire may occur.
Performance may deteriorate.
Do not expose battery to liquids.
Performance may deteriorate.
If battery fluid contacts skin or clothes, rinse with clean
water immediately.
Do not dispose of exhausted batteries with ordinary
^
refuse. Tape over battery terminals before disposal, or
bring them to a Vodafone shop.
Follow local regulations regarding battery disposal.
Keep battery out of the reach of children.
^
xxiv
$
$
*
#
Charge battery within a range of 5]C - 35]C. Out of this
^
range, battery may leak/overheat or performance may
deteriorate.
If your child is using handset, explain all instructions and
^
supervise usage.
If there is abnormal odour or excessive heat, stop using battery
^
and call Vodafone Customer Centre, Customer Assistance.
Do not leave battery uncharged. Charge at least once
^
every 6 months.
!
Page 26

General Notes
General Use
^ Vodafone is not liable for any damages resulting from
accidental loss/alteration of handset or SD Memory Card data.
Please keep separate records of Phone Book entries, etc.
^
Handset transmissions may be disrupted inside buildings,
tunnels or underground, or when moving into/out of such places.
^ Use handset without disturbing others.
^
Handsets are radios as stipulated by the Radio Law. Under the
Radio Law, handsets must be submitted for inspection upon request.
Inside Vehicles
^ Never use handset when driving.
^ Do not park illegally to use handset.
Aboard Aircraft
Never use handset aboard aircraft (keep power off).
Handset use may impair aircraft operation.
^
Handset use near landlines, TVs or radios may cause interference.
^
Beware of eavesdropping.
Because this service is completely digital, the possibility of
signal interception is greatly reduced, however, some
transmissions may be overheard.
Eavesdropping
Deliberate/accidental interception of communications
constitutes eavesdropping.
^ Handset use may affect a vehicle's electronic equipment.
xxv
Page 27

Handset Care
^
If handset is left with no battery or an exhausted one, data may
be altered/lost. Vodafone is not liable for any resulting damages.
^ Use handset between 5]C - 35]C and 35% - 85% humidity.
Avoid extreme temperatures/direct sunlight.
^ Exposing lens to direct sunlight may damage colour filter and
affect image colour.
^ Do not drop or subject handset to shocks.
^ Clean handset with dry, soft cloth. Using alcohol, thinner, etc.
may damage it.
^ Do not expose handset to rain, snow or high humidity.
^ Never disassemble or modify handset.
^ Avoid scratching handset Display.
^ When closing handset, keep straps, etc. outside to avoid
damaging the Display.
^
When using headphones, moderate volume to avoid sound bleed.
^
Handset is not water-proof.
Avoid exposure to liquids and high humidity.
B Keep handset away from precipitation.
B Cold air from air conditioning, etc. may condense causing
corrosion.
B Avoid dropping handset in a wet area (toilet, bathroom, etc.).
B
On the beach, keep handset away from water and direct sunlight.
B Perspiration may seep inside handset causing malfunction.
^
Heavy objects or excessive pressure should be avoided.
May cause malfunction or injury.
B Do not sit down with handset in a back pocket.
B Do not place heavy objects on handset in a bag.
^ Connect only the specified products to Video Out/Headphone
Connector. Malfunction or damage may result.
^ Always turn off handset before removing battery.
If battery is removed while saving data or sending mail, data
may be lost, changed, or destroyed.
xxvi
Page 28
Copyrights
Copyright laws protect sounds, images, computer programmes, databases, other materials and copyright holders.
Duplicated material is limited to private use only. Use of materials beyond this limit or without permission of copyright holders
may constitute copyright infringement, and be subject to criminal punishment. Comply with copyright laws when using
images captured with handset camera.
Video recording and playback are based on
This product is licensed under the MPEG-4 Visual Patent Portfolio
License for the personal and non-commercial use of a consumer to
(i) encode video in compliance with the MPEG-4 Video Standard
("MPEG-4 Video") and/or (ii) decode MPEG-4 Video that was
encoded by a consumer engaged in a personal and
non-commercial activity and/or was obtained from a licensed video
provider. No licence is granted or implied for any other use.
Additional information may be obtained from MPEG LA.
See http://www.mpegla.com
This product is licensed under the MPEG-4 Systems Patent
Portfolio License for encoding in compliance with the MPEG-4
Systems Standard, except that an additional licence and payment
of royalties are necessary for encoding in connection with (i) data
stored or replicated in physical media which is paid for on a title by
title basis and/or (ii) data which is paid for on a title by title basis
and is transmitted to an end user for permanent storage and/or use.
Such additional licence may be obtained from MPEG LA, LLC.
See http://www.mpegla.com for additional details.
MPEG-4
.
Microsoft, MS and Windows are either registered trademarks or
^
trademarks of Microsoft Corp. in the United States and/or other
countries.
The names of other companies and products mentioned herein
^
may be the trademarks of their respective owners.
Windows Me is an abbreviation for Microsoft
^
Millennium Edition operating system (Japanese version).
^
Windows 98 SE is an abbreviation for Microsoft# Windows# 98
Second Edition operating system (Japanese version).
^
Windows 2000 is an abbreviation for Microsoft# Windows# 2000
operating system (Japanese version).
^
Windows XP is an abbreviation for Microsoft# Windows# XP
operating system (Japanese version).
QR Code is a registered trademark of DENSO WAVE INCORPORATED.
#
Windows#
xxvii
Page 29
This product is equipped with JBlend!
designed to accelerate the performance
!
Application.
of Java
Powered by JBlend
1997-2004 Aplix Corporation.
All rights reserved.
JBlend and JBlend-related brands are trademarks or registered
trademarks of Aplix Corporation in Japan and other countries.
Java and Java-related brands are trademarks or registered
trademarks of Sun Microsystems, Inc. in the United States and
other countries.
Chaku-Uta# is a Trademark of Sony Music Entertainment (Japan) Inc.
!
Copyright
The SD logo is a trademark.
Licensed by QUALCOMM Incorporated under one or more of the
following United States Patents and/or their counterparts in other nations:
4,901,307 5,490,165 5,056,109 5,504,773 5,101,501
5,506,865 5,109,390 5,511,073 5,228,054 5,535,239
5,267,261 5,544,196 5,267,262 5,568,483 5,337,338
5,600,754 5,414,796 5,657,420 5,416,797 5,659,569
5,710,784 5,778,338
Bluetooth is a trademark of the Bluetooth SIG, Inc.
The Bluetooth word mark and logos are owned by the Bluetooth SIG,
Inc. and any use of such marks by Sharp is under license. Other
trademarks and trade names are those of their respective owners.
Powered by Mascot Capsule#/Micro3D Edition
Mascot Capsule# is a registered trademark of HI Corporation.
$
2002-2004 HI Corporation. All rights reserved.
!
xxviii
Page 30
The 2.4 GHz frequency band is used for handset Bluetooth-related
functions. Read through the following before use.
The 2.4 GHz frequency band is shared with other industrial,
scientific or medical equipment (microwave ovens, etc.), and
used at licensed premises radio stations and unlicensed
specified low-power radio stations for mobile equipment
identification.
1 Before using this product, ensure that there is no premises
radio station or specified low-power radio station operating for
mobile equipment identification.
2 Should interference occur between this product and premises
radio station for mobile equipment identification, change the
frequency immediately, or stop the transmission and contact
us for countermeasures (partitioning, etc.).
3 For any other issues including interference with specified
low-power radio stations for mobile equipment identification,
contact us at the following number.
Vodafone Customer Centre, General Information
From a Vodafone handset, call toll free at 157 for General
Information.
From landlines, refer to "Customer Service" on P.16-32.
^
This product operates in the 2.4 GHz frequency band based on
FHSS modulation. The operation range is 10 m or less.
This product employs Macromedia# Flash Lite! technology
developed by Macromedia, Inc.
Copyright $ 1995-2004 Macromedia, Inc. All rights reserved.
Macromedia, Flash, Flash Lite, Macromedia Flash and Macromedia
Flash Lite are either registered trademarks or trademarks of
Macromedia, Inc. in the United States and/or other countries.
CP8 PATENT
xxix
Page 31

FCC Declaration of Conformity
This device complies with part 15 of the FCC Rules.
Operation is subject to the following two conditions:
(1) This device may not cause harmful interference, and (2)
this device must accept any interference received, including
interference that may cause undesired operation.
Responsible Party:
SHARP ELECTRONICS CORPORATION
Sharp Plaza, Mahwah, New Jersey 07430
TEL: 1-800-BE-SHARP
Tested To Comply With FCC Standards
FOR HOME OR OFFICE USE
FCC Notice
The handset may cause TV or radio interference if used in
close proximity to receiving equipment. The FCC can
require you to stop using the handset if such interference
cannot be eliminated.
Information to User
This equipment has been tested and found to comply with
the limits of a Class B digital device, pursuant to Part 15 of
the FCC Rules. These limits are designed to provide
reasonable protection against harmful interference in a
residential installation. This equipment generates, uses and
can radiate radio frequency energy and, if not installed and
used in accordance with the instructions, may cause
harmful interference to radio communications.
However, there is no guarantee that interference will not
occur in a particular installation; if this equipment does
cause harmful interference to radio or television reception,
which can be determined by turning the equipment off and
on, the user is encouraged to try to correct the interference
by one or more of the following measures:
1. Reorient/relocate the receiving aerial.
2. Increase the separation between the equipment and
receiver.
3. Connect the equipment into an outlet on a circuit different
from that to which the receiver is connected.
4. Consult the dealer or an experienced radio/TV technician
for help.
Caution: Changes or modifications not expressly approved
by the manufacturer responsible for compliance could void
the user's authority to operate the equipment.
xxx
Page 32

FCC RF Exposure Information
Your handset is a radio transmitter and receiver.
It is designed and manufactured not to exceed the emission
limits for exposure to radio frequency (RF) energy set by the
Federal Communications Commission of the U.S.
Government.
The guidelines are based on standards that were developed
by independent scientific organisations through periodic and
thorough evaluation of scientific studies. The standards
include a substantial safety margin designed to assure the
safety of all persons, regardless of age and health.
The exposure standard for wireless handsets employs a
unit of measurement known as the Specific Absorption
Rate, or SAR. The SAR limit set by the FCC is 1.6W/kg.
The tests are performed in positions and locations (e.g., at
the ear and worn on the body) as required by the FCC for
each model. The highest SAR value for this model handset
when tested for use at the ear is 0.530W/kg and when worn
on the body, as described in this user guide, is 0.386W/kg.
Body- worn Operation; This device was tested for typical
body-worn operations with the back of the handset kept
1.5cm from the body. To maintain compliance with FCC RF
exposure requirements, use accessories that maintain a
1.5cm separation distance between the user's body and the
back of the handset. The use of beltclips, holsters and
similar accessories should not contain metallic components
in its assembly.
The use of accessories that do not satisfy these
requirements may not comply with FCC RF exposure
requirements, and should be avoided.
The FCC has granted an Equipment Authorisation for this
model handset with all reported SAR levels evaluated as in
compliance with the FCC RF emission guidelines. SAR
information on this model handset is on file with the FCC
and can be found under the Display Grant section of
http://www.fcc.gov/oet/fccid after searching on FCC ID
APYHRO00038.
Additional information on Specific Absorption Rates (SAR)
can be found on the Cellular Telecommunications & Internet
Association (CTIA) website at
http://www.phonefacts.net.
xxxi
Page 33

European RF Exposure Information
Your handset has been designed, manufactured and tested
so as not to exceed the limits for exposure to
electromagnetic fields recommended by the Council of the
European Union. These limits are part of comprehensive
guidelines developed by independent scientific
organisations. The guidelines include a substantial safety
margin designed to assure the safety of the handset user
and others and to take into account variations in age and
health, individual sensitivities and environmental conditions.
European standards provide for the amount of radio
frequency electromagnetic energy absorbed by the body
when using a handset to be measured by reference to the
Specific Absorption Rate (SAR). The SAR limit for the
general public is currently 2W/kg averaged over 10g of body
tissue. Your handset SAR value is 0.638W/kg.
This has been tested to ensure that this limit is not
exceeded even when the handset is operating at its highest
certified power. In use however your handset may operate
at less than full power because it is designed to use only
sufficient power to communicate with the network.
xxxii
Page 34
xxxiii
Page 35

Getting Started
1-1
Page 36
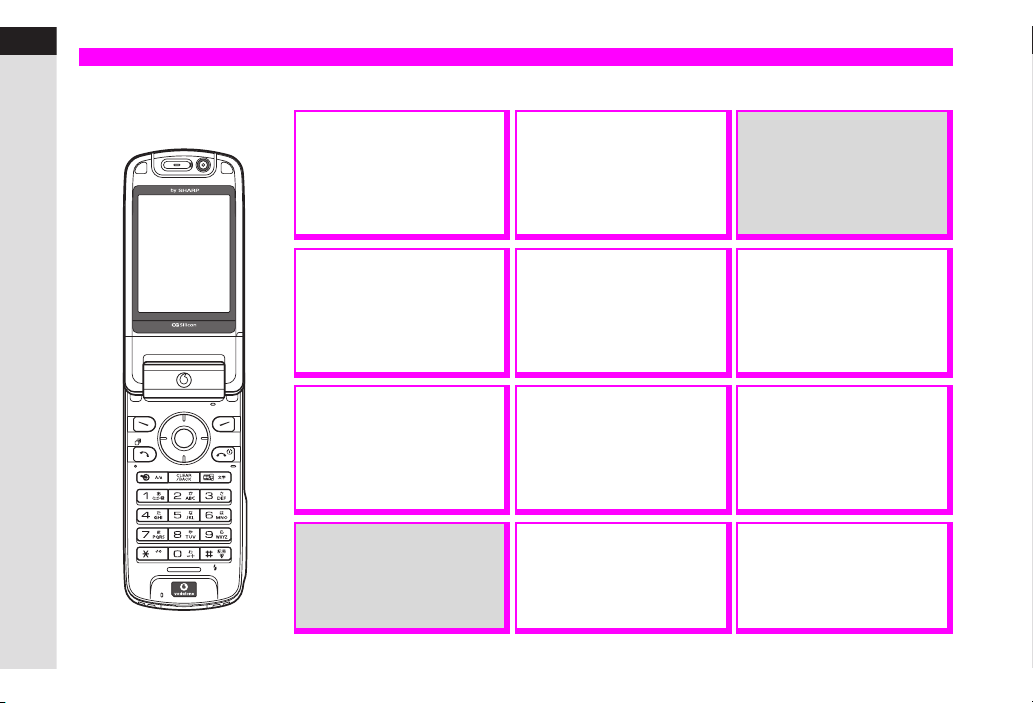
1
Function & Feature Preview
Getting Started
SD Memory Card is required for items with grey background.
1-2
USIM Card
Contains user information. For
use with USIM Card compatible
Vodafone handsets.
P.1-4
International Roaming
Compatible with both W-CDMA
and GSM network systems.
Use the same number in Japan
and abroad.
P.2-14
Phone Book
Save up to 500 entries (with up
to three phone numbers and mail
addresses each) on handset and
more on USIM Card.
P.4-2
Media Player
Play downloaded music and
video images as well as
captured video images.
P.7-2
Rotating Display
Change handset Display
position to use mobile camera,
etc.
P.1-13 - 1-14
Manner Mode
Press a single key to mute
ringer and activate Message
Recorder automatically.
P.2-16
TV Call
Place or receive calls with
voice and video.
P.5-2
Data Folder
Save and manage a variety of
handset files.
P.8-2
Memory Card
Save files to SD Memory Card
to expand handset memory or
back-up handset files.
P.1-25
Kanji Conversion
Use Predictive or Previous
Usage to reduce keystrokes
when entering Japanese text.
P.3-6, P.3-12 - 3-13
Camera
Capture still and video images.
P.6-2
Bluetooth
Exchange files and information
with other handsets, etc.
wirelessly via Bluetooth.
P.9-3
Page 37
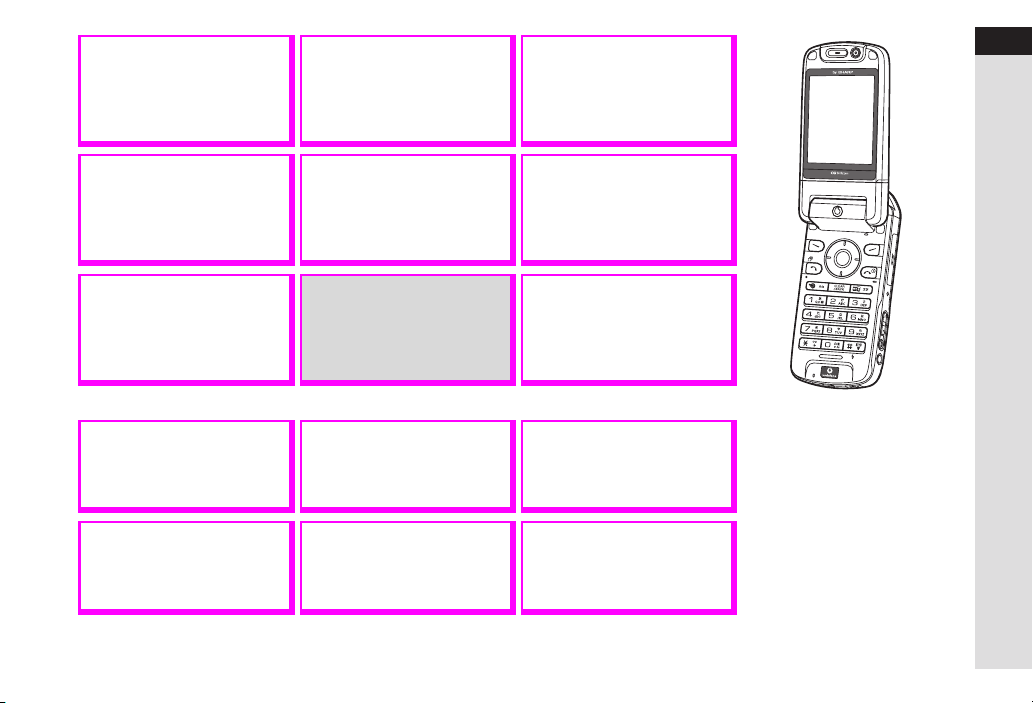
Infrared
Exchange files and information
with other handsets, etc.
wirelessly via Infrared.
P.9-9
Display
Set Wallpaper, System
Graphics and Fonts to
customise your handset.
P.10-4
Display Language
Set handset menus, etc. to
appear in English or Japanese.
P.10-5
1
Getting Started
Video Output
Watch still/video images
captured with handset or
Display contents on TVs, etc.
P.10-7
Barcodes
Scan UPC and QR Codes or
create QR Codes from Phone
Book entries, etc.
P.11-11
Call Forwarding
Forward incoming calls to a
specified number.
P.12-2
Conference Call
Switch between multiple lines
or talk on all simultaneously.
P.12-6
Calendar & Tasks
Organise daily, weekly, and
monthly events.
P.11-2
Electronic Books
Read E-Books (XMDF format)
saved on SD Memory Card.
P.11-24
Optional Services
Voice Mail
Forward incoming calls to
Voice Mail Centre.
P.12-4
Call Barring
Restrict incoming/outgoing calls.
P.12-7
Voice Recorder
Record/play voice. Send
recorded voice via MMS.
P.11-9
Vodafone live!
Exchange SMS/MMS messages,
access the Mobile Internet and
download V-applications.
P.13-2
Call Waiting
Answer an incoming call during
a call.
P.12-5
Caller ID
Show or hide your number
when placing calls.
P.12-10
1-3
Page 38
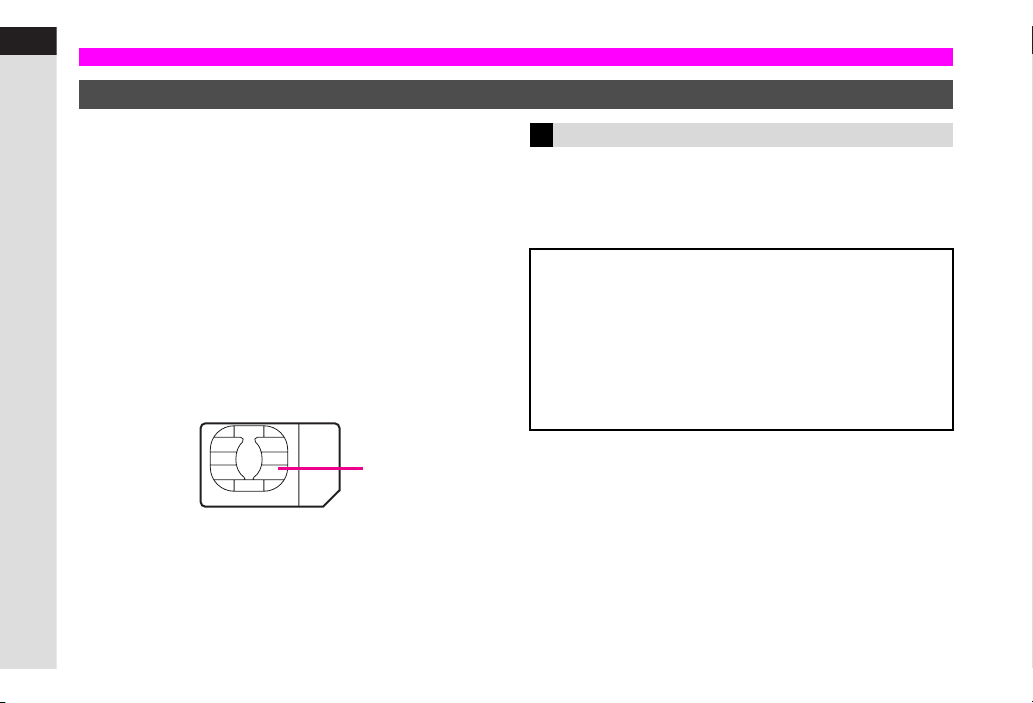
1
USIM Card
Getting Started
General Information & Precautions
Vodafone Global Standard USIM Card is an IC card
containing customer information such as handset number.
USIM Card must be inserted before using a USIM Card
compatible handset. Without USIM Card, calls, messaging,
Web and other Network-related services are not available.
^ Save Phone Book on USIM Card (see
^ Use USIM Card files with other compatible Vodafone
handsets.
^ Do not apply excessive force to insert/remove USIM Card.
^ Do not insert USIM Card into any other IC card device.
Vodafone is not liable for resulting damages.
^ Keep the USIM Card IC chip clean.
^ Use a dry, soft cloth to clean the USIM Card.
^ Do not attach labels to USIM Card. Malfunction may result.
USIM Card
P.4-2
).
IC
If Handset is Dropped or Subjected to Shocks
USIM Card may not be recognised. In such cases, handset
may automatically restart. This is not a malfunction. If Insert
SIM Card appears, check that USIM Card is properly
inserted and restart handset.
Important
^ USIM Card is the property of Vodafone.
^ USIM Card will be reissued for a fee if lost or damaged.
^ Return USIM Card to Vodafone upon subscription
termination.
^ Returned USIM Cards are recycled.
^ USIM Card specifications are subject to change without prior
notice.
^ Back-up USIM Card files. Vodafone is not liable for lost files.
1-4
Page 39
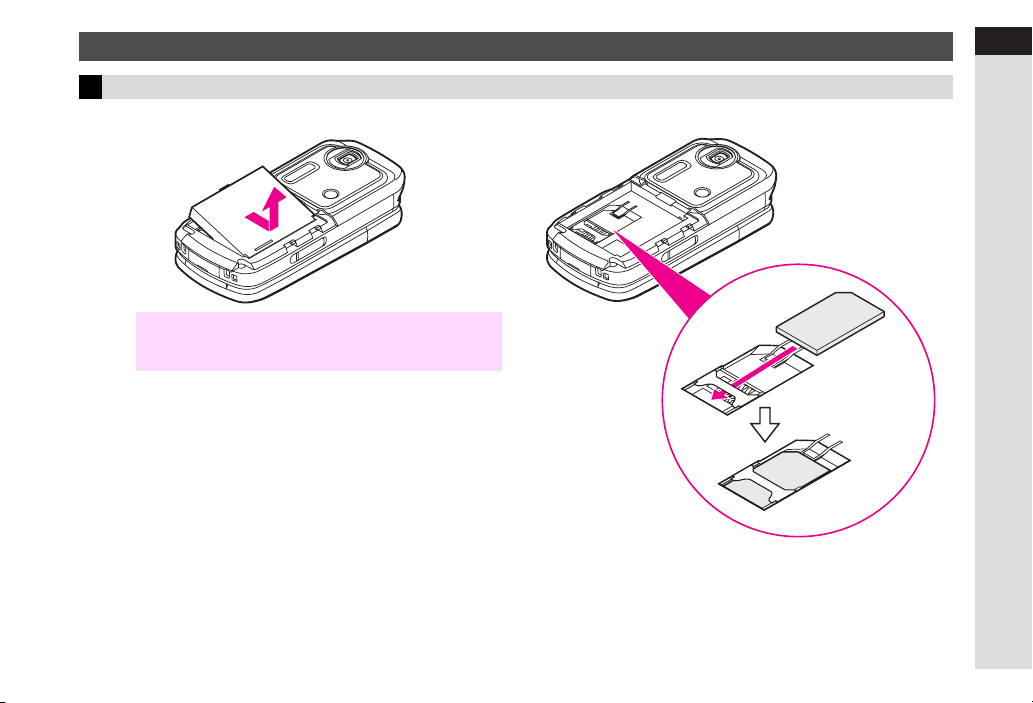
Inserting & Removing USIM Card
Inserting
Remove battery (see P.1-21)
1
^
H
Note
Do not force USIM Card into handset. Damage may result.
^
Avoid touching USIM Card IC chip. May hinder
performance.
Slide in USIM Card with IC chip facing down
2
Insert battery
3
1
Getting Started
1-5
Page 40
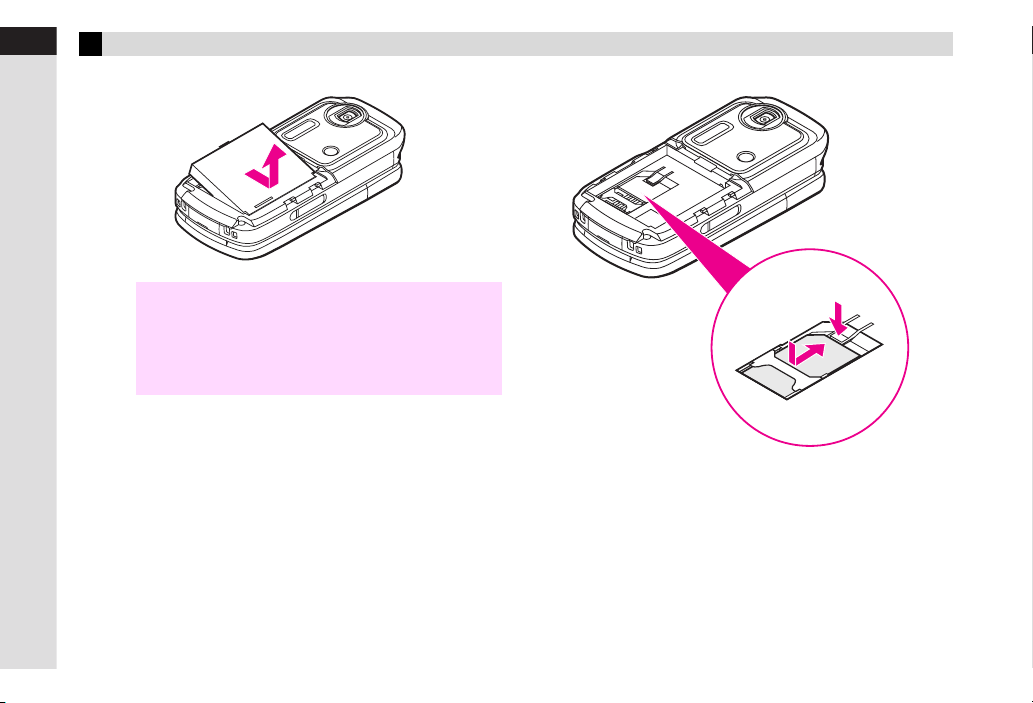
1
Getting Started
Removing
Remove battery (see P.1-21)
1
Press down the tab and slide out USIM Card as shown
2
1-6
Note
^
H
Do not force USIM Card out of handset. Damage may result.
^
Be careful not to lose removed USIM Card.
^
Avoid touching USIM Card IC chip. May hinder
performance. In such cases,
appear or handset may automatically restart. This is not a
malfunction. Avoid touching USIM Card terminals as well.
Insert SIM Card
may
Insert battery
3
e
f
Page 41

USIM PINs
There are two Security Codes for USIM Card: PIN1 and PIN2.
PIN1
A 4-digit to 8-digit Security Code to prevent unauthorised
use of Vodafone handset.
^ PIN1 is 9999 by default.
^ To change PIN1, see P.10-12.
^ When Switch On/Off in PIN Entry is On (see P.10-12), PIN1
is required every time handset is turned on (with USIM Card
inserted).
PIN2
Required to clear Call Costs and to set Max Cost.
^ PIN2 is 9999 by default.
^ To change PIN2, see P.10-12.
PIN Lock & PUK Code
PIN1 Lock or PIN2 Lock is activated if PIN1 or PIN2 is
incorrectly entered three times consecutively. Cancel PIN1
Lock by entering the Personal Unblocking Key (PUK Code).
For information on PUK Code, contact Vodafone Customer
Centre, General Information (see P.16-32).
^
H
Note
If PUK Code is incorrectly entered ten times, USIM
Card is locked and handset is disabled. Write down
PUK Code.
^
For procedures required to unlock USIM Card, contact
Vodafone Customer Centre, General Information
(see P.16-32).
1
Getting Started
1-7
Page 42
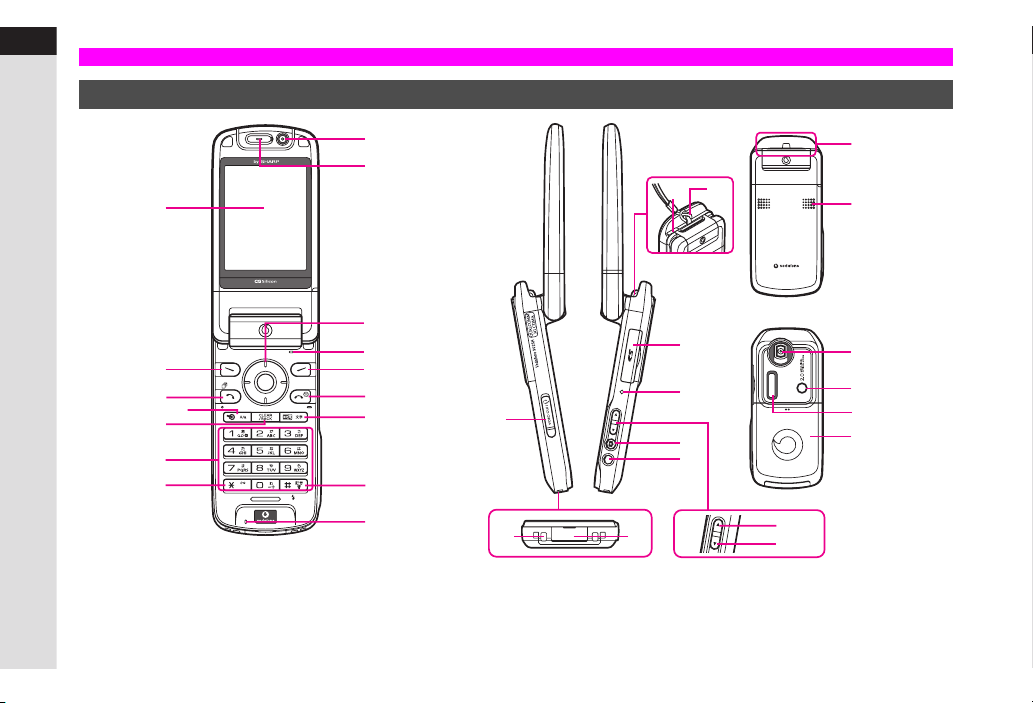
1
Handset Parts & Functions
Getting Started
Handset
1-8
2
5
6
7
1
3
4
8
9
A
B
C
D
E
F
G
H
R
LK
M
N
O
P
Q
JI
a
b
S
T
U
V
W
Page 43

1
Display
2
Left Soft Key
Open messaging menu or execute Soft Key function/
command.
3
Start Key
Initiate/answer calls. Open records of All Calls.
4
Shortcuts & A/a Key
List User Shortcuts, etc. Toggle between upper/lower case
roman letters or standard/small hiragana/katakana in text
entry windows.
5
Clear/Back Key
Delete entries/return to previous window.
6
Keypad
7 U
Key/Keypad Lock
Press for 1+ seconds to set or release Keypad Lock. In
alphanumeric entry, open web/mail address prefixes & suffixes.
8
Internal Camera
Use during TV Call.
9
Earpiece
A
Multi Selector
Select menu items, move cursor, scroll, etc.
B
Microphone
Use in Viewer position.
C
Right Soft Key
Open Vodafone live! menu or execute Soft Key function/command.
D
Power On/Off Key
Press for 2+ seconds to turn handset power on/off.
E
Multimedia/Text Key
Start Media Player or toggle character types.
F
# Key
^ When handset is opened for mobile camera (clamshell
open), turn Mobile Light on/off. In text entry windows, toggle
through Symbol & Pictograph lists.
^ Press for 1+ seconds to activate/cancel Manner mode.
G
Microphone
H
Video Output/Headphone Connector
Connect supplied Video Cable or Multi Stereo Headphones, etc.
I
Charger Terminal
J
External Device Connector
Connect Charger here.
K
Infrared Port
Use for infrared transmissions.
L
Strap Eyelet
Attach straps as shown.
M
Memory Card Slot
Insert SD Memory Card here.
N
Small Light
Illuminates red while charging.
1
Getting Started
1-9
Page 44

O
1
Shutter Key
In Viewer position, press to open selected menu items or
Getting Started
execute functions. Press for 1+ seconds to activate mobile
camera (for more information, see P.6-4).
P
Clear Key
Press for 1+ seconds to activate Pen Light. In Viewer
position, press to cancel the current operation or return to the
previous window, etc. For mobile camera keys, see P.6-4.
Q
Zoom/Select Key
^ In Viewer position, press to select menu items or to move
cursor. For mobile camera keys, see P.6-4.
a
b
R
Internal Antenna
S
Speaker
T
External Camera; lens cover
Capture still and video images.
U
Mobile Light
Flashes for incoming calls/mail. Serves as a strobe or Pen Light.
V
Sub Display
W
Battery Cover
Move cursor down or right.
Move cursor up or left.
NoteHInternal Antenna
^
902SH has no external antenna. Handset transmits and
receives signals via Internal Antenna.
^
Do not cover or place stickers, etc. over the area
containing Internal Antenna. Voice quality is affected
depending on how and where handset is used.
^
For better signal in Standby, close handset (clamshell
closed: see P.1-13). For better voice quality, talk with
handset open (clamshell open: see P.1-13).
1-10
Page 45
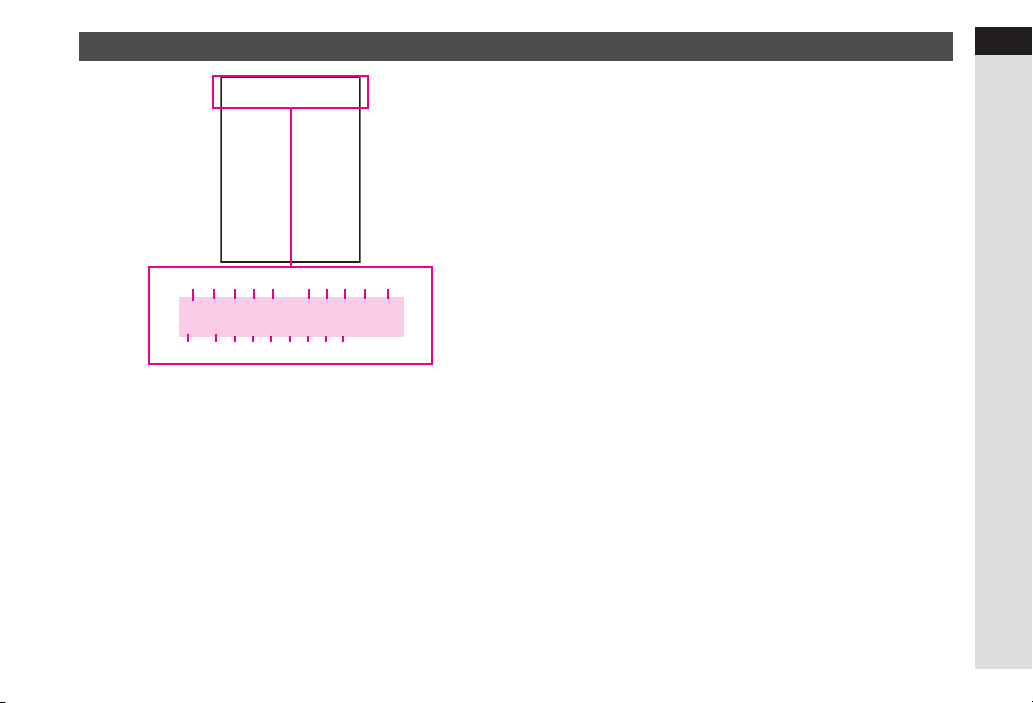
Display
NgX67 1KsgJ
j ehCGkkld
1
2 3 4 5 6 7 8 9 A
NgX67 1KsgJ
j ehCGkkld
B C F G H IJED
1 N
Signal Strength (N Strong O Moderate P Low
Q
Weak S Out-of-Range)
e
Off Line Mode
3
3G
4
GSM (GPRS Available)
j appears red in 3G and grey in GSM.
2 c
SD Memory Card Status
W
Incoming Voice Call
g
Voice Call in Progress
S
TV Call in Progress
b
Line Active (Server or Web Transmission)
3 X
Call Forwarding or Voice Mail
X
SSL
X appears when Call Forwarding or Voice Mail is set for all
Voice Calls.
4 6
SMS
5 7
MMS
3
Receiving Mail
d
Sending Mail
Y
Memory Full
6 1
USB Transmission Ready
d
(red) Infrared Connection in Progress
0
Infrared Transmission in Progress
2
Bluetooth Transmission Ready
B
Bluetooth Transmission in Progress
C
Bluetooth Talk in Progress
7 K
Active V-application
K
(grey) Paused V-application
I
Music Player Active
1
Getting Started
1-11
Page 46
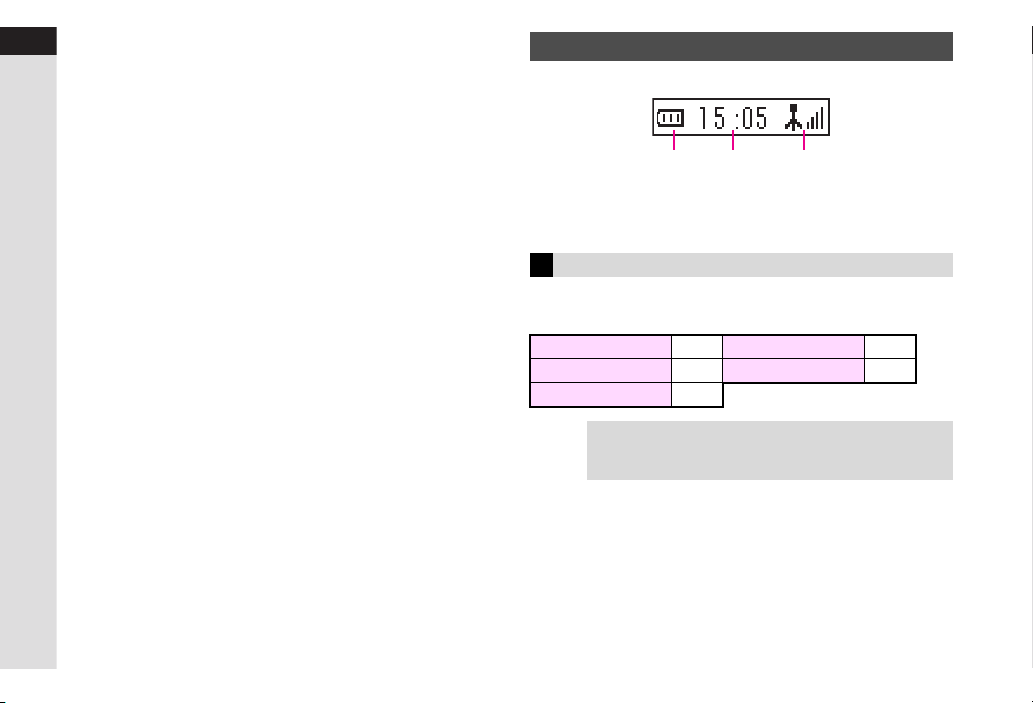
8 s
1 2 3
1
Getting Started
Meeting Mode
r
Activity Mode
b
Car Mode
V
Headset Mode
k
Manner Mode
9 g
Silent
h
Increasing Volume
f
Vibration
G
Silent & Vibration
m
Loudspeaker
w
Microphone Mute
A J
g
Pen Light
g and J flash when Pen Light is in use.
B j
Message Recorder Active
l
Message
l
l
C e
Alarm Set
D h
Schedule (Reminder On)
i
Schedule (Reminder Off)
E C
Message Delivery Failure
F G
Auto Delivery Info
G k
New Voice Mail
H k
Secret Mode Active
I l
Phone Lock Active
b
Keypad Lock Active
J d
(grey) Infrared Transmission Ready
Battery Strength
(green) Message Recorder Active
(black) Message Recorder Cancelled
Sub Display
Sub Display and Display indicators represent the same functions.
1 @
Battery Strength
2
Time
3 S
Signal Strength N Off Line Mode
Incoming Communications
Indicator and number of calls/messages, etc. appear for
missed incoming communications or Alarm.
Missed Calls
Message Recorderh:1 Alarm
New Messages
H
Sub Display Backlight illuminates when handset is closed
Tip
(clamshell closed) or
Backlight for Sub Display is set to Off (see P.10-6).
i
:1 Auto Delivery Infor:1
z
:1
c
is pressed, except when
R
:1
1-12
Page 47
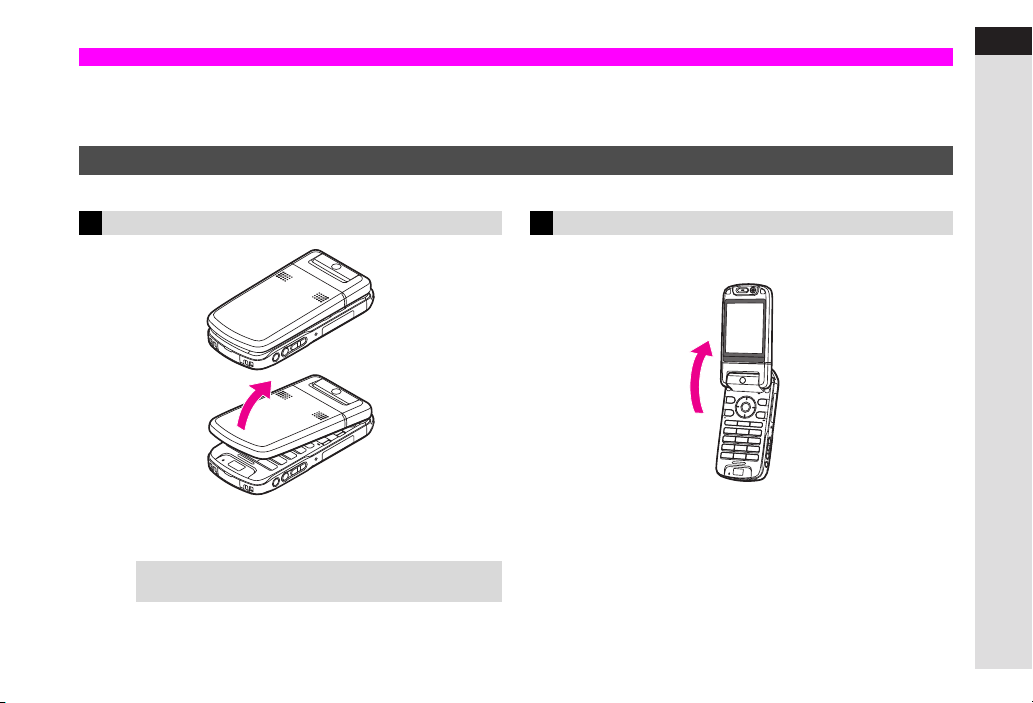
Display Positions & Keys
902SH features a rotating Display. Select from four positions.
In this manual, most operations are described with handset open (clamshell open). However, mobile camera operations (see
are described with Display in Viewer position.
Display Positions
Hold handset with both hands when changing Display position.
Clamshell Closed
1
Clamshell Open
Open handset
3
2
P.6-2
1
Getting Started
)
Handset is closed with Display facing inward.
Keep this position when not in use.
TipHPlace or answer calls with handset open (clamshell open)
or in Viewer position.
Handset is open with Display facing inward.
Place or answer calls, or enter text.
1-13
Page 48
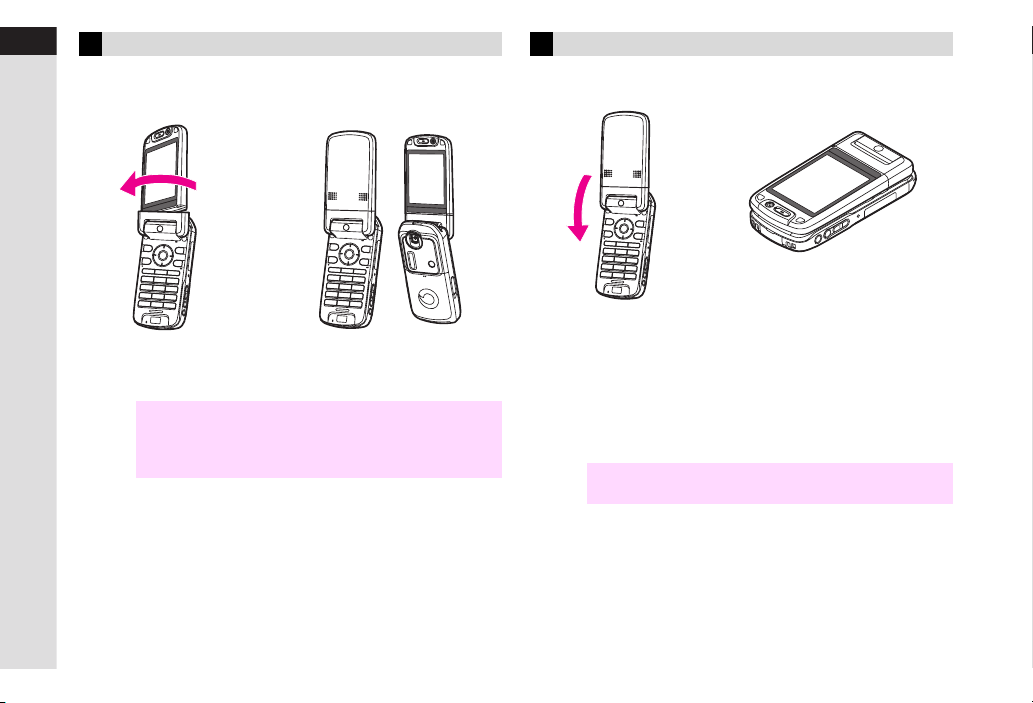
1
Getting Started
Self Portrait Position
Rotate Display 180
4
degrees clockwise
5
Viewer Position
Close handset
6
7
Handset is open with Display facing outward.
Capture a self portrait.
^
H
Note
1-14
Place or answer calls with handset open (clamshell
open) or in Viewer position.
^
Do not rotate Display anticlockwise when changing to
Self Portrait position.
Handset is closed with Display facing outward.
^ Use this position for mobile camera (see
images on Display (see
^ Use h, c, M or L to perform basic operations as with
clamshell open.
H
Do not carry handset with Display in Viewer position.
Note
Damage may result.
P.6-20
).
) or checking
P.6-2
Page 49
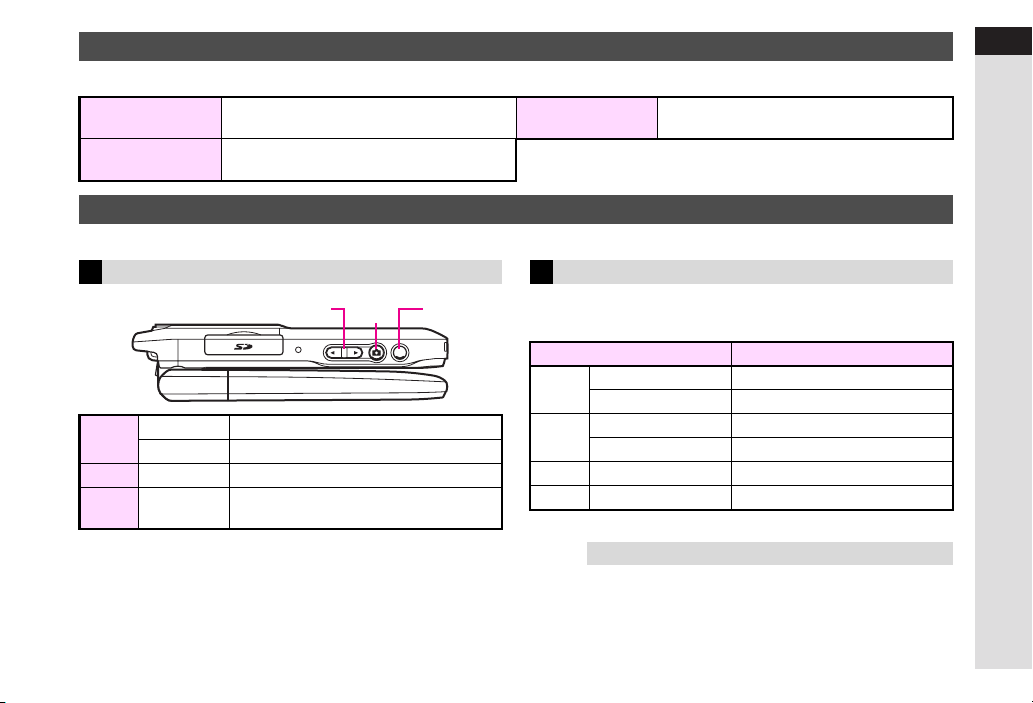
Key Press Methods
Multiple functions are assigned to some keys, distinguished by the following ways to press.
Press Press once softly Full Press (h only)
h
Long Press
Press for 1+ seconds. (For
1+ seconds.)
, press fully for
Half press and press further. Used for mobile
camera.
Side Key Assignments (Viewer)
When handset is in Viewer position, use h, c, M or L.
In Standby
Long Press Activate mobile camera
h
Press Open Main Menu
c
Long Press Illuminate Pen Light
L
Press Adjust Earpiece Volume
M
LM
h
c
During Operations
The keys correspond as follows. (Not applicable during calls or
incoming calls, or while mobile camera or V-application is active.)
Viewer Position Clamshell Open
Long Press
h
Press
Long Press
c
Press
Press
M
L
Press
*
Depends on content.
TipHUse the corresponding keys in Viewer position.
e
b
g
d
C
D
or
or
B
A
1
Getting Started
*
*
1-15
Page 50

1
Battery & Charger
Getting Started
Getting Started
Charge a new battery before use or after a period of disuse.
Battery Life
^ Do not use or store battery at extreme temperatures. May
shorten battery life.
B Ideal working temperature is between 5]C - 35]C.
^ Use specified Charger only. Battery may deteriorate, overheat
or ignite.
^
Replace battery if operating time is noticeably shorter than normal.
Charging
^ Do not use Charger for other purposes.
^ Battery may short-circuit, overheat or burst from contact with
metal objects.
^ Small Light illuminates red while charging. (It may take a while
for the light to illuminate when handset power is off.)
^ Charging takes approximately 135 minutes (with handset
power off).
B
Charging time may vary by ambient temperature.
^ Charger and battery may become warm during charging.
^
Move Charger away from home TVs or radios if interference occurs.
Precautions
^ Use a dry cotton swab to clean handset, battery and Charger
terminals.
^ Avoid:
B Extreme temperatures
B Humidity, dust and vibration
B Direct sunlight
^ Do not leave battery uncharged. Charge at least once every
six months.
^ Use a case when carrying battery separately.
^
H
Tip
Battery must be inside handset to charge.
^
Handset will charge with power on. J flashes and
stays on when complete.
^
Handset will charge while open.
1-16
Page 51
Estimated Hours of Use (fully charged battery)
Continuous Call Time
Continuous Standby Time
Continuous Operating Time 4.5 hours
Continuous Playback Time 7 hours
Continuous TV Call Time 90 minutes
Above values are calculated with Backlight Brightness set to
Level: 2 (default).
^ Continuous Call Time is an average measured with a new,
fully charged battery, with stable signals.
^ Continuous Standby Time is an average measured with a
new, fully charged battery, with handset closed (clamshell
closed) without calls or operations, in Standby with stable
signals. Standby Time may be less than half this value if
handset is out-of-range or signal is weak. Standby Time may
vary by environment (battery status, temperature, etc.).
^ Continuous Operating Time is measured with handset being
operated without calls.
^ Continuous Playback Time is measured with sound/music
being played back in Off Line Mode.
^ The above values (Battery Time) are nominal values,
measured under stable signal conditions.
150 minutes (3G) or 240 minutes
(GSM)
240 hours (3G) or 250 hours (GSM)
Battery Time
Battery Time may shorten when handset is used in poor
conditions:
^
Poor Usage Conditions
B Extreme temperatures (use within a range of 5]C - 35]C)
B Dirty handset, battery or Charger terminals (charging may
be hampered)
B Weak signals or out-of-range
^
Operation
B V-application is active
B Repeated mobile camera use or barcode scanning
B Frequent use of Mobile Light
B Playing video images
B Frequent use of Pen Light
B Continuous Keypad use (Backlight stays on for long periods)
B Use of Music Player/Voice Recorder
B Frequent infrared transfers
B Frequent opening/closing of handset
^
Setting
B Display Saving start time or Backlight time is set longer
B Backlight is set brighter
1
Getting Started
1-17
Page 52
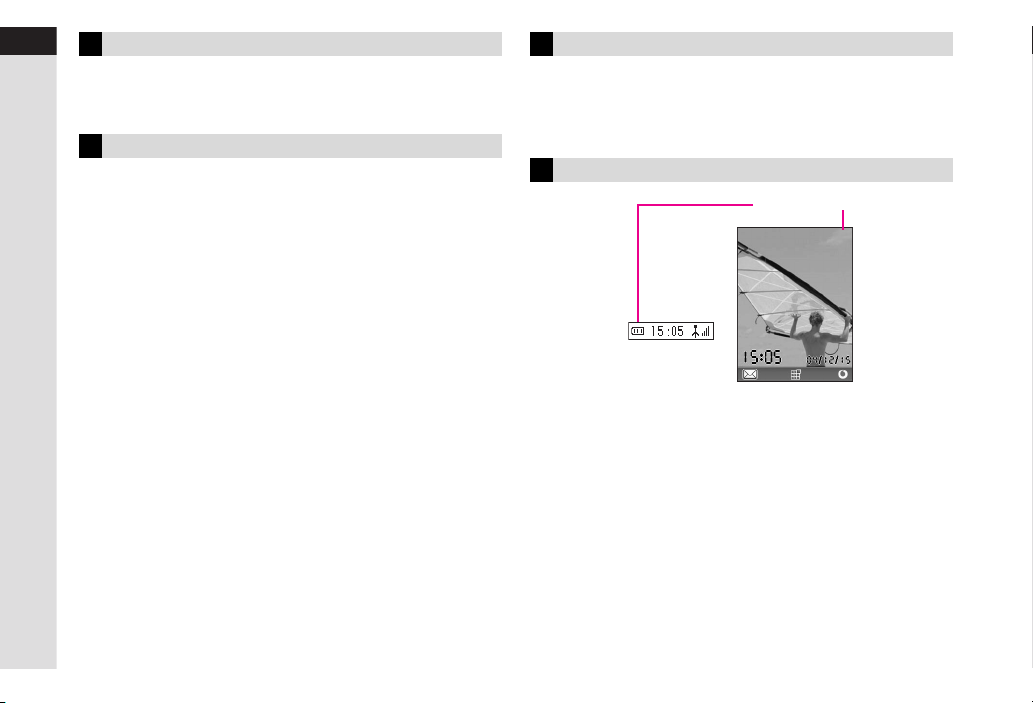
1
Getting Started
Extend Battery Time
Adjust the following settings to reduce power consumption:
^ Display Backlight settings (see P.10-6)
^ Sub Display On/Off and Sub Display Backlight (see P.10-6)
When Battery Runs Out
A message appears and short beeps sound. Handset shuts
down after 20 seconds unless charged. Press
beeps. (Short beeps do not sound in Manner mode.) If battery
runs out while talking, short beeps sound every five seconds.
After 20 seconds, the call ends and handset shuts down.
g
to stop short
Battery Disposal
Do not dispose of exhausted batteries with ordinary refuse.
Tape over battery terminals before disposal, or bring them
to a Vodafone shop. Follow local regulations regarding
battery disposal.
Battery Strength
Strength Level
NJ
Sub Display
1-18
),
Recharge battery.
When battery runs out (
short beeps sound. Handset shuts down after 20 seconds.
M
appears and
Page 53
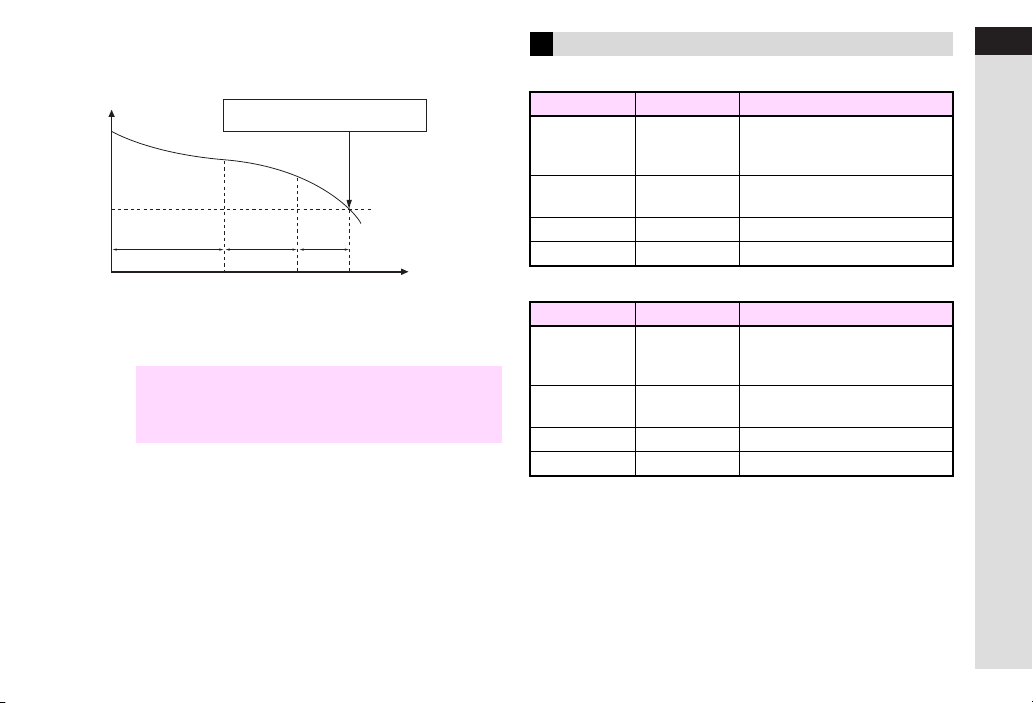
CIndicator
Battery Strength indicator varies as shown.
Charge or replace when level is low.
Recharge battery. appears.
Charge or replace battery immediately.
Minimum Operating
Battery Voltage
Level 3 Level 2 Level 1 Level 0
Approx. 70% Approx. 20%
Remaining Strength (at 25]C)
Approx. 10%
Voltage
MLKJ
CBattery Strength & Environment
At low temperatures, battery is consumed faster.
At high temperatures, battery lasts longer.
Battery Strength indicator is for reference only.
^
H
Note
At Level 1, some functions including Music Player,
^
Voice Recorder, Video Camera, etc. do not operate
(see
P.7-3, P.11-9, P.6-12
).
Hours of Use
Small Light & Battery Strength Indicator
CHandset Power On
Small Light Indicator (J) Conditions
Off Flashes
Flashes red Flashes
Illuminates red Flashes Charging
Off Illuminates Charging completed/Standby
CHandset Power Off
Small Light Indicator (J) Conditions
Off Off
Flashes red Off
Illuminates red Off Charging
Off Off Charging completed
Ambient temperature is outside
the range of 5
battery has run out
Battery life has ended, or battery
defect
Ambient temperature is outside
the range of 5
battery has run out
Battery life has ended, or battery
defect
C - 35]C, or
]
C - 35]C, or
]
1
Getting Started
1-19
Page 54
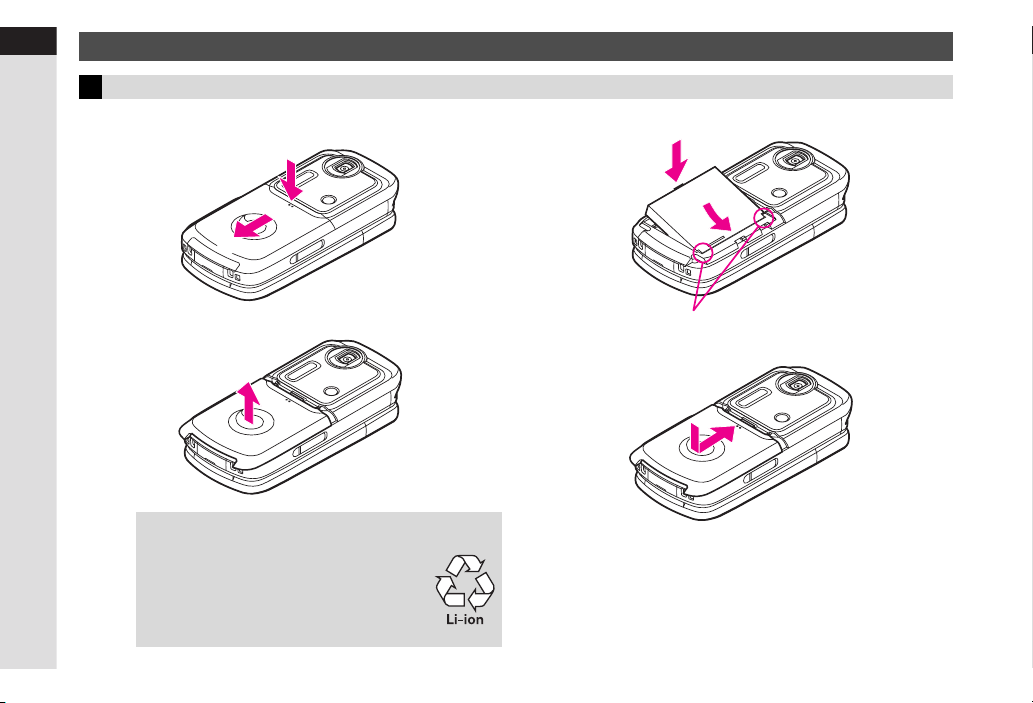
1
Installing & Removing Battery
Getting Started
Inserting
Press down and slide cover as shown
1
f
e
Insert battery
3
f
e
1-20
Lift and remove cover as shown
2
TipHLithium-ion battery is used for this product.
Lithium-ion battery is a recyclable resource.
To recycle a used battery, take it to any shop
^
displaying the symbol shown to the right.
To avoid fire or electric shock, do not:
^
Short-circuit batteries
B
Disassemble batteries
B
With printed side up, fit tabs into battery cavity slots.
^
Close cover
4
Position and slide cover as shown until it stops.
^
Page 55
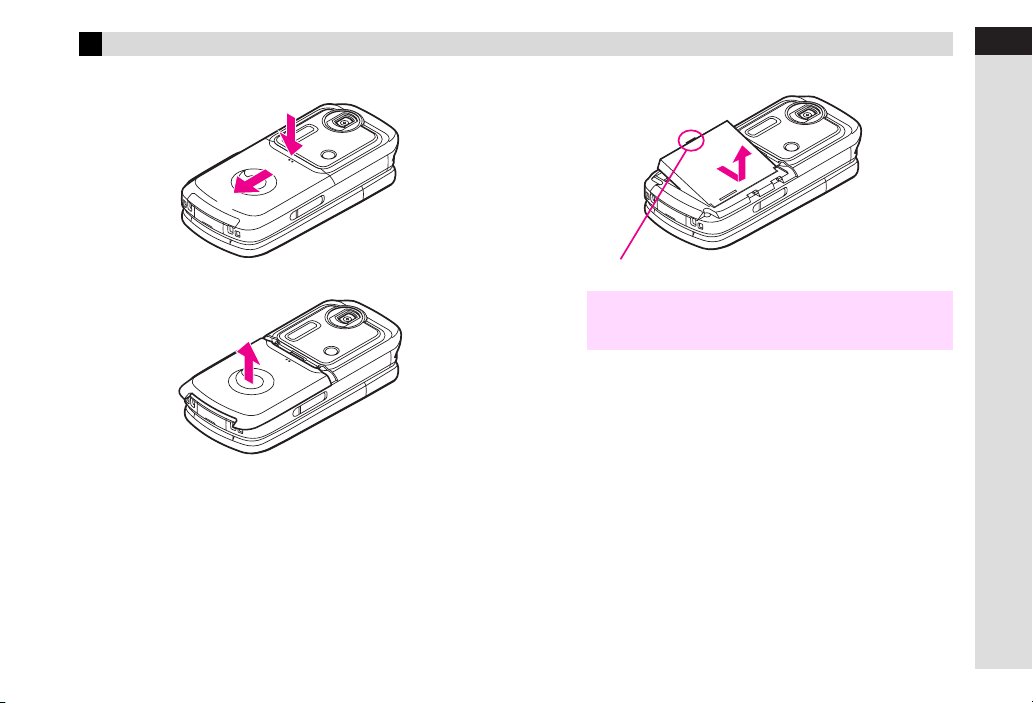
Removing
Press down and slide cover as shown
1
e
f
Lift and remove cover as shown
2
Remove battery
3
Remove battery as shown.
^
Turn handset power off before removing battery.
^
H
Note
Do not remove battery immediately after saving files,
^
sending messages, etc.
1
Getting Started
1-21
Page 56
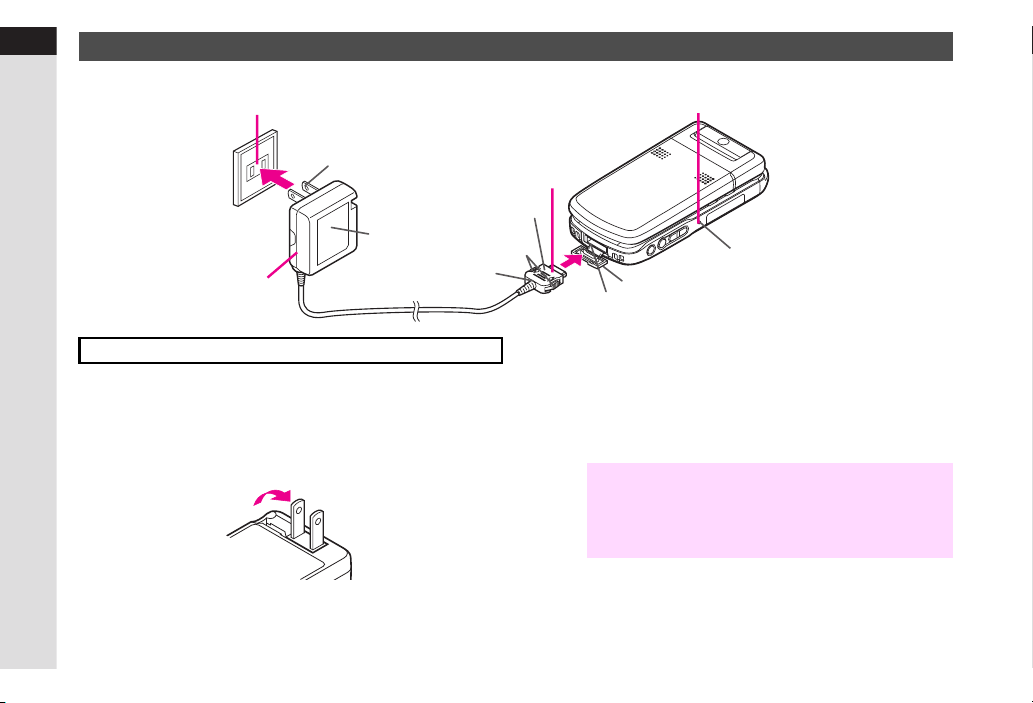
1
AC Charger
Getting Started
1-22
2
100 VAC
Blade
4
Use specified Charger only.
Open Terminal Cover and insert Charger
1
connector until it clicks
Plug in Charger
2
Charging starts and Small Light illuminates red (see
^
^
Extend blades. Fold back when not in use.
Printed Side Up
AC Charger
Charger Connector
Release Tab
P.1-19
3
1
Small Light
External Device Connector
Charging is complete when light goes out
3
^
After Charging
4
Unplug Charger from outlet, then handset
^
).
^
Note
Terminal Cover
Charging takes approximately 135 minutes.
Squeeze release tabs and pull connector straight out.
Cap Terminal Cover.
Do not pull, bend or twist AC Charger cord.
^
H
AC Charger is compatible with 100 - 240 VAC
^
household currents.
Vodafone is not liable for problems caused by charging
^
handset abroad.
Page 57
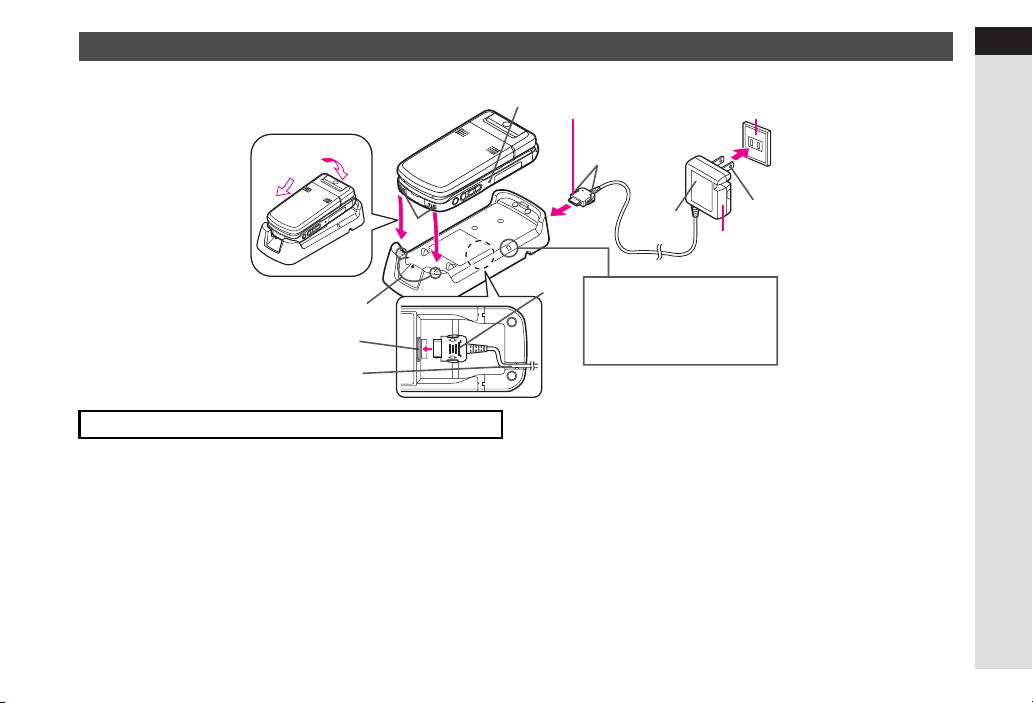
Desktop Holder
1
Getting Started
3
1
Connection Terminal
Use specified Charger and Desktop Holder only.
Insert Charger connector into Desktop Holder
1
until it clicks
Connection Terminal is on the back of Desktop Holder.
^
Plug in Charger
2
^
Extend blades. Fold back when not in use.
2
Slot
Tab
Insert cord
into the groove.
Small Light
4
Printed
Side Down
3
4
5
1
100 VAC
Release Tab
AC
Charger
2
Blade
5
Mobile Light Indicator
Activate Mobile Light (see
P.10-3). Mobile Light
illuminates for incoming calls,
mail and Web info.
Gently insert handset into Desktop Holder
Fit tabs into slots as shown in 1 and push handset as
^
indicated in
^
Charging starts and Small Light illuminates red (see P.1-19).
Charging is complete when light goes out
^
Charging takes approximately 135 minutes.
After Charging
Unplug Charger from outlet and remove handset
2
until it clicks.
1-23
Page 58
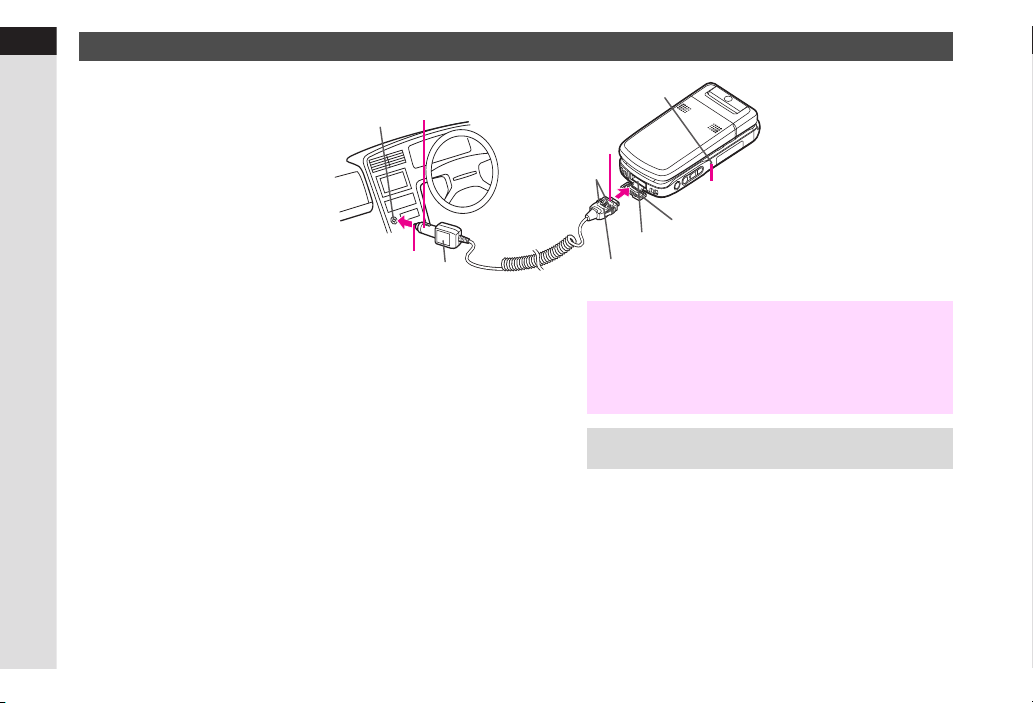
1
g
In-Car Charger
Getting Started
Cigarette Lighter Socket
3
Open Terminal Cover and insert Charger
1
connector until it clicks
Plug in Charger
2
Start car engine
3
^
Charging starts and Small Light illuminates red (see P.1-19).
Charging is complete when light goes out
4
^
Charging takes approximately 145 minutes.
After Charging
5
Unplug Charger from socket, then handset
^
Squeeze release tabs and pull connector straight out.
^
Cap Terminal Cover.
5
2
Plu
Release Tab
Printed Side Up
^
H
Note
^
^
^
^
H
Tip
^
Small Light
1
4
Terminal Cover
External Device Connector
Use In-Car Charger inside vehicles with a negative
earth only.
Disconnect Charger before leaving vehicle to prevent
charging with engine off.
Do not use In-Car Charger with Desktop Holder.
Avoid charging battery inside extremely hot vehicles.
For more information, see In-Car Charger manual.
Use optional In-Car Holder to secure handset.
1-24
Page 59

Memory Card
^ An SD Memory Card is not included. Purchase SD Memory Card separately to use Memory Card-related functions.
^ Format a new SD Memory Card for use with 902SH (see
^ To learn how to save a particular file to an SD Memory Card, refer to that section of the manual.
Precautions
^
902SH is compatible with SD Memory Card and SD-ROM Card.
^ The manufacturer recommends the use of 8, 16, 32, 64, 128,
256 or 512 MB or 1 GB cards.
^
For optimum use of Memory Card-related functions, SD
Memory Cards with 16 MB or more capacity are recommended.
^ To lower the chance of handset malfunction please use only
recommended SD Memory Card sizes.
^ Turn handset power off before inserting or removing an SD
Memory Card.
^ Do not peel off the label on SD Memory Card. Doing so may
damage the card or result in lost information.
^
Do not place new labels or stickers on SD Memory Card. These
items may affect card performance or result in lost information.
^
Use an oil-based felt pen to write on SD Memory Card. Using a pencil
or ballpoint pen may damage the card or result in lost information.
).
P.10-15
^ Never disassemble or modify an SD Memory Card.
^ Do not expose SD Memory Card to strong impacts, pressure
or liquids.
^ Do not touch SD Memory Card terminals or expose them to
metal objects.
^ Do not expose SD Memory Card to direct sunlight or
excessive heat (e.g. inside vehicles, etc.).
^ Keep an SD Memory Card away from dust or high humidity.
^ Do not use in the presence of corrosive gases.
^ Avoid heat sources and do not dispose of in fire.
^ An SD Memory Card is a consumable item. Card performance
deteriorates with usage, eventually becoming unusable and
needs to be replaced.
H
Vodafone is not liable for any damages resulting from
Note
accidental loss/alteration of information. Please keep a
separate record of Phone Book contents, etc.
1
Getting Started
1-25
Page 60
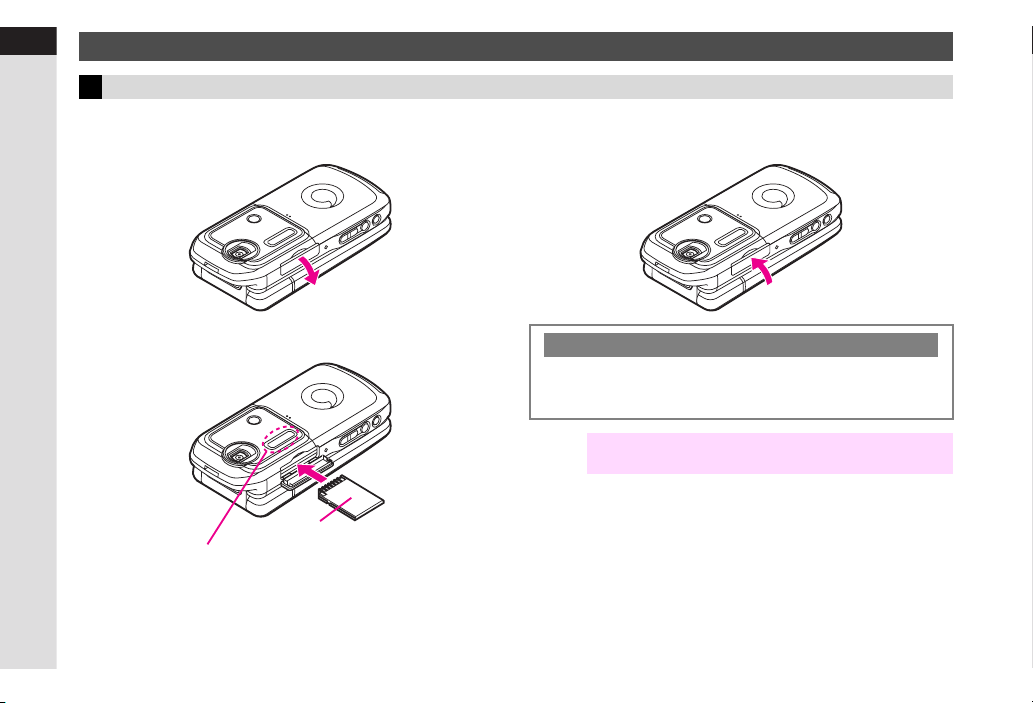
1
Inserting & Removing SD Memory Card
Getting Started
Inserting
Turn handset power off.
Open cover
1
Close cover
3
1-26
Insert card until it clicks
2
Labelled Side Down
^
Avoid putting pressure on this area when inserting or
removing Memory Card.
Write Protection Switch
Set Write Protection Switch to LOCK to prevent accidental
erasure or overwriting. For more information, see SD Memory
Card manual.
H
Do not insert other objects into Memory Card Slot.
Note
Damage may result.
Page 61
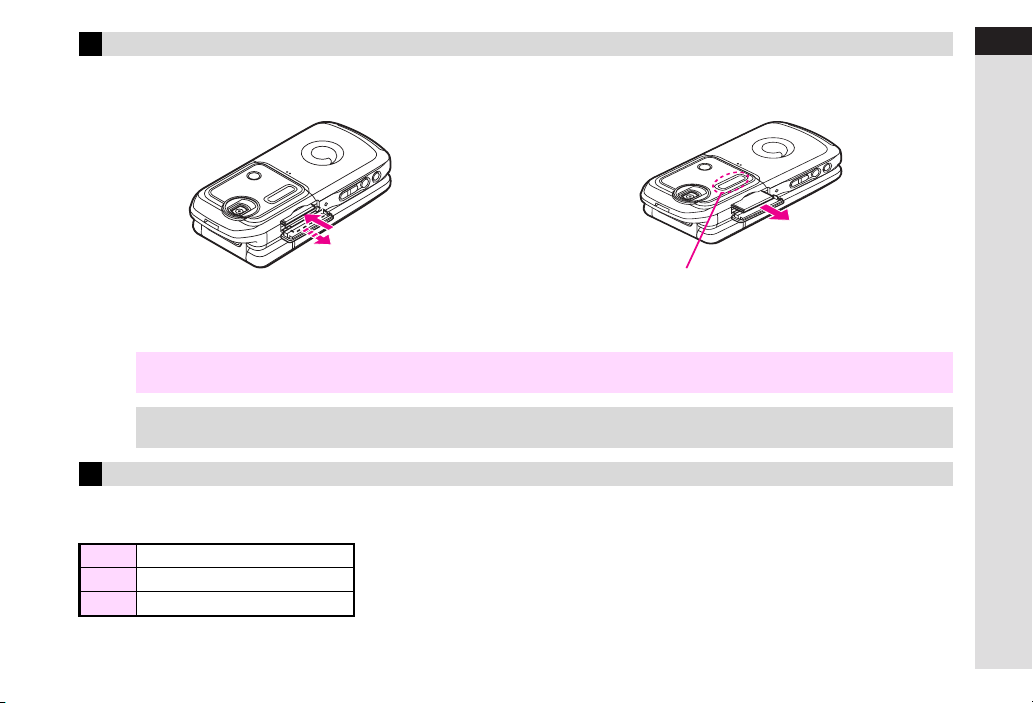
Removing
Turn handset power off.
Open cover and lightly push down on card
1
Remove card
2
1
Getting Started
^
With a light push, the card pops out.
H
Never remove SD Memory Card or battery while files are being accessed.
Note
Damage to handset/card may result.
TipHInsert an SD Memory Card and turn handset power on. Standby appears. Memory Card load times vary depending on card size
and the amount of information saved.
^
Avoid putting pressure on this area when inserting or
removing Memory Card.
^
Slide the card straight out and close cover.
Memory Card Indicator
When an SD Memory Card is inserted into handset, Memory Card indicator appears at the top of Display. Memory Card
indicator lights/flashes when in use, etc.
c
SD Memory Card inserted
S
Accessing files
P
Write protection enabled
1-27
Page 62
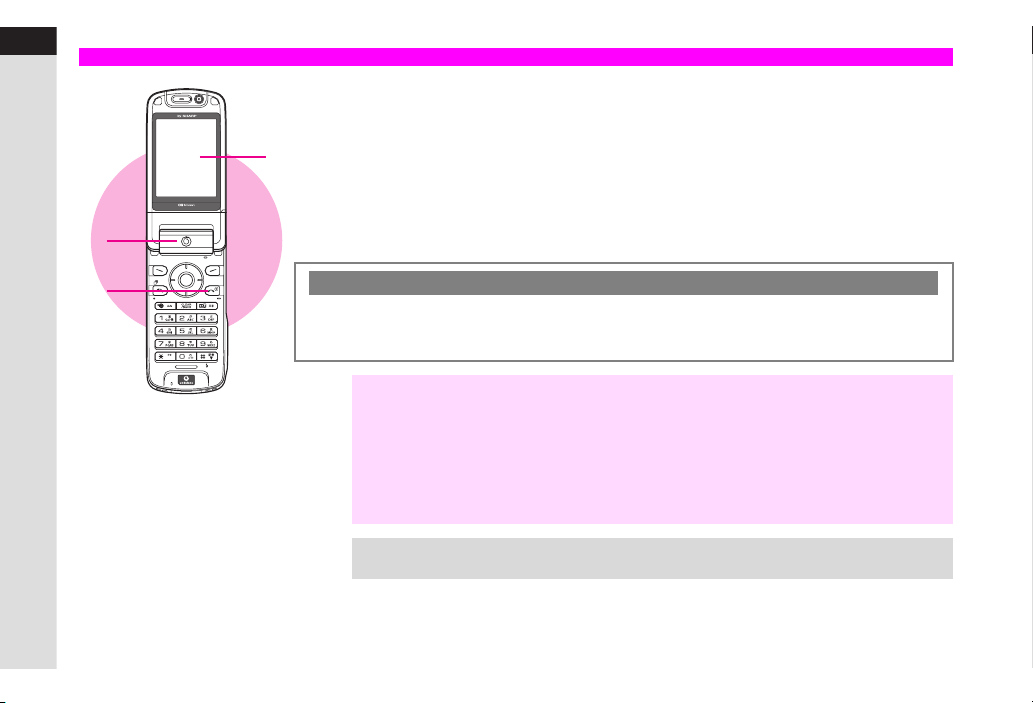
1
Handset Power On/Off
Getting Started
1-28
1
2
4
Open handset (clamshell open)
1
Press g for 2+ seconds
2
3
If date and time have not been set,
Press e
Press
H
Note
H
Tip
i A
d c A
^
Set the current date and time before using handset functions (see P.10-9).
^
USIM Card data is read after turning power on. Signal strength indicator may take some time
to appear. It may take longer when turning power on for the first time.
^
If handset is dropped or subjected to shocks, USIM Card may not be recognised. In such
cases, handset may automatically restart. This is not a malfunction.
^
Insert SIM Card appears when USIM Card is not inserted.
^
If Insert SIM Card appears even if USIM Card is inserted, check that the card is properly
inserted and that the IC chip is clean, then restart handset.
^
Handset receives incoming mail or Web information while closed.
^
Display shuts down after a period of inactivity.
Backlight illuminates and Power
3
On Graphics appear
After graphics, handset is in Standby.
Turning Off
4
Press g for 2+ seconds
Power Off Graphics appear and handset shuts
down.
Handset Clock Settings
Time & Date is not set. Set now?
Set Time Zone (see P.10-9) A Set date and time (see P.10-9)
Standby appears without date and time
appears after Power On Graphics.
Page 63
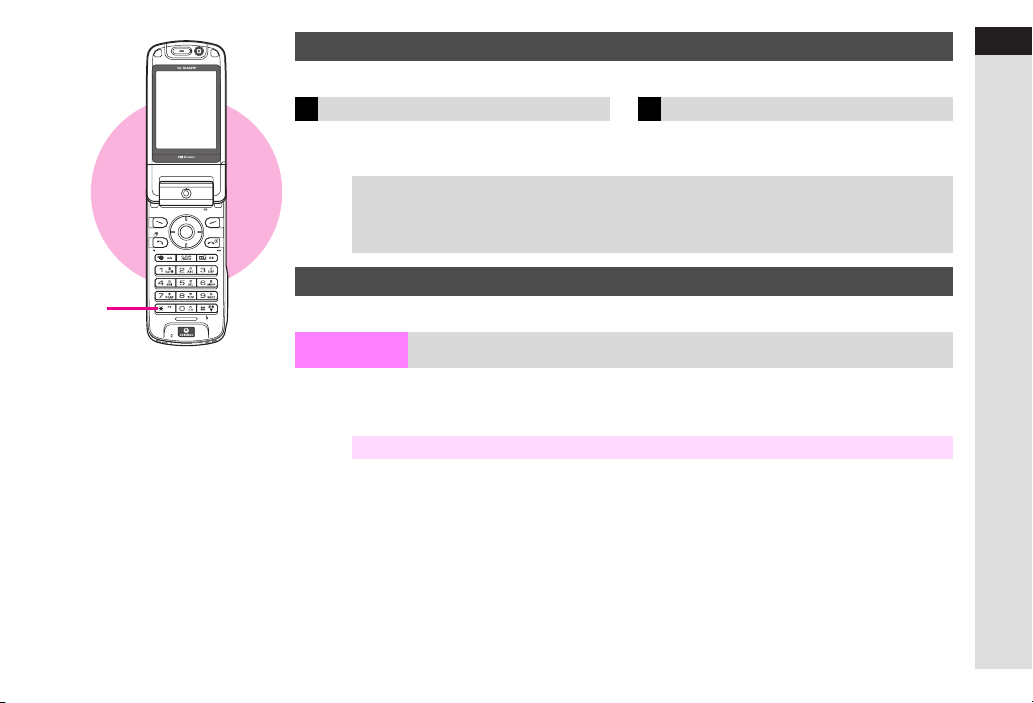
1
Keypad Lock
Use Keypad Lock to lock handset keys and prevent accidental activation of functions or operations.
Activate Cancel
Press ; for 1+ seconds
1
b
appears and Keypad Lock is set.
TipHWhen Keypad Lock is Active
^
Incoming calls temporarily cancel Keypad Lock. To answer calls, press keys for Any Key
Answer (see P.2-5). Keypad Lock reactivates after the calls end.
^
Handset power does not turn off even if g is pressed for 2+ seconds.
In Standby, press ; for 1+ seconds
1
b
disappears.
Pen Light
Use handset as a flashlight.
1
Getting Started
Pen Light On/Off
In Standby, press c (Long Press) A Pen Light illuminates
C
To change illumination colour, press L or M while on.
C
Press c to turn off.
Note
H
Turn Pen Light on and off
Do not point Pen Light at people's faces or look into the light yourself.
1-29
Page 64
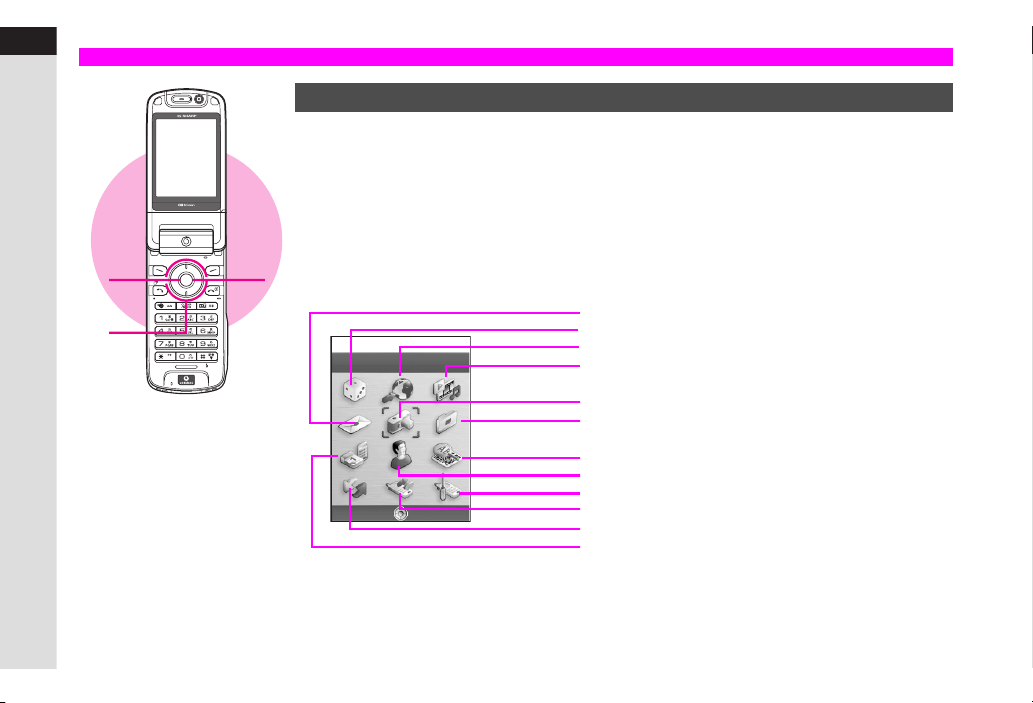
1
Handset Menus
Getting Started
1
2
Main Menu
Access functions/operations from Main Menu.
b
Press
1
Main Menu opens.
C
In Viewer position, press h.
Use G to select an item
2
C
In Viewer position, press L or M.
CMain Menu Items
3
NJ
Camera
Select Exit
b
Press
3
Sub Menu opens (see P.16-2).
C
In Viewer position, press h.
Mail Messages
V-applications
Vodafone live! (Mobile Internet sites)
Media Player
Mobile Camera
Data Folder
Barcode/Text Scanner
Phone Book
Settings
Call Log
Connectivity (Infrared, Bluetooth, etc.)
Tools (Calendar, Alarm, World Clock, etc.)
1-30
Page 65
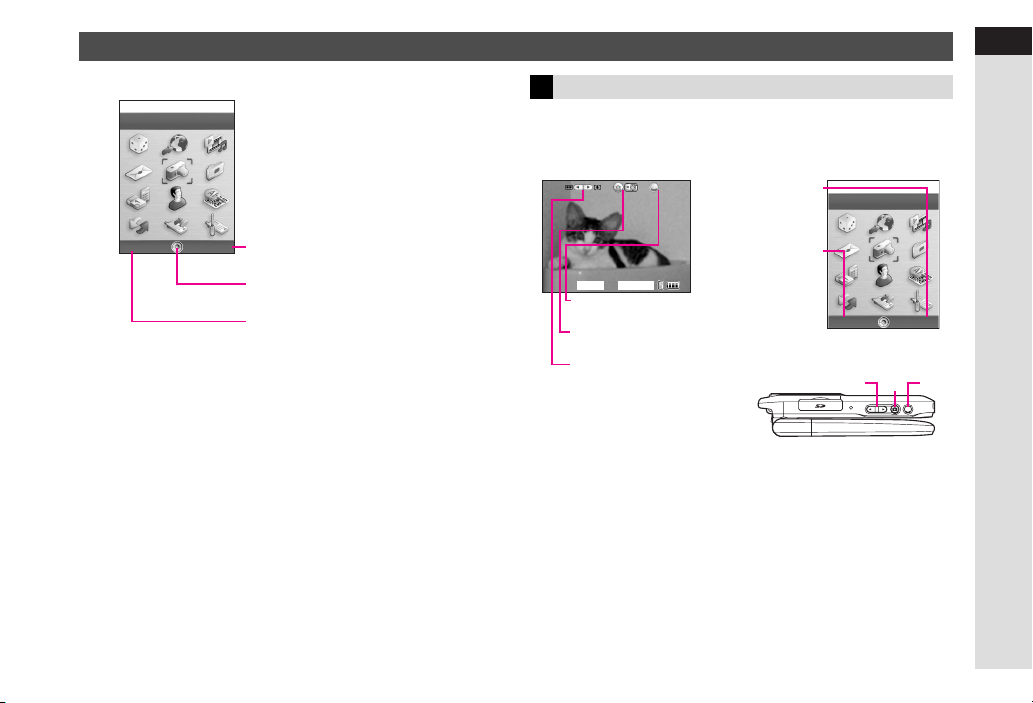
Soft Keys
Options
Soft Key functions appear at the bottom of Display.
NJ
Camera
Select Exit
Press d to select or execute
the assigned function or operation.
Press b to select or execute
the assigned function or operation.
Press e to select or execute
the assigned function or operation.
Soft Key Assignments (Viewer)
Soft Key functions appear at the top of Display when mobile
camera is active.
Mobile Camera
NFOIQcKA
Press c to select or execute
the assigned function or operation.
Press h to select or execute
the assigned function or operation.
Press LM to select or execute
the assigned function or operation.
Options
Press c to select or
execute the assigned
function or operation.
Press h to select or
execute the assigned
function or operation.
Other Windows
NJ
Camera
Select Exit
h
LM
c
1
Getting Started
1-31
Page 66
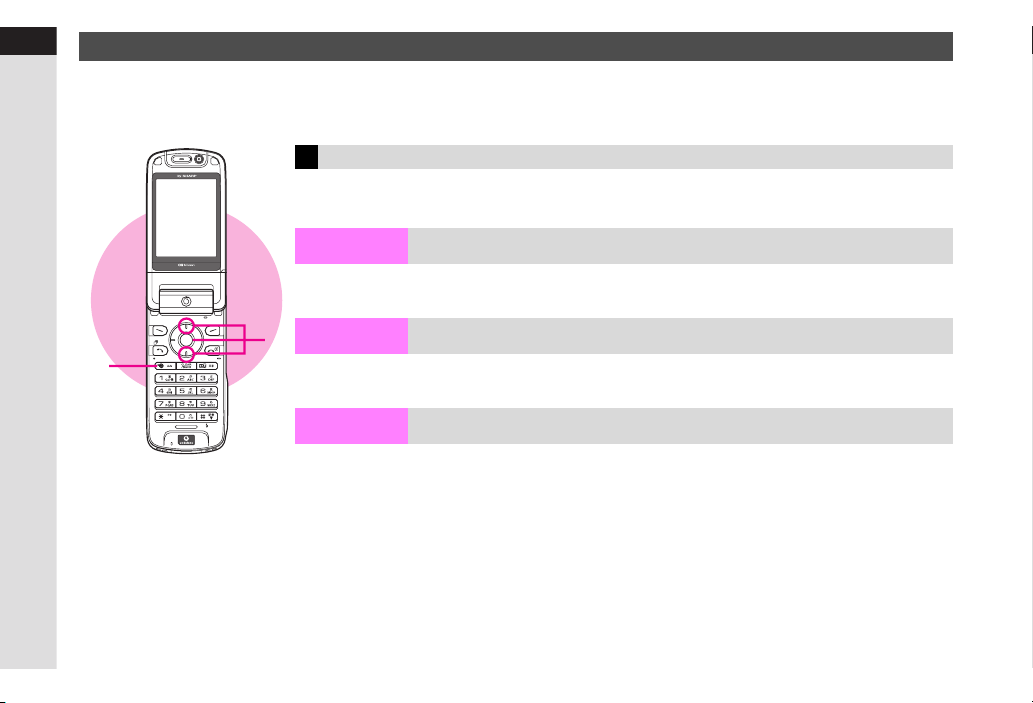
1
User Shortcuts
Getting Started
Create shortcuts to functions and files.
Default shortcuts:
B
Dialled Numbers, Received Calls, Calendar, Calculator and Voice Recorder
Using Shortcuts
k
Press
1
Select a function and press
2
b
1-32
1
Assign
Press k A Select an item A Press e P A Select Assign A Press b A
Select new item A Press b
2
Move
Press k A Select an item A Press e P A Select Move A Press b A
Use E to move position A Press b
Set to Default
Press k A Press e P A Select Set to Default A Press b A
Press e i
Change default shortcuts
Change the order of items
Return to default shortcuts
Page 67

Security Codes
Handset Code, Centre Access Code and Network Password are needed for handset use.
1
Getting Started
Handset Code
9999 or the 4-digit number selected at initial subscription.
Handset Code is required to use/change some handset
functions.
^ U appears when Handset Code is entered.
^ If incorrect, Handset code is incorrect! appears. Enter
correct Handset Code.
Centre Access Code
The 4-digit number in the contract, required to access Voice
Mail via landlines, and to subscribe to fee-based information.
^
H
Note
Tip
Write down Handset Code, Centre Access Code and Network Password. If lost, contact Vodafone Customer Centre, General
Information (see P.16-32).
^
Do not reveal Handset Code, Centre Access Code and Network Password. Vodafone is not liable for misuse or damages.
^
H
Change Handset Code and Network Password as needed (see P.10-14, P.12-10).
^
Do not attempt to change Centre Access Code.
Contact Vodafone Customer Centre, General Information (see P.16-32) for details.
Network Password
The 4-digit number selected at initial subscription, required
to restrict handset services. If Network Password is
incorrectly entered three times, Call Barring settings are
locked. To resolve, Network Password and Centre Access
Code must be changed. For details, contact Vodafone
Customer Centre, General Information (see P.16-32).
1-33
Page 68

Basic Handset Operations
2-1
Page 69
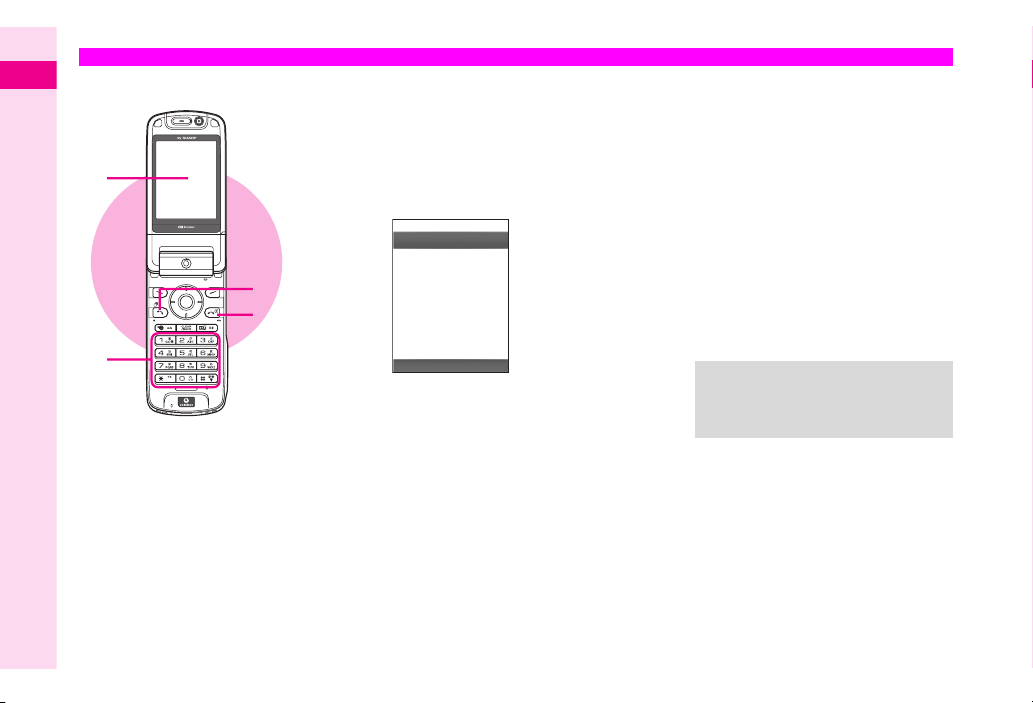
Initiating a Voice Call (in Japan)
2
See P.2-15 for Voice Call from outside Japan and P.5-3 for TV Call.
Basic Handset Operations
Confirm handset is on
1
^
Check signal.
^
Handset will not transmit when S, e, b or
l
1
appears (see
Enter a phone number
2
P.16-4
NJ
EnterNumber
3
4
2
^
Include the dialling code even for local numbers.
Sending/Blocking Caller ID
^
Press the following keys when placing a call.
090392XXXX1
Options Back
B
Send
186
......
;31:
B
Block
184
......
:31:
Alternatively, press e
Show My ID or Hide My ID
).
or
or
P A
A
Select
Press
b
Confirm the number and press
3
Correcting Wrong Numbers
^
Use B or A to move cursor and press
i
to delete the digit above the cursor.
i
Press
entire number and return to Standby.
If you misdial, press
again.
Busy Numbers
^
Press g to end the call and try again later.
Press g to end call
4
^
Alternatively, close handset (clamshell
closed).
H
Tip
for 1+ seconds to delete the
g
to hang up and try
^
Check Call Timers (see P.2-12) and
Call Costs (see P.2-13).
^
Use Loudspeaker when placing calls
(see P.2-9).
f
2-2
Page 70
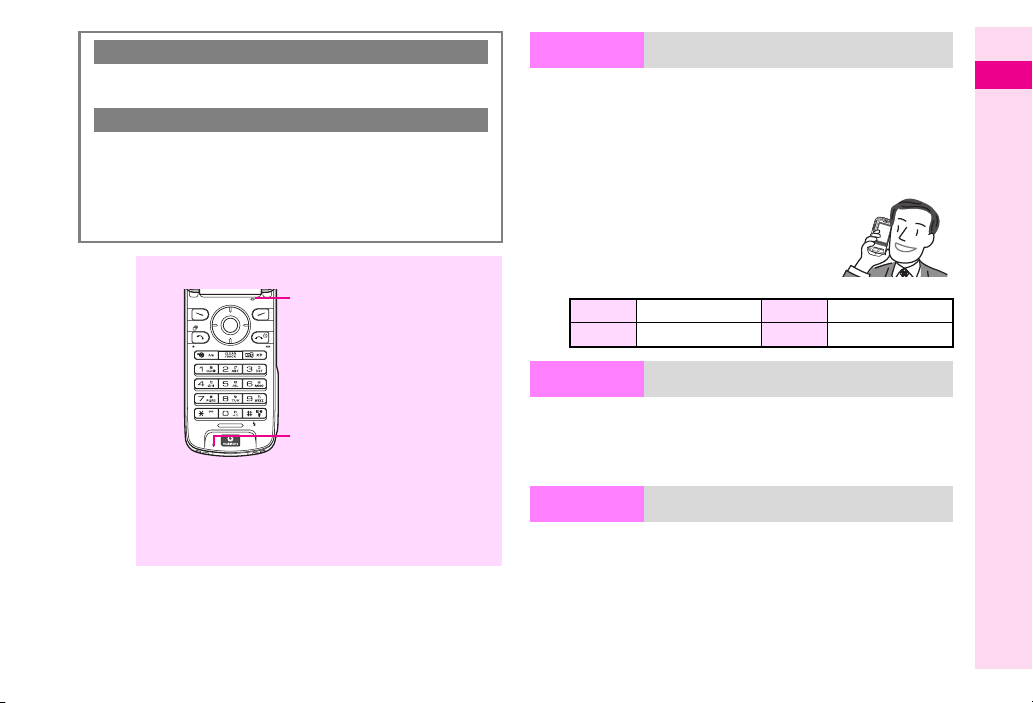
Supported Network Systems
902SH is compatible with 3G and GSM network systems. See
P.2-14 to change system.
Making an International Call
A
In Standby, enter a phone number
P
A Select Country Code A Press b A
A
Select a country
A
Press b A Press
When calling Vodafone handsets, country code is not required.
^
H
Note
Do not cover handset microphone while talking.
Press b twice A Select Japan
f
Microphone
(Viewer position)
Press e
Viewer Position
Place calls with Display in Viewer position
C
Save the number to Phone Book first (see P.4-2).
Press h A Select Phone Book A Press h A Select
Phone Book List A Press h
Open a Phone Book entry (see P.4-9) A Press h
A
A
Select
Call A
Press
h
C
Press c to end the call.
^
In Viewer position, hold handset with
Viewer in and Earpiece up.
^
Side Key Assignments during Calls:
h
Open Options menu
c
End call
M
L
Increase volume
Decrease volume
P
2
Basic Handset Operations
Microphone
(handset open)
^
Avoid covering area over Internal Antenna (see P.1-10 R).
^
Voice quality is affected depending on how and where
handset is used.
^
For better voice quality, talk with handset open
(clamshell open).
Hold
C
Subscribe to Call Waiting (see P.12-5) or Conference Call (see P.12-6).
Hold tone sounds and each other's voice is not
heard
During a call, press e P A Select Hold A
Press b
C
To cancel, press b A Select Retrieve A Press
Mute
Microphone
Mute your handset microphone
Other party's voice can be heard
b
During a call, press e P A Select Mute
Microphone A Press b
C
To cancel, press e
b
Press
P A
Select Unmute Mic. A
2-3
Page 71
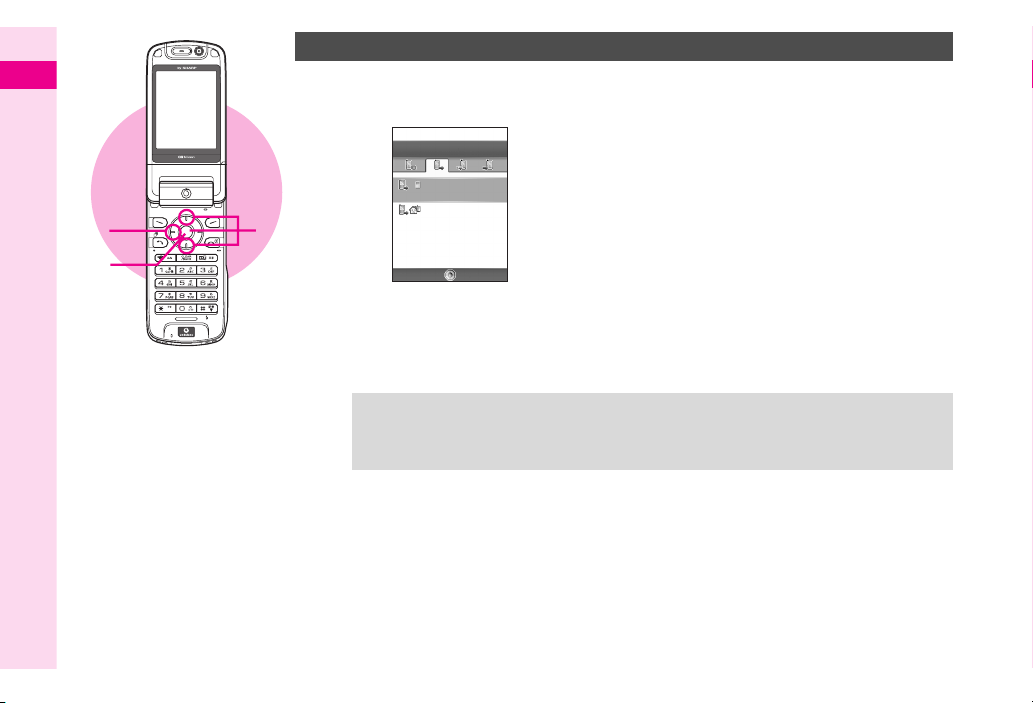
2
Basic Handset Operations
1
3
Redial
Up to 10 recently dialled numbers are saved in Dialled Numbers. Place calls from Dialled Numbers.
B
2
Press
1
Dialled numbers appear with date and time.
Name appears if saved in Phone Book.
^
Press D or C to see more.
^
Press F to see Missed Calls, Received
Calls or All Calls.
H
Tip
NJ
DialledNumbers
03123XXXX1
04/12/1616:50
mikioueda
04/12/1314:15
03123XXXX1
16‑11‑200404:50PM
Options Back
^
When the same number is dialled more than once, only the last record appears.
^
Records remain even after handset power is turned off.
^
When there are 10 records, oldest records are replaced by new ones. Alternatively, delete
records manually (see P.2-11).
Select a record and press
2
b
Press
3
Number is dialled.
b
2-4
Page 72
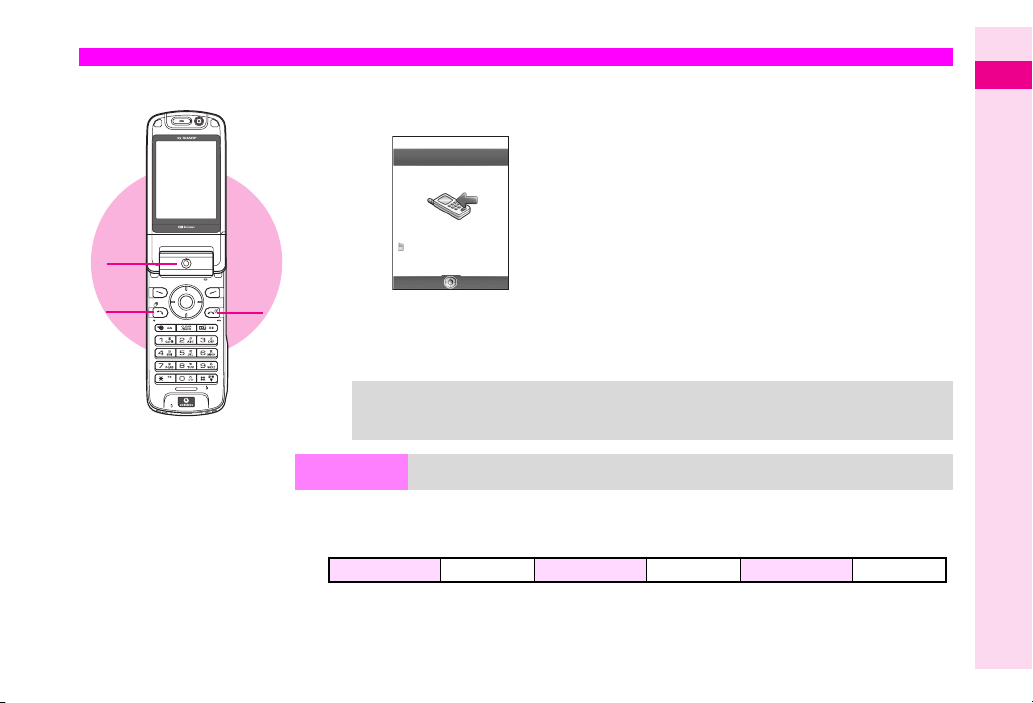
Incoming Voice Call
See P.5-3 for incoming TV Call.
When a call arrives, open handset
1
N7 J
VoiceCall...
f
Press
2
Press g to end call
3
^
Alternatively, close handset (clamshell closed).
2
Basic Handset Operations
1
2
03123XXXX1
Answer Busy
^
3
Number appears when Caller ID is sent.
(Caller's name appears if the number is
saved in Phone Book.)
H
When Any Key Answer is active (see P.10-3), press any of the following keys (besides f) to
Tip
answer calls:
0
- 9, ;, :, G, k, j, L,
Viewer Position
When a call arrives, press h
C
Press c to end the call.
^
Side Key Assignments for Incoming Calls:
h
*
Available if When Busy (forwarding condition) is set for Call Forwarding or Voice Mail. Calls are
rejected when Off (see P.12-3 - 12-4).
B
For operations during calls in Viewer position, see P.2-3.
M
Answer calls with Display in Viewer position
Answer call
c
*Forward callc (Long Press) Reject call
2-5
Page 73
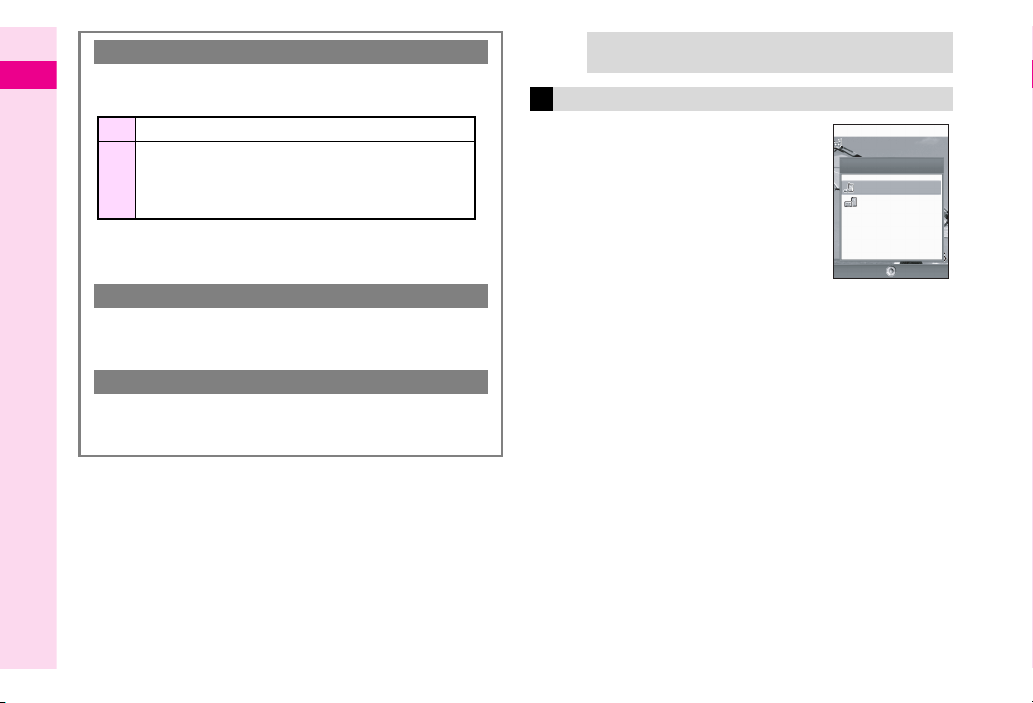
Rejecting or Forwarding Incoming Calls
While handset is ringing/vibrating, use the keys below to reject
2
Basic Handset Operations
or forward an incoming call.
g
Reject a call (see P.2-8)
Forward a call to a preset number.
Available if When Busy (forwarding condition) is set
d
for Call Forwarding or Voice Mail. Calls are rejected if
Off (see P.12-3 - 12-4).
^
Alternatively, activate Message Recorder (see P.2-20).
^
For operations in Viewer position, see P.2-5.
When Message Recorder is Active
Outgoing message plays and recording starts (see P.2-20). When
Message Recorder is not active, use Quick Recorder (see P.2-21).
^
Caller incurs charges in either case.
Caller ID
C
Phone numbers do not appear when Caller ID is not sent.
Unset ID appears instead.
C
Up to 10 incoming calls details are saved (see P.2-7).
H
Change Ringtone volumes, patterns, or Mobile Light
Tip
colours (see P.10-2 - 10-3).
Information
Information window opens for missed
calls or Message Recorder messages.
Select Call and press b to see details
(see P.2-11).
NJ
Information
1Call
1VoiceMsg.
Select Exit
2-6
Page 74
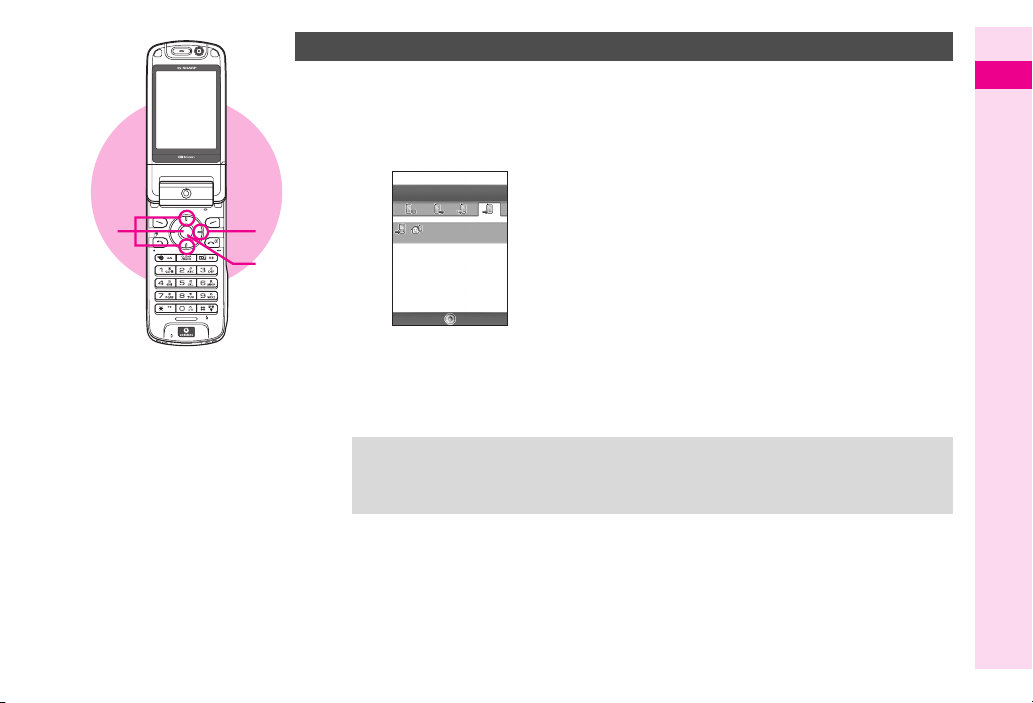
2
Calling from Received Calls
When Caller ID is sent, numbers appear.
Up to 10 received calls are saved in Received Calls (see P.2-11). Place calls to those
numbers.
A
1
3
Press
1
Received numbers appear with date and time.
Name appears if saved in Phone Book.
^
Press D or C to see more.
^
Press F to see Dialled Numbers, Missed
Calls or All Calls.
H
Tip
N7X67k1KsgJ
ReceivedCalls
mikioueda
04/12/1520:50
03123XXXX1
16‑11‑200404:50PM
Options Back
^
Names in Secret mode entries appear only when handset is in Secret mode.
^
Records remain even after handset power is turned off.
^
When there are 10 records, oldest records are replaced by new ones. Alternatively, delete
records manually (see P.2-11).
Select a record and press
2
b
Press
3
Number is dialled.
b
2
Basic Handset Operations
2-7
Page 75
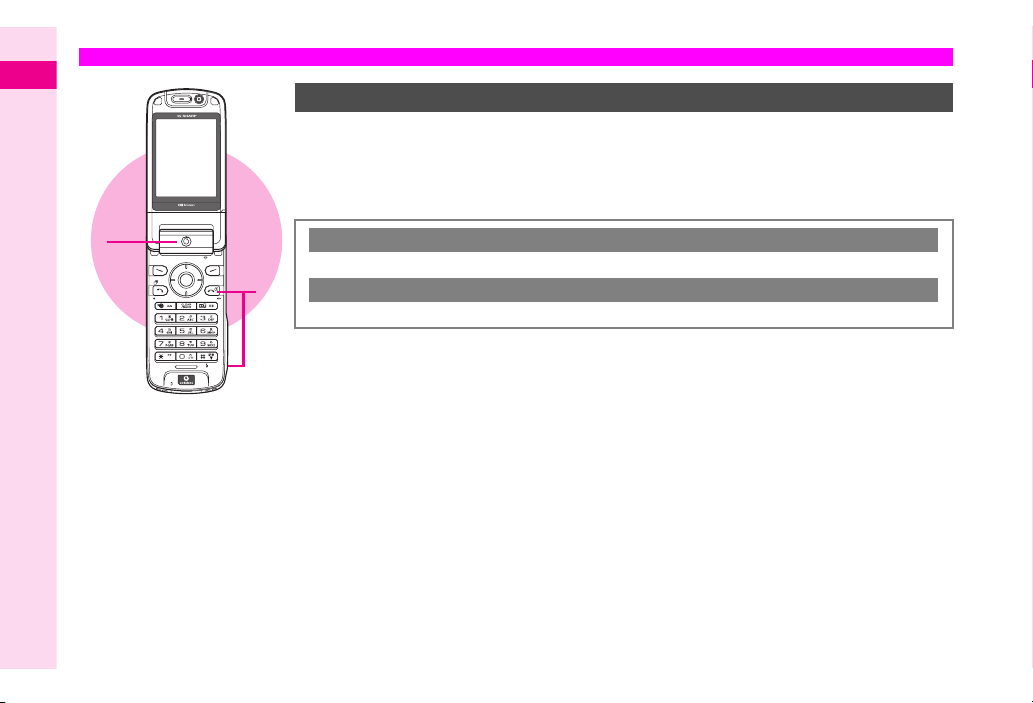
Rejecting Incoming Calls
2
Basic Handset Operations
Rejecting a Call
Calls are rejected and saved in Missed Calls.
When a call arrives, open handset
1
While handset is ringing/vibrating,
2
press g or c for 1+ seconds
2-8
1
Voice Mail
Unanswered calls are forwarded to Voice Mail (see P.12-4).
2
When Message Recorder is not active, use Quick Recorder (see P.2-21).
Message Recorder
Page 76
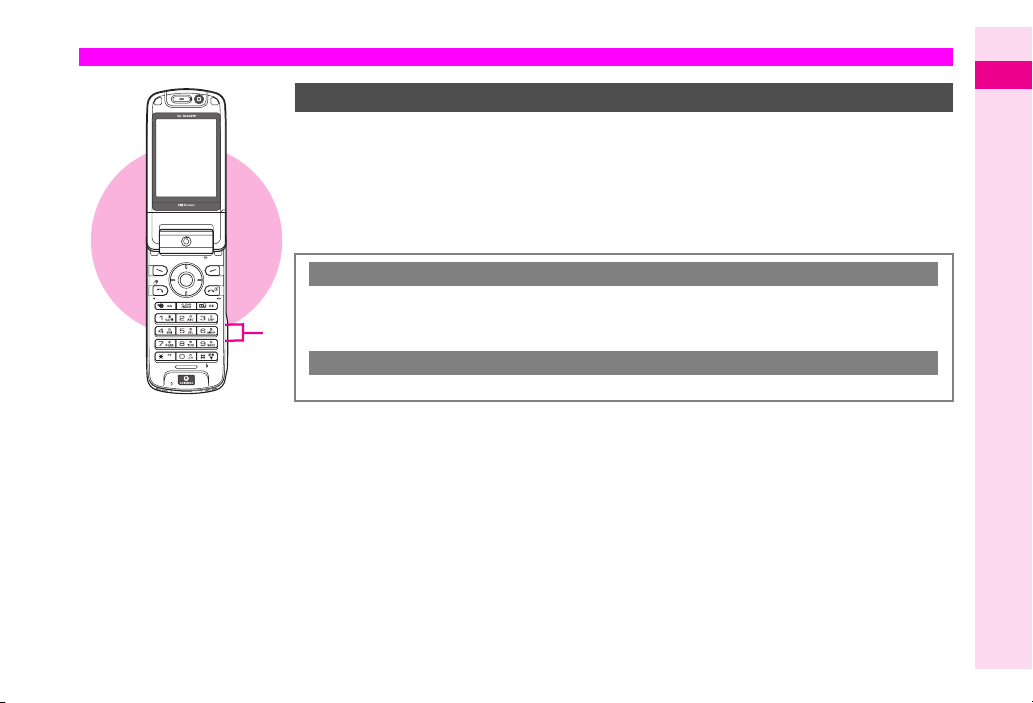
Engaged Call Operations
Earpiece Volume
Adjust Earpiece Volume (5 levels). Earpiece Volume is Level:3 by default.
During a call, press L or
1
Use Loudspeaker for handsfree conversations.
During a call, press e
B
1
To cancel, press e
2
During a call, press Keypad (0 - 9, ; or :) to send individual Touch Tone.
P A
P A
M
Loudspeaker
Select
Select Loudspeaker Off A Press
Touch Tone
Press L (up) or M (down) to
2
adjust volume level
Each press changes volume.
^
Volume level remains as set even after
handset power is turned off.
Loudspeaker On
A Press
b
b
2
Basic Handset Operations
2-9
Page 77
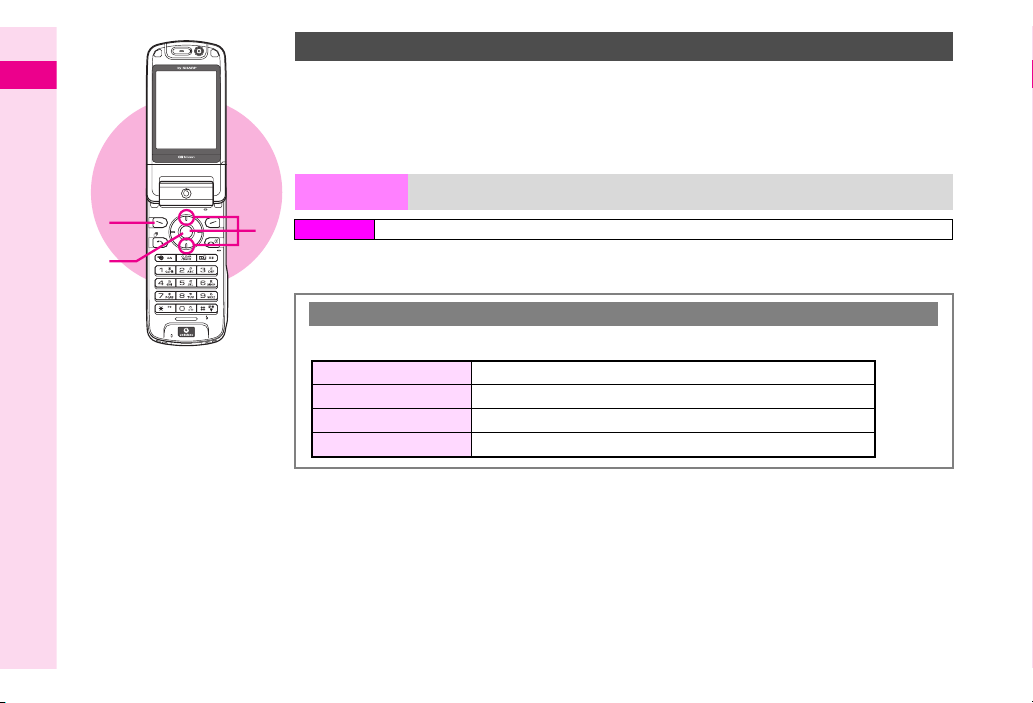
2
Basic Handset Operations
Voice Memo
During a call, press e
1
Select Record and press
2
Recording starts.
P
b
Press b to stop
3
^
Alternatively, end call to stop.
^
Recordings remain even after handset power
is turned off.
2-10
1
3
Play
Main MenuH Call Log A Message Recorder
2
Select Play A Press b
C
To delete, press e
During a call, press e
Phone Book List Call another number saved in Phone Book
Messages Create a new message or check received/sent/draft messages
Dial New Number Call another number
Disable/Enable DTMF Disable/enable sending Touch Tones during a call
Play Voice Memos
P
while message is playing A Select
Other Engaged Call Operations
P
.
Delete
A Press b A Press e
i
Page 78
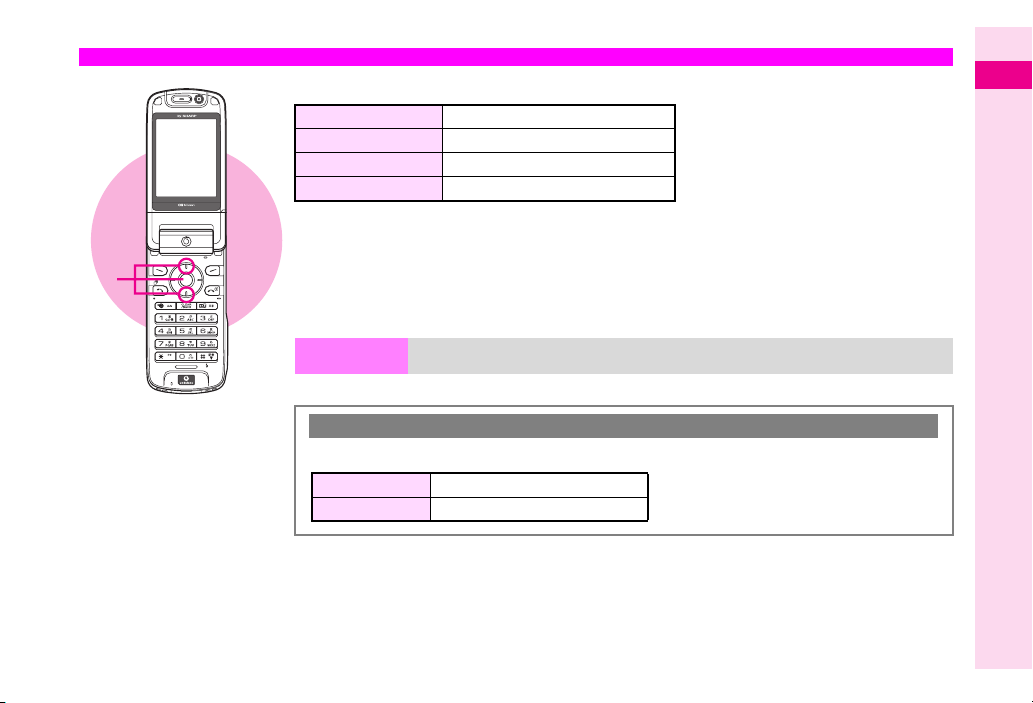
Call History
1
2
Open the following records:
All Calls All received, missed or dialled calls
Dialled Numbers All outgoing calls
Missed Calls Unanswered calls
Received Calls Answered calls
Make calls or send messages from call history.
f
Press
1
All Calls appears.
C
Press F to see others.
2
Select a record and press
Record details appear.
C
To initiate a Voice Call, press f.
C
To initiate a TV Call, press e
Select TV Call
A
Press
b
b
P A
2
Basic Handset Operations
Delete
Select a record A Press e P A Select Delete A Press b A Press e i
Open call history and press e
Save Number Save the number to Phone Book
Create Message Compose a new message
Delete selected call history records
Call History Options
P
.
2-11
Page 79
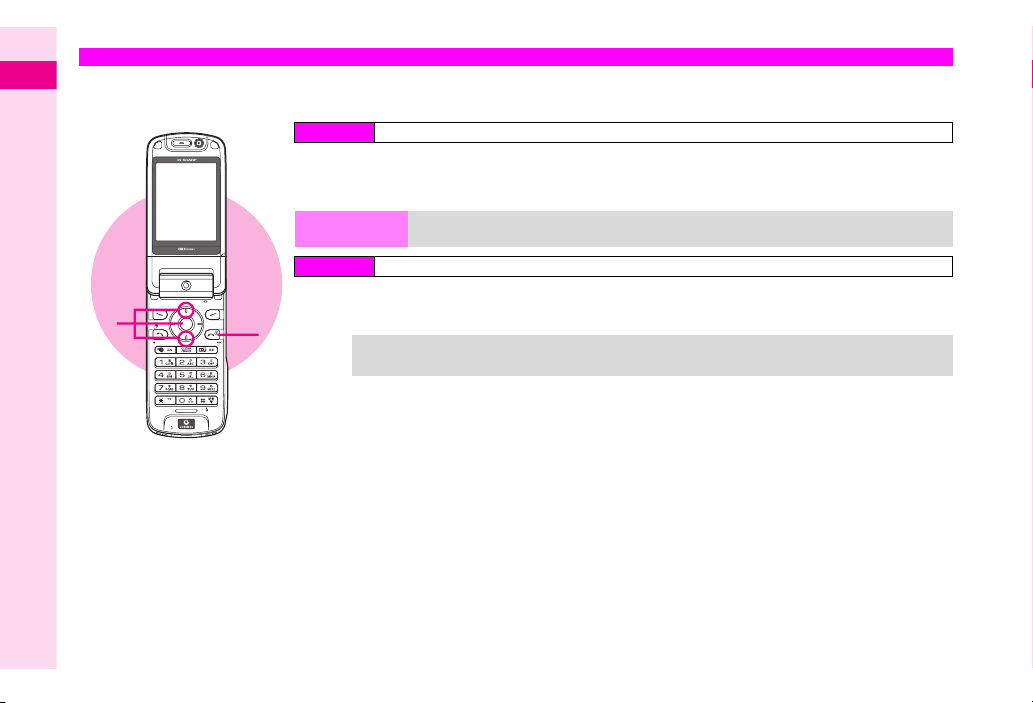
Call Time
2
Check estimated call time of the most recent call (Last Call Time) and the total call time (All Calls Time).
Basic Handset Operations
Check call time for Dialled Calls or Received Calls.
H
Call Log A Call Timers
Press g to exit
b
^
Last Call Time and All Calls Time remain even if handset power is turned off.
^
Ring time for incoming or outgoing calls is not counted. On hold time is counted.
2
1
Main Menu
Select Received Calls or Dialled
1
Calls and press
Clear Timers Reset Call Timers
Main MenuH Call Log A Call Timers
Select Clear Timers A Press b A Enter Handset Code A Press e K A
Press e i
2
Tip
H
2-12
Page 80
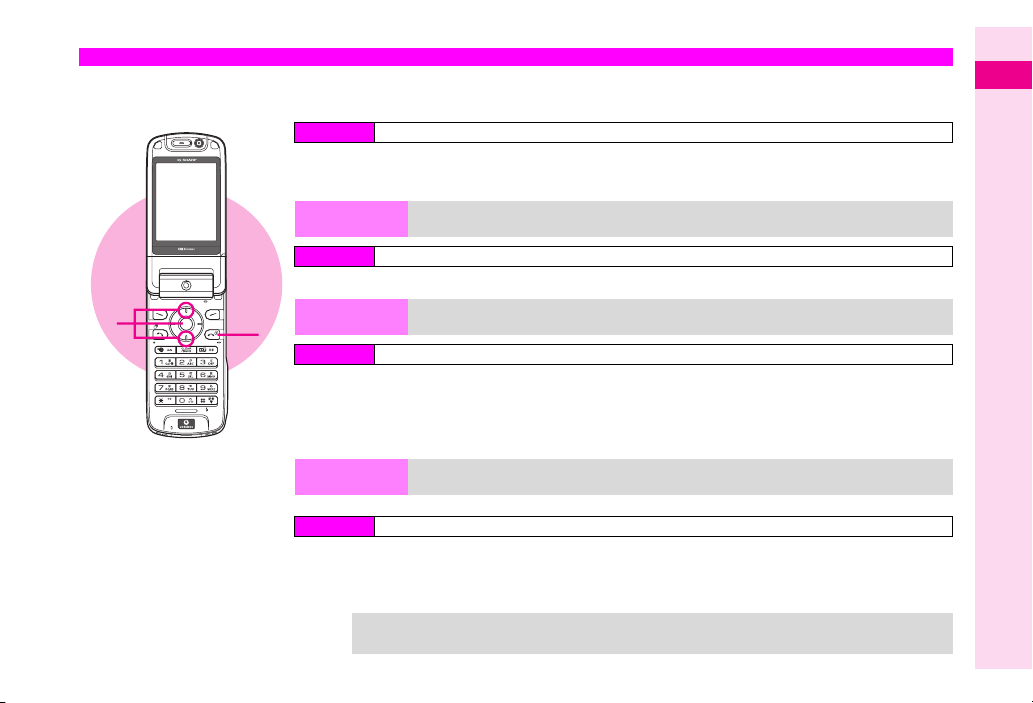
Call Charge
Check estimated call charge of the most recent call (Last Call Cost) and total charges (All Calls Costs).
Set a limit of total charges.
H
Call Log A Call Costs
Press g to exit
b
Reset call charge records
H
Call Log A Call Costs
Set a limit of total charges
When the limit is exceeded, outgoing calls are blocked
H
Call Log A Call Costs
Max Cost A
To check the set limit, select Max Cost A Press b A Select Read Limit A Press
To check the remaining amount, select Residual Credit A Press
H
Cost Units A
To check Cost Unit, select Cost Units A Press b A Select Read Units A Press
^
Last Call Cost and All Calls Costs remain even if handset power is turned off.
^
Sum of charges appears for Conference Call (Optional Service).
Press b A Select
b
Call Log A Call Costs
Press b A Select
2
Set Limit A
Set Units A
Press b A Enter PIN2 A Press b
b
Press b A Enter PIN2 A Press b
1
Main Menu
Select Last Call or All Calls and
1
press
Clear Costs
Main Menu
Select Clear Costs A Press b A Enter PIN2 A Press b A Press e i
Max Cost
2
Main Menu
Select
A
Enter the amount A Press
C
C
Cost Units Set conversion rate to calculate call charges
Main Menu
Select
A
Enter currency unit A Press b A Enter Cost per Unit A Press b twice
C
H
Tip
b
b
K
YEN 1
2
Basic Handset Operations
2-13
Page 81
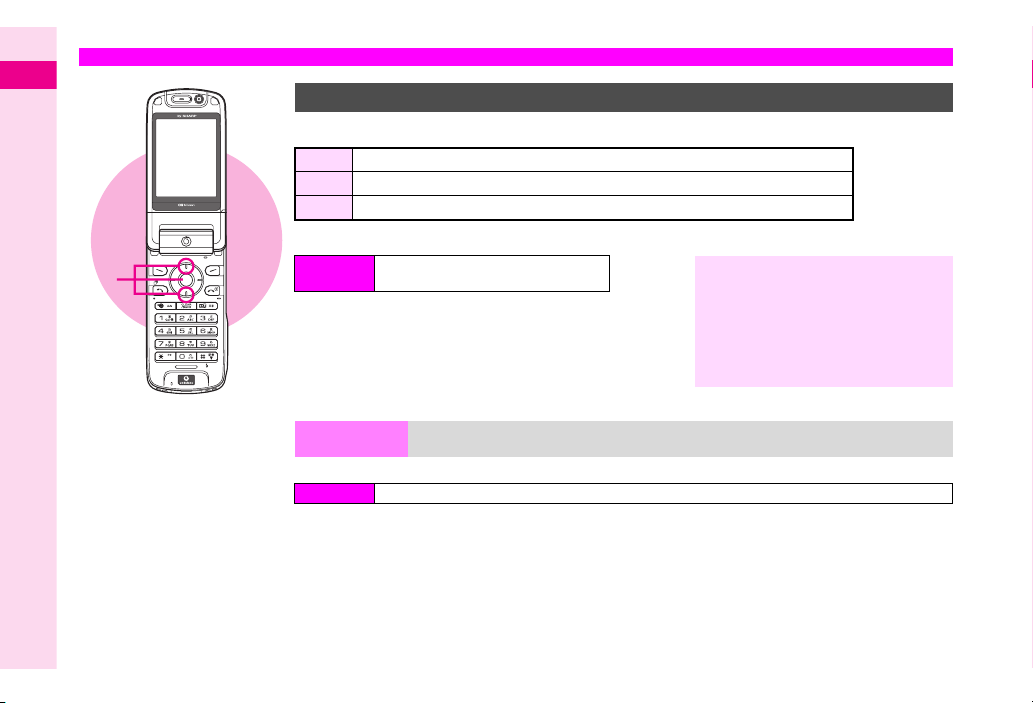
Outside Japan (International Roaming)
2
Basic Handset Operations
1
2
Changing System Settings
902SH is compatible with 3G and GSM network systems.
3G Use in Japan or in 3G service area abroad
GSM Use only in GSM service area outside Japan
Auto Mode changes automatically depending on the current location (network status)
Auto is set by default.
H
Main Menu
Select
1
Select 3G or GSM and press
2
^
Selected system is activated.
C
To change system automatically, select
Auto
Connectivity A Network
Settings
System Settings
A
b
Press
and press
b
b
Note
^
H
For information on international
roaming (available countries, areas,
costs, functions or restrictions),
contact Vodafone Customer Centre,
General Information (see P.16-32).
^
A separate subscription is required for
international roaming.
2-14
Select Network
Main Menu
Select Manual A Press b A Select a Network A Press b
C
To change Network automatically, select Automatic A Press
C
To change priorities of Network selection for Automatic, see P.9-15.
C
Adding Network: see P.9-14
^
Use in default setting (Automatic). Set Manual to connect to a specific Network.
Select a Network to connect
H
Connectivity A Network Settings A Network Settings A Select Network
b
K
Automatic
Page 82
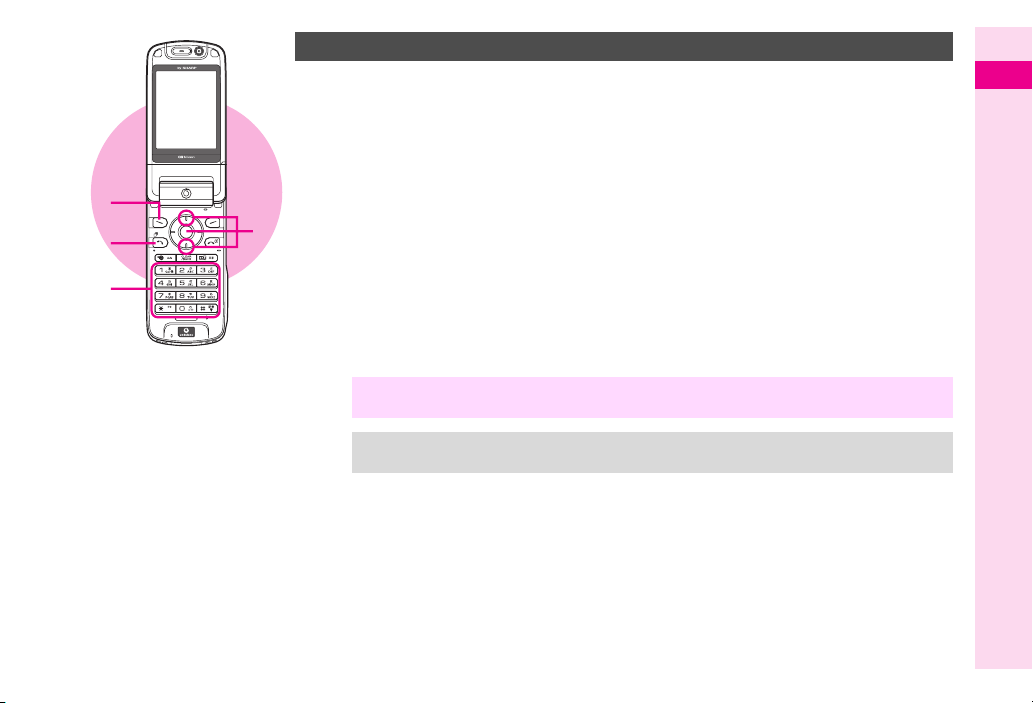
2
7
1
Calling from Outside Japan
Enter a phone number
1
^
Include the dialling code for landline phone
numbers.
C
When calling landlines or handsets within
the country, proceed to Step 7.
C
To enter numbers directly, press 0 for
1+ seconds (
code
3
4
5
6
first
B
When calling numbers in Italy (country
code: 39) or Russia (country code: 7),
include first
Press e
2
Select Country Code and press
3
NoteHOther party's voice may not be heard or handset microphone may be muted in some areas after
placing a call on hold and cancelling it (see P.2-3).
TipHAdding Country Codes
To add country codes frequently used, see P.10-11 "Country Codes".
W
appears) A Enter a country
A
Enter a phone number (omit the
0000
) A Proceed to Step 7
.
0000
P
b
Select a country and press
4
Country code appears.
Calling Unlisted Countries
^
Select Enter Code, press b and enter a
country code.
Calling Vodafone Handsets
^
Always select
b
Press
5
Select Abroad and press
6
^ W
and country code are inserted before the
phone number. The first
the country selected is Italy (39) or Russia (7).
W
indicates international calls.)
(
f
Press
7
日本
日本
日本日本
(country code: 81).
(JPN)
is omitted unless
0
b
b
2
Basic Handset Operations
2-15
Page 83
Manner Mode
2
Basic Handset Operations
Minding Mobile Manners
Please use your handset responsibly. Use these basic tips as a guide. Inappropriate handset use can be both dangerous and
bothersome. Please take care not to disturb others when using your handset. Adjust handset use according to your surroundings.
^ Turn it off in theatres, museums and other places where silence is the norm.
^ Refrain from using it in restaurants, hotel lobbies, lifts, etc.
^ Observe signs and instructions regarding handset use aboard trains, etc.
^ Refrain from use that interrupts the flow of pedestrian or car traffic.
Manner-Related Features
Manner Mode (see P.2-17)
C
Press a single key to automatically mute all Ringtones and
activate Vibration mode for incoming calls and mail.
Vibration Mode (see P.10-3)
C
Activate Vibration mode to use handset vibration to alert
you to incoming calls, mail, etc. in public places.
Volume Settings (see P.10-2)
C
Decrease or mute Ringtone volume for incoming calls/mail
as well as tones for Web or V-applications when carrying
handset in public places.
Off Line Mode (see P.2-18)
C
Use Off Line Mode to suspend all handset transmissions.
When Off Line Mode is active, incoming and outgoing calls/
mail as well as Vodafone live! transmissions are blocked.
Message Recorder (see P.2-20)
C
Use Message Recorder to handle incoming calls when it is
inappropriate or unsafe to answer.
2-16
Page 84
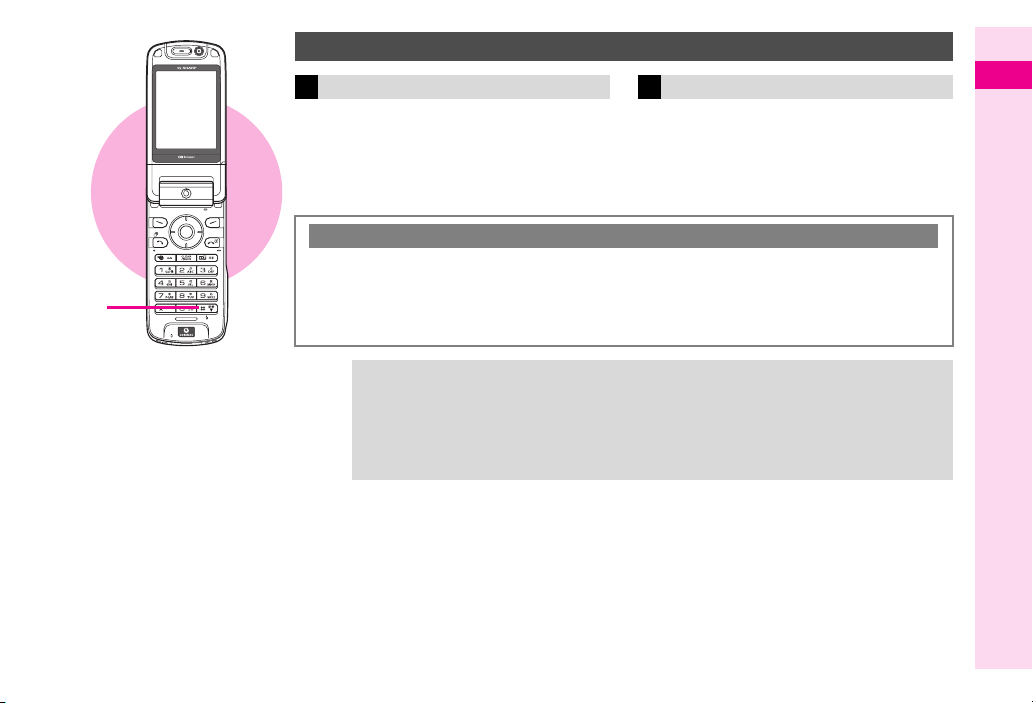
1
Activating/Cancelling Manner Mode
Activate Cancel
Press : for 1+ seconds
1
k
and Manner mode selected. appear.
j
(Message Recorder), f (Vibration),
g
(Silent) and h (Increasing Volume) appear
as set in Manner settings.
When Manner Mode is Active
C
Keypad Tones, Power On/Off, error and barcode recognition tones are muted, but a beep for Switch Line
still sounds (see P.12-6).
C
Shutter click sounds even in Manner mode.
C
Manner mode active. Output sound? appears when Media Player is activated.
C
Message Recorder, Ringtone, Vibration and Mobile Light operate according to Manner settings.
^
Tip
When Message Recorder is recording messages, the other party's voice is heard through Earpiece.
H
^
To change Manner settings, see P.10-2.
To turn on/off Message Recorder in Manner mode, follow these steps.
Press b A Select
Manner
Select
Message Recorder
Settings
A Press b A Select
A
Press e
P A
A
Press b A Choose On or Off A Press
In Standby, press : for 1+ seconds
1
k
disappears and Manner mode is cancelled.
Mode Settings
Select Personalise A Press b A Select
A Press b A
b
2
Basic Handset Operations
2-17
Page 85
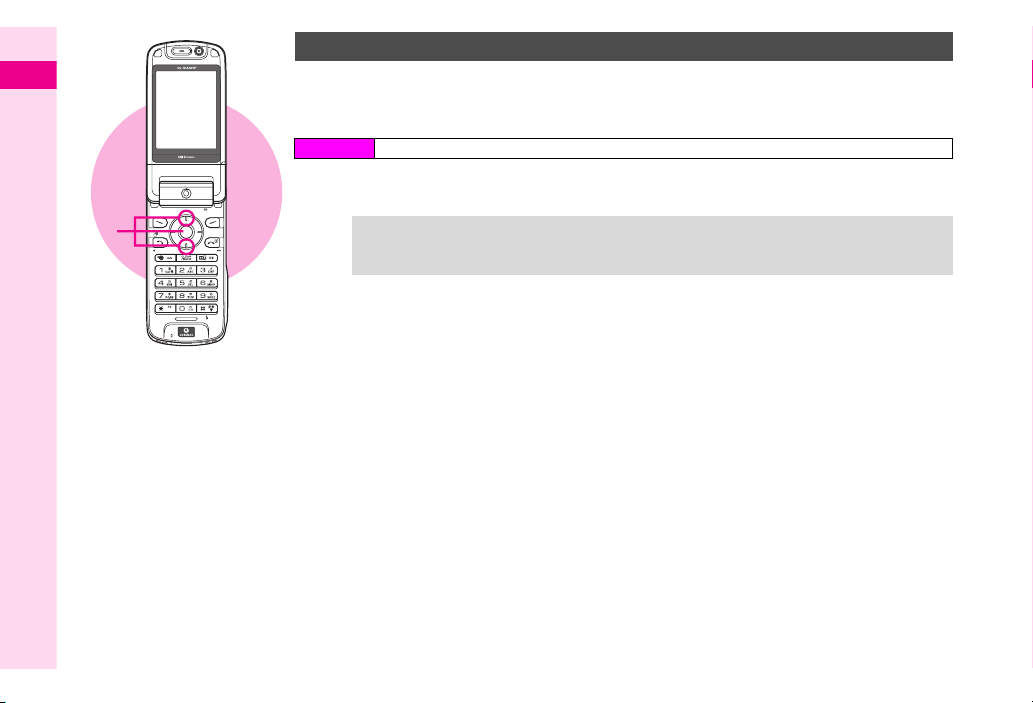
2
Basic Handset Operations
1
2
Activating/Cancelling Off Line Mode
Use Off Line Mode to suspend all handset transmissions.
^
In Off Line Mode, incoming and outgoing calls as well as Vodafone live! transmissions are blocked.
^ Off Line Mode is Off by default.
Main MenuH Connectivity A Network Settings A Network Settings
Select Off Line Mode and press
1
TipHWhen Off Line Mode is set while a Network V-application (see P.15-2) is paused, confirmation
appears. Press
Mode is cancelled.)
e i
to enter Off Line Mode. (Network connection is disabled until Off Line
b
Choose On or Off and press
2
When On is set, e appears.
b
2-18
Page 86

Multi Stereo Headphones
Initiating Calls
Use Call Button on Multi Stereo Headphones to call the
number saved in Speed Dial l (see P.4-12).
Plug Headphones into handset
1
Press Call Button for 1+ seconds until a beep sounds
2
^
The number is dialled.
Press Call Button for 1+ seconds until a beep sounds
3
^
Call ends. Alternatively, press g to disconnect call.
H
If Speed Dial l is a Secret mode entry, activate Secret
Note
mode to call it (see P.10-14).
^
H
Tip
Cancel Phone Lock and Phone Book Lock to place
calls (see P.10-13).
^
Do not wrap cord around handset or Internal Antenna.
Electronic noise from cord may cause malfunction or
interference.
^
Plug in Headphones firmly. If not, sounds may not be heard.
Answering Calls
Plug Headphones into handset
1
Ringer sounds from Headphones and handset speaker.
Press Call Button for 1+ seconds
2
^
Perform Step 3 on the left to end the call.
2
Basic Handset Operations
2-19
Page 87
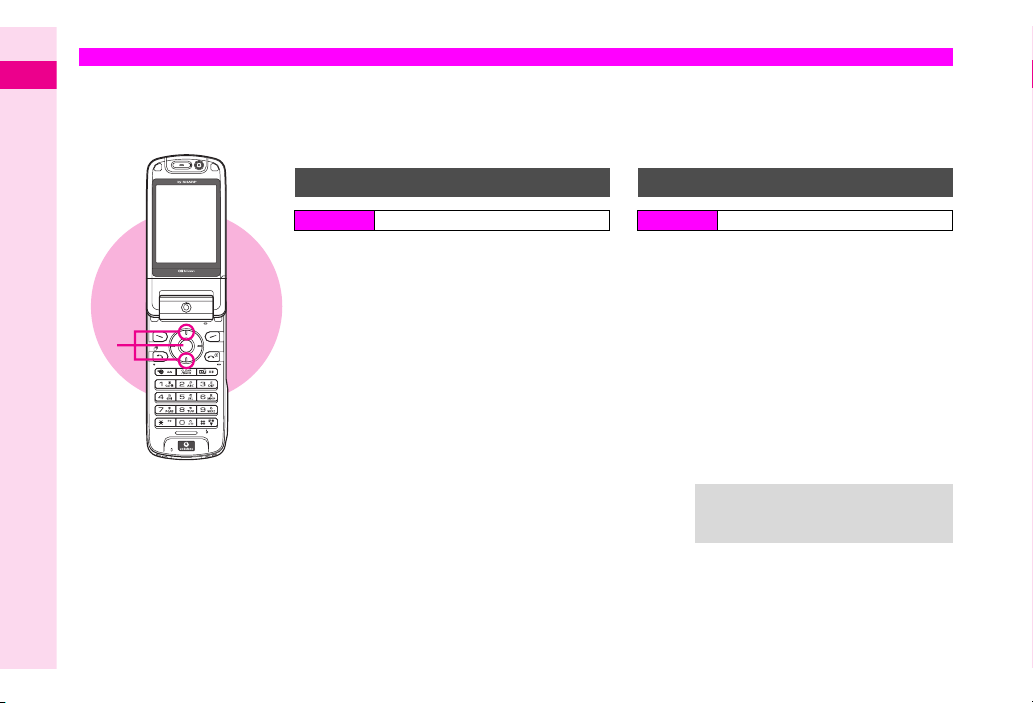
Message Recorder
2
Record caller messages on handset. Message Recorder cannot be used when handset is off, out-of-range or in Off Line
Basic Handset Operations
Mode. Use Voice Mail to record caller messages when Message Recorder is not available (see P.12-4).
Record up to 90 seconds or 20 messages between Message Recorder and Voice Memo (see P.2-10).
2-20
1
2
3
Activate/Deactivate
H
Main Menu
Select Recorder Settings and
1
press
Select On/Off Setting and press
2
C
To sample outgoing message, select
Guidance Message
C
To activate or mute Earpiece for outgoing
message/caller message recordings, select
Volume
Link to Profile or Silent
Choose On and press
3
^
Press g to return to Standby (j appears).
l
(
recorded.)
C
To cancel, choose Off A Press
Call Log A Message Recorder
b
A
Press
A
Press b A Select
A
Press
b
appears in green when messages are
b
b
b
b
Playing Messages
H
Main Menu
Select Play and press
1
Number of recordings appears and playback
starts from the most recent message. After all
messages have played, playback ends
automatically.
C
Press d
C
To skip a message, press A during
playback.
C
To play the previous message, press B
during playback.
C
To delete a message, press
e P
Delete
TipHIncoming Calls
Call Log A Message Recorder
b
W
to stop playback.
during playback A Select
A
Press b A Press e
Message playback stops for incoming calls.
Press f to answer the call.
i
Page 88
Answer Time
C
Adjust ring time between 0 and 59 seconds (Message
Recorder waits to answer calls). Answer Time is 09 seconds
by default.
Press b A Select Call Log A Press b A Select
A
Message Recorder
A
Settings
Press
B
To start recording immediately after a call arrives, enter
00
C
When Message Recorder and Voice Mail or Call Forwarding
are both active, response priority changes depending on ring
time settings.
Example: Ring time for Message Recorder: 9 seconds
Ring time for Voice Mail or Call Forwarding: 10 seconds
In this example, Message Recorder responds first. (Priority
may change depending on signal conditions.)
^
If Message Recorder is full or handset is in Off Line Mode
or out-of-range, incoming calls are handled by Voice Mail
or Call Forwarding.
Press b A Select Answer Time A
b A
Enter time (00 - 59) A Press
A
b
Press
Press b A Select Recorder
b
Message Recorder Disabled
When less than 12 seconds remain or 20 messages are
recorded, Message Recorder is disabled. Delete messages
(see P.2-20) to activate Message Recorder.
When Message Recorder is Active
C
For incoming calls, outgoing message plays and recording starts.
^
Recording continues even if handset is closed.
^
To answer calls, press f during recording (no message
will be recorded).
^
When recording ends, l appears.
C
If recording capacity became full after the recording,
Message Recorder is deactivated and
l
(black) appears.
Quick Recorder
Use Quick Recorder to record caller messages on handset
when Message Recorder is inactive. When a call arrives, follow
the steps below. Outgoing message plays and caller's message
is recorded.
Press b A Select Recording A Press
b
2
Basic Handset Operations
2-21
Page 89

Text Entry
3-1
Page 90
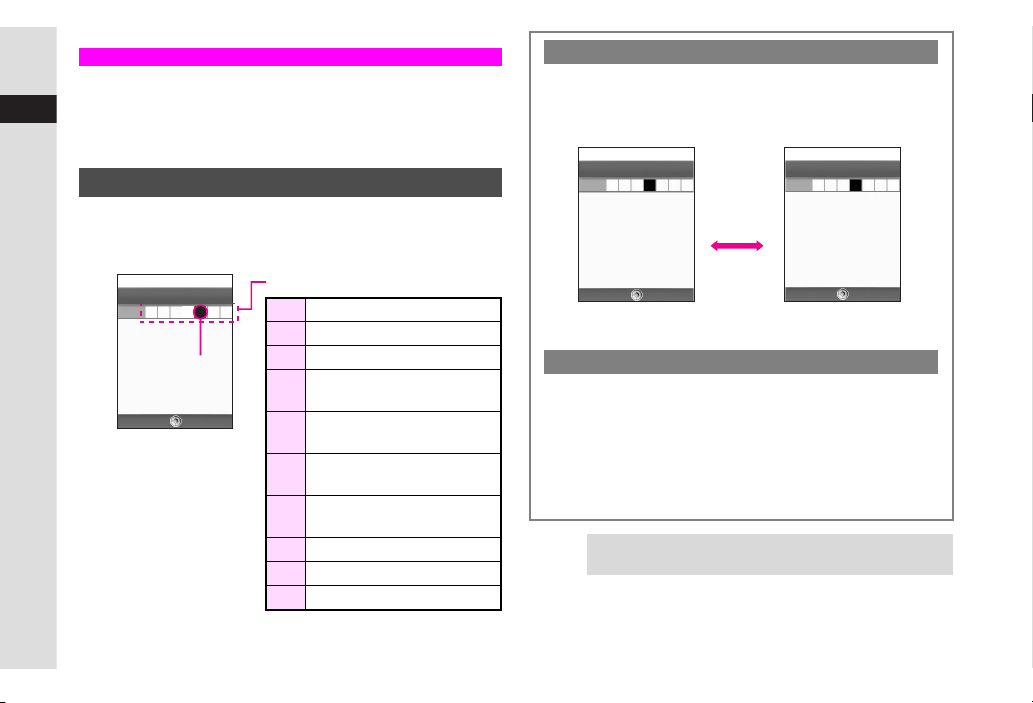
Characters
Use Kana and Pager (see P.3-9) to enter alphanumerics,
Symbols, hiragana, kanji, katakana and Pictographs.
3
Text Entry
Operations are described for Kana Mode except in "Pager
Code" on P.3-9.
Entry Modes
Press j to toggle between character types as follows:
I%J%@%A%D%E%G%I…
Alternatively, press F to toggle between character types.
NJ
Message
ADEG I J@
Current Entry
Mode
Options Back
Available Modes
A
Kanji (hiragana)
D
Double-byte katakana
E
Single-byte katakana
Double-byte alphanumerics
F
(upper/lower case)
Double-byte alphanumerics
G
(lower/upper case)
Single-byte alphanumerics
H
(upper/lower case)
Single-byte alphanumerics
I
(lower/upper case)
J
Single-byte number
@
Pictograph Code
B
Character Code
Upper & Lower Case
In double- or single-byte alphanumerics mode, press k to
toggle between upper case and lower case. For Pager Mode (see
P.3-9), in double- or single-byte character mode, press
toggle between upper and lower case.
NJ
Message
ADEG IJ@
Options Back
Double-byte Alphanumerics
(Lower Case)
k
NJ
ADEF IJ@
Options Back
Double-byte Alphanumerics
(Upper Case)
Message
k
to
Pictograph & Character Codes
Press e to toggle as follows:
Pictograph Code 1 % Pictograph Code 2 %
%
Pictograph Code 3
Pictograph Code 5
Character Code
^
Current Pictograph Code page number appears at the
bottom.
^
H
Tip
Handset Character Codes correspond to 6,355 kanji.
^
Some characters are not available for mail addresses, etc.
Pictograph Code 4 %
%
Pictograph Code 6 %
%
Pictograph Code 1
3-2
Page 91
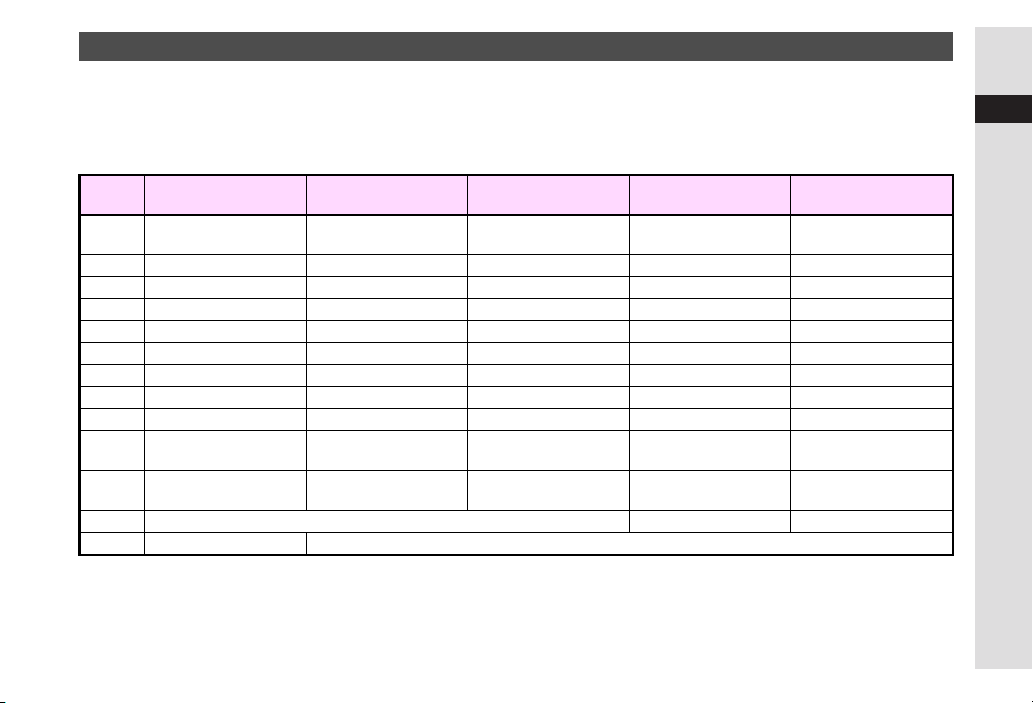
Key Assignments
Multiple characters are assigned to each key. Press a key to toggle between character options for that key.
Example: In katakana entry, press 1 three times for
When entering characters, press f to toggle between character options in reverse. (Not available for entering single-byte
number, Pictographs and Character Codes.)
Example: Enter
Key
1
2
3
4
5
6
7
8
9
0
;
:
C
1
is for phone number entry. Press for 1+ seconds.
+
2
is available only in single-byte katakana entry.
-
3
Extensions are listed for easy entry.
4
(Pause), ? and - are for phone number entry.
P
5
Single-byte for single-byte katakana/alphanumeric entry.
Kanji (Hiragana)
, then press f to return to
いいいい
[Double-byte]
あいうえお
ぁぃぅぇぉ
かきくけこ カキクケコ ABCabc2
さしすせそ サシスセソ DEFdef3
たちつてとっ タチツテトッ GHIghi4
なにぬねの ナニヌネノ JKLjkl5
はひふへほ ハヒフヘホ MNOmno6
まみむめも マミムメモ PQRSpqrs7
やゆよゃゅょ ヤユヨャュョ TUVtuv8
らりるれろ ラリルレロ WXYZwxyz9
わをんー、。
わをんー、。
わをんー、。わをんー、。
(Line Break)
X
゛゜
Log, Double-byte Symbol5/Pictograph Code #
Conversion (Up) Cursor Up
Katakana
[Double & Single-byte]
アイウエオ
ァィゥェォ
ワヲンー、。
ワヲンー、。
ワヲンー、。ワヲンー、。
X
(Line Break)
2
゛゜
゛゜
-
゛゜゛゜
ああああ
.
.
ウウウウ
Alphanumerics
[Double & Single-byte]
@./_―1
X(space)
(Line Break) 0 +
,.0
,.0X
,.0,.0
Single-byte Mail/
Web Extensions
3
Numbers
[Single-byte]
11
22
33
44
55
66
77
88
99
1
U
P (Pause) ? -
Pictograph Code 1 - 6
& Character Codes
4
-----------------
-----------------
0
3
Text Entry
3-3
Page 92
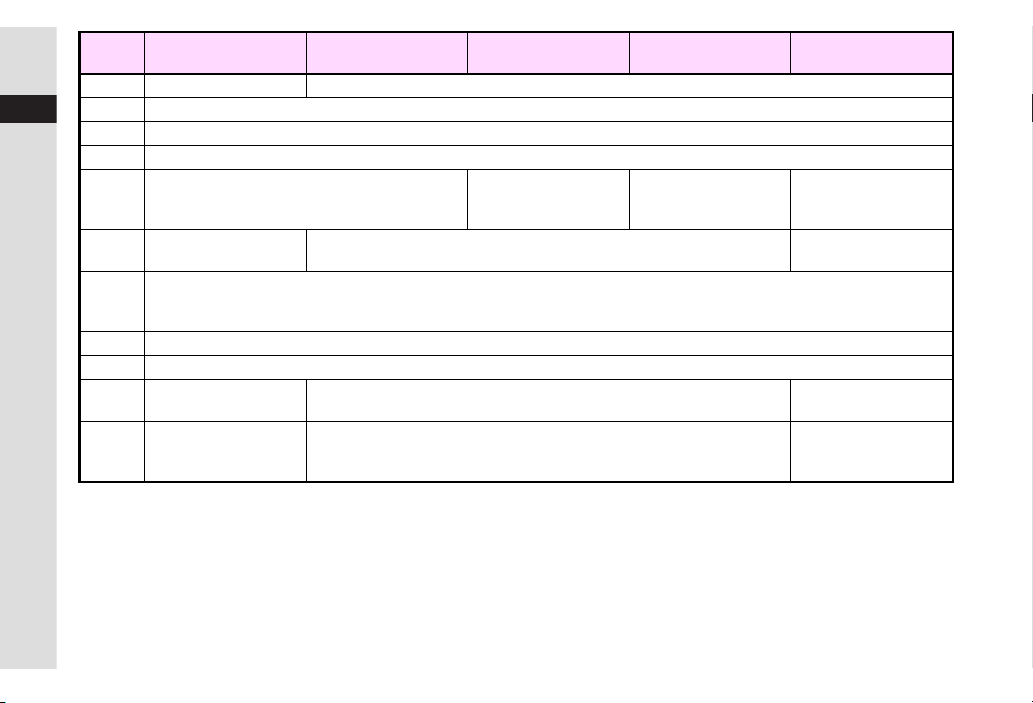
3
Text Entry
Key
D
B
A
j
Kanji (Hiragana)
[Double-byte]
Conversion (Down) Cursor Down X (Line Break)
Katakana
[Double & Single-byte]
Alphanumerics
[Double & Single-byte]
Cursor Left
Cursor Right
Change Character Type
Numbers
[Single-byte]
Toggle case + Toggle
k
Toggle case (for some characters)
mode (upper & lower/
----------------- -----------------
lower case)
Delete One Character/
i
Press
Cancel Conversion
Delete One Character
i
Long
Delete before or after cursor
Press
f
b
e
Phonetic Conversion
Recover up to 64 deleted characters
OK
-----------------
6
Hiragana to Katakana/
d
Alphanumerics
-----------------
Conversion
6
Press f once for each character to recover immediately after deleting. [Not available after deleting text with i (Long Press).]
Pictograph Code 1 - 6
& Character Codes
Delete Code/
One Character
Switch Pictograph Code
1 - 6/Character Codes
Pictograph Code 1 - 6/
Log List
3-4
Page 93
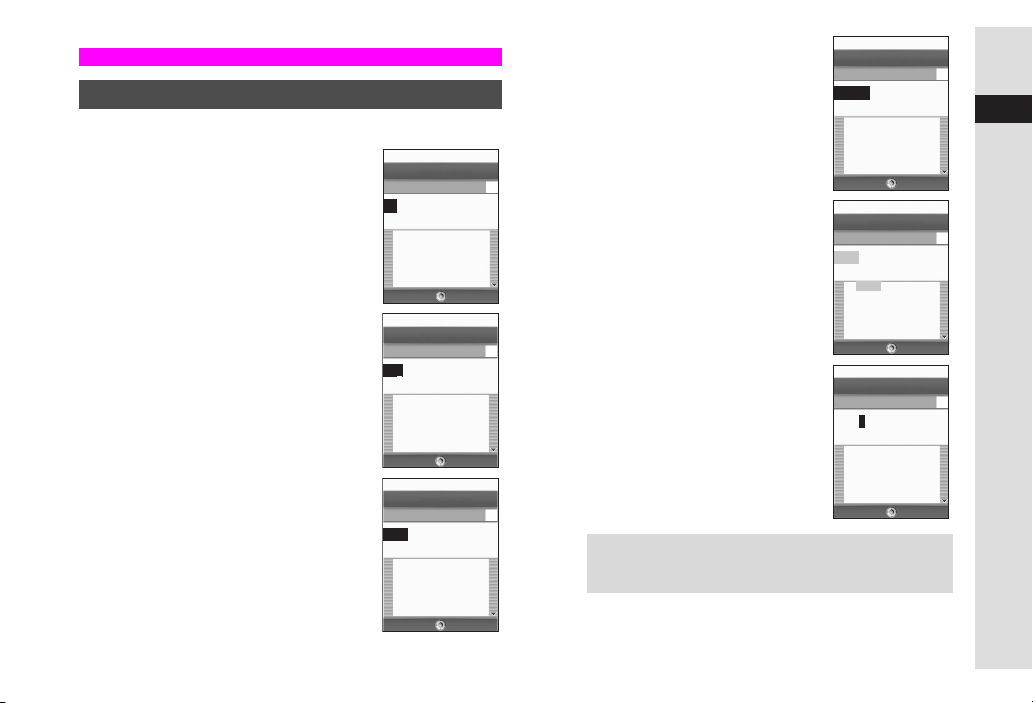
Entering Characters
Kanji, Hiragana & Katakana
鈴木
A
;
A
鈴木
in kanji (hiragana) entry mode
鈴木鈴木
first.
Example: To enter
Press 3 three times
1
Word suggestions change as hiragana are
entered.
Press
2
^
When the next character is on the same
key, press
Press 3 three times and
3
press
Press 2 twice
4
To enter hiragana without converting to
kanji, skip to Step 6.
NJ
Message
0(30KB)A
す
98すぐに
97すぐ
96する
95スケジュール
94すべて
Kanji kana
NJ
Message
0(30KB)A
す
98すぐに
97すぐ
96する
95スケジュール
94すべて
Kanji kana
NJ
Message
0(30KB)A
すず
61涼しい
60鈴
59鈴木
58珠洲
57錫
Kanji kana
Press D (convert) and use E to
5
select a word
C
C
C
Press
6
TipHSwitch to double-byte or single-byte katakana mode to
NJ
Message
0(30KB)A
すずき
07鈴木
06スズキ
05鱸
04鈴木京香
03鈴木田
Kanji kana
NJ
Message
0(30KB)A
To see other suggestions, press e
d J
or
To exit the list, press i.
To change segment, see P.3-6.
.
b
enter katakana. Alternatively, enter hiragana and then
select katakana from the word suggestion list.
W
鈴木
07鈴木
06スズキ
05鱸
04鈴木京香
03鈴木田
Back Next
NJ
Message
2(29KB)A
鈴木
21さん
20くん
19ちゃん
18君
17様
Options Back
3
Text Entry
3-5
Page 94
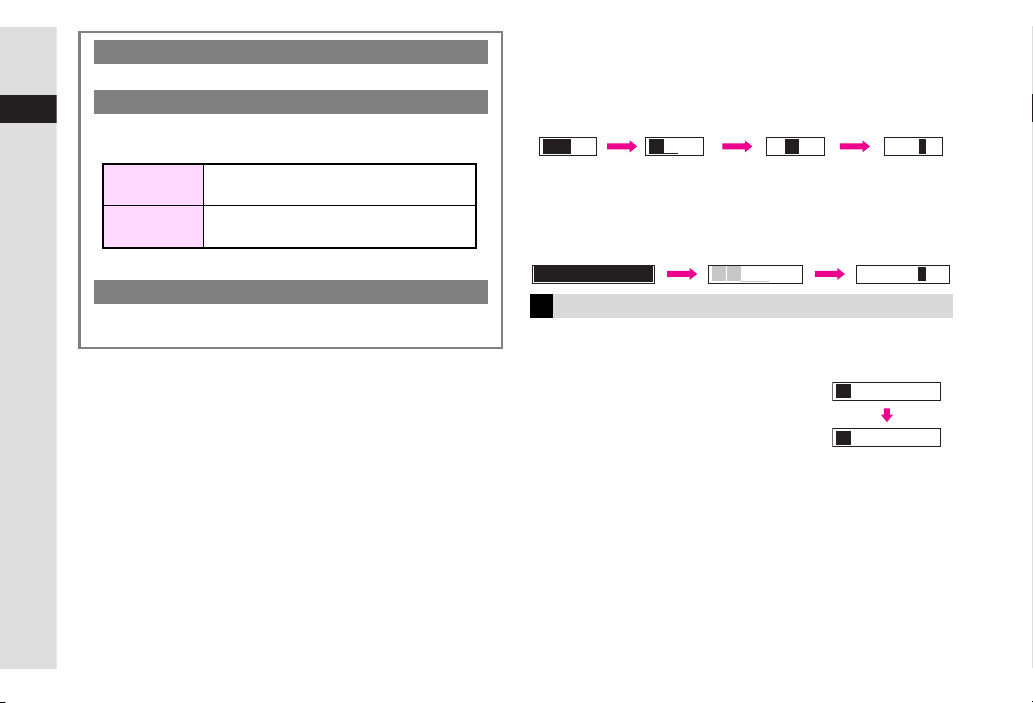
Learning Function
B DE
DE
D
The most recently used word appears first in the list.
3
Text Entry
Use
Predictive
kanji more quickly.
Predictive
Previous
Usage
Both functions are active by default (see
^
Predictive & Previous Usage
and
Previous Usage
Word suggestions change as up to 5
hiragana are entered
Suggests words/characters likely to follow
entry based on previous entries
to convert hiragana to
User Dictionary
Save frequently used words/phrases to select from the word
suggestion list (see
P.10-10
).
P.3-13
CSegmenting Phrases
b
P.3-5
to
If the word is not in the list, press i after Step 5 on
to segment hiragana to convert separately.
exit. Then use
Example: Segment
みち みち 三ち 三智
F
みち
みち
みちみち
into
みみみみ
b
and
ちちちち
.
CSelecting Multiple Converted Words
Press j.
西山大輔
Example: To enter
).
にしやまだいすけ
Small Kana (
Enter small hiragana
西山大輔
西山大輔西山大輔
j
西山大輔
, etc.)
っっっっ, ッッッッ
ああああ, いいいい, うううう, ええええ, おおおお, つつつつ, やややや, ゆゆゆゆ
西山大輔
and
as
よよよよ
well as small katakana.
Enter a character and press
1
k
つ
k
っ
3-6
Page 95
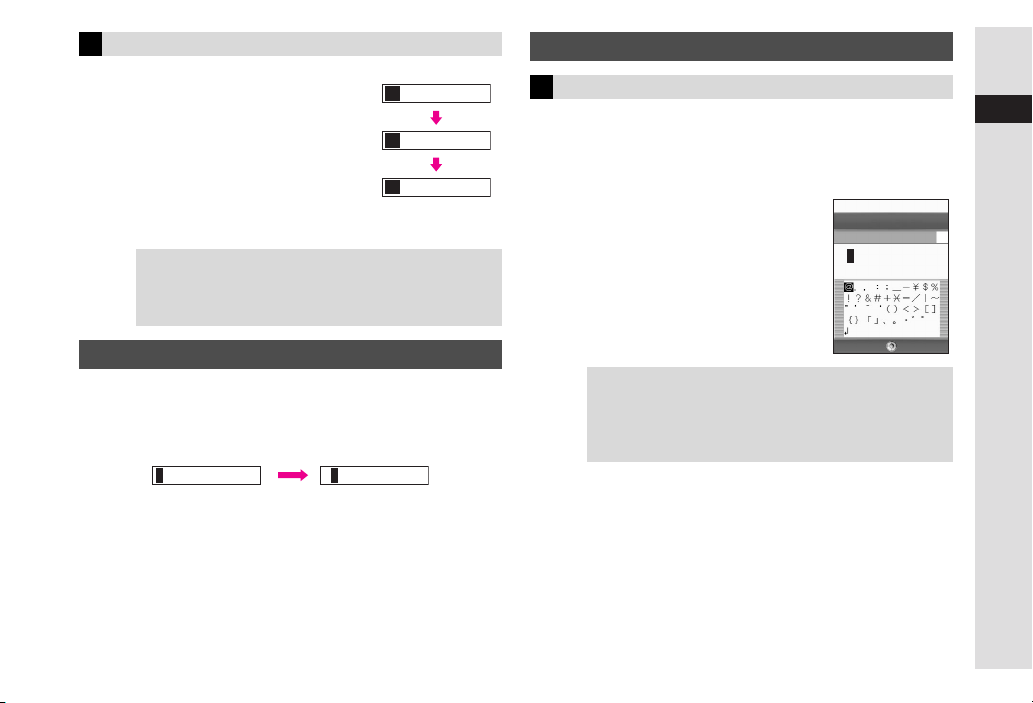
Adding
゛゛゛゛
or
゜゜゜゜
Symbols, Pictographs & Emoticons
゛゛゛゛
たたたた
(Ta) row
and three
and twice for
゛゛゛゛
or
゛゛゛゛
゜゜゜゜
;
to
.
は
かかかか
ば
ぱ
;
;
.
゜゜゜゜
Enter a character and press
1
^
In kanji (hiragana)/double-byte katakana
entry, press the key once to add
(Ka) row,
characters, and press twice to remove.
For
to add
times to remove.
TipHIn Single-byte Katakana Entry:
ささささ
(Sa) row and
はははは
(Ha) row characters, press once
゛゛゛゛
, twice to add
^
Press the key once to add
Symbols are single-byte.
^
Press i to remove
゜゜゜゜
Entering Alphanumerics
Enter alphanumerics in double-byte alphanumerics (upper &
lower case) or single-byte alphanumerics (upper & lower case)
mode. Alternatively, enter numbers in single-byte number mode.
^ When the next character is on the same key (example:
a ad
entering a then b), press
^
In double-byte or single-byte alphanumerics mode, press k
to toggle between upper and lower case.
3
A first to move cursor.
Symbols & Pictographs
Press : to open Log List
1
(Log List is available in some entry modes)
Recently used Symbols/Pictographs appear.
^
-- appears by default or when Log List is deleted (see P.3-8).
NJ
Use G to select one and press
2
^
Repeat Step 2 to enter more.
C
To see more lists, press e or :.
The list toggles as follows: Log List
Symbol List (1 - 3)
B
Press D to scroll down.
Press d
3
^
Tip
Single-byte Symbols do not appear in Log List.
H
^
Symbols are double or single-byte according to the
character type. (Pictographs are all double-byte.)
^
Alternatively, enter
Some Symbols can be selected.
%
W
Pictograph List (1 - 6)
to end
きごう
きごう
きごうきごう
b
1(29KB)A
@
%
Symbol2
and press D (convert).
Message
Back
3
Text Entry
3-7
Page 96
3
Text Entry
Deleting Log List
In a text entry window, press
A
Input/Conversion
A
Symbols
^
Press i twice to return to the text entry window.
^
Log List cannot be deleted in Pictograph Code mode.
Press b A Press e
Press b A Select Clear
e P A
Select
i
Pictograph Code Mode
C
To enter from Pictograph Codes, enter two digits (see P.16-15)
in Pictograph Code mode.
^
To edit a code mid-entry, press i to clear first digit then
enter correct digits.
C
To enter from Pictograph List, press d
Pictograph
^
A
b
To toggle through list 1 - 6 and Log List, press e.
Press
a A
Select a
Emoticons
In a text entry window, press e
1
Select Emoticons and press
2
Select an emoticon and press
3
^
Alternatively, enter a descriptive word such as
and press
selected.
^
Enter two digits (01 - 50) to jump to the emoticon assigned to
the number.
H
Tip
D
(convert). Corresponding emoticons can be
^
Emoticons cannot be entered in Pictograph Code (1 - 6).
^
For other emoticons, enter
P
b
b
わーい
わーい
わーいわーい
and press D (convert).
かお
かお
かおかお
Space
or
うーん
うーん
うーんうーん
3-8
In a text entry window, press
1
^
Alternatively in alphanumeric entries,
1
press
space.
seven times to enter a
A
Ueda
A
Ueda
Line Break
Insert line breaks in mail message text, Text Templates, etc.
Press D at the end of text
1
^
To insert line breaks in text, press 0
X
appears, then press b. Line
until
break is inserted at the cursor position.
Keystroke count varies by character
entry mode (see P.3-3).
Contactmeat
D
Contactmeat
X
Page 97
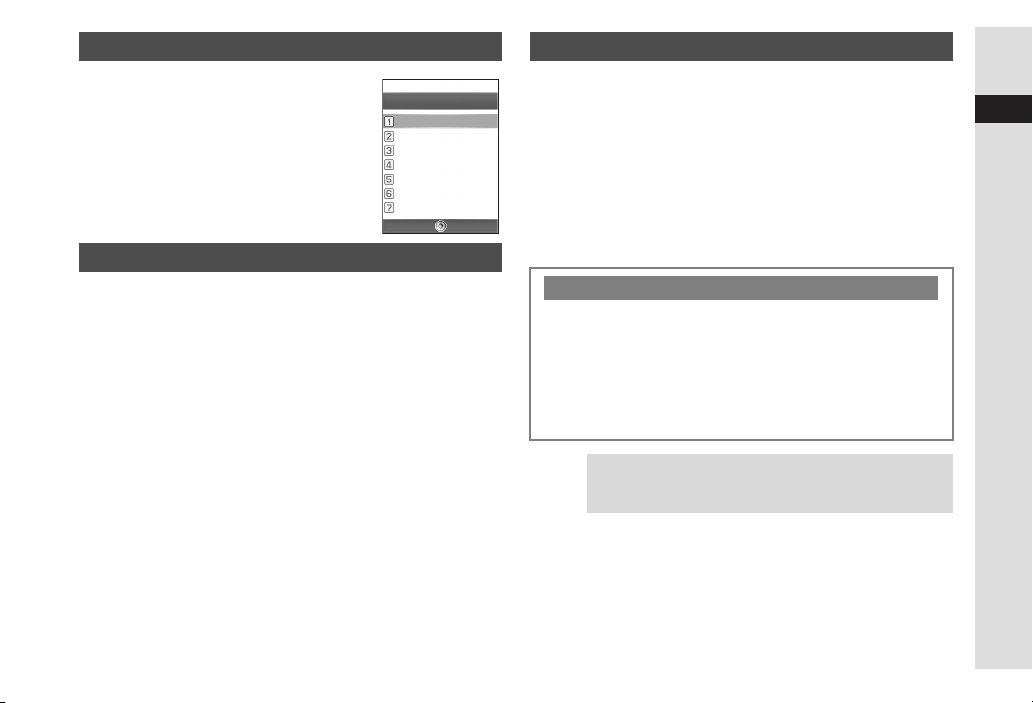
Mail & Web Extensions
In alphanumeric entry, press
1
Select an extension and press
2
^
Mail addresses and URLs are single-byte.
;
NJ
QuickAddressList
b
.co.jp
.ne.jp
.ac.jp
.or.jp
http://
www.
.com
Select Back
Character Code
In Character Code entry mode, enter four digits
1
(see P.16-9)
Pager Code
In a text entry window, press e
1
Select Input/Conversion and press
2
Select Input Method and press
3
Select Pager Code and press
4
Pager Code entry window opens.
C
▼
To switch to Kana Mode, select Kana A Press
Enter two digits (see P.3-10)
5
^
Pager Mode is active until switched to Kana Mode.
Character Entry Modes
C
For text entry in Pager Mode, press j to toggle between
character modes as follows:
Single-byte lower case (
Character Code (
^
Press e to toggle between Pictograph Code 1 - 6 and
Character Code mode.
C
Press k to toggle between upper and lower case.
^
H
Tip
Hiragana to Katakana/Alphanumerics Conversion is
disabled in Pager Mode.
^
To enter
゛゛゛゛
N) %
B) %
Double-byte lower case (L)
or
, see Pager Code List on P.3-10.
゜゜゜゜
P
b
b
b
b
Pictograph Code 1 - 6 (@)/
3
Text Entry
3-9
Page 98
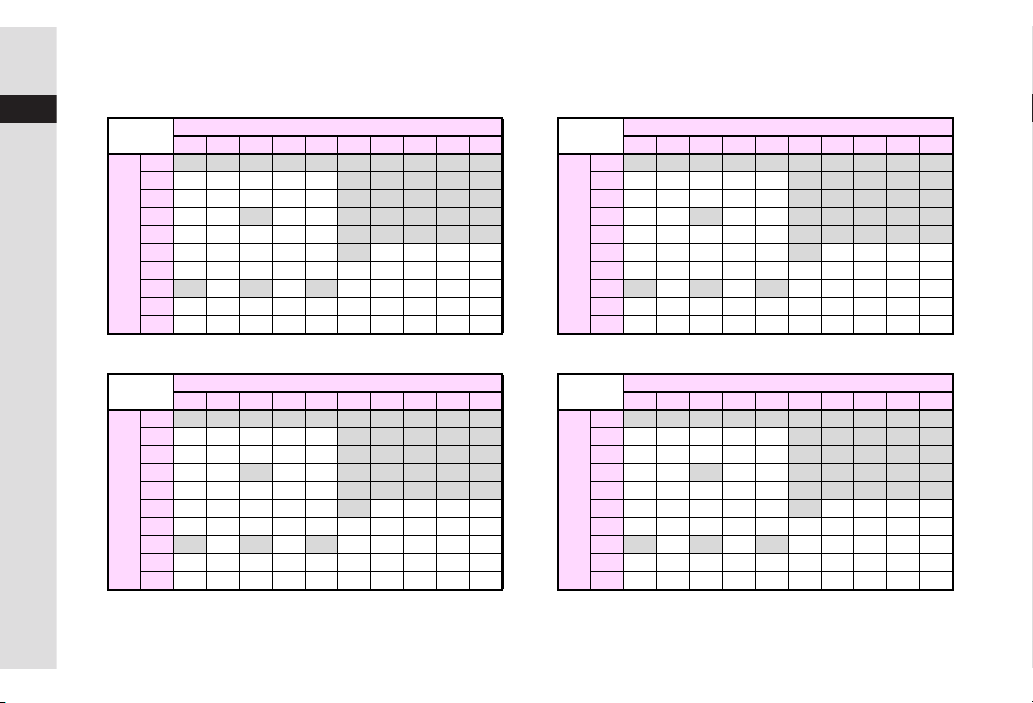
Pager Code List
C
^ Blanks indicate no entry.
^ Upper and lower case are available for characters with grey background. Press k to switch.
Double-byte upper case Single-byte upper case
3
Text Entry
Second digit (Press secondly) Second digit (Press secondly)
1 2 3 4 5 6 7 8 9 0 1 2 3 4 5 6 7 8 9 0
あ い う え お A B C D E
1
かきくけこF G H I J
2
さしすせそK L M N O
3
たちつてとP Q R S T
4
なにぬねのU V W X Y
5
はひふへほZ?!−/
6
まみむめも¥& Z
7
や(ゆ)よ
8
らりるれろ
9
First digit (Press first)
わをん゛゜
0
U
#
12345
67890
space
*1
*2
Y
1
2
3
4
5
6
7
8
9
First digit (Press first)
0
Double-byte lower case Single-byte lower case
Second digit (Press secondly) Second digit (Press secondly)
1 2 3 4 5 6 7 8 9 0 1 2 3 4 5 6 7 8 9 0
ぁ ぃ ぅ ぇ ぉ a b c d e
1
2
3
4
5
6
7
8
9 9
First digit (Press first)
*1
Press
*2
Press
0
70
80
f g h i j
k l m n o
っ p q r s t
u v w x y
z
ゃ ゅ ょ
*1
*2
、。
to insert line breaks (in mail message text, Text Templates, etc.).
to toggle between upper and lower case.
1
2
3
4
5
6
7
8
First digit (Press first)
0
^ Y and Z are double-byte.
ア イ ウ エ オ A B C D E
カキクケコF G H I J
サシスセソK L M N O
タチツテトP Q R S T
ナニヌネノU V W X Y
ハヒフヘホZ?!‑/
マミムメモ¥& Z
ヤ(ユ)ヨ U #
space
*1
*2
Y
ラリルレロ12345
ワヲン
゛゜
67890
ァ ィ ゥ ェ ォ a b c d e
f g h i j
k l m n o
ッ p q r s t
u v w x y
z
ャ ュ ョ
*1
*2
,.
3-10
Page 99
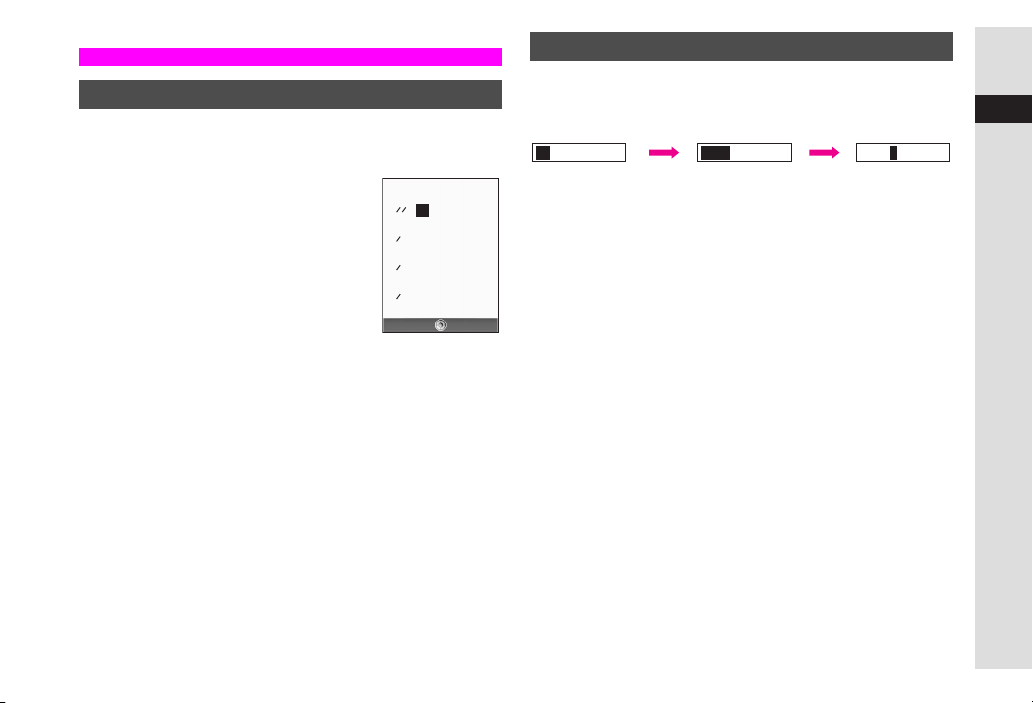
Conversion Methods (Japanese Only)
DE
Phonetic Conversion
Enter alternate readings to search for kanji.
Enter reading in hiragana
1
Press e
2
suggestions
Select a kanji and press b to enter
3
_
to see
NJ
[かい]
001介会解回塊
壊廻快怪悔
011恢懐戒拐改
魁晦械海灰
021界皆絵芥蟹
開階貝凱蓋
031街鎧骸會偕
Select Back
One-Hiragana Conversion
Enter the first hiragana to access previously selected words.
Example: To enter
^
One-Hiragana Conversion and User Dictionary (see
memory. Selected words may not be saved if User Dictionary is full.
^ Up to 20 word selections are saved per hiragana.
When memory is full, the oldest entry is deleted to make room
for a new entry, however, User Dictionary remains unchanged.
鈴木
鈴木
鈴木鈴木
鈴木す 鈴木
b
P.10-10
) share
3
Text Entry
3-11
Page 100
Hiragana to Katakana/Alphanumerics Conversion
Enter katakana and alphanumerics in kanji (hiragana) entry mode.
3
1
Text Entry
2
Enter hiragana and press d
^
To enter AM, press
26
Use E to select a word and press b to enter
^
Hiragana to Roman Letter Conversion (hiragana with
is converted to the same characters/Symbols):
あ@い.う/え_お
かAきBくCけ
さDしEすFせ
たGちHつIて
なJにKぬLね
はMひNふOへ
まPみQむRめSも
やTゆUよV
らWりXるYれZろ
わ,を.ん
^
Hiragana to Number Conversion (hiragana with ゛
converted to the same numbers):
B ああああ
(A) row...1
B たたたた
(Ta) row...4
B まままま
(Ma) row...7
B わをんー
わをんー
わをんーわをんー
B かかかか
B なななな
B やややや
(Long Sound)
(Ka) row...2
(Na) row...5
(Ya) row...8
、。
、。
、。、。
S
, and then press d
Space
Space
Space
Space
Space
----- ----- ----- -----
ー(LongSound)、。
Space
LineBreak
B ささささ
(Sa) row...3
B はははは
(Ha) row...6
B らららら
Line Break...0
(Ra) row...9
S
゛゛゛゛
こ
そ
と
の
ほ
゛ or ゜゜゜゜ is
゛゛
or
Space
Space
Space
Space
Space
Space
Space
Space
Space
Quick Conversion (for Hiragana)
Quick Conversion helps reduce keystrokes needed to enter
frequently used words.
A list of word suggestions appears based on the key pressed.
.
Example: To enter
゜゜゜゜
Normal
Conversion
Quick
Conversion
(for Hiragana)
1
2
Note
Tip
Enter hiragana and press
Cursor turns green.
^
While cursor is green, use F to segment entered hiragana
and then convert one segment at a time.
C
To cancel Quick Conversion, press i A Press D for
normal conversion
Use E to select a word and press
Use Quick Conversion in kanji (hiragana) mode only.
H
The most recently used word (mostly nouns) appears first.
H
微妙
微妙
微妙微妙
(
)
(
ばばばば
びびびび
(
) D (convert)
うううう
) 7 (
77
) 8 (
まままま
66;
888888
111
6;
(convert)
C
C
(
(
b
みみみみ
ょょょょ
やややや
)
)
) 1 (
)
ああああ
3-12
 Loading...