

VMI Artesia AP-100 Owner's Manual

AP-100
Owner s Manual
V
irgin
M
usical
I
nstruments

Precaution
Thank you f or purc hasing t his digita l instrument.
Fo r correct use, please
read the manual carefully and keep it for future reference. please read
the manual carefully and keep it for future reference.
Safety Precautions
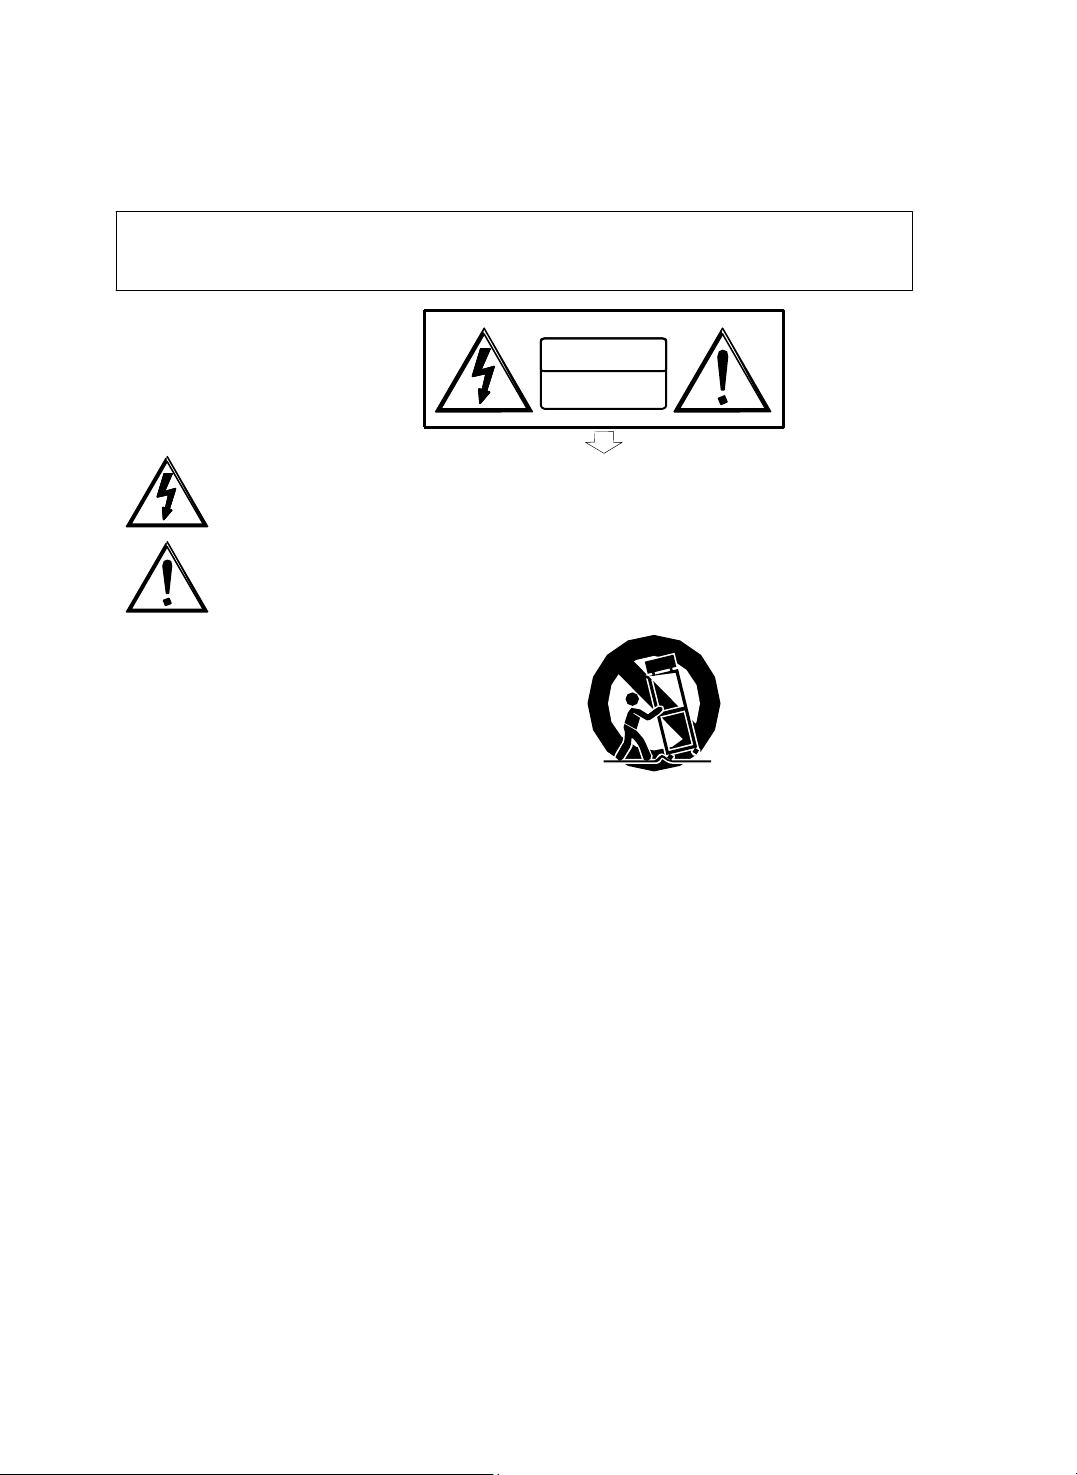
CAUTION
RISK OF ELE CTRI C SHOC K
The lightning flash with arrowhea d symbol within a n equilateral triangle i s
intended to alert the user to the presence of uninsulated “dangerous voltage”
Within the product ’ enclo sure that may be of sufficient magnitude to constitute a
The exclamation point within an e quilateral triang le is intended to alert the user
operating and maintenance (servicing) instructi ons in
DO NOT OPEN
risk of electric shock to persons.
to the presence of important
the literature accompanying the product.
Important Safety Instructions
1) Read these instructions.
2) Keep these instructions.
3) Heed all warnings.
4) Follow al l instru ction s.
5) Do not use this apparatus near water.
6) Clean only with dry cloth.
7) Do not block any ventilation openings, and install in accordance with the manufacturer's instructions.
8) Do not install near any heat sources such as radiators, heat registers, stoves, or other apparatus (including amplifiers) that produce heat.
9) Do not defeat the safety purpose of the polarized or grounding-type plug. A polariz ed plug has two bla des
grounding type plug has two blad es and a third grounding prong. The wide
plug does not fit into you r outlet ,
10) Protect th e power cord from b eing walked on or pi nched particula rly at plugs, convenien ce receptacles, and the point where they exit from th e
apparatus.
11) Only use attachments/accessories specified by the ma nufacturer.
12) Use only with the cart, stand, tripod, bracket, or table specified by the manufacturer or sold with the
caution wh en mov ing th e ca rt/a ppara tu s com binat ion t o a void injur y from tip-over (Figure 1) .
13) Unplug this apparatus during lightning storms or when unused
14) Refer all servicing to qualified service personnel. Servicing is required when the apparatus has been damaged
in any way, such a s power -supply cord or plug is damage d, liqu id has be en s pilled or object s have fallen
into the apparatus, the apparatus has been exposed to rain or moisture, does not operate normally, or has been
dropped.
WARNING: To reduce the risk o f fire or electri c shock, do not expose this appa ratus to ra in or moisture.
expose d to drip ping or sp lash ing and n o obje cts fille d with li quids,
Always make sure all batteries are inserted in conformity with the +/- polarity markings.
Always r eplace a ll batt eries at the same time. Do not use new batteries together with old ones. Also, do not mix batte ry types, b ecause thi s
can cause overheating, fire, o r battery fluid leakage.
Remove the batteries from the instrumen t if it is not to be used in a long time.
consult an electrician for replacement of the obso lete outlet.
such as va ses, sha ll be pla ced o n th e a pparat us.
(Figure 1)
with one wider than the other. A
blade or the third prong is provided for your safety. If the provided
apparatus. When a cart is used, use
over a long period of time
CAUTION: Apparatus shall not be

Thank you for choosing the Digital Piano
Your digital piano is a high quality digital piano featuring an 88 note
hammer action, touch sensitive keyboard and the most advanced
PCM tone gene ration techn ology that ,combined, will prov ide you with
a rich performing and p laying experience. You can als o record your
own perform ances to play along to. The digital pia no is more than
great tech nology, y our digital pia no is also a stylish piece of furniture
that will look great anywhere in your hom e. To get the mos t out of
your in strum ent, ple ase rea d this ma nual tho roughly and try out the
various functions as we take you through them. We hope your new
instrument will continue to entertain you for many years to come.

1
Contents
PANEL CONTROL … … … … … … … … … 2
THE CONNECTOR BOX … … … … … … 3
1. Headphones … … … … … … … … … … 3
2.
Midi Out
3. Line Out
4. USB Midi/USB Audio 4
5. AUX In 4
6. Bluetooth… … … … … … … … … … … … 4
PANEL CONTROLS … … … … … … … … 5
1. Power/Standby
2.
Adjust The Volume
3.
Adjust The Sound
4. Demo Play
5.
LCD Display
6. FUNCTION] Button 6
7. [
+ / YES] & [- / NO] … … … … … ……………6
VOICE & FUNCTION … … … … … … … 7
1. Voice … … … … … … … … … … … … … … 7
2. Layer Mode … … … … … … … … … … … 8
3. Split Mode … … … … … … … … … … … 9
4. Duet ……………………………………10
5. Reverb … … … … … … … … … … … … 11
6. Effects … … … … … … … … … … … … 11
7.
2
8. Tempo
FUNCTION 13
1. Reverb Type
2. Effects
3. Reverb Level
4. Effects Level
5.
6. Metro Volume
7.
8. Split
9.
10.
11. USB Speed
12. Mutetrack
13. Split Point
14. Touch
15. Transpose
Type
Metro Type
Main Vol ume
Volume
Layer Volume
USB Disk Song 's Volume …………
Metronome
1
12
13
13
14
14
15
15
16
16
16
17
17
17
1
17
18
18
3
3
5
5
5
5
6
16. Master Tune
17.
Loadmem
18. Savemem
19. Grading
20. Local
21. Bluetooth
22. Reset
REGISTRATION MEMORY… … … … 22
1.
Save
2. Load
3. Saving The Registration Data To
USB Disk
4. Use Registration Data from USB
5. Delete REG File from USB
SONG RECORDING……………………24
1.
QuickRecording
2. Multi Track Recording
3.
Melody Track Recording…………… 27
4
. Delete Song
5. Save Tck to USB
6. Memory Button
7. Mutetr ack
8. Adjusting Song's Volume
PLAY ALONG SONGS 29
1. Selecting A Song
2. Listening To The Entire Song
3. Practicing The Right Hand Of The
Selected Song
4. Practicing The Left Hand Of The
Selected Song
5. Practicing Both Hands Of The
Selected Song
MIDI FUNCTION 31
Local On/Off
Load MIDI File
APPENDIX 33
1. Voice List
2. MIDI Implementation Char t … …
3. Factory Reset
4. Specifications
5. Assembly Instruction
…………
1111
…
…………
… …
11
111
11111
18
19
19
20
21
21
21
22
22
22
22
23
24
25
28
28
28
28
28
29
29
29
30
30
31
32
33
34
35
36
37
2
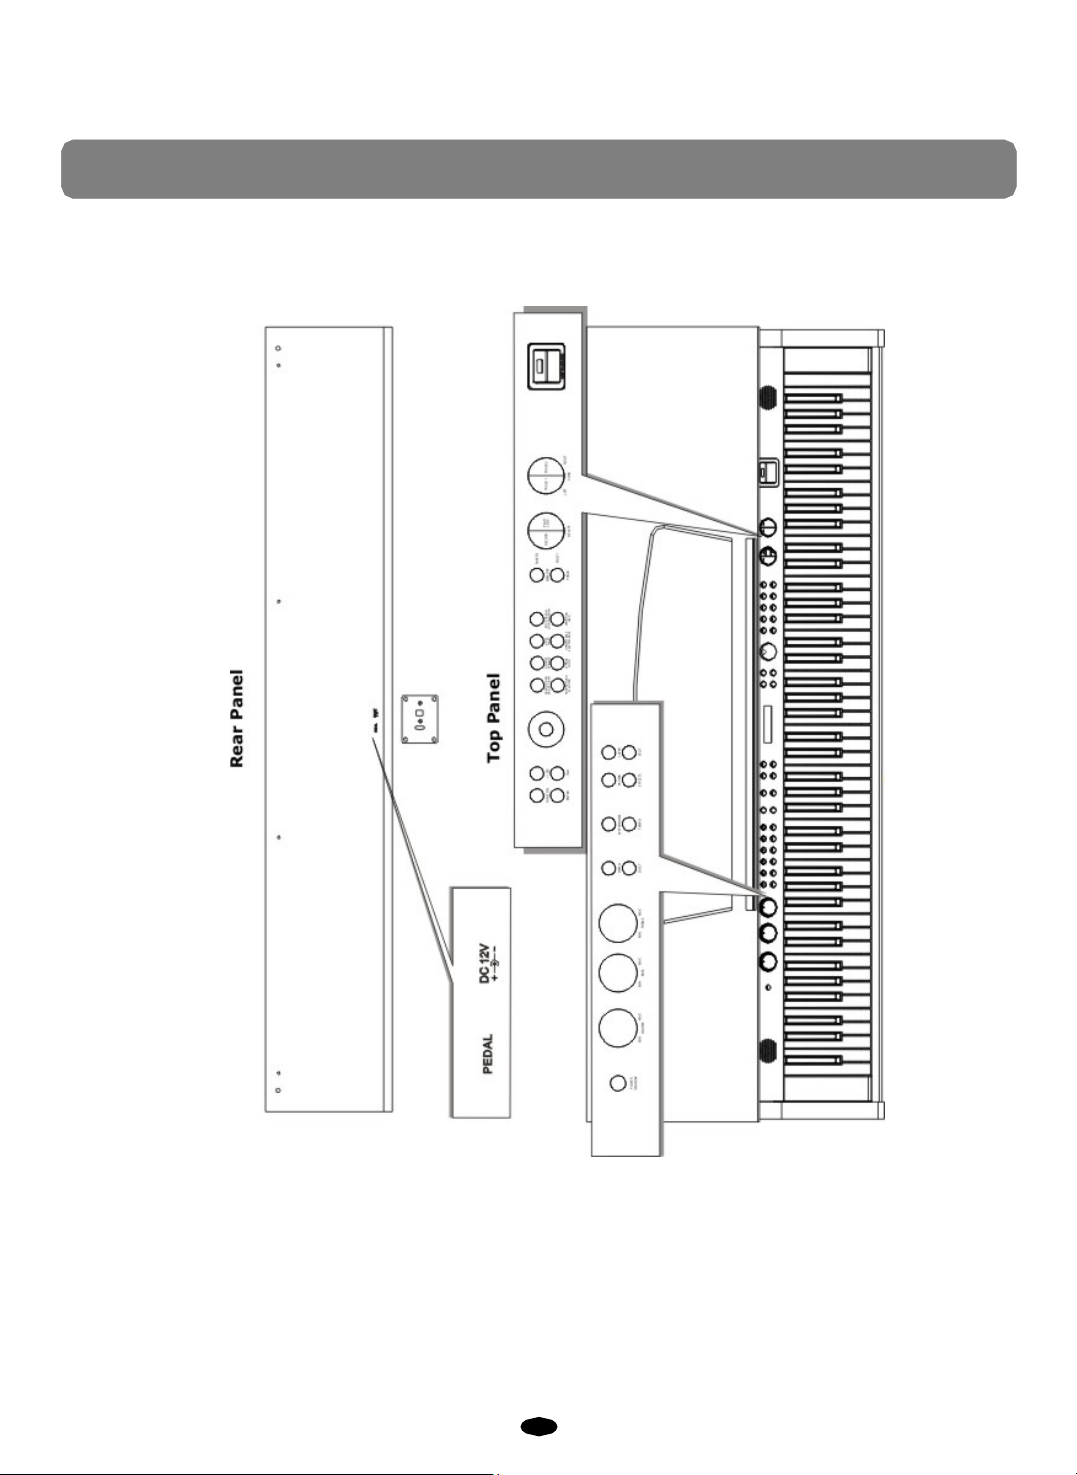
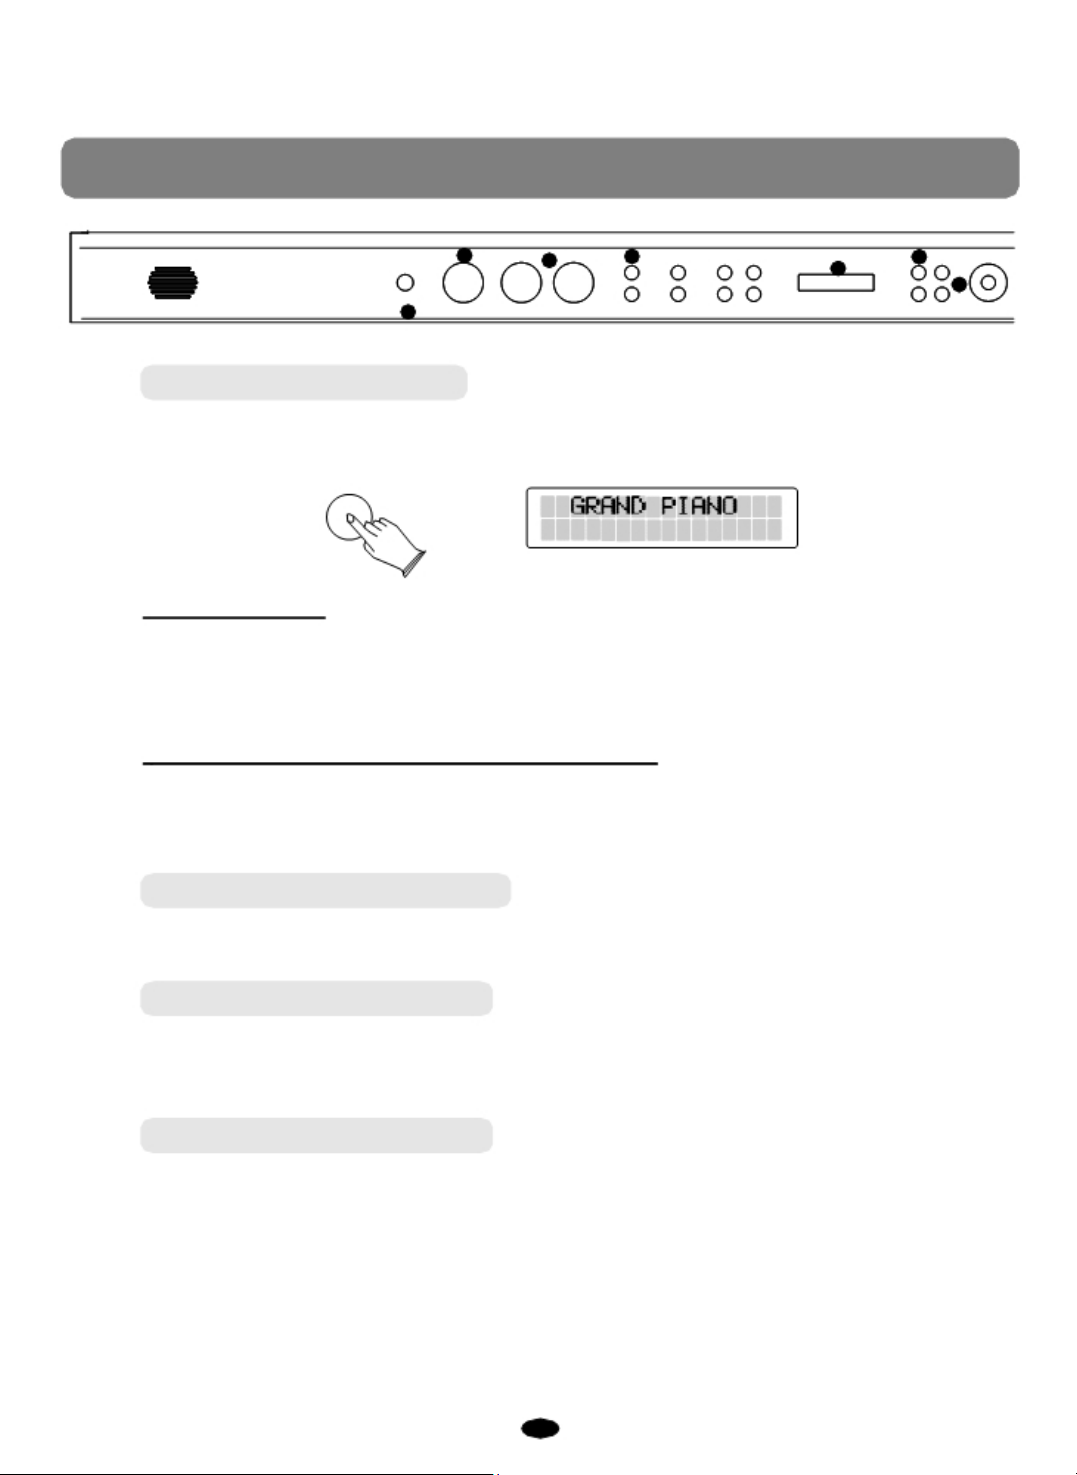
Panel Control
3
THE CONNECT
BOX
The piano features a connection box which allows you to connect
external audio equipment, a computer, other MIDI equipment or
headphones. The following describes each option in more detail.
1.Headphones
Two sets of standard stereo headphones can be plugged in here
late-night playing. The internal speaker
headphones is
NOTE
Never use headphones at a high vol ume, because hi gh volume levels may
cause permanent hearing damage.
plugged i nto 1. HEADPH ONE jac k.
1
2 MIDI Input
USB
to Host
Out Bluetooth Level
system is automatically shut off when a pair of
for private practice or
2.MIDI Out
MIDI (Musical Instrument Digital Interface) is a world-standard
interface which allows
electronic musical instru men ts to
communicate with each other, by
sending and receiving compa tible
MIDI OU T
notes, program change and other types of MIDI data. You should
only plug the MI DI out in to a nother device f eaturing a MI DI input.
communication
MIDI IN
NOTE
MIDI OUT Transmits MIDI data to another MIDI device.
3.Line Out
The piano's stereo RCA line output can be used to deliver the
output of the piano to a keyboard a mplifier, stereo sound system,
recorder. The piano 's internal sound system will remain on unless headphones are plugged
in to the
1. Headphone jack.
mixing console or tape
4
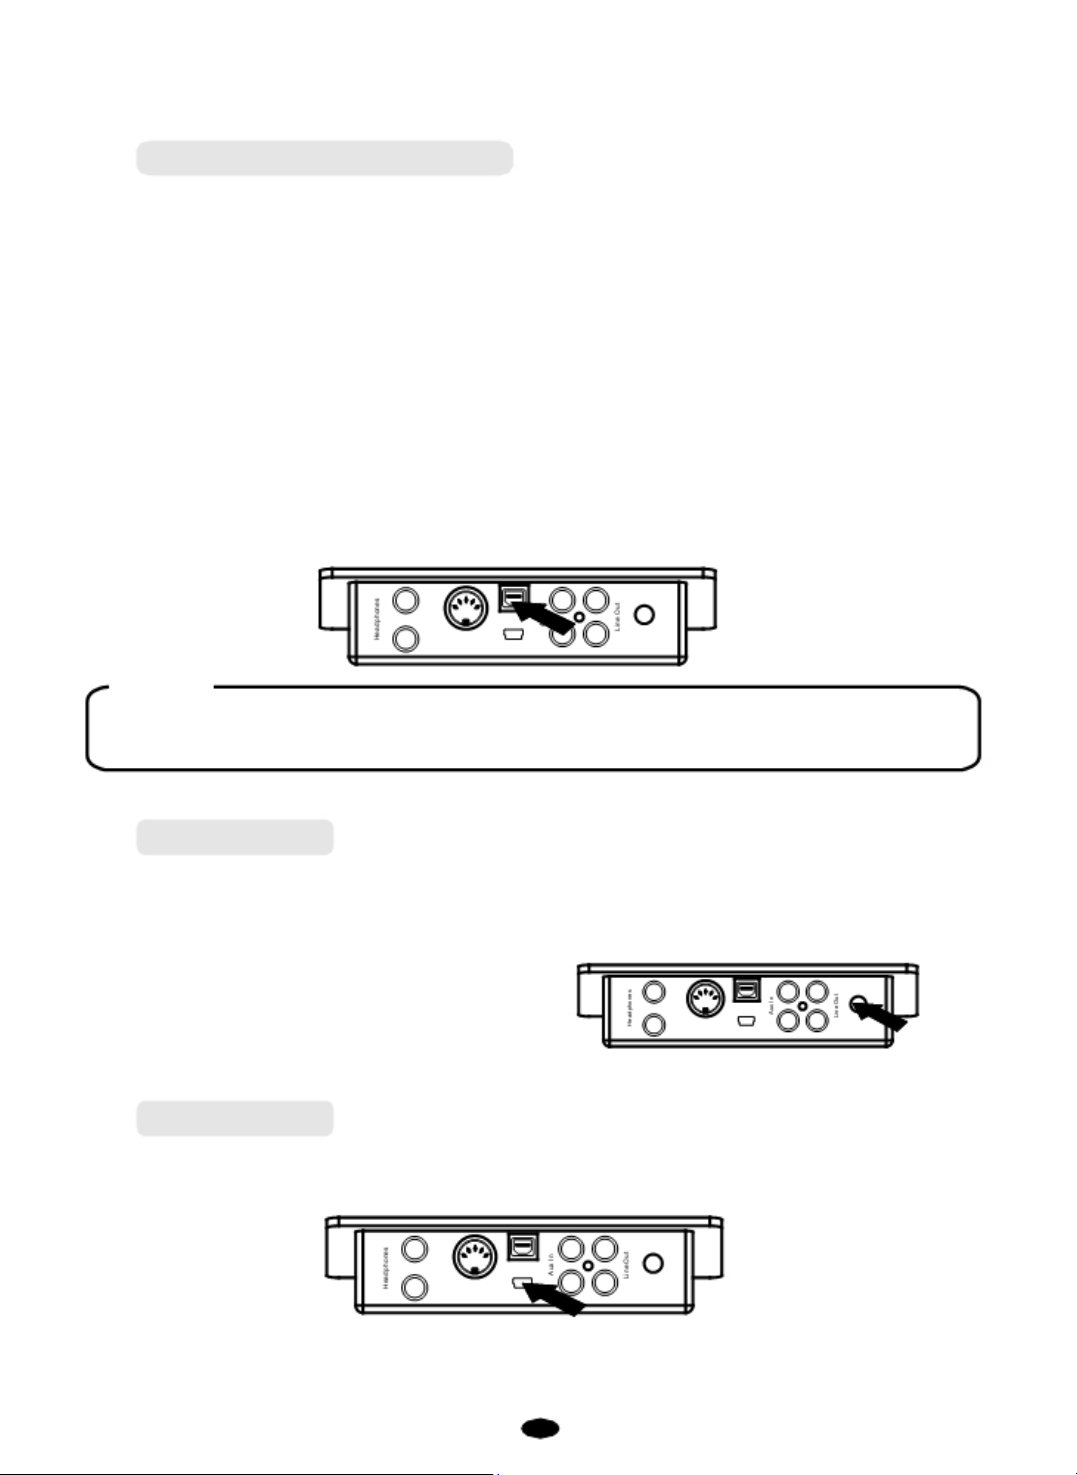
4. USB-MIDI/USB AUDIO
This product allows the transfer of MIDI information over USB to a computer.
Because you r piano is USB Cla ss Compli ant,
there is no n eed to ins tall a driver to enab le it to
work with your computer. Sim ply just plug it in and the OS will do the rest. The pian o will work
with all standard MIDI b ased computer software.
USB AUDIO interface is a digital audio interface. By USB cable,
transfer intact audio signals from the PC to this
instrument, and enjoy it on this
you can dig itally
instrument or use it for accompaniment when you play this instrument; likewise, you
can transfer intact
audio signals from the i nstrum ent to your PC to record a nd edit m usic.
1
2 MIDI Input
Out Bluetooth Level
to Host
USB
NOTE
The piano also supports USB Audi o.
5. Aux In
The Aux I n stereo RCA connect ors allow you to m ix an e xternal
sound source (such as a CD player, MP3 player or computer output)
with the piano's internal sounds, for playback through the piano's
built-in speakers or headphone
outputs.
The Aux In signal level can be
1
2
USB t o Hos t
MIDI Input
Out Bluetooth Level
adjuste d us ing t he In put Le vel k nob.
6. Bluetooth
This piano can support Bluetooth wit h the Conne ction of the Bluetooth Receiver.
Reference: Bluetooth.
1
2 MIDI Input
USB
to Host
Out Bluetooth Level
5
1
POWER /STANDBY
2 3 4
MIN MAX MIN MAX MIN MAX DUET TEMPO
VOLUME BASS
1
TREBLE
PANEL CONTROL S
6
5
DEMO METRONOME
REVERB LAYER
EFFECTS
SPLIT
FUNCTION
+ / YES
7
ENTER
- / NO
1. Power/Sta n dby
Turn the po we r on by pressing the [POWER/STANDBY] switch, the
will light.
Auto Standby
This product will s witch of f autom atical ly after 30 m inutes of inac tivity. In this case, press
the [POWER/STA NDBY]
button again to turn the unit back on.
Deactivate the Auto Standby function
With the piano turned off, hold the first white key and first black key on the left side of the
keyboa rd at th e same time and then turn on the unit to deactivate the Auto Standb y
function.
POWER/
STANDBY
panel LCD display
2. Adjust The Volume
Use [VOLUME] c ontrol to ad just the vo lume to your des ired level.
3. Adjust The Sound
Use [BASS]/[TREBLE] controls to adjust the tone to your desired
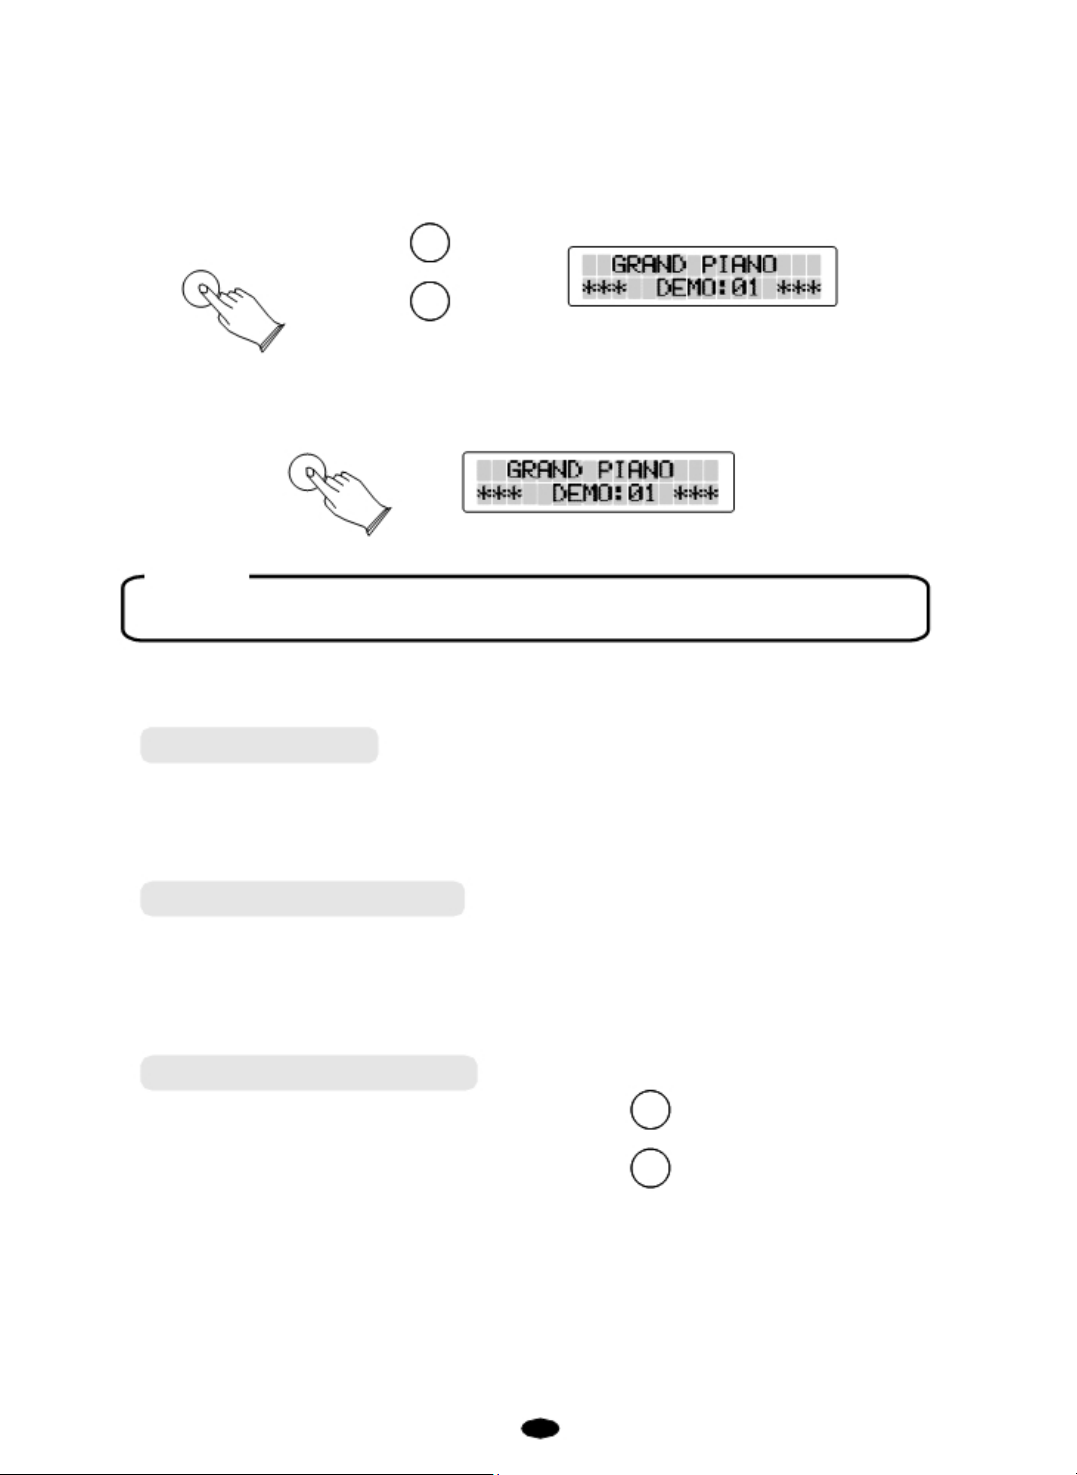
4. Demo Play
There are 14 demo songs pre-recorded in th e piano.
A demo song may be selected by either of two methods:
level.
6
a.Use [+/YES] / [-/NO]Buttons:
/ [-/NO] bu ttons to select th e song yo u want to play.
and voice buttons will flash .
DEMO
b.
Voice Select Bu tton: Press the [
desired Vo ice Select b utton. The [DE MO] and voice buttons wi ll flash .
DEMO
Press [
DEMO
] button,
U se [+/YES]
The [DEMO]
+ / YES
- / NO
DEMO] butto n, then press the
NOTE
The Main voic e will simultaneously change when the demo s ong changes.
Press [DEMO] button again to stop playing
.
5. LCD Display
The L CD w il l d is p l ay th e a pp r op r i a te s t atu s , f u n c t ion , value, voice or the current mode of
operation.
6. [FUNCTION] Button
The [FUNCTION] button transfers the pi ano to Ed it mode, enabl ing
the parameters of many features such as touch
sensitivity, splits, la yers an d MIDI contro l,
the modification of
among others.
7. [+ / YES] & [- / NO]
Parameter adjustment button.
+ / YES
- / NO

7
1
VOICE & F UNCTION
1. Voice
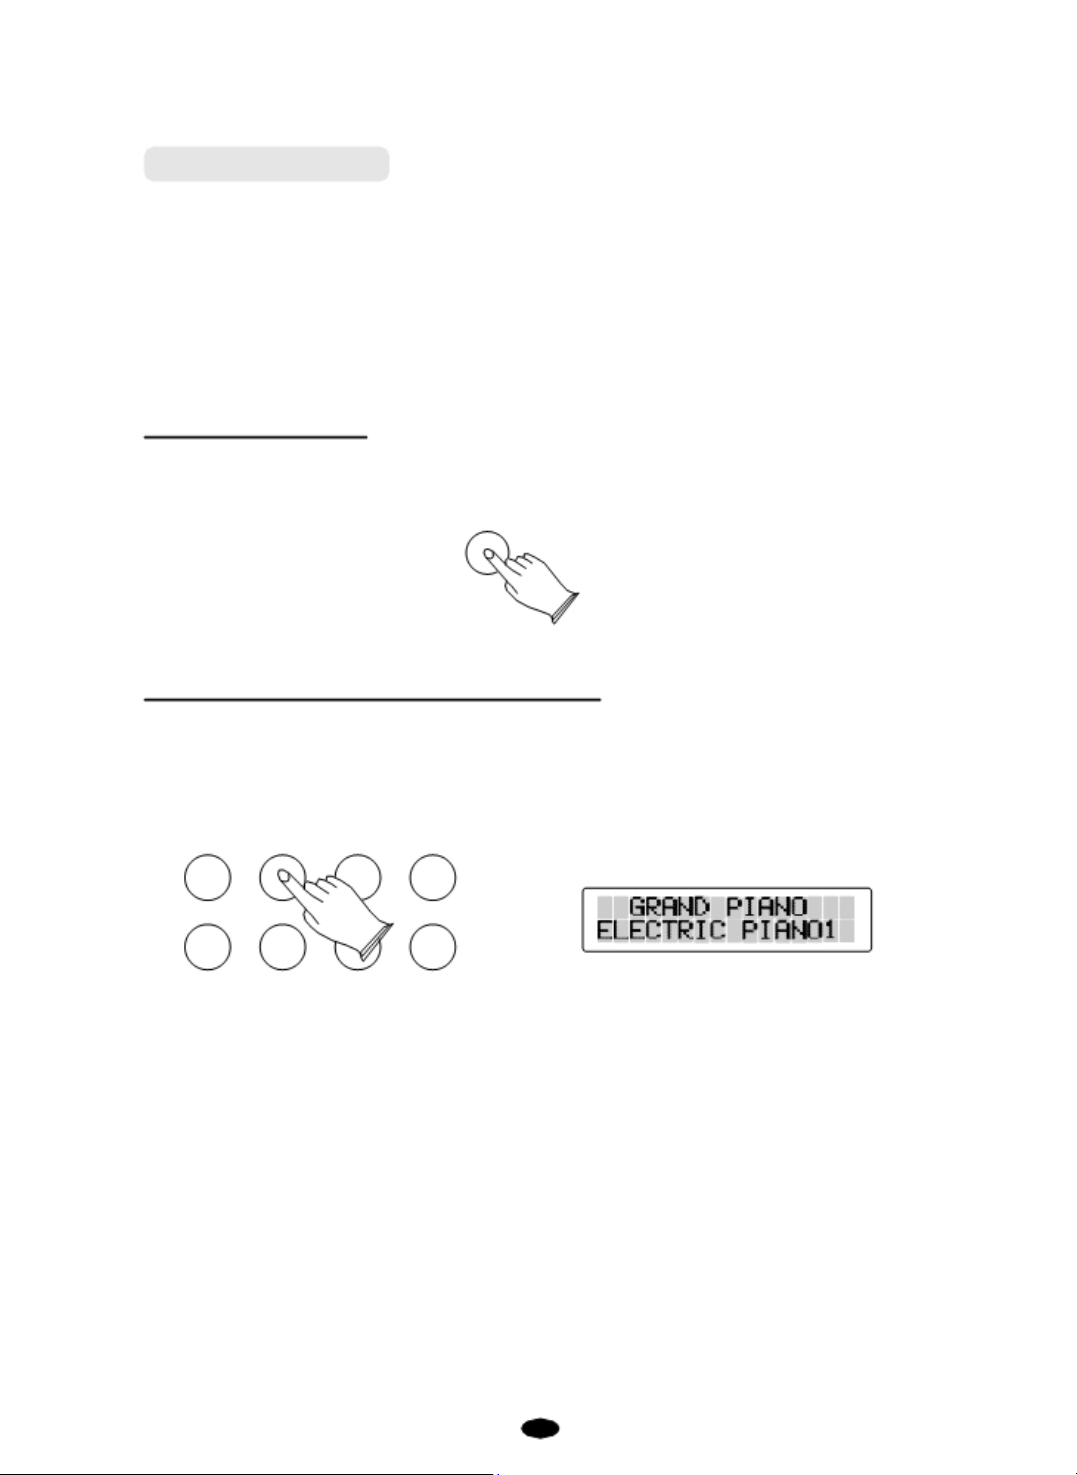
Selecting A Voice
Your instrument has 14 built-in quick select voices, which include several pianos
other instrum ents. These dig itally -sampled musical
instrument s ounds may be se lected one a t a time.
GRAND PIANO E.PIANO 1 VIBES ROCK ORGAN
BRIGHT PIANO E.PIANO 2 FM EP CHU RCH OR GAN
HARPSICHORD STRINGS UPRIGHT BASS VARIATION
N.GUITAR CHOIR ELECTRIC BASS USER
To se lec t a quick select voice, press the appropriate Voice Selec t button on the
the front panel.
NOTE
When [VARIATIO N/USER] bu tton is unlit, you can press
the appropriat e button to selec t the voice in the f irst line.
When [VARIATION/USER] button is lit, you can press the
appro priate button to select the voic e in the se cond l ine.
as well as
right side of
Setting A Voice
Your instrument has 128(01-128) GM standard voices. Press
[VARIATION/USER] button 2 seconds
, the user indicator will flash.
In USER voice Mode, Hold down the appropriate voice select button
for 2 seconds, then the [
flashing, use
to set the voice you want to set into the direct user voice .
GRAND PIANO E.PIANO 1 VIBES ROCK ORGAN
BRIGHT PIANO E.PIANO 2 FM EP CHURCH ORGAN
HARPSICHORD STRINGS UPRIGHT BASS VARIATION
N.GUITAR CHOIR ELECTRIC BASS USER
[+ / YES] / [- / NO] buttons or [DATA WHEEL] knob
VARIATION/USER] and voice button is
8
Save User Voice
In user mode, press
the appr opriat e voice s elect bu tton ag ain
to save user voice.
Press [VARIATION/USER] button again to exit.
2. Layer Mode
In Layer mode two voices may be played simultaneously, each
at selected volumes. To enter Layer mode
Press [LAYER] button an d the
press the voice button or
[DATA WHEEL] knob to select the second voice.
GRAND PIANO E.PIANO 1 VIBES ROCK ORGAN
BRIGHT PIANO E.PIANO 2 FM EP CHURCH ORGAN
HARPSICHORD STRINGS UPRIGHT BASS VARIATION
N.GUITAR CHOIR ELECTRIC BASS USER
indicator is flashing, then
use [+ / YES] / [- / NO] button or
:
When [LAYER] button is lit,
MAIN sound.
GRAND PIANO
BRIGHT PIANO
HARPSICHORD
N.GUITAR
E.PIANO 1 VIBES
E.PIANO 2
STRINGS UPRIGHT BASS VARIATION
CHOIR
ELECTRIC BASS
FM EP
ROCK ORGAN
CHURCH ORGAN
USER
press the v oice b utto n
to select the
To adjust the volume of the Main voice and layer voice, please refer to [FUNCTION] menu,
see page 16.
Press [LAYER] button again
to exit.
9
3. Split Mode
Split Mode allows the keyboard to be divided into two sections so
that d iffe rent voices may b e pl ayed w ith th e le ft and righ t han ds.
The volume may be independently adjusted for each voice, the
highest note pla yed with the le f t ha nd) may be
adjusted and the Split Voice may be
changed as des ired.
Enter Split Mode
Press the [S PLIT] button . Th e indicator will flash. The Split
(left hand) v oice will b e Bass and the Split Point w ill be G2.
SPLIT
Change the Split (left hand) voice
Change the Split (left hand) voice by eit her of o ne methods:
Press [SPL IT] bu tton , the Split indi cator is f lashin g, the n pr ess
the voice se lect button
[DATA WHEEL] knob to select the
GRAND PIANO E.PIANO 1 VIBES ROCK ORGAN
BRIGHT P IANO E.PIANO 2 FM EP CHURCH ORGAN
HARPSICHORD STRINGS UPRIGHT BASS VARIATION
N.GUITAR CHOIR ELECTRIC BASS USER
use [+ / YES] / [- / NO] button or
left hand
voice.
Split Point (the
 Loading...