

Page 1
INSTRUCTIONS FOR VIXEN SX POLAR AXIS SCOPE
FINDERSCOPE 6X30mm (8 Deg. Real FOV)
POLAR ALIGN METHOD
POLAR ALIGNMENT RETICLES
ACCURACY OF ALIGNMENT
ILLUMINATOR
WATER LEVER
ABOUT POLAR AXIS SCOPES
Polar Axis scopes are used for precisely pointing the equatorial mount at the celestial pole and this process
is called “Polar Alignment”. When taking astrophotography of nebulae or star clusters, you will have to
exactly set the telescopes’s axis of rotation to accord with the Earth’s axis of rotation.
.
Caution:
If Polar Alignment is not done properly, stars will rotate around an axis in the center of the image or stars
will trail off and you will not be able to get tight star images. Polar alignment is not possible in both the
northern and southern latitudes of 70 degrees. Check you latitude and longitude before starting polar
alignmnt.
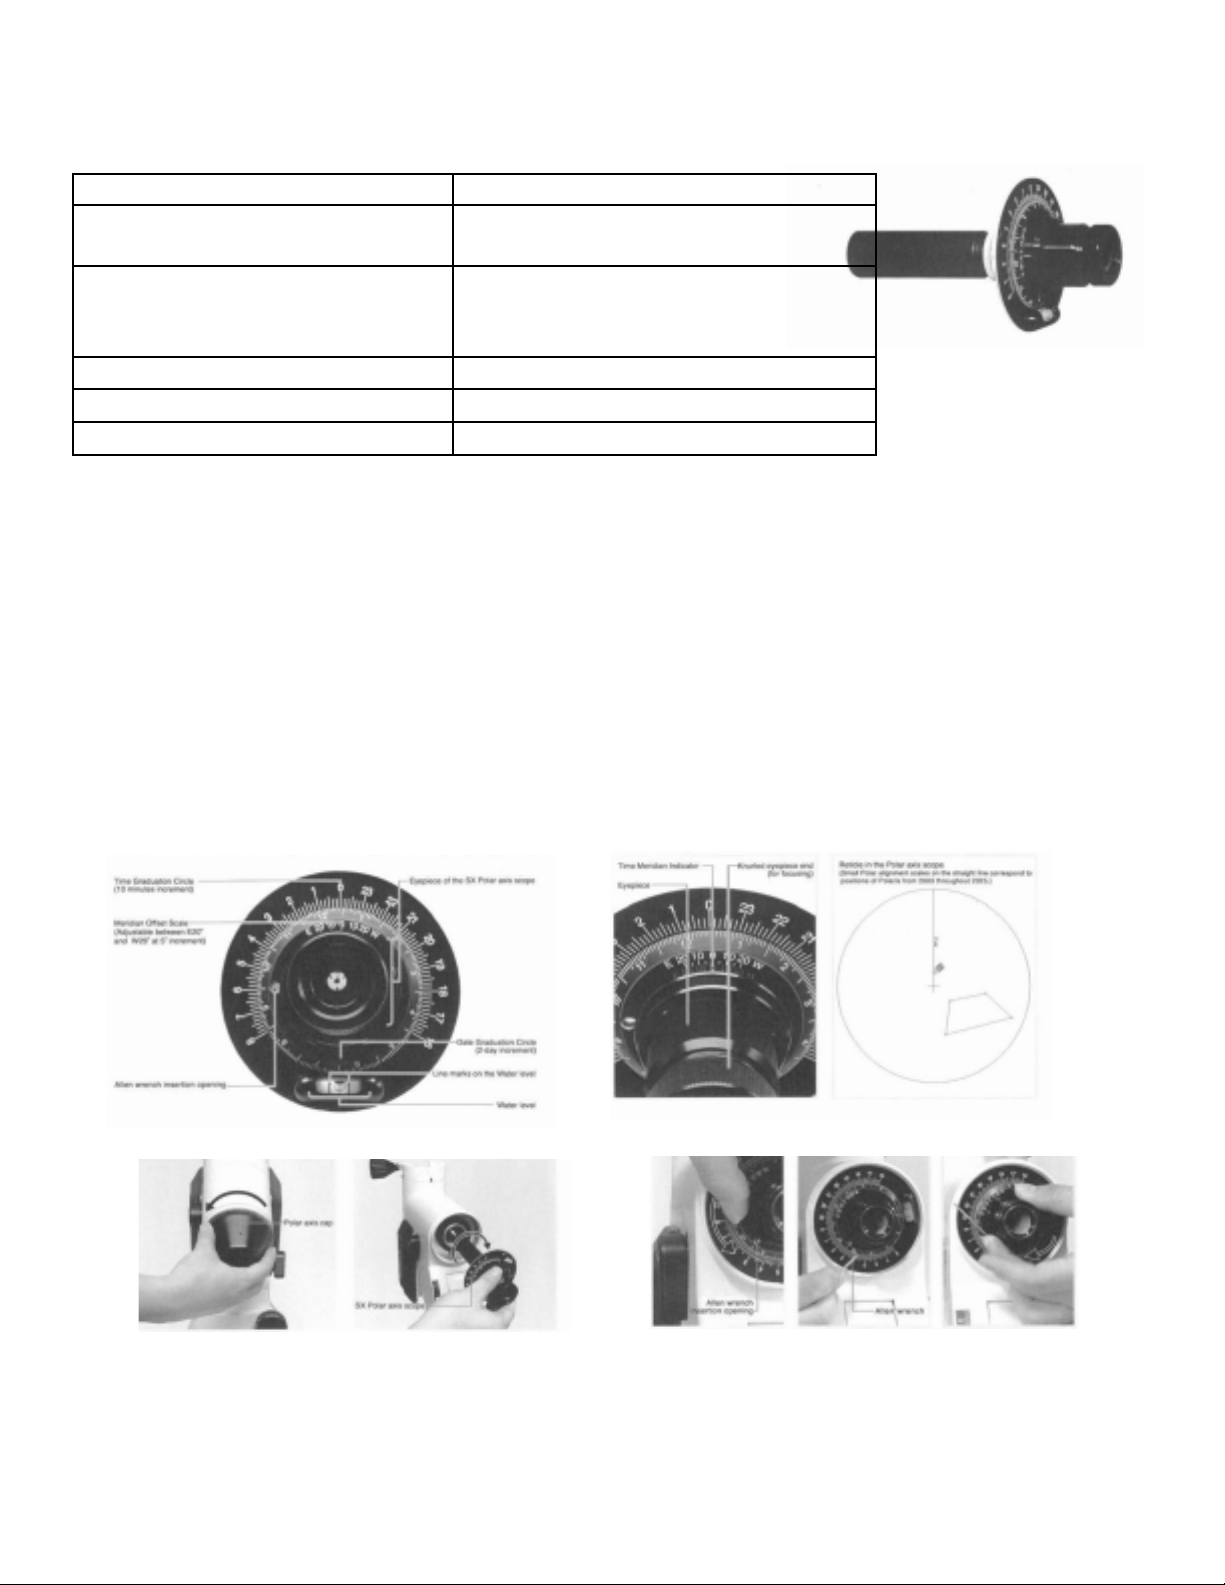
Date and Time graduation circles with
meridian offset scale
Polaris alignment scale in the northern
hemisphere and Octantis’ four stars alignment in the southern hemisphere
Less than 3 arc minutes
Red LED light, pre-installed
Built in water level
VIXEN POLAR AXIS SCOPE COMPONENTS
INSTALLING THE VIXEN SX POLAR AXIS SCOPE
Remove the plastic Polar
Axis cap by tuning it counterclockwise.
Attach the SX Polar Axis
scope to the Polar axis of
the mount by tunring it
clockwise.
*Make sure the Polar Axis
scope is inserted straight to
avoid damaging threads.
After the Polar Axis
scope is installed, turn
the date graduation circle
so that the Allen wrench
insertion opening will
overlap the hole underneath
Insert the supplied Allen wrench into
the hole to use as a gripping aid.
Secure the SX Polar Axis scope by
gripping the Allen Wrench and turning
it clockwise
Page 2
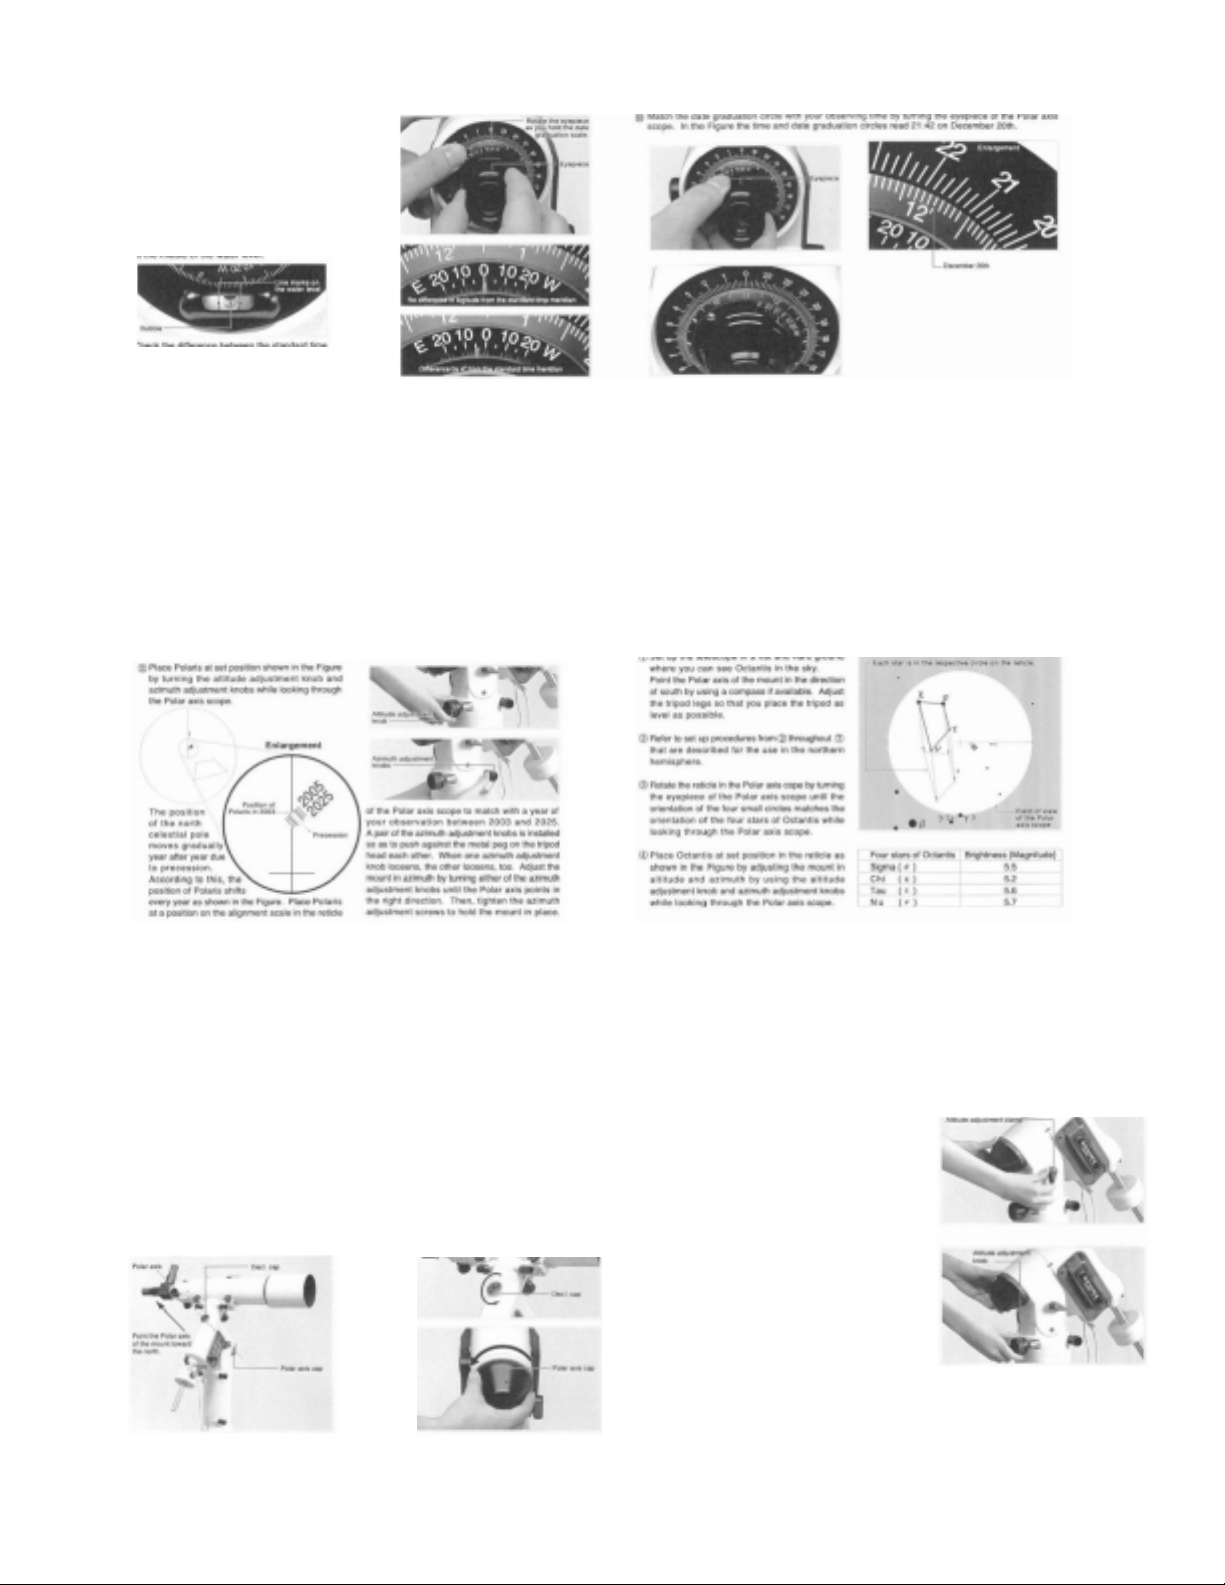
Turn the time graduation circle by
holding the water level on both
sides so that the bubble is in the
middle of the water level.
Check the difference between the standard time meridian of your region and your observing site on a map of the area. If the
observing site is in the east of standard time meridian, rotate the time meridian indicator in the direction as indicated E on the
meridian offset scale. If the observing site is in the west of the standard time meridian, rotate the time meridian indicator in the
direction indicated W on the meridian offset scale. You can more the time meridian indicator by rotating the eyepiece of the
Polar Axis Scope while youhold the date graduation circle with your finger as show in the image above.
USING THE POLAR AXIS SCOPE IN THE SOUTHERN HEMISPHERE
USING THE POLAR AXIS SCOPE IN THE NORTHERN HEMISPHERE
Set up your telescope on flat hard
ground where you can see Polaris in
the sky. Point the Polar Axis of the
mount in the direction of North as
shown in the figure below, using a
compass if available. Adjust the tripod
legs so that it is as level as possible.
Take off the Decl. cap
and Polar Axis cap.
These caps can be removed easily by twisting counter clockwise.
Adjust the mount in altitude until the
latitude indicator (the edge in front
of the altitude scale) points to you
latitude. (Refer to the manual for the
Sphinx equatorial mount)
The mount is set at an altitude around
35 deg at the Vixen factory. Be sure
to adjust the mount in altitude when
your observing site is different from the
initial setting.
Release the altitude adjustment clamp
and turn the knob as shown in the
figures to the right. The mount can be
adjusted within +- 15 deg at 35 deg.
Page 3

Advance the setting to aligning the telescope on the screen of the
STAR BOOK until the relevant star chart appears on the screen. Refer to the section “Aligning the telescope” in the instruction manual
of the Sphinx Mount
Rotate the Decl axis by operating the keys DC+ or DCwhile looking in the Polar Axis in front of the Polar Axis
body. Move until you see the Polar Axis Scope through the
hole on the Decl. Axis.
Adjust the brightness of the illuminator for the Vixen Polar Axis scope. Press the key
that is assigned for “MENU” to display the system menu. Choose Polar Axis Light
Bright by moving the cursor with the arrow keys and then press “Select”. The dialog
box opens and you can adjust the brightness of the illuminated reticle in the Polar Axis
by operating the arrow keys as you look through the Polar Axis Scope.
Vixen Optics a Division of MrStarGuy, Inc. www. vixenoptics.com
 Loading...