

Page 1
ND8321 / 8421
Network Video Recorder
Quick Installation Guide
繁中 日本語
English
Dansk
Indonesia
簡中
Français
Deutsch
Español Português
HDMI Local Display • 8 Channel Recording •
Full Integration with VIVOTEK Cameras
Italiano
Türkçe
Polski
Русский
Česky Svenska
Nederlands
Page 2
Warning Before Installation / Warnung vor der Installation /
5
1
0
0
0
0
2
2
1
G
Waarschuwing voor de installatie
Power off the Network Video
Recorder if you detect abnormal
smell or smoke coming from it.
Netzwerkvideorekorder bei
Rauchentwicklung
oder ungewöhnlichem Geruch
sofort abschalten.
Schakel de Netwerk Video Recorder
uit zodra het begint te roken of
ongewoon ruikt.
Do not place the Network Video
Recorder around the heat sources,
such as television or oven.
Stellen Sie den
Netzwerkvideorekorder nicht in
der Nähe von Wärmequellen (z. B.
Fernsehgeräte, Heizgeräte,
etc.) auf.
Plaats de Netwerk Video Recorder
niet in de buurt van hittebronnen,
zoals een televisie of een oven.
Keep the Network Video Recorder
away from direct sunlight.
Setzen Sie den
Netzwerkvideorekorder keiner
direkten Sonneneinstrahlung aus.
Houd de Netwerk Video Recorder uit
de buurt van direct zonnelicht.
Do not attempt to remove or uninstall the software on the mounted ash memory.
Versuchen Sie nicht, die Software des installierten Flash-Speichers zu entfernen
oder zu deinstallieren.
U mag de software op het geplaatste ashgeheugen niet zelf verwijderen of de
installatie ervan ongedaan maken.
Keep the Network Video Recorder
away from water. If the Video Recorder
is wet, power off immediately.
Halten Sie den Netzwerkvideorekorder
von Wasser und sonstiger Feuchtigkeit
fern. Falls die Netzwerkkamera nass
oder feucht geworden sein sollte,
schalten Sie sie sofort aus.
Houd de Netwerk Video Recorder uit
de buurt van water. Indien de Network
Camera nat is, schakel het dan
onmiddellijk uit.
Refer to your user's manual for the
operating temperature.
Hinweise zur Betriebstemperatur
siehe Benutzeranleitung.
Verwijs naar de gebruikers
handleiding voor de
bedieningstemperatuur.
Do not place the Network Video
Recorder in high humidity
environments.
Stellen Sie den
Netzwerkvideorekorder nicht in
feuchter Umgebung auf.
Plaats de Netwerk Video Recorder
niet in de buurt van erg vochtige
omgevingen.
English
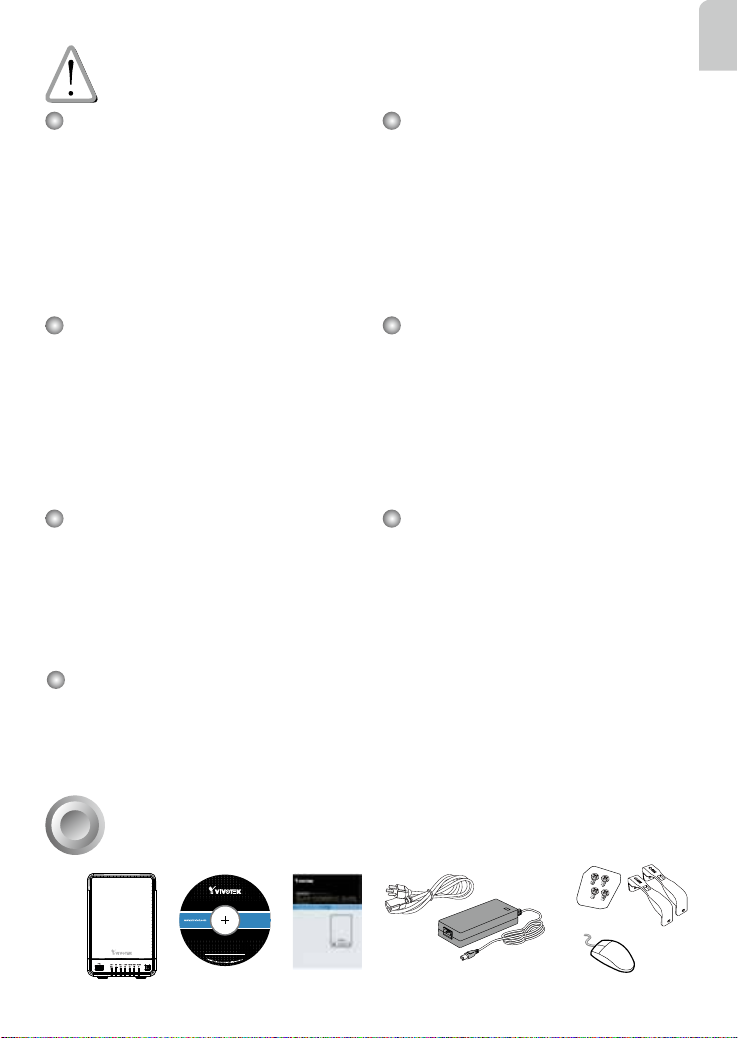
Package Contents / Packungsinhalt kontrollieren /
1
Verpakkingsinhoud
EN - 1
Page 3
Physical Description / Beschreibung der Teile / Fysieke
2
beschrijving
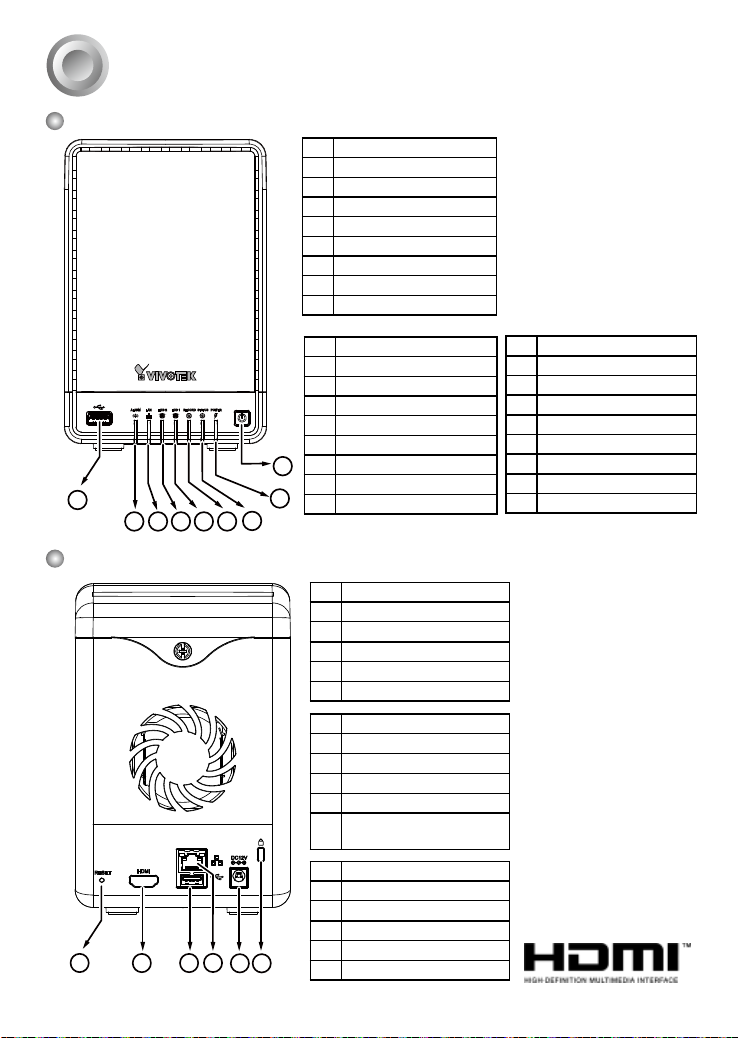
Front View / Ansicht von vorne / Vooraanzicht
1 USB port
2 Alarm LED
3 LAN activity LED
4 HDD 2 activity LED
5 HDD 1 activity LED
6 Recording activity LED
7 System Status LED
8 Power LED
9 Power button
1 USB-Port
2 Alarm LED
3 LAN Aktiv LED
4 HDD2 Aktiv LED
5 HDD1 Aktiv LED
6 Aufnahme Aktiv LED
7 Systemstatus LED
9
8 Netz-LED
1
2 3 4 5 6
8
9 Netztaste
7
Rear View / Ansicht von hinten / Achteraanzicht
1 Reset button
2 HDMI port
3 RJ-45 LAN port
4 USB port
5 DC 12V power input
6 Chassis lock hole
1 Reset-Taste
2 HDMI port
3 RJ-45 LAN port
4 USB-port
5 DC 12V Stromeingang
6 Öffnung für
Gehäuseschloss
1 Resetknop
2 HDMI-poort
3 RJ-45 lanpoort
4 Usb-poort
1
234
5 6
5 Gelijkstroom 12V-ingang
6 Behuizingsslotgat
1 Usb-poort
2 Alarmled
3 Lan-activiteitsled
4 HDD2-activiteitsled
5 HDD1-activiteitsled
6 Opnameactiviteitsled
7 Systemstatusled
8 Aan/uitled
9 Aan/uitknop
EN - 2
Page 4
IMPORTANT / WICHTIG / BELANGRIJK
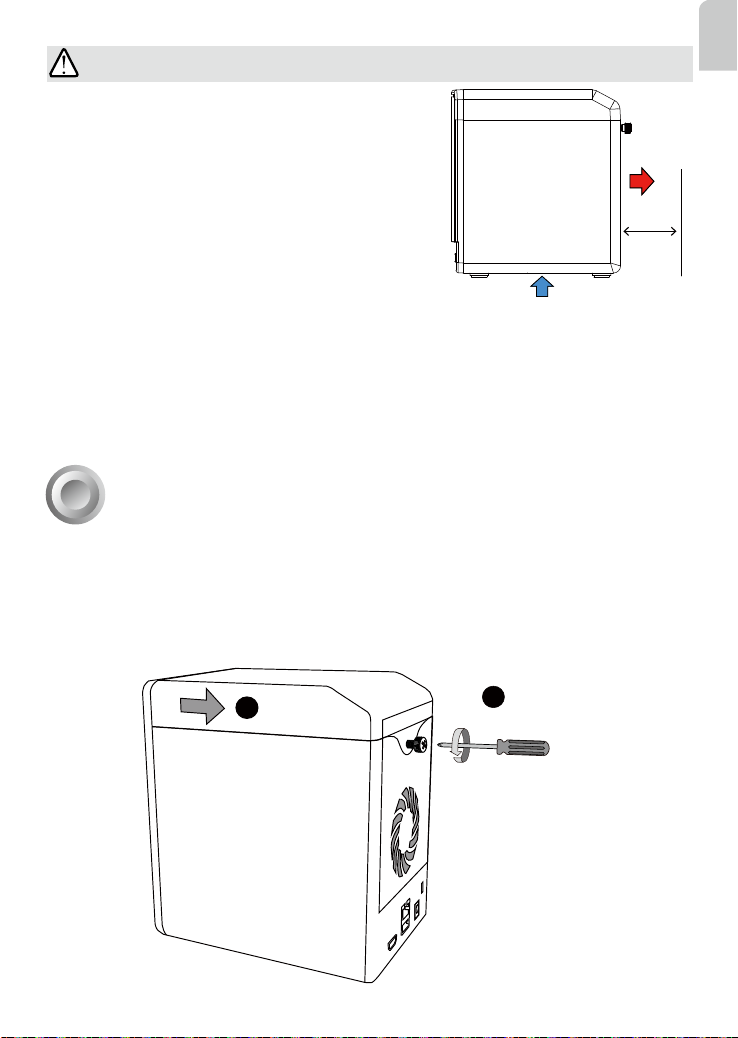
It is important to leave a clearance of 10cm to the
rear side of the chassis. The clearance is required to
ensure an adequate airow through the chassis to ventilate heat.
Es ist wichtig, zur Chassis-Rückwand einen Abstand
von 10 cm frei zu lassen. Der Abstand ist erforderlich,
um das Chassis ausreichend zu belüften
Laat 10cm ruimte vrij aan de achterzijde van de behuizing. Dit is zeer belangrijk. De ruimte is nodig voor een
adequate luchtstroom door de behuizing om warmte
weg te voeren.
To ensure normal operation, maintain ambient airow. Do not block the airow around
chassis such as placing the system in a closed cabinet.
Sorgen Sie für einen ausreichenden Luftstrom um das Gehäuse, um den normalen Betrieb
zu gewährleisten. Blockieren Sie nicht den Luftstrom um das Gehäuse, wie z.B. durch das
Aufstellen des Systems in einem geschlossenen Schrank.
Om een normale bediening te verzekeren, behoud een omringende luchtstroom. Blokkeer
de luchtstroom rond de behuizing niet, zoals door het systeem in een gesloten kast te
plaatsen.
Hardware Installation / Hardwareinstallation / Hardware
3
installatie
SATA hard disk(s) are user-supplied. The network video recorder can readily accommodate
most of the off-the-shelf SATA hard drives.
SATA Festplatten sind nicht im Lieferumfang enthalten. Der Netzwerk-Videorekorder kann
die meisten im Handel erhältlichen SATA Festplatten verwenden.
SATA harde schijf (schijven) zijn voorzien voor de gebruiker. De netwerk video recorder kan
dadelijk de meeste van de kast afkomstige SATA harde schijven onderbrengen.
10cm
English
2
1
EN - 3
Page 5

1. Loosen the retention screw on the rear of the chassis.
Lösen Sie die Schraube an der Rückseite des Gehäuses.
Draai de bevestigingschroef aan de achterkant van de behuizing los.
2. Slide the top cover back, and then remove the top cover.
Schieben Sie die obere Abdeckung zurück und entfernen Sie anschließend die obere
Abdeckung.
Schuif de bovenkant van de behuizing naar achteren en verwijder hem.
3. Secure the HDD brackets to the hard disks.
Befestigen Sie die HDD Halterungen an den Festplatten.
Bevestig de HDD-beugels op de harde schijven.
4. Gently put the hard disks into drive bays with its label side facing the inside of the chassis and the connector side facing downwards. When the hard disks reach the bottom,
use slightly more force to engage the the SATA connectors.
Setzen Sie die Festplatten vorsichtig mit der beschrifteten Seite nach oben und mit den
Kontakten nach außen zeigend in die Laufwerksschächte ein. Wenn die Festplatten den
Boden erreichen, schieben Sie etwas fester, um die SATA Anschlüsse einrasten zu lassen.
Plaats de harde schijven voorzichtig in de stationlades. De zijde met het label moet geri-
cht zijn op de binnenkant van de behuizing en de stekker moet omlaag zijn gericht. Als
de harde schijven de onderkant bereiken, drukt u iets steviger om de SATA-stekkers te
laten grijpen.
5. When done, install the top cover.
Bringen Sie danach die obere Abdeckung wieder ab.
Plaats de bovenkant van de behuizing terug.
HDD 1
HDD 2
34
Beschriftete Seite
EN - 4
Label side
Labelzijde
Page 6

Interface Connections / Interface Anschlüsse / Interface verbindingen
1. Connect to a monitor using an HDMI cable.
Schließen Sie einen Monitor über das HDMI Kabel an.
Sluit een beeldscherm aan via een HDMI-kabel.
2. Connect CAT5e or better-quality Ethernet cable to cameras via a local, switched network, or clients through the Internet. Refer to next page for more information.
Schließen Sie CAT5 oder höherwertige Ethernetkabel über ein lokales Switch-Netzwerk
an Kameras oder an Clients über das Internet an. Siehe nächste Seite für weitere Informationen.
Verbind CAT5 of betere kwaliteit Ethernet kabels via een plaatselijk, geschakeld netwerk,
of cliënten door het internet. Verwijs naar de volgende pagina voor meer informatie.
3. Connect USB devices such as, mouse, keyboard, or USB optical drive (formatted in FAT
format), or UPS.
Schließen Sie USB-Geräte wie z.B. Maus, Tastatur oder optische USB-Laufwerke (FAT-
Dateiformat) oder USV an.
Sluit usb-apparatuur aan, zoals een muis, toetsenbord of usb-optische stations (gefor-
matteerd in FAT) of UPS.
4. Connect the power adaptor to the power mains and the system.
Schließen Sie das Netzteil an die Steckdose und das System an.
Sluit de stroomadapter aan op een stopcontact en op het systeem.
Router
LAN / WAN
2
English
1
3
4
EN - 5
Page 7

Initial Conguration - via a Local Console
4
Erstmalige Konguration - über eine Lokale Konsole
Initiële conguratie - via een lokale console
IMPORTANT / WICHTIG / BELANGRIJK
If you congured the system using an Ethernet web console, please skip the Auto Setup
steps when you connect the HDMI cable. You may accidentally format your storage
volumes.
Wenn Sie das System mit einer Ethernet Webkonsole konguriert haben, überspringen Sie
bitte die Automatische Einrichtung, wenn Sie das HDMI Kabel anschließen. Sie könnten
Ihre Speicherlaufwerke aus Versehen formatieren.
Als u het systeem hebt gecongureerd via een Ethernet-webconsole, slaat u de stappen
van Automatisch instellen over zodra u de HDMI-kabel aansluit. Anders formatteert u
wellicht per ongeluk de opslagvolumes.
A local console requires the following:
Eine lokale Konsole benötigt Folgendes:
Een lokale console vereist het volgende:
1. A monitor is connected via an HDMI cable.
Einen über ein HDMI Kabel verbundenen Monitor.
Een beeldscherm is aangesloten via een HDMI-kabel.
2. A mouse and/or a keyboard are connected to the system.
Eine an das System angeschlossene Maus und/oder Tastatur.
Een muis en/of toetsenbord is aangesloten op het systeem.
3. It is presumed that the system has not been congured yet.
Es wird angenommen, dass das System noch nicht konguriert wurde.
Het wordt aangenomen dat het systeem nog niet is gecongureerd.
1. Select the UI language, Time zone, and current date and time. Click on the Contunue
button to proceed.
Wählen Sie die Sprache der Benutzeroberäche, Zeitzone und das aktuelle Datum und
die Uhrzeit aus. Klicken Sie auf Fortfahren.
Selecteer de schermtaal,
tijdzone en actuele datum
en tijd. Klik op de knop
Doorgaan om verder te
gaan
.
EN - 6
Page 8

2. The system will then start to scan the local subnet for connected cameras.
Das System wird starten und das lokale Subnetz nach angeschlossenen Kameras
durchsuchen.
Het systeem scant vervolgens het lokale subnet op verbonden camera’s.
3. All cameras detected on the network will be automatically selected. Maximum is 8 for
the NVR. If necessary, deselect the cameras you want to exclude from the conguration.
Click Continue to proceed.
Sämtliche im Netzwerk erkannten Kameras werden automatisch ausgewählt. Das
Maximum für den NVR beträgt 8. Wählen Sie die Kameras ab, die Sie von der
Konguration ausschließen möchten. Klicken Sie auf Fortfahren.
Alle in het netwerk gedetecteerde camera's worden automatisch geselecteerd. Het
maximum voor de NVR is 8. Indien nodig vinkt u de camera's uit die u wilt uitsluitend van
de conguratie. Klik op Doorgaan om verder te gaan.
English
4. The system will automatically create volumes from the installed disk drives. The process
will take several minutes.
Das System wird automatisch Volumes von den installierten Festplatten erstellen. Der
Vorgang wird einige Minuten dauern.
Het systeem maakt automatisch volumes op de geïnstalleerde harde schijven. Dit proces
duurt enkele minuten.
5. When done, the LiveClient screen will display, and, by default, the recording from the
selected cameras will immediately take place.
Anschließend wird der LiveClient Bildschirm angezeigt, und die Aufnahme von
ausgewählten Kameras standardmäßig umgehend gestartet.
Als dit klaar is, verschijnt het LiveClient-venster. De opnames van de geselecteerde
camera's vindt standaard onmiddellijk plaats.
EN - 7
Page 9

NOTE / HINWEIS / OPMERKING:
1. The maximum recording bandwidth is 32Mbps. When cameras are recruited into the conguration,
their stream 1 is used as the recording stream. The camera stream 1 will be congured into
H.264/720P/30fps/CBR 3Mbps.
The resolution and fps of stream 1 may vary depending on the specications of different cameras.
Die maximale Aufnahmebandbreite ist 32Mbps. Wenn Kameras in die Konguration aufgenommen
werden, wird ihr Stream 1 als das Aufnahmesystem verwendet. Der Kamerastream 1 wird in
H.264/720P/30fps/CBR 3Mbps rekonguriert.
Die Auösung und fps von Stream 1 kann sich je nach Spezikationen von verschiedenen Kameras
unterscheiden.
De maximale bandbreedte voor de opname is 32 Mbps. Als camera's in de conguratie worden
opgenomen, wordt hun stream 1 gebruikt als opnamestream. De camerastream 1 wordt
gecongureerd op H.264/720P/30 fps/CBR 3 Mbps.
De resolutie en fps van stream 1 kan variëren, afhankelijk van de specicaties van de diverse
camera's.
2. If there are more than 8 cameras in your local network, you will need to manually select cameras.
If there are less than 8 cameras, the Auto Setup will automatically move to the next conguration
step.
Wenn sich mehr als 8 Kameras in Ihrem lokalen Netzwerk benden, müssen Sie die Kameras
manuell auswählen.
Wenn weniger als 8 Kameras vorhanden sind, wird die Automatische Einrichtung automatisch zum
nächsten Kongurationsschritt wechseln.
Als meer dan 8 camera's zijn verbonden met het lokale netwerk, dient u handmatig de camera's te
selecteren.
Indien minder dan 8 camera's aanwezig zijn, gaat Automatisch instellen automatisch naar de
volgende conguratiestap.
EN - 8
Page 10

Page 11

P/N:625024800G Rev. 1.0
All specications are subject to change without notice.
c
Copyright 2014 VIVOTEK INC. All rights reserved.
VIVOTEK INC.
6F, No.192, Lien-Cheng Rd., Chung-Ho, New Taipei City, 235, Taiwan, R.O.C.
|T: +886-2-82455282| F: +886-2-82455532| E: sales@vivotek.com
VIVOTEK Netherlands B.V.
Busplein 36, 1315KV, Almere, The Netherlands
|T: +31 (0)36 5389 149| F: +31 (0)36 5389 111| E: saleseurope@vivotek.com
VIVOTEK USA, INC.
2050 Ringwood Avenue, San Jose, CA 95131
|T: 408-773-8686| F: 408-773-8298|E : salesusa@vivotek.com
 Loading...