

Page 1
VIVOTEK Mounting Accessories
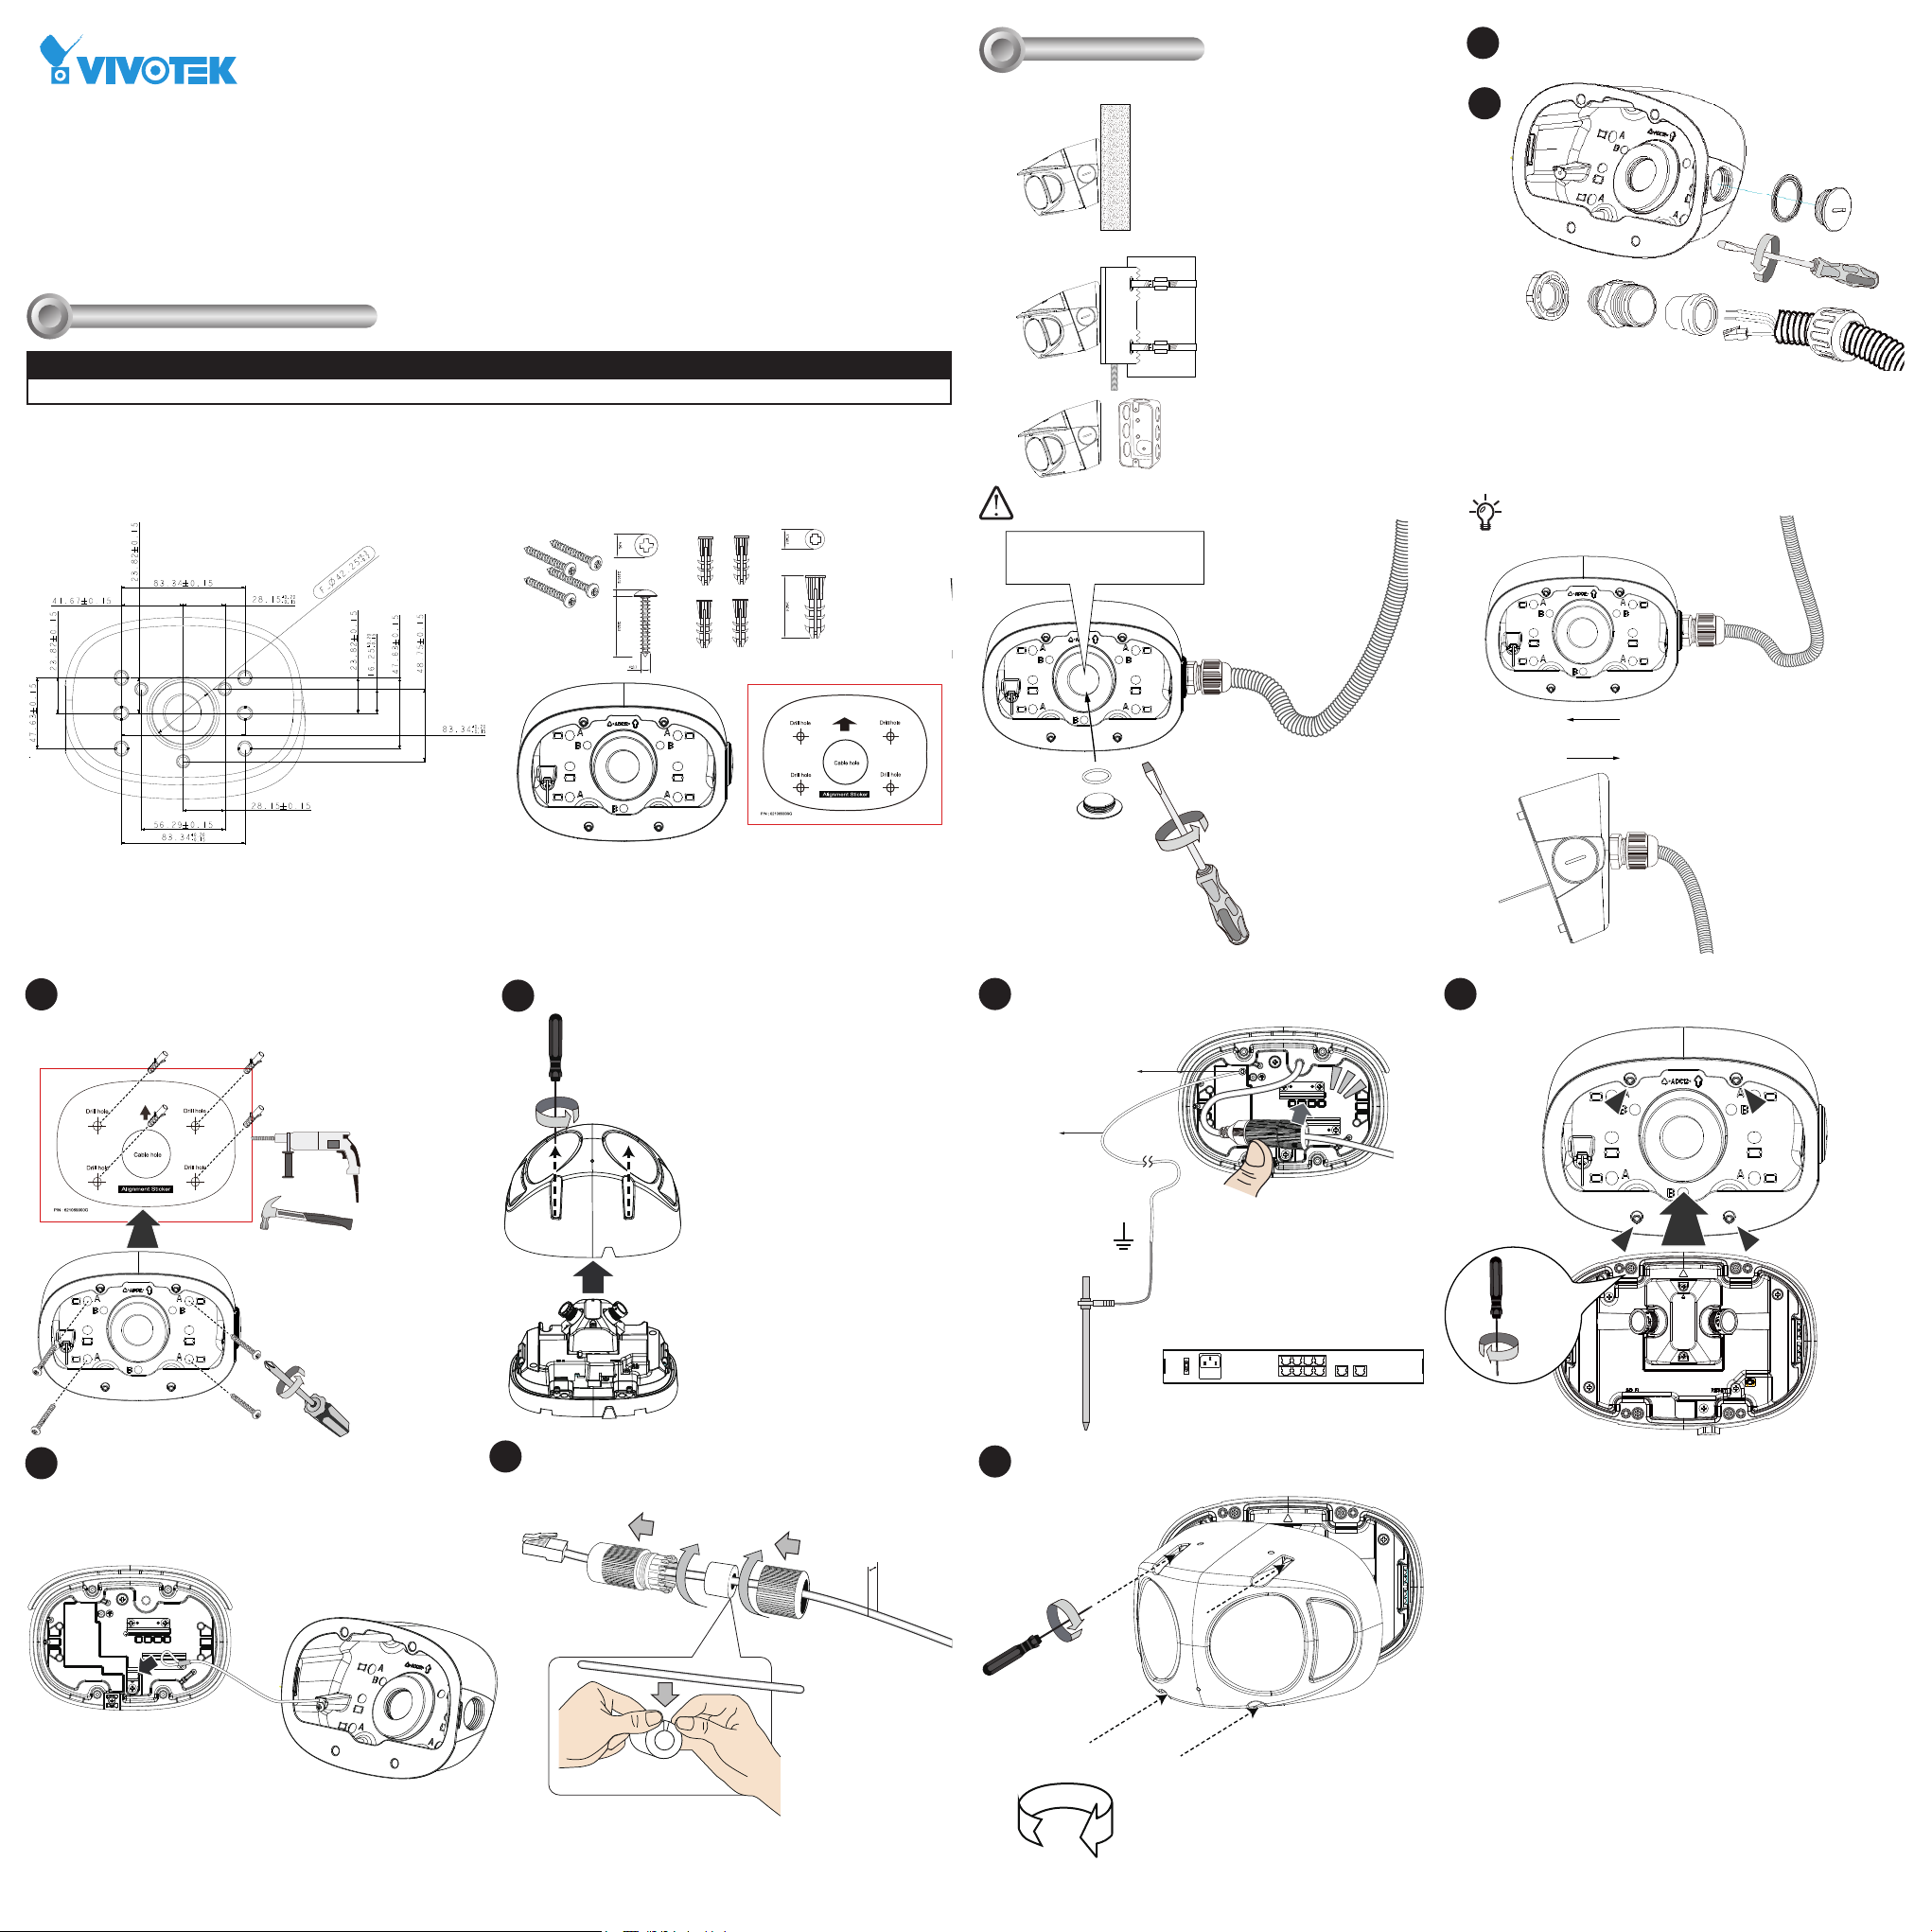
Installation
II
Remove the plastic plug on the conduit hole. A 3/4" conduit is
A
required for routing the cables with waterproof connection.
Revison History:
Compatible cameras/brackets
MS9390-HV
Mounting Dimensions
Rev. 1.0: Initial release
Compatible VIVOTEK Cameras
I
AM-21N Tilt Bracket
Installation Guide
Accessory Ordering part no.: 100228700G
Package Contents
M4 X 25
There are 3 mount types:
A
B
C
If using the side hole,
seal the center hole.
A. Wall mount,
B. Pole mount via AM-312,
Corner mount via AM-412
C. to electrical junction box.
A-1
Install the cable gland and pass cables through it. The conduit
is user-supplied.
Install the cable conduit before wall-mounting. The conduit
can be installed from the side or through the center hole.
3/4”
Attach the included alignment sticker to a preferred position.
A-2
Drill holes on the wall and install the tilt bracket. If the space
behind the wall allows, you may also pass cables through the
wall.
Ø 6.5mm
unit: mm
Remove the top cover from your camera.
A-3
x4
Torque: 6.5±0.5kgf-cm
Attach the waterproof cable gland to the retention clips at the
A-6
back of the camera. Connect a grounding wire to the ground
screw of the camera.
Stainless SS M3*5
Green/Yellow
≥ 20AWG
OR
Install the camera to the tilt bracket by fastening 4 T10
A-7
screws.
Attach the tether wire to the back of the camera.
A-4
Install the waterproof components of the cable gland to your
A-5
Ethernet cable following the QIG of your camera. The cable
gland will be placed within the protection of the tilt bracket.
5.5 ~ 6.4mm
1.5m
Install the dome cover to the camera.
A-8
ON
OFF
x4
Torque: 6.5±0.5kgf-cm
802.3at
100~240V
LAN/PoE
AC
T10
3
7
1
10
9
658
GE LAN GE LAN
4
2
Open a live view console and adjust the shooting direction.
Refer to the camera's QIG for more information.
Page 2
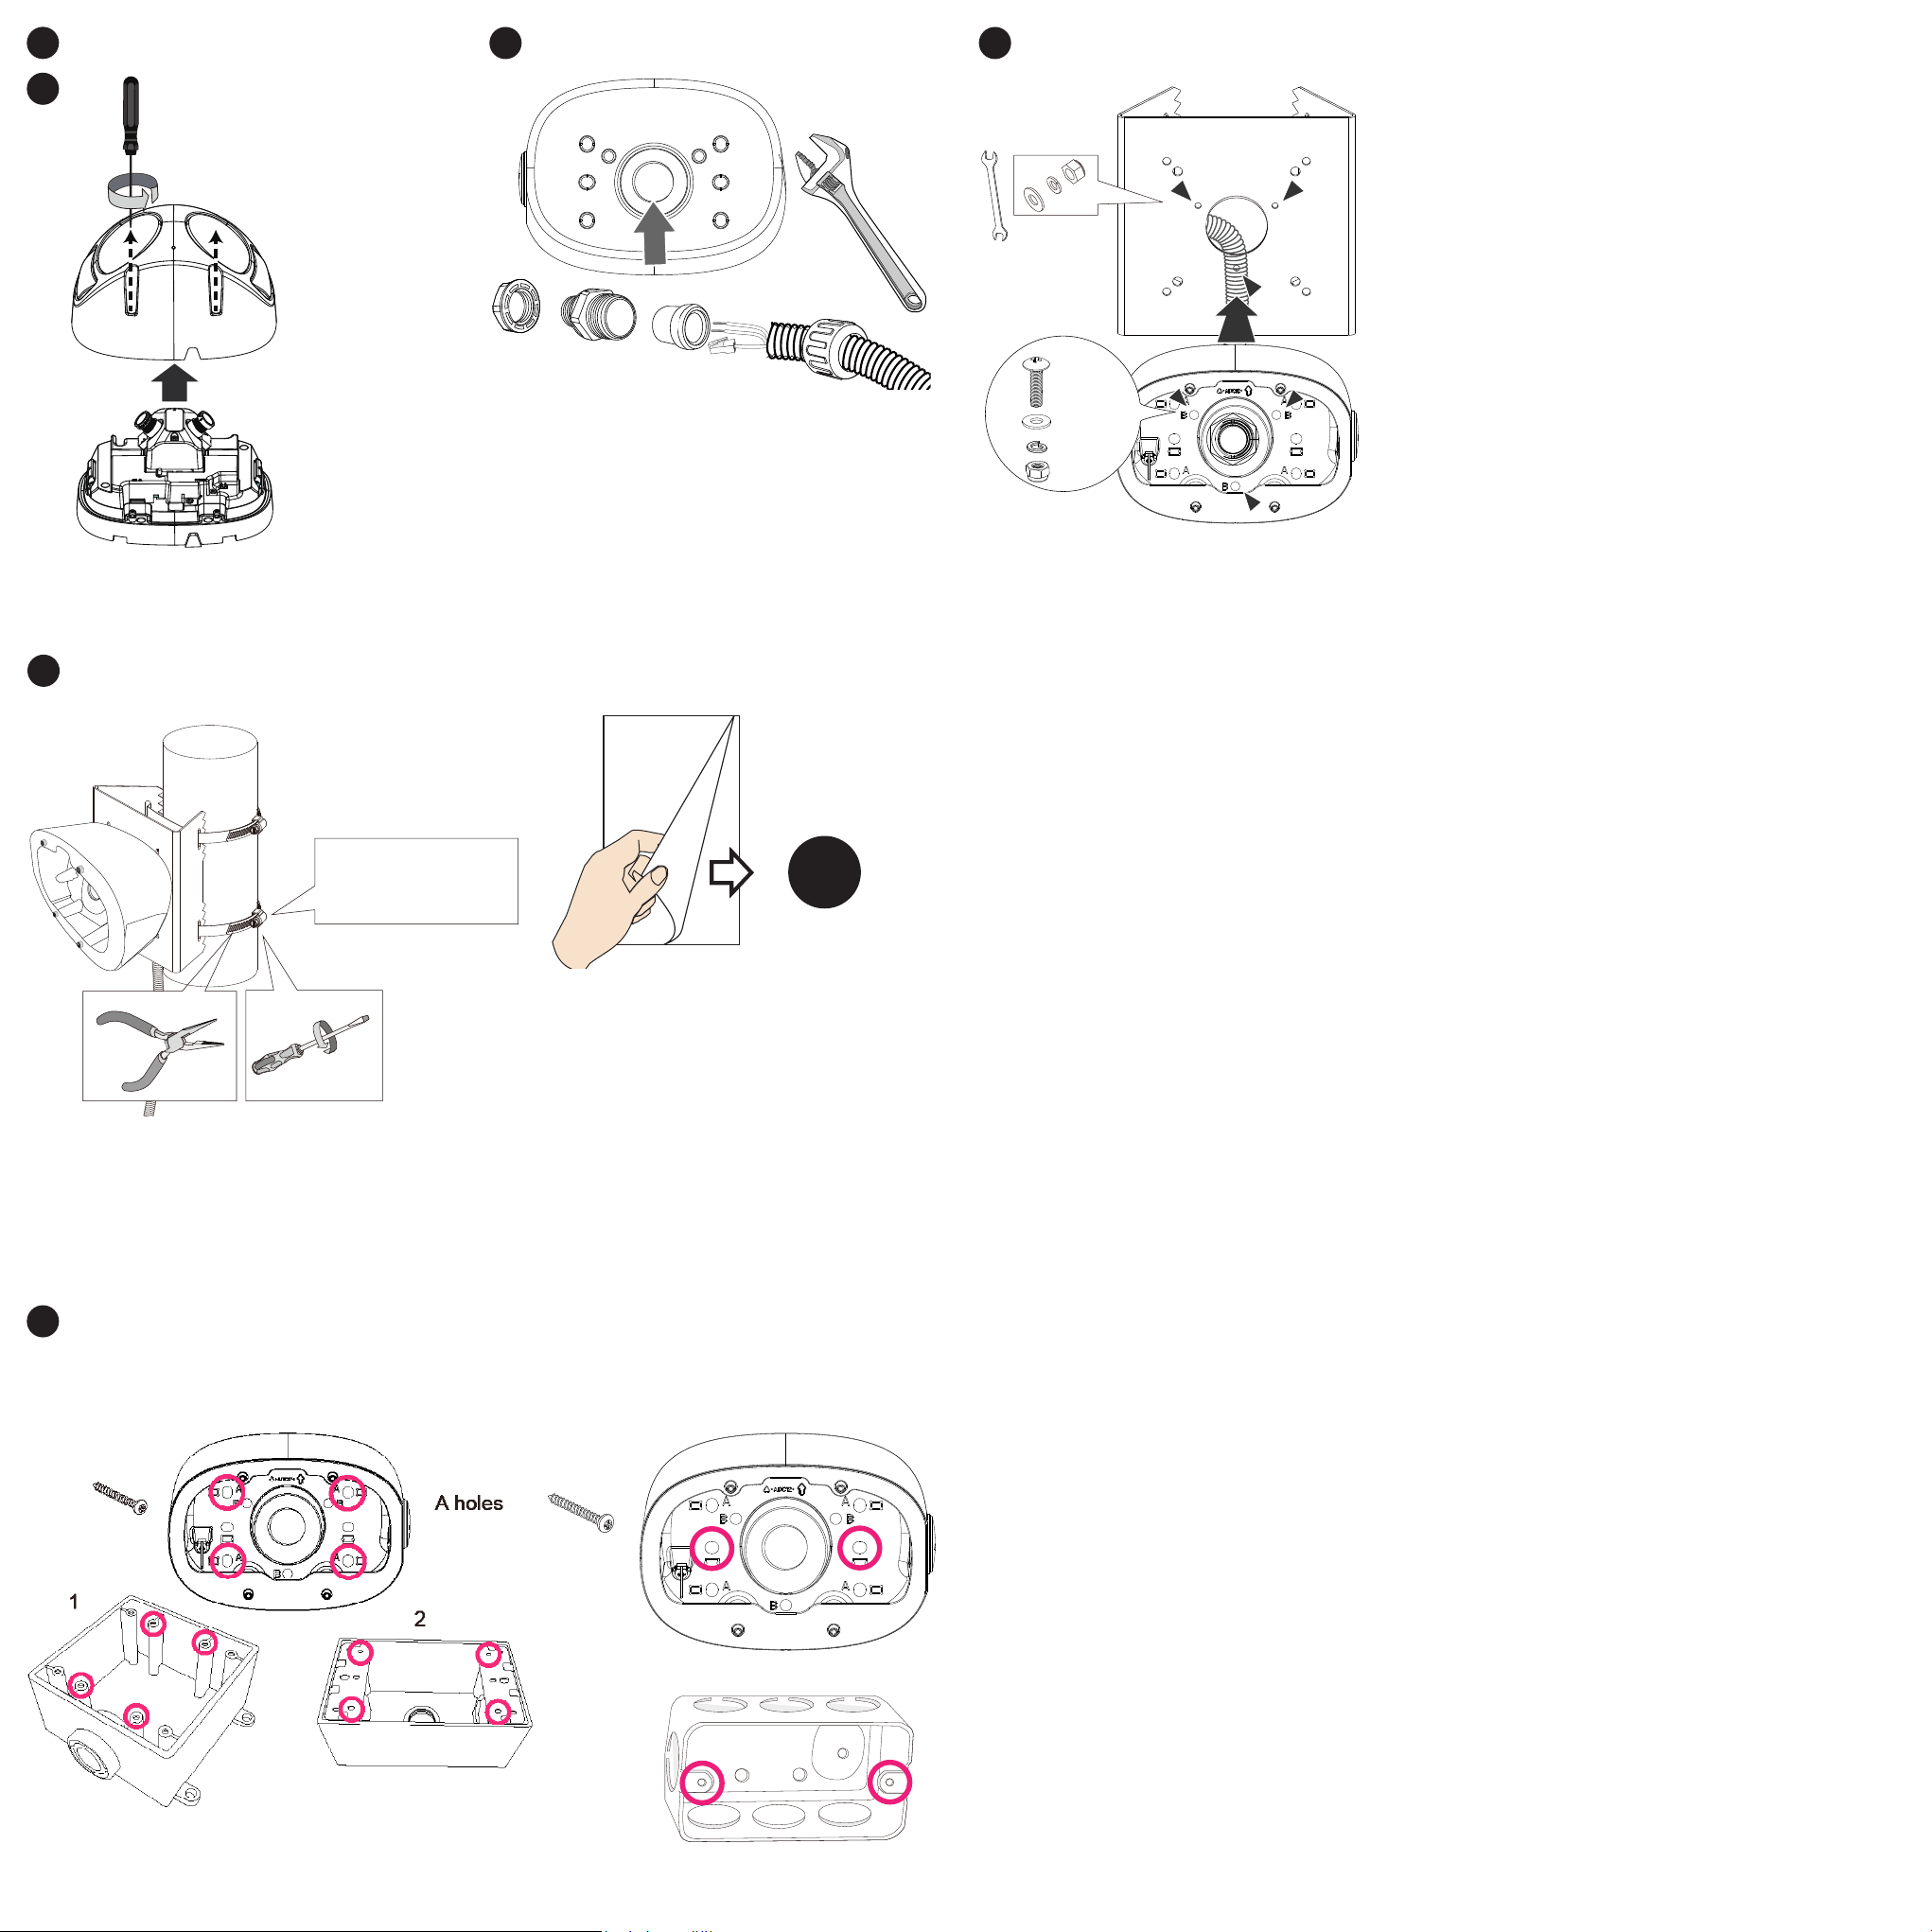
Remove the top cover from the camera.
B
B-1
x4
Torque: 6.5±0.5kgf-cm
Install a 3/4" conduit to the center hole. A 3/4" conduit is required
B-2
for routing the cables with waterproof connection.
Install the tilt bracket to AM-312 using the included M4 screws,
B-3
washers and hex nuts. Pass the conduit through the center hole
of the AM-312.
B holes
M4X15
AM-312
1. Pass the stainless steel straps through the bracket and around the
B-4
pole.
2. Tighten the straps using a pincer plier and a at blade screwdriver.
Installation Torque:
35 lb-in(40kg-cm)
Refer to Step A-4 for the rest of the installation process.
A-4
The tilt bracket supports the installation to the following electrical
C
boxes:
1. Cantex 3/4" type FSE 2 Gang, Outdoor/Indoor electrical box.
2. Generic 3/4" conduit box enclosure, 3/5 holes.
3. Single rectangular handy box.
The rest of the installation steps are identical to those described
above.
A holes
3
 Loading...