

Page 1
IR illuminator (AI-101) Quick Installation Guide 2012/04/05
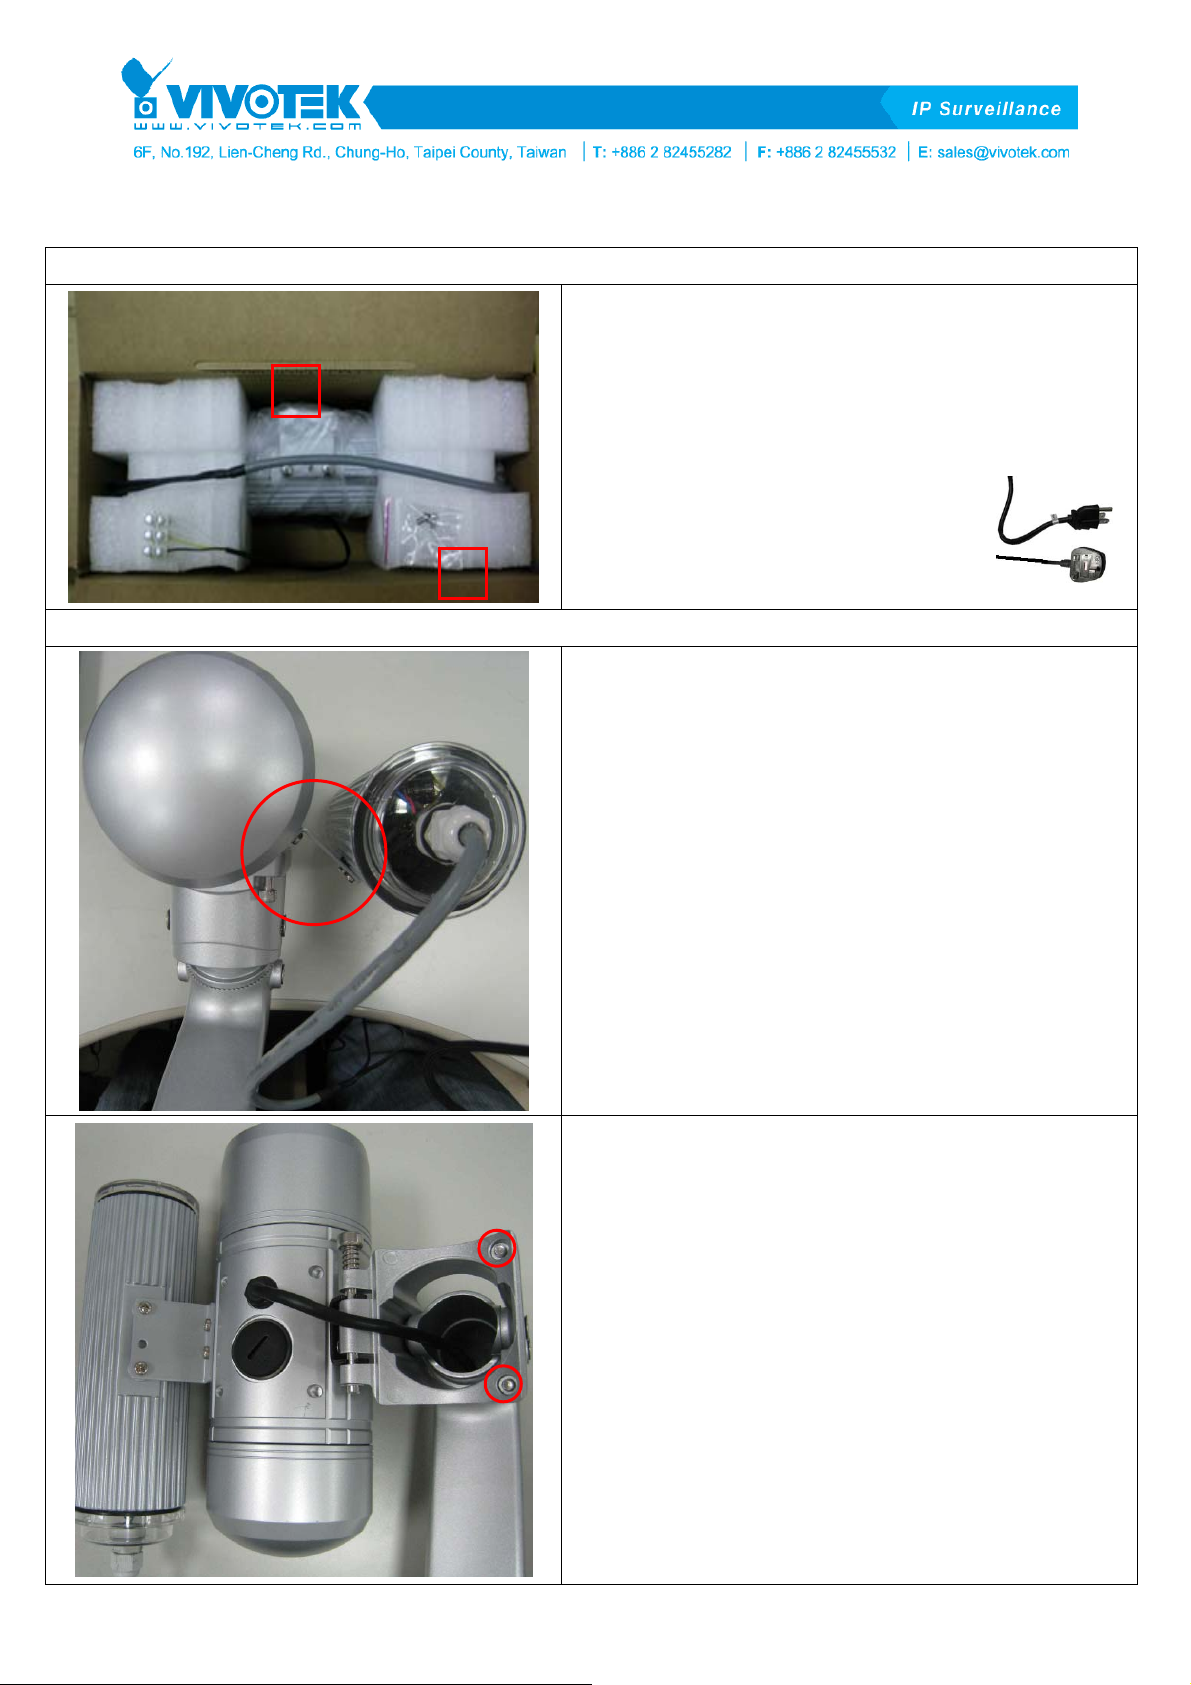
1. Product Introduction
Package Contents:
A. IR illuminator (AI-101) * 1 pcs (including stand
2. Installation
A
B
plate and power plug)
B. Screw * 2 pcs
※ You should purchase power cable
suitable for your local plug with
enough cable length, as shown on
the right:
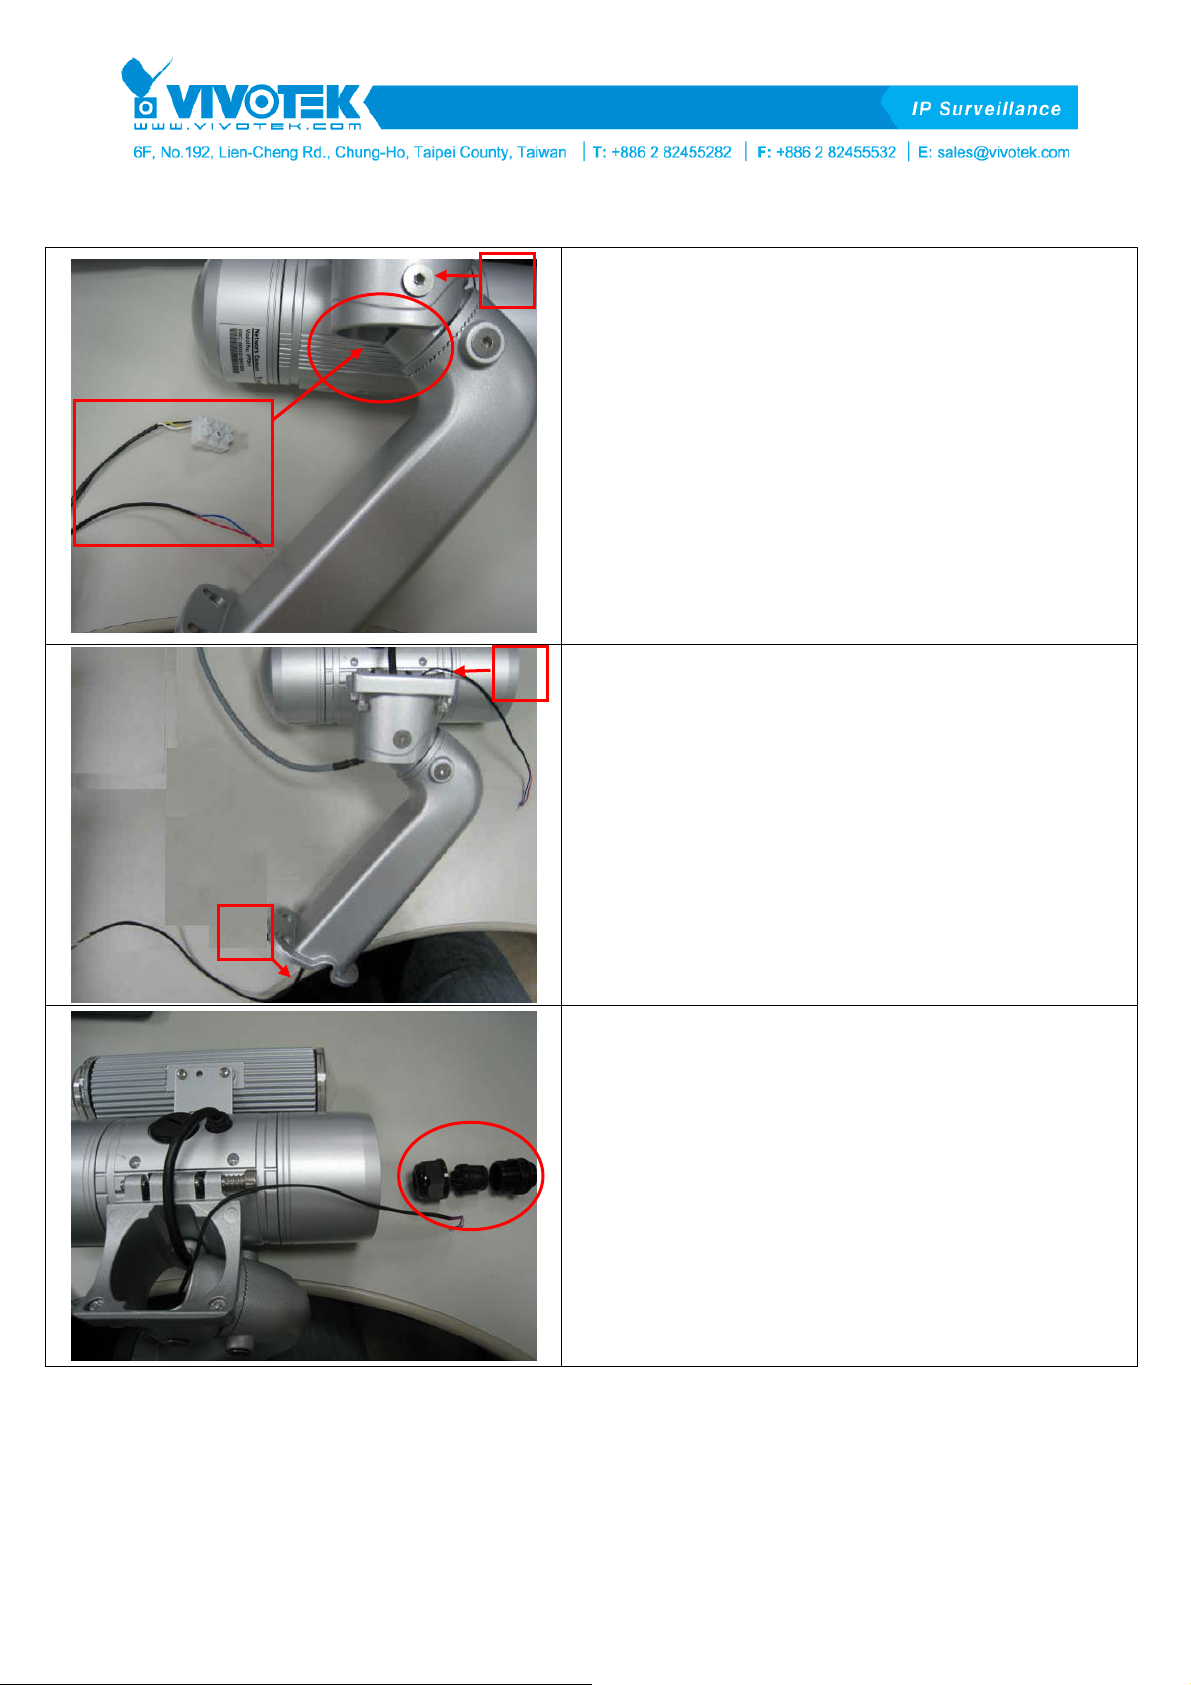
Step 1:
a. Take Network Camera (including the stand).
b. Attach the AI-101 (including locking screws) to
the side of the Network Camera.
Step 2:
a. As shown on the left, loosen the fixing screws of
the stand and the Network Camera. Open the
Network Camera.
1
V1.0
Page 2
IR illuminator (AI-101) Quick Installation Guide 2012/04/05
A
B
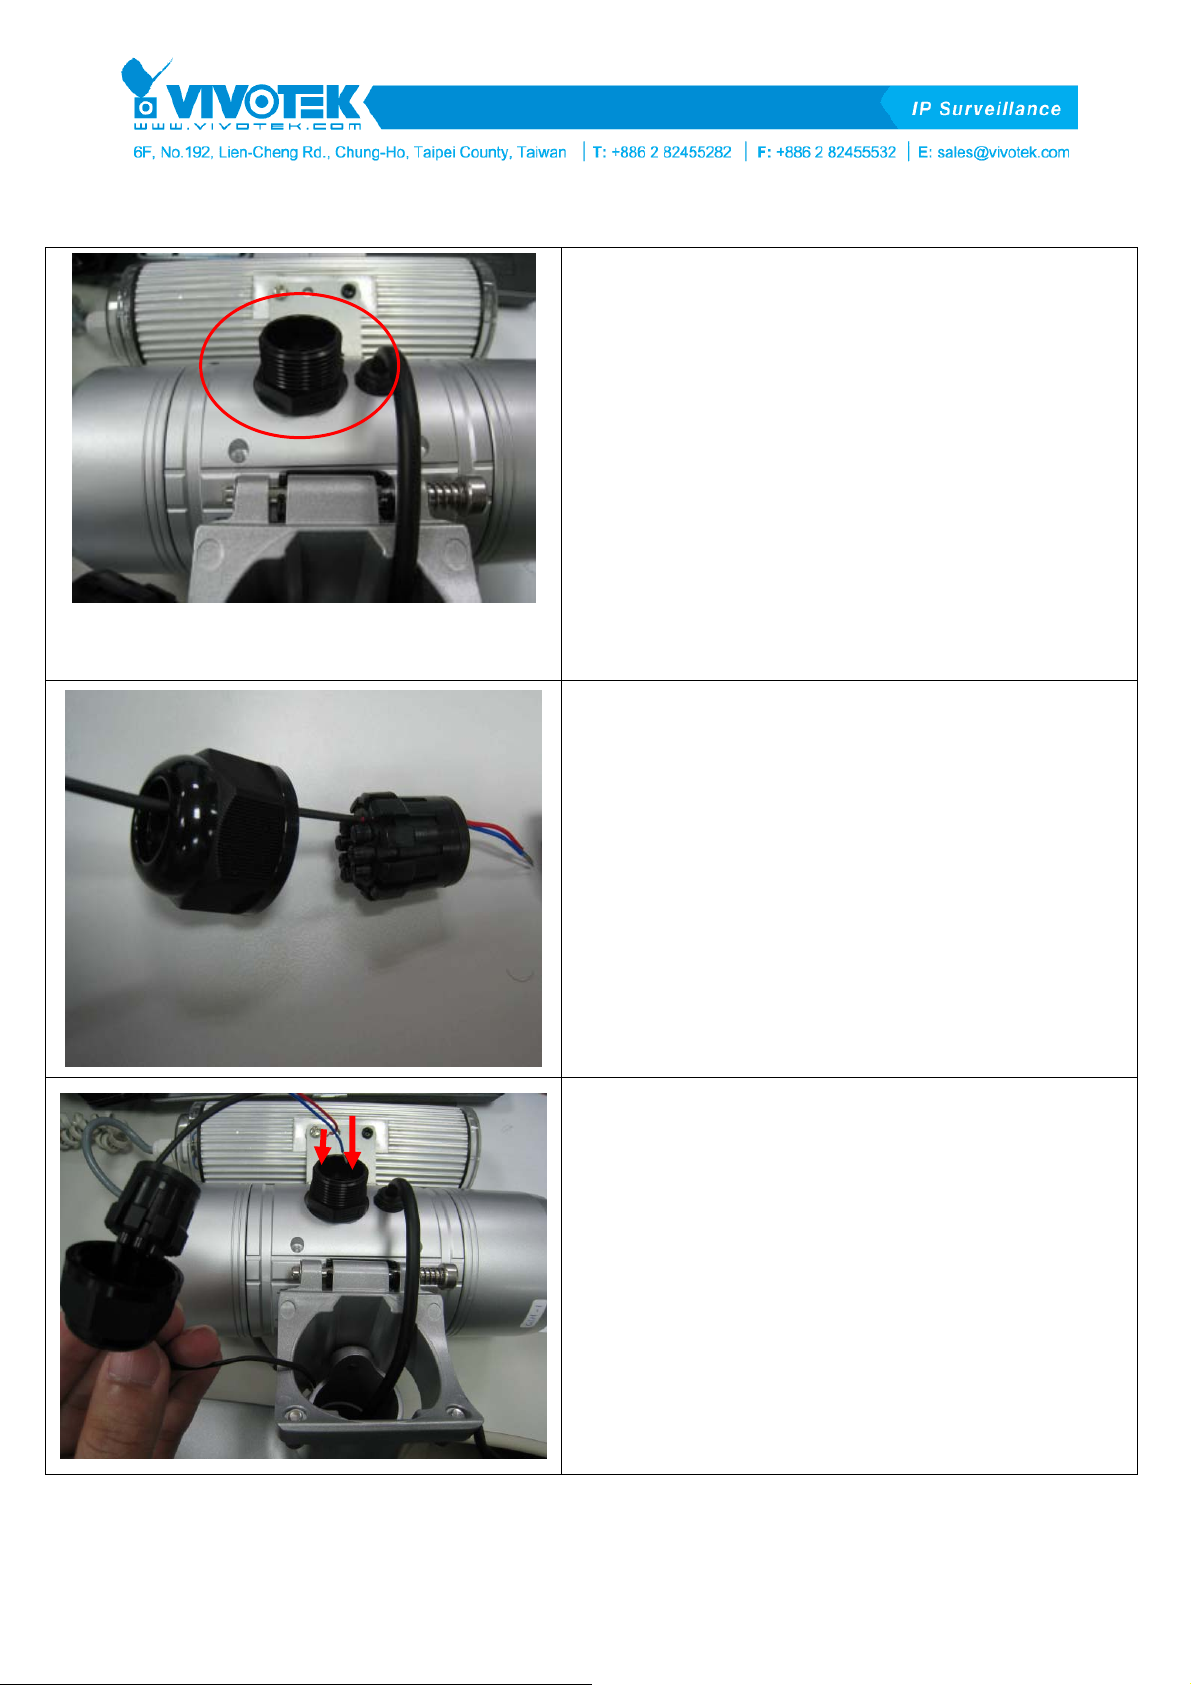
Step 3:
a. Loosen the fixing screw of the stand (A, as
shown on the left). Adjust the angle and lean the
stand joint forward to its maximum.
b. Pass the AI-101 control cable and power cable
into the opening of the stand, as shown on the
left.
Step 4:
a. Pass the power cable through the bottom of the
stand (A, as shown on the left)
b. Pass the control cable to the opening of the
stand. (B, as shown on the left)
A
Step 5:
a. As shown on the left, take the components of the
waterproof connector from the Network Camera
stand pack.
2
V1.0
Page 3
IR illuminator (AI-101) Quick Installation Guide 2012/04/05
Step 6:
a. Open the waterproof connector seal of the
Network Camera.
b. Secure the bottom of the waterproof connector
seal.
※ Make sure that the waterproof connector to the
Network Camera is secured tightly.
Step 7:
a. Pass the control cable through the components
of the waterproof connector one by one.
Step 8:
a. Pass the control cable into the bottom of the
Network Camera.
3
V1.0
Page 4

IR illuminator (AI-101) Quick Installation Guide 2012/04/05
Step 9:
a. Tuck the remaining part of the control cable into
the case as much as possible.
※ The back cover of the Network Camera can be
opened so that control cable can be pulled out.
Step 8:
a. Secure the waterproof connector tightly.
※ Make sure that the waterproof connector to the
Network Camera is secured tightly.
Step 10:
a. Secure the waterproof connector completely.
b. Attach the Network Camera body to the stand as
indicated by the arrow mark.
※ Make sure that the waterproof connector is
secured tightly.
4
V1.0
Page 5

IR illuminator (AI-101) Quick Installation Guide 2012/04/05
Step 11:
a. Secure the fixing screws of the stand and the
Network Camera tightly.
b. Open the back cover of the camera.
c. Step 12:
d. Connect the control cable as shown in
the ”General I/O Terminal Block” section of the
User’s Manual.
※ Blue: Connect Blue Ctrl ─ to “Ground”
※ Red: Connect Red Ctrl ┼ to “Digital Output”
Step 13:
a. Secure the back cover of the Network Camera.
※ Make sure that the cables are not jammed when
you screw the back cover.
Step 14:
a. Connect the power cable you bought to the
adapter of the IR illuminator.
※ The cable should be connected based on
polarity.
5
V1.0
Page 6

IR illuminator (AI-101) Quick Installation Guide 2012/04/05
Step 15:
a. Once you complete the steps above, attach the
camera to the stand plate and fix it on the wall
(as shown on the left).
3. Setting
Step 1:
a. As shown in the QIG (User’s Manual), log on to the
homepage.
b. Enter ”Configuration”, then click “Advanced mode.”
c. Enter ”Audio and video” setting page.
d. Unfold ”Day/Night settings:”, check
and save
the setting, then in the night mode, the AI-101
should be activated.
6
V1.0
Page 7

IR illuminator (AI-101) Quick Installation Guide 2012/04/05
Note:
a. There is only one DO connector on this Network
Camera. If the external IR illuminator is used, no
other DO devices can be connected.
b. When you check the “Turn on external IR
illuminator” option, a warning message will appear.
Click “Yes” to enable the IR illuminator. Please
note, however, all events about DO trigger in the
Event Setting will be cleared after enabling.
c. Once you enable the IR illuminator, the Digital
output option on the System page will be disabled.
d. Once you enable the IR illuminator, the Digital
output option on the homepage will be disabled.
※ If DO function is needed, please uncheck the
option in
the “Day/Night settings:”. Then the DO function
can be used again.
7
V1.0
 Loading...