

Vivo DESK-V000EB Instruction Manual

35.25” x 23.25” Electric Desk Riser
Scan the QR code with your mobile device or follow the link
for helpful videos and specications related to this product.
Instruction Manual
https://vivo-us.com/products/desk-v000eb
help@vivo-us.com www.vivo-us.com 1-800-371-5654
SKU: DESK-V000EB
2 3
If you do not understand these directions, or if you have any doubts about the safety of the
installation, please call a qualied technician. Check carefully to make sure there are no missing or
defective parts. Improper installation may cause damage or serious injury. Do not use this product
for any purpose that is not explicitly specied in this manual and do not exceed weight capacity.
We cannot be liable for damage or injury caused by improper mounting, incorrect assembly, or
inappropriate use.
PACKAGE CONTENTS
TOOLS NEEDED
Scissors
33 lbs
(14.97kg)
DO NOT EXCEED WEIGHT CAPACITY.
Failure to do so may result in serious injury.
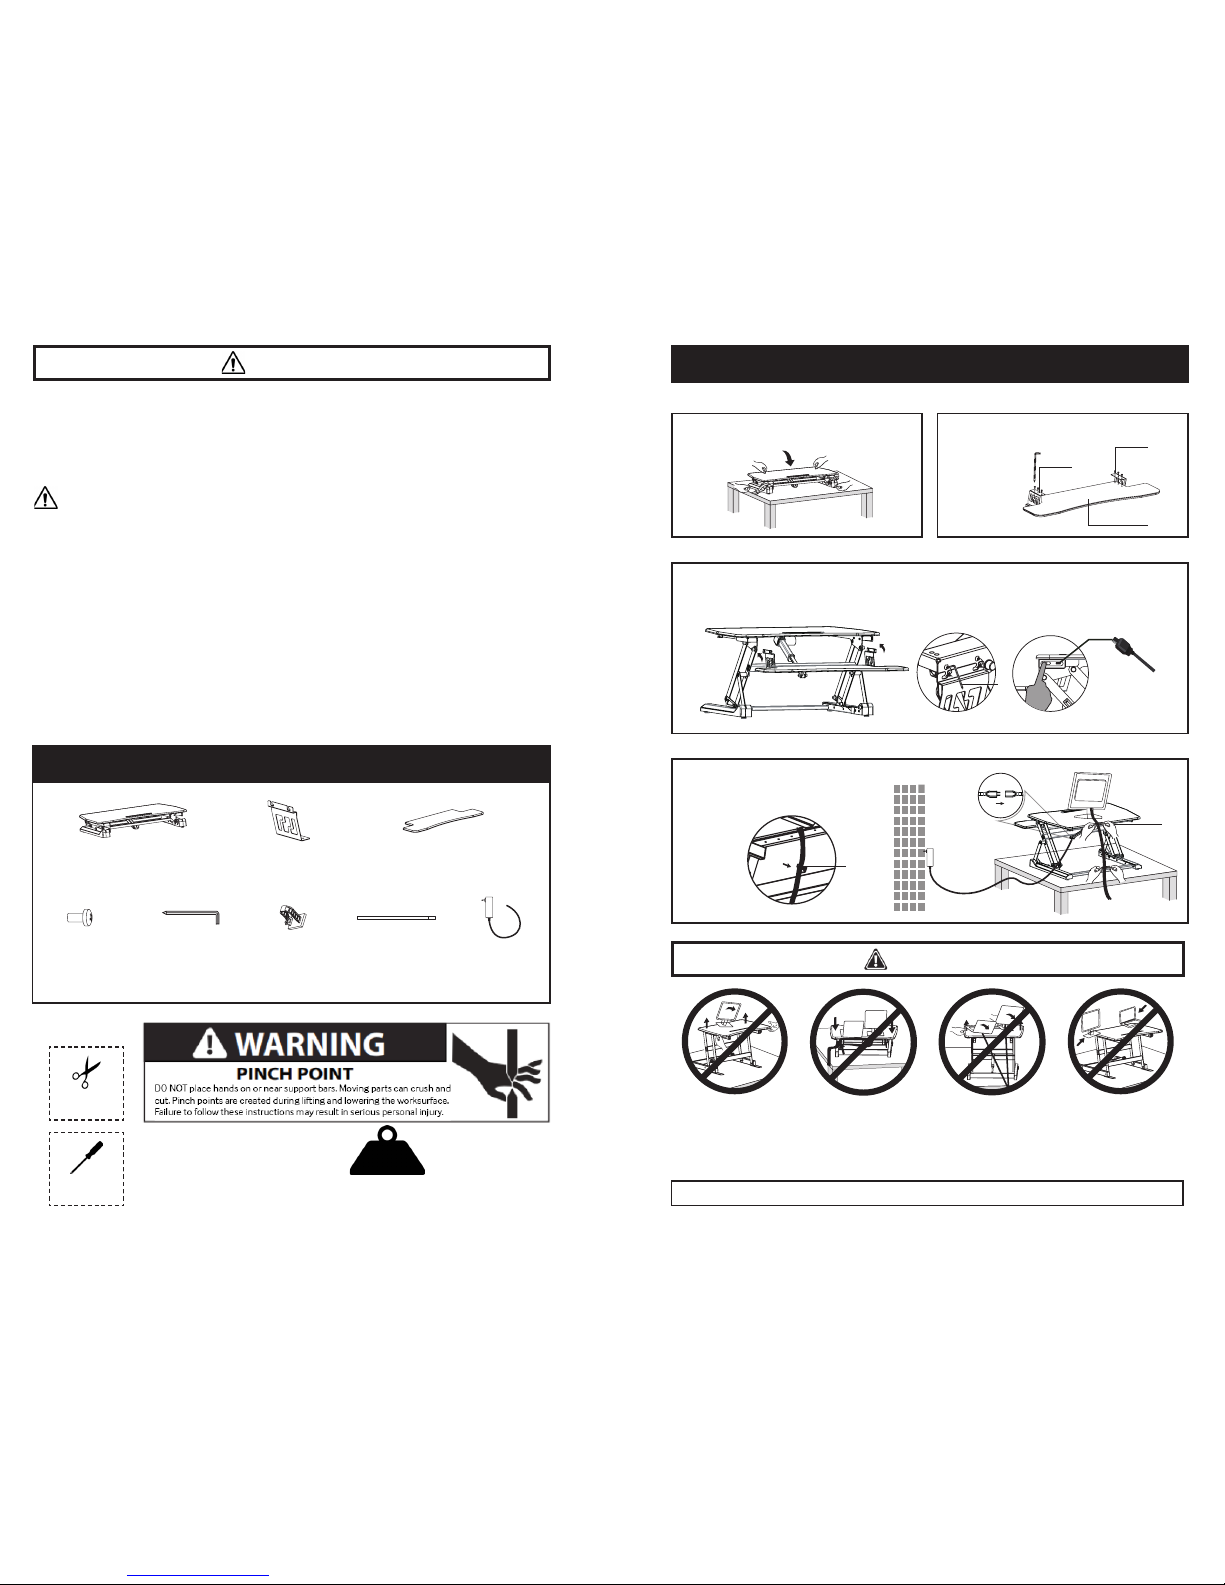
ASSEMBLY STEPS
STEP 1
Carefully remove desktop (A) from packaging
and set on table. Cut ties from desktop.
WARNING!
Phillips
Screwdriver
A (x1)
Adjustable
Desktop
B (x2)
Bracket
C (x1)
Keyboard
Tra y
H (x1)
Power Cable
D (x6)
Screw
E (x1)
4mm Alley Key
F (x1)
Cable Clip
G (x2)
Cable Tie
ELECTRICAL SAFETY INSTRUCTIONS
THIS PRODUCT IS POWERED BY ELECTRICITY. IN ORDER TO AVOID BURNS, FIRE AND ELECTRIC
SHOCK, PLEASE READ THE FOLLOWING INSTRUCTIONS CAREFULLY.
• DO NOT CLEAN PRODUCT WHILE POWER IS CONNECTED.
• DO NOT DISASSEMBLE OR REPLACE COMPONENTS WHILE POWER IS CONNECTED.
• NEVER OPERATE THE SYSTEM WITH A DAMAGED CORD OR PLUG. PLEASE CONTACT YOUR
SELLER TO REPLACE DAMAGED PARTS.
• NEVER OPERATE SYSTEM IN DAMP ENVIRONMENTS OR IF ANY ELECTRICAL COMPONENTS HAVE
MADE CONTACT WITH LIQUIDS.
• ALTERATIONS OF THE GIVEN POWER UNIT ARE NOT ALLOWED.
• OUTDOOR USE IS PROHIBITED.
STEP 2
Secure brackets (B) to keyboard tray (C) using the
six screws (D).
STEP 3
Plug the power cable (H) into the wall and press the switch on the right side to raise the desktop. Hang
keyboard tray over pre-installed screws, and tighten screws using the allen key (E). The USB 2.0 port
allows for charging phone, tablet, or other device.
STEP 4
Attach cable clip (F) where desired. Place
the monitor on desk and manage cable
with cable ties (G).
Raise desktop
slowly to keep
items stable.
Keep monitor and
laptop base fully on
the desktop.
Leave enough slack
in cable to allow for
full range of vertical
motion (15” / 38 cm).
Follow the cable
routing instructions to
avoid the potential to
pinch cables.
CAUTION!
Failure to follow these instructions may result in property damage and/or personal injury.
C
D
B
E
F
G
 Loading...