

Vivitar VviCam 3788xi Operation Manual
Operation manualOperation manual
Operation manualOperation manual
Digital cameraDigital camera
-English
R

FCC STATEMENT
This device complies with Part 15 of the FCC Rules. Operation is subject to the following
two conditions:
(1) this device may not cause harmful interference, and
(2) this device must accept any interference received, including interference that may
cause undesired operation
This equipment has been tested and found to comply with the limits for Class B
digital devices, pursuant to Part 15 of the FCC rules. These limits are designed to
provide reasonable protection against harmful interference in a residential installation,
This equipment generates, uses and can radiate radio frequency energy and, if not
installed and used in accordance with the instructions, may cause harmful interference
to radio communications. However, there is no guarantee that interference will not
occur in a particular installation. If this equipment does cause harmful interference to
radio or television reception, which can be determined by turning the equipment off
and on, the user is encouraged to try to correct the interference by one or more of the
following measures :
Note:
Reorient or relocate the receiving antenna.
Increase the separation between the equipment and receiver.
Connect the equipment into an outlet on a circuit different from that to which the
receiver is connected.
Consult the dealer or an experienced radio/ TV technician for help.
A

Use of shielded cable is required to comply with Class B limits in Subpart B or Part
15 of the FCC rules.
Do not make any changes or modifications to the equipment unless otherwise
specified in the manual. If such changes or modifications should be made, you could
be required to stop operation of the equipment .
TRADEMARK INFORMATION
Microsoft and Windows are U.S. registered trademarks of Microsoft Corporation.
Pentium is registered trademark of Intel Corporation.
Macintosh is a trademark of Apple Computer, Inc.
SD is a trademark.
PhotoSuite , PhotoVista and the MGI logo are trademarks or registered trademarks
of MGI Software Corp.
Adobe, the Adobe logo, and Acrobat are trademarks of Adobe Systems Incorporated.
Other names and products may be trademarks or registered trademarks of their
respective owners.
TM
READ THIS FIRST
Please start by reading the important messages below first.
1. The bundled driver, software ,design , specifications and user's manual that were
packaged with the camera are subject to change without notice.
2. The accessories that come with the camera may vary between regions.
3. For diver updates ,you can contact the dealer where you purchased the camera for
help.
4. We are not liable whatsoever for any compensation arising from errors in
descriptions in this user's manual.
B
R
R
R

WARNINGS
Do not the camera if it is emitting smoke ,become unusually hot to be touched ,emitting
any unusual odor or noise, or if it is in any other abnormal state. Operating the camera
in any of these situations may cause a fire or an electrical shock. Stop using the
camera immediately , turn the camera off , and then disconnect the power source
( batteries or AC power adapter). (If you are using the AC power adapter , unplug the
adapter from the AC power outlet after you have disconnected the camera).
After checking that smoke is no longer being emitted , contact your dealer or a local
authorized service facility and request repairs . Never attempt to repair the camera
yourself as this is dangerous.
Do not use the camera if any foreign object have entered the camera . Turn the camera
off ,and then disconnect the power source (batteries or AC power adapter ).(If you are
using the AC power adapter, unplug the adapter from the AC power outlet after you
have disconnected camera.) Then contact your dealer or a local authorized service
facility. Do not continue to use the camera as this may cause a fire or an electrical shock.
If the camera has been dropped or if the camera cause has been damaged ,turn the
camera off ,and then disconnect the power source (batteries or AC power adapter ).
(If you are using the AC power adapter ,unplug the adapter from the AC power outlet
after you have disconnected the camera.) Then contact your dealer or a local
authorized service facility .Do not continue to use the camera as this may cause a fire
or an electrical shock.
C

Do not touch the power plug during a thunderstorm if you are using the AC power
adapter .This may cause an electrical shock.
Do not place the camera in damp or dusty locations .This may cause a fire or an
electrical shock.
Do not place the camera in a location affected by oil fumes or steam ,such as near a
cooking stove or humidifier .This may cause or an electrical shock.
Exposure to high temperatures may adversely may adversely affect the camera case
and internal components and may cause a fire.
Do not cover or wrap camera or the AC power adapter with a cloth or quit .This may
cause heat to build up and distort the case and cause a fire .Always use the camera
and its accessories in well-ventilated locations.
D
Do not place the camera in any unstable location such as on a wobbly table or sloping
surface where the camera may fall or tip over and cause injury.
Do not expose the camera to moisture and make sure that there is no water getting
into the camera .Take particular care when using the camera under extreme weather
conditions such as rain or snow ,or when operating the camera at the beach on near
water .Water in the camera may cause a fire or an electrical shock.
Do not attempt to modify the camera .This may cause a fire or an electrical shock.
Do not remove the camera casing . This may cause an electrical shock. Internal
inspection ,maintenance and repairs should only be carried out your dealer or a local
authorized service facility.
CAUTIONS

Handle the camera carefully and do not bump the camera into any bard object.
Handing the camera roughly may cause a malfunction.
Do not move camera while it is switched on .(If you are using the AC power adapter ,
unplug the adapter from the AC power outlet after you have switched off the camera.)
Ensure that any connector cords or cables to other devices are disconnected before
moving the camera .Failure to do so may damage the cords and cause a fire or an
electrical shock.
When leaving the camera unused for long periods ,such as during a vacation ,always
unplug the camera from the power source (batteries or AC power adapter ) for safety.
(If are using the AC power adapter ,unplug the adapter from the AC power outer you
have disconnected the camera .)Failure to do so could result in a fire.
Do not use batteries other than those specified for use with the camera .The use of
unsuitable batteries may in the batteries splitting or leaking and cause a fire ,injury ,
or soiling of the battery compartment .
When fitting batteries into the camera ,check the polarity markings on the battery
(-and+)to ensure that you insert the battery correctly .Incorrect battery polarity may
result in the batteries splitting or leaking and causing a fire ,injury ,or soiling of the
battery compartment .
Remove the batteries if the camera will not be used for an extended period of time.
The batteries may leak and cause a fire ,injury or soiling of the battery compartment .
If he batteries leak ,clean and wipe the battery compartment carefully and install new
batteries .Wash your hands carefully if you touch the battery fluid.
E

OPERATIONS MANUAL
Content
1
1. Index
1.1 Thanks
1.2 Accessories
2. System Requirement
3. Camera Specification
3.1 Technical Specification
3.2 Camera layout
4. Installation and Prepare for using your camera
4.1 Connecting camera strap
4.2 Loading Re-chargeable Battery pack
4.3 Charging the battery by camera
4.4 Charging the battery by battery charger
4.5 Loading the Memory card (SD Card)
5. LCD icon Display
6. Using the camera
6.1 Turn on the camera
6.2 How to change the Mode setting
6.3 How to take the best image by adjusting Focusing slider
6.4 How to use the flash mode
7. Taking pictures / movie
7.1 Taking color Still Pictures
7.2 Taking Movie (Moving motion)
7.3 Taking Self-timer color still pictures
7.4 Taking Black and White still pictures
9
9
10
11
12
13
15
16
16
17
17
18
19
19
19
20
21
3
3
4
3
5
5
7

2
8. Preview or Replay Pictures / movie
9. How to delete Pictures/ Movie
10.HowtousethecameraasaPCcamera
11.Adjusting the setting of the camera by using 'Menu' function
11.1 Self-timer
11.2 Flash
11.3 White Balance
11.4 Size of pictures
11.5 Quality of pictures
11.6 Set up date and time
11.7 Format memory card
12.Others Set Up
12.1 Install USB
12.2 How to change the USB model
12.3 How to change to TV model
12.4 How to set up the Auto Power off
13.Install software and download pictures
13.1 Installation of Applications
13.2 Download Picture
13.3 Install camera and software under Windows 98 System
13.4 How to install driver under Windows 98 system
13.5 Install camera under Windows ME/2000/XP
13.6 Download the photo
13.7 Cut the connection of computer and camera
13.8 Other ways of downloading the camera's images
14.Maintenance of Camera
21
24
25
26
27
27
29
30
31
32
33
33
33
34
34
35
35
35
42
42
43
43
44
45
46
46
3
1.Index
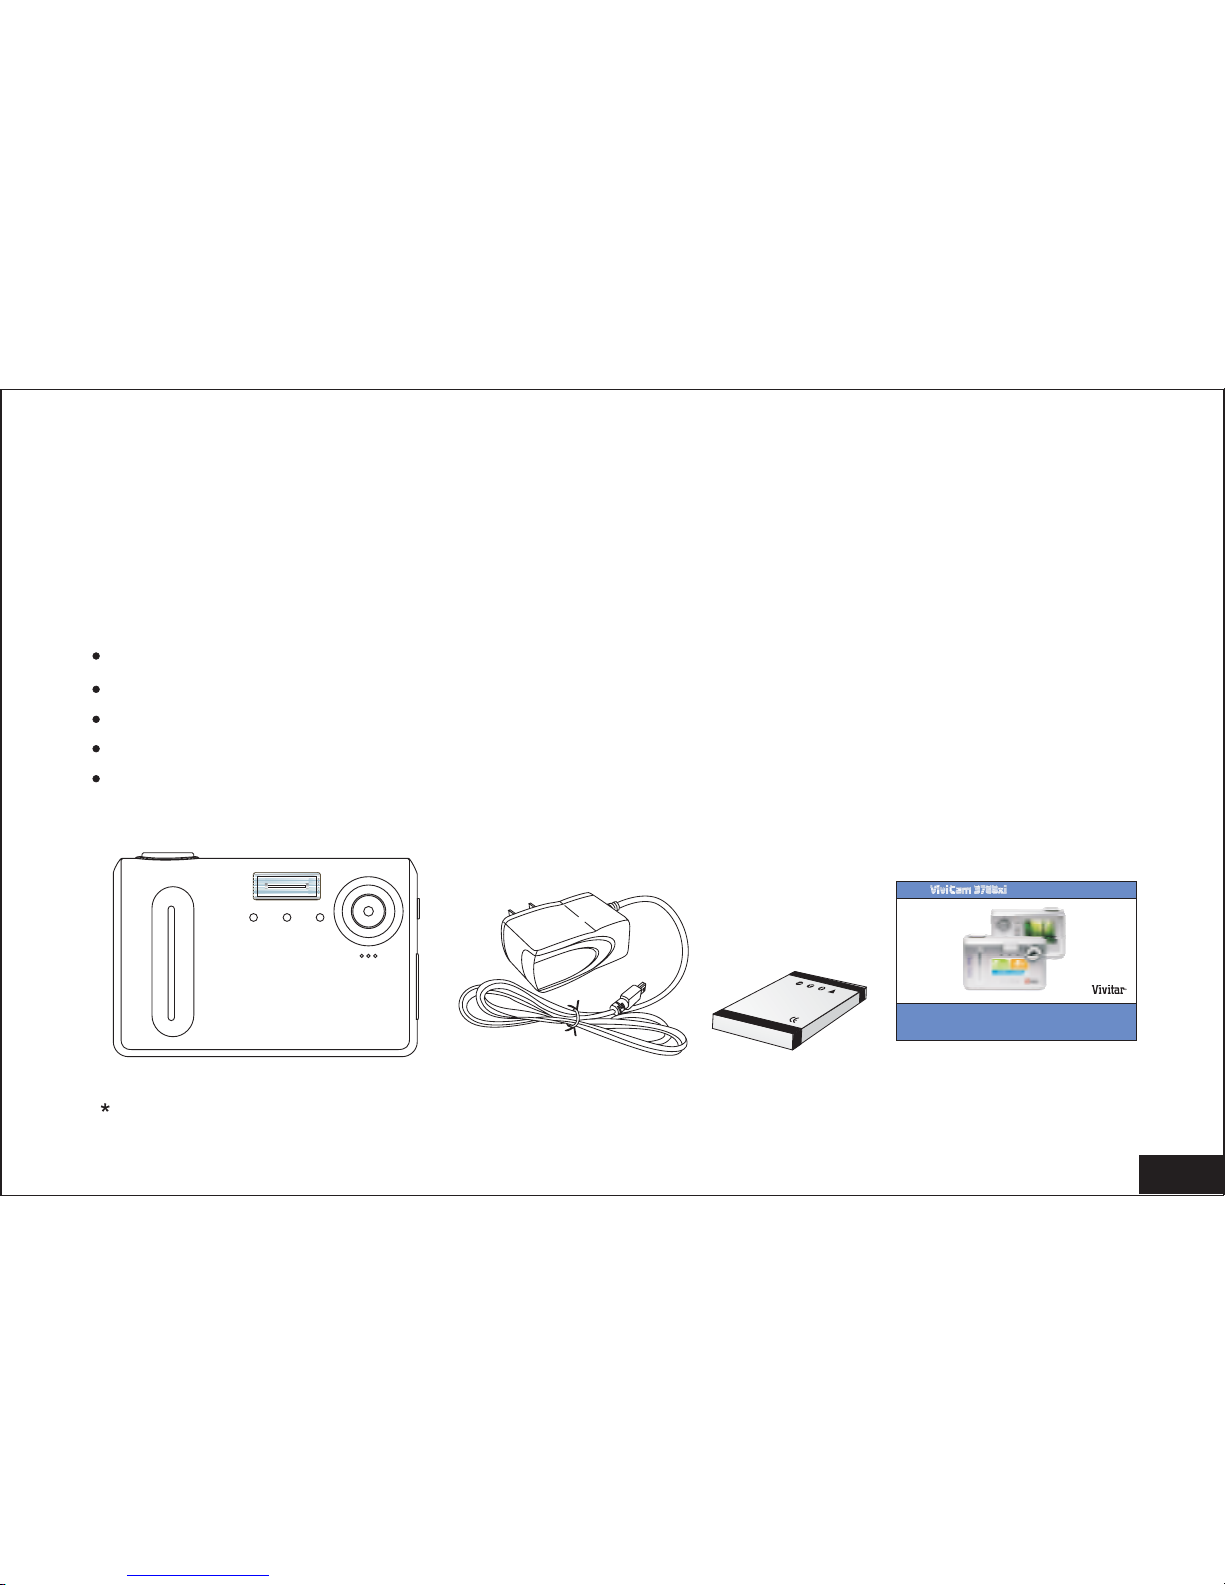
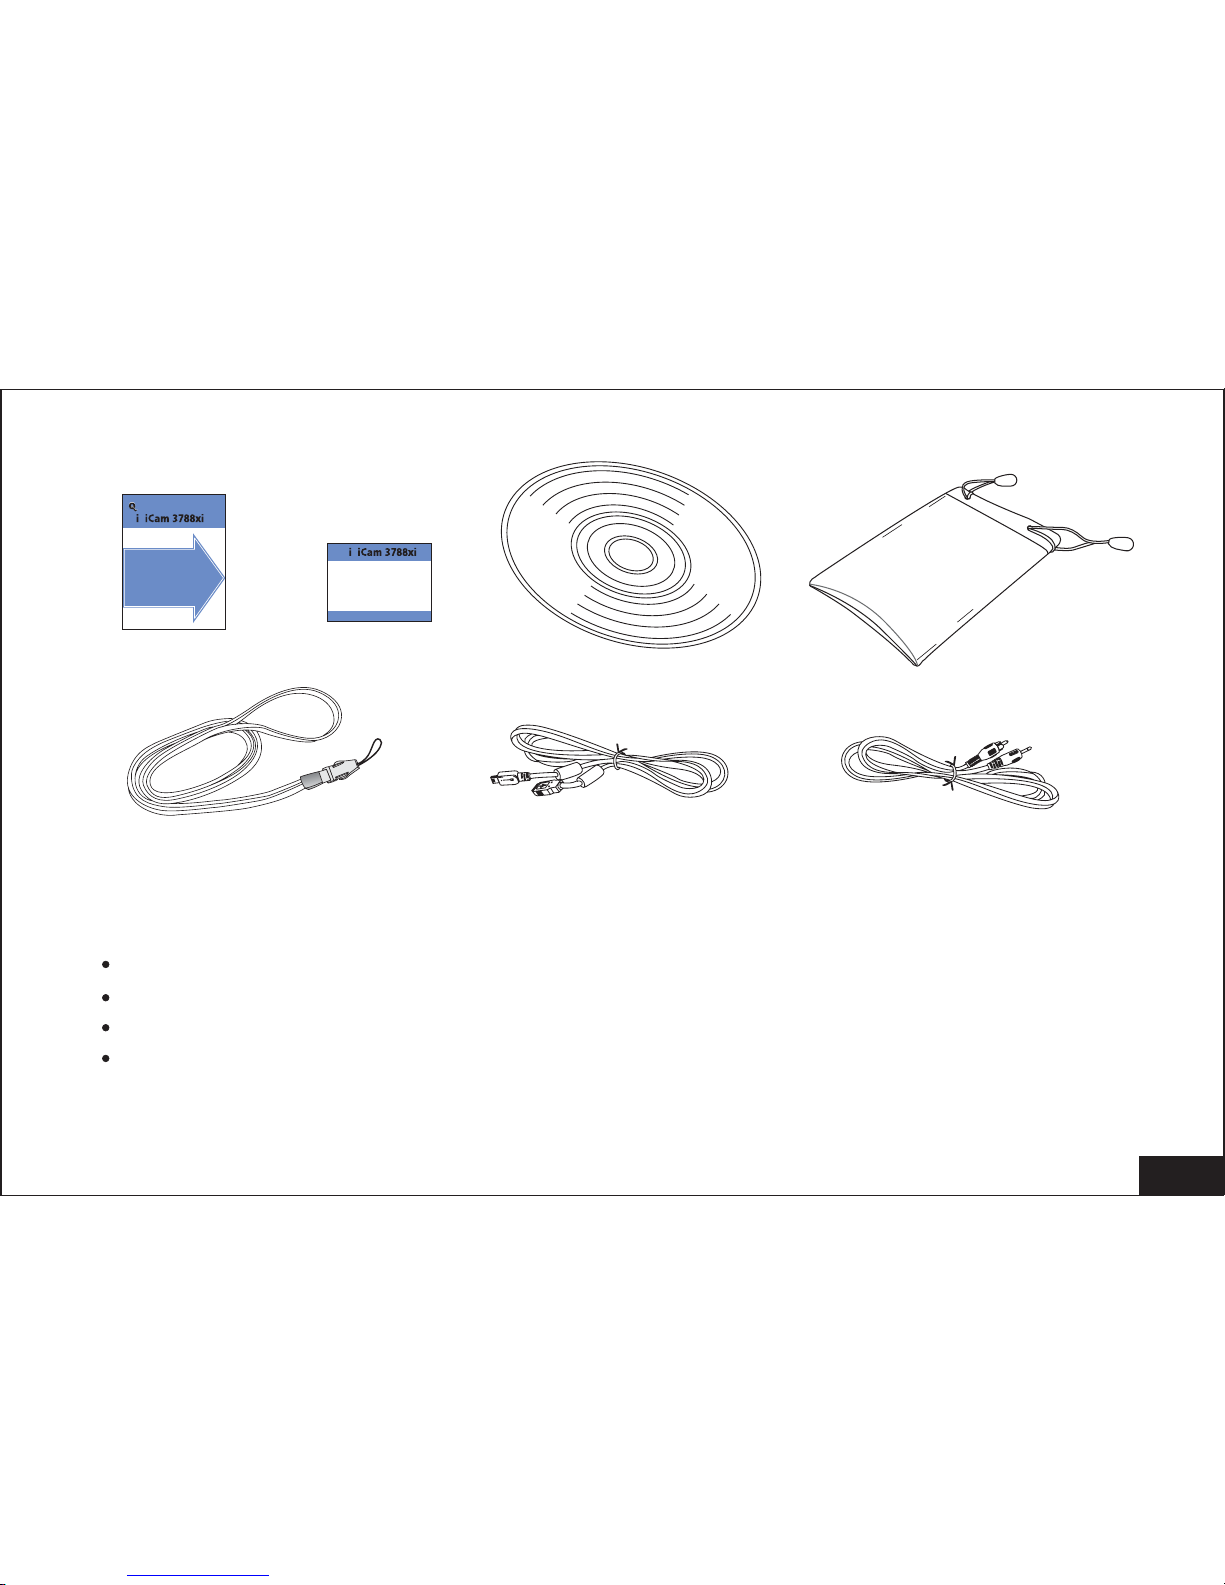
1.2 Accessories included:
Thanks for purchasing our digital camera. Before start using the camera, please
read the manual with care in order to get full use of the various functions and
the life of the camera. Please keep the manual for future reference.
USB cable / AV cable
Software and Driver CD
User Manual /
Protective leather Case / Strap
650mAh Rechargeable Battery Pack 1pc
extend
Quick Start Guide / Warranty
Li-polymer
3
.7V
1.1 Thanks
SD/ Pouch card will be optional.Extra rechargeable Battery
Operation manual
Operation manual
Digital cameraDigital camera
-English
R
4
USB
Win 98 SE/ Windows 2000/ Windows XP/ mac 10.0
Pentium CPU 266MHz and upper
Memory 64MB and upper
Disk at least 100M space
2. System Requirement
Me/
WARRANTY
WARRANTY
uick Start Guide
uick Start Guide
START HERE
START HERE
Itis strongly recommendedthat you
followthese step-bystep numbered
instructionsto set upand quickly
beginusing
V v
V v

5
f=9mm
Aperture F=3
Depth of Field Marco 20cm, portrait 100-250cm, Normal 150cm ~ &
Shutter Speed Electronic shutter, 1/2-1/1000 Second
Camera Lens 1/3 inch adjustable lens Marco, portrait, Normal
Shooting Mode
Single shot
Self-timer shot
Movie: AVI format, 7-15 frame/sec
On 320*240 mode, length of time relies on capacity of
memory medium Black & White shot
Focus
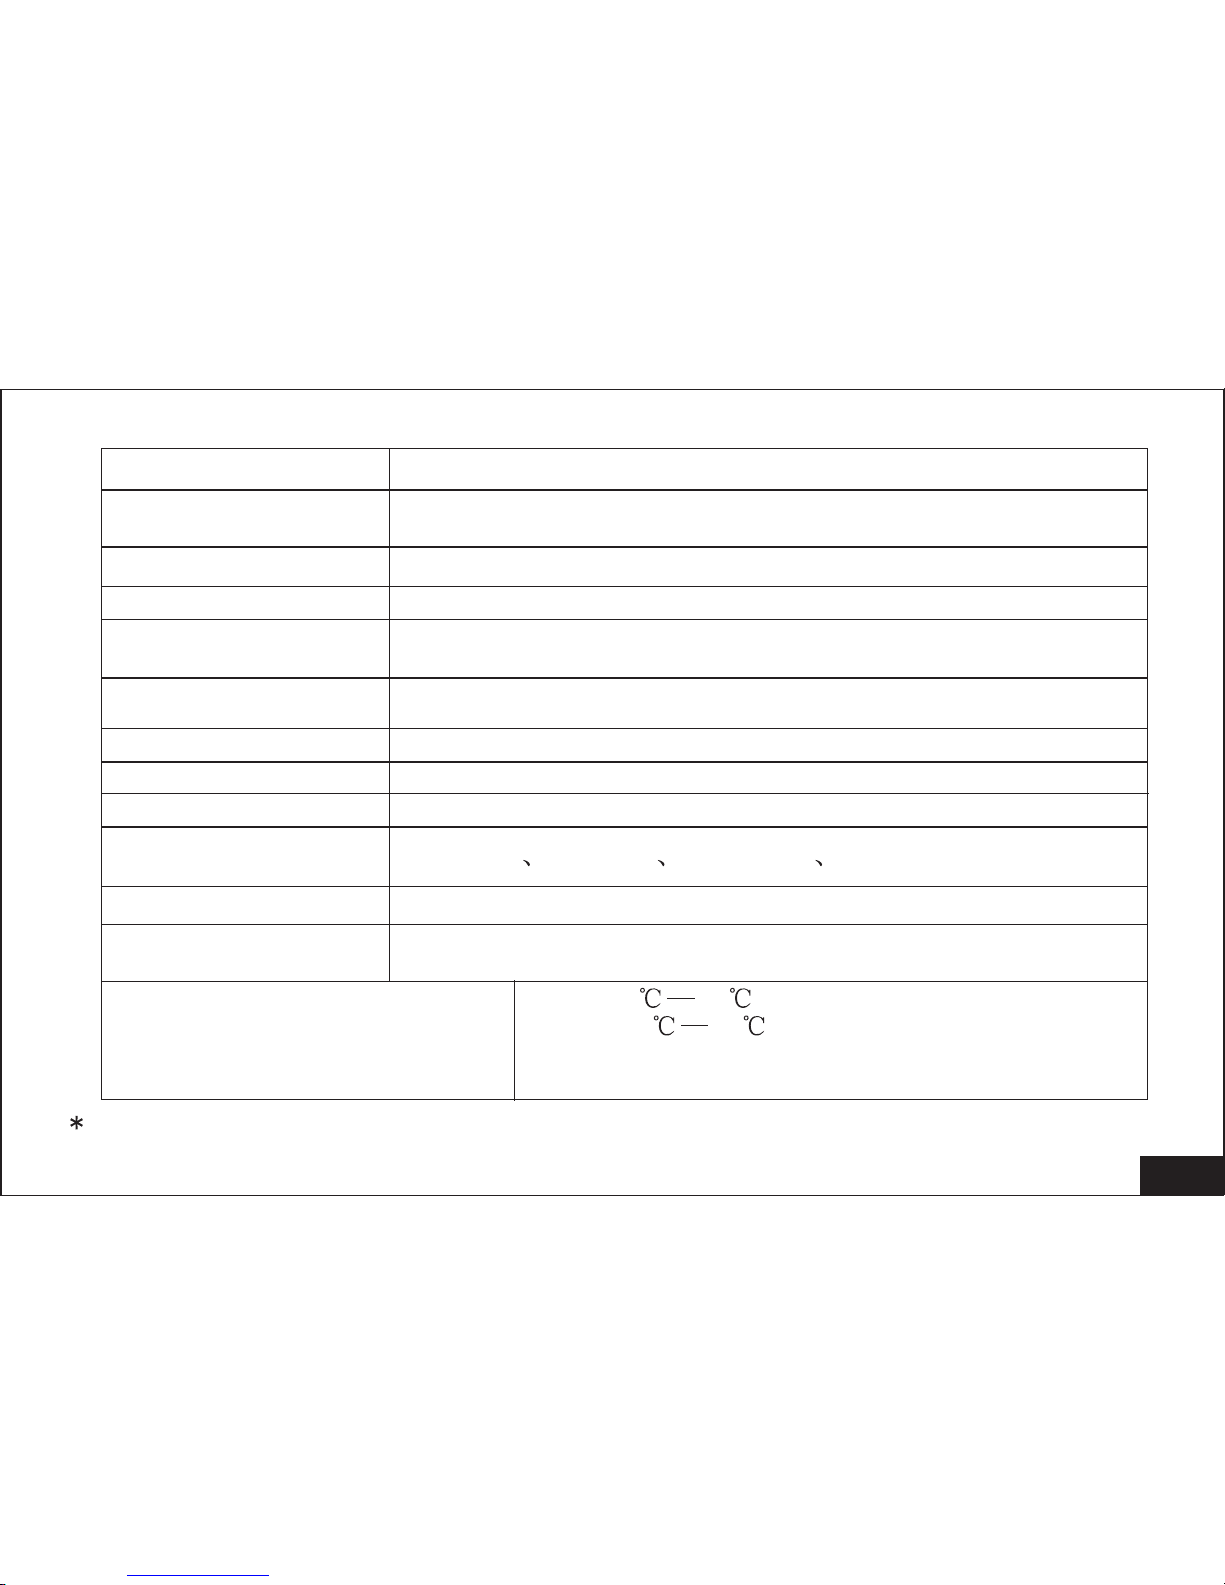
3. Camera Specification
3. 1 Technical Specification
Sensor
Effective Pixel
Resolution
File Storage
File Format
3.3Mega pixels CMOS sensor
3.17Mega pixel
2816x2112,2048x1536, 1600x1200, 1280x960,
*Internal* 16M Flash , SD Card (8MB-512MB)
JPEG
Number of Photos
in 16MB Memory
40(2048*1536), 60(1600*1200pixels), 400(1280*960),
25(2816*2112). Piece of pictures is related to image
Pixel
6 Mega Pixels(with )interpolation
Digital Zoom 4 times
6
Automatic, sunshine, fluorescence light,
incandescence light
Exposure Control Automatic,
Flash Mode No Flash ( / Forced / AutomaticDefault)
Communication
Interface
NTSC/PAL
1.8' TFT color LCD
OSD Menu
Languages
Power Supply 650mAh, Li-polymer Rechargeable battery
Chinese English Japanese German
OS Compatibility WIN98SE/2000/ME/XP; Mac Os10.0 or above
PC-Camera Mode
640*480: 7frame/sec, 352*288: 20frame/sec, 320*240:
20frame/sec
White Balance
USB1.1
Photo Explorer 8.0 BASIC
PC Application
Software
Internal flash memory is subjected to be changed without further notice.
Operational Temperature 0 30
Storage Temperature -10 45
Dimension
Weight(battery not included ) 90 grams
93(W) x60(H) x18.59(D) mm
TV Output
LCD
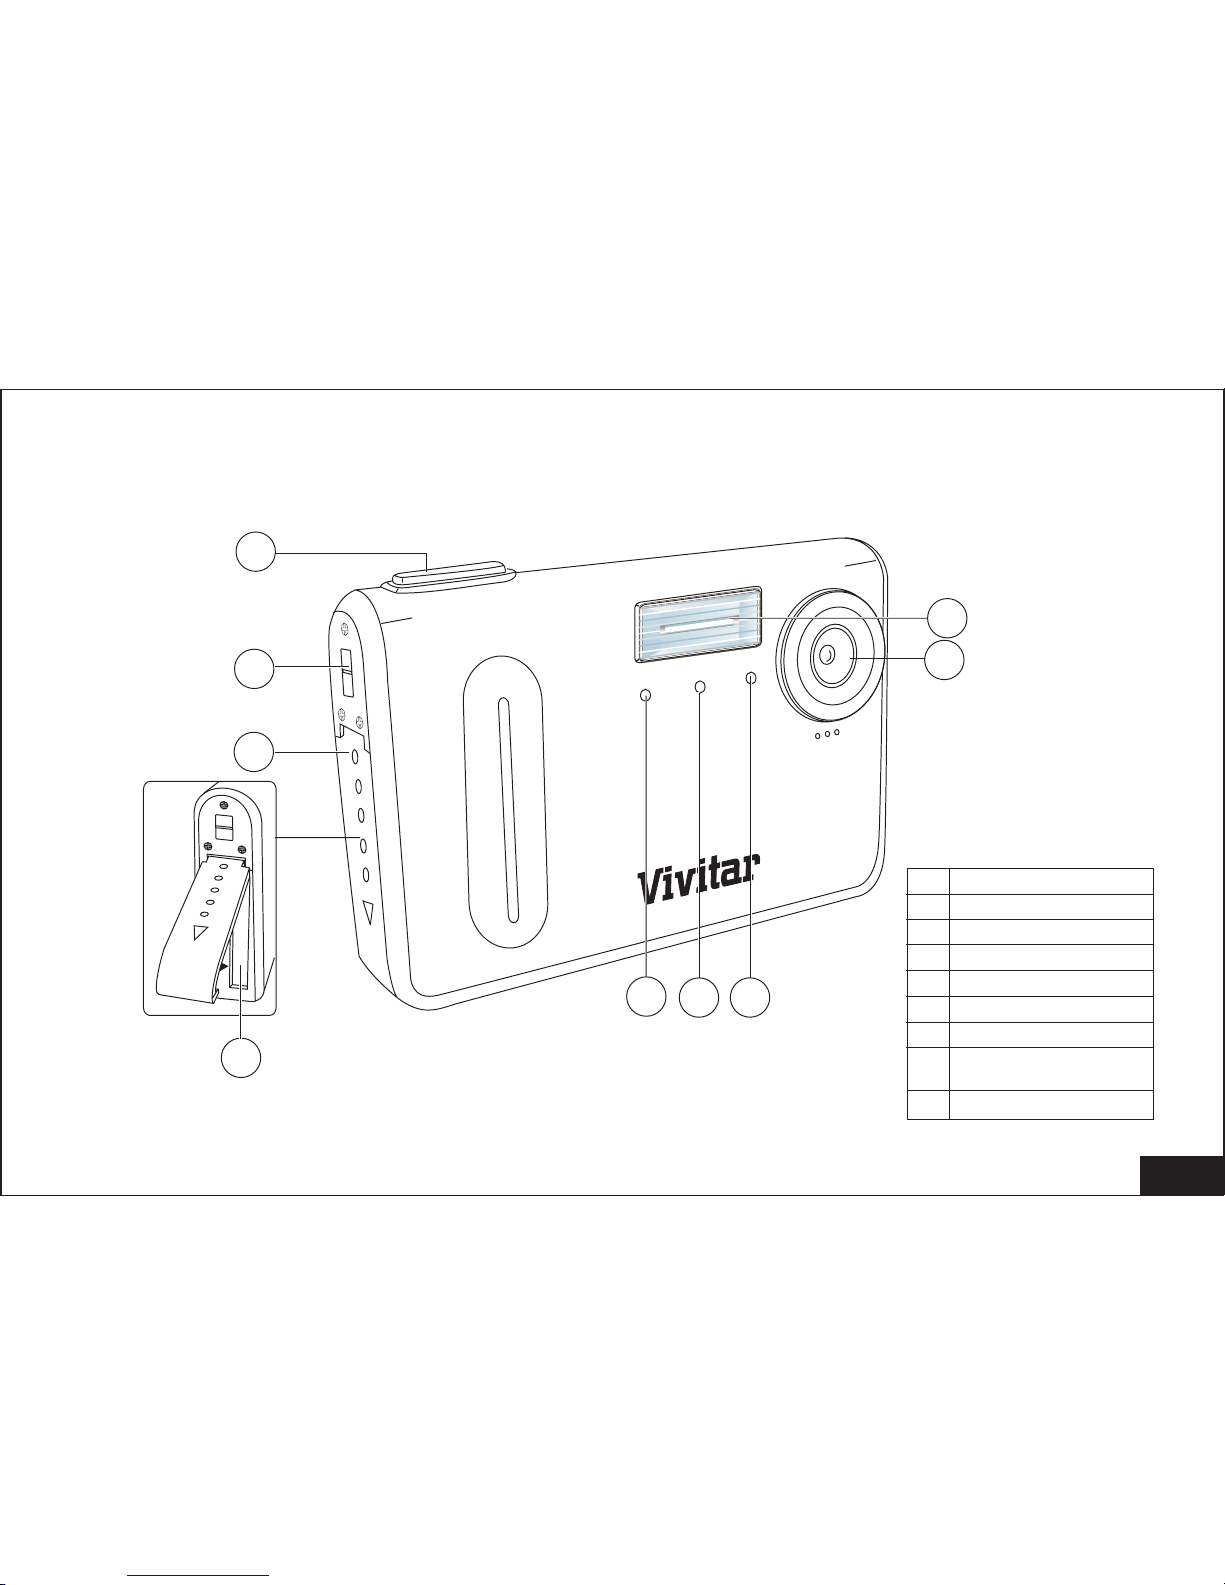
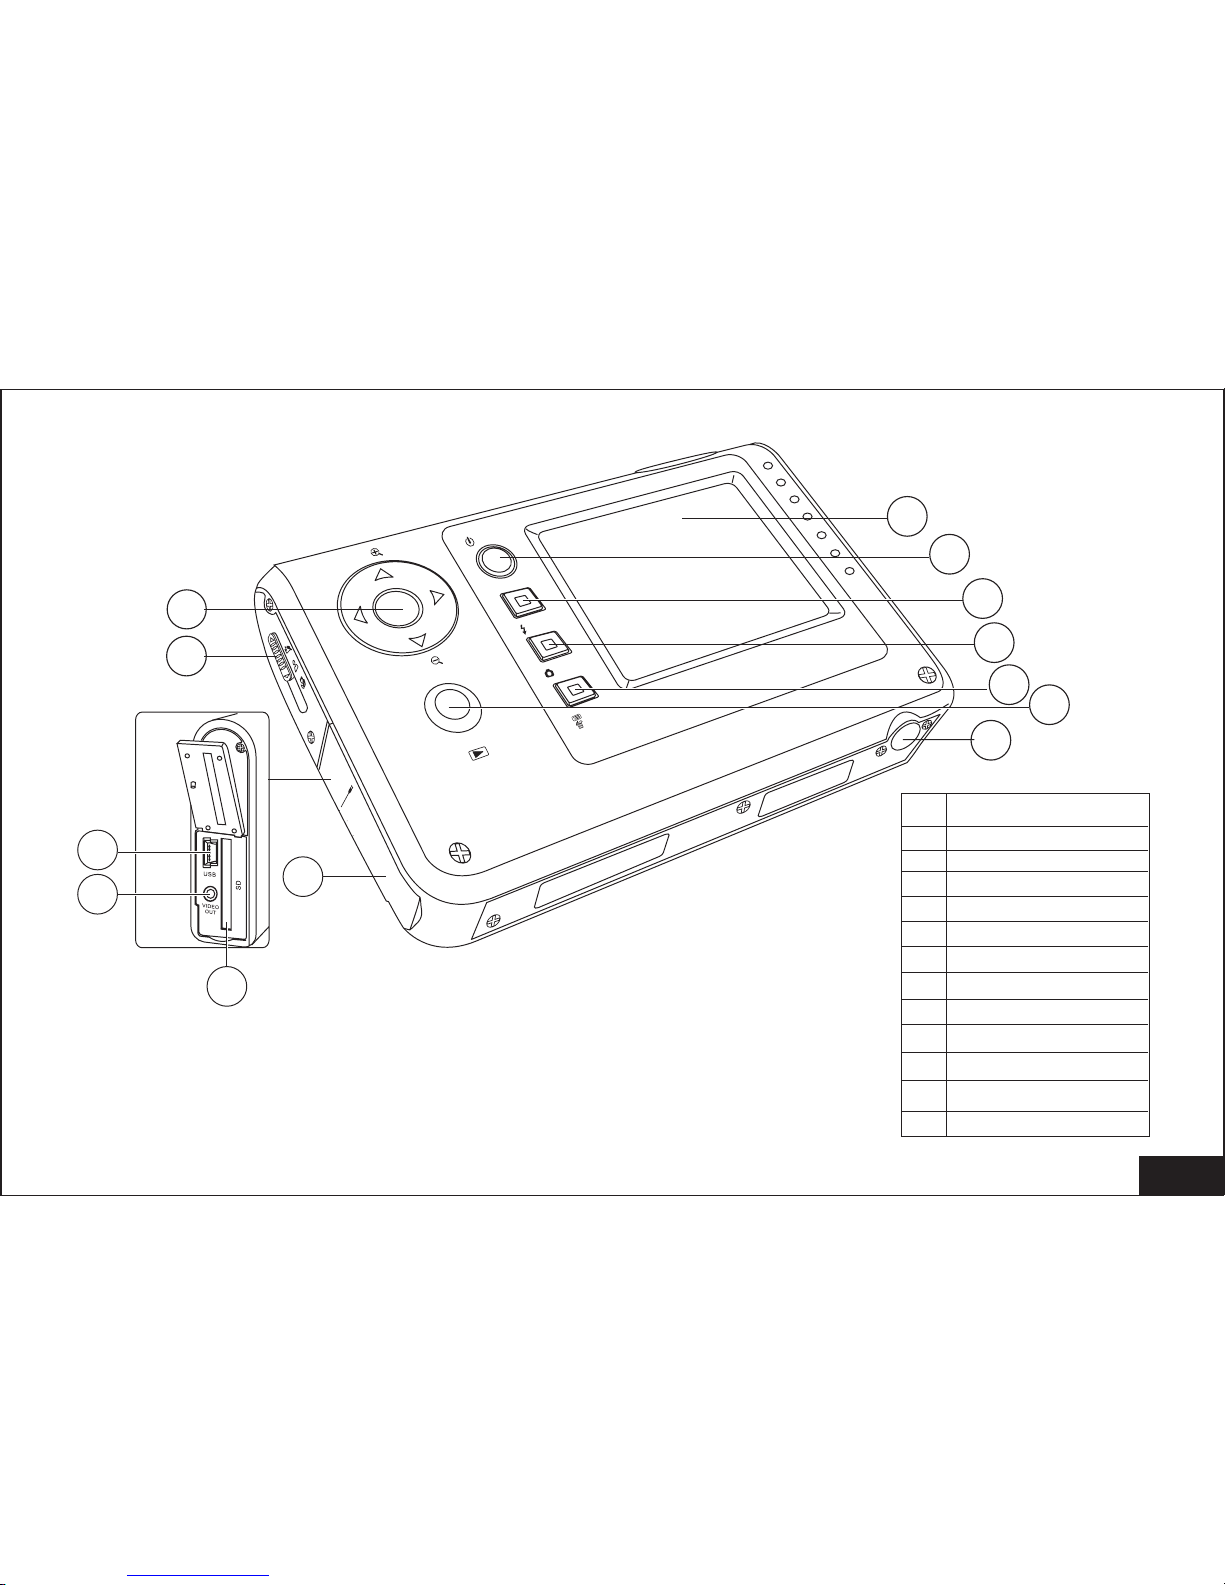
3.2 Camera layout
1
2
3
4
5
7
8
9
Battery
1
2
3
4
5
6
7
8
9
Lens (F3. f=9mm)
Flashlight
Shutter button
Strap slot
Battery cover
Battery apartment
Battery charging LED/
ST Led
Power on Led / ST Led
Self timer lamp
7
6
Battery
10
11
3 Steps Focus slider
Up Down
Left Right Button
12
13
14
15
16
17
18
19
20
22
21
Tripod Socket
TFT LCD Display
Power button
Flash button
USB Socket
VIDEO OUT jack
Memory Card Slot
OK / Preview Button
Menu / Delete button
Side Cover
Mode button
8
USB
VIDEO
OUT
SD
c
ard
Mode
Menu /
Delete
OK
/P
review
T
W
6.0 MEGA PIXELS
Flash
Power
15
17
18
19
20
22
16
21
10
11
12
13
14
9
4. Installation and prepare for using your camera
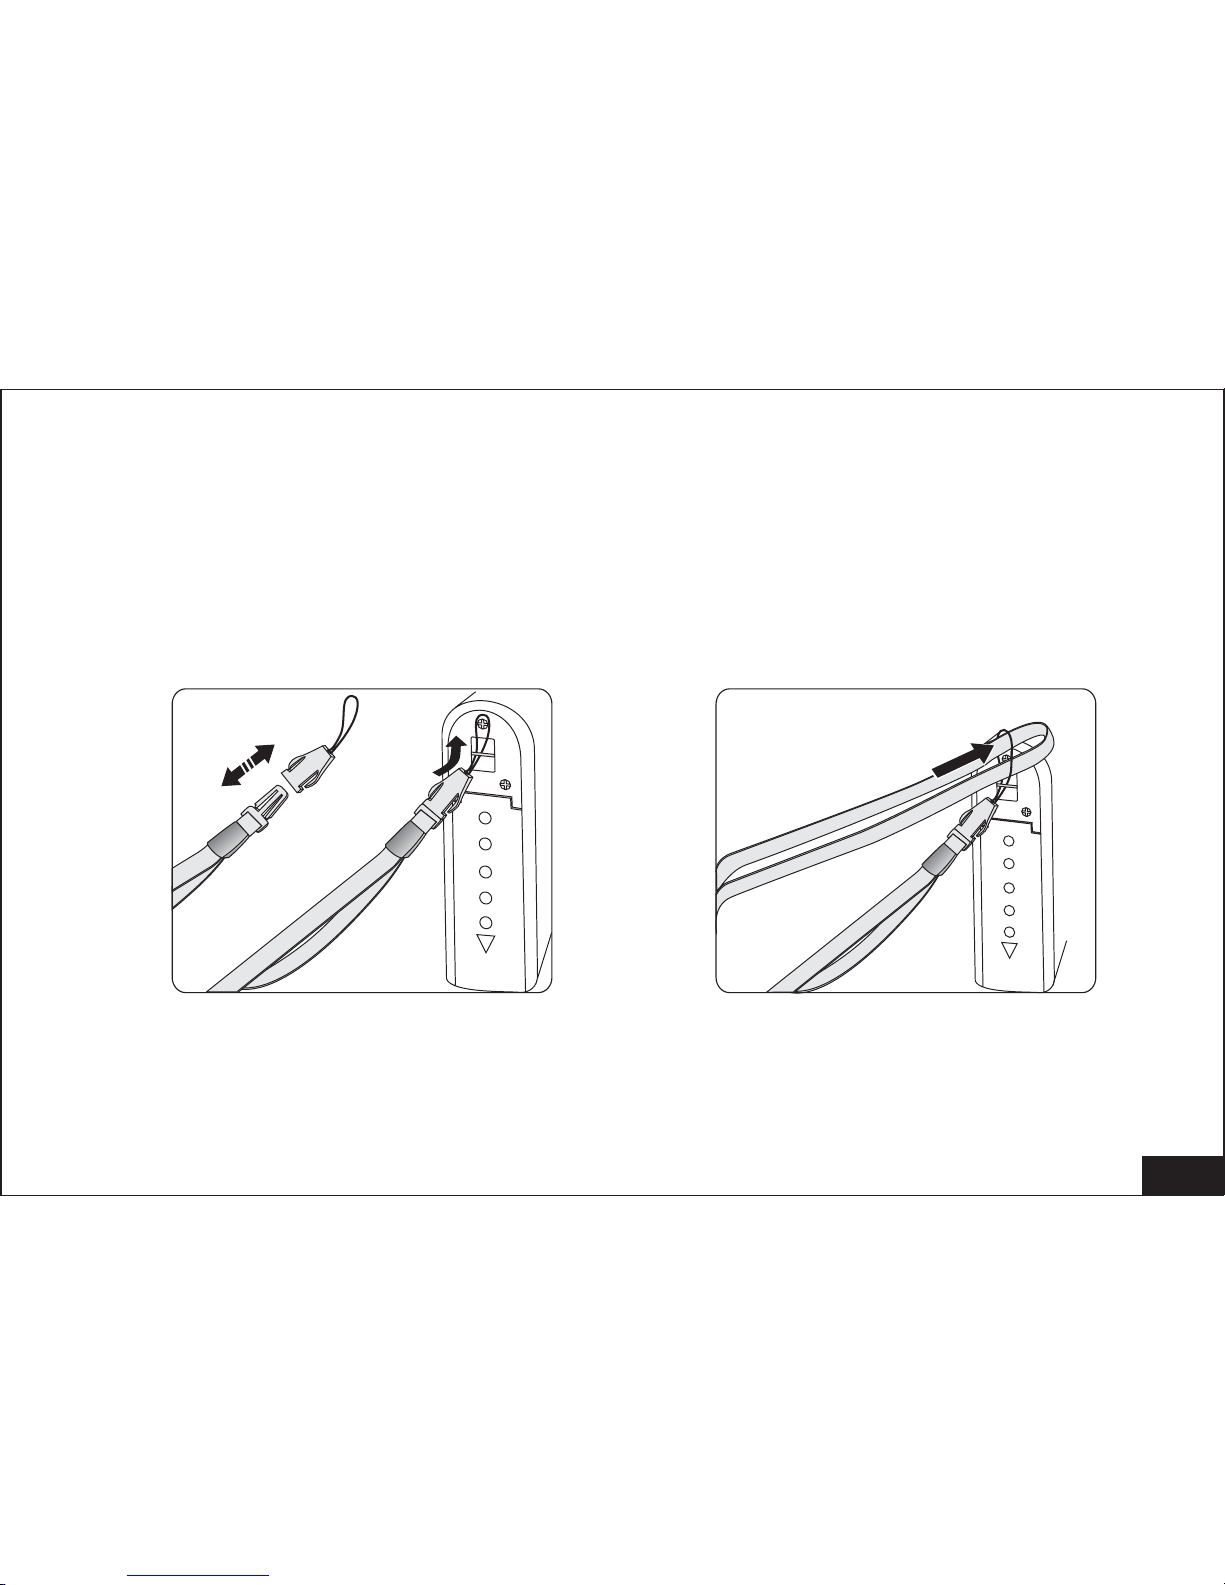
4. 1 Connecting the Camera Strap
Take the strap out from the package; connect the strap to the camera per
instruction.
Battery
Battery
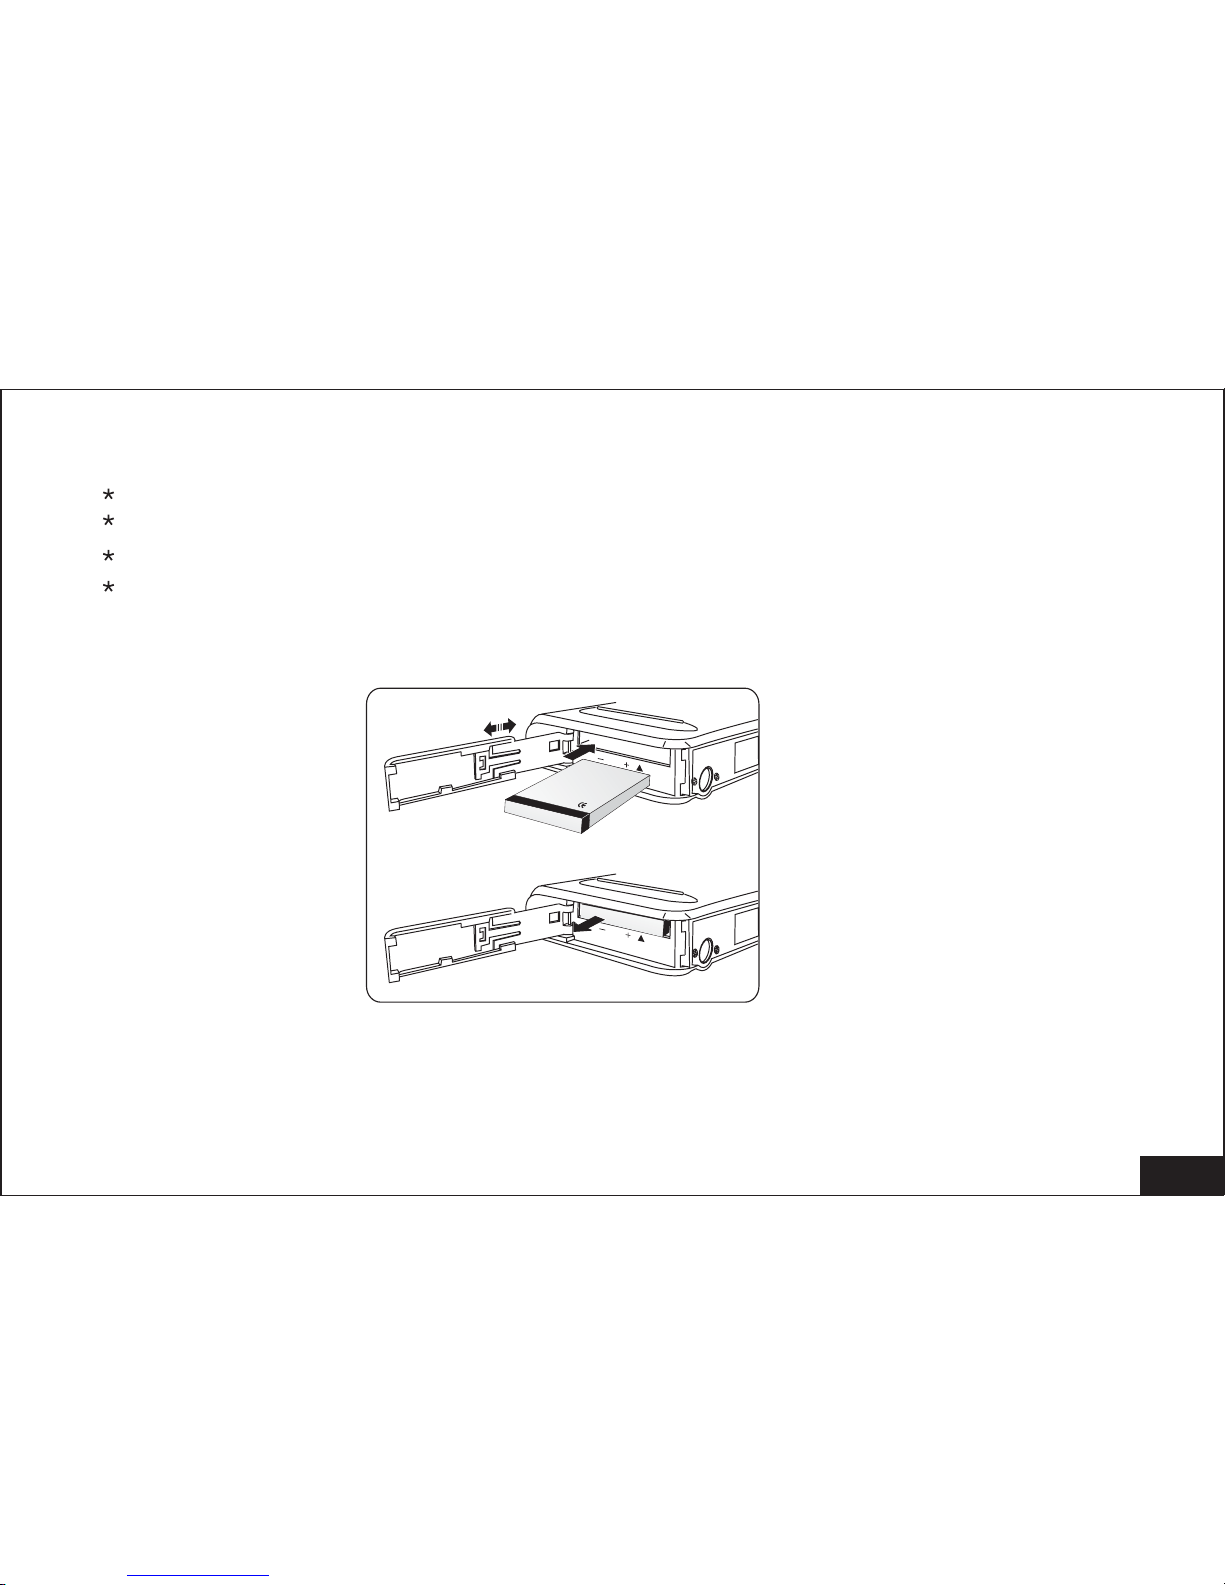
4.2 Loading Rechargeable Battery Pack
Take the Rechargeable Battery Pack out from the packaging box
Open the Battery Compartment by sliding the battery door
Insert the battery per the indication of the +/- direction
Close the battery door
10
Li-polymer
3.7V
 Loading...