

Vivitar Vivicam 3712xi Owner's Manual
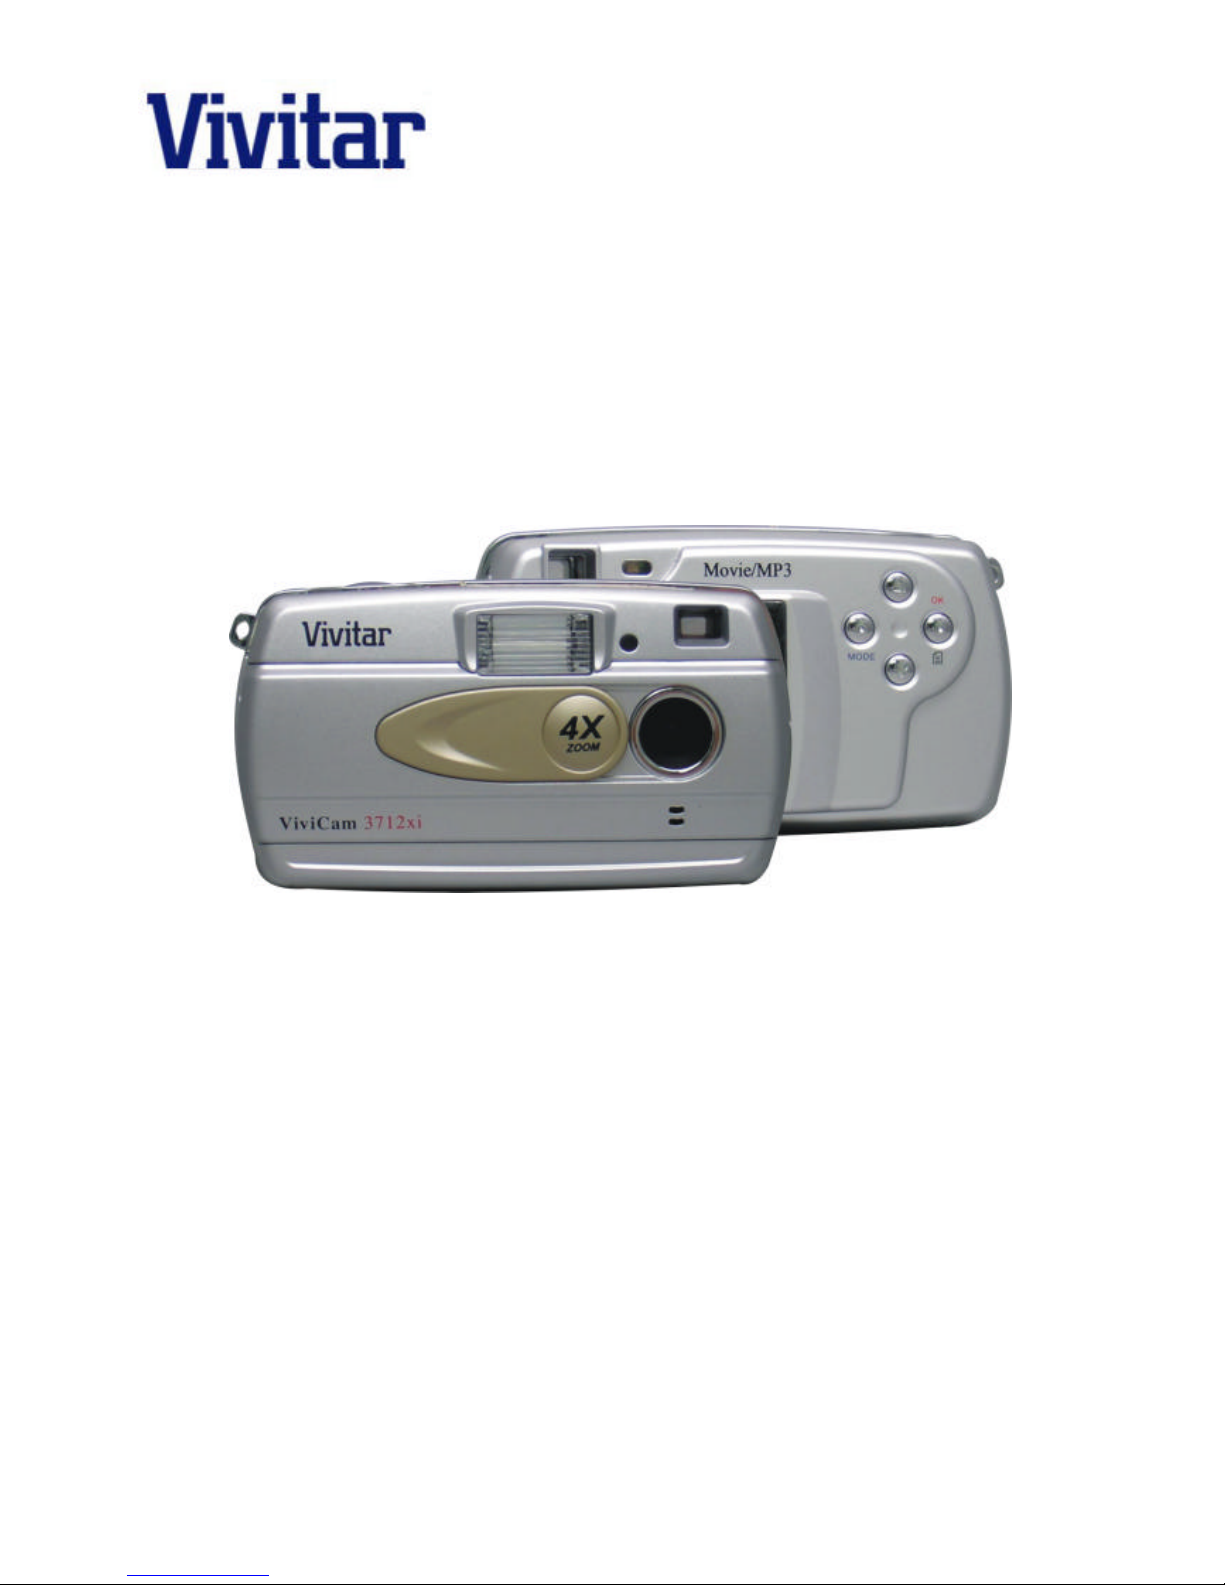
ViviCam 3712xi
3.2 Mega Pixel Digital Camera
With Integrated MP3 Player
Owner’s Manual

2
About This Manual
This manual is designed to assist you in using the Digital Camera. Information
provided in this document has been carefully checked for accuracy.
Warning!
Any changes or modifications not expressly approved by the manufacturer for compliance could void your
authority to operate the equipment.
Declaration of Conformity
This device complies with part 15 of the FCC rules. Operation is subject to the following conditions:
This device may not cause harmful interference.
This device must accept any interference received, including interference that may cause undesired
operation.
Canadian Department of Communications
This class B digital apparatus meets all requirements of the Canadian Interference-causing Equipment
Regulations.
Cet appareil numérique de la classe B respecte toutes les exigences du Réglement sur le matériel
brouilieur du Canada.
MS-DOS and Windows are registered trademarks
other countries. Windows is an abbreviated term
Other company or product names are trademarks
Copyright
This document contains proprietary information protected by copyright. All rights are reserved. No part of
this manual may be reproduced by any mechanical, electronic or other means, in any form, without prior
written permission of the manufacturer.
Federal Communications Commission (FCC) Compliance
This equipment has been tested and found to comply with the limits for a Class B digital device, pursuant
to Part 15 of the FCC Rules. These limits are designed to provide reasonable protection against harmful
interference in a residential installation. This equipment generates, uses, and can radiate radio frequency
energy and, if not installed and used in accordance with the instructions, may cause harmful interference
to radio communications. However, there is no guarantee that interference will not occur in a particular
installation. If this equipment does cause harmful interference to radio or television reception, which can
be determined by turning the equipment off and on, the user is encouraged to try to correct the
interference by one or more of the following measures:
• Reorient or relocate the receiving antenna.
• Increase the separation between the equipment and the receiver.
• Connect the equipment to an outlet on a circuit different from that to which the receiver is
connected.
• Consult the dealer or an experienced radio/TV technician for help.
or r
egistered trademarks of their respective companies.
of the Microsoft Corporation registered in the USA and
referri
ng to the Microsoft Windows Operation System.
Trademark Recognition

3
Table of Contents
General Information
- Power Supply Page 4
- Minimum System Requirements Page 4
- Package Contents Page 4
- Optional Accessories Page 4
Getting Started
- How to Insert the Batteries Page 5
- How to Insert a SD Memory Card Page 5
- How to Copy MP3 Files to the SD Card Page 5
Identifying Components Page 6
Identifying Camera Icons
- Camera Icons Page 7
- Image Capture Mode Icons Page 7
- Video Capture Mode Icons Page 8
- Audio Mode Icons Page 8
- MP3 Player Mode Icons Page 8
- Playback Mode Icons Page 8
Using the Digital Camera
- How to Setup the Camera Page 9
- How to Capture Digital Still Image Page 11
- How to Capture Digital Video Page 14
- How to Record Audio Page 14
- How to Playback Image/Video on the LCD Page 15
- How to Playback Image/Video on a TV Page 19
- How to Listen to MP3 Music Page 20
Installing Software
- Software Overview and Features Page 21
- How to Install Digital Camera Driver and software Page 21
Making Connections
- How to Connect to the PC Page 25
- How to Connect to the TV Page 25
Downloading Files
- How to Download Files to a PC Page 26
- How to Download Pictures via Ulead PhotoExpress 4.0 SE Page 27
- How to Download MP3 Music to the Camera Page 27
Camera Maintenance Page 28
Safety Rules Page 29
Product Specifications Page 30
Trouble shooting
Page 31

4
General Information
Power Supply
The Digital Camera uses two AA alkaline or Ni-MH batteries.
Notes:
- The Digital Camera comes with 16MB flash memory, therefore all images saved on the
internal memory will remain on the camera even if you remove the batteries.
- Remove the batteries before storing the digital camera for an extended period of time.
- Do not use different brands or different types of batteries together.
- Do not use new and used batteries together.
- Power off the camera before replacing batteries.
Minimum System Requirement
Pentium II Class processor or higher
Windows® 98SE/ME/2000/XP
64MB RAM (128MB recommended)
310MB free hard disk
CD-ROM drive
USB port
16-bit color display or higher
Package Contents
• Digital camera
• Camera wrist strap
• Camera pouch
• Earphones
• USB cable
• Quick Start Guide
• Software CD containing:
o EDigital Camera Driver
o AUlead PhotoExpress 4.0 SE software
o AAcrobat Reader 5.0
o OOwner's manual
Optional Accessories
• AV cable (for video output)

5
Getting Started
How to Insert the Batteries
1. Open the battery compartment cover located on the side of the camera.
2. Note the battery polarities +/- inside the battery compartment door, and insert two (2) new AA
alkaline or Ni-MH batteries.
3. Close the battery compartment cover by clicking it shut.
How to Insert a SD Memory Card
1. Open the battery compartment cover located on the side of the camera.
2. Slide the SD card into the SD slot according to the arrow direction on the card and push down
gently until the card secures in the slot. Note: the label should face towards the batteries.
3. Close the battery compartment cover by clicking it shut.
4. To remove the memory card, push down on the SD card with the thumb. The card should eject,
pull out the card with the fingers.
Note:
(1) The SD card may be “locked” (write-protected). This means
that the SD card is READ-ONLY, and will not store files. When
the SD card is inserted properly, the camera will automatically
detect if the SD card is locked or unlocked. It will display a
“locked” icon on the LCD. If the SD card is locked, remove the
SD card from the camera, locate the tiny switch on the side of
the SD card and switch it to unlock position before inserting it
back in the camera. (It is best to consult the SD card
manual as the SD card may vary depending on the
brand).
(2) When the SD card is locked, the image capture mode and video capture mode will be disable.
How to Copy MP3 Files to the SD Card
1. Highlight the MP3 music files on the computer, right-click the mouse, and select “Copy” from the
shortcut menu.
2. Go to “My Computer” “Removable Disk E:\” (where E:\ is the SD card), right-click the mouse,
and select “Paste” from the shortcut menu.
3. The MP3 files are now copied on the SD card.
6
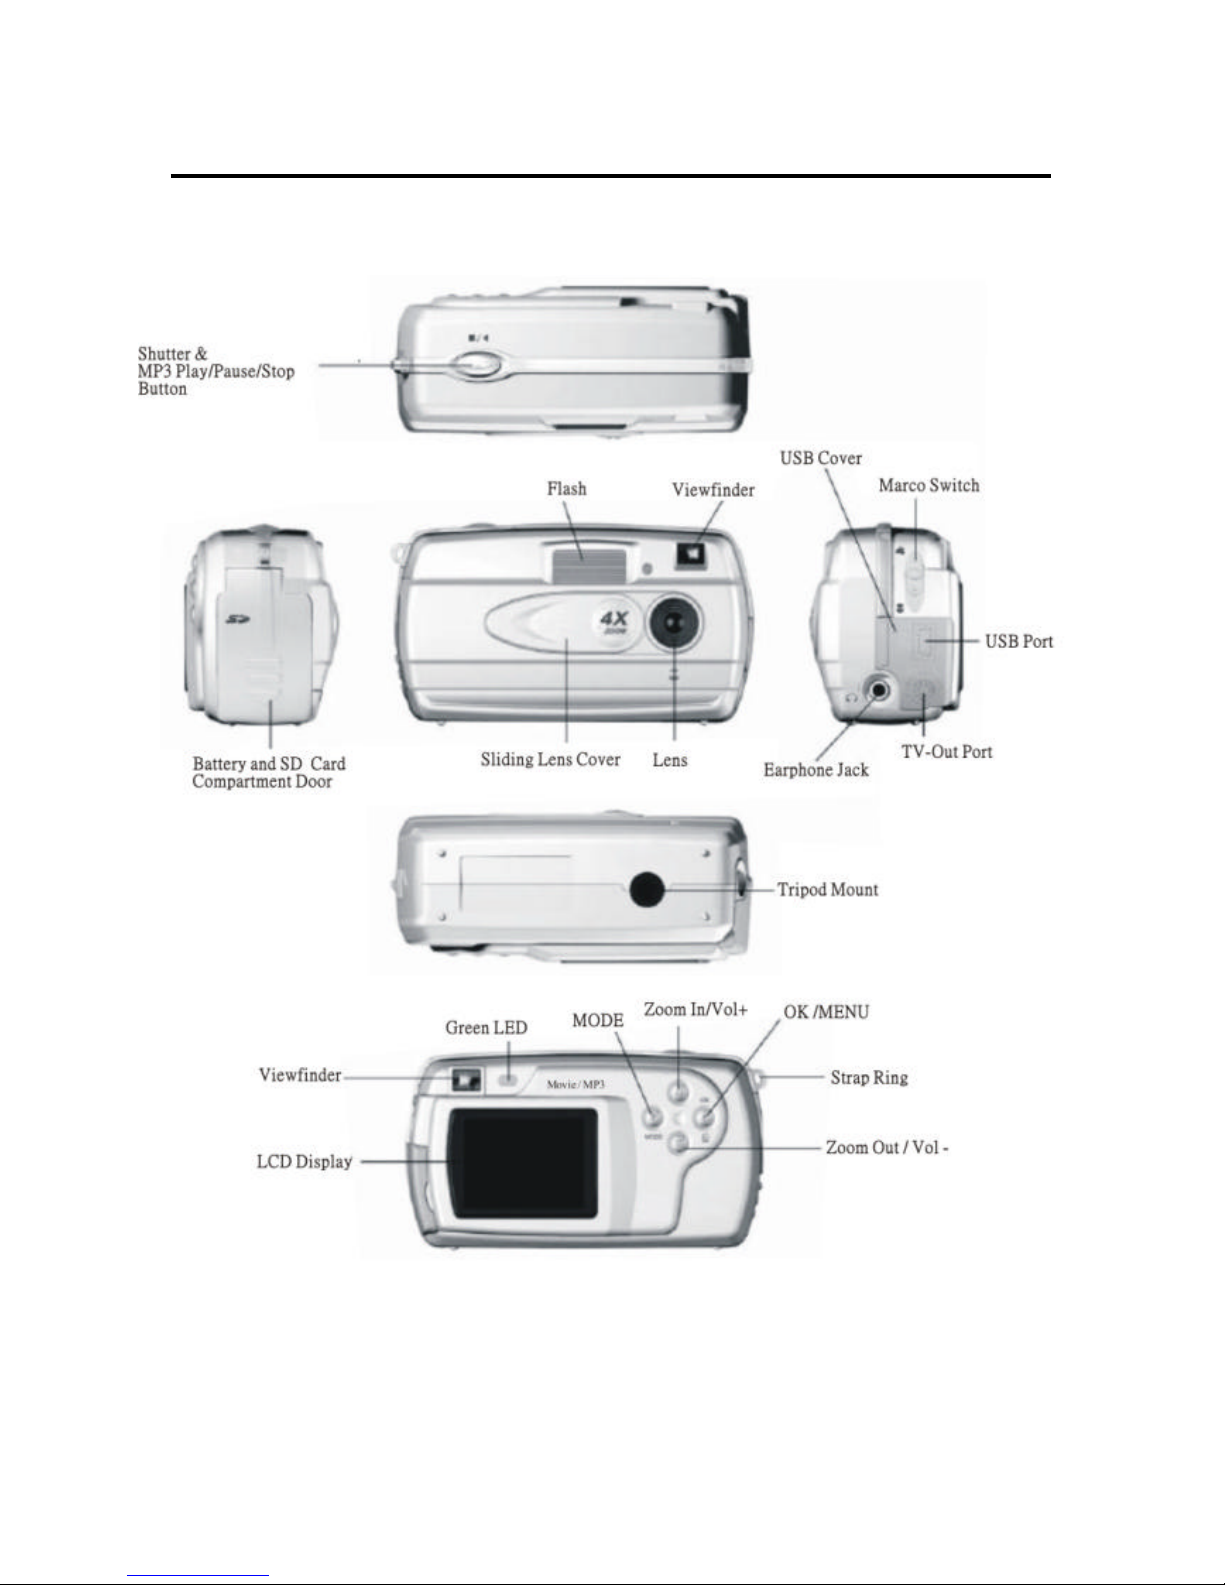
Identifying Components
Camera Components
7
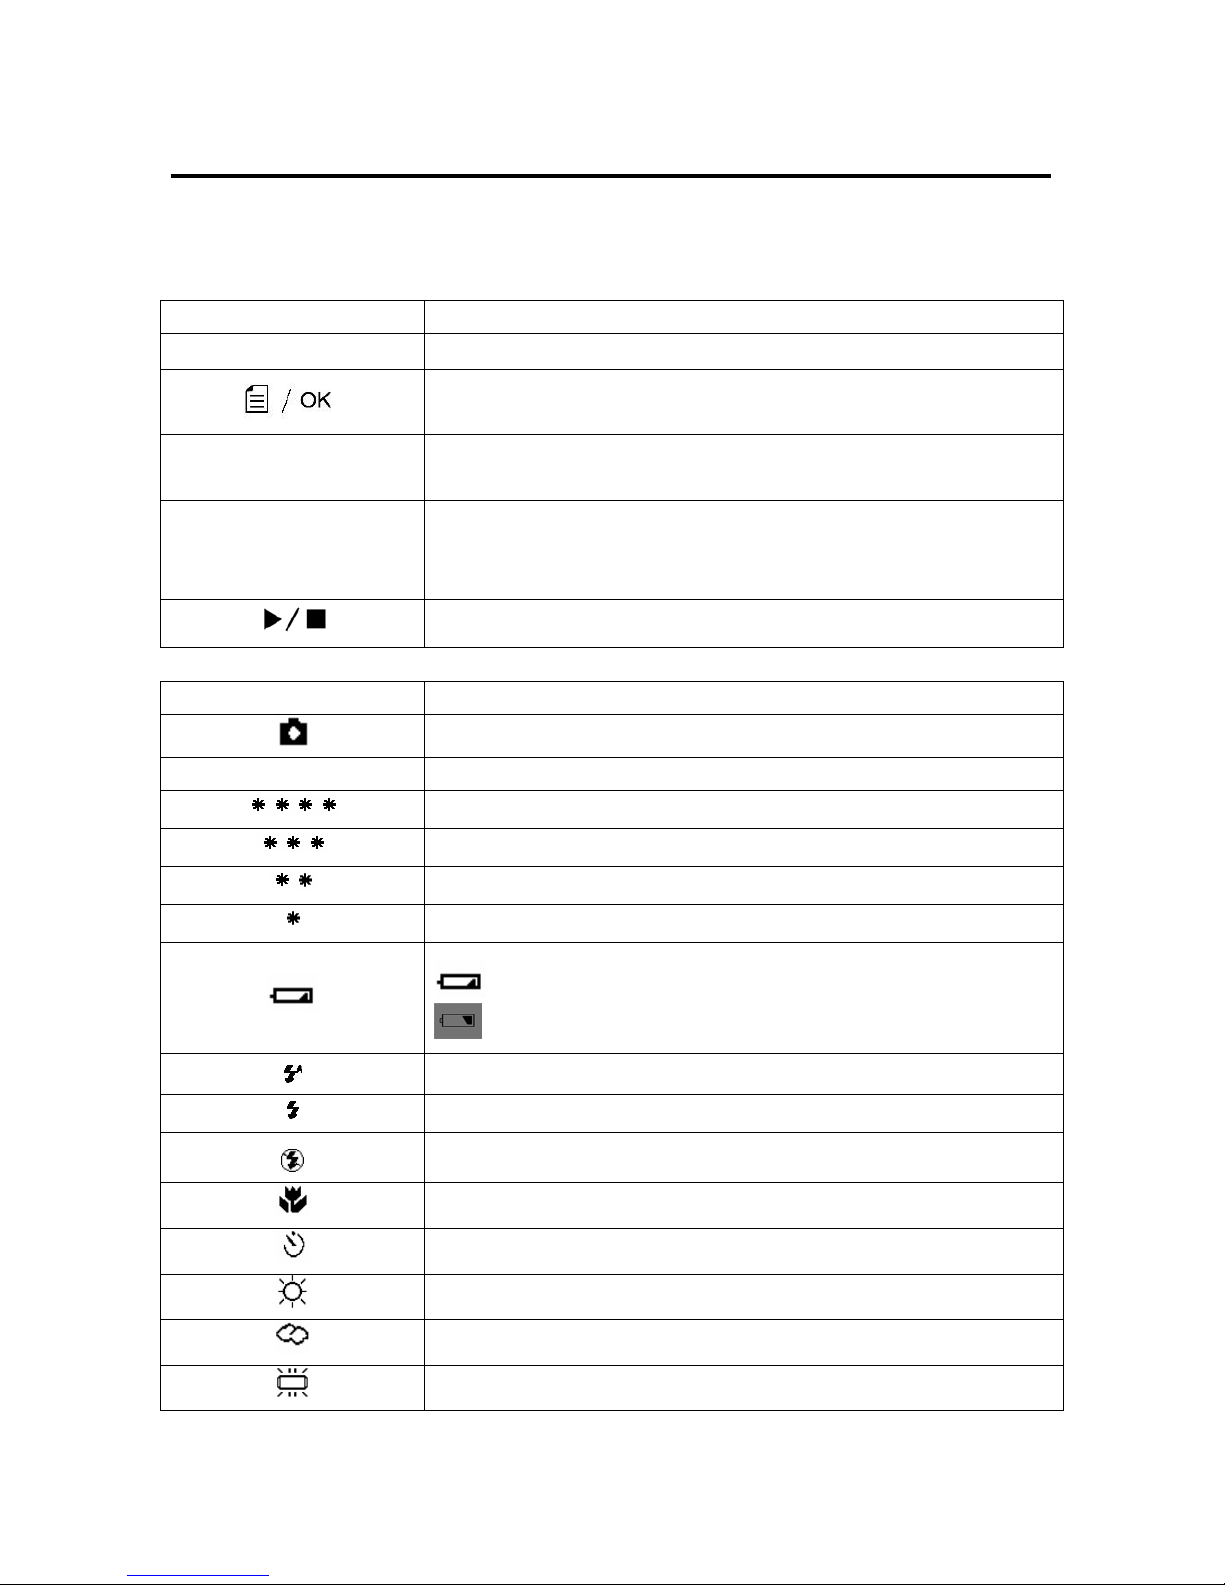
Identifying Camera Icons
The Digital Camera has six operating modes: still image capture mode, video capture mode, audio recording mode,
playback mode, MP3 player mode, and setup mode. Use the following charts to identify the camera icons
and their functions.
Camera Icons Functions
MODE
Mode button to scroll to different camera modes
MENU/OK button to display the available menus in each mode, to confirm
a selection, and to scroll to the right on a menu list
Up/Volume+/Zoom+ button to scroll up, increase the volume level on
MP3 player, or zoom-in during still/video capture modes
Down/Volume-/Zoom- button to scroll down, decrease MP3 music
volume, zoom-out or to turn off the LCD icons during still/video capture
modes
Shutter button to take a picture and to Play/Stop the MP3 music
Image Capture Mode Icons Functions
Still image capture mode
888
Number of pictures remaining on the available memory
6M resolution: 2848 x 2136 *
High resolution: 2048 x 1536
Normal resolution: 2048 x 1536
Low resolution: 2048 x 1536
Battery level indicator
– battery is low and flash will not function
– battery is drained and camera will not function
Flash is automatic and will fire when light is insufficient
Flash is ON regardless of the lighting condition
Flash is OFF regardless of the lighting condition
Macro mode is enabled
Self-timer is activated: 10 seconds
Sunny - White balance option
Cloudy - White balance option
Fluorescent - White balance option
▼
▲
8
Tungsten - White balance option
Night - white balance option
* 6 Mega Pixel enhanced resolution via camera firmware
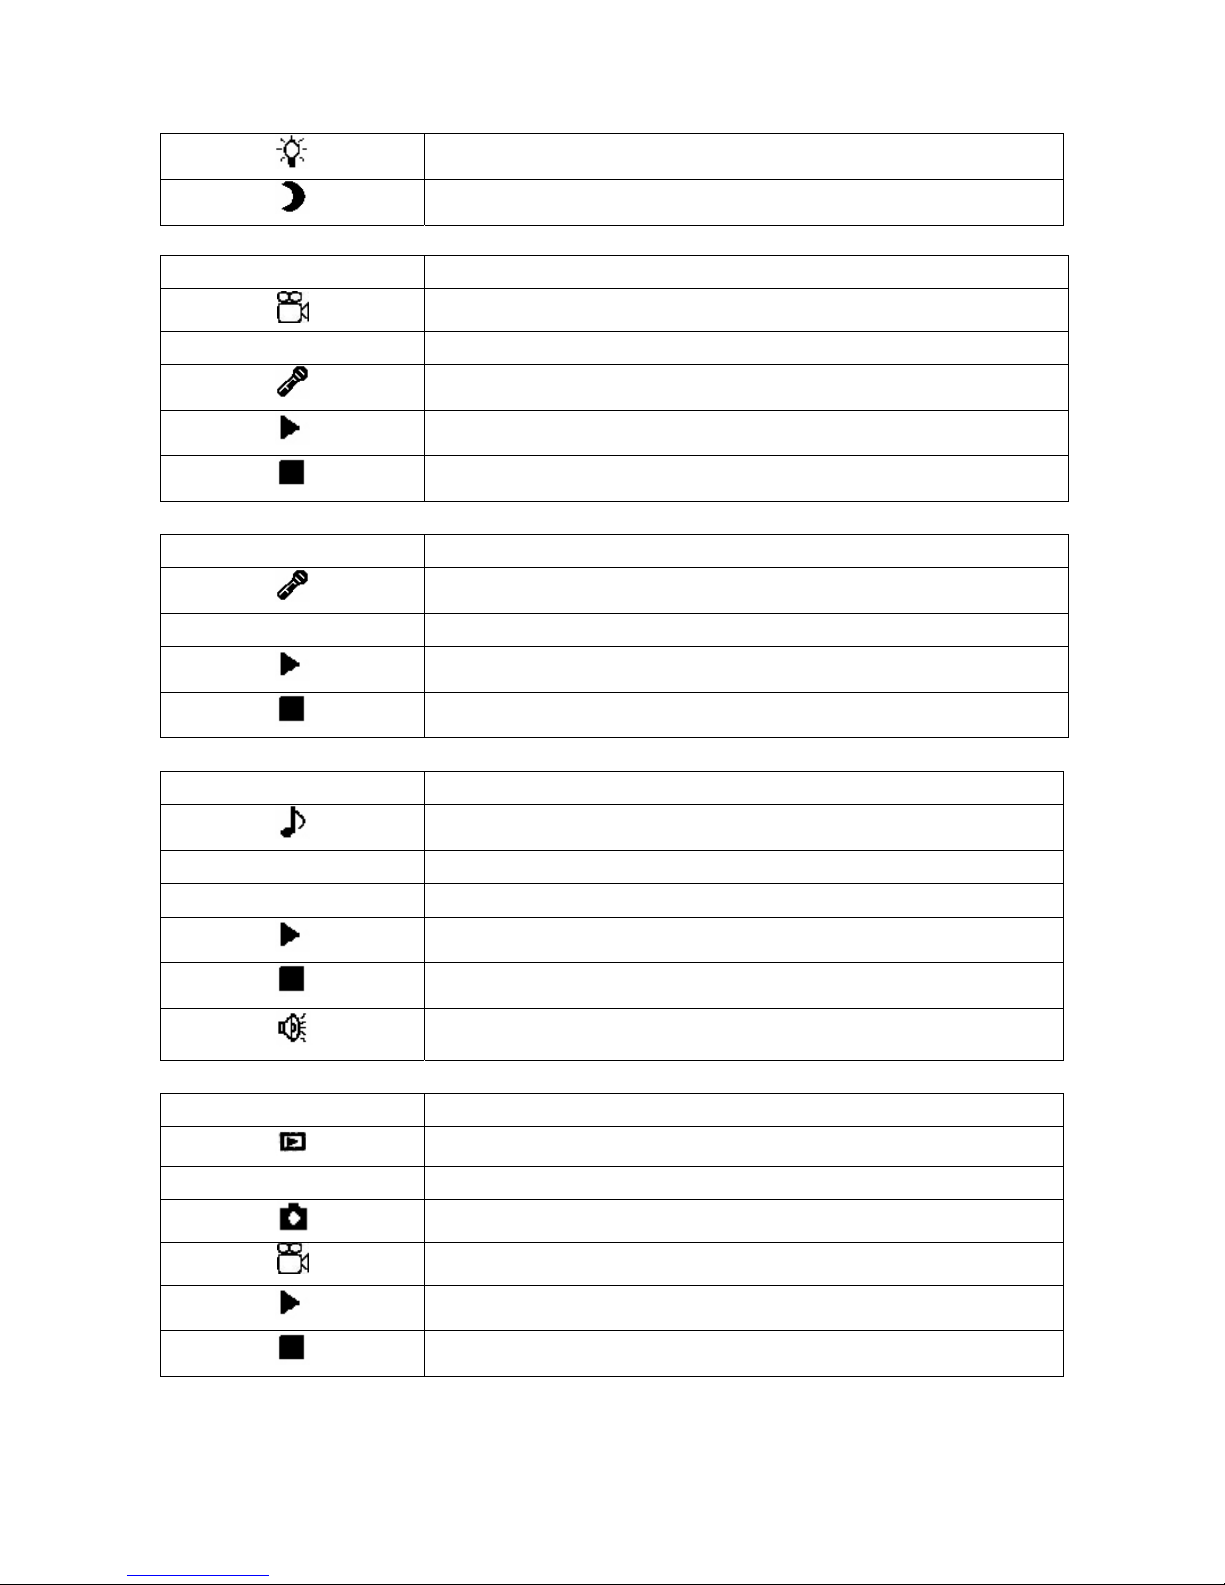
Video Mode Icons Functions
Video capture mode
01:00 Time elapsed in minutes and seconds
Audio is ON
Start recording the video
Stop recording the video
Audio Mode Icons Functions
Audio recording mode
88:88
Time elapsed in minutes and seconds
Start recording audio
Stop recording audio
MP3 Mode Icons Functions
MP3 player mode
888/888
Number of song(s) playing / Total number of song(s)
00:00
Time elapsed in minutes and seconds
Play MP3 music
Pause/Stop MP3 music
Volume indicator
Playback Mode Icons Functions
Playback mode
000 / 000
Image Number displayed / Total number of images
Still image playback
Video playback
Playing video/audio
Stop playing video/audio

9
Using the Digital Camera
How to Setup the Camera
1. Power ON the camera by sliding the lens cover to the left. The LCD screen will display a splash
screen followed by the still image capture preview screen.
2. Press the MODE button to enter the Setup mode. The Setup Menu is shown below:
3. Press the / buttons to select the item and press the OK button.
Setup Menu Features & Usage
Language
This feature allows you select the language you
want. The following are the language options:
• English
• French
• Spanish
• Italian
• German
• T. Chinese
Use the / buttons to toggle to your desired
language and then press the OK button.
Sound
This feature allows the camera to give a beep
during normal operation. (e.g. taking a picture,
deleting a file, etc).
• ON
• OFF
Use the / buttons to select ON or OFF and
press the OK button.
▼
▲
▼
▲
▼
▲
 Loading...