

Page 1
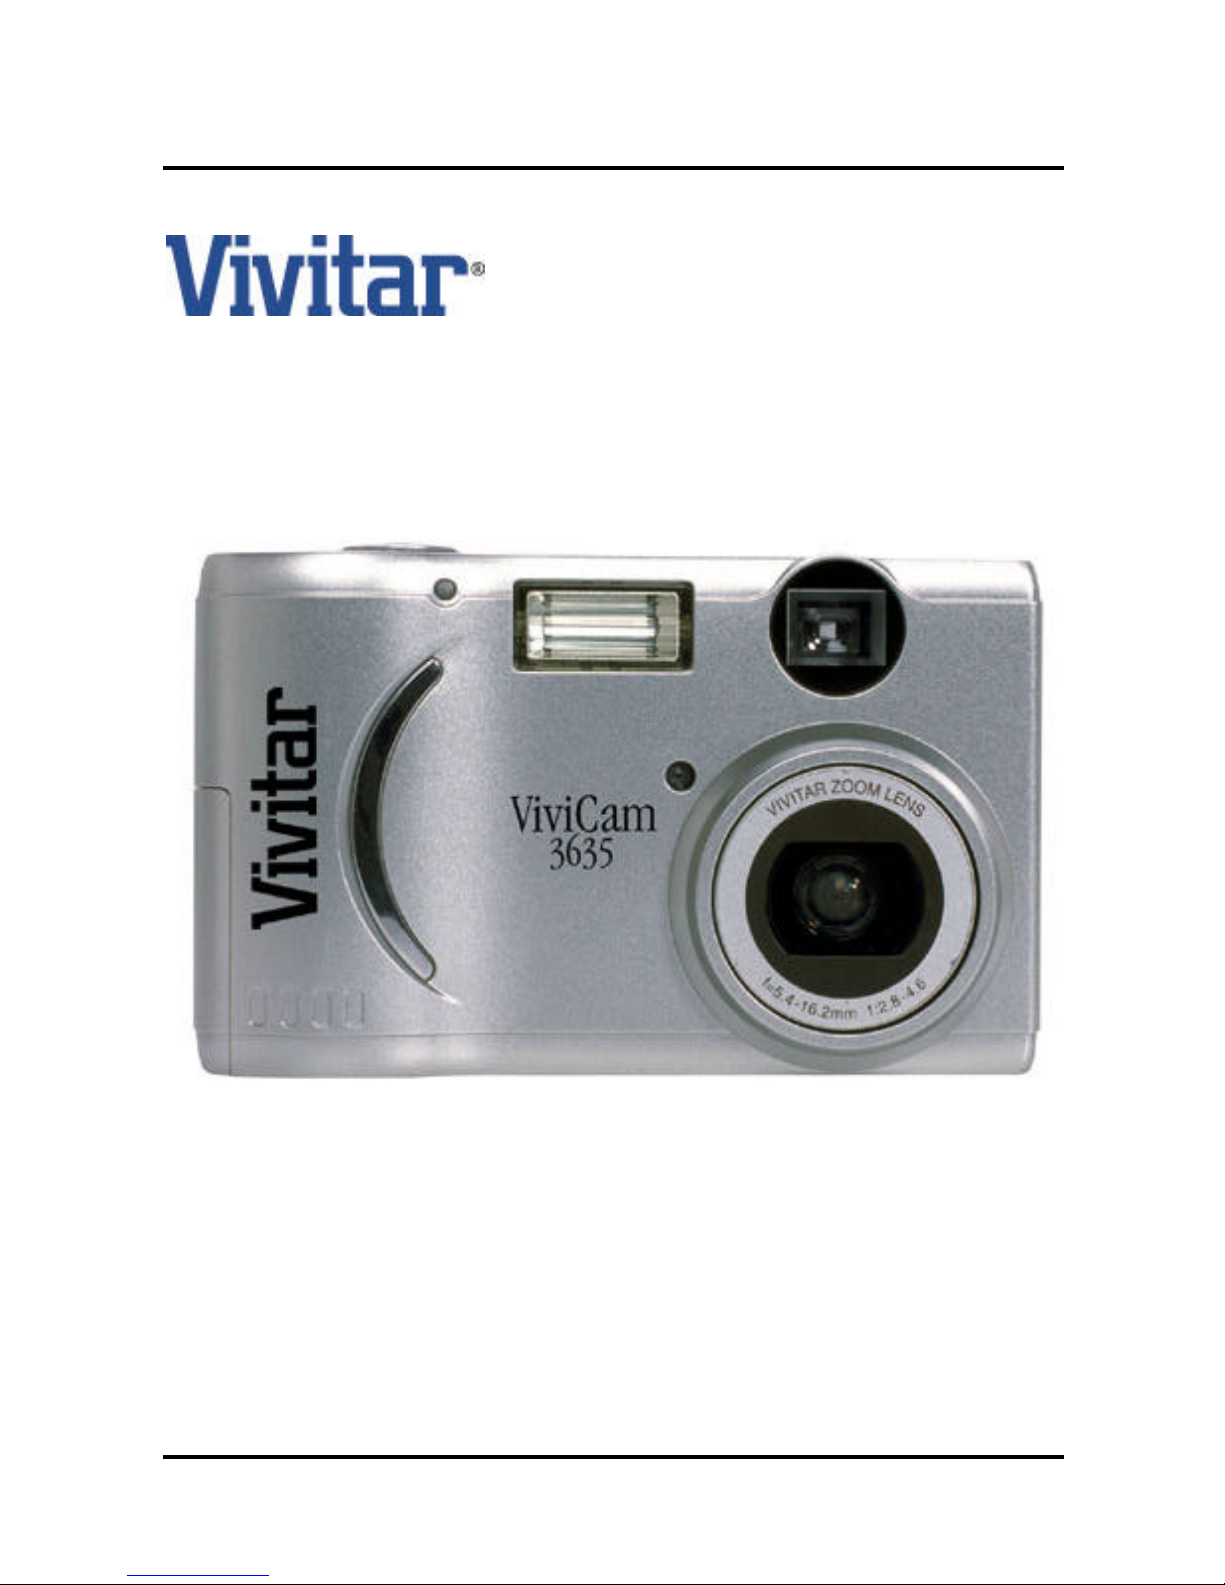
Vivicam 3635 User Manual
English 021009
Page 2

1
Warranty Policy
This camera is under warranty for one full year from the date of purchase by the original purchaser.
In case of defects in materials or workmanship, we will replace or repair the camera free of charge.
This warranty applies to the camera only. This warranty does not include batteries, or other accessories that have not been manufactured by our company. This warranty will not be honored if the
camera has been mishandled or tampered with, or altered by anyone other than the manufacturer.
Other than for the warranty herein, we are not responsible for loss, damage, or inconvenience of
any kind.
A defective camera being returned under warranty must be accompanied by a brief description of
the difficulties encountered and also by a proof of purchase with the date of purchase clearly indicated.
All related transportation costs and insurance are at the owners expense. Any alteration of this
warranty cannot be made without the written approval from our company.
FCC Notice
This equipment has been tested and found to comply with the limits for a Class B digital device,
pursuant to part 15 of the FCC Rules. These limits are designed to provide reasonable protection
against harmful interference in commercial installation. This equipment generates, uses and can
radiate radio frequency energy and if not installed and used in accordance with the instructions,
may cause harmful interference to radio communications. However, there is no guarantee that
interference will not occur in a particular installation.
If this equipment does cause harmful interference to radio or television reception, detectable by
turning the equipment in question off and on, the user is encouraged to try to correct the interference by one or more of the following measures: Reorient or relocate the receiving antenna; Increase the distance between the equipment and the receiver; Connect the equipment to an outlet
on a different circuit than that which the receiver is connected to; Or consult the dealer or an
experienced radio/TV technician for help.
NOTE
A shielded-type DC power cable incorporated with a ferrite core is required in order to meet the
FCC emission limits and also to prevent interference to the nearby radio and television reception.
Use only shielded I/O cable incorporated with a ferrite core to connect this equipment to host
computer and TV set. Shielded A.C. power cable and shielded I/O cables are required in order to
meet the FCC emission limits. It is essential that only the supplied power cord and I/O cable(s) be
used.
Page 3

2
E
Do not use this camera if it is emitting smoke, becomes unusually hot to be touched,
emitting any unusual odor or noise, or if it is in any other abnormal states.
Operating the camera in any of these situations may cause a fire or an electrical
shock.
(batteries or AC power adapter). (If you are using the AC power adapter,
unplug the adapter from the AC power outlet after you have disconnected the camera.)
After checking that smoke is no longer being emitted, contact your dealer or your local
authorized service facility
and request repairs. never attempt to repair this camera yourself as this is dangerous.
Do not use the camera if any water has entered the camera.
Turn the camera off, and then disconnect the power source (batteries or AC power
adapter).
(if you are using the AC power adapter, unplug the adapter from the AC power outlet
after you have disconnected the
camera.) Then contact your dealer or your local authorized service facility. Do not
continue to use the camera as this
may cause a fire or an electrical shock.
Do not use the camera if any foreign objects have entered the camera. Turn the
camera off,
and then disconnect the power source (batteries or AC power adapter).
(if you are using the AC power adapter, unplug the adapter from the AC power outlet
after you have disconnected the
camera.) Then contact your dealer or your local authorized service facility. Do not
continue to use the camera as this
may cause a fire or an electrical shock.
If the camera has been dropped or if the camera case has been damaged,
turn the camera off, and then disconnect the power source (batteries or AC power
adapter).
(if you are using the AC power adapter, unplug the adapter from the AC power outlet
after you have disconnected the
camera.) Then contact your dealer or your local authorized service facility.
Do not continue to use the camera as this may cause a fire or an electrical shock.
Warning
Page 4

3
Warning
Do not place the camera in any unstable locations such as on a wobbly table or sloping
surface where the camera may fall or tip over and cause injury.
Do not expose the camera to moisture and make sure that there is no water getting into
the camera.
Take particular care when using the camera under extreme weather conditions such as
rain or snow,or when operating the camera at the beach on near water.
Water in the camera may cause a fire or an electrical shock.
Do not insert or drop metallic or inflammable foreign objects into the camera through
access points such as the Compact Flash card slot.
This may cause a fire or an electrical shock.
Do not attempt to modify this camera.
This may cause a fire or an electrical shock.
Do not remove the camera casing. This may cause an electrical shock.
Internal inspection, maintenance and repairs should only be carried out by your dealer
or local authorized service facility.
Avoid using this camera in the bathrooms.
Exposure to excessive moisture may cause a fire or an electrical shock.
Do not touch the power plug during a thunderstorm if you are using the AC power
adapter.This may cause an electrical shock.
Never operate this camera in any way while driving a vehicle.
This may cause a traffic accident.
Page 5

4
Caution
Do not place this camera in damp or dusty locations.
This may cause a fire or an electrical shock.
Do not place this camera in a location affected by oil fumes or steam,such as near a
cooking stove or humidifier. This may cause a fire or an electrical shock.
Do not leave this camera in a location subject to extremely high temperatures,
such as in a sealed vehicle or in direct sunlight.
Exposure to high temperatures may adversely affect the camera case and
internal components and may cause a fire.
Do not cover or wrap the camera or the AC power adapter with a cloth or quilt.
This may cause heat to build up and distort the case and cause a fire.
Always use the camera and its accessories in well-ventilated locations.
Handle the camera carefully and do not bump the camera into any hard object.
Handling the camea roughly may cause a malfunction..
Do not move the camera while it is switched on.
(if you are using the AC power adapter, unplug the adapter from the AC power outlet
after you have switched off the camera.)
Ensure that any connector cords or cables to other devices are disconnected before
moving the camera,Failure to do so may damage the cords or cables and cause a fire
or an electrical shock.
When handing the camera ,always unplug it from the power source (batteries or AC
power adapter) for safety.
(if you are using the AC power adapter, unplug the adapter from the AC power outlet
after you have disconnected the camera.)
Failure to do may result in an electrical shock.
Page 6

5
Caution
When leaving the camera unused for long periods, such as during a vacation,
always unplug the camera from the power source (batteries or AC power
adapter ) for safety.(if you are using the AC power adapter, unplug the dapter
from the AC power outlet after you have disconnected the camera.)
Failure to do so could result in a fire.
Do not use batteries other than those specified for use with your camera.
The use of unsuitable batteries may result in the batteries splitting or
leaking and causing a fire, injury,or soiling of the battery compartment.
When fitting batteries into the camera, check the polarity markings on the
battery ( - and + )to ensure that you insert the battery correctly.
Incorrect battery polarity may result in the batteries splitting or leaking and
causing a fire, injury,or soiling of the battery compartment.
Remove the batteries if the camera will not be used for an extended period
of time.The batteries may leak and cause a fire, injury or soiling of the
battery compartment.
If the batteries leak, clean and wipe the battery compartment carefully and
install new batteries.
Wash your hands carefully if you touch the battery fluid.
Page 7

6
C
ONTENT
Preparation
Checking accessories
System Requirements
Name of Parts
Preparing the Power Supply
Inserting/Removing the SD Memory Card/Multi-media Card
Attaching the Strap
Adjusting the Menu Display Language and Time/Date
Basic Recording
Recording
Setting the Picture Quality
Selecting the Recording Mode
Auto Mode
Red-Eye Reduction Mode
Fill-in Flash
Night View Portrait
Flash Off
Distant Mode
Macro Mode
Self-Timer Mode
Advanced Recording
Using the M-REC menu
Recording a Movie
Using the Digital Zoom
Exposure Compensation
Changing the White Balance
Changing the AE Mode
Changing to Slow Shutter Speed
Adjusting the Screen Contrast
Recording in Black and White
Resetting the Camera to Default Settings
8
8
8
8
11
12
14
14
15
15
17
18
19
19
19
20
19
20
20
21
21
21
22
22
23
23
24
24
24
24
24
chapter 1
chapter 2
chapter 3
Page 8

7
Basic Playback
Playing back Images
About the Playback Screen
Playing Back Movies
Advanced Playback/Erasing
Using the PLAY Menu
Erasing Images
Viewing Multiple Image (Index Playback)
Viewing a Slideshow of Images
Keeping Important Images (Protect Setting)
Displaying the File Number
Adjusting the Screen Contrast
Selecting the Image to Print (DPOF)
Advanced Operations
Using the SET-UP Menu
Formatting the SD Memory Card/Multi-Media Card
Setting the Self-timer
Setting the Auto Shut-off Time
Resetting the File Number
Turning off the Beep Sound
Setting the QuickView
Setting the Date
Setting the Language
Transferring your Images to your Computer
Driver Installation
Downloading Images
Specifications
25
chapter 4
chapter 5
chapter 6
chapter 7
25
25
26
27
27
27
28
28
28
29
29
29
32
32
32
33
33
33
34
34
34
34
34
35
35
36
Page 9
8
Names of parts
MODE button
LED1,LED2
Viewfinder
Status LCD
PICTURE button
LCD monitor
5-way button
( / / (W) / (T)
and center OK buttons)
Strap holder
Card access LED
AC adapter socket
USB terminal
MENU button
DISPLAY button
Battery/card cover
1
C
hapter
PreparationPreparation
PreparationPreparation
Preparation
1
Thanks for the purchase of the digital camera. With the camera, you will live a whole new
camera experience and make photo shooting more interesting and fun. Here below we will
guide you through the whole picture taking process, please read this Users Manual carefully
and keep them in a safe place for future reference.
E
Checking Accessories
ƒ¬ƒ¬
ƒ¬ƒ¬
ƒ¬ Software CD-ROM
ƒ¬ƒ¬
ƒ¬ƒ¬
ƒ¬ USB Cable
ƒ¬ƒ¬
ƒ¬ƒ¬
ƒ¬ AC Power Adapter ( optional )
ƒ¬ƒ¬
ƒ¬ƒ¬
ƒ¬ Battery ( optional )
ƒ¬ƒ¬
ƒ¬ƒ¬
ƒ¬ SD Memory Card ( optional )
ƒ¬ƒ¬
ƒ¬ƒ¬
ƒ¬ Owners Manual, Quick Start Guide
ƒ¬ƒ¬
ƒ¬ƒ¬
ƒ¬ Pouch and Strap
System Requirements
ƒ¬ƒ¬
ƒ¬ƒ¬
ƒ¬ Windows 98/2000/Me, Pentium 166 MHz or higher for PC Users
ƒ¬ƒ¬
ƒ¬ƒ¬
ƒ¬ Mac OS 8.6/9.0/9.1/X, Power PC CPU for Macintosh Users
ƒ¬ƒ¬
ƒ¬ƒ¬
ƒ¬ Color monitor (800x600 24-bit or higher recommended)
ƒ¬ƒ¬
ƒ¬ƒ¬
ƒ¬ Available USB port, CD-ROM drive
ƒ¬ƒ¬
ƒ¬ƒ¬
ƒ¬ 80 MB available hard disk space
ƒ¬ƒ¬
ƒ¬ƒ¬
ƒ¬ At least 32 MB RAM
Page 10
9
Shutter button
Self-timer LED
Flash
Flash sensor
Main swith
Viewfinder window
Lens
Tripod hole
Main switch
OFF
M
SET
Manual mode (M-REC)
Images can be recorded using manual settings.
Auto mode (REC)
Images can be recorded using default settings.
Power off
The camera is turned off.
Playback mode (PLAY)
Images recorded can be played
back on the LCD monitor.
Setup mode (SET UP)
Various settings can be changed.
Page 11
10
5-way button
Used for zoom operation and menu operation. Pressing the center acts as the OK button.
MENU/DISPLAY button
MENU button
Displays menus of various modes.
DISPLAY button
Images can be displayed and recorded using the LCD monitor by pressing the
DISPLAY button during Manual mode ( ) and Auto mode ( ) .
1
4
2
5
6
3
Camera mode
1
By selecting a preset recording mode using the MODE button, the subject can be
recorded in the optimal condition.
Auto
Red-eye Reduction
Fill-in Flash
Night View Portrait
Flash Off
Distant
Macro
Self-timer
For details on each mode, see Chapter 2 Basic Recording.
Status LCD
W
T
OK button
Page 12
11
2
Battery life indicator
When using batteries, the battery level is indicated using 3 levels (full: ;
low: ; empty: ).
Picture quality mode
3
The picture quality of image data can be selected from 3 types by pressing the
PICTURE button.
Remaining number of frames
4
Remaining number of frames available for recording is displayed. When the camera is connected to a PC, PC is displayed.
5
6
This indicator is displayed when the camera is set to movie recording.
This indicator is displayed when the camera is set to black-and-white
recording.
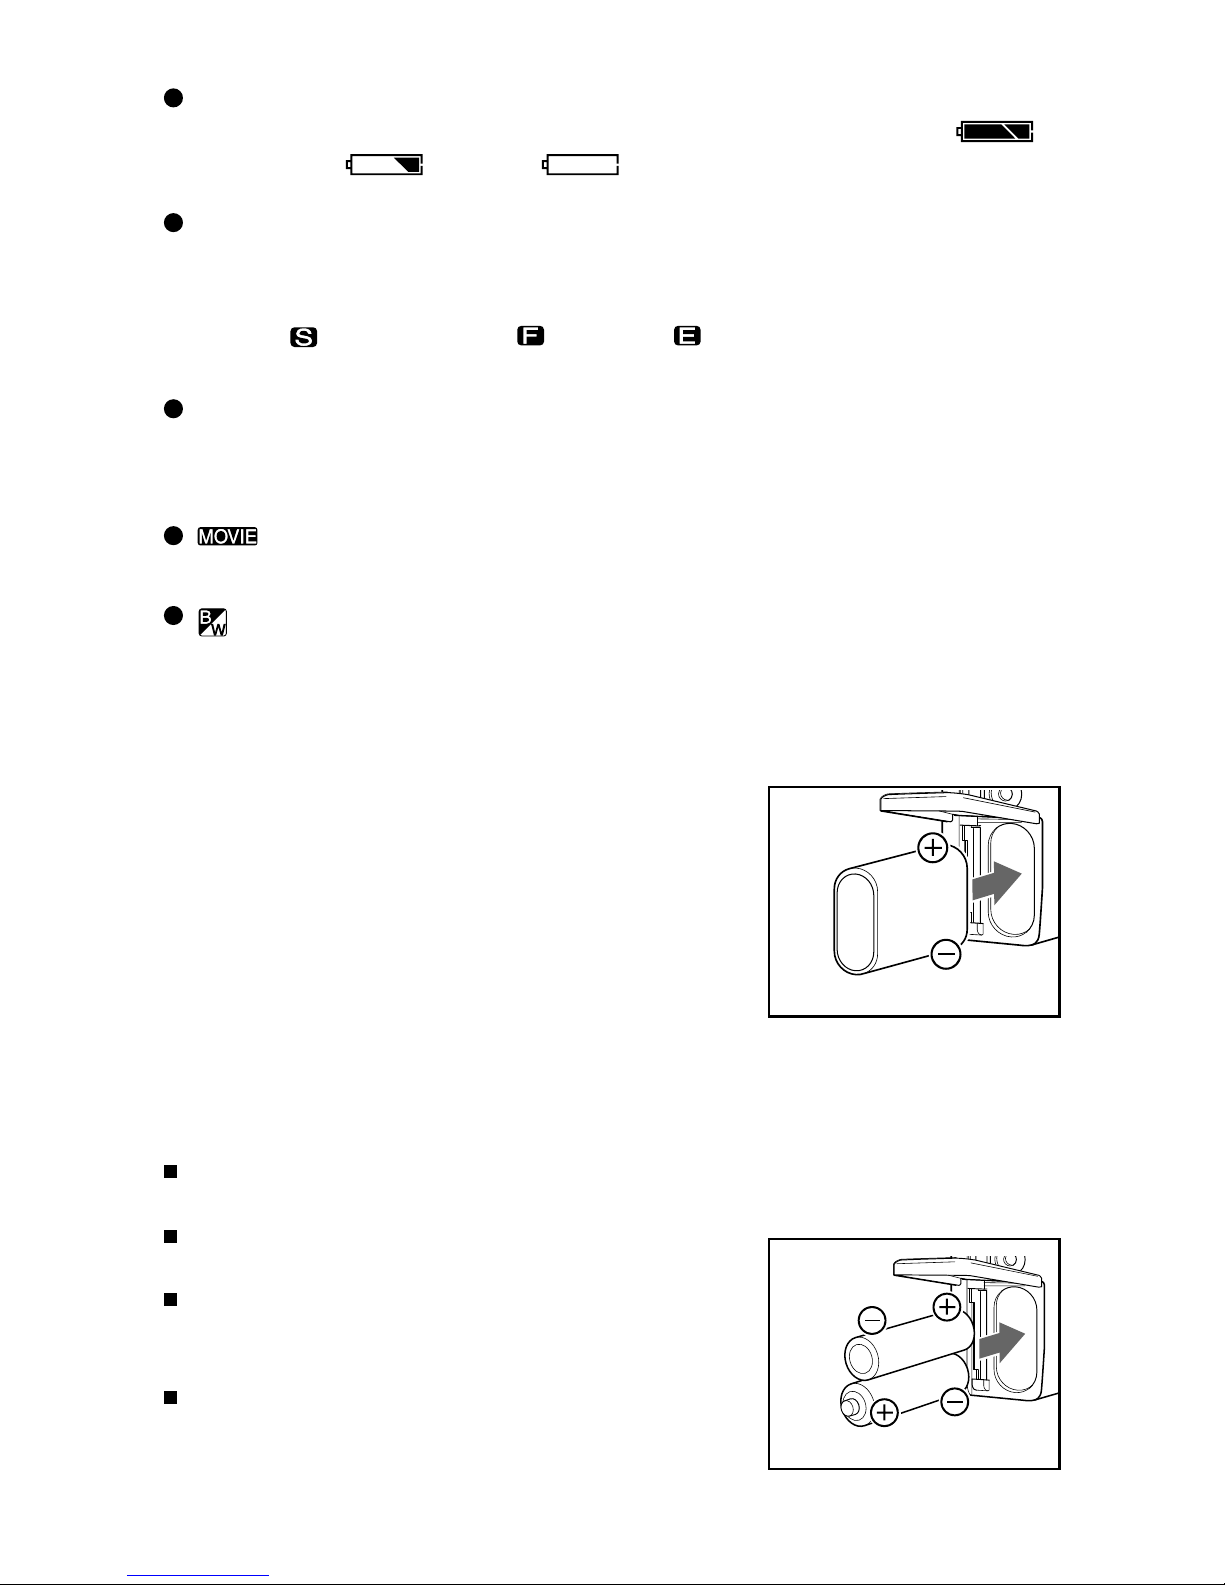
Preparing the Power Supply
Turn the main switch to the OFF position.
CR-V3 lithium battery
1. Open the battery/card cover by sliding in the direction
indicatied the arrow.
2. Insert the battery in the correct direction as shown in
the diagram.
3. Close the battery/card cover.
AA batteries
Insert AA batteries (2 units) with polarity as shown in the
diagram inside the battery compartment.
AA alkaline batteries and AA nickel-hydrogen batteries
can be used.
Do not use a mix of different types, different
manufactures, different classifications of batteries.
When using rechargeable batteries, read the instruc tion manual of the batteries and charger
before use.
Rechargeable batteries cannot be charged in the
camera.
SUPER FINE FINE ECONOMY
Page 13

12
Using the AC adapter
Insert the AC adapter into a wall outlet . Next, connect the power cable of the AC adapter into the
AC adapter jack on the camera.
Always use the supplied AC adapter .Otherwise fire and/or electrical shock may
occur as a result.
When carrying the camera overseas, check with a travel agency, etc., and prepare a conversion
adapter suitable for the power plug of the destination country in advance.
Auto shut-off function
When using the camera with batteries and no operation is made for a certain time, the camera
power will automatically turn off to prevent battery depletion.
To recover from auto shut-off, press the MODE button, PICTURE button, / / / button,
shutter button or DISPLAY button.
The time for auto shut-off is factory set to 3 min, and the setting can be changed in the
SETUP menu. (See page 33 .)
The auto shut-off function operates even when using the AC adapter.
Inserting/Removing the SD Memory Card/Multi-Media Card
Always turn the main switch to the OFF position and make sure the card access LED is off
before inserting/removing the SD Memory Card/Multi-Media Card.
Inserting the card
1. Open the battery/card cover.
2. Face the label of the SD Memory Card/Multi-Media Card toward the front of the camera and
the end of the connector toward the card slot.
3. Carefully insert the card into the camera with the mark on the label facing up until a click is
heard. The card will be locked.
Battery life indicator
The number of pictures that can be taken varies according to the performance and usage
conditions of the batteries. Power is consumed by the following operations even when not
recording and these will reduce the number of images that can be recorded.
Repeated focus operations by pressing the shutter button halfway.
Repeated zoom operations.
Extensive use of the LCD monitor in the Playback mode.
Communication with a PC.
Page 14

13
OPEN
4. Close the battery/card cover.
Removing the card
1. Open the battery/card cover.
2. Press the edge of the inserted SD Memory Card/Multi Media Card.
3. The card will unlock and eject.
4. Close the battery/card cover.
SD Memory Card cannot be inserted and locked if the front/back sides or the up/down
direction are incorrect.
If force is used when inserting SD Memory Card/Multi-Media Card, damage may
occur to the connector section.
Caution
SD Memory Cards and Multi-Media Cards are manufactured using precision electronic
components. Do not perform the following as malfunction or damage may occur as a result.
During image recording, the card access LED is lit. While the lamp is on, do not open the
battery/card cover or remove the SD Memory Card/Multi-Media Card. Interrupting the
writing process will not only cause the camera to malfunction but the card may become
unusable.
Do not touch the terminal with hands or metal objects. Damage to the components may
occur as a result of static electricity. Before handling a SD Memory Card or Multi-Media
Card, discharge any static build-up from your body by touching grounded metal, etc.
Keep dust, water and foreign objects away from the terminal section.
Do not store the card in places with high humidity, dusty places or where static electricity
or electromagnetic fields are likely to occur.
Do not bend, drop or apply excessive force.
Avoid heat, liquid and direct sunlight when using and for storage.
Do not dismantle or modify.
Press to Eject
Page 15

14
Important
When using Multi-Media Cards, the operation response time may be longer during shoot
ing and playback when compared with the SD Memory Cards. However, this is due to the
specification of the Multi-Media Card and is not a malfunction.
The SD Memory Card includes a write-protect switch. Please note that pictures cannot be
taken or deleted when the write-protect switch is on.
When using SD Memory Cards/Multi-Media Cards on a PC, do not change the attributes
(read-only, etc.) of the files , the file names or the directory name of image data saved on an
SD Memory Card/Multi-Media Card or save files other than image data taken by this
camera. Images that have been changed or added will not only play back on the camera but
may cause the camera to malfunction as well.
Always format SD Memory Cards/Multi-Media Cards using this camera. A card formatted
in a PC may not operate properly.
Attaching the Strap
Pass the thin loop through the strap into the
strap holder on the right side of the camera.
1
2
Pass the strap through the thin loop and pull.
Adjusting the Menu Display Language and Time/Date
When using the camera for the first time, set the menu display language and time/date. The
setting range is between January 1, 2001 and December 31, 2035.
The menu language, time and date are maintained by the backup condenser. The setting
contents are therefore retained even when replacing the lithium battery/AA batteries.
Backup time during battery replacement is about 15 minutes.
1. Make sure that batteries, or AC adapter have been installed/connected.
2. Set the main switch to , , or SET . The LCD monitor will turn on and the
Language Setting screen will appear.
3. Press the / button to select the desired language and press the OK button. The
Confirmation screen for the selected language will appear.
4. Press the button to select YES and press the OK button. The selected language
will be confirmed and the Time/Date Setting screen will appear.
Page 16

15
5. Use the / button to adjust the number to the current Year, Month, Day & Time.
Press the / buttons to move the next/previous data field.
6. When the last item is selected/changed, press OK button. The Confirmation screen for
the date setting will appear.
7. Press the OK button again. The set values will be stored.
Recording
Normal recording is performed with the subject
a distance of more than 0.8m. For distances
between 0.25m to 0.8m from the subject, see
Macro Recording mode (page20).
1. Check to make sure that an SD Memory
Card/Multi-Media Card is properly inserted.
2. Set the main switch to . The lens will
extend.
If the main switch is set to while the
lens is being held, Err may appear in the
status LCD. If this occurs, turn the main
switch to OFF and turn it back to .
3. Press the PICTURE button to set the picture
quality.
For more information, see Setting the
Picture Quality (page17 ).
4. Press the MODE button to set the recording
mode.
For more information, see Selecting the
Recording Mode (page18 ) to Self-timer
Mode (page 21 )
5. Look through the viewfinder to determine
the image composition, and then press the
(W) and (T) buttons to set the
subject size.
OFF
M
SET
4
2
2C
hapter 2
Basic RBasic R
Basic RBasic R
Basic R
ecorecor
ecorecor
ecor
dingding
dingding
ding
3
Page 17

16
When pressing the (W) button, the subject
will become smaller (wide). When pressing the
(T) button, the subject will become larger
(telescopic). The zoom range is equivalent to
35 105mm in a 35mm camera.
6. Lightly press the shutter button (halfway). The
LED1 will light green and the focus and exposure
will be locked. If the subject to focus is not in
the center of the viewfinder, perform
Focus Lock Recording (page17 ).
Viewfinder and LED
For normal recording, aim at the subject using the
entire viewfinder area. To focus, position the subject within the diagonally-lined center area of [ ]
located at the center of the viewfinder.
For macro recording (0.25m to 0.8m), or if the zoom
position is set to TELE and the distance
between the camera and subject is near, record
with the LCD monitor set to ON since the viewfinder
and the recording range will vary. For macro
recording, see (page20).
Color Status Definition Warning sound
Red Blinking System error (error code displayed on status LCD) Yes
Red Blinking Image blur warning, Low light warning No
Red On Flash charging No
Green Blinking Auto-focus (AF) unavailable* No
Green On Camera ready for recording No
Green and Red Blinking Camera unstable warning, low-luminance warning
or when subject cannot be focused (AF) Yes
Green and Red Blinking Insufficient card space, or card is not inserted,
damaged, unformatted or write-protected No
Green and Red On Formatting card or during process No
The operation of writing the recorded image to the SD Memory Card/Multi-Media Card
will start and at the same time, the card access LED on the side of the camera will light
(orange). When the card access LED turns off, the writing process is completed.
7. Gently press the shutter button completely. Recording is completed when a buzzer
sound is heard.
Focus area
LED 1
(Green)
5
LED 2
(Red)
LED Messages
Type
LED 2
LED 2
LED 2
LED 1
LED 1
LED 1,2
LED 1,2
LED 1,2
Page 18

17
Focus Lock Recording
Use the following procedure if the subject to
record is not in the center of the viewfinder.
1
Position the subject so that it falls within
the focus frame and lightly press the
shutter button(halfway).
The LED 1 will light green and the focus
position will be locked.
Releasing the finger from the shutter button after locking the focus position will
cancel the focus lock.
2
While continuing to hold the shutter button down lightly (halfway), re-position
the subject for the desired composition
and gently press the shutter button down
completely to record.
1
2
Recording using the LCD moniter
As well as using the optical viewfinder, the LCD monitor can be used as viewfinder for framing.
Set the main switch to .
Press the DISPLAY button to turn on the
LCD monitor.
1
3
Record by referring to the LCD monitor.
Recording procedure is the same as
when using the viewfinder.
2
MENU
DISPLAY
Setting the Picture Quality
By using the PICTURE button, the picture quality of the image data to be recorded can be
selected from 3 types. The currently selected picture quality is displayed on the status LCD.
SUPER FINE(Default setting)
FINE
ECONOMY
Page 19

18
Number of recordable images
The values shown below are guides when recording using the same picture mode. When there are
files other than images, or when recording is made while switching the picture quality mode/recording mode, the number of recordable images will vary. Furthermore, the number of recordable
images may also vary depending on the recorded subject.
Picture quality mode Estimated number of File size (estimate)
recordable images (8MB card)
SUPER FINE About 17 images About 240KB
FINE About 26 images About 150KB
ECONOMY About 68 images About 60KB
*Note: When using an SD Memory Card
Picture quality modes and number of recorded pixel
Picture quality mode Number of recorded pixels (H) × (V) Picture quality
SUPER FINE 1600 × 1200 pixels
(Default)
Selecting the Recording Mode
By selecting a preset recording mode using the MODE button, the subject can be recorded in
the optimal condition. 14 modes can be selected using the 8 icons.Pressing the MODE button
will cycle through the recording modes.The selected recording mode is pointed by the arrow
icon of on the status LCD.
During auto power-off, the setting of each mode is saved. ( Night View Portrait mode
and Self-timer mode are canceled.)
Among the 3 picture quality modes,
this mode is superior in quality.Images consisting of about 2 million
pixels can be recorded in this mode.
Images consisting of about 1.3
million pixels can be recorded in this
mode.
Among the 3 modes,this mode allows the most number of images to
be recorded.
ECONOMY
FINE
640 × 480 pixels
1280 × 960 pixels
Page 20

19
Jump function:When power is turned off, the mode returns to (default setting).
However, the previously set mode can be selected by pressing the MODE button once.
(Self-timer is not included as a previous set mode.)
Single-action AUTO function:Pressing the MODE button for 2 seconds will return the mode
to .
(Auto)Mode
Since this mode automatically performs all settings, it allows you to concentrate on the actual
image to record. When recording in a dark place or against backlight, the camera will automatically determine whether the flash is necessary.
Press the MODE button and select .
NOTE:
* The flash recording range is 0.8 to 3.0m when the camera is set to WIDE and 0.8 to
2.0m when set to TELE (the range varies depending on the zoom position and aperture).
* While the flash is being charged, the viewfinder LED will light in red. While the LED is
on, flash recording cannot be made.
(Red-eye Reduction) Mode
Pre-flashing is performed before the actual flash to reduce the red-eye effect. Other than the
pre-flash, the mode is the same as .
Press the MODE button and select .
* The red-eye reduction may have little effect if the subject is not directly facing the
pre-flash or actual flash, or when there is some distance between the camera and
subject.
NOTE:
(Fill-in Flash) Mode
Used to soften dark shadows on the face of the subject due to backlight, artificial lighting, etc.
The flash will always be used regardless of the surrounding brightness.
Press the MODE button and select .
(Night View Portrait) Mode
Used when recording subjects with night view as the background. The flash and red-eye
reduction will always be used.
Under low light conditions, the shutter speed will become slow. Since this may result in the
image becoming blurred, use of a tripod is recommended.
Press the MODE button and select .
Page 21

20
(Flash off) Mode
Used when recording in a place where flash photography is prohibited, or when utilizing the
night view or indoor lighting for recording. The flash will always be off during recording.
Under low light conditions, the shutter speed will become slow. Since this may result in the image
becoming blurred, use of a tripod is recommended.
Press the MODE button and select .
(Distant) Mode
Used when recording far away scenery.Infinity focus is selected at this mode to gain maximum
sharpness. The flash will always be off during recording.
Press the MODE button and select .
(Macro) Mode
Used when recording the subject at close distances.
Macro recording is used when the subject is within a distance range of between 0.25m ~ 0.8m
(Tele 0.3m~0.8m)from the front of the lens.
For macro recording, the flash will always be off. Under low light conditions, the shutter
speed will become slow. Since this may result in the image becoming blurred,the use of a
tripod is recommended.
Caution: For macro recording, the recording range and the field of view within the viewfinder
will differ. Use the LCD as a viewfinder monitor for recording.
Set the main switch on the top of the camera to . The lens will extend.
1
2
Press the PICTURE button to set the picture quality .
Press the MODE button and select .
3
Press the DISPLAY button to turn on the LCD monitor.
4
Apply the same procedure as the normal recording to take a close-up shot. (Refer to
normal recording from step 5 to 7 at (page15)
5
Focus adjustment may be difficult for the following condition:
A location where the subject or background is extremely dark.
Objects with no contrast ,flat objects with only horizontal lines, fast moving objects,
poorly lit objects , objects with strong backlight or reflecting light, and objects that
flicker such as fluorescent lighting.
Page 22

21
(Self-timer) Mode
This mode automatically releases the shutter after a delay so that the person making the
recording can be included in the image. The self-timer LED on the front of the camera will
flash in red and the shutter will be released after about 10 seconds. The delay time can be
set to either 10 sec (default setting) or 3 sec in the SET-UP menu. (See page33)
Press the MODE button and select .
To cancel the self-timer, select a mode other than using the MODE button.
3C
hapter
AdAd
AdAd
Ad
vv
vv
v
anced Ranced R
anced Ranced R
anced R
ecorecor
ecorecor
ecor
dingding
dingding
ding
3
Using the M-REC menu
The main switch of the camera can be set to , so that recording can be made with
user-defined settings. M-REC menu contains Movie mode, Digital Zoom, Camera Exposure,
White Balance, AE mode, Slow Shutter, Screen Contrast and Black & White sub-menus. To
access the M-REC menu and how to change the settings, perform the following steps :
1. Set the main switch to . The lens will extend.
If the main switch is set to with the lens is being held, Err may appear in the
status LCD. If this occurs, turn the main switch to OFF and then turn it back to .
2. Press the MENU button to enter the M-REC menu mode.
3. Press the 5/6button to select the desired sub-menu.
4. Press the 3/4button to change the sub-menu setting.
5. Press the OK button to exit the M-REC menu mode.
6. Record using the set conditions. (See Recording page15.)
OFF
M
1
2
3
4
5
Page 23

22
The menu settings that have been made will be saved even when the power is turned off.
The settings set in the M-REC menu will not have any effect when the main switch is set
to .
Recording a Movie
Movies can be recorded with this camera. The available recording resolutions are: 320 X 240
pixels and 160 X 120 pixels. The maximum recording time for a movie is about 15 seconds
and recording continues while the shutter button is held down.
ĆĆ
ĆĆ
Ć
When the movie mode is set, all menus with the exception of Reset All and Screen
Contrast will become unavailable.
1. Enter the M-REC menu mode and press the / button to select Movie mode.
2. Press the / button to select Off (default setting), 320 x 240 or 160 x 120.
3. Press the OK button to exit the M-REC menu mode. Through images will be displayed on
the LCD monitor with a yellow frame. And the resolution will be displayed in the upper
left of the screen, and the recording time will be displayed in the upper right of the screen.
1 2 3 4
The optical zoom will not operate during movie recording. (Perform the operation before
pressing the shutter button.)
Using the Digital Zoom
By combining the optical zoom (3x) and digital zoom (1.5x, 2x), images can be recorded with
a zoom of 4.5 times to 6 times the original size.
The digital zoom can only be used when optical zoom is set to TELE (3x).
When movie mode is selected, the icon will appear on the status LCD.
When the movie mode is selected and the main switch is set to , the LCD monitor
will automatically turn on and display through image. (The LCD monitor will not turn off
even when pressing the DISPLAY button.)
4. Record the movie. The movie will be recorded while the shutter button is held down.
During recording, REC will appear on the right side of the screen in red and the recorded
time will be displayed.
Page 24

23
1. Enter the M-REC menu mode and press the / button to select Digital Zoom.
2. Press the button to select On.
3. Press the OK button to exit the M-REC menu mode.
4. Press the (T) button until the optical zoom stops. Then, release the 5 WAY button
and press the button again.
ĆĆ
ĆĆ
Ć
A blue frame will appear on the LCD monitor and the magnification ratio will be displayed
on the top right. Use the LCD monitor as the viewfinder for recording.
1 2 4
Pressing the / button each time will switch the magnification between 1.5x and 2x.
Digital zoom cannot be used when the LCD monitor is off.
When using digital zoom, the picture quality may decrease compared to images
recorded under normal conditions.
Exposure Compensation
The exposure can be compensated to intentionally brighten or darken the overall recorded
image. The camera exposure can be adjusted within the range of ±1.5EV at 0.3EV intervals.
1. Enter the M-REC menu mode and press the / button to select Camera Exposure.
2. Press the / button to adjust the exposure compensation. Pressing the button will
darken the image and the button will lighten the image.
3. Press the OK button to exit the M-REC menu mode.
It is recommended to record multiple images with different camera exposure settings and
later select the best image.
The result of compensation may be insufficient when using the flash.
Changing the White Balance
The white balance can be adjusted so that images can be recorded in natural colors no
matter what light source the subject is exposed to.
1. Enter the M-REC menu mode and press the / button to select White Balance.
2. Press the / button to select Auto (default setting), (Daylight),
(Incandescent lighting), (Strobe lighting) or (Fluorescent lighting) depends
on your lighting condition.
3. Press the OK button to exit the M-REC menu mode.
Page 25

24
When there are multiple light sources or when the subject is under special lighting, the
desired result may not be achieved.
Changing the AE mode
For normal setting, the AE mode is set to center weighted light reading. The mode can also
be changed to spot reading. In spot reading, the exposure can be adjusted based on a
selected position of the subject.
1. Enter the M-REC menu mode and press the / button to select AE mode.
2. Press the / button and select Regular or Spot.
3. Press the OK button to exit the M-REC menu mode.
Changing to Slow Shutter Speed
The normal shutter speed is between 1/2000 and 1/8 seconds, but by turning on Slow
shutter mode, the range can be extended to between 1/2000 and 2 seconds. Use a tripod
for stabilizing the camera.
1. Enter the M-REC menu mode and press the / button to select Slow Shutter.
2. Press the / button and select On.
3. Press the OK button to exit the M-REC menu mode.
The slow shutter setting can only be used during Night view portrait, flash off, distant and
macro modes.
Adjusting the Screen Contrast
The screen contrast can be adjusted depending on the recording location.
1. Enter the M-REC menu mode and press the / button to select Screen Contrast.
2. Press the button to enter the Screen Contrast menu and use the and buttons
to adjust the brightness.
3. Press the OK button and exit the REC menu mode.
Recording in black and white
Used for expressing a nostalgic feeling similar to using black-and-white film, or for recording
characters on a magazine, blackboard, etc. as memos.
1. Enter the M-REC menu mode and press the / button and select Black & White.
2. Press the button and select On.
3. Press the OK button to exit the M-REC menu mode. Through image on the LCD monitor
will be displayed in black-and-white. will be displayed on the status LCD.
Resetting the Camera to Default Settings
Various settings made in the M-REC menu can be reset to default settings.
1. Enter the M-REC menu mode to select Reset All.
2. Press the button to enter the Reset All menu and press the button to select YES.
3. When the OK button is pressed, all settings will return to the default settings.
Page 26

25
Default settings :
Movie mode Off
Digital Zoom Off
Camera Exposure ± 0
White Balance Auto
AE mode Regular
Slow Shutter Off
Black & White Off
4
C
hapter 4
Basic PlaybackBasic Playback
Basic PlaybackBasic Playback
Basic Playback
Playing Back Images
Recorded images can be displayed on the LCD monitor.
Note: If, after recording, the main switch is set to , the camera will not enter playback
mode until the card access LED is off. (When the card write process is completed, the
camera will automatically enter playback mode.)
1. Set the main switch to . The latest image recorded will be displayed.
Movies will be displayed inside a yellow frame.
When there is no image data, the message No picture in camera will appear.
2. Press the / buttons to browse the previously / succeeding recorded images.
The image will first appear jagged. The image will become clear in a few moments.
Images can be forwarded even before they become clear.
26
25
26
1
2
About the Playback Screen
Other than images, the LCD monitor displays the following:
OFF
M
Page 27

26
File no. (displayed only when the
image number is set to ON)
The directory number and file number
recorded on the card are displayed. These
registration numbers are assigned
uniquely to each image and used when
creating DPOF files (page29).
Picture quality
mode(always displayed)
Zoom playback magnification (displayed only during zoom
playback)
Frame no. (always displayed)The
frame no. is attached to each image for
playback on the camera.The maximum
number of frames this camera can playback
is 999. If there are more than 999 images
on a SD memory Card/Multi-Media
Card, the camera may not play back the
images properly.
Date display (displayed for 3
seconds during playback)
Protected mark (displayed only for
protected images)
Displaying images at 2x magnification
1. Select the image to display.
2. Press the OK button. The center of the image will be displayed at magnification of 2X.
Magnified images are displayed inside a blue frame.
3. Press the / / / button to scroll the image and display the desired portion.
4. Press the OK button returns the screen to the original 1x display.
3
2
Playing Back Movies
1. Select the movie to play back.
Movies are displayed in a yellow frame.
2. Press the OK button. The playback of the movie will start.
All information displays will be cleared at the time of playback.
Playback cannot be started when the LEDs is on (red/green) or the card access LED is on.
3. Press the OK button to stop playback and return to the initial screen. Press the button
to pause. Press the button once more to resume playback. When playback is finished,
the screen returns to the initial screen.
Superfine
Fine
Economy
Movie
Page 28

27
5
C
hapter 5
Advanced Playback/ErasingAdvanced Playback/Erasing
Advanced Playback/ErasingAdvanced Playback/Erasing
Advanced Playback/Erasing
Using the PLAY Menu
Set the camera to , so that various playbacks can be made. Play menu contains Erase,
Index, Slide Show, Protect, Image number, Screen Contrast, DPOF sub-menus. To access the
Playback menu and change the settings, perform the following steps :
1. Set the main switch to . The last image recorded will be displayed.
2. Press the MENU button to enter the PLAY menu mode. The PLAY menu screen will appear.
3. Press the / button to select the desired sub-menu.
4. Press the / button to change the sub-menu setting.
5. Press the OK button to exit the PLAY menu mode.
The menu settings that have been made will be saved even when the power is turned off.
Erasing Images
Displayed images can be erased one image at a time or all recorded images can be erased at
one time.
Erasing one frame
1. Display the image to erase on the LCD monitor.
2. Press the MENU button and enter the PLAY menu mode. Erase will be selected.
3. Press the button to enter the Erase mode and press the button to select This.
4. Press the OK button. The displayed image will be erased .
Image number following the frame erased will be reassigned.
Erasing all frames
1. Press the MENU button and enter the PLAY menu mode. Erase will be selected.
2
1
Playing back Movies on a PC
First, transfer the movie files to a PC ( page 34 ). To playback a movie on a PC, video player
software is required. Macintosh users can download the latest version of QuickTime from
the Apple Computer web site : http://www.apple.com
Windows users can download the latest version of Windows Media Player from the
Microsoft Corporation web site : http://www.microsoft.com
Page 29

28
2. Press the button to enter the Erase menu and press the button to select ALL.
3. Press the OK button.
4. Press the button to select YES.
5. Press the OK button. After Erasing ALL Pictures... is displayed, all images are erased
and No Picture in Camera is displayed.
If there are one or more protected images, the last frame is displayed.
Erasure time may take some time when erasing many frames or when using a Multimedia
Card.
Viewing Multiple Images (Index Playback)
Images of 9 frames are displayed at one time on the LCD monitor. This function is useful for
quickly locating the desired image to display.
1. Enter the PLAY menu mode and press the / button to select Index.
2. Press the button. Images of 9 frames will appear at one time.
The select frame is displayed with a red frame.
Movie images are displayed with , and protected images are displayed with .
3. Press the / / / and buttons to select the desired image.
4. Press the OK button. The selected image will be displayed in the normal display mode.
Viewing a Slideshow of Images
Recorded images can be checked by playing back at specific intervals.
1. Enter the PLAY menu mode and press the / button to select Slide Show.
2. Press the button. The slideshow confirmation screen will appear. YES will be
selected.
3. Press the OK button. Slideshow will start with the first frame and each frame will be
displayed in order at an interval of 3 seconds.
4. During the playback: Press the button to pause, press the button again to resume.
Press the OK button to stop slideshow playback.
5. When playback is finished, the display will stop at the final frame.
The frame playback interval of 3 seconds cannot be changed.
1
2
Keeping Important Images (Protect Setting)
Recorded images can be protected to prevent them from being accidentally erased.
Applying the protect setting
1. Display the image to protect on the LCD monitor.
2. Enter the PLAY menu mode and press the / button to select Protect.
Page 30

29
3. Press the button. The Protect confirmation screen will appear. YES is selected.
If NO is selected using the button and the SET button is pressed, the camera will return
to the normal playback screen.
4. Press the OK button. The image will be protected and the protected mark will appear.
Protected images will not be deleted even when erasing all frames.
Removing the protect setting
1. Display the protected image on the LCD monitor.
2. Enter the PLAY menu mode and press the / button to select Protect.
3. Press the button. The protect confirmation screen will appear. YES will be selected.
4. Press the button to select NO.
5. Press the OK button. The protect setting will be removed from the image and the
protected mark will disappear.
Displaying the file number
The file no. can be displayed on the image being played back. (See page 26.)
1. Enter the PLAY menu mode and press the / button to select Image number.
2. Press the button and select On.
3. Press the OK button. The camera returns to the normal playback display and the file no.
will be displayed on the image.
When selecting Off and pressing the OK button or MENU button, the file no. will be
cleared from the image.
Adjusting the Screen Contrast
The screen contrast can be set to darker or brighter as your preferences. Please refer to
(page24) for more details on how to make adjustments.
Selecting the Image to Print (DPOF)
Images cannot be printed by the camera itself.
This menu is for giving instructing about the images and the quantity of print required for
automatic output of images within a card to a DPOF (*1) compatible digital printer. There are 2
types of specifications: single frame specification and all frame specification.
A DPOF file is automatically created on the card and the order data is recorded within this file.
(*1) DPOF: abbreviation for Digital Print Order Format
When printing images using the DPOF function on your own printer, first check with the
printer manufacturer to make sure that your printer is DPOF compatible.
1 2 3 4
Page 31

30
Selecting images (single frame/all frames)
1. Enter the PLAY menu mode and press the / button to select DPOF.
2. Press the button to enter the DPOF menu. Set up will be selected.
3. Press the OK button.
4. Press the / button to select Select or ALL.
Select - Images within the card are selected one at a time and the quantity to print is
specified.
ALL - The quantity of all frames within the card is specified. The quantity
cannot be specified for individual frames.
For Select
5. Select Select and press the OK button.
6. Select the image using the / button and specify the quantity to print using
the / button.
The range that can be specified for Quantity is 1 99 for each image file.
7. Press the OK button. The camera will return to the screen of .
8. Press the button to select Exit and press the OK button.
1 2 4
5 6 7
For ALL
5. Select ALL and press the OK button.
6. Press the / button to specify the quantity to print. (Select ALL is selected.)
The range that can be specified for Quantity is 1 99 for each image file.
If there are more than 100 images on the card, the message You may select up to 100
pictures will appear and the camera will display the Select screen.
7. Press the OK button. The camera will return to the screen of .
8. Press the button to select Exit and press the OK button.
2
2
Page 32

31
5
Checking/determining images
The File number and Quantity are displayed in a list and the setting contents are checked.
1. Press the button to select List.
2. Press the OK button. The specified file number and quantity will be displayed in a list.
3. After checking the contents using the / button, press the button and select OK.
4. Press the OK button. The camera will return to the DPOF menu.
5. Press the OK button to exit the PLAY menu mode.
1 2 3 5
Deleting images from the list (single frame/all frames)
Images not required to be printed can be deleted from the list (single frame/all frames).
1. Display the list screen.
For single frame
2. Press the / button to select the image to delete.
3. Press the OK button. The image to delete and the delete confirmation screen will appear.
4. Press the button to select YES and press the OK button. The list screen with the
deleted image removed will be displayed.
5. Press the button to select OK and press the OK button. The camera will return to
the DPOF menu.
6. Press the OK button to exit the PLAY menu mode.
1
2 3
4
6
6
7
Page 33

32
For all frames
1. Press the button to select Clear ALL and press the OK button. The camera will
return to the DPOF menu.
2. Press the OK button to exit the PLAY menu mode.
6C
hapter 6
Advanced OperationAdvanced Operation
Advanced OperationAdvanced Operation
Advanced Operation
Using the SET-UP Menu
By changing various items of the SET-UP menu, the camera can be set to your needs.
The main switch of the camera can be set to SET , so that various settings can be made
according to your needs. SET-UP menu contains Format, Self-Timer, Auto Shut Off, Number
Reset, Beep, Quick Review, Date & Time, Language sub-menus. To access the SET-UP menu
and change the settings, perform the following steps :
1. Set the main switch to SET . The LCD monitor will turn on and the SET-UP menu screen
will appear.
2. Press the / button to select the desired sub-menu.
3. Press the / button to change the sub-menu setting.
To make a series of settings, repeat steps 2 to 3.
4. Set the main switch to a mode other than SET to exit the SET-UP menu mode.
The setting made are saved even when the power is turned off.
1
2 3
Formatting the SD Memory Card/Multi-Media Card
1. Enter the SET-UP menu mode. Format is selected.
2. Press the button to enter the Format menu.
3. Press the button to select YES and press the SET button. Formatting... message
will appear. When formatting is completed, the screen of will be displayed.
1
2
3
1
Page 34

33
Setting the Self Timer
The self-timer interval can be changed from 10 seconds (default setting) to 3 seconds.
1. Enter the SET-UP menu mode and press the / button to select Self Timer.
10 sec is selected.
2. Press the button to select 3 sec The setting will take effect at the time the menu
selection is made.
3. Move to the next menu or set the main switch to a mode other than SET to exit the SET-
UP menu mode.
1 2
Setting the auto shut-off time
The auto shut-off time can be changed from 3 minutes (default setting) to 10 minutes, or the
function can be turned off.
1. Enter the SET-UP menu mode and press the / button to select Auto Shut Off.
3min is selected.
2. Press the button to select 10 min or Off. The setting will take effect at the time the
menu selection is made.
3. Move to the next menu or set the main switch to a mode other than SET to exit the SET-
UP menu mode.
Even if the selection is set to Off, the camera will automatically shut-off after several
hours.
1 2
Resetting the file number
The file number can be reset.
1. Enter the SET-UP menu mode and press the / button to select Number Reset.
2. Press the button to select On. The setting will take effect at the time the menu
selection is made.
3. Move to the next menu or set the main switch to a mode other than SET to exit the SET-
UP menu mode.
If number reset is set to On, and there are no images within the card that were recorded
with this unit, images will be numbered from xxxxxx1.jpg. If there are images recorded
with this unit, the number following the last file no. will be used.
Page 35

34
Turning off the beep sound
The beep sound heard during warnings, etc. can be turned off.
1. Enter the SET-UP menu mode and press the / button to select Beep. On is
selected.
2. Press the button to select Off. The setting will take effect at the time the menu
selection is made.
3. Move to the next menu or set the main switch to a mode other than SET to exit the
SET-UP menu mode.
Setting the quick review
1. Enter the SET-UP menu mode and press the / button to select Quick Review.
Off is selected.
2. Press the button to select On. The setting will take effect at the time the menu
selection is made.
3. Set the main switch to a mode other than SET to exit the SET-UP menu mode.
When setting the quick review on, no matter whether the LCD monitor is on or off, a
preview of the captured image will be temporarily shown on the LCD Monitor as soon as
the image acquired. When the 3 seconds are over, the LCD Monitor will return to viewfinder
mode or automatically turned it off.
During this 3 seconds of preview in either case, the user will have the option, by means
of an on-screen prompt, of saving the image just captured by selecting the YES and
pressing the OK button or deleting the images by selecting No and pressing the OK
button. If there is no key operation within the 3 seconds, the image is automatically saved.
Setting the date
1. Enter the SET-UP mode and press the / button to select Date & Time.
2. Press the button to enter the Date & Time menu.
3. For the setting, see Adjusting the Menu Display Language and Time/Date (page 14 ).
4. Set the main switch to a mode other than SET to exit the SET-UP menu mode.
Setting the language
1. Enter the SET-UP mode and press the / button to select Language.
2. Press the button to enter the Language menu.
3. For the setting, see Adjusting the Menu Display Language and Time/Date (page 14 ).
4. Set the main switch to a mode other than SET to exit the SET-UP menu mode.
Before image transfer, please read the following guideline carefully.
7
C
hapter 7
Transferring your Images to the Computer
Page 36

35
Downloading Images
1. Turn on the power of your PC.
2. Connect the camera and PC using the USB cable supplied.
3. Set the main switch on the top of the camera to , , or SET . PC
will appear on the status LCD.
4. Double click My Computer.
5. Double click the newly created removable device (G) .
ĆĆ
ĆĆ
Ć
This assumes that the new device is drive G. The drive letter may differ depending
on the PC you are using.
ĆĆ
ĆĆ
Ć
An undefined Name icon will appear on the desktop if connected with
Macintosh computer.
6. Double click the DCIM folder.
7. Double click the inside folder to display the icon of the image file.
8. Double click the file to display the image.
9. To save, copy (drag and drop) the file to the desired location on the PC.
ĆĆ
ĆĆ
Ć
While the camera is connected to a PC, the camera cannot be used for recording
or playing back images.
ĆĆ
ĆĆ
Ć
The camera cannot be connected to your PC if the card is not inserted.
Warning :
Do not disconnect the USB cable/AC adapter, or open the battery/card cover while the
card access LED is on. Furthermore, do not format the SD Memory Card or Multi-Media
Card using a PC. Data may become damaged.
Image files can be copied to a hard disk or other media and deleted as necessary. For
details, refer to the instruction manual operating system in use.
Images that have been altered or newly saved on an SD Memory Card/Multi-Media Card
using a device other than this camera will not only play back on the camera but may
cause the camera to malfunction when inserted.
Do not change the file name of image data saved on an SD Memory Card/Multi-Media
Card using a PC or save files other than image data taken by this camera.
Driver Installation
If you are planing to transfer your images into a computer, make sure to complete the camera
driver installation before the camera connection. The steps are as below:
1. Insert the software CD-ROM disc into your CD-ROM drive
2. The setup program starts. Follow the on screen instructions to complete the camera
driver installation.
3. Restart the computer
Page 37

36
Specifications
Image sensor 1/2.7CCD, 2.11 mega pixels (1688x1248)
Recording medium SD Memory Card/Multi-Media Card
Image resolution Still image - Super fine 1600 x 1200 ; Fine 1280 x 960 ;
Economy 640 x 480
Movie - 320 x 240 ; 160 x 120 pixels
Number of recordable images Super fine : approx. 17 images
Fine : approx. 26 images
Economy : approx. 68 images
Movie (1 movie = Max. of 15 sec.)
320X240 pixels: approx. 2 movies
160X120 pixels : approx. 8 movies
(* When using an 8MB SD Memory Card )
File Format JPEG (EXIF 2.1), DCF, DPOF, AVI
Lens Auto focus zoom lens
f=5.4 ~ 16.2mm (Equivalent to f=35 ~ 105mm by 35mm film
camera conversion)
F 2.8(W) ~ 4.6(T)
Focusing range 0.25m ~ (during macro recording mode: 0.25m ~ 0.8m ;
normal recording: 0.8m ~ )
Exposure control Programmed AE
Photometry Center weighted light reading (normal setting), spot reading
White balance Auto, daylight, incandescent, flash, fluorescent
Shutter speed 1/8 ~ 1/2000 sec (during slow shutter ON: 2 ~ 1/2000 sec)
Flash Internal auto lighting flash
Flash effective range : WIDE: 0.8 ~ 3.0m TELE: 0.8 ~ 2.0m
Red-eye reduction/AUTO/ON/OFF available
Recording modes Recording modes: Single shooting/Self-timer /Macro/ Long
distance/Night view portrait/Back-and-white/Digital zoom
(1.5x, 2.0x) / Movie (320x240, 160x120)
LCD monitor 1.5 inch TFT color LCD monitor
Playback Single frame, close-up playback (2x), movie playback, index
playback, slideshow
Deletion Single frame/all frames/format
LED display Self-timer LED, LED 1,LED 2, card access LED
Buzzer Various warnings during recording
Auto-date function Date and time recorded
Power supply CR-V3 lithium battery (1 unit), AA nickel-hydrogen batteries
(2 units), AA alkaline batteries (2 units), or AC adapter(DC 3V)
I/O terminals USB terminal, AC adapter jack
Operating temperature 5°C ~ 45°C (Humidity: 20% ~ 80%RH)
Size (W
¡Ñ¡Ñ
¡Ñ¡Ñ
¡Ñ H
¡Ñ¡Ñ
¡Ñ¡Ñ
¡Ñ D) 100.8
¡Ñ¡Ñ
¡Ñ¡Ñ
¡Ñ 64
¡Ñ¡Ñ
¡Ñ¡Ñ
¡Ñ 42.8mm
Weight Approx. 175g (excl. batteries, SD Memory Card)
Apple, Macintosh, Power Macintosh, Mac OS, and the Mac OS logo are registered trademarks of Apple Computer Inc. Microsoft and
Windows are registered trademarks of the Microsoft Corporation. Pentium is a registered trademark of the Intel Corporation. All other
trademarks are the property of their respective owners.
 Loading...