

Page 1

VIV-35MM-P
INSTRUCTION MANUAL
35mm High Speed Aspherical Lens
Page 2

Limited Five Year Warranty
-1-
Vivitar warrants this quality product to be free of defects in material and workmanship for a
period of five years from the date of purchase. During the period, Vivitar will repair or replace the
product at no charge for parts or labor.
TIME PERIOD OF THIS WARRANTY
The time period of this warranty starts from the date of the original purchase and expires on the
fifth anni versary date of purchase.
WHAT IS NOT COVERED BY THIS WARRANTY
No express or implied warranty is made for any defects in this product which result from
accident, abuse, misuse, failure to operate the product in accordance with relevant instructions,
neglect, immersion in or exposure to chemicals or liquids, extremes of climate, fungus, excessive
wear and tear/cosmetic damage and defects resulting from other extraneous causes such as
unauthorised disassembly, repair or modification.
This warranty shall not extend to any incidental or consequential damages arising from the
purchase, use or inability to use this product even if Vivitar has been advised of such damages.
The laws of some countries and some States thereof do not allow the limitation of incidental or
consequential damages, so the above limit
ation or exclusion may apply to you.
Page 3

Brightness Control
-2-
WHAT TO DO WHEN SERVICE IS NEEDED
TECHNICAL SUPPORT
support team members will answer your questions. For phone support in the US please call 1-800-592-9541, in the
UK call 0800 917 4831. If you would like to call from anywhere else, please visit www.vivitar.com for your local toll
free number.
STEP 1. Package the product and relevant accessories carefully, using ample padding materials and a sturdy
mailing container to prevent damage in transit.
STEP 2. Include in package:
a) Evidence of date and place of original purchase (for example, a copy of your sales receipt).
b) Detailed description of your problem.
c) When possible, a sample evidencing the problem.
STEP 3. Return item (insured) to: (in the U.S.):
Vivitar
Attn: Technical Support
195 Carter Drive
Edison NJ 08817
When service is complete, the product will be returned to you shipping prepaid. In the event the product is
deemed to be not faulty or the defect is a result in wear and tear, Vivitar may levy a handling charge for the
from country and State to State thereof. For more information visit our website www.vivitar.com
(in the U.K.)
Sakar UK
2D Siskin Parkway East
CV3 4PE, UK
Page 4

-3-
Introduction
Thank you for purchasing the VIV-35MM-P High Speed Aspherical Lens. This lens will provide you with
many unique and exciting photo taking opportunities which we hope you will enjoy.
Features of Your Lens:
Your 35mm High Speed Aspherical Lens is designed with its own mount. Users can take photographs
easily without installing an additional adaptor by mounting the lens directly onto the camera.
Please read these directions prior to using your lens.
-A floating design that will provide you with sharp images for both long shots and close up shots
-A single glass aspherical lens which can give you crisp looking shots even at periphery angles.
-Two high refraction lenses made of premium optical glass.
-An ultra-multi-coating (UMC) design that suppresses ghosting and delivers clear images.
-Eight aperture stops, enabling effective out-focusing
-Can be used with Pentax film and digital SLR cameras
Page 5
-4-
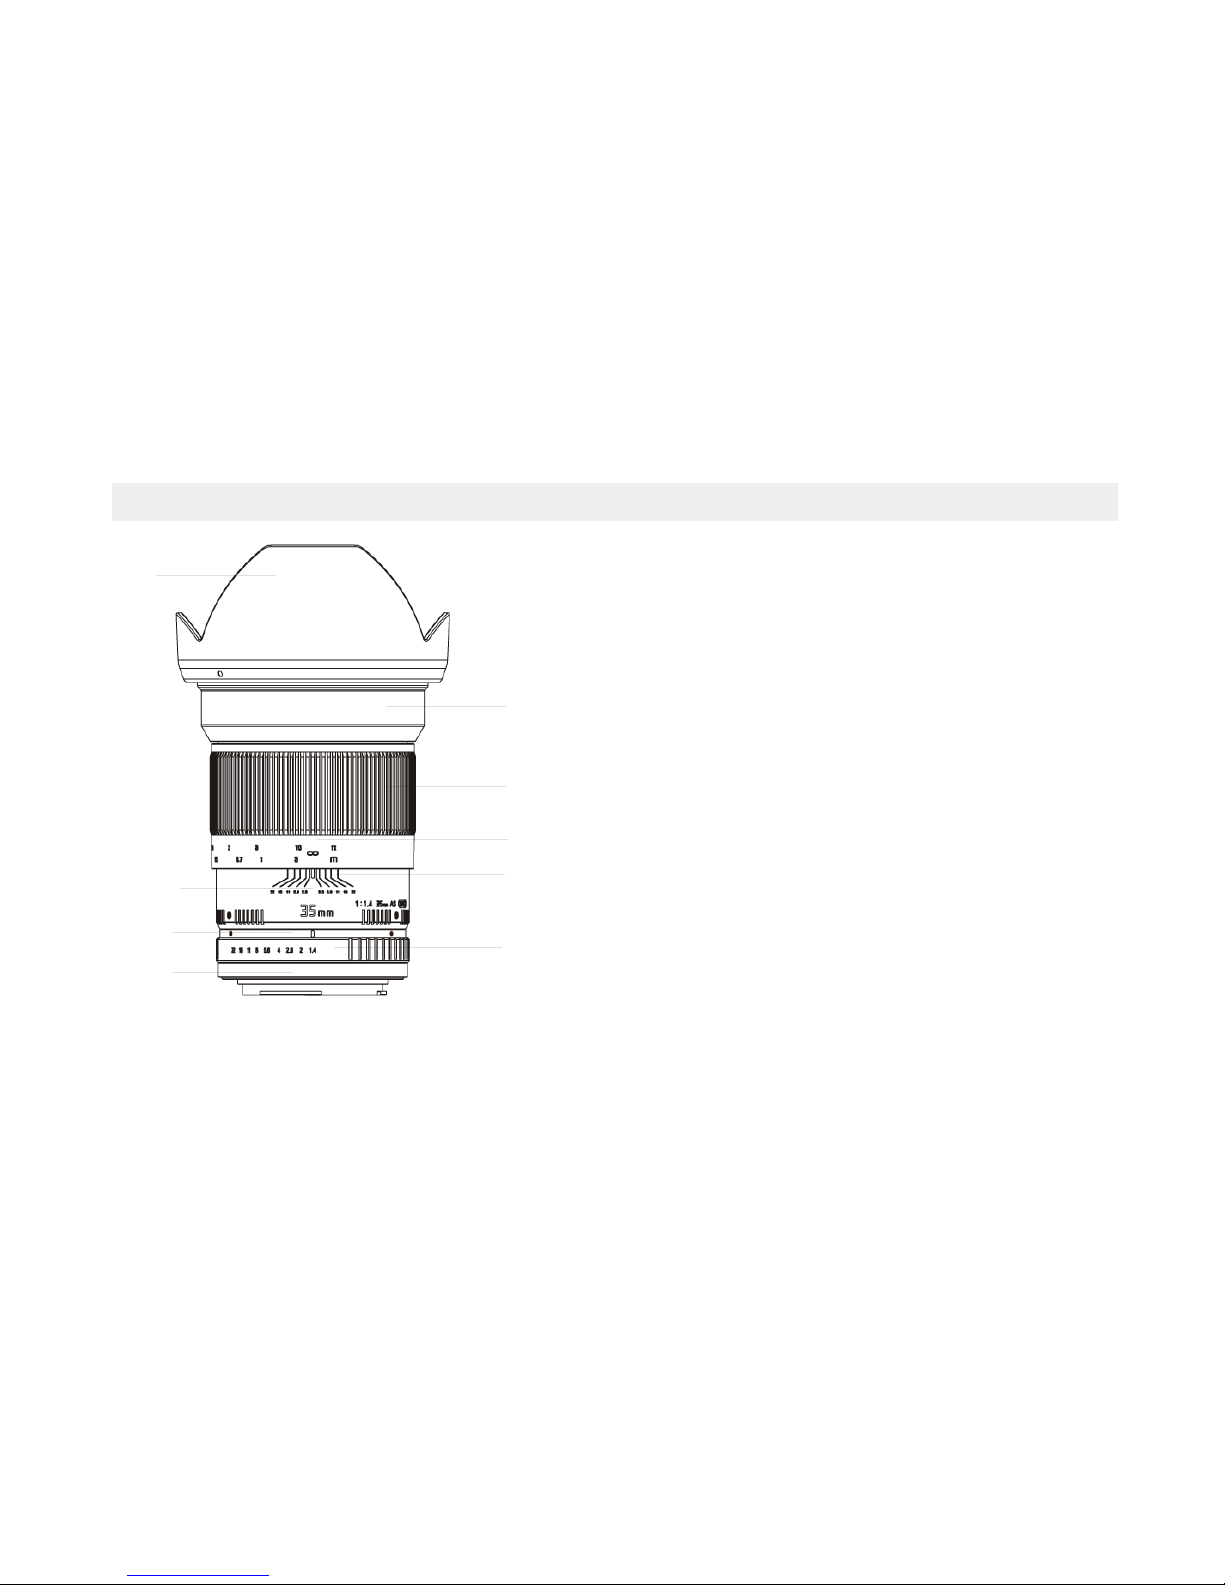
A Quick Look at Your Device
1. Lens Ring Mount (camera locking area)
2. Aperture Value Scale
3. Distance Scale
4. Focus Scaling Ring
5. Focusing Ring
6. Hood Locking Tube
7. Hood
8. Depth of Field Scale
9. Aperture Adjustment Ring
1
2
3
4
5
6
7
8
9
Page 6

-5-
Attaching Your Lens to Your Camera
Detaching Your Lens from Your Camera
Your VIV-35MM-P lens is uniquely designed for Pentax digital SLR cameras.
Hold the hood of the lens gently, and align the depth of field scale of the lens with the lens
attachment reference point on of the camera. Next, push the lens into the camera and turn the
lens carefully until it makes a clicking sound, and the depth of field scale is positioned on the
upper part of the camera.
Hold the hood of the lens gently, and press the lens release button on the camera.
Turn the lens in the opposite direction as when attaching, and carefully pull it out.
Page 7

-6-
Focus Adjustment
You can adjust the focus of the subject you are photographing by turning the focusing
ring on your lens, as it is an MF (manual focus) adjustment lens. To do so,
please follow the steps below:
1. When focusing on a subject from a long distance, turn the focus ring to the right
(1 to ∞) and focus on the clearest subject by using the indication signal on the camera or
by checking visually.
2. When focusing on a subject from a short distance, turn the focus ring to the left
(∞ to 1) and focus on the clearest subject by using the indication signal on the camera or
by checking visually.
Page 8
-7-
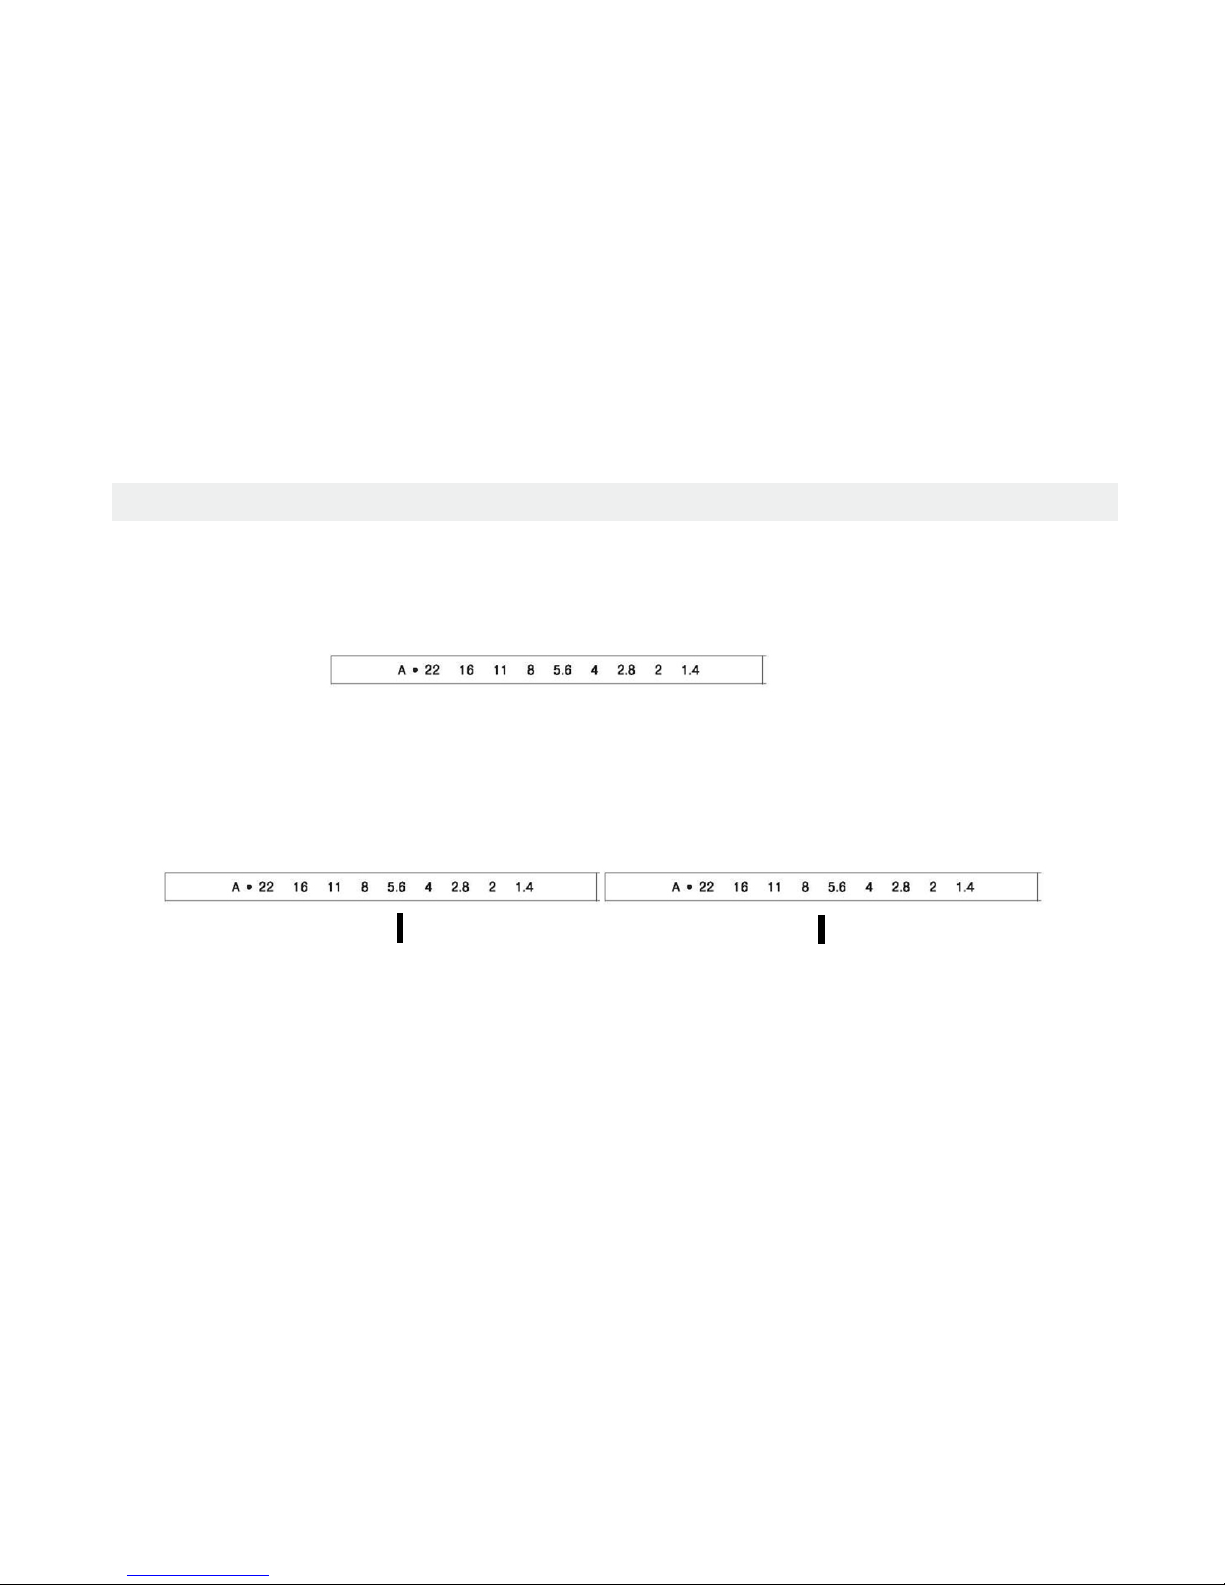
Brightness Control
You can set the amount of brightness you want by turning the aperture adjustment ring when
using your lens.
5.6 and 8 are 1 stop apart (1EV). Set a 0.5 stop (0.5EV) between 5.6 and 8
When you turn the aperture adjustment ring between 22, 16, 11, 8, 5.6, 4, 2.8, 2 and 1.4 you are
making 1 stop each turn. Brightness can be set more precisely by making half stops as well (see
below).
[Aperture adjustment ring markings]
Page 9

-8-
Camera Settings
Some cameras require special settings when using this lens. Please read the information
below and set your camera accordingly.
Av mode: the mounts on your lens supports Av mode.
1) Allign the A mode indicator to the depth of field scale by pressing the A button on the
aperture adjustment ring of the lens.
2)Set the mode dial of the camera to ‘Av’.
Page 10

-9-
Camera Settings (continued)
3. Set the focus adjustment
lever of the camera to MF
(The camera settings discussed apply to the Pentax K20D camera. Settings for the
camera or the menu may be changed depending on the model or due to a menu
upgrade. Refer to your camera manual or contact the camera manufacturer for more
detailed information.)
4. Set the menu on the camera.
5. Adjust the brightness by turning the dial at the
back of the camera.
Page 11
-10-
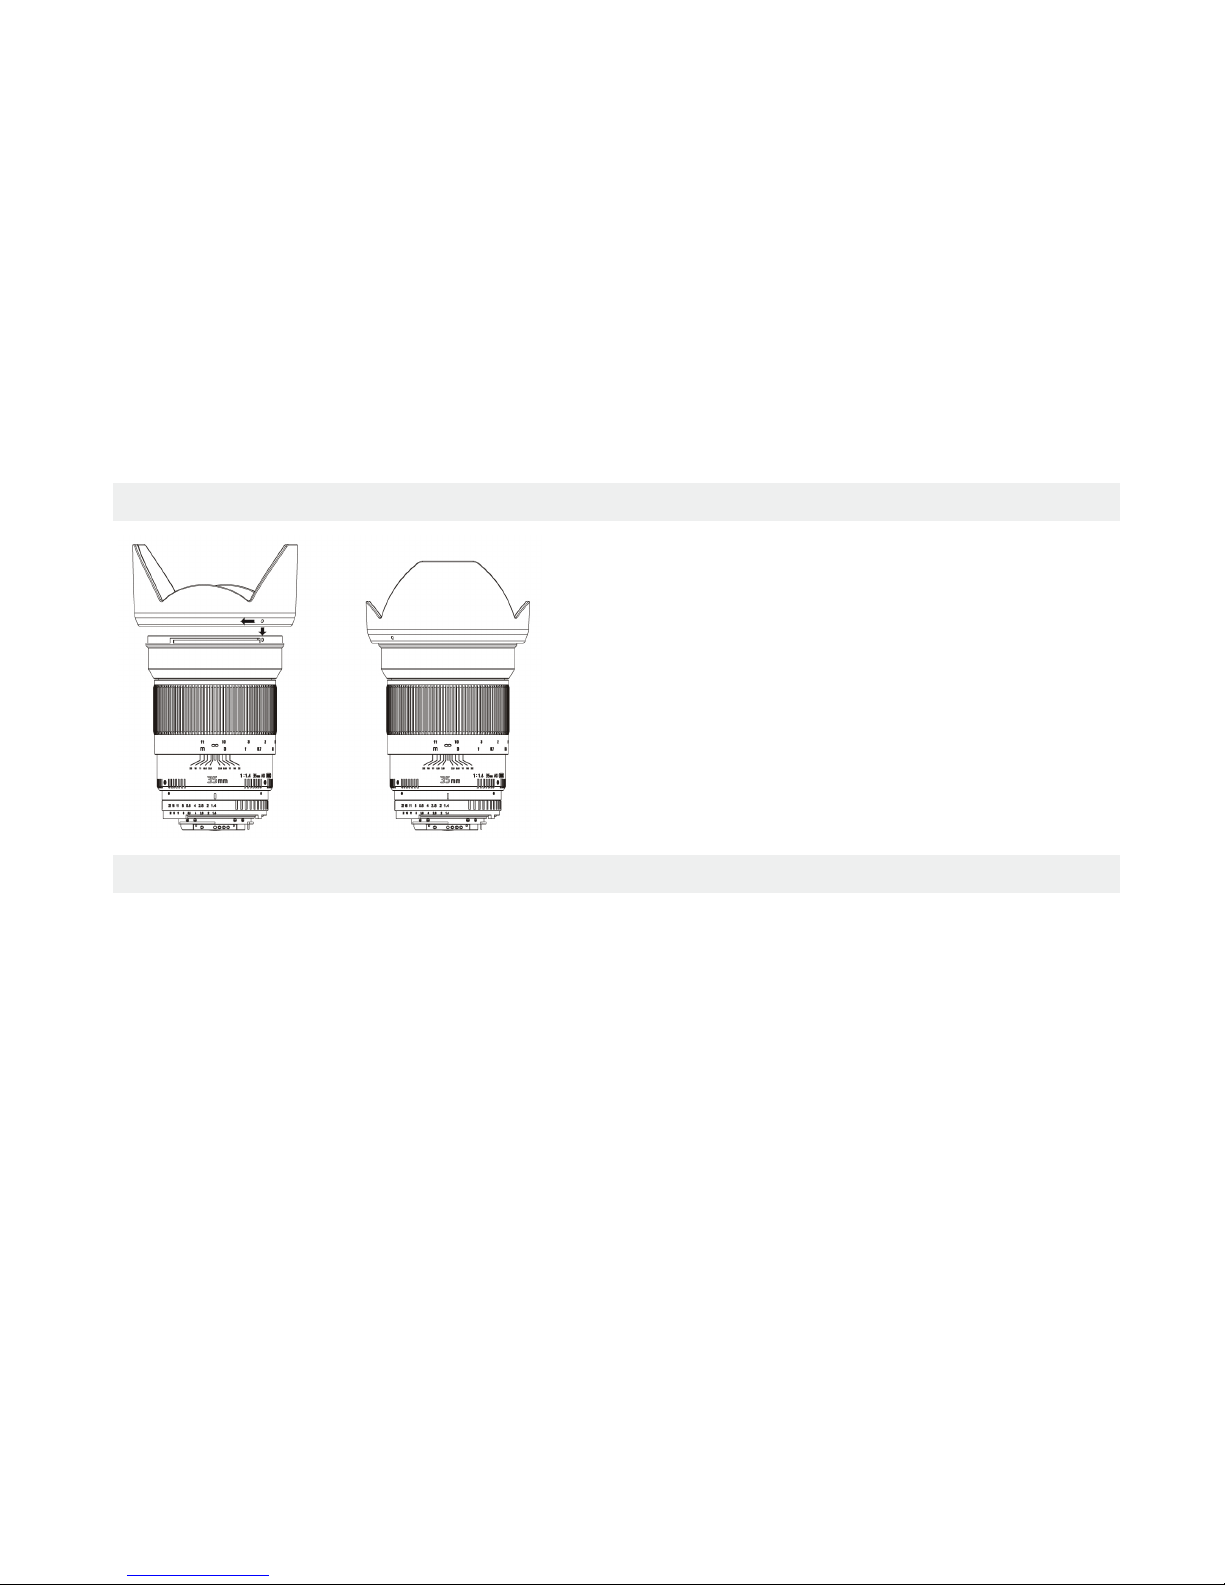
Mounting the Hood
Specifications
The hood has a bayonet system, which
guarantees speedy, efficient, safe and precise
installation and will help you take shots that are
free of flaring and ghosting. Allign the
attachment reference point on the hood with the
reference point on the lens. Push the hood
onto the lens and turn the hood to the right until
it makes a clicking sound.
-35mm f/1.4
-Aperture Range F1.4-22
-Diagonal View Angle: 63°
-Weight: 1.64lb
-Diameter x Length: 83 x 110mm
-Uses 77mm Filters
-Minimum Focusing Distance: 0.3m (1ft)
-Maximum Diameter: 83mm
-Construction: 12 Elements in 10 Groups
Page 12

-11-
Troubleshooting
Page 13

-12-
Troubleshooting (continued)
Page 14

-13-
Caution
Page 15
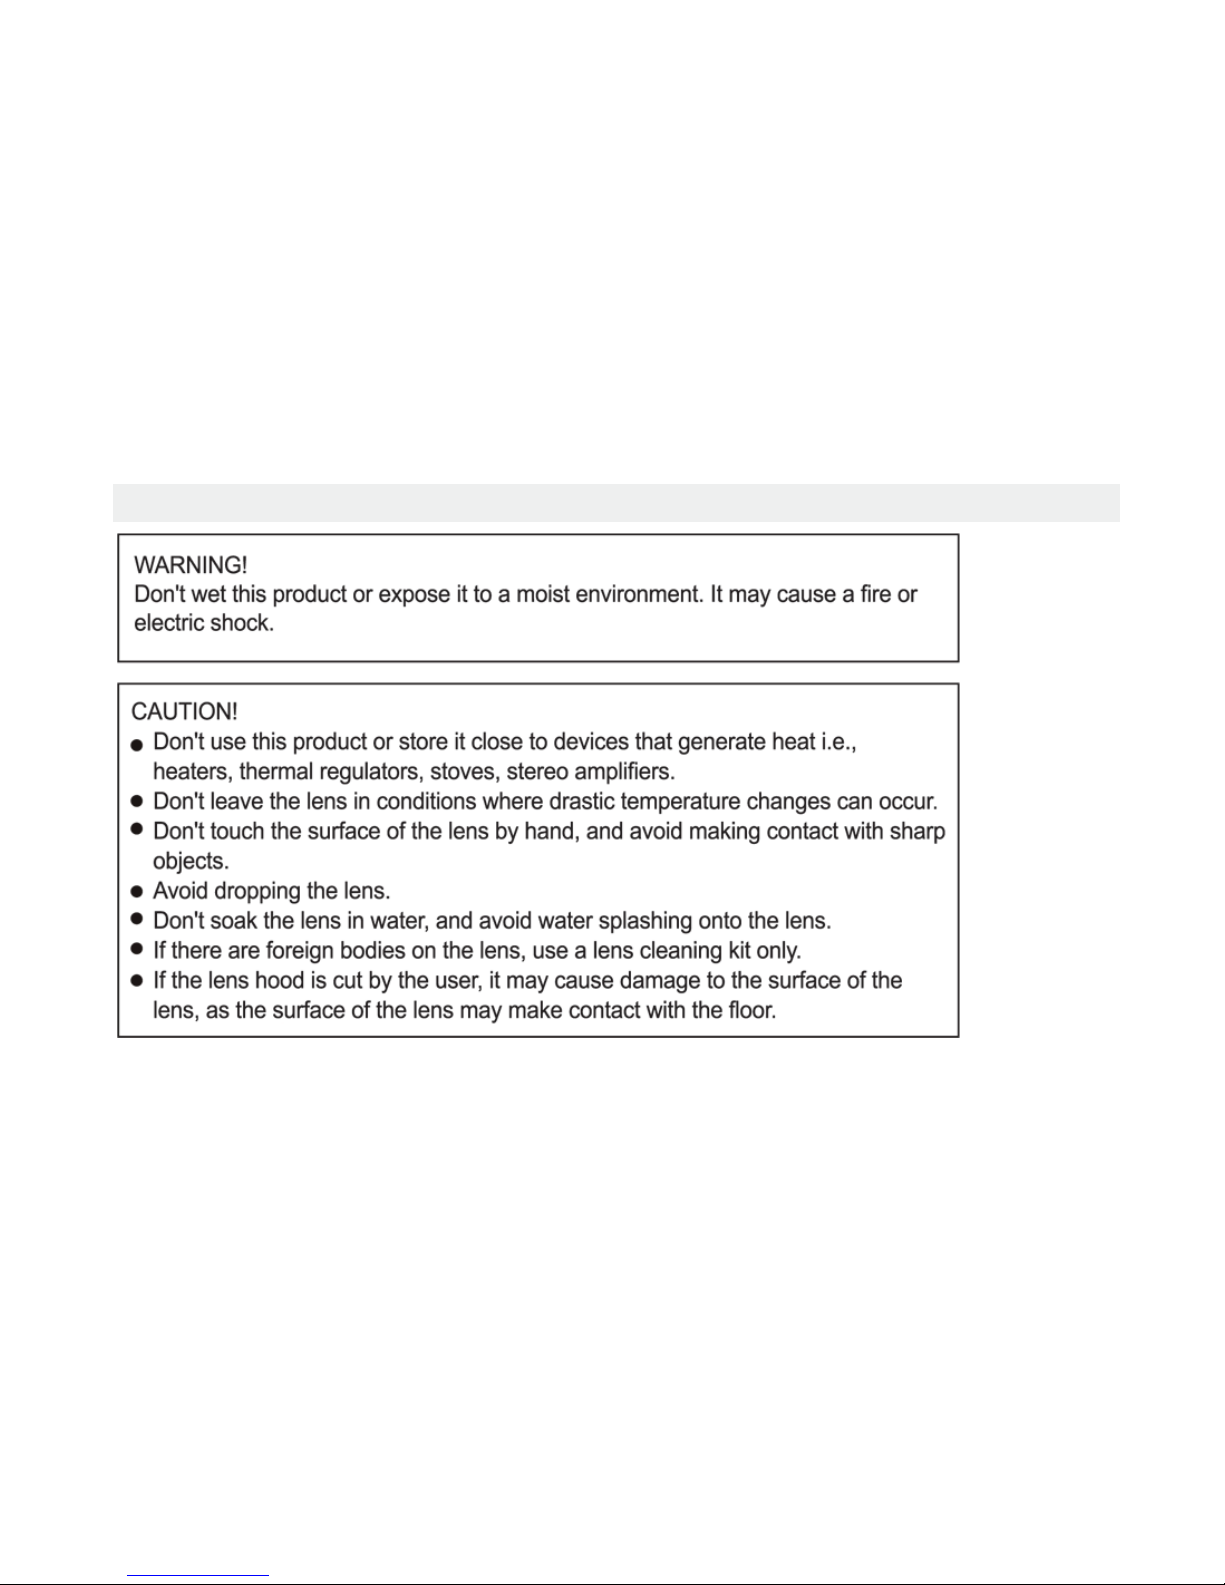
-14-
Caution
Page 16

®
 Loading...