


User Manual
DMD1001
1

TABLE OF CONTENTS
PRODUCT DESCRIPTION ......................................................................... |
3 |
WHAT’S INCLUDED ................................................................................... |
3 |
PARTS LIST .............................................................................................. |
3 |
POWER SUPPLY ....................................................................................... |
4 |
REPLACING BATTERIES ............................................................................. |
4 |
MEASUREMENT PRINCIPLE ......................................................................... |
5 |
OPERATING INSTRUCTIONS - SETTING DATE, TIME, UNIT ............................... |
5 |
OPERATING INSTRUCTIONS - APPLYING THE CUFF ....................................... |
7 |
OPERATING INSTRUCTIONS - MEASURING ................................................... |
8 |
OPERATING INSTRUCTIONS - DATA MANAGEMENT ........................................ |
10 |
INFORMATION FOR USER .......................................................................... |
11 |
ABOUT BLOOD PRESSURE ......................................................................... |
12 |
TROUBLESHOOTING ................................................................................ |
15 |
AUTHORIZED COMPONENT ....................................................................... |
16 |
COMPILED STANDARDS LIST ...................................................................... |
16 |
FCC STATEMENT ....................................................................................... |
16 |
SPECIFICATIONS ..................................................................................... |
17 |
SAFETY INFORMATION .............................................................................. |
17 |
WARNING ............................................................................................... |
18 |
EMC GUIDANCE ...................................................................................... |
21 |
WARRANTY REGISTRATION ........................................................................ |
21 |
2
PRODUCT DESCRIPTION
The Vive Precision blood pressure monitor is a portable device that allows you to accurately track blood pressure from the comfort of home. It is rigorously tested for accuracy and approved for use by the FDA, and has a built in alarm function to alert you of irregular heartbeats. Features a two-user functionality and a 250-combined measurement memory. Protected by a two-year warranty.
WHAT’S INCLUDED
•1x Blood Pressure Monitor
•1x Arm Cuff (Type BF applied part) 8 3/4”- 16 1/2”
•4x AAA batteries
•Two-Year Warranty
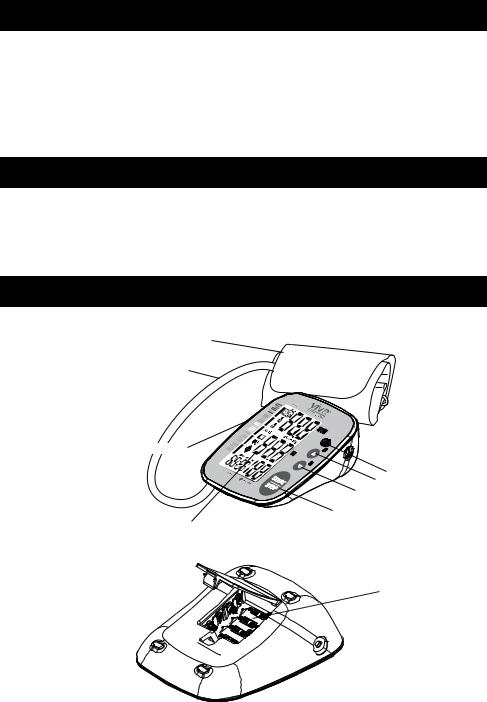
PARTS LIST
1.Cuff
2.Air pipe
3.PCBA
4.Pump
5.Valve
CUFF
AIR HOSE
AIR CONNECTOR PLUG
 DC POWER SOCKET
USER SWITCH
MEM BUTTON
SET BUTTON
START•STOP BUTTON
LCD DISPLAY
BATTERY COMPARTMENT
3
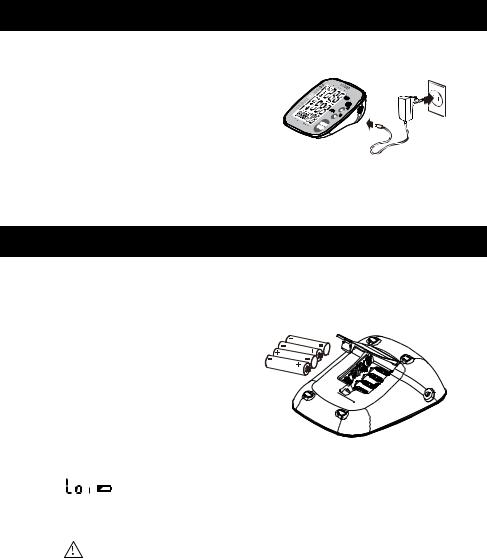
POWER SUPPLY
The Choice of Power Supply
1.Battery powered mode: 6VDC 4×AAA batteries
2. AC adaptor powered mode: 6V 1A (Please use the recommended
AC adaptor model). (Not Included)
adaptor
*Please unplug the adaptor when not in use.
REPLACING BATTERIES
WARNING
In order to get the best effect and protect your monitor, please use the right battery and special power adapter which
complies with U.S. safety standard.
Installing and Replacing the Batteries
•Open the battery cover.
•Install the batteries by matching the correct polarity, as shown.
•Replace the cover.
Replace the batteries when:
• The |
|
shows |
•The display dims
•The display does not light up
WARNING
•Remove batteries if the device is not likely to be used for some time.
•The old batteries are harmful to the environment, so please DO NOT dispose with other daily trash.
•Remove the old batteries from the device and follow your local recycling guidelines.
•Do not dispose of batteries in fire. Batteries may explode or leak.
4
MEASUREMENT PRINCIPLE
This product uses the Oscillometric Measuring method to detect blood pressure. Before every measurement, the unit establishes a “zero pressure” equivalent to the air pressure. Then it starts inflating the arm cuff, meanwhile, the unit detects pressure oscillations generated by beat-to-beat pulsatile, which is used to determine the systolic and diastolic pressure, and also pulse rate. The device also compares the longest and the shortest time intervals of detected pulse waves to mean time interval then calculates standard deviation. The device will display a warning signal with the reading to indicate the detection of irregular heartbeat when the difference of the time intervals is over 25%.
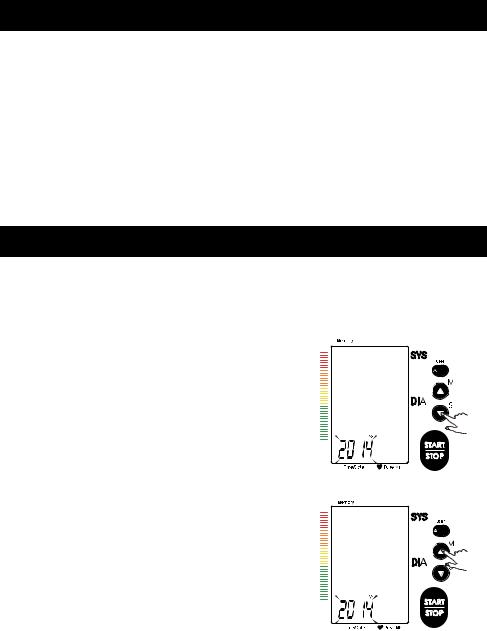
OPERATING INSTRUCTIONS - SETTING DATE, TIME, UNIT
It is important to set the clock before using your blood pressure monitor, so that a time stamp can be assigned to each record that is stored in the memory. (The setting range of the year: 2014—2054 time format: (12H/24H)
1. When the monitor is off, hold pressing “S” button for 3 seconds to enter the mode for year setting. Or when the monitor is off, press “S” button shortly, it will display the time. Then hold pressing “S” button to enter the mode for year setting.
2. Press the “M” button to change the [YEAR]. Each press will increase the numeral by one in a cycling manner.
5

3. When you get the right year, press “S” button to set down and turn to next step.
4. Repeat step 2 and 3 to set the [MONTH] and [DAY].
5.Repeat steps 2 and 3 to set the [TIME FORMAT between 12 hour time and 24 hour time.
6. Repeat step 2 and 3 to set the [HOUR] and [MINUTE].
6
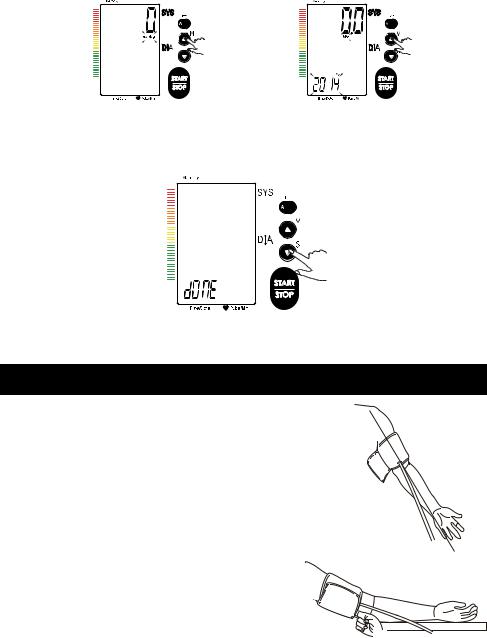
7. Repeat step 2 and 3 to set the [MEASUREMENT UNIT].
mmHg is
U.S. Standard Measurement
8. After the unit is set, the LCD will display “done” first, then display all the settings you have done and then it will turn off.
OPERATING INSTRUCTIONS - APPLYING THE CUFF
1.Attach the cuff tubing to the left side input for proper use.
2.Apply the cuff on your upper arm. Make sure the position of the tube is off-center; toward the inner side of arm in line with the little finger.
3.The cuff should be snug but not too tight. You should be able to insert one finger between the cuff and your arm.
 2~3cm
2~3cm
7
 Loading...