

Page 1
NOU S VIV ONS SAIN
w
i
s
e
r
T
t
T
u
bo
r
B
u
r
sh
We l iv e h ea lth y
VACUUM CLEANER
ПЫЛЕСОС
r
e
t
Twis
“Vitesse France S.A.R.L”
91 rue du Faubourg Saint Honore´
75008 Paris-France
www.vitesse.ru
VS-761
Page 2
DEAR CUSTOMER!
You have made an excellent decision. Vitesse® “Nouveau” home range offers
you an exclusive, high quality range of appliances for your ultimate home luxury
and healthy living.
This appliance is not intended for use by person (including children) with
reduced physical, sensory or mental capabilities, or lack of experience and
knowledge, unless they have been given supervision or instruction concerning
use of the appliance by a person responsible for their safety.
Children should be supervised to ensure that they do not play with the
appliance.
Safety Instructions
1. Keep the appliance away from Children
2. Only use the appliance for the purpose intended!
3. NEVER leave the device unattended when in operation.
4. Never switch it on if the power supply cable is damaged, or if any other
damage is visible on the appliance. Never open the housing but instead
contact to carry out repairs.
5. Do not use the device to remove any burning or smoking objects, such as
cigarettes, matches or hot ashes, any sharp objects such as broken glass, or
water or any other any other fluids. Any of the above could damage the
appliance and may cause injury to the operator. Glowing ashes, burning
cigarettes etc. may set the filter alight, fluids may cause a short
circuit and sharp objects will damage the filter.
6. Never expose the appliance to the elements (rain etc.)
7. Always unplug the appliance from the main power supply before cleaning
or servicing (e.g. changing the filter)
8. When unplug the power cable from the wall socket, please do not pull on
the cable. Instead apply gentle force to the plug housing.
Children are often unable to understand the dangers of using electrical
equipment or may be underestimate them. Therefore do not allow children to
work with electrical equipment
1. Never sit or stand on the appliance.
2. This vacuum cleaner is only suitable for use with 230V, 50Hz.
3. Only use the appliance once it has been fully assembled. The filter must
be undamaged!
4. If a carpet has been recently shampooed, ensure that it has completely
dry before vacuuming.
5. Never stand the appliance next to a radiator or an oven.
6. If you should pass this appliance on to another user, please provide them
with these operating instructions.
7. Please keep hair, loose items of clothing, fingers and all other extremities
away from any openings and moving parts.
8. The guarantee does not cover damage caused as a result of incorrect
handling, nonconformity with the user instructions and damage caused by /
repairs carried out by third parties. This also applies to wear & tear
on the parts, e.g. the filter.
9. Do not use the appliance to remove any burning orsmoking objects, such
as cigarettes matches or hot ashes, or any flammable liquids.
10. Keep the pipe or tube ends form the face and body.
11. Do not use the appliance without the correct dust receiver tank in place.
12. Always unplug the appliance before fitting or removing any accessory
parts.
13. Read through the assembly instructions carefully before assembling the
appliance. The assembly sequence must be followed precisely.
14. In the interest of your own safety please check the appliance carefully for
damage before use. In case any faults do not use the appliance until it
has been repaired by and expert.
15. Only use the original accessories.
16. Always remove the plug from the main power supply before fitting or
removing any accessory parts.
17. In order to avoid an electric shock never immerse the power supply cable,
plug or any other parts of the appliance in water or any other fluid.
18. ONLY use the appliance for the purpose intended.
19. Only use the appliance once it has been completely assembled and is
ready for use!
20. NEVER immerse appliance parts in water.
21. NEVER use the appliance close to water.
22. NEVER clean the appliance using a sourcing pad or abrasive cloth.
23. DO NOT use cleaning brushes or abrasive agents.
Do not crush or bend the cable, or place it on hot surfaces.
24. Never cover the air vents as this may lead to overheating. Danger of fire!
Your cyclone vacuum cleaner and its technical data:
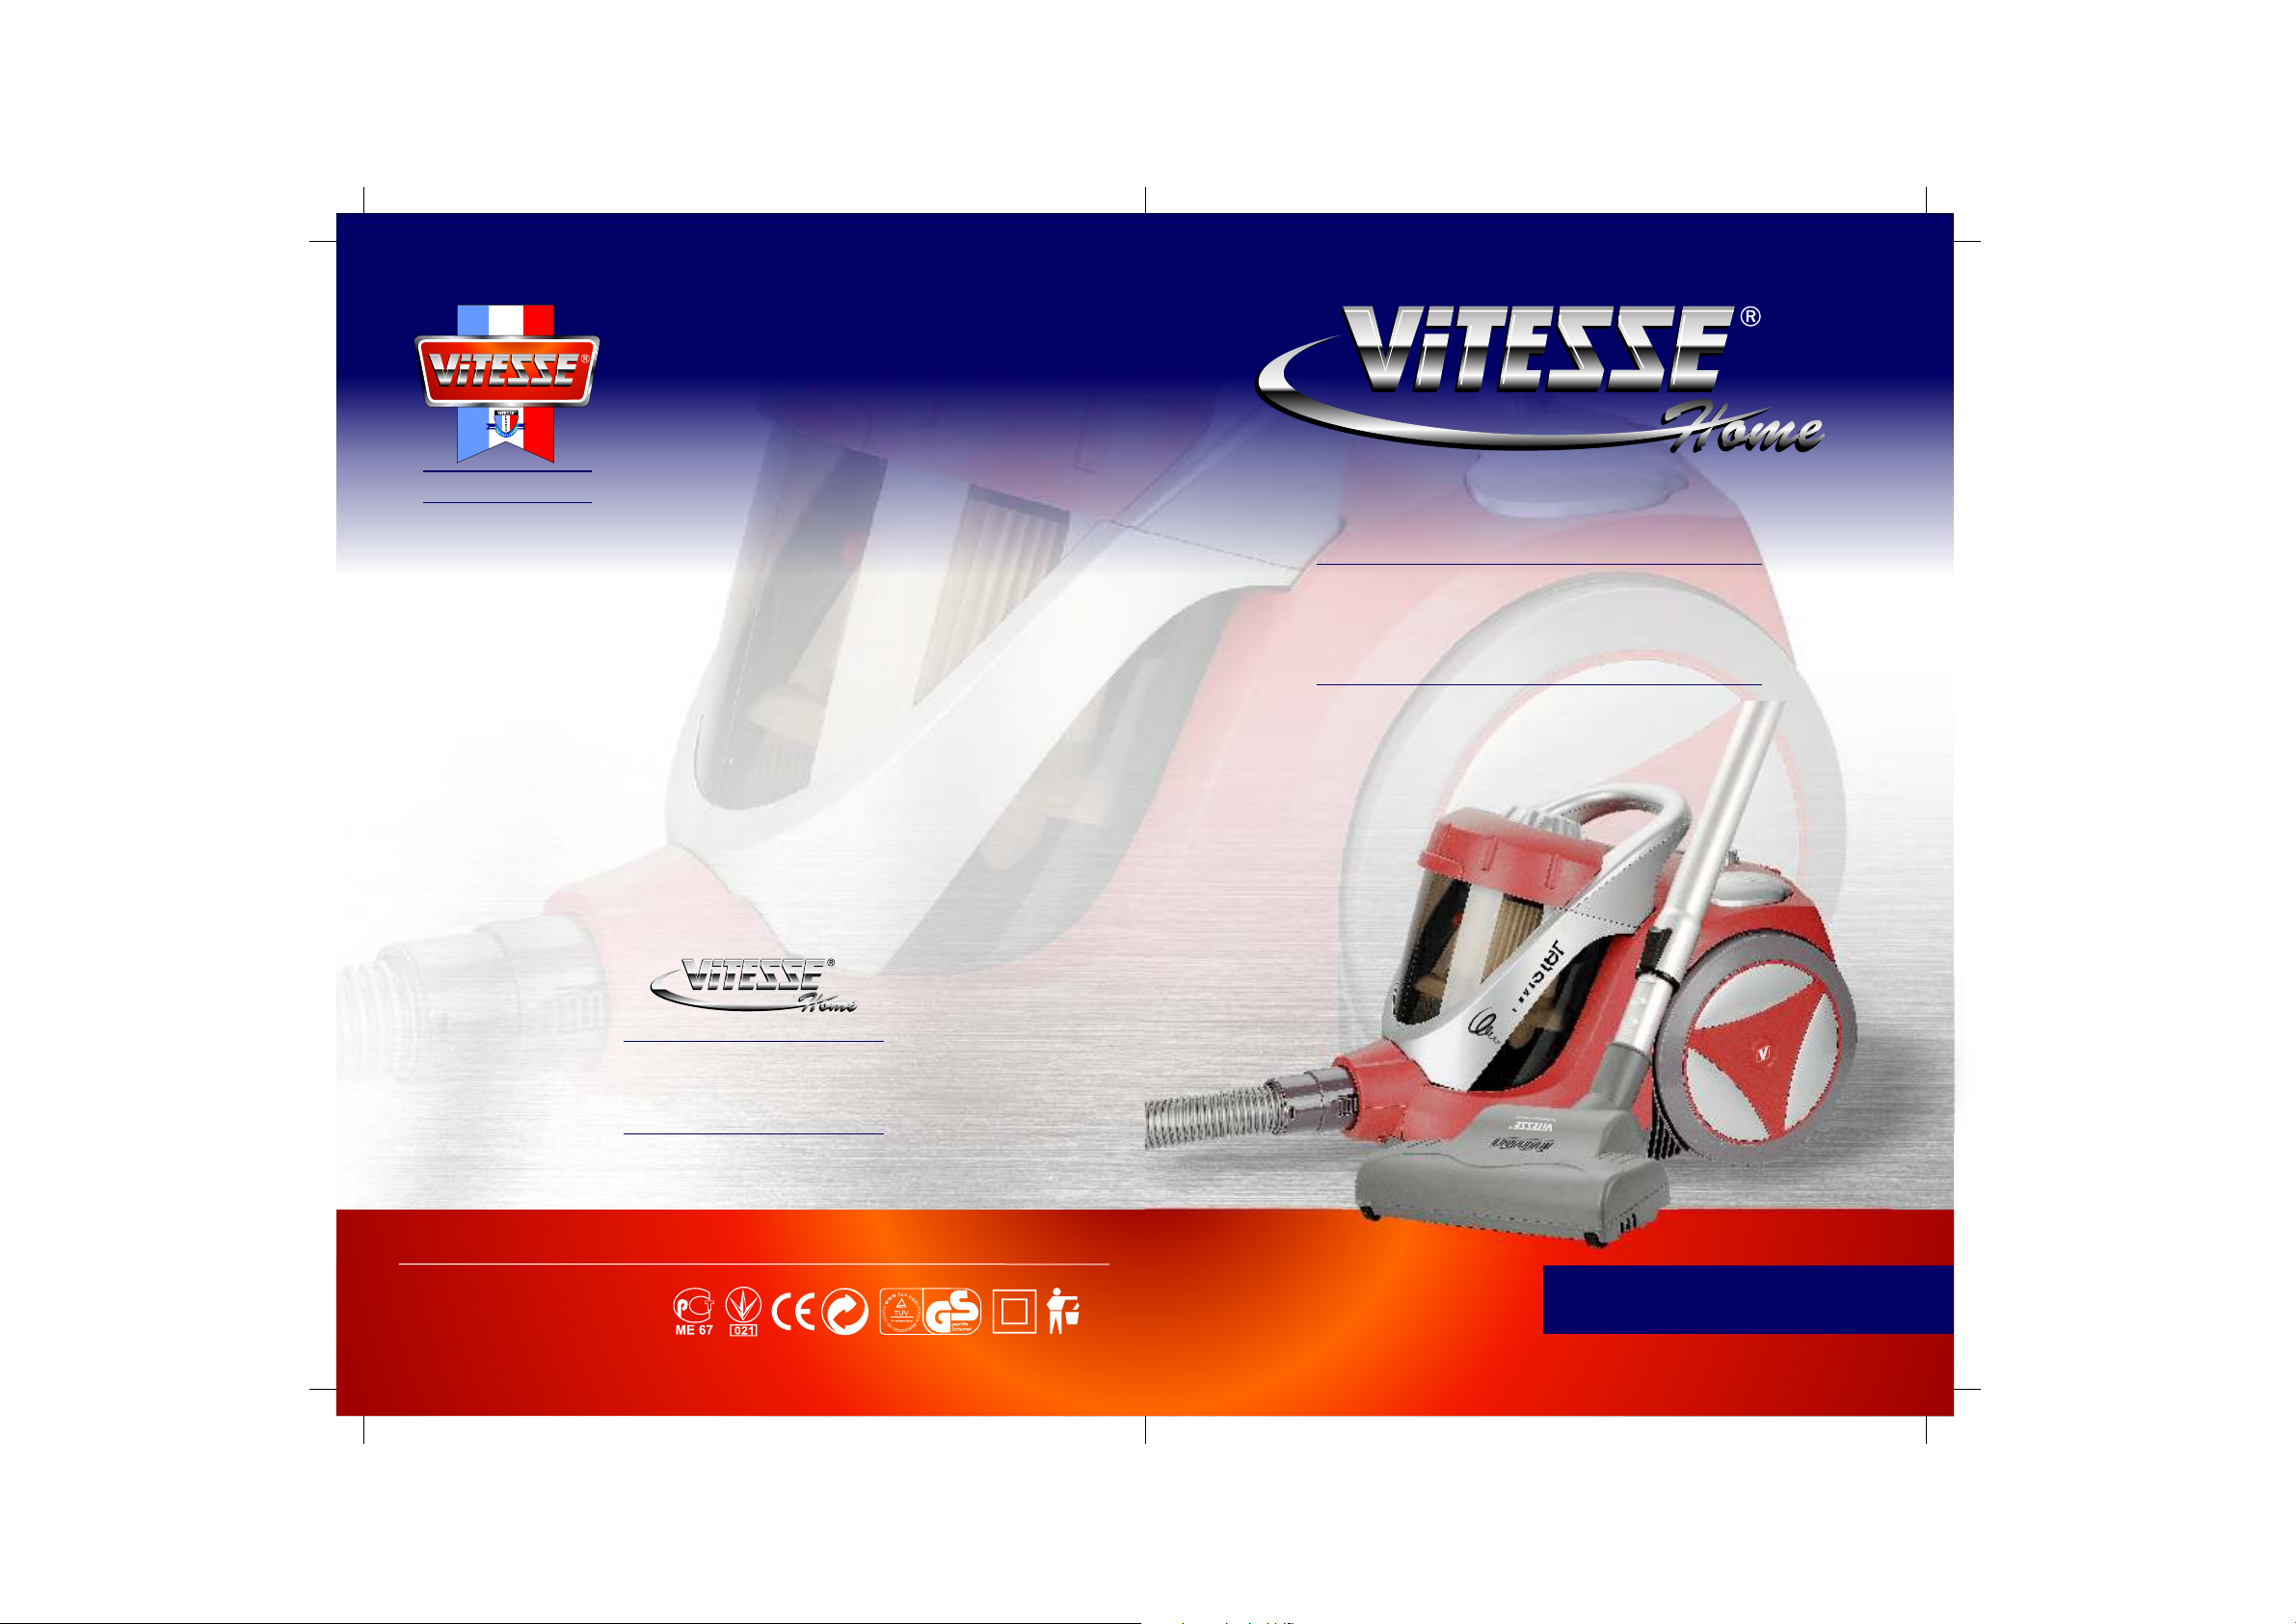
Attachments:
1. Floor nozzle
2. Telescopic tube
3. Vacuum Hose
4. Brush nozzle /
upholstery nozzle ( 2 in 1)
5. Crevice nozzle
6. Dust receiver tank incl.
filter
P/1 P/2
Page 3
Equipments:
1. 3 wheels
2. Washable long-life filter
3. Automatic cable rewind
4. Maximum motor capacity 2200W
5. Exhaust air subject to multi-filter process
6. Electrical regulation of the suction capacity
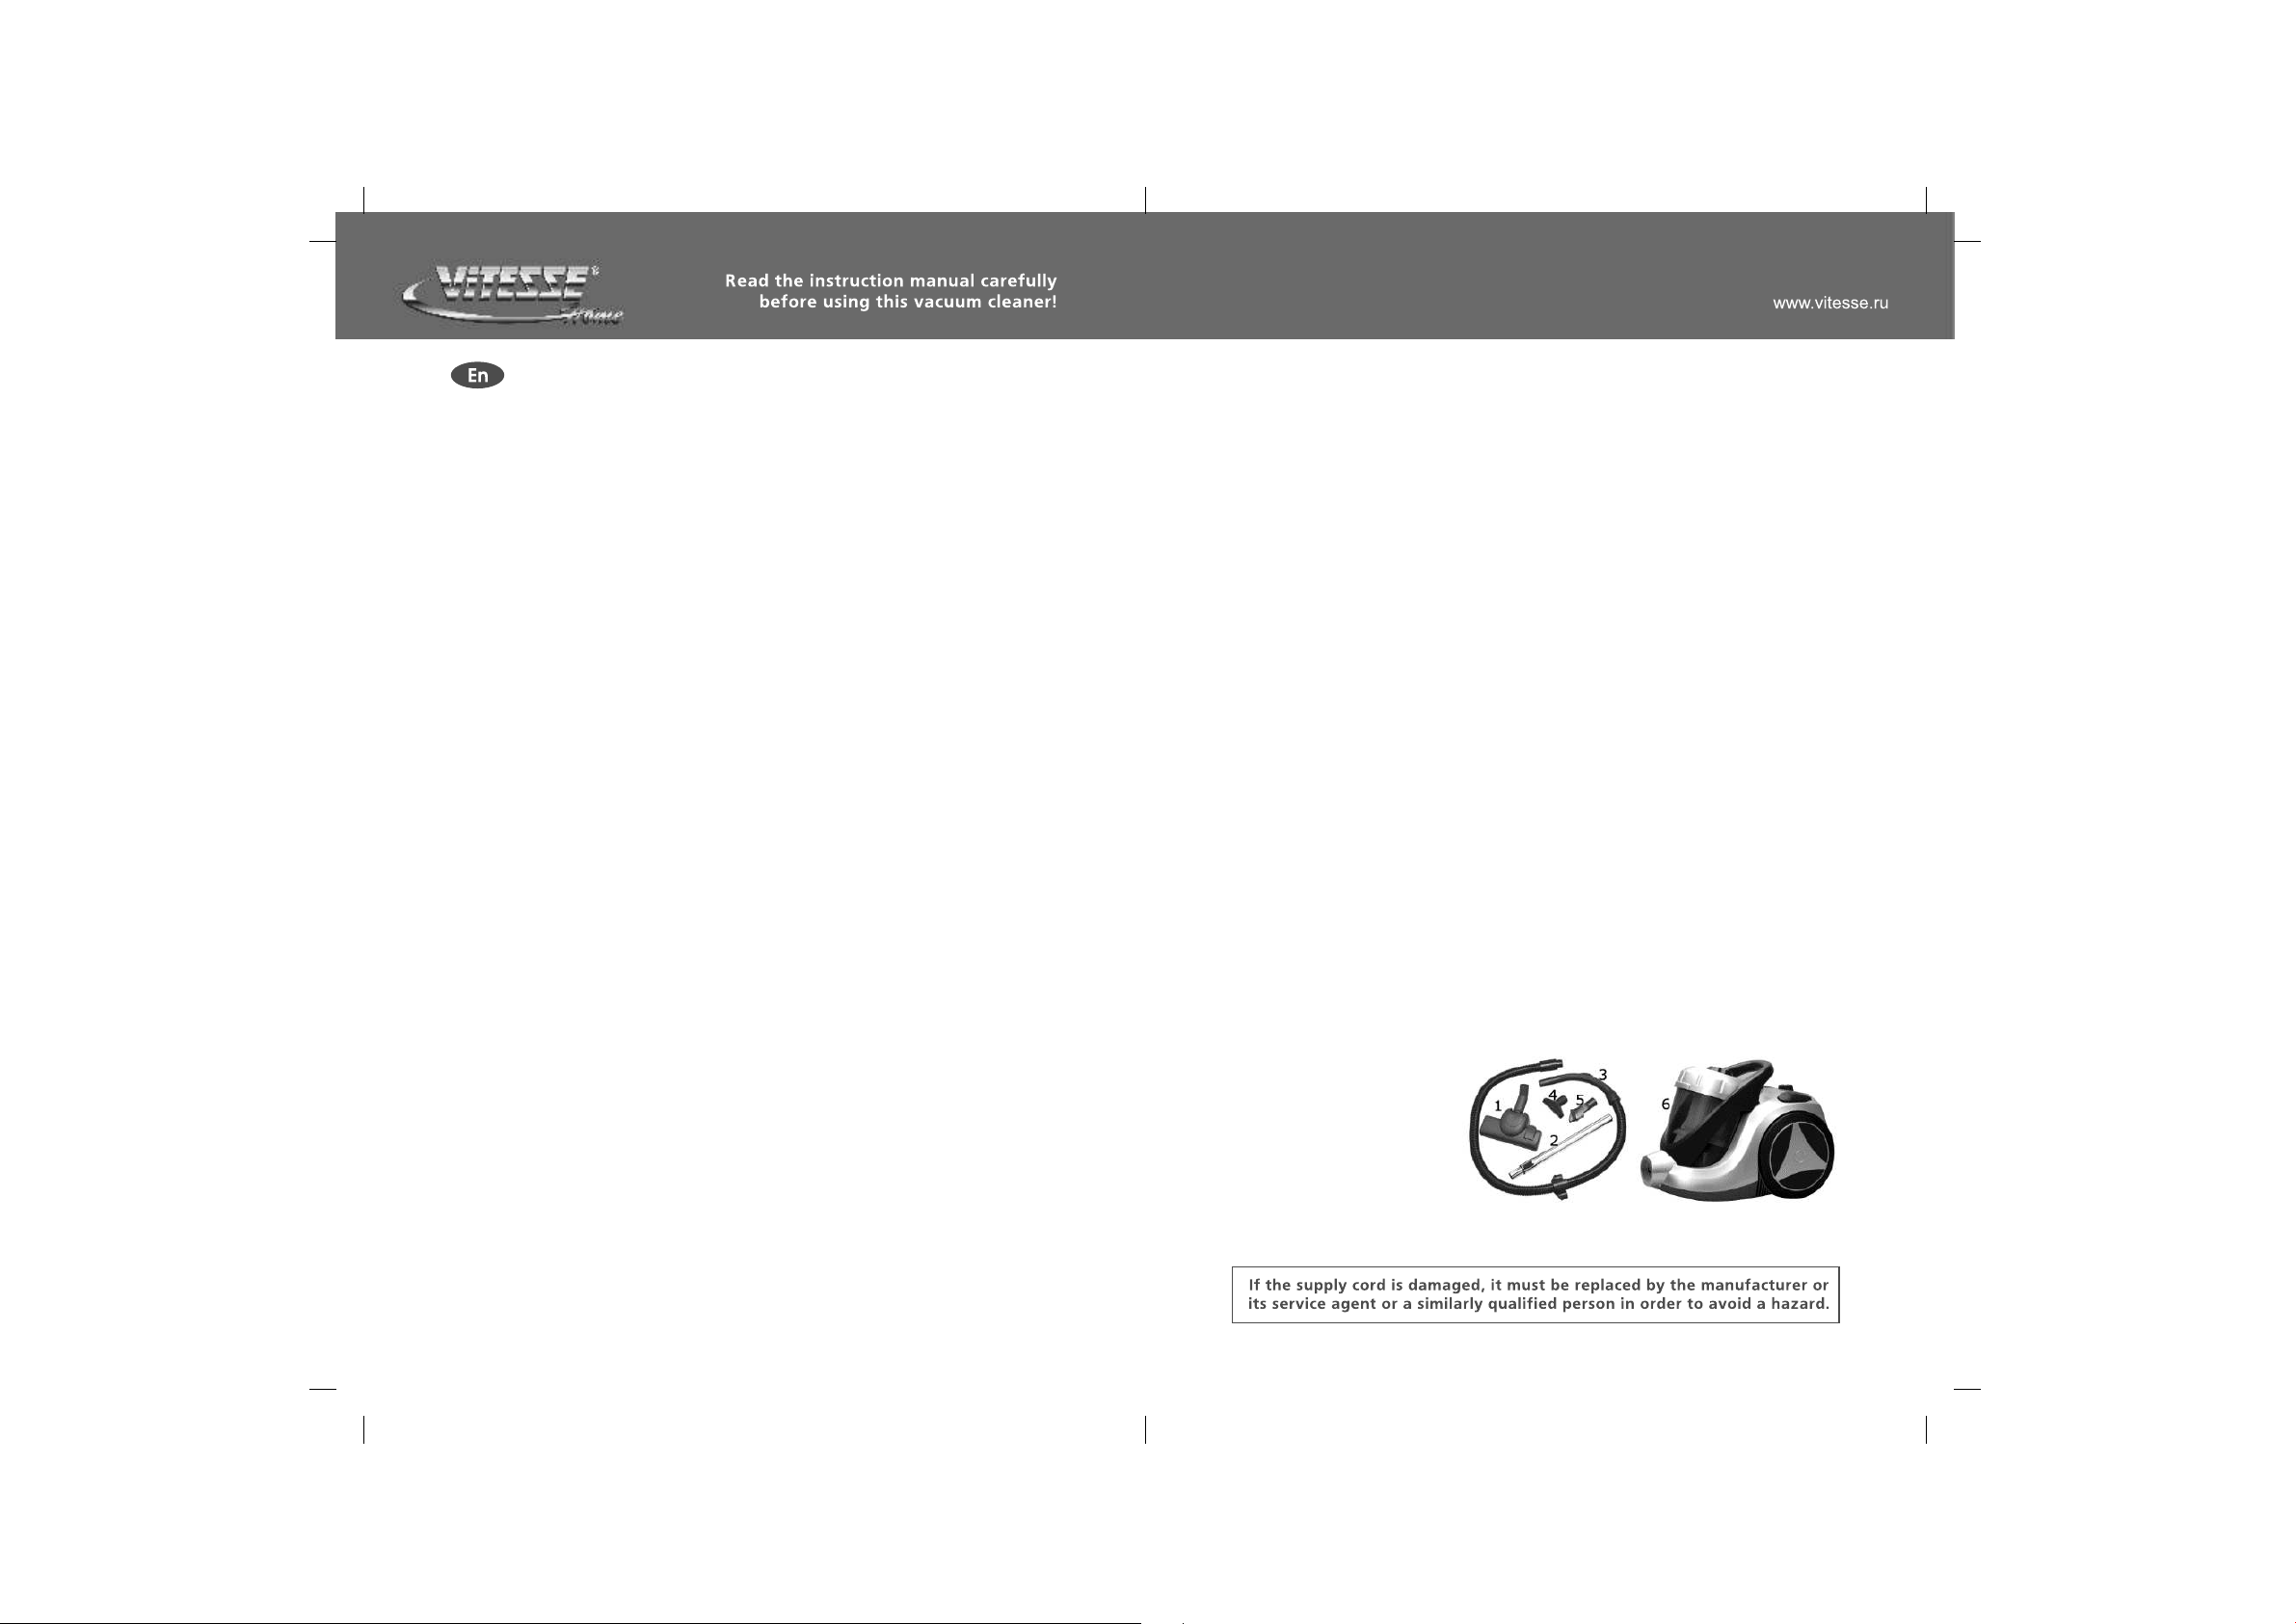
Crevice nozzle:
The crevice nozzle is well suited to the vacuuming those areas that you are
unable to gain access to tight spaces, material folds corners and niches.
Technical data:
Main connection: 230V/50Hz
Capacity: 2200W
GS CE EMC EMF
We reserve the rights to make changes to the scope of deliverables,
equipment and the technical data!
Filter cleaning system:
The cleaner 2200W cyclone vacuum cleaner is fitted with a unique filter
cleaning system. This allows you to remove the dust from the receiver tank in
a completely new, clean and comfortable manner.
Explanation of accessories:
You will receive two different nozzles with your 2200W cyclone vacuum
cleaner. These allow the device to be utilized for a variety of applications.
Floor nozzle:
The floor brush is the fitting most commonly used. That perfect for us on
large, even areas. The 360 joint allows the nozzle to gain access to every
corner, with ease and without complication. The toggle switch provides you
with the option of using the floor nozzle with a range of floor coverings:
1. For carpets: Push the toggle switch to select the symbol for carpet. By
pressing the toggle switch you will have lowered the brushes.
2. For polished floor coverings, press the toggle symbol for smooth flooring.
Assembling your 2200W
Cyclone vacuum cleaner:
Attention:
Before attaching or detaching any accessories always ensure that you unplug
the power supply from the wall socket!
1. Attaching or detaching the hose:
To attach: Push the vacuum hose into the air intake opening until it snaps
into place.
To detach: Push the button on the vacuum hose to release the hose.
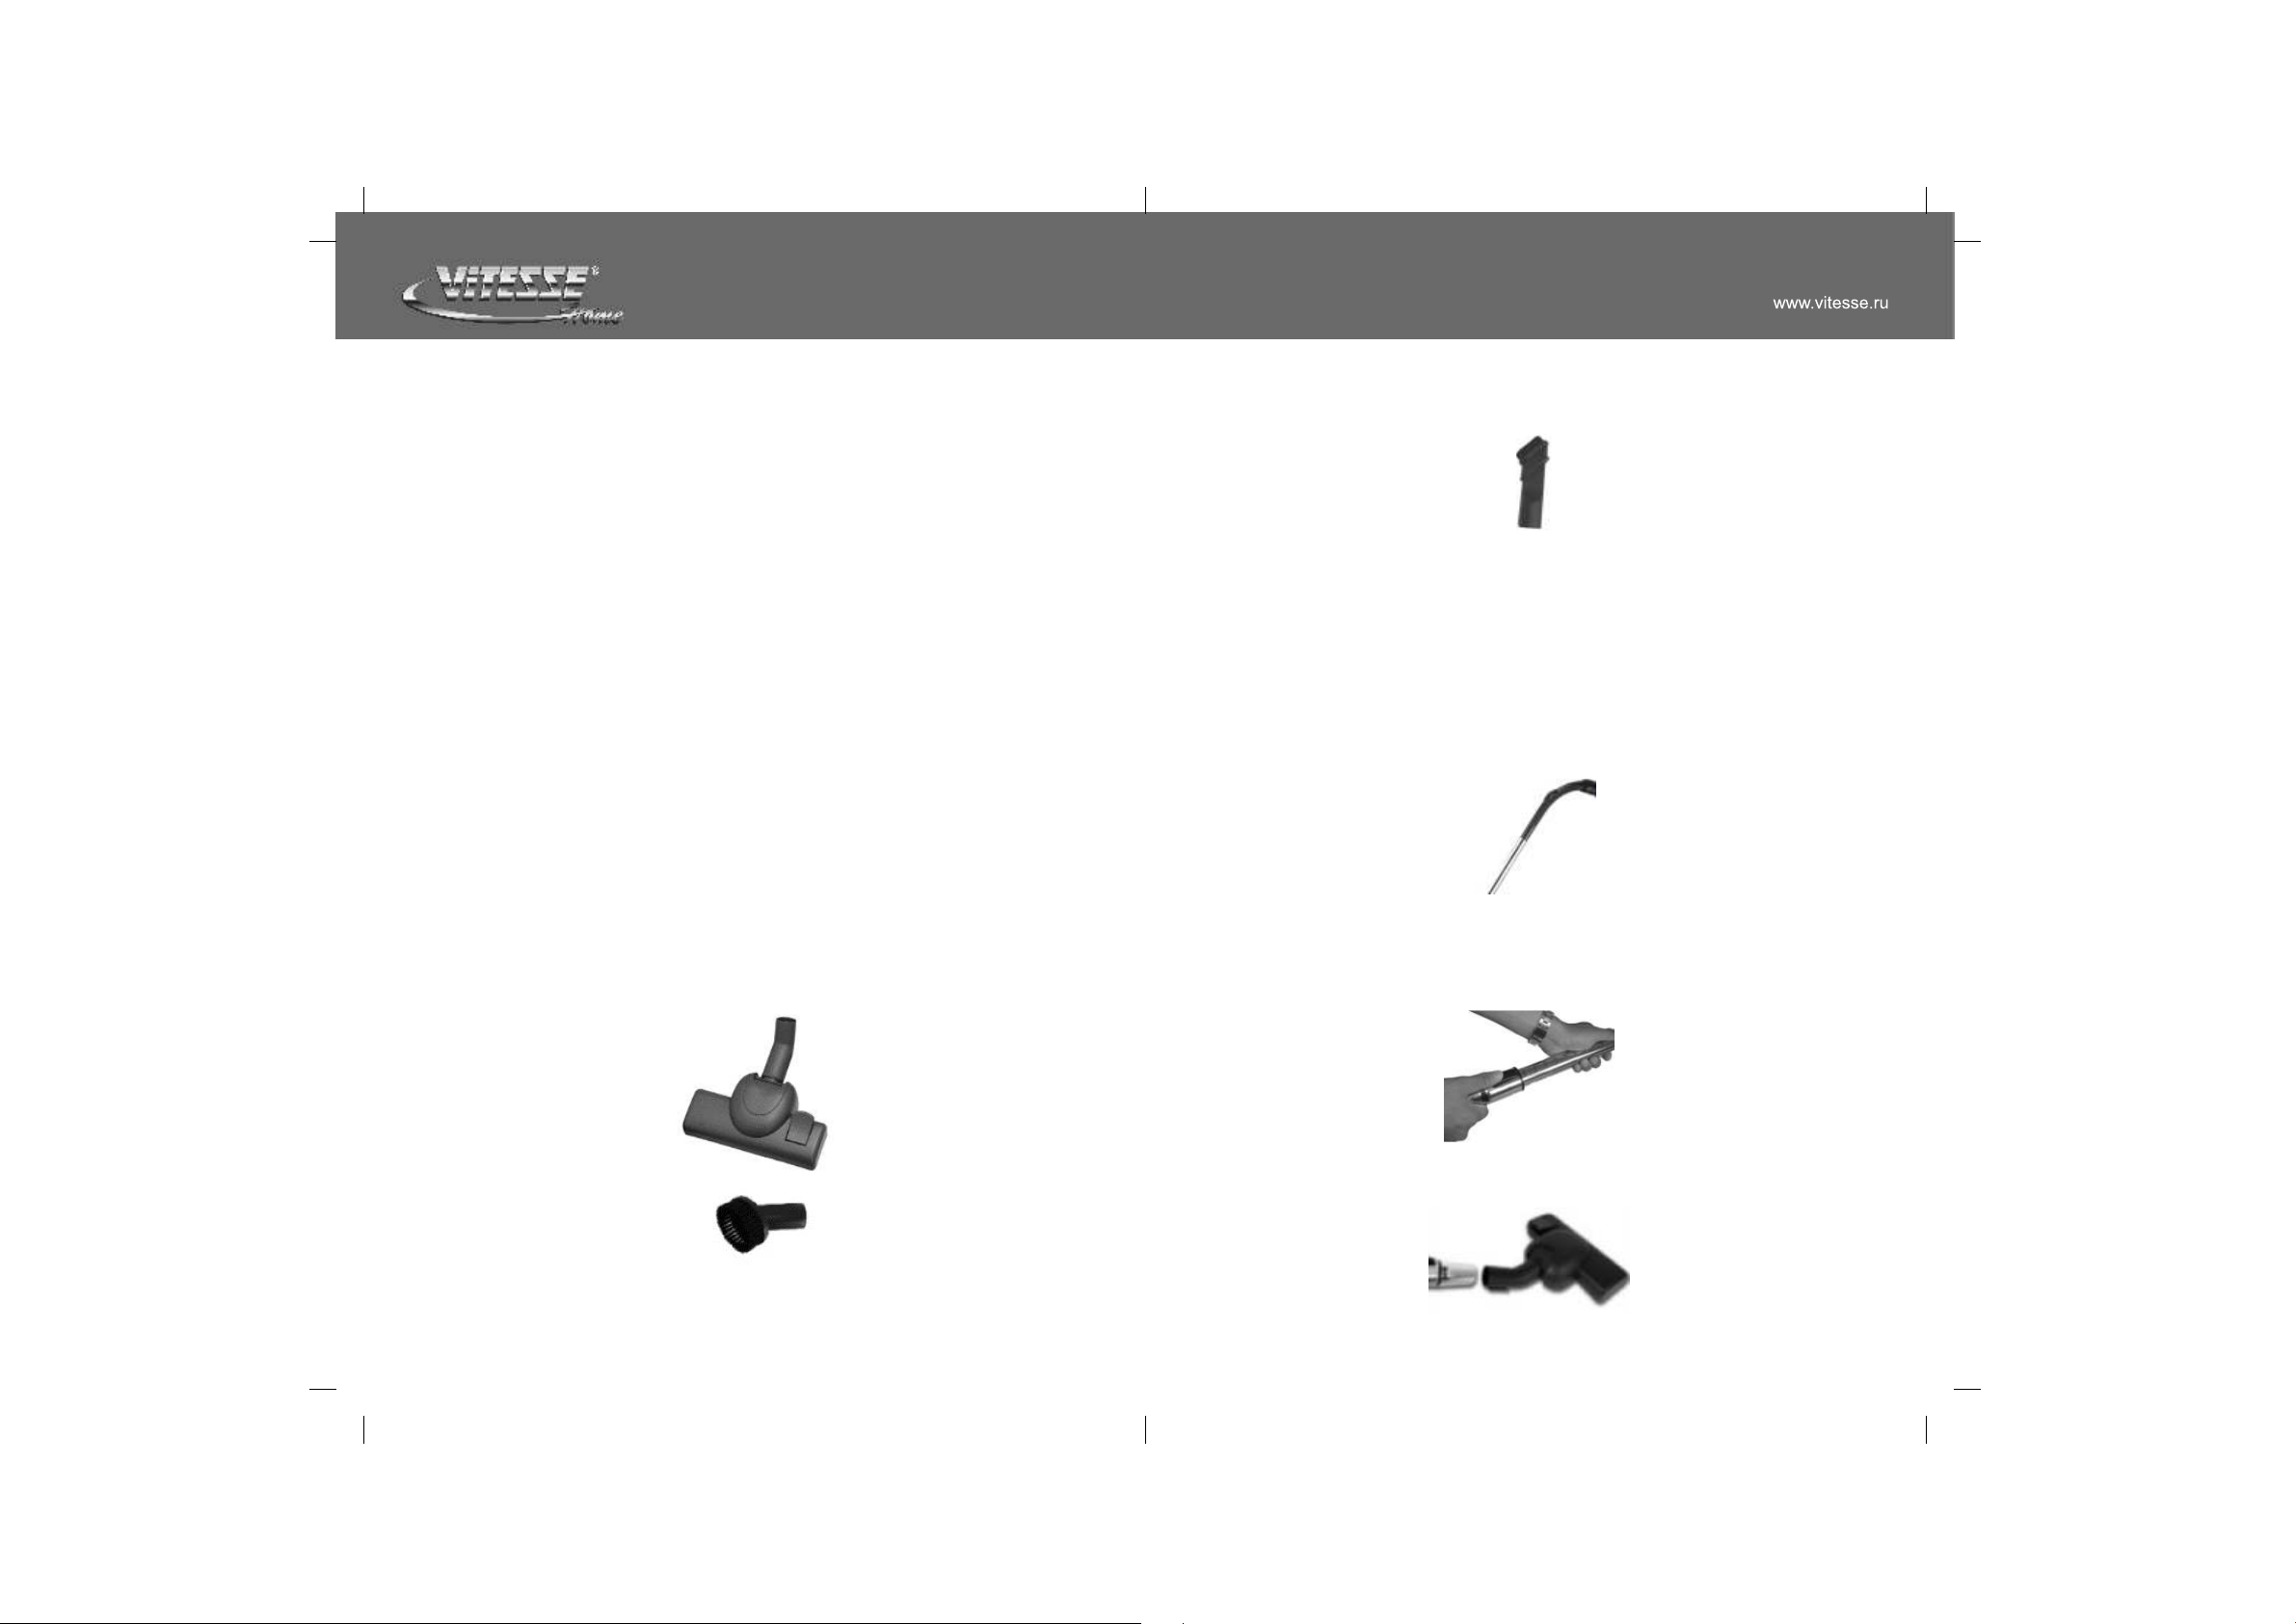
2. Attaching the telescopic tube and its accessories:
• Mount the telescopic tube onto the handle
• Set the telescopic tube to the desired length. In order to do this simply
push the slide on the telescopic tube forwards before pulling on the
lower part of the tube until it has reached the length required. Once
you have selected the optimum length, let the slide return to its
original position and ensure that it snaps shut.
Brush nozzle:
3. The brush nozzle is the best fitting for cleaning sensitive surface such as
picture frames or books.
P/3 P/4
• Now attach the floor brush to the telescopic tube as shown in the
diagram. Attach the crevice nozzle and brush nozzle using the same
method.
Page 4

Vacuuming:
• Before use ensure that you have released a sufficient length of cable, then
plug the device into the wall socket. The ideal cable length is identified on
the cable by a yellow marking. When unrolled, the cable should not exceed
t h e m a x i m u m l e n g t h . T h i s i s i d e n t i f i e d b y t h e r ed
marking.
• Turn on the model cyclone vacuum cleaner by gently tipping the foot to
press down on the ON/OFF switch.
Note:
On rare occasions it is possible that a “whistling” soundmay be heard when
the device is switched on. This will cease after a short period and
does not indicate the presence of fault.
Stop:
Never use the device to vacuum clay, cement, drill or plaster. These materials
will block the filter.
Varying the suction capacity:
You can use the suction capacity regulator to select individual suction
requirements. Turn the regulator forth in order to increase the suction
capacity, back to decrease it.
• MIN: This level is ideal when vacuuming sensitive materials such as
curtains.
• MIN-MAX: The middle level is suitable for upholstered furniture, carpets
and mattresses.
• MAX: This level should only be used for robust flooring such as wood and
tiles.
After vacuuming:
Once you have finished vacuuming turn the device off:
• Use either the foot or the hand to press the ON/OFF switch on the
cyclone vacuum cleaner.
• Remove the plug from the wall socket. (Never pull on the cable, always
apply light pressure to the plug housing)
• Take the plug in your hand in order to avoid the cable flicking up during the
winding process. Press down on the cable rewind button with the foot until
the cable has rewound completely onto the cable drum, which
is inside of cyclone vacuum cleaner.
• In order to place the device in its parking position, use the hook located
above the floor nozzle to guide it into the cyclone vacuum cleaner nozzle
holder.
The Filter
The cyclone vacuum cleaner functions without a dust bag. The cyclone
technology directs the dusty intake air into the dust receiver tank using air
turbulence. The washable long-life filter (Filter) in the dust receiver tank and
an exhaust air filter combine to ensure that the air is clean before it is
expelled.
Attention: The device must only be used with the filter and exhaust air filter
in place.
Secondary air valve:
The secondary air valve, which is located on the device handle, allows you to
control the suction power of the model cyclone vacuum cleaner more finely.
It is recommended that the secondary air valve be opened when cleaning
curtains etc. in order to avoid them being drawn in to the device.
To open: push forwards
To close: push backwards
P/5 P/6
Emptying the dust receiver tank:
The dust receiver tank is transparent, which means that you are always able
to see how full it is. You should always empty the dust receiver tank by the
time its contents reach the MAX mark.
Always unplug the appliance before emptying the dust receiver tank!
You can now remove both the tank and the cleaning system from their
anchored position using the carry handle located on the dust receiver tank.
Now simply carry the dust receiver tank to the dustbin.
Page 5

Hold the dust receiver tank over your dustbin and push the interlock device
back. This action will open the bottom of the dust receiver tank, which will
release its contents into the bin.
Cleaning the cyclone vacuum cleaner:
As and when necessary, the cyclone vacuum cleaner may be wiped clean
using a damp cloth and a little mild cleaning fluid. Never use abrasive
cleaning fluids as these could damage the appliance surface. Ensure the not
fluid is allowed to seep inside the cyclone vacuum cleaner. Never place parts
in the dishwasher.
Note if the dust receiver tank is very full, it is recommended that a bag be
pulled over the tank so that the tank can be emptied into the bag first. This
avoids excessive dust being released.
Once the tank is empty it is recommended that the Filter be cleaned if
necessary.
• Carefully turn the Filter in an clockwise wise direction, until it disengages.
Now remove the Filter.
• Clean the Filter thoroughly. Never clean the Filter using soap or any other
cleaning fluid. This would destroy the filter!
• If the Filter is heavily soiled, and this is leading to a reduction in suction
power, it is recommended that the filter be replaced with a new one.
Once cleaning is complete, replace the filter by simply reversing the process
outlined above.
• Place the Filter back in the dust receiver tank and turn it carefully in a
anti-clock direction, until it locks in place.
Now place the reassembled dust receiver tank back in the cyclone vacuum
cleaner, ensuring that it clicks into place. Your cyclone cleaner is now ready
for use.
Exhaust filter:
• Remove the plug from the wall socket. (Never pull on the cable, always
apply light pressure to the plug housing)
• Remove the exhaust air filter cover by pressing the interlock release
button.
• Take out the exhaust air filter and rinse it well under cold, clean water
before leaving to dry. Never clean the exhaust air filter using soap or any
other cleaning fluid. This would destroy the filter!
• Reposition the exhaust air filter.
• If the exhaust air filter is heavily soiled, it is recommended that the filter
be replaced with a new one.
• Replace the exhaust air filter cover.
Disposal:
If you wish to dispose of the packaging, please ensure that you do so in an
environmentally friendly manner and take it to a recycling facility. If you wish
to dispose of the device itself at any point, please also do so in an
environmentally friendly manner. This device should not be disposed of
alongside general household waste. Please contact your local waste collection
office or recycling centre. They will be able to advise you further.
Technical Data
Power supply: 230V ~ 50HZ
Power consumption: 2200W
P/8P/7
Page 6

УВАЖАЕМЫЕ ПОКУПАТЕЛИ! ВЫ ПРИНЯЛИ БЛЕСТЯЩЕЕ РЕШЕНИЕ!
Фирма Vitesse® “Nouveau” предлагает Вам гамму эксклюзивных
высококачественных приборов для несомненно роскошного и здорового
образа жизни.
Не допускается использование техники человеком (или ребенком) с
огранич е н н ы м и фи з и ч е с к и ми , сенс о р н ы м и или у м с тв е н н ы м и
возможностями, а также человеком без опыта или без знания инструкций.
Исключение составляют случаи, когда техника используется под
наблюдением человека, ответственного за безопасность, или после того,
как будет проведен инструктаж.
Дети могут использовать технику только под наблюдением взрослых, чтобы
исключить случаи игры с техникой.
Руководство по эксплуатации
Перед первым использованием прибора внимательно прочитайте
руководство по эксплуатации. Сохраните руководство для дальнейших
консультаций.
ТЕХНИКА БЕЗОПАСНОСТИ
1. Не оставляйте работающий прибор без присмотра, следите чтобы
дети находились на безопасном расстоянии от прибора.
2. Используйте прибор по назначению!
3. Не используйте прибор, если на шнуре или на вилке видны
следыповреждения, не используйте прибор, если он падал или был
поврежден. Отнесите прибор в сервисный цент для осмотра или
починки.
4. Не используйте прибор для уборки горящих или дымящих предметов
таких как, сигареты, спички или пепел, любых острых объектов таких как,
разбитое стекло, или воды или других жидкостей. Выше перечисленные
предметы могут привести к травмам и повреждениям. Не затушенные
сига р еты м о г у т прожеч ь фил ьт р , вод а может приве с т и к
короткому замыканию.
5. Не подвергайте прибор воздействию природных факторов (дождь, снег).
Этот прибор предназначен только для домашнего использования.
6. Перед чистк ой или ремонтом прибора или если прибор не
используется, отключите его от сети.
7. При отключении или подключении прибора, держитесь за штекер, не
тяните за кабель питания.
8. Никогда не вставайте и не садитесь на пылесос.
9. Используйте прибор только тогда, когда он полностью собран.
Убедитесь что фильтр не поврежден
10. Не чистите вашим пылесосом влажные поверхности. С его помощью
нельзя удалять жидкости. Ковры обработанные жидким очистителем,
должны высохнуть до начала их чистки пылесосом.
11. Не размещайте прибор вблизи источников тепла, горячих приборов, так
как это может привести к деформации пластмассовых частей
прибора.
12. Держите волосы, одежду, пальцы и другие части тела подальше от
отверстий и движущихся частей прибора.
13. Не направляйте трубку прибора в сторону человека.
14. Перед использованием прибора, убедитесь, что емкость для сбора пыли
правильно установлена.. Никогда не работайте пылесом без
установленного или с поврежденным пылесборником.
15. Всегда доставайте штепсель из розетки, перед тем как собрать или
разобрать прибор.
16. в се гд а ис по л ьз у й т е п р и на д л е жн о с т и ре ко ме н до ва н ны е
производителем.
17. Для избежания поражения электрически током не погружайте прибор
или шнур питания в воду или в другую жидкость.
18. Всегда используйте прибор по назначению.
19. Всегда используйте полностью укомплектованный пылесос.
20. Не используйте прибор возле воды.
21. Не используйте абразивные чистящие средства для чистки прибора, это
может повредить корпус.
22. Не перекрывайте отверстия для поступления воздуха, это может
привести к перегреву.
Описание
1. Щетка для пола
2. Телескопическая трубка
3. Шланг
4. Щетка для обивки
5. Щелевая насадка
6. Емкость для пыли и фильтр
Оборудование
3 колеса
Моющийся фильтр
Автоматическое сматывание шнура
Максимальная мощность мотора 2200 Вт
Электронное регулирование мощности всасывания
Эксплуатация
Система очистки фильтра
Прибор оснащен уникальной системой очистки фильтра от пыли. Это
позволит вам очищать емкость для-пыли, совершенно новым и удобным
для вас способом.
Объяснение принадлежностей
В комплект входит две разных насадки. Это позволит вам, по разному
использовать прибор.
P/9
P/10
Page 7

Насадка для пола
Насадка для пола, как правило, употребляется в большинстве случаев.
Эта насадка не заменима для большой площади. Угол вращения на 360
градусов позволяет получить доступ к трудно доступным местам.
• Для ковров: нажмите переключатель для того, что бы выбрать режим
для ковров. Нажимая на переключатель, вы опускаете вниз щетки.
• Для гладких поверхностей, переключите насадку в положение для
гладких поверхностей.
Щетка для обивки
Эта щетка лучше всего подходит для чистки нежных поверхностей таких
как, рамы картин, книги.
Насадка для щелей
Эта насадка позволяет вам добраться к трудно доступным местам, углы,
тесные пространства и т.д.
Сборка прибора
Внимание: Перед тем как начать сборку пылесоса , убедитесь в том, что
он отключен от сети!
1. Подсоединение или отсоединение шланга:
Подсоединение: для того, что бы присоединить шланг, вставьте шланг
во всасывающие отверстие пока не прозвучит щелчок.
Отсоединение: Для того, что бы отсоединить шланг, нажмите кнопку
на шланге.
2. Подсоединение телескопической трубки:
• После этого подсоедини те щетку д ля п о ла к те лескопичес кой
трубке, так как это показано на рисунке.
Включение
• Перед началом работы вытяните шнур питания на необходимую
длину и вставьте вилку в розетку электросети. Идеальная длинна
шнура отмечена желтой линией на шнуре. Разматывая шнур, длина
не должна превышать красную отметку.
• Для того что бы включить прибор аккуратно нажмите ногой на кнопку
«ВКЛ»/«ВЫКЛ» (ON/OFF).
Внимание: Не используйте пылесос для удаления цемента, гипса,
извести или других видов сыпучих предметов, так как они могут
забить фильтр.
Регулировка мощности
Вы можете регулировать мощность прибора в зависимости от ваших
потребностей. Поворачивая регулятор вперед, вы увеличиваете
мощность, назад уменьшаете.
MIN: этот уровень мощности подходит для нежных материалов,
занавески
MIN-MAX: этот уровень мощности подходит для ковров, матрасов,
обивки.
MAX: этот уровень мощности подходит для твердых поверхностей,
дерева, черепица.
• Вставьте телескопическую трубку в рукоятку
• Выберите нужную для вас длину трубки. Для того, что бы сделать
это нажмите вперед затвор на трубке и потяните за нижнюю часть
трубки. После это отпустите затвор и убедитесь, что он стал на
прежнее место.
P/11 P/12
Второй воздушный клапан
Втор о й в озд ушный кл àïàí, êîòîð û é ð àñпол ожен на рукоят к е ,
позволяет вам регулировать мощность всасывания. Рекомендовано
открывать второй клапан при чистке занавесок и т.д.
Для того, что бы открыть: нажмите вперед
Для того, что бы закрыть: нажмите назад.
Page 8

После использования
После того как вы закончили эксплуатацию прибора, выключите его.
• Для этого вам необходимо нажать на кнопку «ВКЛ»/«ВЫКЛ»
(ON/OFF).
• Достаньте штепсель из розетки. (Никогда не вытаскивайте штепсель,
держась за шнур)
• Нажмите кнопку сматывания шнура на корпусе пылесоса, чтобы
смотать кабель.
Фильтр
Прибор работает без мешка для пыли. С помощью воздушной
турбулентности, прибор направляет и собирает пыль в емкости для
пыли. Моющийся фильтр в емкости для пыли, и воздушный фильтр
гарантируют чистоту воздуха на выходе из прибора.
Внимание: прибор не должен работать без установленных фильтров.
• Тщательно почистите фильтр. Никогда не используйте мыло или
д р у г и е ч и с т я щ и е с р е д с т в а . Э т о п о в р е д и т ф и л ьт р .
• Если фильтр очень сильно забит, это будет влиять на мощность,
поэтому рекомендовано заменить его.
Для того, что бы поставить фильтр на место, повторите процедуру в
обратном порядке.
• Поставьте фильтр обратно в емкость для пыли и поверните его
против часовой стрелки до упора.
Очистка емкости для пыли
Емкость для сбора пыли прозрачная, это позволяет вам видеть, на
сколько он заполнен. Всегда очищайте емкость для пыли, когда
достигните отметки «МАХ».
Перед тем как очистить емкость для пыли, достаньте штепсель из
розетки.
Теперь вы можете достать емкость для пыли и систему очистки,
используя специальную ручку, размещенную на емкости для пыли.
Теперь вы спокойно можете выкинуть мусор из емкости.
Держите емкость для пыли над мусорным ведром и потяните за ручку
назад. Это движение откроет нижнюю часть емкости и очистит ее.
После очистки емкости для пыли, рекомендовано, почистить фильтр.
• Аккуратно поверните фильтр по часовой , äî òåõ ïîð ïîêà
стрелке
он не открутится. Теперь достаньте фильтр.
После этого поставьте емкость для пыли обратно в прибор. Теперь
прибор снова готов для эксплуатации.
Выпускной фильтр
• Достаньте штепсель из розетки. Никогда не вытаскивайте штепсель,
держась за шнур.
• С помощью нажатия кнопки достаньте крышку выпускного отверстия.
• Достаньте выпускной фильтр и промойте его тщательно под чистой и
холодной водой и подождите до тех пор, пока он не высохнет.
• Никогда не используйте мыло и другие моющие средства, это
повредит фильтр.
• Поставьте на место фильтр.
• Если фильтр очень загрязнен, то рекомендовано его заменить.
• Поставьте на место крышку выпускного отверстия.
Технические характеристики
Питание: 230 В/50 Гц
Мощность 2200 Вт
GS CE EMC EMF
Компания оставляет за собой право вносить изменения во внешний вид,
комплектацию и технические характеристики прибора.
Уход и чистка
Если необходимо, прибор можно почистить с помощью влажной мягкой
ткани. Никогда не используйте абразивные моющие средства. Так как
они могут повредить поверхность прибора. Никогда не мойте части
прибора и сам прибор в посудомоечной машине.
P/13 P/14
 Loading...