

Page 1
NOU S VIV ON S S AI N
We l iv e h ea lt hy
PRESSURE COOKER
СКОРОВАРКА
“Vitesse France S.A.R.L” (Витессе, Франция)
91 Руе Де Фоборг Сант Хонор, Париж 75008, Франция
Сделано в Китае
www.vitesse.ru
Рис
Нагрев
Рыба
Выпечка
Рыба
Каша Тушение
Давление
Каша
Бобовые
Функция
Бобовые
Суп
Подогрев
Курица/
Тушение
Мясо
Подогрев/
Отмена
Курица/
Мясо
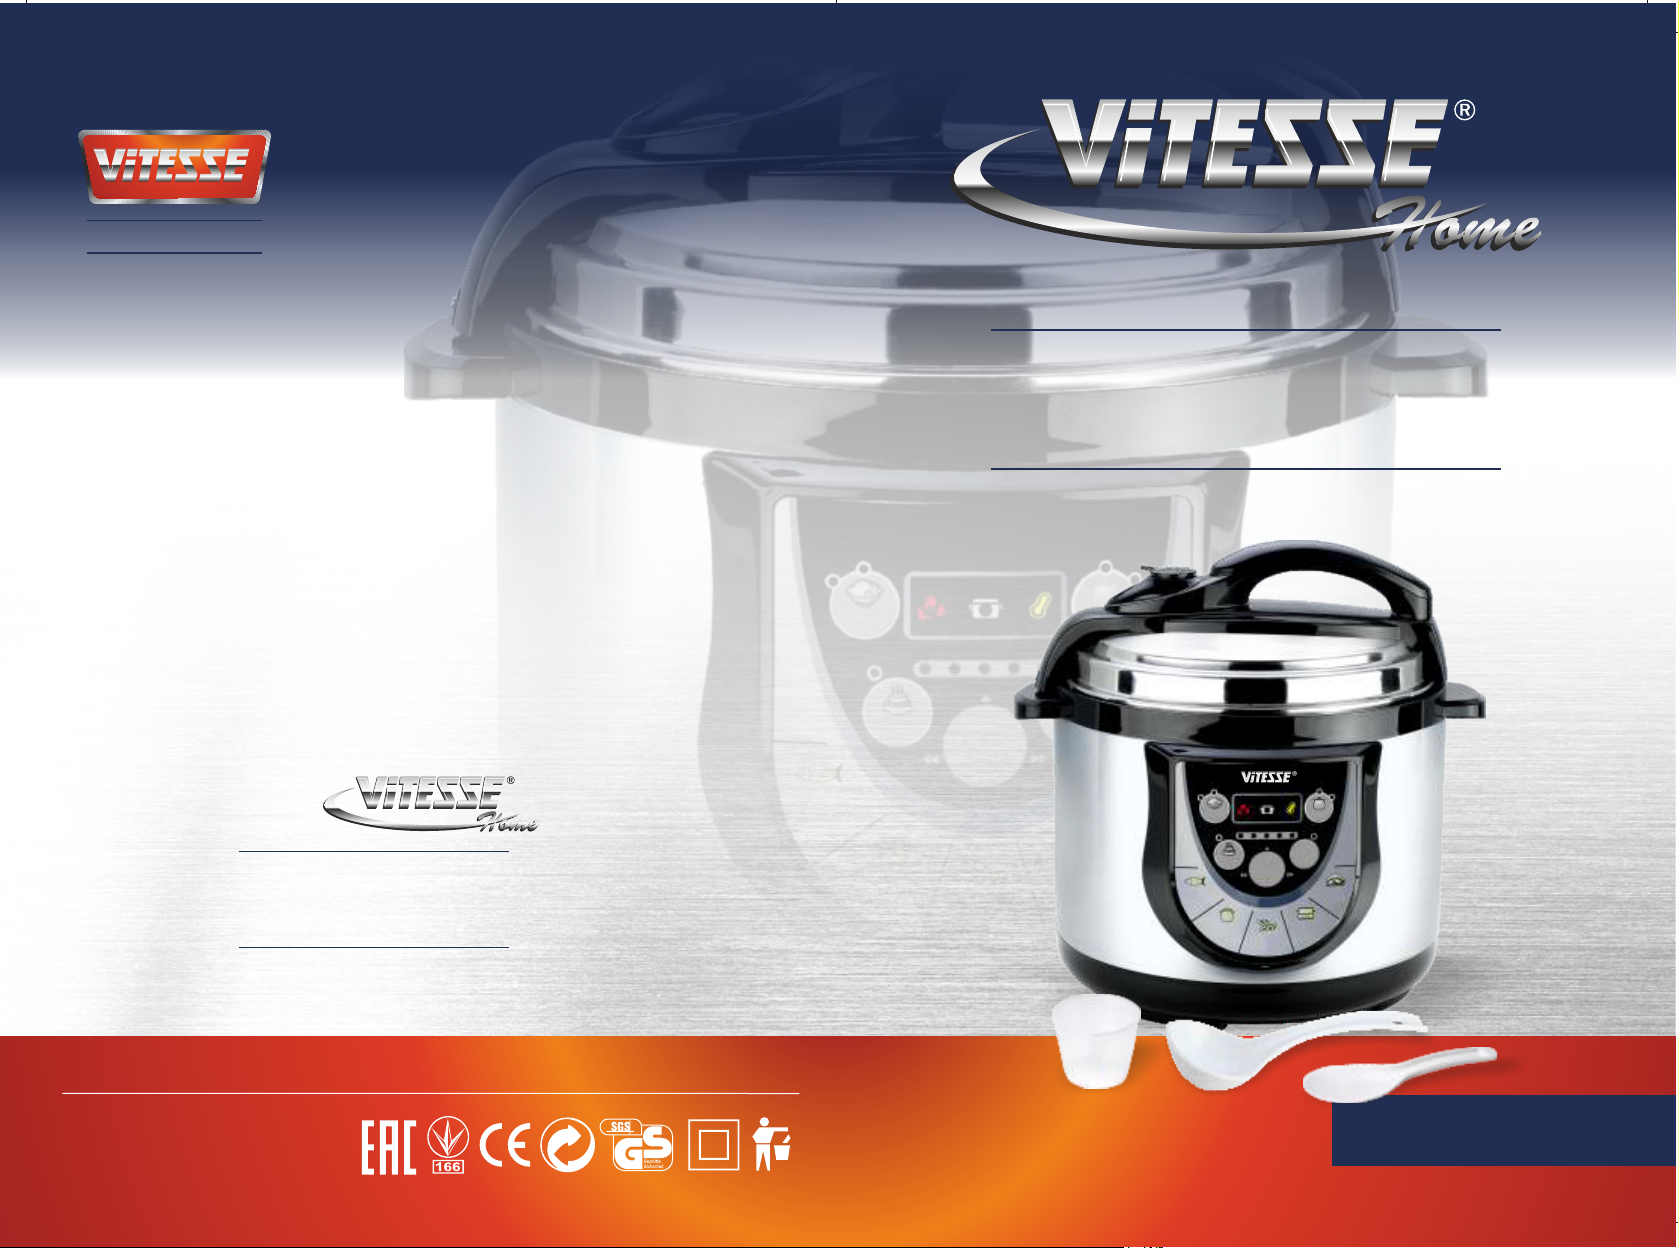
VS-511
Page 2

www.vitesse.ru
Dear Customer!
You have made an excellent decision. Vitesse home range offers you
an exclusive, high quality range of appliances for your ultimate home luxury
and healthy living.
IMPORTANT SAFEGUARDS
When using this electrical appliance, safety precautions should always be
observed, including the following:
• Read all of the instructions before use.
• Close adult supervision must be provided when this appliance is used by
or near children.
• Keep pressure cooker out of the reach of children.
• Do not touch hot surfaces. Use handles or knobs.
• Using attachments not recommended or sold by the manufacturer may
cause hazards.
• Do not operate with a damaged cord or plug. If the appliance is not working
as it should, has been dropped or damaged, left outdoors or dropped into
water, do not use it and return it to the manufacturer for proper service,
repair, or replacement.
• Do not let cord hang over the edge of the table or counter, or touch hot
surfaces.
• Make sure appliance is off before unplugging from the electrical outlet.
• Always unplug before cleaning and removing parts.
• For indoor use only.
• Do not place near hot gas or electric burner.
• Do not cover the appliance or have it near flammable material including
curtains, draperies, walls, and the like when in operation.
• Always use in a well ventilated area.
• To protect against electrical shock, do not immerse plug, cord or housing in
water or any other liquid.
• Keep hands and face away from pressure regulator knob when releasing
pressure.
• After cooking, use extreme caution when removing the lid. Serious burns
can result from steam inside the unit.
• While the unit is in operation, never remove the lid.
• Do not use without the removable cooking pot in place.
• Do not cover the pressure valves with anything. An explosion may occur.
• Do not attempt to dislodge food when the appliance is plugged in.
• Do not fill the pressure cooker more than 1/2 full with food or 2/3 full with
liquid. When cooking foods that expand during cooking, do not fill the unit
over 1/2 full.
• When cooking foods under pressure, at least 1 cup (8 oz) of liquid should
be used.
• Foods such as apple sauce, cranberries, pearl barley, oatmeal or other
cereals, split peas, noodles and pasta should not be cooked under
pressure in the pressure cooker. These foods tend to foam, froth and
sputter, and may block the floating valve.
• To reduce the risk of electrical shock, cook only in the removable cooking
pot.
• Do not use an extension cord with this pressure cooker. However, if one is
used, it must have a rating equal to or exceeding the rating of this
appliance.
• The pressure cooker is for household use only.
• The pressure cooker should not be used for other than the intended use.
• Extreme caution should be used when moving any appliance containing
hot food or liquid.
• Servicing or repair should only be completed by a qualified technician.
• The pressure cooker has a polarized AC (Alternating Current) plug (one
blade is wider than the other). This plug will fit in a polarized outlet only one
way, as a safety feature. Reverse the plug if the plug does not fit fully in the
outlet. Contact a qualified electrician if it still does not fit. Do not attempt to
defeat this safety feature.
• WARNING: Never deep fry or pressure fry in the pressure cooker. It is
dangerous and may cause a fire and serious damage.
• This appliance is not intended for use by persons (including children) with
reduced physical, sensory or mental capabilities, or lack of experience
and knowledge, unless they have been given supervision or instruction
concerning use of the appliance by a person responsible for their safety.
CAUTION: Perishable foods such as meat and poultry products, fish, cheese
and dairy products cannot be left at room temperature for more than 2 hours.
(No longer than 1 hour when the room temperature is above 90°F) When
cooking these foods, do not set the delay time function for more than 1-2
hours.
P/1 P/2
Page 3
www.vitesse.ru
SAVE THESE INSTRUCTIONS
FEATURES
• Pressure Regulator Knob: Turned to AIRTIGHT and the lower position
when cooking to reach pressure, and turned to EXHAUST and in the upper
position to release pressure (Quick release method)
• Floating Valve: The floating pin is a safety device. It will rise against
pressure built up and keep the cover in the locking position until pressure is
released.
• Self Locking Lid: Allows you to lock the lid to the pressure cooker and does
not allow you open the lid until the pressure has dropped to zero.
• Removable Cooking Pot: 1.5 L capacity double non-stick removable pot
provides even heat distribution.
• Condensation Reservoir: Collects excess water during cooking.
• Gasket: Creates an airtight seal that is needed for the Pressure Cooker to
operate.
• Pressure Safety Valve: Allows excess pressure to escape if too much
pressure is building up during cooking process.
CONTROL PANEL FUNCTIONS
• Start: Use to begin the cooking cycle.
• Preset: Allows you to delay the cooking start time later.
• DIY (Do-It-Yourself): Allows you to self-program the cooking time.
• Warm/Cancel: When indictor light is lit, unit will reheat or keep warm
cooked food. This will also cancel any cooking setting or function. The light
will go off when pressed again to indicate it has been cancelled.
• Beef: Preset pressure setting for cooking Beef.
The default setting is 6 minutes. You can adjust the cooking time by
pressing the button again, and then press START to confirm the setting.
• Soup: Preset pressure setting for cooking Soup.
The default setting is 5 minutes. You can adjust the cooking time by
pressing the button again, and then press START to confirm the setting.
• Chicken: Preset pressure setting for cooking Chicken.
The default setting is 5 minutes. You can adjust the cooking time pressing
the button again, and then press START to confirm the setting.
• Bean/Vegetable: Preset pressure setting for cooking Vegetables. The
default setting is 1 minute. You can adjust the cooking time by pressing the
button again, and then press START to confirm the setting.
• Rice: Preset pressure setting for cooking Rice. The default setting is 4
minutes. You can adjust the cooking time from by pressing the button
again, and then press START to confirm the setting.
P/3 P/4
Page 4

www.vitesse.ru
Before First Use
1. Remove all packing materials and literature.
2. Wash all removable parts in warm soapy water. Rinse and dry all parts
thoroughly. Wipe the outer housing with a clean damp cloth. NEVER
immerse the housing in water or any other liquid. NEVER clean any parts in
a dishwasher.
3. Make sure the gasket is seated properly inside the lid. To ensure the
correct fitting, fill the removable cooking pot with two-thirds water (Note:
use the 3 cup mark on the inside of the cooking pot); and run the unit for 15
minutes using DIY Function.
4. Release the pressure by turning the pressure regulator knob to EXHAUST.
The floating valve will drop.
5. Let the appliance cool to room temperature and then empty and clean.
How to Operate Using Pressure Setting
Before using the pressure cooker each time, check to be sure that the gasket
and the pressure regulator valve are clean and positioned properly.
1. The unit comes with a detachable cord. Plug the cord into the unit first, then
into a wall outlet.
The unit will beep and the display will show “0.00”
2. Open the lid, holding the handle and turning it in anti-clockwise direction
(to the right) until the lid will not move any further, then remove the lid
vertically.
3. Remove the cooking pot and place food into the pot according to the recipe
or cooking chart.
4. Position the pot into the appliance and place the lid onto the Pressure
Cooker and turn it clockwise (to the left) until the lid is locked.
5. Turn the pressure regulator knob on the top of the lid to AIRTIGHT.
6. Set the cooking function based upon the recipe or desired food setting.
7. Press the “Start” button to begin cooking.
8. When cooking is finished, the unit will beep 3 times. Let the pressure drop
on its own (called natural release) or turn the regulator knob to EXHAUST
(called quick release) until the pressure is reduced.
CAUTION: When turning the knob to release pressure, hot steam/liquid will
be ejected.
WARNING: Do not hold the pressure regulator knob. Hot steam/liquid will be
ejected. Keep hands and face away from steam vents, use pot holders when
removing the inner pot or touching any hot items, and never force the lid open.
The lid will only open once the pressure is released. Remove the lid by lifting it
away from you to avoid being burned by the steam.
Warm Function
This function reheats or keeps cooked food warm.
1. Follow instructions for Pressure Cooking (Steps 1-2only).
2. Place cooked food in removable cooking pot.
3. Place lid on pressure cooker.
4. Turn the pressure regulator knob to AIRTIGHT.
5. The “Warm/Cancel” indicator light will be lit and the display will read “0.00”.
Press “Start.” You can cancel this function at any time by pressing the
“Warm/Cancel” button.
Beef (Hard Meat) Function
Use this setting for pieces of beef. It is preprogrammed for High
Pressure, 6 minutes. This function is adjustable for different types and sizes of
beef up to 35 minutes.
1. Follow instructions for Pressure Cooking.
2. Lock the lid in place and turn the regulator knob to AIRTIGHT.
3. Press the “Beef” button. The display will show “0.06” for 6 minutes of
cooking time. This is the default setting. (You can adjust the default setting
by pressing the “Beef” button again until the desired time is reached up to
35minutes).
4. Press “Start” button to begin. The unit will begin to heat and come up to
pressure. When the pressure level is reached, the timer will begin to count
down.
5. When the cooking is finished, the unit will beep 3 times and the display will
turn off. This indicates the desired cooking process is complete.
6. Let the pressure drop on its own (natural release) or turn the pressure knob
to EXHAUST (called quick release) until the pressure is totally reduced
down.
Caution: Hot steam or liquid will be ejected if quick release is used.
NOTE: Press the “Warm/Cancel” button when cooking time is complete, or to
cancel and reset. Otherwise, the pressure cooker will automatically switch to
warm. Unless “Warm/Cancel” button is pressed and indicator light goes off,
the unit will keep food warm.
P/5 P/6
NOTE: Press the “Warm/Cancel” button when cooking time is complete, or to
cancel and reset. Otherwise, the pressure cooker will automatically switch to
warm. Unless “Warm/Cancel” button is pressed and indicator light goes off,
the unit will keep food warm.
Page 5

www.vitesse.ru
Soup Function
Use this setting for soup. It is preprogrammed for High Pressure, 5 minutes.
This function is adjustable for different types and quantities of soup up to 35
minutes.
1. Follow instructions for Pressure Cooking.
2. Lock the lid in place and turn the regulator knob to AIRTIGHT.
3. Press the “Soup” button. The display will show “0.05” for 5 minutes of
cooking time. This is the default setting. (You can adjust the default setting
by pressing the “Soup” button again until the desired time is reached up to
35 minutes)
4. Press “Start” button to begin. The unit will begin to heat and come up to
pressure. When the pressure level is reached, the timer will begin to count
down.
5. When the cooking is finished, the unit will beep 3 times and the display will
turn off. This indicates the desired cooking process is complete.
6. Let the pressure drop on its own (natural release) or turn the pressure knob
to EXHAUST (called quick release) until the pressure is totally reduced
down.
Caution: Hot steam or liquid will be ejected if quick release is used.
NOTE: Press the “Warm/Cancel” button when cooking time is complete, or to
cancel and reset. Otherwise, the pressure cooker will automatically switch to
warm. Unless “Warm/Cancel” button is pressed and indicator light goes off,
the unit will keep food warm.
Chicken Function
Use this setting for pieces of chicken. It is preprogrammed for High Pressure,
5 minutes. This function is adjustable for different types and sizes of chicken
up to 30 minutes.
1. Follow instructions for Pressure Cooking.
2. Lock the lid in place and turn the regulator knob to AIRTIGHT.
3. Press the “Chicken” button. The display will show “0.05” for 5 minutes of
cooking time. This is the default setting. (You can adjust the default setting
by pressing the “” button again until the desired time is reached up to 30
minutes)
4. Press “Start” button to begin. The unit will begin to heat and come up to
pressure. When the pressure level is reached, the timer will begin to count
down.
5. When the cooking is finished, the unit will beep 3 times and the display will
turn off. This indicates the desired cooking process is complete.
6. Let the pressure drop on its own (natural release) or turn the pressure knob
to EXHAUST (called quick release) until the pressure is totally reduced
down.
Caution: Hot steam or liquid will be ejected if quick release is used.
NOTE: Press the “Warm/Cancel” button when cooking time is complete, or to
cancel and reset. Otherwise, the pressure cooker will automatically switch to
warm. Unless “Warm/Cancel” button is pressed and indicator light goes off,
the unit will keep food warm.
Vegetable Function
Use this setting for vegetables. It is preprogrammed for High Pressure, 1
minute. This function is adjustable for different types and sizes of vegetables
up to 20 minutes.
1. Follow instructions on page 4 for Pressure Cooking.
2. Lock the lid in place and turn the regulator knob to AIRTIGHT.
3. Press the “Vegetable” button. The display will show “0.01” for 1 minutes of
cooking time. This is the default setting. (You can adjust the default setting
by pressing the “Vegetable” button again until the desired time is reached
up to 20 minutes)
4. Press “Start” button to begin. The unit will begin to heat and come up to
pressure. When the pressure level is reached, the timer will begin to count
down.
5. When the cooking is finished, the unit will beep 3 times and the display will
turn off. This indicates the desired cooking process is complete.
6. Let the pressure drop on its own (natural release) or turn the pressure knob
to EXHAUST (called quick release) until the pressure is totally reduced
down.
Caution: Hot steam or liquid will be ejected if quick release is used.
NOTE: Press the “Warm/Cancel” button when cooking time is complete, or to
cancel and reset. Otherwise, the pressure cooker will automatically switch to
warm. Unless “Warm/Cancel” button is pressed and indicator light goes off,
the unit will keep food warm.
Rice Function
Use this setting for rice. It is preprogrammed for High Pressure, 4 minutes.
This function is adjustable for different types and quantities of rice up to 20
minutes.
1. Follow instructions for Pressure Cooking.
2. Lock the lid in place and turn the regulator knob to AIRTIGHT.
3. Press the “Rice” button. The display will show “0.04” for 4 minutes of
cooking time. This is the default setting. (You can adjust the default setting
by pressing the “Rice” button again until the desired time is reached up to
20 minutes)
P/7 P/8
Page 6

www.vitesse.ru
4. Press “Start” button to begin. The unit will begin to heat and come up to
pressure. When the pressure level is reached, the timer will begin to count
down.
5. When the cooking is finished, the unit will beep 3 times and the display will
turn off. This indicates the desired cooking process is complete.
6. Let the pressure drop on its own (natural release) or turn the pressure knob
to EXHAUST (called quick release) until the pressure is totally reduced
down.
Caution: Hot steam or liquid will be ejected if quick release is used.
NOTE: Press the “Warm/Cancel” button when cooking time is complete, or to
cancel and reset. Otherwise, the pressure cooker will automatically switch to
warm. Unless “Warm/Cancel” button is pressed and indicator light goes off,
the unit will keep food warm.
DIY (Do-It-Yourself) Function
Use this setting to program the cooking time from 1 to 99 minutes.
1. Follow instructions for Pressure Cooking.
2. Lock the lid in place and turn the regulator knob to AIRTIGHT.
3. Press the “DIY” button. The display will show “0.00” You can program the
time by pressing the “DIY” button until the desired time is reached. (The
maximum time is 99 minutes.)
4. Press “Start” button to begin. The unit will begin to heat and come up to
pressure. When the pressure level is reached, the timer will begin to count
down.
5. When the cooking is finished, the unit will beep 3 times and the display will
turn off. This indicates the desired cooking process is complete.
6. Let the pressure drop on its own (natural release) or turn the pressure knob
to EXHAUST (called quick release) until the pressure is totally reduced
down.
Caution: Hot steam or liquid will be ejected if quick release is used.
NOTE: Press the “Warm/Cancel” button when cooking time is complete, or to
cancel and reset. Otherwise, the pressure cooker will automatically switch to
warm. Unless “Warm/Cancel” button is pressed and indicator light goes off,
the unit will keep food warm.
Preset Function
This setting allows you to begin cooking food up to 9 hours later in 1 hour
increments. You can use the Preset function with the other functions - Warm,
Beef, Soup, Chicken, Vegetable, Rice and DIY (Do-It-Yourself).
CAUTION: Perishable foods such as meat and poultry products, fish, cheese,
and dairy products cannot be left out at room temperature for more than 2
hours. (No longer than 1 hour if the room temperature is above 90 °F.) When
cooking these foods, do not set the Preset function for more than 12 hours.
1. Follow instructions for Pressure Cooking.
2. Lock the lid in place and turn the regulator knob to AIRTIGHT.
3. Press the “Preset” button. The display will show “1.00” You can increase
the time by pressing the “Preset” button again until you reach the desired
time. (The maximum time is 9 hours.)
4. Next, press the desired cooking function button: Warm, Beef, Soup,
Chicken, Vegetable, Rice or DIY (Do-It-Yourself).
5. The display will show the default setting for that particular function. This
time can be changed by pressing the function button again until the desired
time is reached.
6. Next, press “Start” button to begin. Once the Preset time has elapsed, the
unit will begin to heat and come up to pressure.
When the pressure level is reached, the timer will begin to count down.
7. When the cooking is finished, the unit will beep 3 times and the display will
turn off. This indicates the desired cooking process is complete.
8. Let the pressure drop on its own (natural release) or turn the pressure knob
to EXHAUST (called quick release) until the pressure is totally reduced
down.
Caution: Hot steam or liquid will be ejected if quick release is used.
NOTE: Press the “Warm/Cancel” button when cooking time is complete, or to
cancel and reset. Otherwise, the pressure cooker will automatically switch to
warm. Unless “Warm/Cancel” button is pressed and indicator light goes off,
the unit will keep food warm.
Cleaning/Maintenance
Do not wash any parts of the pressure cooker in the dishwasher.
Always wash the pressure cooker thoroughly after every use, or if it has not
been used for an extended period of time.
1. Unplug and let the unit cool before cleaning.
2. Wash the removable cooking pot with warm soapy water. Rinse and dry
thoroughly.
3. Wipe the outer housing with a clean damp cloth. Do not submerge in water.
4. Turn the lid upside down, grasp the gasket on either side and pull up.
Replace the pressure regulator knob by placing it back onto the metal
fitting and rotating the knob until it drops into place. Clean the rubber
gasket in warm soapy water. Rinse and dry thoroughly. Replace the gasket
by pushing it down inside the edge of the lid. Make sure the groove in the
center of the gasket is positioned around the metal ring on the inside edge
of the lid. Note: If the gasket is not positioned properly, the unit will not
work.
NOTE: The gasket must always be properly positioned on the underside of
the lid. Check periodically to make sure that it is clean, flexible, and not
cracked or torn.
P/9 P/10
Page 7

www.vitesse.ru
5. If the gasket is damaged, do not use the appliance and contact the
Customer Service department.
6. To clean the pressure regulator filter, turn the lid upside down, grasp the
metal filter, located in the center of the lid and pull up. Clean the filter with
Уважаемые покупатели! Вы приняли блестящее решение!
Торгов ая марка ViT E SSE пред л агает Вам ко ллекци ю
высококачественных приборов для несомненно роскошного и здорового
образа жизни.
warm soapy water using a small brush to remove any food particles.
Replace the filter by positioning it back onto the metal clips, and snapping it
РУКОВОДСТВО ПО ЭКСПЛУАТАЦИИ
back in place.
7. In order to maintain good performance of your pressure cooker, the bottom
of the removable cooking pot, in the area of the sensor pad, must be
cleaned after each use. Wipe with a soft damp cloth and be sure to dry
thoroughly.
Перед первым использованием прибора внимательно прочитайте
руководство по эксплуатации. Сохраните руководство для дальнейших
консультаций.
МЕРЫ БЕЗОПАСНОСТИ И ПРЕДОСТОРОЖНОСТИ
8. Never use abrasive cleaners or scouring pads to clean any of the parts.
Во врем я экспл у атаци и п рибор а всегд а придер живай тесь
Cleaning the Pressure Regular Knob
Check that the pressure regulator knob and the pressure safety valves are in
good working order before each use.
1. After the unit has cooled, remove the lid.
2. Press down and turn the pressure regulator knob counter clockwise past
the EXHAUST setting and carefully lift the knob up to remove.
3. Using a brush, check and remove any food or foreign particles that may be
lodged in the floating valve.
4. Replace the pressure regulator knob by lining the notches up to the inside
wall of the pressure regulator chamber in the lid and turn clockwise.
нижеперечисленных мер предосторожности:
1) Не позволяйте детям играть с устройством. Храните скороварку в месте,
не доступном для детей.
2) Не прикасайтесь к горячей поверхности скороварки, держите за ручки.
3) Использование деталей, не рекомендованных производителем, может
привести к поломкам.
4) Не используйте устройство, если шнур питания или штепсельная вилка
повреждены.
5) Следите за тем, чтобы шнур питания не касался горячих поверхностей
и не свисал с края стола.
6) Перед тем как отсоединить устройство от электросети, убедитесь, что
оно выключено.
SPECIFICATIONS
Power supply: 220-240V ~ 50Hz
Power: 860 Watts
7) Всегда отключайте устройство от электросети, прежде чем приступить к
его чистке или ремонту.
8) Не ставьте устройство рядом с кухонной плитой или нагревательными
приборами.
Environment friendly disposal
You can help protect the environment!
Please remember to respect the local regulations:
hand in the non-working electrical equipments
to an appropriate waste disposal center.
9) Не н ак ры вай те ус тр ой с тв о и не ст ав ьт е ег о ря д ом с
легковоспламеняющимися предметами, близко к шторам, стенам и т. п.
10) Используйте устройство только в хорошо вентилируемых
помещениях.
11) Не погружайте шнур питания, штепсельную вилку и саму скороварку в
воду или другие жидкости.
12) Если в работе устройства возникли неполадки, оно было каким-либо
образом повреждено или опущено в воду, не используйте его и
обратитесь в сервисный центр!
P/11 P/12
Page 8

www.vitesse.ru
13) Будьте осторожны с ручкой регулятора давления, не подходите
слишком близко во время выпуска пара.
14) Будьте внимательны, снимая крышку после окончания приготовления.
Выход пара из скороварки может стать причиной серьёзных ожогов.
15) Не передвигайте скороварку во время приготовления.
16) Перед тем как приступить к приготовлению, убедитесь, что внутренняя
ёмкость скороварки установлена.
17) Не накрывайте клапаны давления, это может привести к взрыву.
18) Не закладывайте и не доставайте из скороварки продукты, если она
подключена к электросети.
19) Используйте для приготовления только съёмную внутреннюю ёмкость
идущую в комплекте с прибором.
20) Не подключайте скороварку к удлинителю. Если же удлинитель всё-таки
используется, убедитесь, что он соответствует техническим
характеристикам устройства.
21) Скороварка предназначена исключительно для домашнего
использования! Н е используйте скороварку не по назначению.
ВНИМАНИЕ: Не применяйте скороварку для жарки во фритюре или жарки
под давлением. Это может стать причиной возгорания.
22) Будьте аккуратны при перемещении скороварки, если в ней находится
горячая еда или жидкость.
23) Осм отр и ремонт устройства должен производить толь ко
квалифицированный специалист.
24) Устройство имеет поляризованную вилку переменного тока, для
которой подходит поляризованная розетка. Вилку можно вставить в
розетку только одной стороной в качестве меры предосторожности.
Если вилка не входит в розетку, переверните её. Если проблема не была
решена, обратитесь к квалифицированному электрику.
25) Это устройство не предназначено для использования детьми и людьми
с ограниченными физическими, психическими и умственными
способностями, а также людьми, не обладающими необходимым
опытом и умениями, если только они не были ознакомлены с правилами
эксплуатации прибора лицами, ответственными за их безопасность.
26) Не используйте съёмную чашу для хранения продуктов!
ВНИМАНИЕ: Не сл ед ует ост а вл ять в ёмк ост и с ко ров арк и
скоропортящиеся продукты (мясо, рыбу, молочные продукты) при
комнатной температуре более чем на 2 часа. При температуре выше
30°С оставляйте продукты не более чем на 1 час.
БЕЗОПАСНОСТЬ
Благодаря тщательно подобранным современным технологиям
скороварка ViTESSE безопасна для эксплуатации и приготовления в ней
пищи. Скороварка имеет 8 уровней безопасности:
®
1. Поплавковый клапан защиты устройства:
Давление отсутствует, если крышка не закрыта.
2. Безопасность открытия и закрытия крышки:
Крышка не может быть открыта в случае, если давление
воздуха не освобождено.
3. Защита от перегрева:
Когда температура внутри кастрюли возрастает до
предела, питание автоматически отключится, без
сброса давления.
4. Функция безопасности предельной температуры:
Если используется пустая кастрюля, либо давление
превышает допустимый уровень, нагрев прекращается
автоматически. Как только температура снизится до
безопасного уровня, скороварка вновь включится.
5. Устройство анти-блокировки:
Не допускает блокировки выпускного клапана и
обеспечивает плавный выход воздуха.
P/13 P/14
Page 9

6. Контроль безопасности давления:
Если давление превышает допустимый уровень,
произойдет автоматическое отключение прибора.
7. Ограничение предельного уровня давления:
При отсутствии контроля над ограничением давления, и
при этом д а вление пр евышает максимал ьно
допустимый рабочий уровень, давление воздуха
ограничивается автоматически.
8. Сброс давления:
В то м сл уча е, есл и пр оиз о шел от к аз все х
вышеназванных систем и внутреннее давление
превышает максимально допустимый уровень,
внутренняя кастрюля автоматически опустится вниз, и
пар начнет выходить из-под края крышки.
www.vitesse.ru
СХЕМА ПРИБОРА
ПРИМЕЧАНИЕ: Прибор оснащен функцией «Быстрого сброса давления».
Для нагнетания давления во время приготовления поверните ручку в
позицию «ЗАКРЫТО». Поверните в позицию «ОТКРЫТО», чтобы сбросить
давление по окончании приготовления (см. наклейку на крышке).
P/15 P/16
Page 10

www.vitesse.ru
ПЛАВАЮЩИЙ КЛАПАН
РАЗБОРКА КОНДЕНСАЦИОННОГО КЛАПАНА
АКСЕССУАРЫ
Ложка Половник
Мерный стакан
Шнур питания
ПАНЕЛЬ УПРАВЛЕНИЯ
2 3 4
1
Рис
Рис
Нагрев
Рыба
Каша
Давление
Бобовые
Подогрев
Тушение
Курица/
Мясо
Суп
Суп
11 12
Подогрев/
Выпечка
8
Функция
7
13
1. Кнопка «РИС» - для включения режима риса.
2. Световой индикатор режима «НАГРЕВ».
3. Световой индикатор режима «ДАВЛЕНИЕ».
4. Световой индикатор режима «ПОДОГРЕВ».
5. Кнопка «СУП» - для включения режима суп.
6. Световой индикатор режима «РЫБА»
7. Световой индикатор режима «КАША»
8. Световой индикатор режима «БОБОВЫЕ»
9. Световой индикатор режима «ТУШЕНИЕ»
10. Световой индикатор режима «КУРИЦА/МЯСО»
11. Кнопка «ВЫПЕЧКА» - для включения режима выпечка.
12. Кнопка «ФУНКЦИЯ» - для выбора режимов
13. Кнопка «ПОДОГРЕВ / ОТМЕНА» - для отмены выбранных настроек
и включения/выключения функции «ПОДОГРЕВ».
Подогрев/
Отмена
Отмена
96 10
5
P/17 P/18
Page 11

www.vitesse.ru
ЭКСПЛУАТАЦИЯ ПРИБОРА
Электрическая скороварка ViTESSE - многофункциональный кухонный
прибор, который изменит Ваш взгляд на кухонную технику.
Благодаря современным технологиям приготовления пищи под давлением
скороварка ViTESSE позволит Вам готовить любимые блюда в несколько
®
раз быстрее! При этом Вы не только существенно снизите затраты
электроэнергии (по сравнению с обычной плитой), но и сохраните в
продуктах все витамины и питательные вещества. А блюда получаются
ароматными, полезными и необыкновенно вкусными.
ПЕРЕД ПЕРВЫМ ИСПОЛЬЗОВАНИЕМ
1. Распакуйте скороварку.
2. Промойте внутреннюю съемную емкость в мыльной воде. Затем
протрите её насухо. Протрите корпус скороварки влажной губкой.
Никогда не погружайте скороварку в воду или другие жидкости. Никогда
не мойте детали устройства в посудомоечной машине!
3. Убедитесь, что уплотнительное кольцо размещено под крышкой.
ПЕРЕД КАЖДЫМ ИСПОЛЬЗОВАНИЕМ
Перед каждым использованием скороварки проверяйте:
1. Правильно ли установлено уплотнительное кольцо под крышкой.
2. Регулятор давления должен стоять в позиции «ЗАКРЫТО» (см. наклейку
на крышке)
3. Следите, чтобы регулятор давления был всегда чистым, при
необходимости прочистите его (см. пункт «Чистка и уход»).
РЕКОМЕНДАЦИИ ПО КОЛИЧЕСТВУ ПРОДУКТОВ
1. Не заполняйте скороварку продуктами более, чем наполовину.
Жидкостями- более чем на 2/3.
2. Для приготовления пищи под давлением необходимо использовать - не
менее 1 стакана жидкости.
3. Не рекомендуется готовить яблочное пюре, клюкву, овсяные хлопья и
макаронные изделия под давлением. Эти продукты, как правило, пенятся,
разбрызгиваются и могут блокировать плавающий клапан.
®
ПРИГОТОВЛЕНИЕ БЛЮД В ПРИБОРЕ
1. Подключите шнур к устройству, а затем вставьте вилку в розетку.
После подключения к сети электропитания начнут мигать все
световые индикаторы.
2. Откройте крышку, держась за ручку и поворачивая её против часовой
стрелки (вправо) до упора. Затем снимите крышку.
3. Достаньте ёмкость для приготовления и загрузите в неё ингредиенты в
соответствии с рецептом.
4. Установите ёмкость для приготовления в устройство, накройте крышкой
и поверните её по часовой стрелке (влево), пока не сработает
блокировка.
ПРИМЕЧАНИЕ: Приготовление пищи возможно также и с открытой
крышкой (см . книгу рецептов), при этом давление нагнетаться не будет.
5. Установите регулятор давления на крышке в позицию «ЗАКРЫТО».
6. Выберите подходящий для данного блюда режим приготовления.
ПРИМЕЧАНИЕ: Для отмены выбранной программы или перезапуска
приготовления нажмите кнопку «ПОДОГРЕВ/ОТМЕНА» один раз.
7. Через три секунды загорится световой индикатор «НАГРЕВ» (идет
процесс нагрева). По окончании процесса нагрева загорится (мигает)
индикатор «ДАВЛЕНИЕ». Скороварка начнет процесс приготовления.
8. После окончания приготовления скороварка подаст звуковой сигнал и
перейдет в режим «ПОДОГРЕВ». Для отмены режима «ПОДОГРЕВ»
нажмите кнопку «ПОДОГРЕВ/ОТМЕНА» один раз.
П Р ИМ Е ЧА Н ИЕ : д а в л е н и е с ни ж а е т с я
автоматически (естественный сброс давления).
Для быстрого снижения давления поверните ручку
регулятора давления в позицию «ОТКРЫТО» (см.
наклейку на крышке). При этом возможен выход
горячего пара или жидкости.
ВНИМАНИЕ: Не держитесь за ручку регулятора давления. Будьте
осторожны во время выпуска горячего пара или жидкости. Старайтесь не
находиться близко к паровым клапанам. Перемещая внутреннюю ёмкость
для приготовления или касаясь горячих деталей, пользуйтесь прихватками.
Никогда не открывайте крышку с применением силы. Крышка открывается,
только когда давление сброшено. Поднимайте крышку таким образом,
чтобы не получить ожог от выходящего пара.
P/19 P/20
Page 12

www.vitesse.ru
РЕЖИМЫ ПРИГОТОВЛЕНИЯ
Скороварка ViTESSE снабжена 8 автоматическими режимами
®
приготовления. Внимательно отнеситесь к выбору подходящего режима.
Режим «РИС» предназначен для приготовления различных сортов риса
и пловов. Для включения данного режима приготовления нажмите кнопку
РИС. Обратите внимание: данный режим предназначен для
приготовления рассыпчатого сухого гарнира. Для приготовления вязкого
риса и каш выберите режим «КАША».
Режим «ВЫПЕЧКА» предназначен для приготовления различных
пирогов, запеканок, бисквитов, шарлоток и омлетов. Для включения
данного режима приготовления нажмите кнопку ВЫПЕЧКА.
Режим «СУП» идеально подходит для приготовления различных супов.
В скороварке ViTESSE быстро готовятся даже крупяные супы (например,
®
рассольник), требующие длительного приготовления на плите. Для
включения данного режима нажмите кнопку СУП на панели управления.
Режим «РЫБА» прекрасно подходит для приготовления нежного мяса
рыбы. В этом режиме Вы также можете приготовить различные
морепродукты и овощи. Для включение данного режима нажмите кнопку
ФУНКЦИЯ один раз, при этом загорится световой индикатор «РЫБА».
В режиме «КАША» Вы без труда приготовите различные молочные
каши, каши на воде. Для включения данного режима нажмите кнопку
ФУНКЦИЯ два раза, при этом загорится световой индикатор «КАША».
Обратите внимание: не рекомендуется использовать для приготовления
овсяные хлопья, а также каши быстрого приготовления.
Режим «БОБОВЫЕ» подходит для приготовления фасоли, гороха и
чечевицы. Для включения данного режима нажмите кнопку ФУНКЦИЯ три
раза, при этом загорится световой индикатор «БОБОВЫЕ». Обратите
внимание: перед приготовлением бобовые необходимо предварительно
замачивать, а затем готовить с достаточным количеством воды (на 1 стакан
исходного продукта необходимо 3-4 стакана воды, на 2 стакана - 5-6
стаканов воды). Во избежание блокировки плавающего клапана не
рекомендуем готовить более 2-2,5 стаканов сухого продукта, поскольку
бобовые имеют свойства пенится и увеличиваться при варке в объеме.
Точное количество воды и бобовых зависит от их вида и сорта.
Режим «КУРИЦА/МЯСО» подходит для приготовления различных блюд
из мяса. Для включения данного режима нажмите кнопку ФУНКЦИЯ пять
раз, при этом загорится световой индикатор «КУРИЦА/МЯСО».
ФУНКЦИЯ «ПОДОГРЕВ»
В этом режиме скороварка разогревает блюдо или сохраняет готовое
блюдо тёплым.
1. Подключите прибор к электросети и откройте крышку, как указано выше.
2. Достаньте ёмкость для приготовления и поместите в неё ингредиенты.
3. Установите ёмкость в скороварку.
4. Установите ручку регулятора давления в позицию «ЗАКРЫТО».
5. Нажмите кнопку «ПОДОГРЕВ/ОТМЕНА», при этом загорится
соответствующий световой индикатор. Вы можете в любое время
о т м е ни т ь вы по лн ен ие э т о й ф у н к ци и, н а жа в к н о п к у
«ПОДОГРЕВ/ОТМЕНА» повторно.
ЧИСТКА И УХОД
После каждого использования скороварки, или когда она долго не
использовалась, её необходимо чистить.
1. Отключите скороварку от электросети и дайте ей остыть.
2. Промойте съёмную ёмкость для приготовления в тёплой мыльной
воде. Протрите емкость насухо снаружи и внутри.
ВНИМАНИЕ: Не используйте абразивные моющие средства и
жёсткие щётки для чистки съёмной ёмкости.
3. Протрите корпус скороварки влажной губкой. Не погружайте её в воду.
4. Переверните крышку и снимите металлический ободок, потянув на
себя. Снимите уплотнительное кольцо. Прочистите уплотнительное
кольцо в теплой мыльной воде, а затем протрите насухо. Установите
уплотнительное кольцо обратно на металлический ободок.
Убедитесь, что оно установлено правильно (см. рисунок)
кольцо
Режим «ТУШЕНИЕ» предназначен для приготовления различных
тушеных мясных и овощных блюд. Для выбора режима нажмите кнопку
ФУНКЦИЯ четыре раза, при этом загорится световой индикатор
«ТУШЕНИЕ».
P/21 P/22
Уплотнительное кольцо
Ободок без кольца
Ободок с кольцом
Page 13

www.vitesse.ru
ПРИМЕЧАНИЕ: Если уплотнительное кольцо будет установлено
неправильно, скороварка не будет работать. Следите за тем, чтобы
уплотнительное кольцо всегда было чистым, гибким, без трещин и
надрывов. Если уплотнительное кольцо повреждено, не включайте
устройство. Обратитесь в сервисный центр.
5. Чтобы прочистить регулятор давления, снимите металлический
фильтр, расположенный в металлическом зажиме на ручке крышки.
Чистите фильтр в тёплой мыльной воде при помощи маленькой
щёточки. Установите фильтр обратно в металлические зажимы.
металлические
зажимы
Фильтр
ВНИМАНИЕ: Детали скороварки не предназначены для чистки в
посудомоечной машине.
РЕКОМЕНДАЦИИ ПО ИСПОЛЬЗОВАНИЮ СЪЕМНОЙ ЧАШИ
ТЕХНИЧЕСКИЕ ХАРАКТЕРИСТИКИ
Мощность: 860 Вт
Объем: 4 литра
Параметры питания: 220 - 240В ~ 50Гц
1. Для помешивания используйте только деревянную лопатку или
специальную пластмассовую ложку.
2. Не разрезайте блюдо внутри кастрюли.
3. Внутренняя чаша скороварки имеет антипригарное покрытие, поэтому
после нескольких дней эксплуатации на ней может появиться
коричневый налет.
4. Не наливайте в кастрюлю уксус, это может повредить антипригарное
покрытие.
5. Спустя некоторое время кастрюля может поменять цвет из-за того,
что контактирует с водой и моющими средствами - это нормальное
явление и скороварка может без опасений эксплуатироваться дальше.
6. Для увеличения срока эксплуатации - не рекомендуется мыть
съёмную ёмкость в посудомоечной машине.
P/23 P/24
Page 14

www.vitesse.ru
ДЛЯ ЗАМЕТОКДЛЯ ЗАМЕТОК
P/25 P/26
 Loading...