

Page 1
VT-TPTZ10HR-4N
VT-TPTZ18HR-4N
4.0 MegaPixel H.265 IP PTZ
Cameras w/IR LED Illumination
QUICK START GUIDE
VITEK
VITEK
FEATURES
• 1/3” 4.0 MegaPixel CMOS Sensor
• Up to 2592x1520 @ 30fps
• H.265/H.264/MJPEG Triple Streaming
• True Day/Night by IR Cut Filter
• Built-in 5mm to 50mm Lens offering 10x Optical Zoom
(VT-TPTZ10HR-4N) / Built-in 4.8mm to 84mm Lens offering 18x
Optical Zoom (VT-TPTZ18HR-4N)
• 6 Integrated IR LEDs with up to 165’ IR Range (VT-TPTZ10HR4N) / 10 Integrated IR LEDs with up to 500’ IR Range
(VT-TPTZ18HR-4N)
• DigitalNoise Reduction
• 220 Presets programmed with view direction, zoom, BLC, etc
• Max manual speed 480°/sec
• 360°continuous rotation
• 16:9 Video format
• Double layer metal body construction with IP66 Weather Resistance
• Includes Wall Mount Bracket & Power Supply
• ONVIF Compliant
• 12VDC Operation
• 3 Year Warranty
PLEASE NOTE:
Complete User Guide, Software, Tools, and Updates are
available online. Scan the QR Code or visit:
http://www.vitekcctv.com/Downloads
Page 2
Package Contents
1. IP IR Speed dome
2. Wall mount bracket
3. Power supply
4. Screws kits
5. User manual
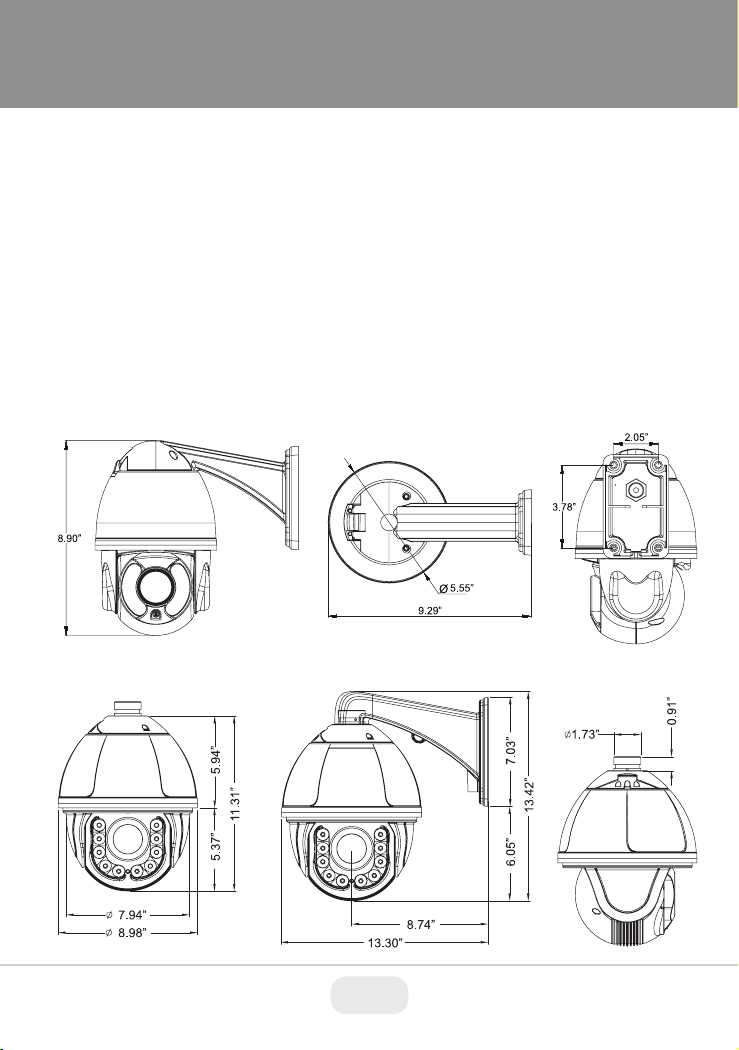
Dimensions
VT-TPTZ10HR-4N Dimensions:
VT-TPTZ18HR-4N Dimensions:
2 3
Page 3
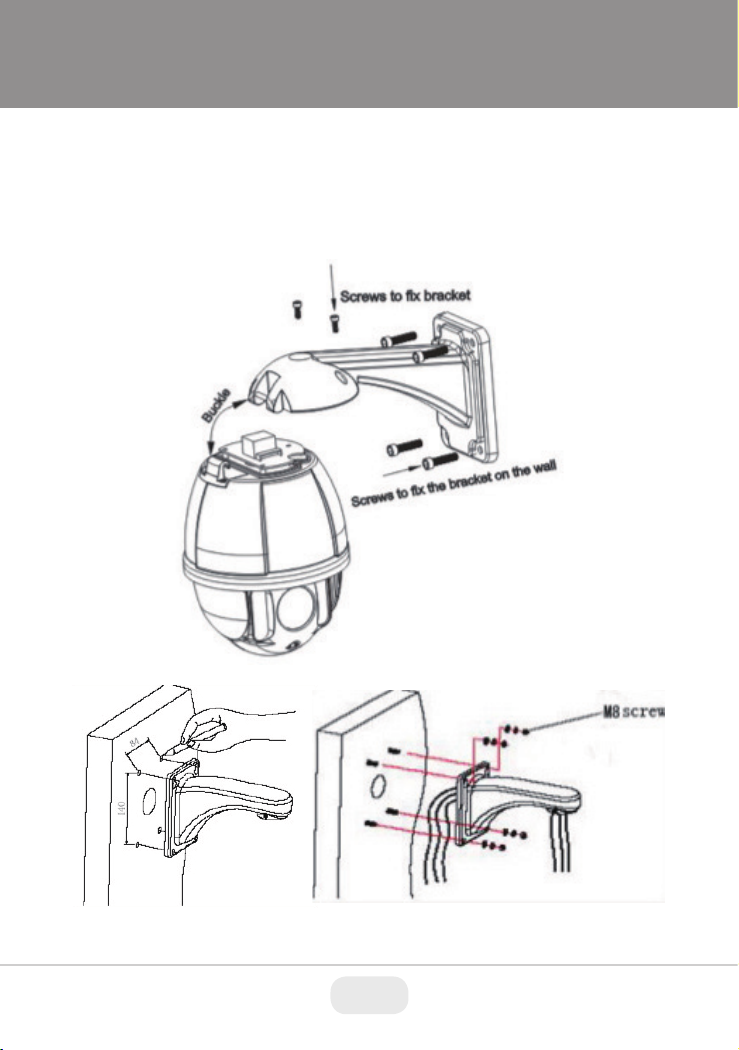
Wall Mount Installation
Wall mounted domes can be used in a hard wall structure whose
thickness should be enough to install expansion bolts in an indoor and
outdoor environment. The wall must bear at least 4 times the weight of
the dome.
Attach the wall bracket to the wall, then feed the cables through it.
3
Page 4

Setup & Configuration
1. With a computer running Windows 7 or above install IP Wizard
2. With computer connected to the same network that the IP PTZ is
connected too, run IP wizard.
3. After IP Wizard is opened click on Search
4. IP Wizard will find all Transcendent IP PTZ cameras on the network
4 5
Page 5

Setup & Configuration
6. Once camera is highlighted you can change the IP address or ports
by making changes and then clicking on “Modify”
7. Once changes are completed double click on the IP camera you want
to connect too. IE will open and direct you to the login screen of the
camera.
8. Default User name and Password are admin/admin
5
Page 6

Setup & Configuration
9. After logging into camera click on “Browse” for live view or “Settings”
for detailed programming
6 7
Page 7

Setup & Configuration
5. Once camera(‘s) are found highlight the camera that needs to be
changed
7
Page 8

Setup & Configuration
8
 Loading...