

Vitek VTD-M30, VTD-MV30 Installation Manual
FEATURES:
• Sony® 1/2.8” Progressive Scan CMOS Sensor
• Up to 30fps live view @ 2048 x 1536 (3.15 MegaPixel)
• MegaPixel IR Corrected Fixed 3.6mm & 2.8-12mm Motorized Varifocal Lens
Options with 1 click focus for easy Configuration
• Optional 35 Dynamic Infrared LEDs at 850nm enable viewing in total
darkness up to 120 feet
• XD-DNR (2D-DNR + 3D-DNR) Noise Reduction
• True Day/Night by ICR - Dual Filter Switch
• Triple Streaming (H.264/MJPEG) offering Extensive Integration Possibilities
• Real-time Lens Distortion Correction (LDC) for an optically correct picture
• Compliance with the latest Onvif Profile S
• On-board network security with IP address filtering
• Advanced OSD Features including Image Stabilization & Corridor Mode
• MicroSD memory card slot for Local recording supporting up to 128GB
MicroSDXC cards
• Ultra Versatile Design with Infinity Ball Mount for Any Viewing Angle
• Can be Flush or Surface mounted and Fits Perfectly in 4S (indoor domes) &
4-11 (vandal domes) Backboxes
• Outdoor Vandal Resistant Versions Feature Fully Gasket Sealed with an IP-68
Water tight NEMA Rating & Optional Extreme Cold (-60°F) Temperature Kits
• Optional Mounts Available
• Available in Ivory or Black
• 12VDC & PoE (Power over Ethernet) Operation
VTD-M30 / VTD-MV30
Virtuoso Series 3.15MP WDR IP
Mighty Dome Camera Series
INSTALLATION GUIDE
VITEK
VITEK
CAUTION: TO REDUCE THE RISK OF ELECTRIC SHOCK,
DO NOT REMOVE COVER (OR BACK).
NO USER SERVICEABLE PARTS INSIDE.
REFER SERVICING TO QUALIFIED SERVICE PERSONNEL.
To prevent fire or shock hazard, do not expose the unit to rain or moisture.
To prevent electric shocks and risk of fire hazards, do NOT use other than
specific power source.
Warning :
This equipment has been tested and found to comply with the limits for a Class
A digital device, pursuant to part 15 of the FCC Rules. These limits are designed
to provide reasonable protection against harmful interference when the equipment
is operated in a commercial environment. This equipment generates, uses, and
can radiate radio frequency energy and, if not installed and used in accordance with
the instruction manual, may cause harmful interference to radio communications.
Operation of this equipment in a residential area is likely to cause harmful
interference in which case the user will be required to correct the interference at
his own expense.
Caution :
Any changes or modifications in construction of this device which are not expressly
approved by the party responsible for compliance could void the user's authority
to operate the equipment.
Mains power quality should be that of a typical commercial environment. If the user
of the model requires continued operation during power mains interruptions, it is
recommended that the model be powered from an uninterruptible power supply
(UPS) or a battery.
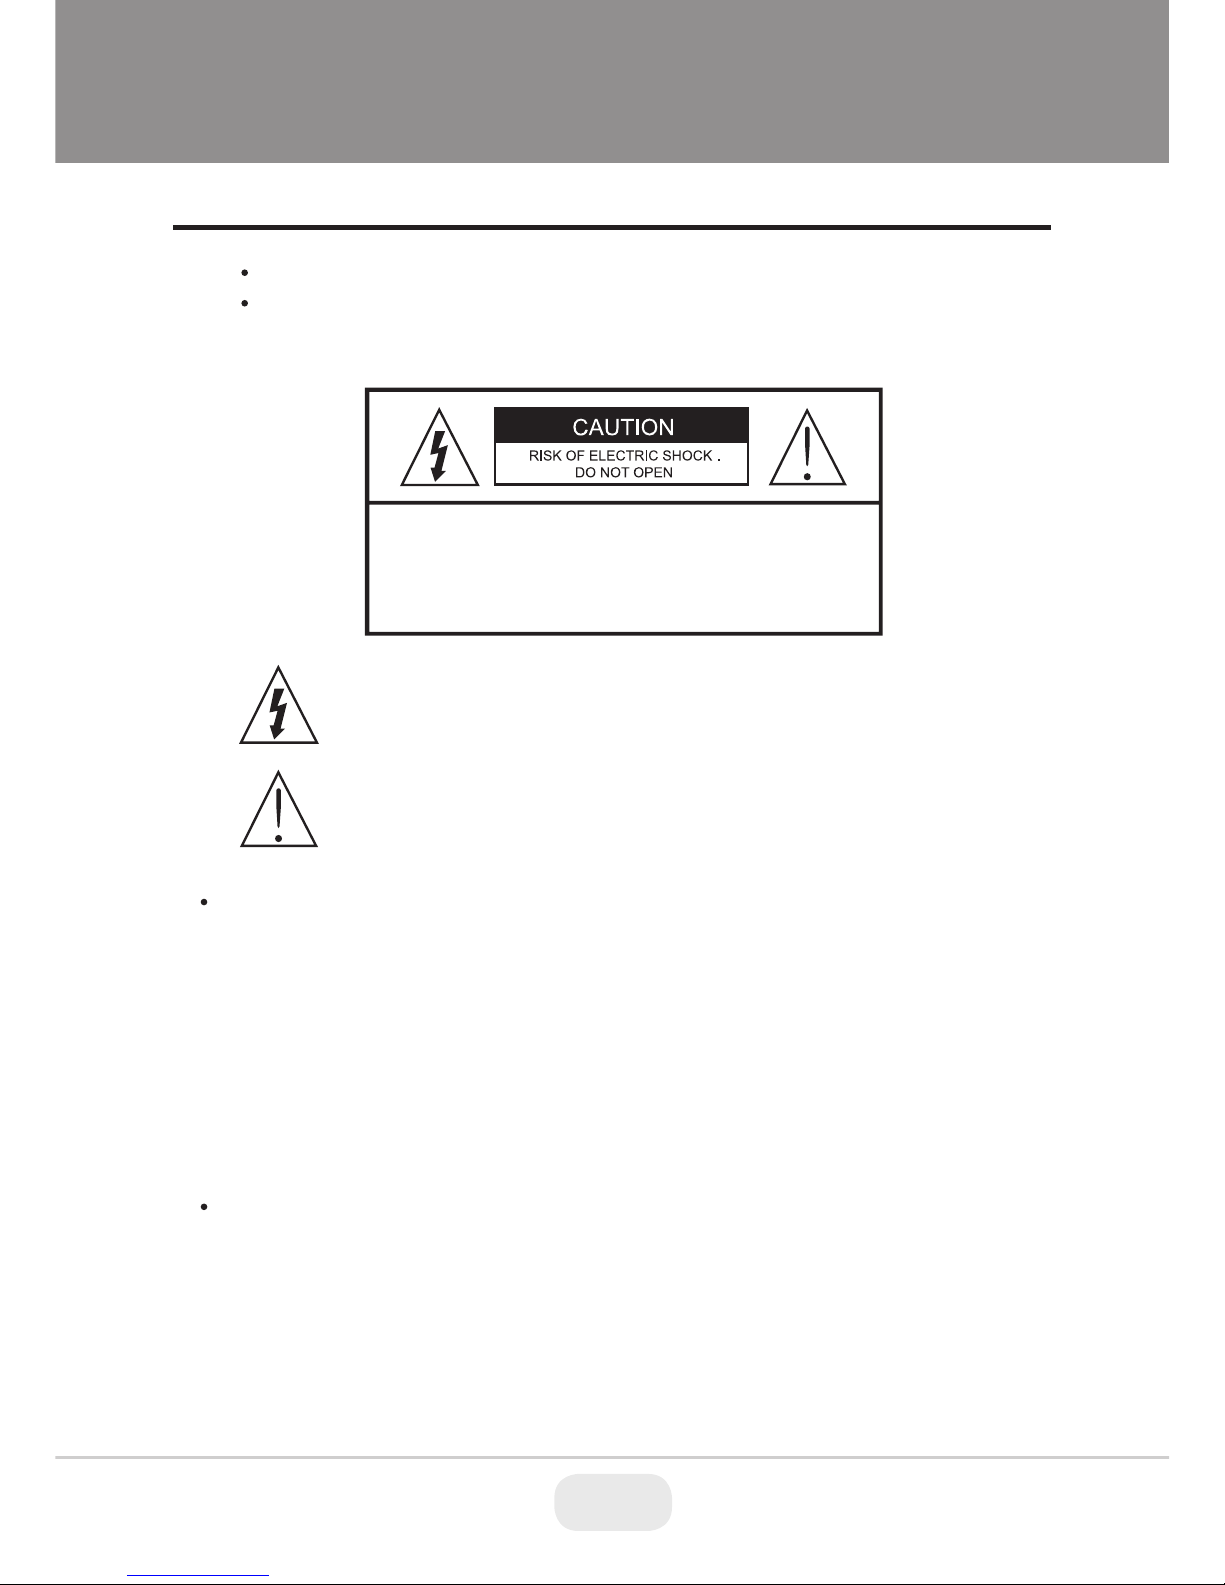
The symbol is intended to alert the user to the presence of important
operating and maintenance(servicing) instructions in the literature
accompanying the unit.
The symbol is intended to alert the user to the presence of uninsulated
"dangerous voltage" within the product's enclosure that may be of
sufficient magnitude to constitute a risk of electric shock to persons.
Safety Precaution
2 3

Package Contents
Torx Wrench (Outdoor Vandal Versions Only)
Type #: T20
Length: 63mm / Diameter: 4mm
Qty: 1
Phillips head Screws (Outdoor Vandal Versions Only)
For attaching the dome cover to the flush housing.
Type #: Phillips head M4x10
Length: 10mm / Diameter: 4mm
Qty: 4
Self Tapping Screws
For attaching the surface mount housing or the the flush mount base to a
solid surface.
Type #: Phillips St4x30
Length: 30mm / Diameter: 4mm
Qty:4
Self Tapping Screws - (Indoor Version Only)
For attaching the dome cover to the flush housing.
Type #: Phillips St4x12
Length: 12mm / Diameter: 4mm
Qty: 4
Plastic Anchors
If necessary, use the to help secure the self tapping screws.
Length: 30mm / Diameter: 7mm
Qty: 4
Mounting Template
Qty: 1
Mounting Template
Surface Mount
109
.
0
70.0
RJ45 Coupler
Qty: 1
Installation CD
Qty: 1
3
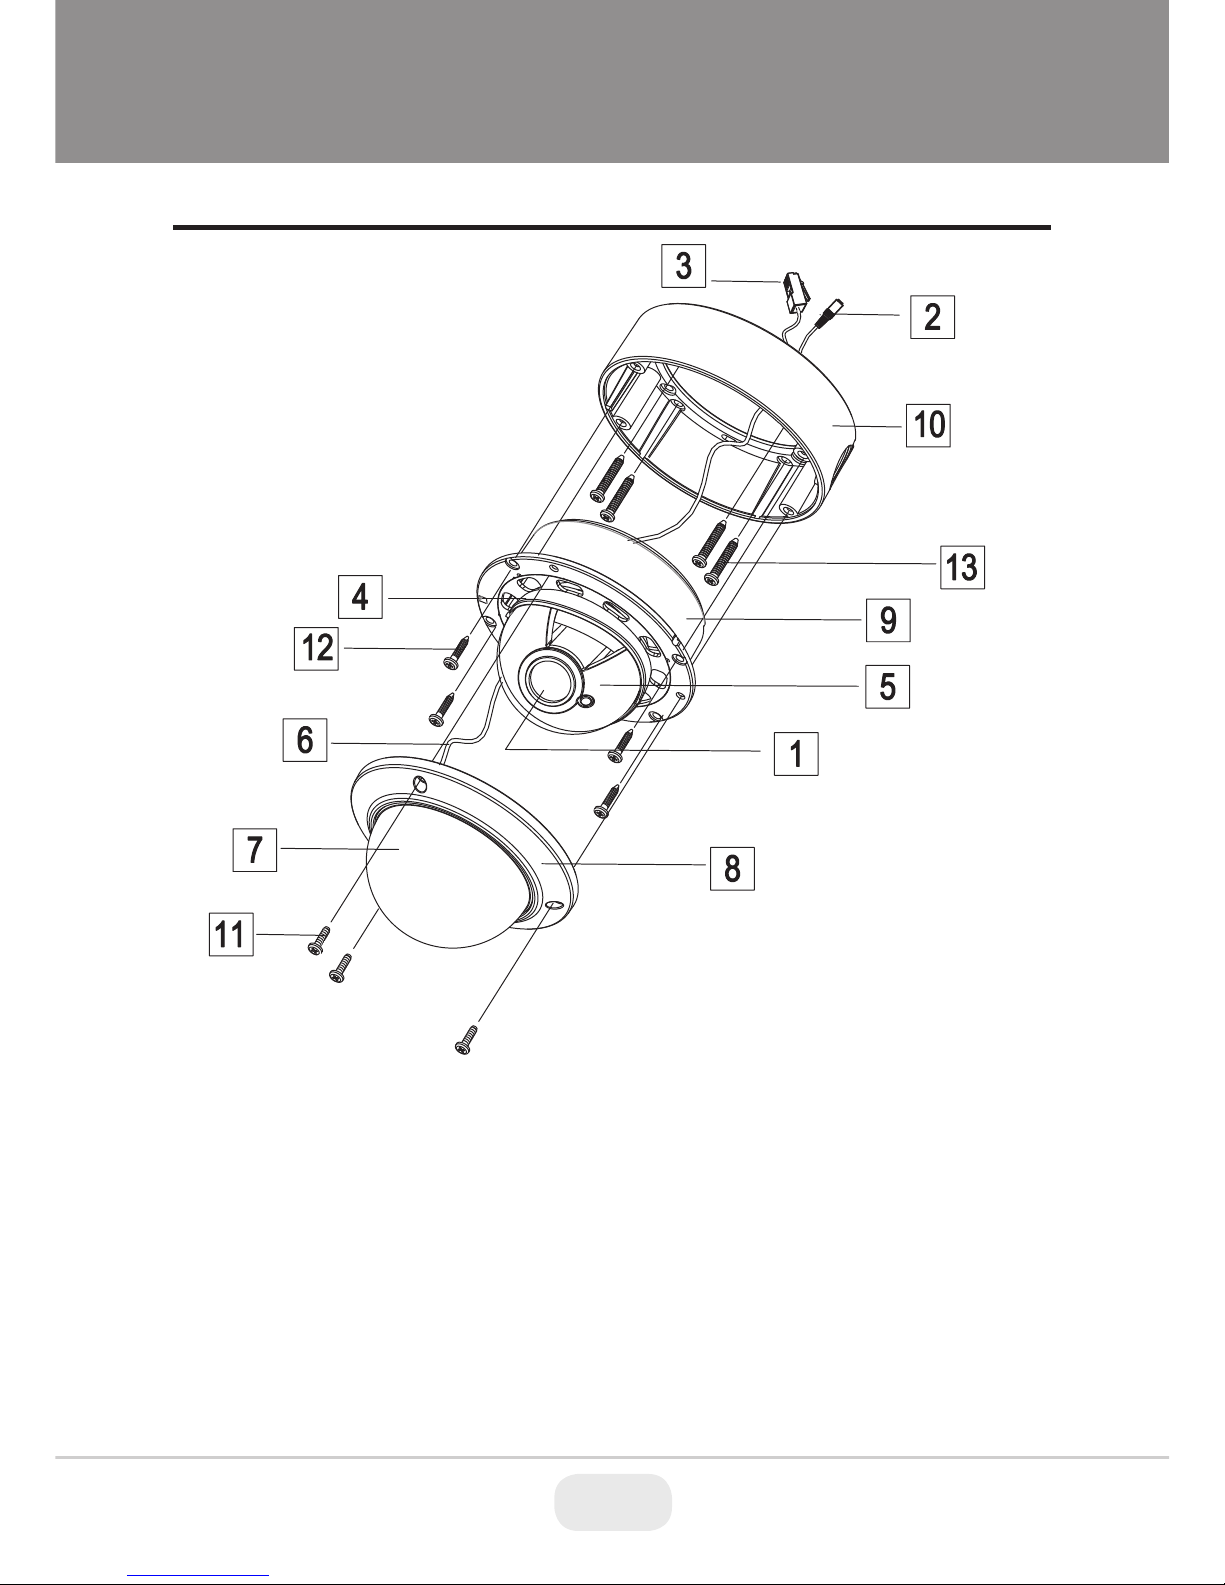
Part Names
1) Lens
2) 12VDC Power Input Connector
(Not for use with PoE)
3) RJ45 Ethernet Connector
4) Camera Holder
5) Ball with the Camera Assembly
6) Safety Wire
7) Bubble
8) Dome Cover Ring
9) Flush Mount Base
10) Surface Mount Base
11) Assembly Screws - Torx M4x9
(Vandalproof)
12) Assembly Screws - Phillips
ST4x12 (Indoor) / Phillips M4x10
(Outdoor Vandalproof IR)
13) Mounting Screws - Phillips ST4x30
4 5
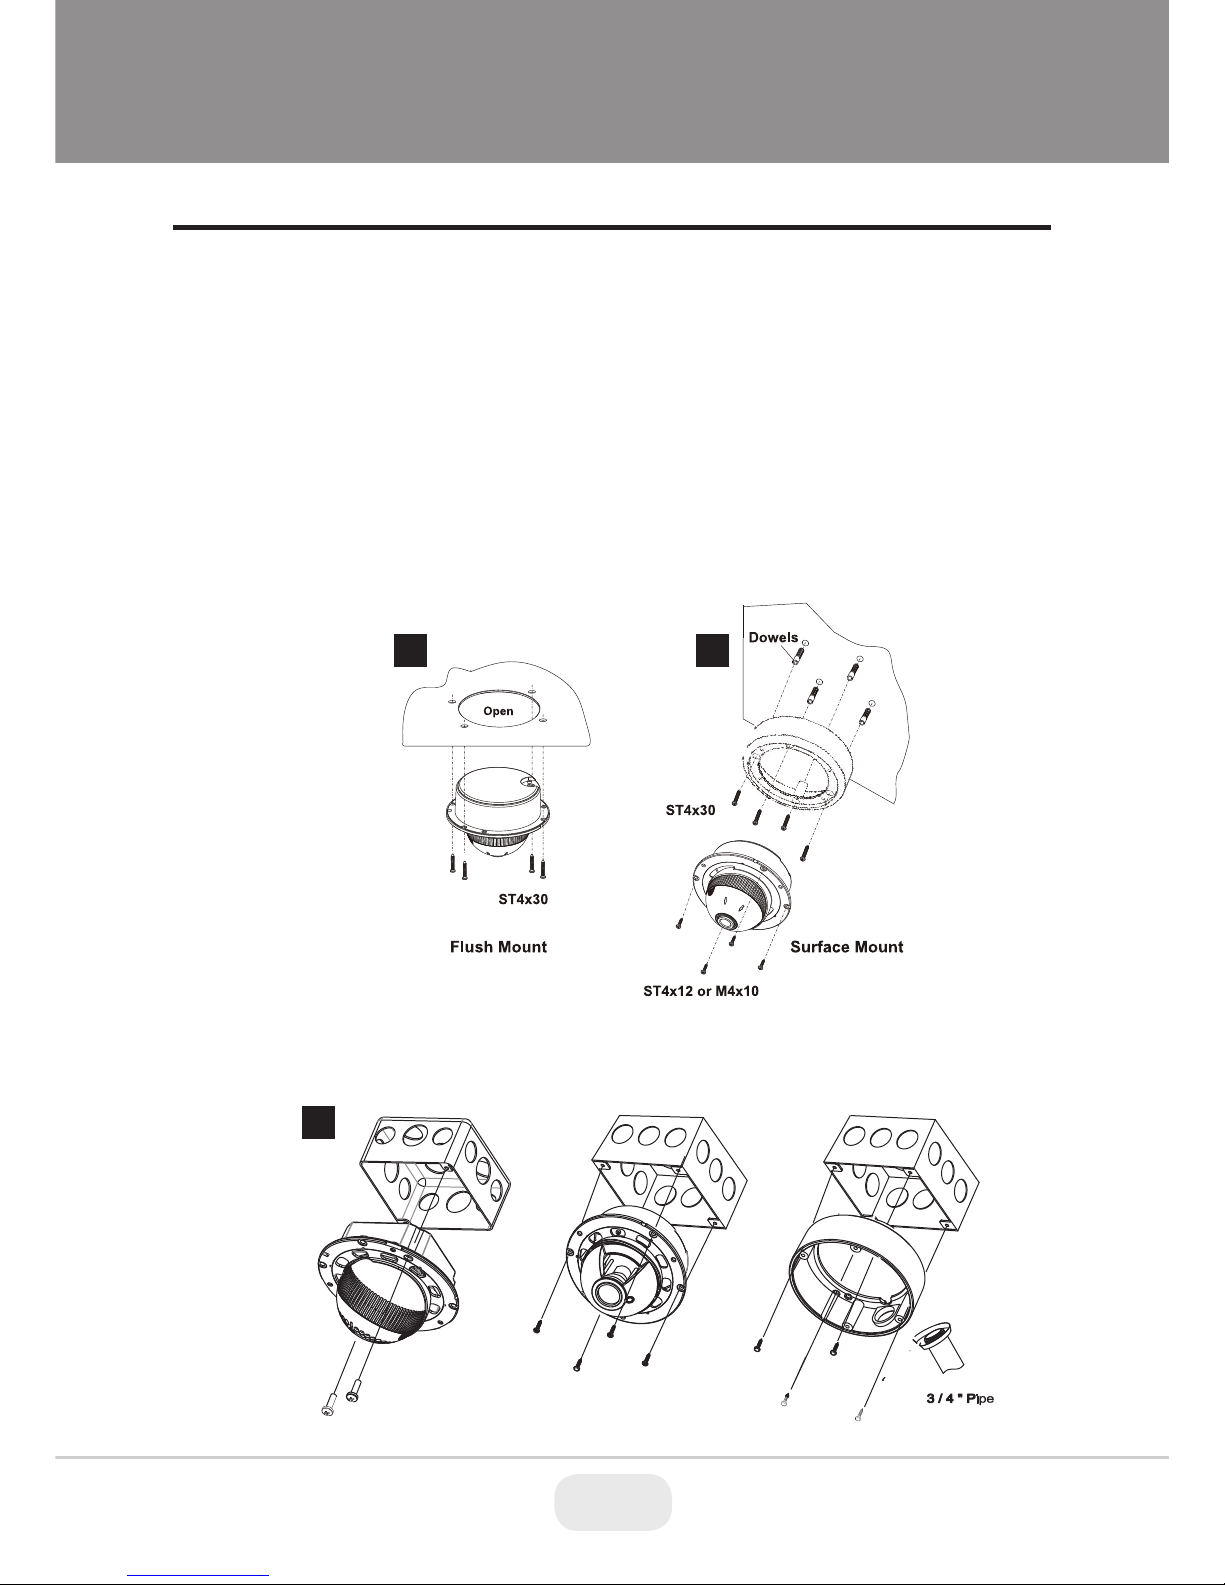
Installation Instructions
1) Remove Dome Cover
Use the provided Torx wrench to unscrew the vandal proof screws and remove the
dome cover.
A) Flush Mount Installation:
Using four St4x30 screws, attach the flush mount base to a sturdy surface.
Optional flush mount decorator plate. Model: VT-MD-FMP
B) Surface Mount Installation:
Drill pilot holes at the mounting location using the provided mounting template.
Using four St4x30 screws, mount the surface mount housing to a sturdy
surface. Using four ST4x12 (Indoor) screws or M4x10 (Vandal-proof) screws,
attach the flush mount base to the surface mount housing.
Mighty Domes can easily be flush or surface mounted to an electrical junction
box (4S J-Box) using the pre-drilled mounting holes on either the surface mount
housing or the the flush mount base.
C) Junction Box Installation:
2) Choose Installation Method:
A B
C
5
 Loading...