

Vitek VTD-13FN, VTD-13VN, VTD-20VN User Manual
VITEK
ENVI Series
ENVI Series 1.3 & 2.o MegaPixel
Indoor Dome Camera Series
• 1/3” 1.3 & 2.0 Megapixel Progressive Scan CMOS image sensors
• Up to 30fps live view @ 1920x1080p (2.0 MegaPixel Models) / 1280x1024 (1.3
MegaPixel Models)
• 3.8mm Fixed / 2.8-10mm Varifocal Auto Iris Lens options
• 2D-DNR Noise Reduction
• 16:9 (2.0 MegaPixel Models) / 4:3 (1.3 MegaPixel Models) Video format
• Secondary video output for installation & maintenance
• H.264/MJPEG Dual Streaming
• Minimal Latency with up to 16 simultaneous user connections
• Onvif Compliance
• EDGE recording with onboard MicroSD memory card slot (supports up to 32GB
of local storage)
• Optional Wall Mount available
• 12VDC Operation / Optional PoE (Power over Ethernet)
Specifications & installation procedure subject to change without notice.
Visit www.vitekcctv.com for the most current information available.

ENVI Series: VTD-13FN / VTD-13VN / VTD-20VN
1
Table of Contents
1. Box Contents............................................................................................................................ 6
2. Included Accessories ................................................................................................................ 6
3. Available Accessories ................................................................................................................ 6
3.1. Wall Mount (VT-AP/WMT) ............................................................................................ 6
4. VTD-13FN Installation ............................................................................................................... 7
4.1. Connections ................................................................................................................. 7
5. VTD-13VN / VTD-20VN Installation ............................................................................................ 9
5.1. Connections ................................................................................................................. 9
6. Camera Software Installation .................................................................................................. 13
7. VTD-13FN / VTD-13VN / VTD-20VN Fea tur es ........................................................................... 16
8. IP Installer: Introduction ......................................................................................................... 17
9. Installing and Uninstalling ....................................................................................................... 17
9.1. Installing IP Installer .................................................................................................. 17
9.2. Uninstalling IP Installer ............................................................................................... 20
10. Using IP Installer ................................................................................................................. 23
10.1. Starting the Program .................................................................................................. 23
10.2. Search Product ........................................................................................................... 24
10.3. Manual Network Setup ................................................................................................ 25
10.4. Automatic Network Setup............................................................................................ 27
10.5. Using DHCP Server ..................................................................................................... 30
10.6. Using PPPoE ............................................................................................................... 30
10.7. Updating Firmware ..................................................................................................... 32
10.8. Filter Configuration ..................................................................................................... 34
10.9. Live View ................................................................................................................... 35
11. Admin Menu of VITEK VTD-13/VTD-20 Series ........................................................................ 37
11.1. Entering Admin Menu ................................................................................................. 37
11.2. Admin Menu Structure ................................................................................................ 38
12. Quick Configuration .............................................................................................................. 38
12.1. Step 1:Changing Server Name ..................................................................................... 38
12.2. Step 2: Time Setup ..................................................................................................... 38
12.3. Step 3: Network Setup ................................................................................................ 38
12.4. Step 4: IPCCTVDNS.COM ............................................................................................ 39
12.5. Step 5: Recording Configuration .................................................................................. 39
12.6. Finish......................................................................................................................... 39
13. System Configuration Menu .................................................................................................. 39
13.1. Server Name Setup..................................................................................................... 39
13.2. Date & Time............................................................................................................... 40

ENVI Series: VTD-13FN / VTD-13VN / VTD-20VN
2
13.3. Admin Password ......................................................................................................... 41
13.4. Access Control ............................................................................................................ 41
13.5. User Registration ........................................................................................................ 41
13.5.1. Add ................................................................................................................. 41
13.5.2. Edit ................................................................................................................. 43
13.5.3. Delete ............................................................................................................. 43
14. Network Configuration .......................................................................................................... 43
14.1. Static IP Configuration ................................................................................................ 44
14.2. DHCP Client Configuration ........................................................................................... 44
14.3. PPPoE Configuration ................................................................................................... 45
14.4. Network Ports ............................................................................................................ 45
14.5. Bandwidth Control Configuration ................................................................................. 46
14.6. View Network Status................................................................................................... 47
14.7. Network Status Notify ................................................................................................. 47
14.8. IP-CCTV DNS Setup .................................................................................................... 48
14.9. Port Forwarding & UPnP ............................................................................................. 49
14.10. R TP/RTSP Setup ......................................................................................................... 50
15. Device Configuration ............................................................................................................ 52
15.1. Privacy Zone .............................................................................................................. 52
15.2. Camera & Motion ....................................................................................................... 54
15.2.1. Camera Configuration....................................................................................... 56
16. Advanced Configuration ........................................................................................................ 60
16.1. Advanced Services ...................................................................................................... 61
16.1.1. E-mail Service Configuration ............................................................................. 62
16.1.2. FTP (Buffered) Service Configuration ................................................................. 65
16.1.3. FTP (Periodic) Service Configuration .................................................................. 67
17. Recording Configuration for Cameras with microSD card ........................................................ 69
17.1. MicroSD Configuration ................................................................................................ 69
17.2. Recording Configuration with microSD card .................................................................. 72
18. Utilities ................................................................................................................................ 75
18.1. System Log ................................................................................................................ 76
18.2. Save Configuration ..................................................................................................... 76
18.3. Reboot ....................................................................................................................... 76
18.4. Factory Default ........................................................................................................... 77
18.5. System Update ........................................................................................................... 77
19. ENVI Series Viewer............................................................................................................... 80
19.1. Introduction ............................................................................................................... 80
19.2. Key Features .............................................................................................................. 80
19.3. System Requirement for PC......................................................................................... 80

ENVI Series: VTD-13FN / VTD-13VN / VTD-20VN
3
20. Installing and Uninstalling ..................................................................................................... 81
20.1. Installing ENVI Series Viewer ...................................................................................... 81
20.1.1. Installing on Web Browser ................................................................................ 81
20.1.2. Manual Installation ........................................................................................... 83
20.2. Uninstalling ENVI Series Viewer ................................................................................... 84
20.2.1. Uninstalling with Program Menu ........................................................................ 84
20.2.2. Uninstalling on Control Panel ............................................................................ 85
21. Starting ENVI Series Viewer .................................................................................................. 86
21.1. Control Bar ................................................................................................................ 87
21.2. Channel Control Bar .................................................................................................... 88
21.3. OSD Channels Buttons ................................................................................................ 88
21.3.1. Saving as Image File ........................................................................................ 88
21.3.2. Saving as Video File ......................................................................................... 89
21.3.3. Manual Recording ............................................................................................ 89
21.3.4. Instant Playback .............................................................................................. 90
21.4. Extended Features ...................................................................................................... 91
21.4.1. Pausing Live Video ........................................................................................... 91
21.4.2. FPS Control ..................................................................................................... 91
21.4.3. Flip Control ...................................................................................................... 92
22. EN-V-R: Introduction ............................................................................................................ 93
23. Requirements for Installation ................................................................................................ 94
23.1. EN-V-R Versions ......................................................................................................... 94
23.2. System Requirement for PC......................................................................................... 94
24. Installing EN-V-R .................................................................................................................. 95
25. Uninstalling EN-V-R .............................................................................................................. 97
25.1. Closing Active EN-V-R ................................................................................................. 97
25.2. Executing Uninstaller .................................................................................................. 98
26. Components of EN-V-R Program ........................................................................................... 99
26.1. EN-V-R Configurator ................................................................................................... 99
26.2. EN-V-R Service ........................................................................................................... 99
26.3. EN-V-R Controller ....................................................................................................... 99
26.4. EN-V-R System Tray Menu ........................................................................................ 100
27. Starting EN-V-R Configurator .............................................................................................. 100
28. Quick Start Guide ............................................................................................................... 102
28.1. EN-V-R Configurator User Interface ........................................................................... 102
28.2. Searching for IP Devices ........................................................................................... 103
28.3. Registering IP Devices .............................................................................................. 104
28.4. Viewing Live Video ................................................................................................... 107
28.5. Recording Video ....................................................................................................... 108
29. ENVI Smart Player .............................................................................................................. 113

ENVI Series: VTD-13FN / VTD-13VN / VTD-20VN
4
29.1. Introduction ............................................................................................................. 113
29.2. Key Features ............................................................................................................ 113
29.3. System Requirement for PC....................................................................................... 113
30. Installing and Uninstalling ................................................................................................... 114
30.1. Installing Smart Player .............................................................................................. 114
30.1.1. Manual Installation ......................................................................................... 114
30.2. Uninstalling Smart Player .......................................................................................... 116
30.2.1. Uninstalling on Program Menu ........................................................................ 116
31. Configuring & Viewing Player .............................................................................................. 126
31.1. Main Window View ................................................................................................... 127
31.2. Connecting to NVR Player ......................................................................................... 128
31.3. Creating a Group ...................................................................................................... 128
32. Searching Video ................................................................................................................. 130
32.1. Searching Video ....................................................................................................... 130
32.2. Daily Search ............................................................................................................. 130
32.2.1. Search Mode .................................................................................................. 131
32.2.2. GO to Time Position ....................................................................................... 131
32.3. Condition Search Mode ............................................................................................. 131
32.3.1. Advanced Search Mode .................................................................................. 132
33. Video Playback Controls ...................................................................................................... 133
34. Extra Features ................................................................................................................... 134
34.1. Window Control ........................................................................................................ 134
34.2. Recording Period ...................................................................................................... 134
34.3. Backup .................................................................................................................... 135
34.4. Snapshot ................................................................................................................. 136
34.5. Print ........................................................................................................................ 137
34.6. Ratio Display ............................................................................................................ 137
35. EN-V-R Configuration ......................................................................................................... 139
35.1. System, Network Configuration ................................................................................. 139
35.1.1. Configuring System name ............................................................................... 139
35.1.2. System, Network Configurat i on - Ad min password ........................................... 140
35.1.3. System, Network Configurat i on - Access Control .............................................. 140
35.1.4. System, Network Configuration - HTTP Port..................................................... 141
35.1.5. System, Network Configurat i on–IP CCTV-DNS ................................................. 141
36. IPCCTVDNS Registration ..................................................................................................... 142
37. IP-Device Registration ........................................................................................................ 148
37.1. IP-Device Registration (Manual) ................................................................................ 148
37.2. IP-Device Registration (Automatic) ............................................................................ 150
IP-Device Modification ................................................................................................. 152
37.3. IP-DeviceDeletion ..................................................................................................... 154

ENVI Series: VTD-13FN / VTD-13VN / VTD-20VN
5
37.4. IP-Device Homepage ................................................................................................ 154
37.5. Camera Management ................................................................................................ 154
37.5.1. Configure Camera Name and Information ........................................................ 155
37.5.2. Camera Resolution, Quality ............................................................................. 156
37.5.3. Configure Camera Recording Condition ........................................................... 157
37.5.4. Alarm, Event Configuration ............................................................................. 160
37.6. User Management .................................................................................................... 161
37.6.1. User Registration ........................................................................................... 162
37.6.2. User Modification ........................................................................................... 162
37.6.3. User Deletion ................................................................................................. 163
37.7. Disk Setup ............................................................................................................... 163
37.7.1. Disk Setup ..................................................................................................... 163
37.7.2. Disk Quota Modification and Deletion .............................................................. 163
37.7.3. Disk Mode Change ......................................................................................... 164
37.8. Utilities .................................................................................................................... 166
37.8.1. Email account Configuration ........................................................................... 166
37.8.2. About Program .............................................................................................. 167
38. Using EN-V-R Controller ...................................................................................................... 168
39. Connecting to EN-V-R ......................................................................................................... 169
39.1. PC with EN-V-R installed ........................................................................................... 169
39.2. PC without EN-V-R.................................................................................................... 170
ENVI Series: VTD-13FN / VTD-13VN / VTD-20VN
6
1. Box Contents
1) Dome Camera
2) Mounting Accessories
3) ENVI Series CD
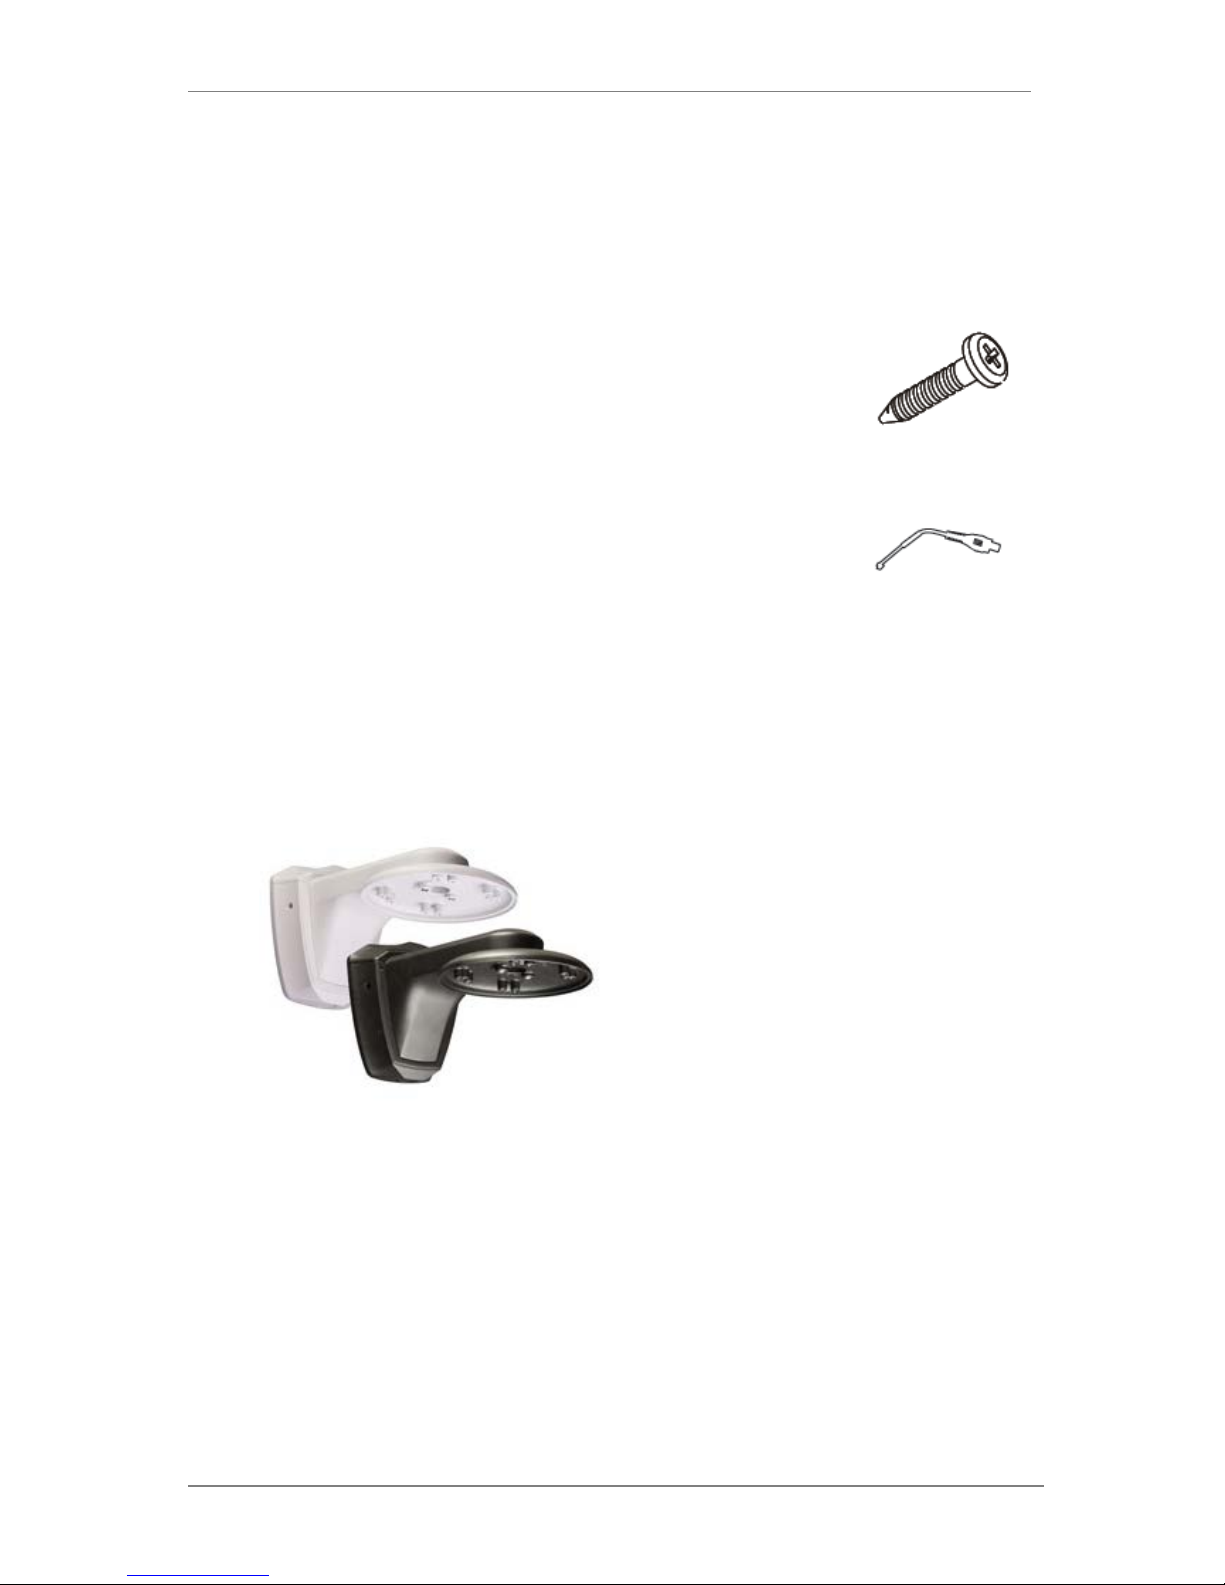
2. Included Accessories
Self Tapping Screws
For mounting dome to ceiling, wall etc.
Type #: Phillips head ST4x30
Qty: 2
Secondary Video Output Cable
To be used with a service monitor for adjusting the angle, focus and zoom.
Qty: 1
3. Available Accessories
Optional Wall Mount:
3.1. Wall Mount (VT-AP/WMT)
ENVI Series: VTD-13FN / VTD-13VN / VTD-20VN
7
4. VTD-13FN Installation
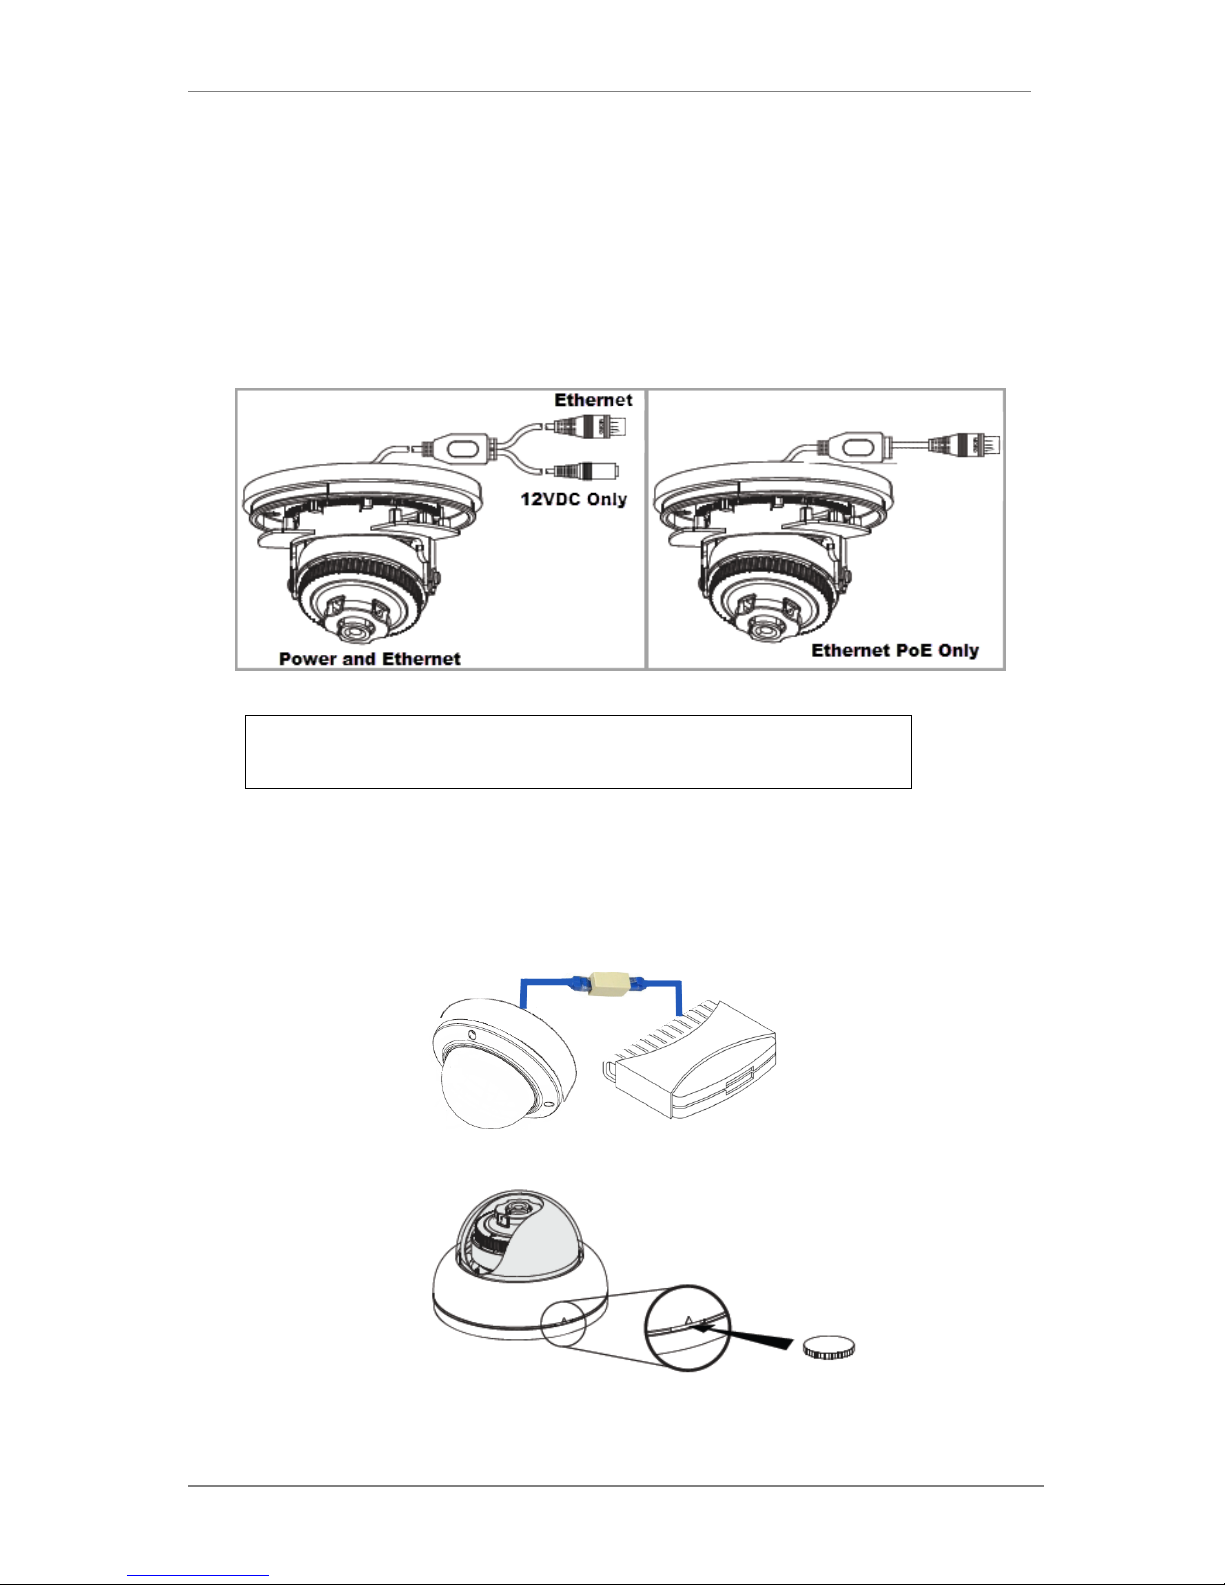
4.1. Connections
1. Power
Depending on the type of installations, apply power to the camera by one of the options
below.
a) Via Ethernet – Use only wit h PO E switch (100 Meters max distance)
b) 12VDC - Use with 12VDC 500mA
NOTE: If your camera is PoE you do not n eed to apply
separate power
2. Ethernet connection
a) Insert one end of the Ethernet cable into the network jack of your camera, and insert the
other end into the data port (sample: switch, router, etc)
3. Remove the dome cover from the camera using a coin
ENVI Series: VTD-13FN / VTD-13VN / VTD-20VN
8
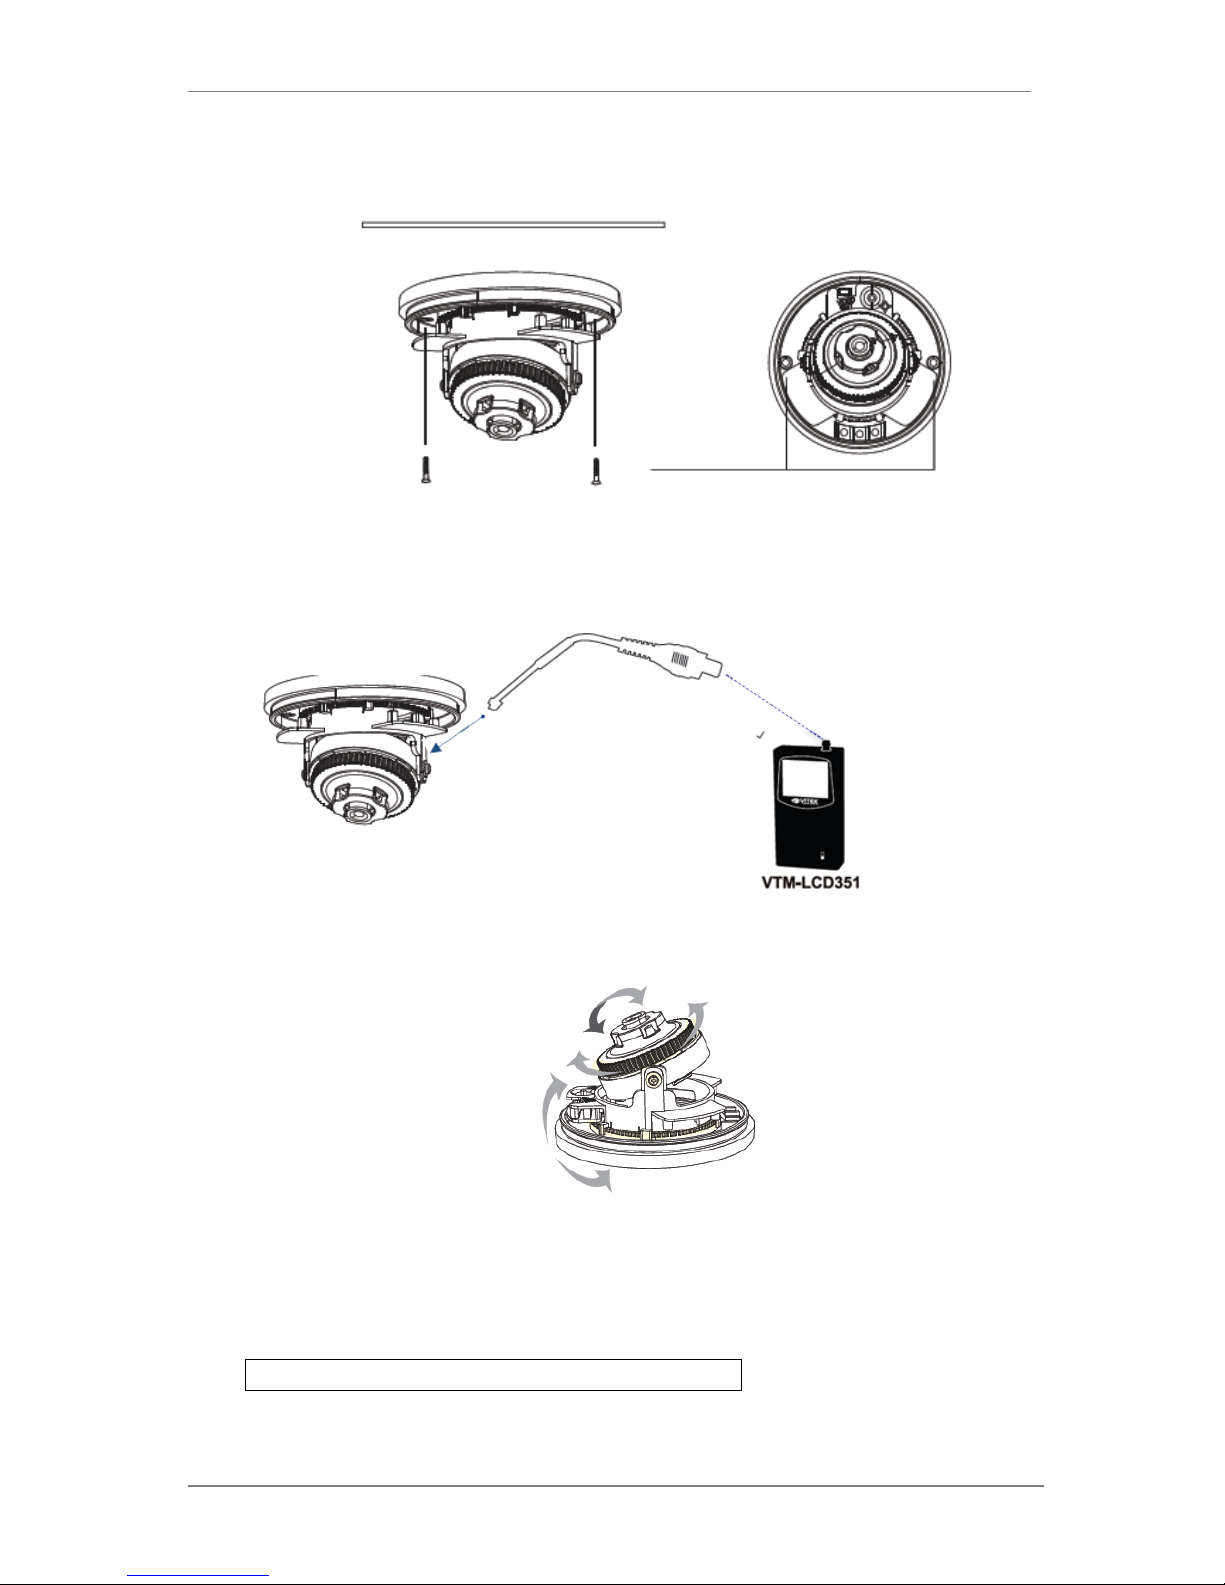
4. Place the camera in the desired location and install usingsupplied screws.
5. With the help of a ha nd held monitor (VTM-LCD351 not included) you can adjust the field of
view and focus the camera.
a) Connect the secondary video cable bet ween the camera and the monitor BNC as sho wn
below.
6. Adjusting Camera View
You can adjust the camera’s Pan / Tilt
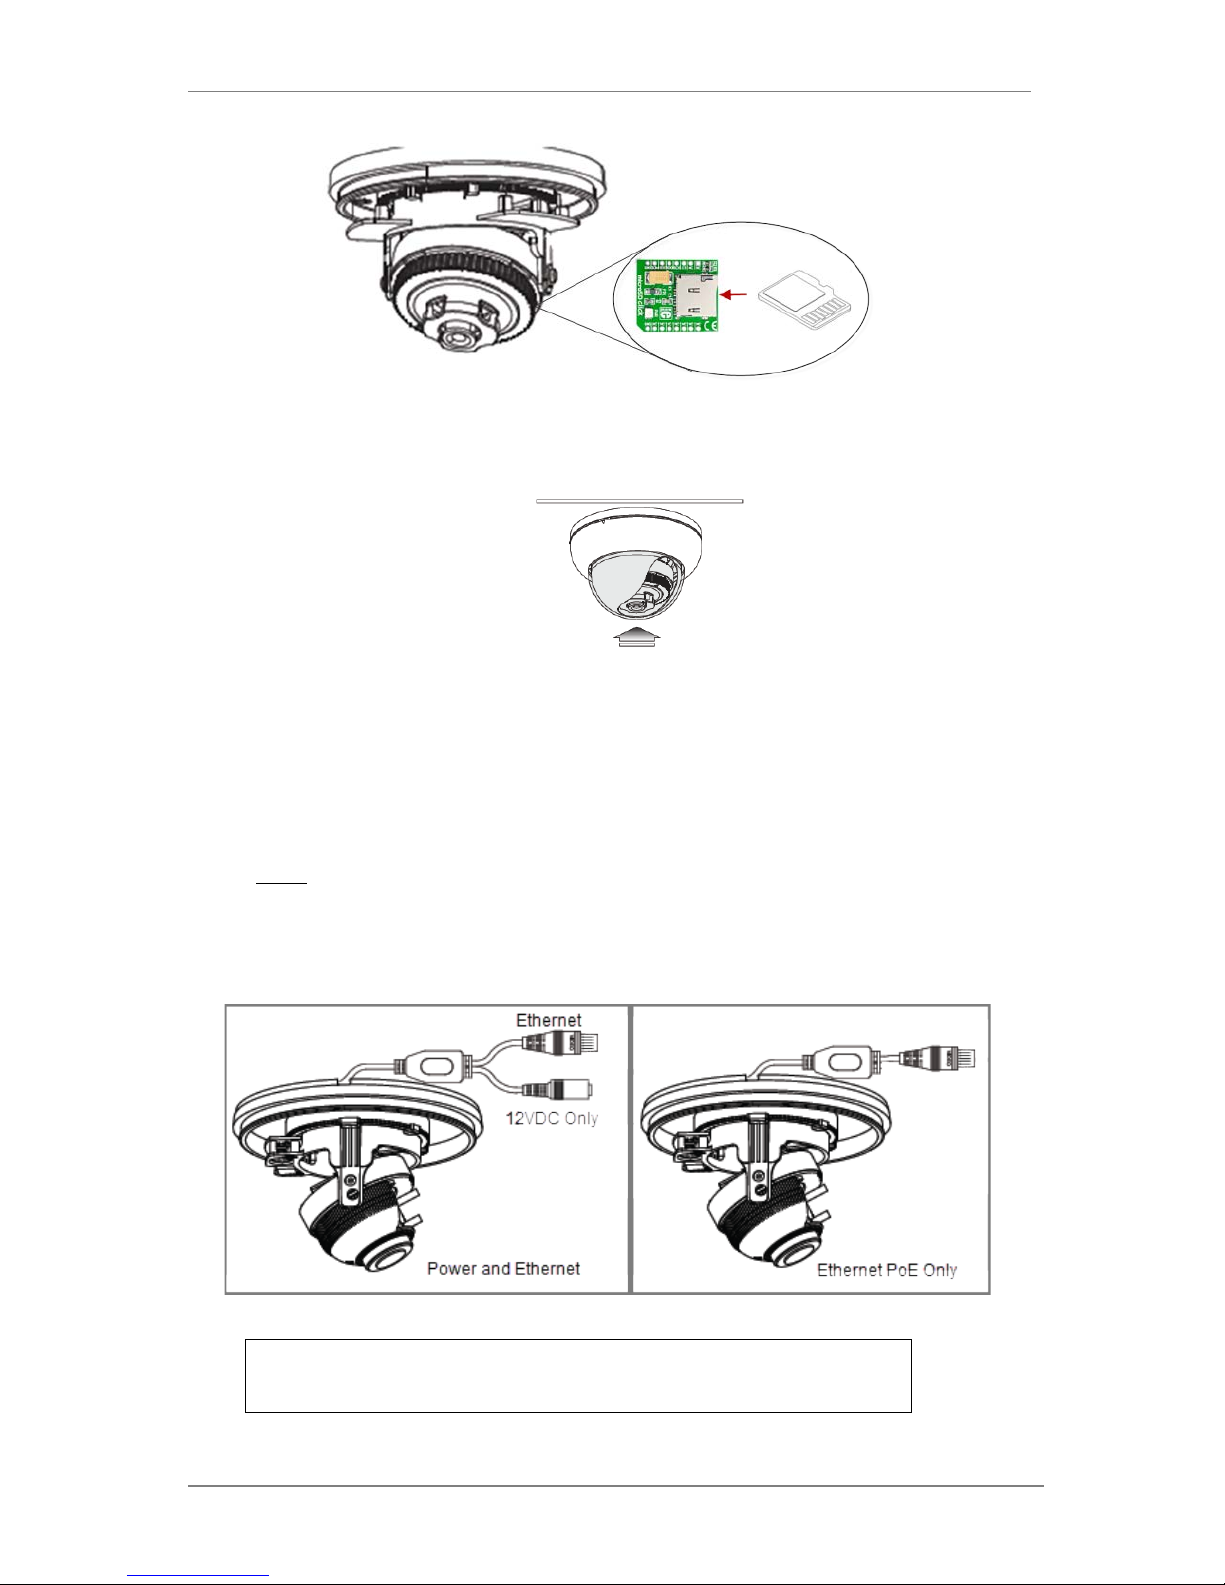
7. Removable Storage
For recording directly on the camera you wil l need to install a MicroSD card, this will allow
you to play video directly from the camera. The MicroSD card willneed to be formatted.
(refer to Section 17.1MicroSD Configura tion on page 69
for instructions on Formatting)
Note: (Please use only class 10 MicroSD cards)
ENVI Series: VTD-13FN / VTD-13VN / VTD-20VN
9
8. After the camera adjustments are completed, place the dome cover back on to the camera
base.
5. VTD-13VN / VTD-20VN Installation
5.1. Connections
1. Power
Depending on the type of installations, apply power to the camera by one of the options
below.
a) Via Ethernet – Use only wit h PO E switch (100 Meters max distance)
b) 12VDC - Use with 12VDC 500mA
NOTE: If your camera is PoE you do not need to apply
separate power
ENVI Series: VTD-13FN / VTD-13VN / VTD-20VN
10
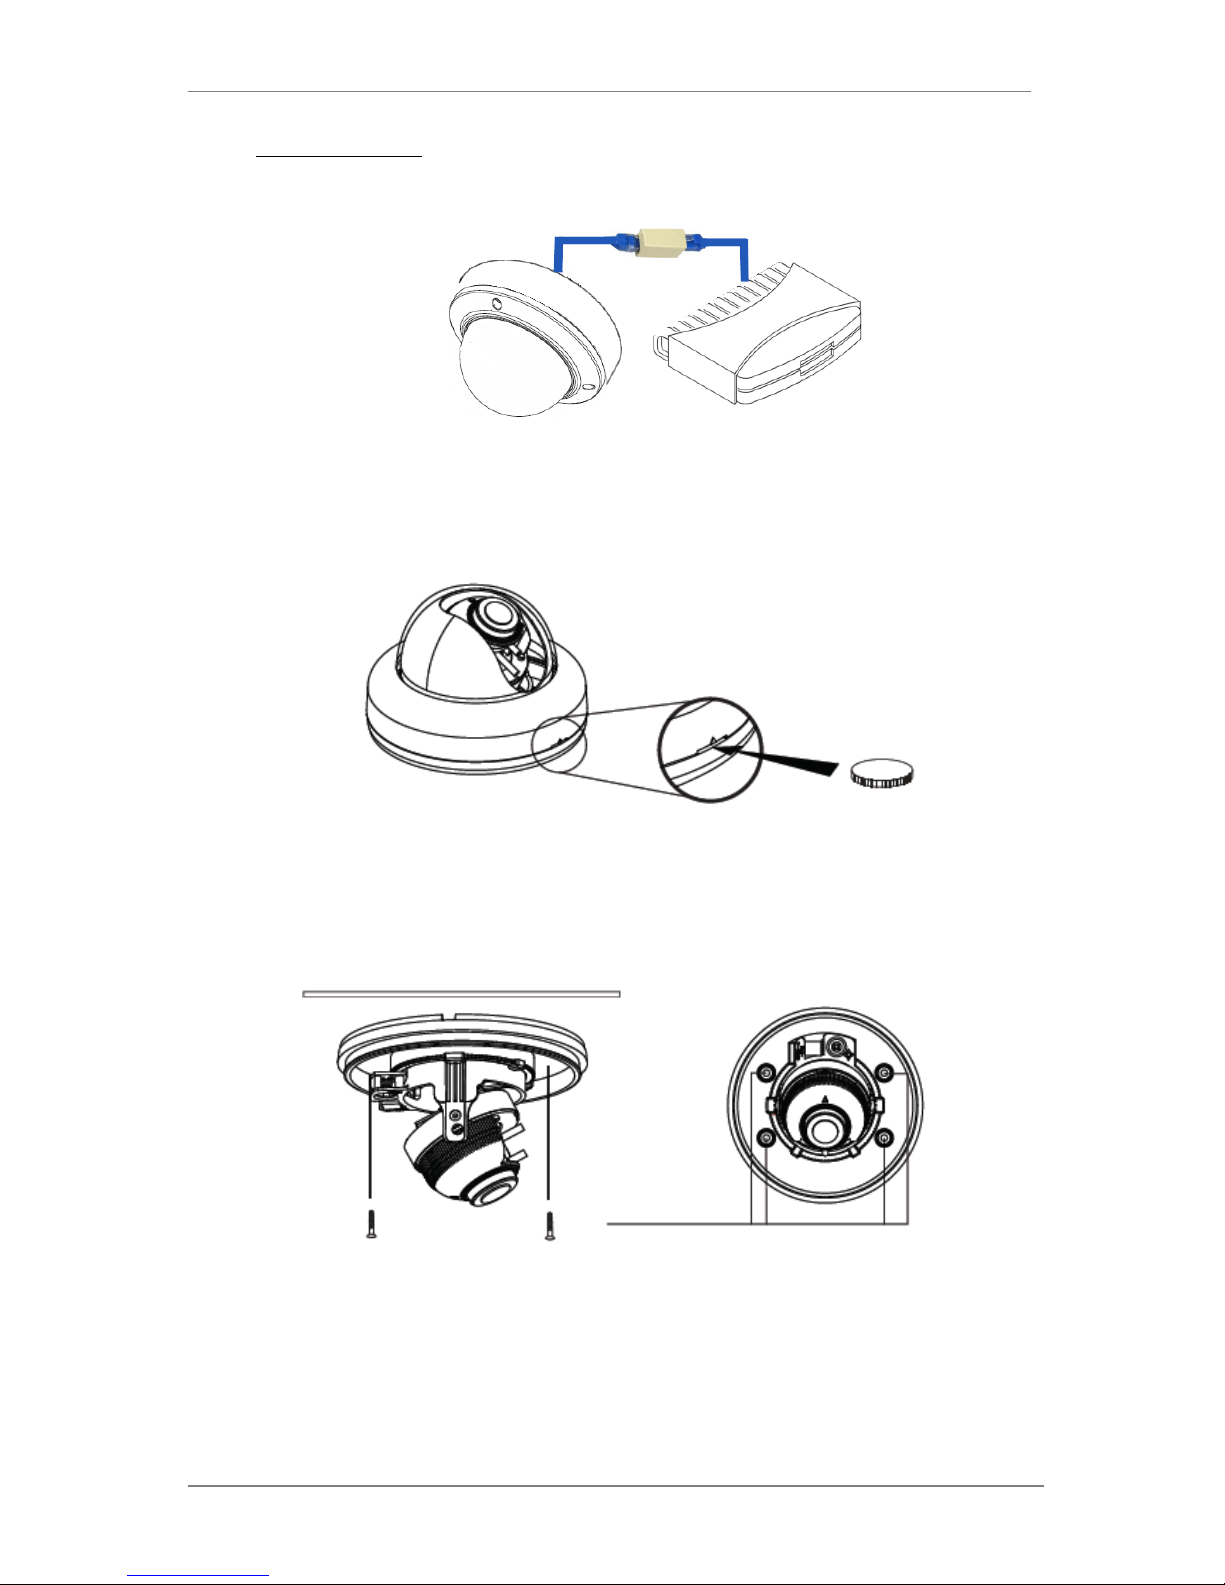
1. Ethernet connection
b) Insert one end of the Ethernet cable into the network jack of your camera, and insert the
other end into the data port (sample: switch, router, etc)
2. Remove the dome cover from the camera using a coin
3. Place the camera in the desired location and install usingsupplied screws.
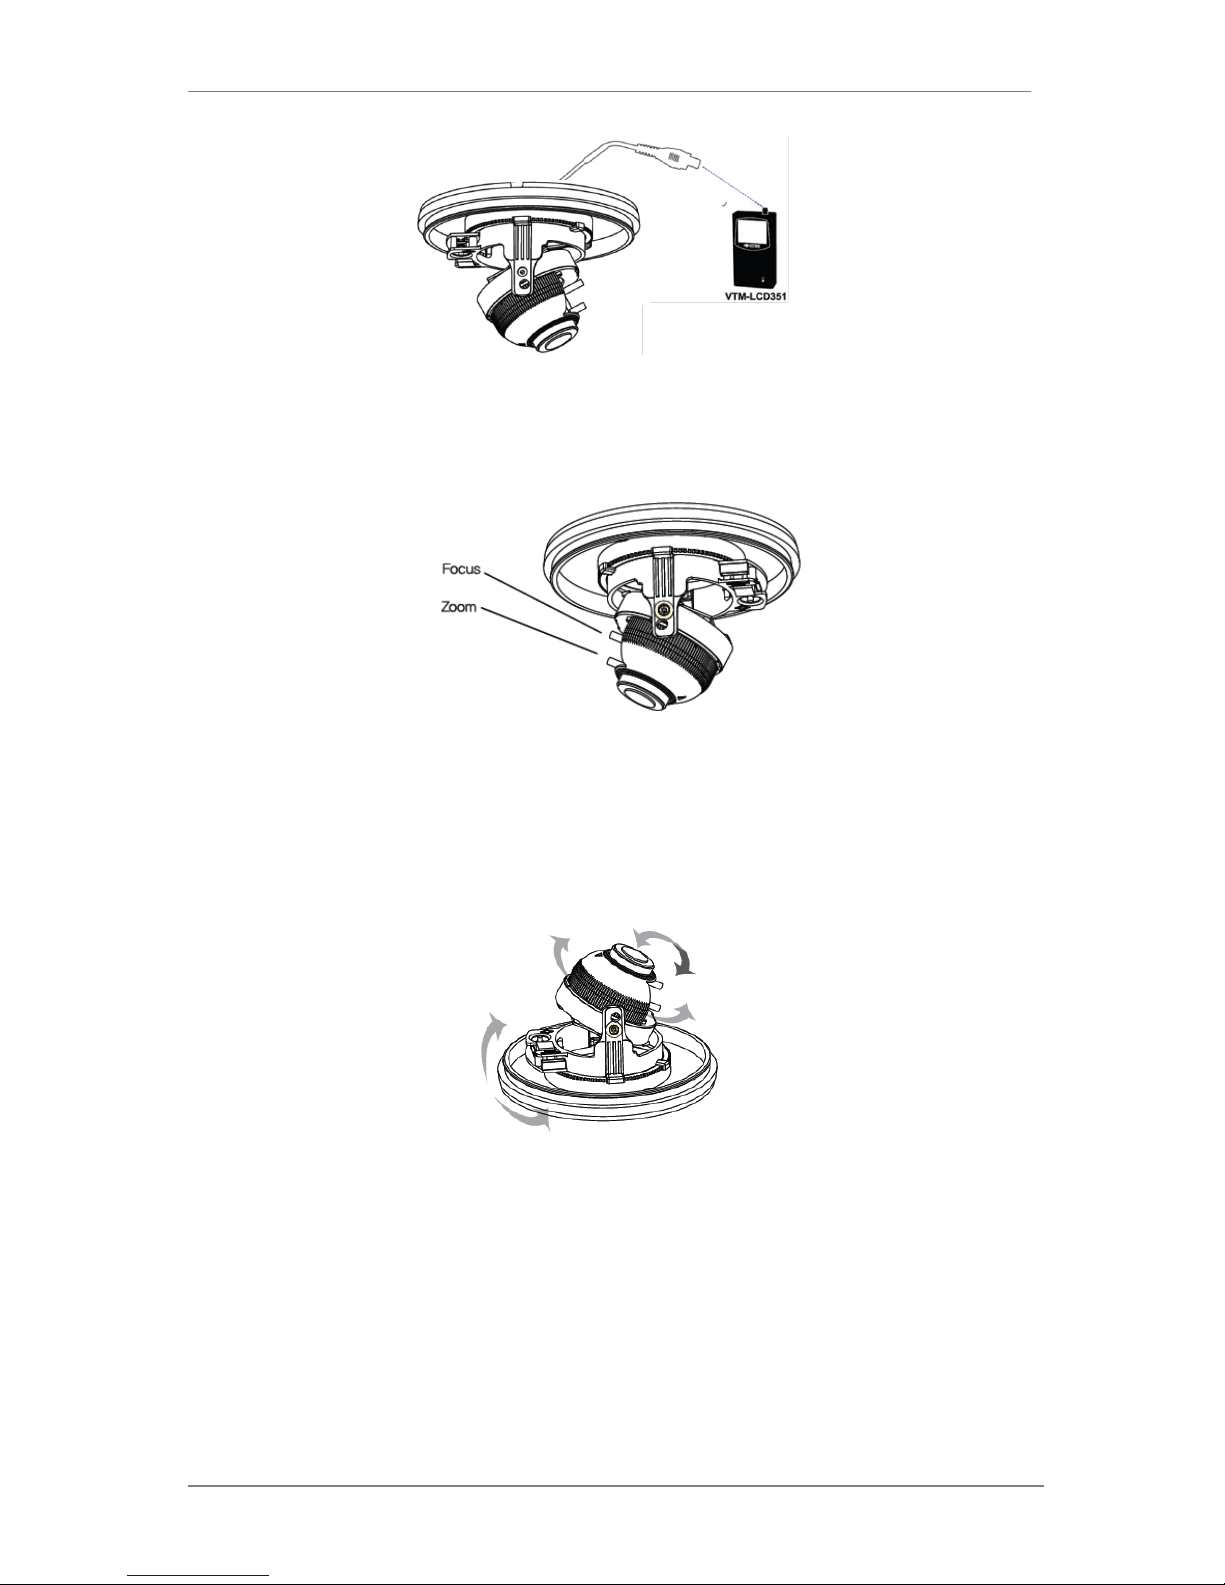
4. With the help of a ha nd held monitor (VTM-LCD351 not included) you can adjust the field of
view and focus the camera.
b) Connect the secondary video cable between the camera and the monitor BNC as shown
below.
ENVI Series: VTD-13FN / VTD-13VN / VTD-20VN
11
5. Lens Adjustment
a) Loosen Zoom & Focus screw and make necessary adjustments as shown.
Field of view: Telephoto(T) to Wide(W)
Focus: Near(N) to infinity (
∞)
6. Adjusting Camera View
You can adjust the camera’s Pan / Tilt
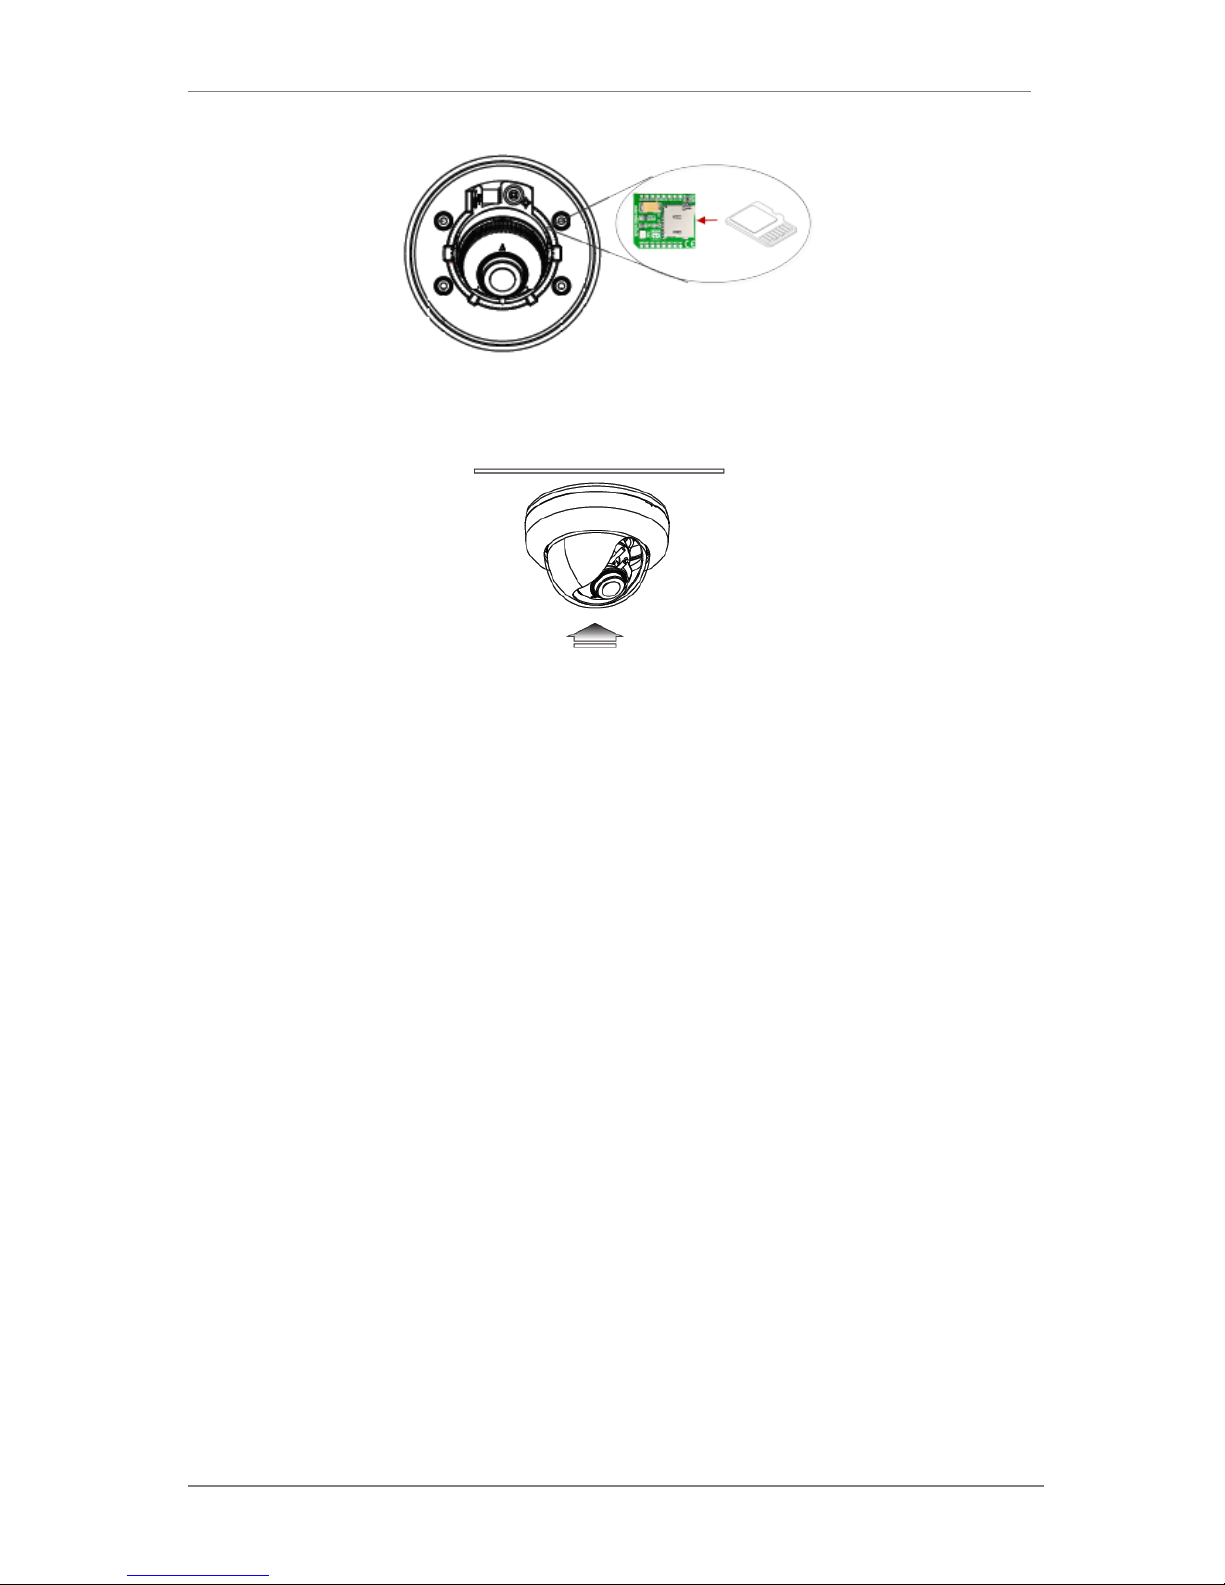
7. Removable Storage
a) For recording directly on the camera you will need to install a microSD card, this will allow
you to play video directly from the camera. The MicroSD card will need to be formatted.
(refer to Section 17.1MicroSD Configura tion on page 69for instructions on Formatting)
ENVI Series: VTD-13FN / VTD-13VN / VTD-20VN
12
8. After the camera adjustments are completed, place the dome cover back on to the camera
base.
ENVI Series: VTD-13FN / VTD-13VN / VTD-20VN
13
6. Camera Software Installation
1. Run IP Installer Software from the CD program on a computer that is on the same network
as the IP camera.
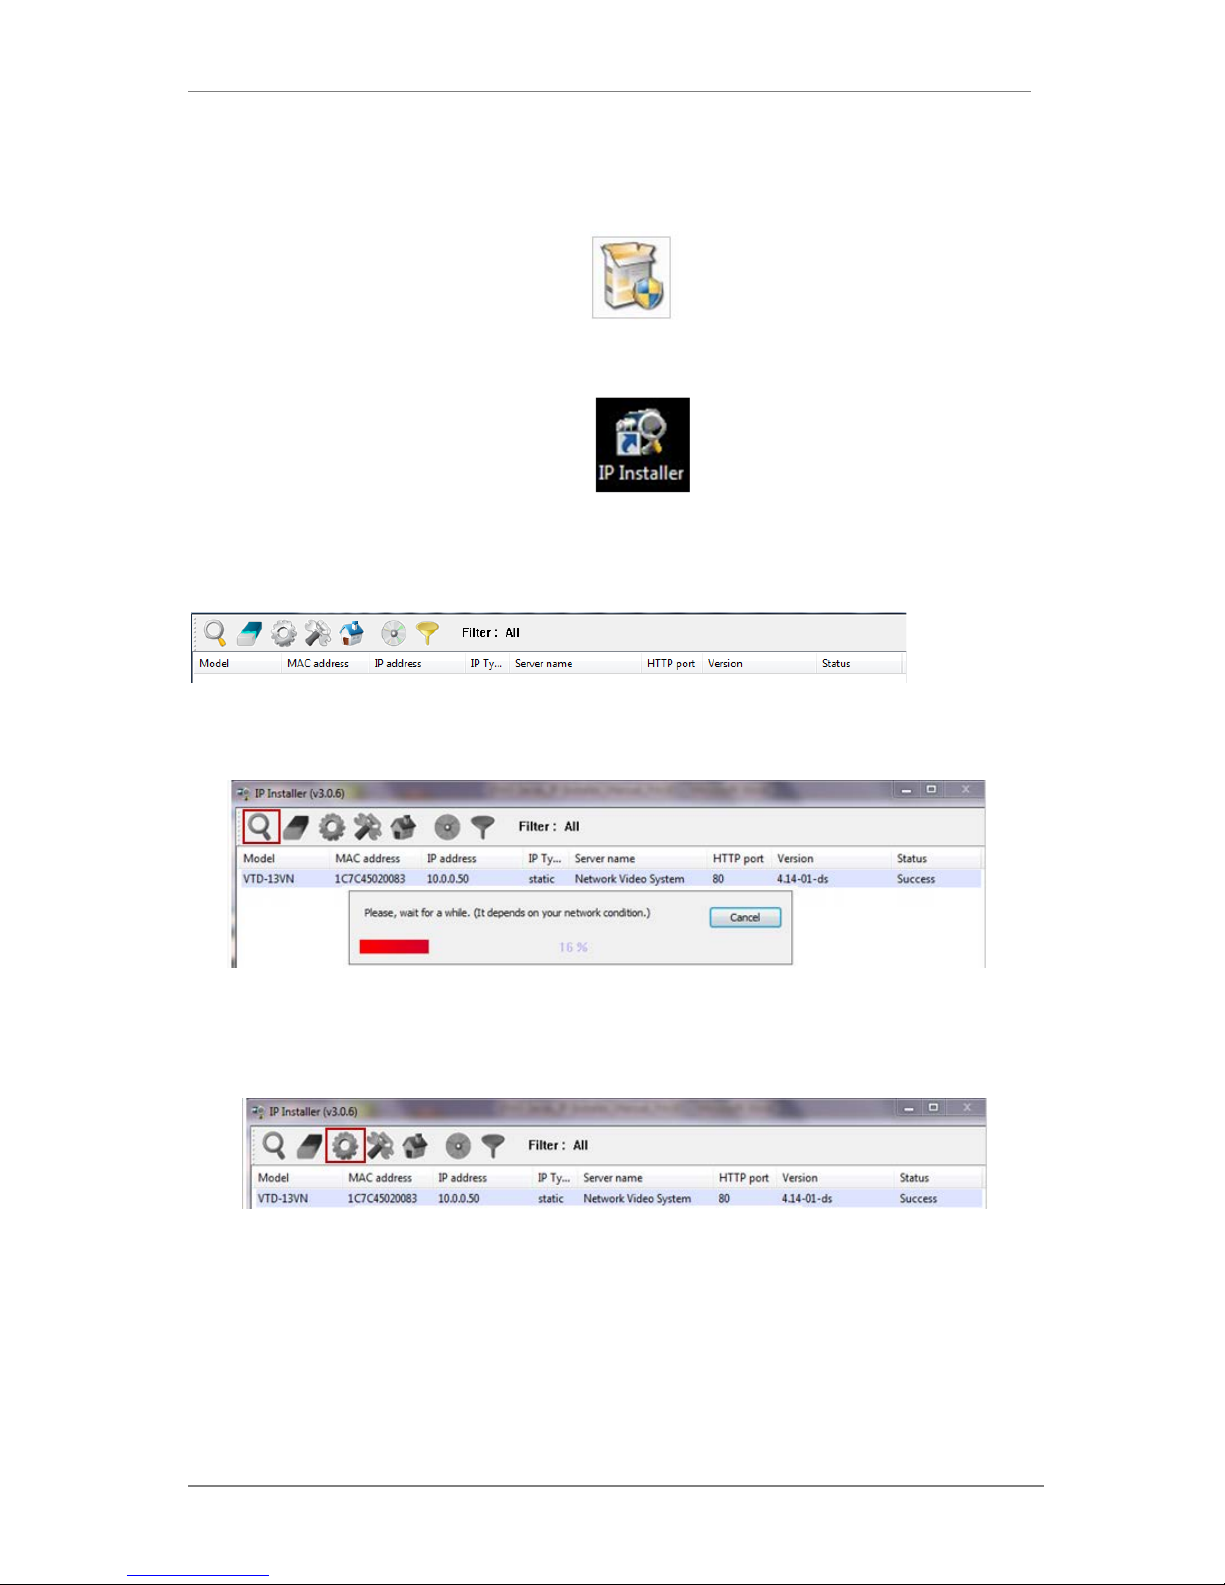
2. StartIP Installer, by double clicking the icon “IP Installer”
3. After the program has started, the main window of IP Installer program will appear on the
screen as shown below.
4. Search for the installed camera on the network by clicking the searc h product icon, the
camera should appear as the image below. The default IP address is 10.20.30.40
5. To assign an automatic IP address to this camera within the network, click the “Automatic IP
Setup” icon
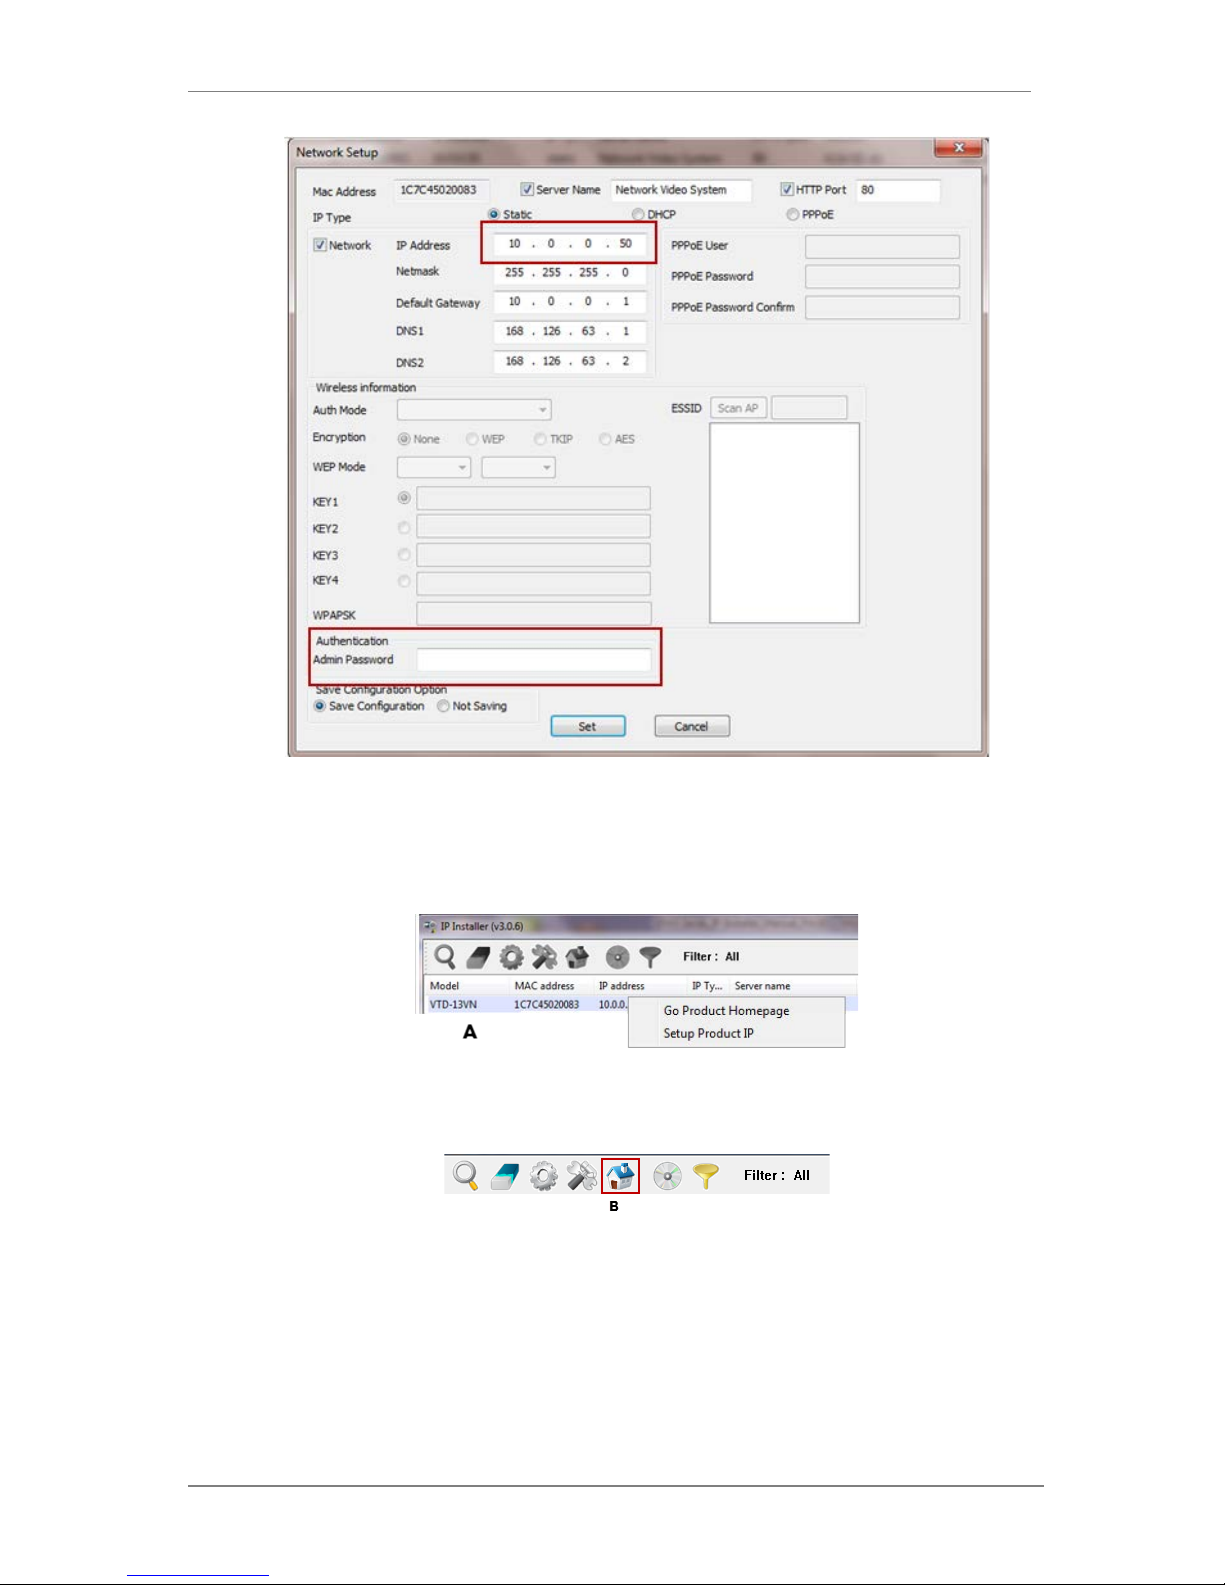
6. Verify the Automatic IP address provided, enter the de fault password root and then click Set
as shown below.
ENVI Series: VTD-13FN / VTD-13VN / VTD-20VN
14
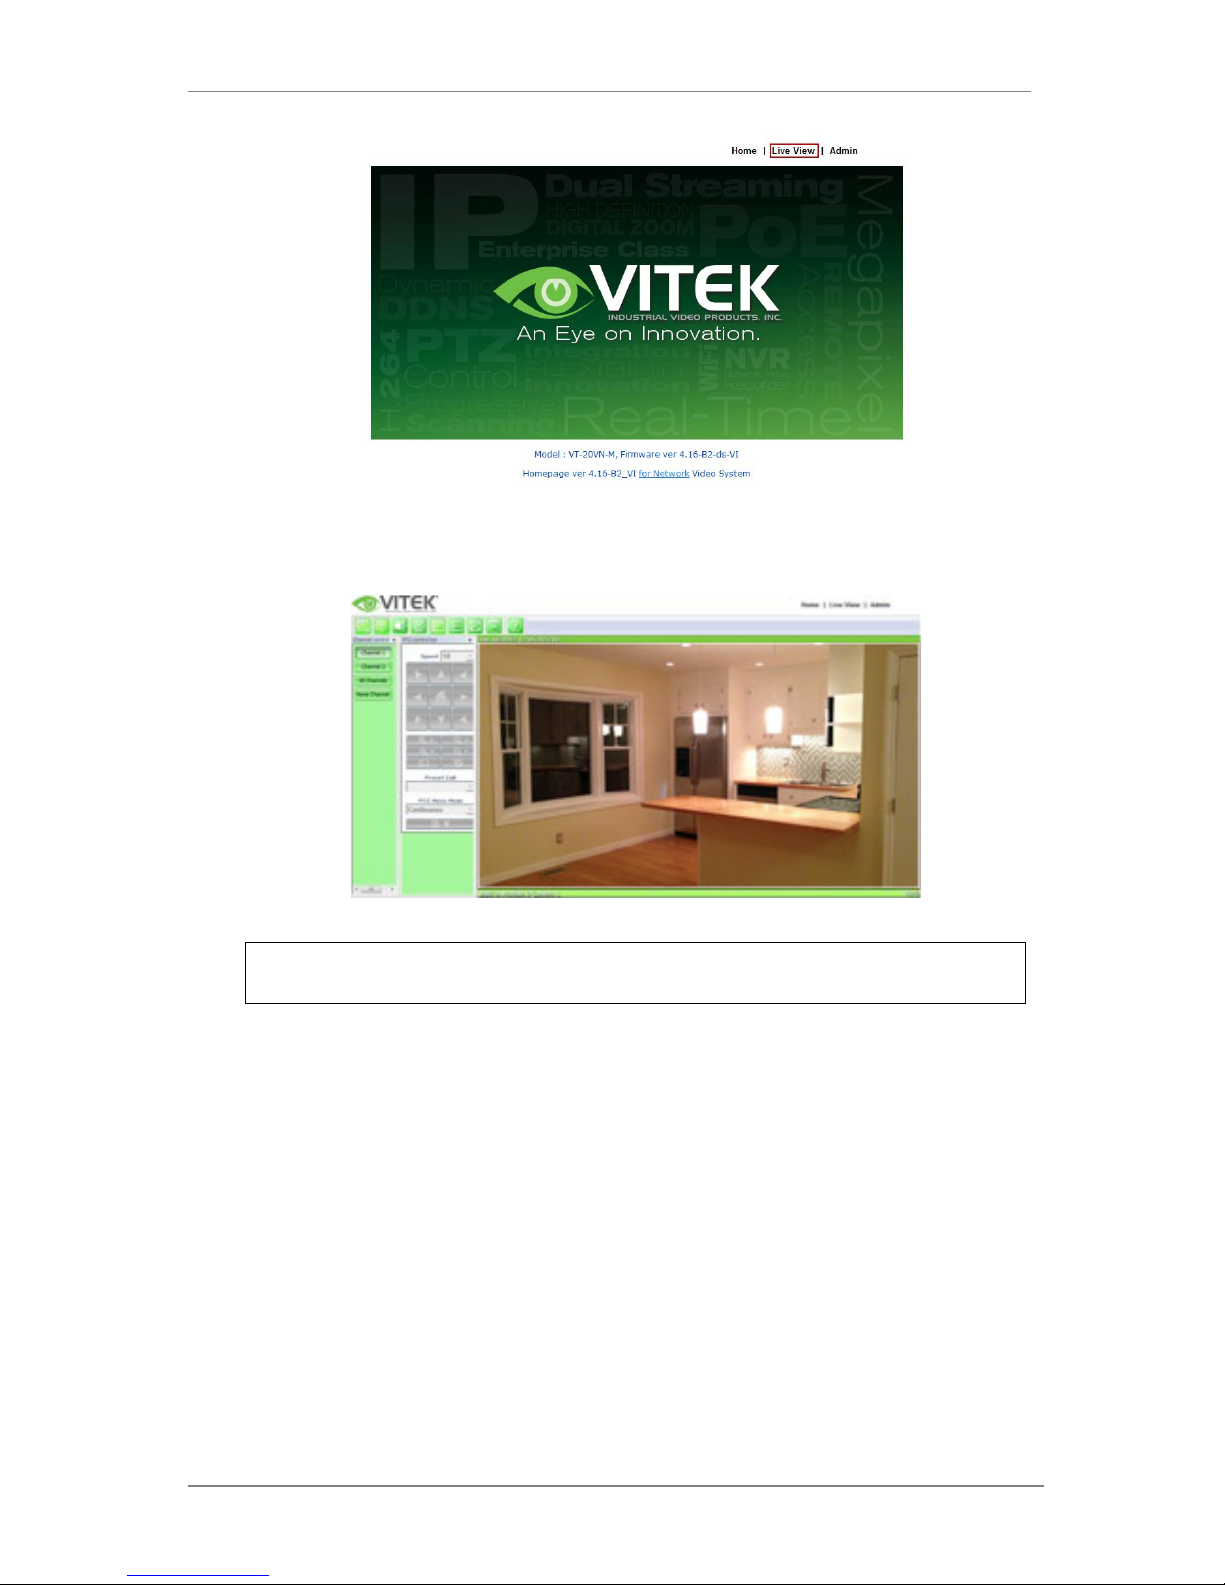
7. After the camera was configured by the program automatically, you will be able to get access
by
a) Right click over the camera information, “
Go Product Homepage
”
b) Click over the icon “
Connect Product Homepage
”
8. From the Home Page, you can “
Live View”
or administrate
“Admin”
the camera.
ENVI Series: VTD-13FN / VTD-13VN / VTD-20VN
15
On Live View you will be able to see live video from your camera.
NOTE: For more information, refer to Section 11
Admin Menu of VITEK VTD-13/VTD-20
Series on page 37.

ENVI Series: VTD-13FN / VTD-13VN / VTD-20VN
16
7. VTD-13FN / VTD-13VN / VTD-20VN Features
VTD-13FN
ENVI Indoor 1.3 MegaPixel IP Dome Camera Series
1/3" 1.3 Megapixel Progressive Scan CMOS imager
Up to 30fps live view @ 1280x1024
3.8mm Fixed Lens Included
2D-DNR Noise Reduction
4:3 Video format
Secondary video output for installation & maintenance
H.264/MJPEG Dual Streaming
Minimal Latency with up to 16 simultaneous user connections
Onvif Compliance
SD memory card slot for Local recording
12VDC Operation / Optional PoE (Power over Ethernet)
Available in Ivory or Black
VTD-13VN / VTD-20VN
ENVI Indoor 1.3 / 2.0 MegaPixel IP Dome Camera Series
1/3" 1.3 / 2.0 Megapixel Progressive Scan CMOS imager
Up to 30fps live view @ 1280x1024 / 19 20x 10 80
2.8-10mm Varifocal Auto Iris Lens
2D-DNR Noise Reduction
4:3 Video format (1.3) 16:9 Video format(2.0)
Secondary video output for installation & maintenance
H.264/MJPEG Dual Streaming
Minimal Latency with up to 16 simultaneous user connections
Onvif Compliance
12VDC Operation / Optional PoE (Power over Ethernet)
Available in Ivory or Black
ENVI Series: VTD-13FN / VTD-13VN / VTD-20VN
17
8. IP Installer: Introduction
IP Installer is a proprietary utility program for VitekIP products. It enables users of Vitek products
to search their network for any Vitek network camera, video server, or network video recorder no
matter what IP address it has. By using IP Installer, users will be able to facilitate network setup
process for Vitek products deployment.
Runs on Microsoft Windows operating system (XP, Vista, 7, 8)
Search for Network Cameras, Video Servers, and Network Video Recorders
Capable of firmware updating
Support automatic and manual IP setup
9. Installing and Uninstalling
** It’s recommended to install this program as an administrator **
9.1. Installing IP Installer
If the program is started from the CD supplied with Vitek products, insert the CD in to CD/DVD tray
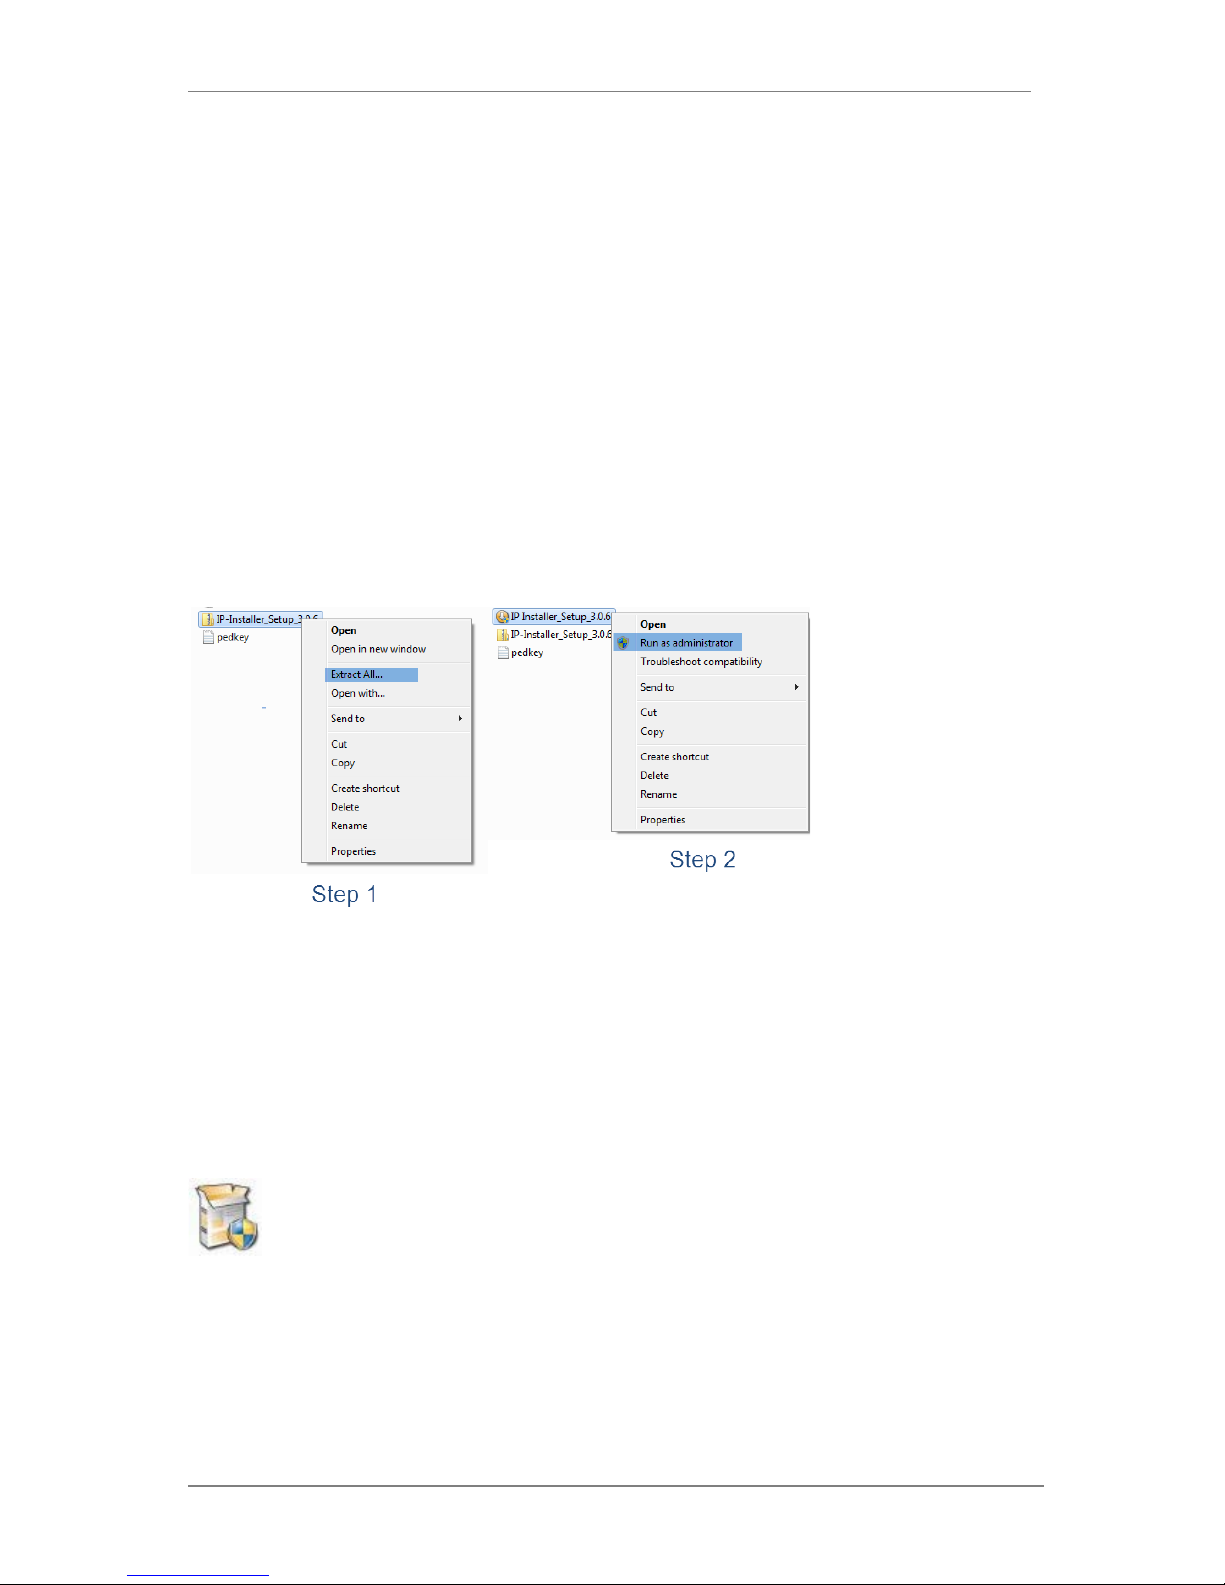
and check the installation file. If it is download or copied from the Internet or any other media,
locate the file from the PC’s hard drive. You will see the icon as shown with the file name IP
Installer_Setup_x.x.x.exe. The actual file name in your case may vary a s the version changes.
Double click the icon to start installation.

ENVI Series: VTD-13FN / VTD-13VN / VTD-20VN
18
You may be prompted to cont inue running the installation program.
Click Yes button, then the following window will be shown on the screen.
To continue the installat ion, click Next. The following window will be displayed for location to
install.

ENVI Series: VTD-13FN / VTD-13VN / VTD-20VN
19
The default location for installation is C:\Program Files\IP Installer. It is recommended to install
in this folder, if you want to change it to a different loc ation, click the Browse button to choose
location. Now click the Install button. You will see the progress of theinstall as shown below.
ENVI Series: VTD-13FN / VTD-13VN / VTD-20VN
20
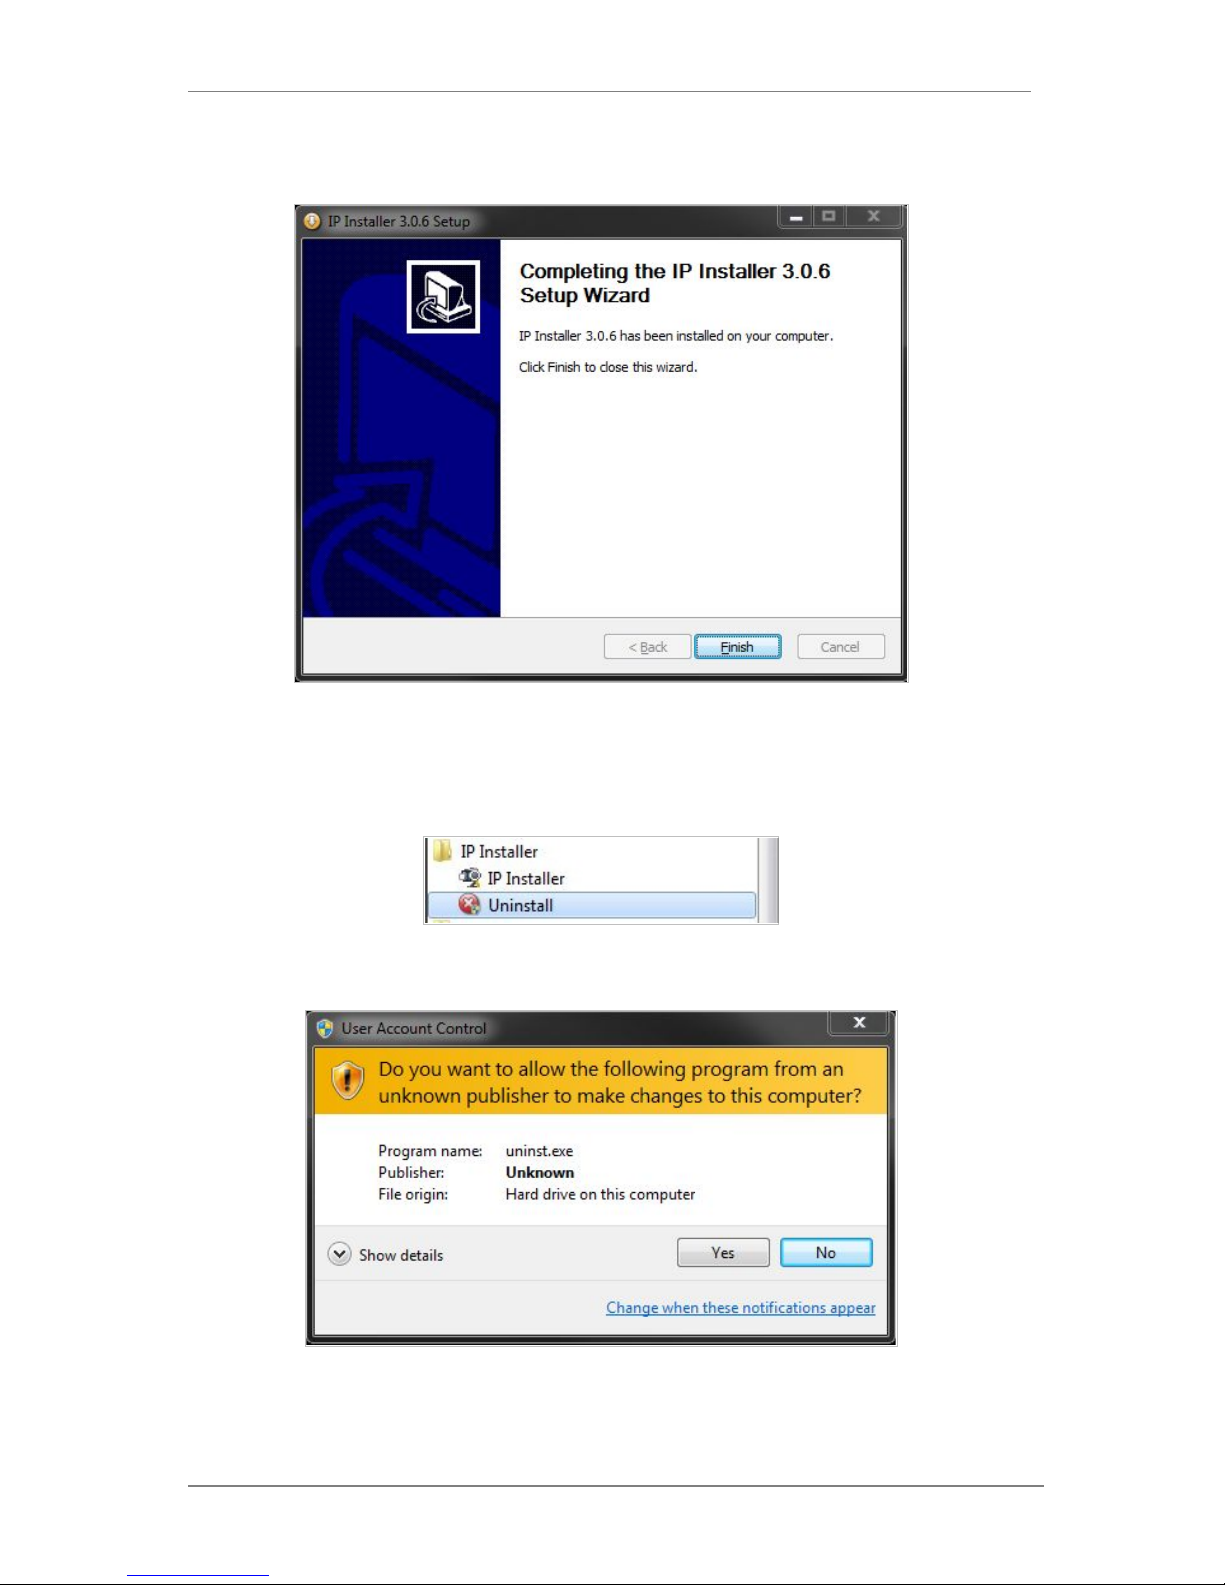
When the files are done copying, the following window will be shown. Click the Finish button to
complete the installation.
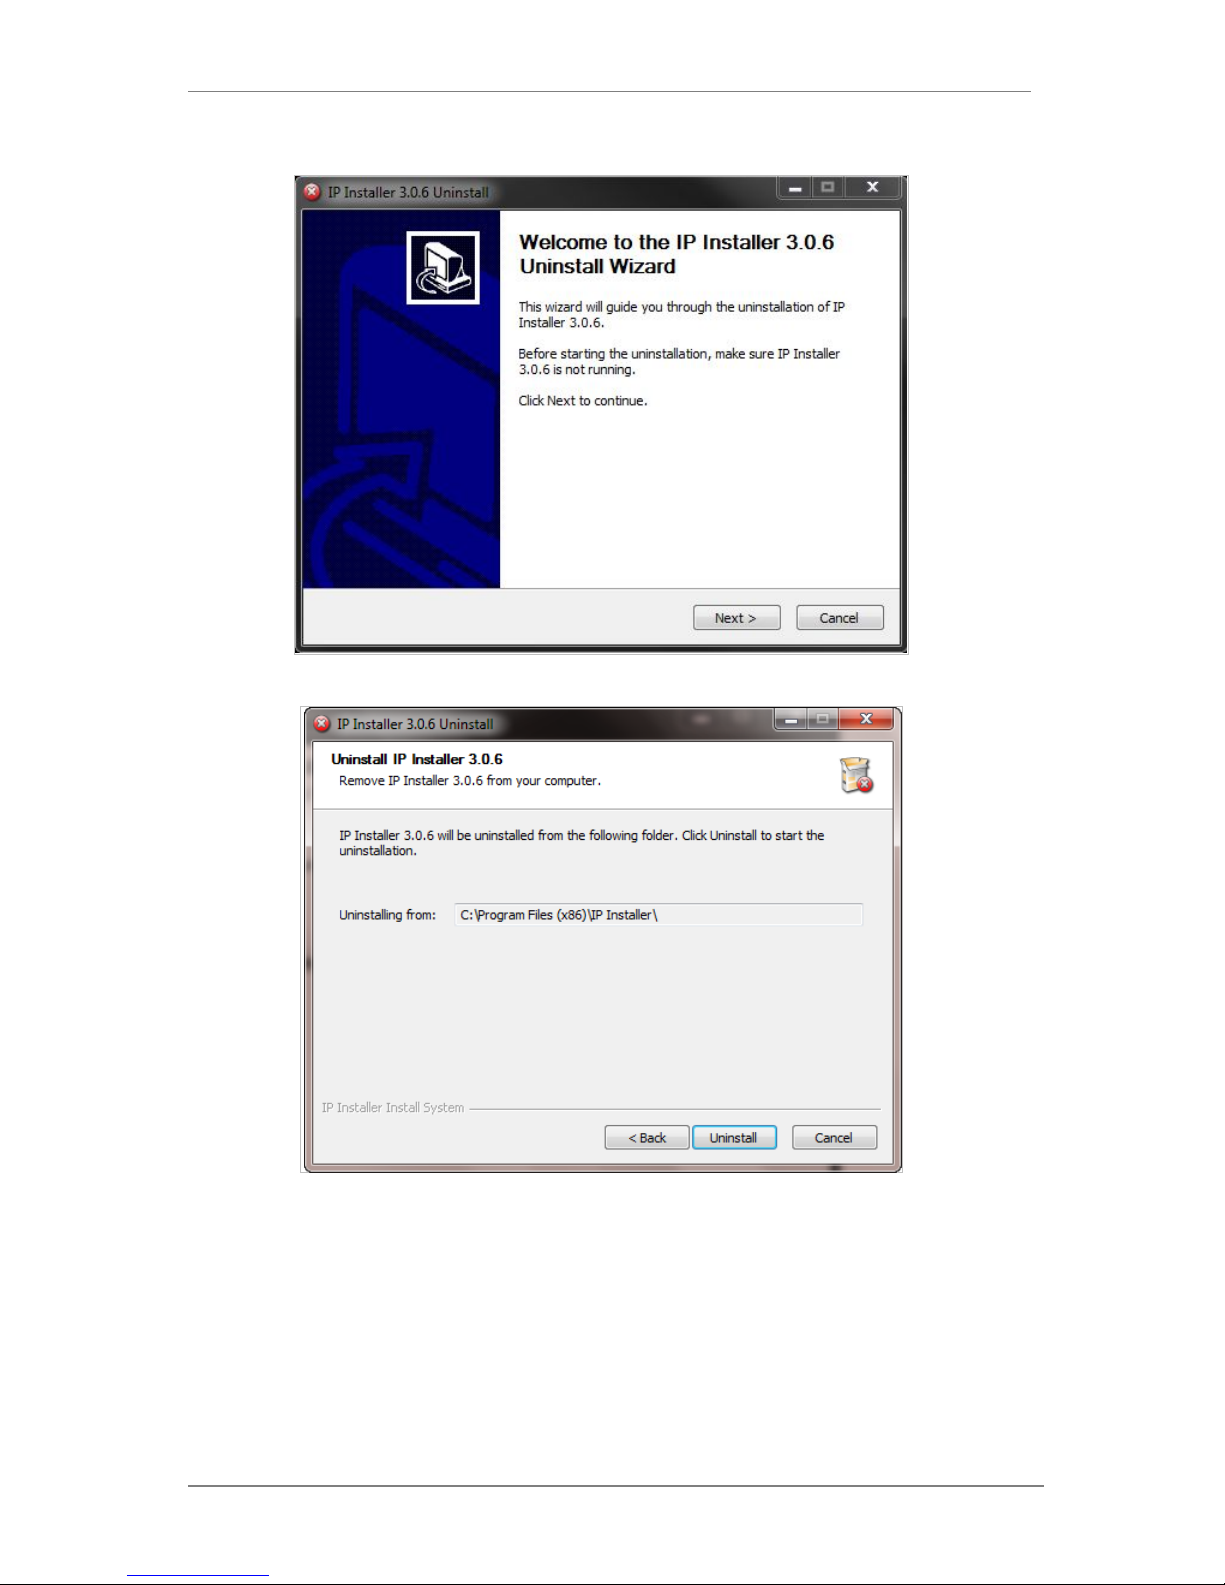
9.2. Uninstalling IP Installer
If you want to remove the IP Installer program from your PC, click Start > All Programs > IP
Installer > Uninstall.
You may be prompt to continue running theuni nstall program.
ENVI Series: VTD-13FN / VTD-13VN / VTD-20VN
21
Click onthe Yes button, then the following window will be shown on the screen.
Click on the Next button and you will see the following window.
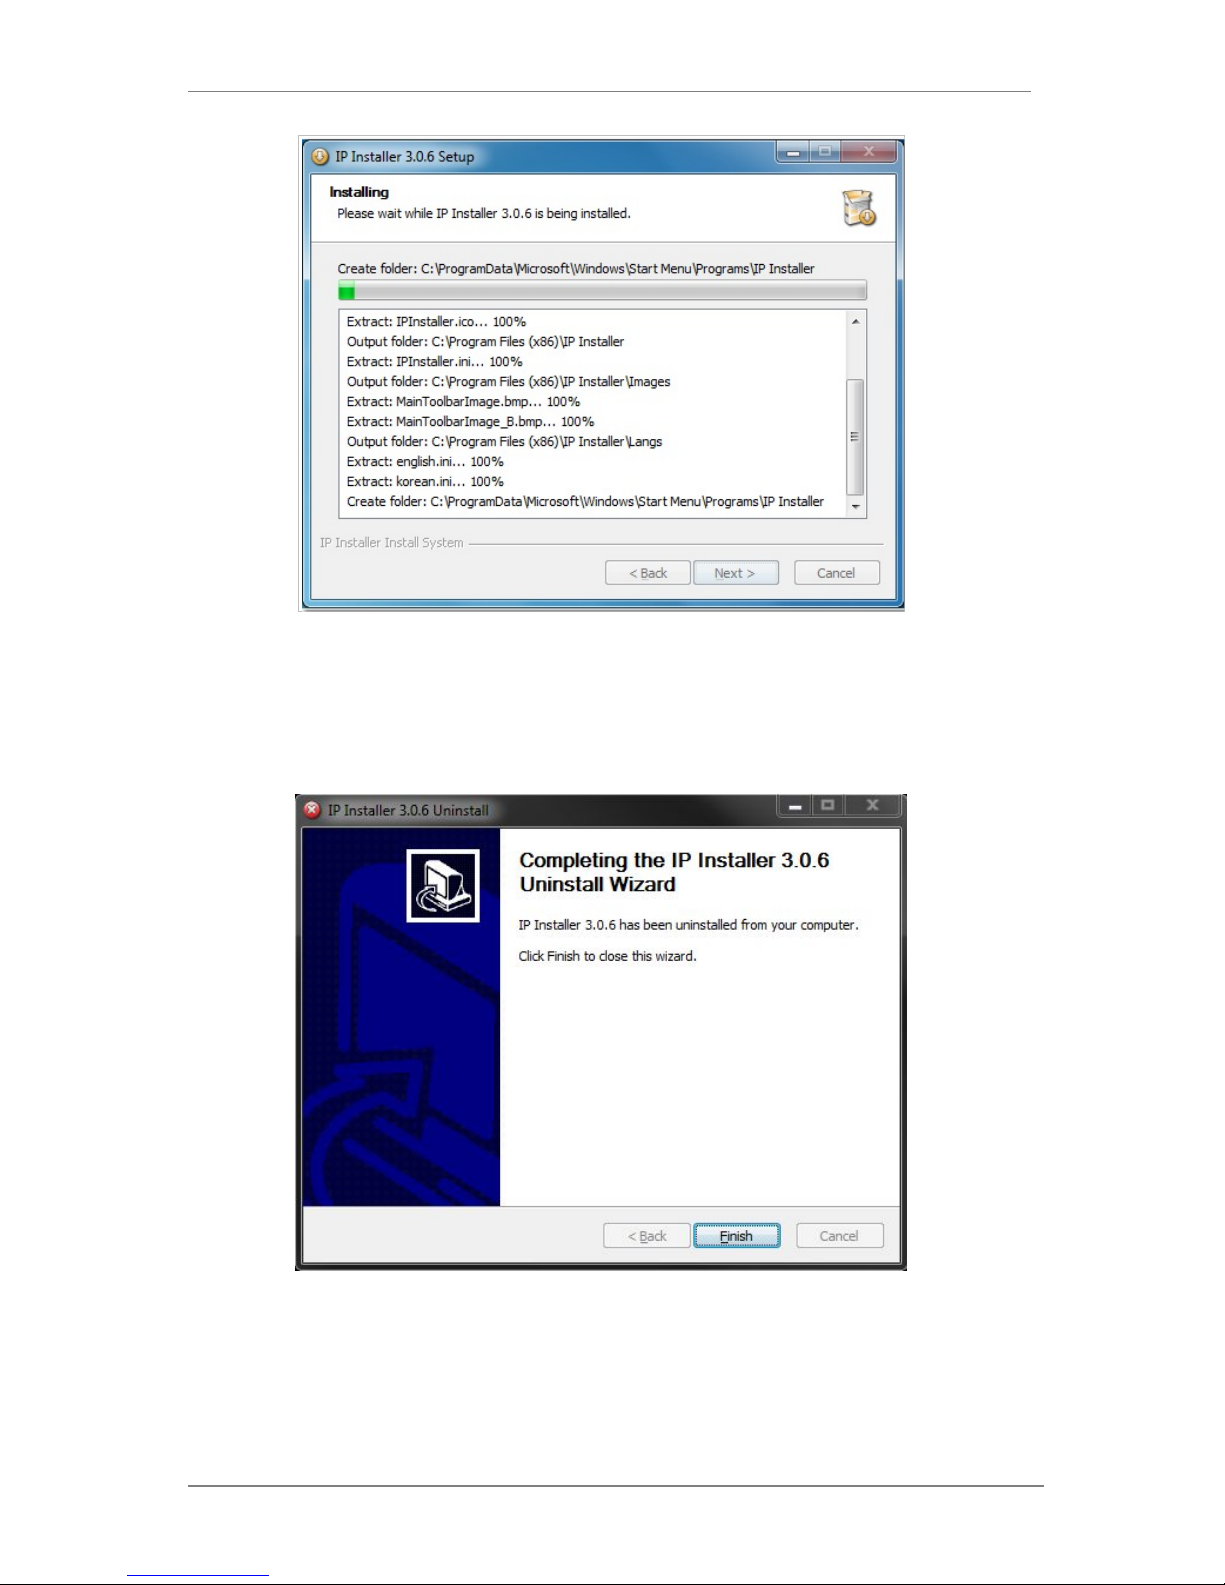
Click on the Uninstall button to start removing the IP Installer program from your compute r.
The following window will be displayed.
ENVI Series: VTD-13FN / VTD-13VN / VTD-20VN
22
Click on the Finish button to close the window
ENVI Series: VTD-13FN / VTD-13VN / VTD-20VN
23
10. Using IP Installer
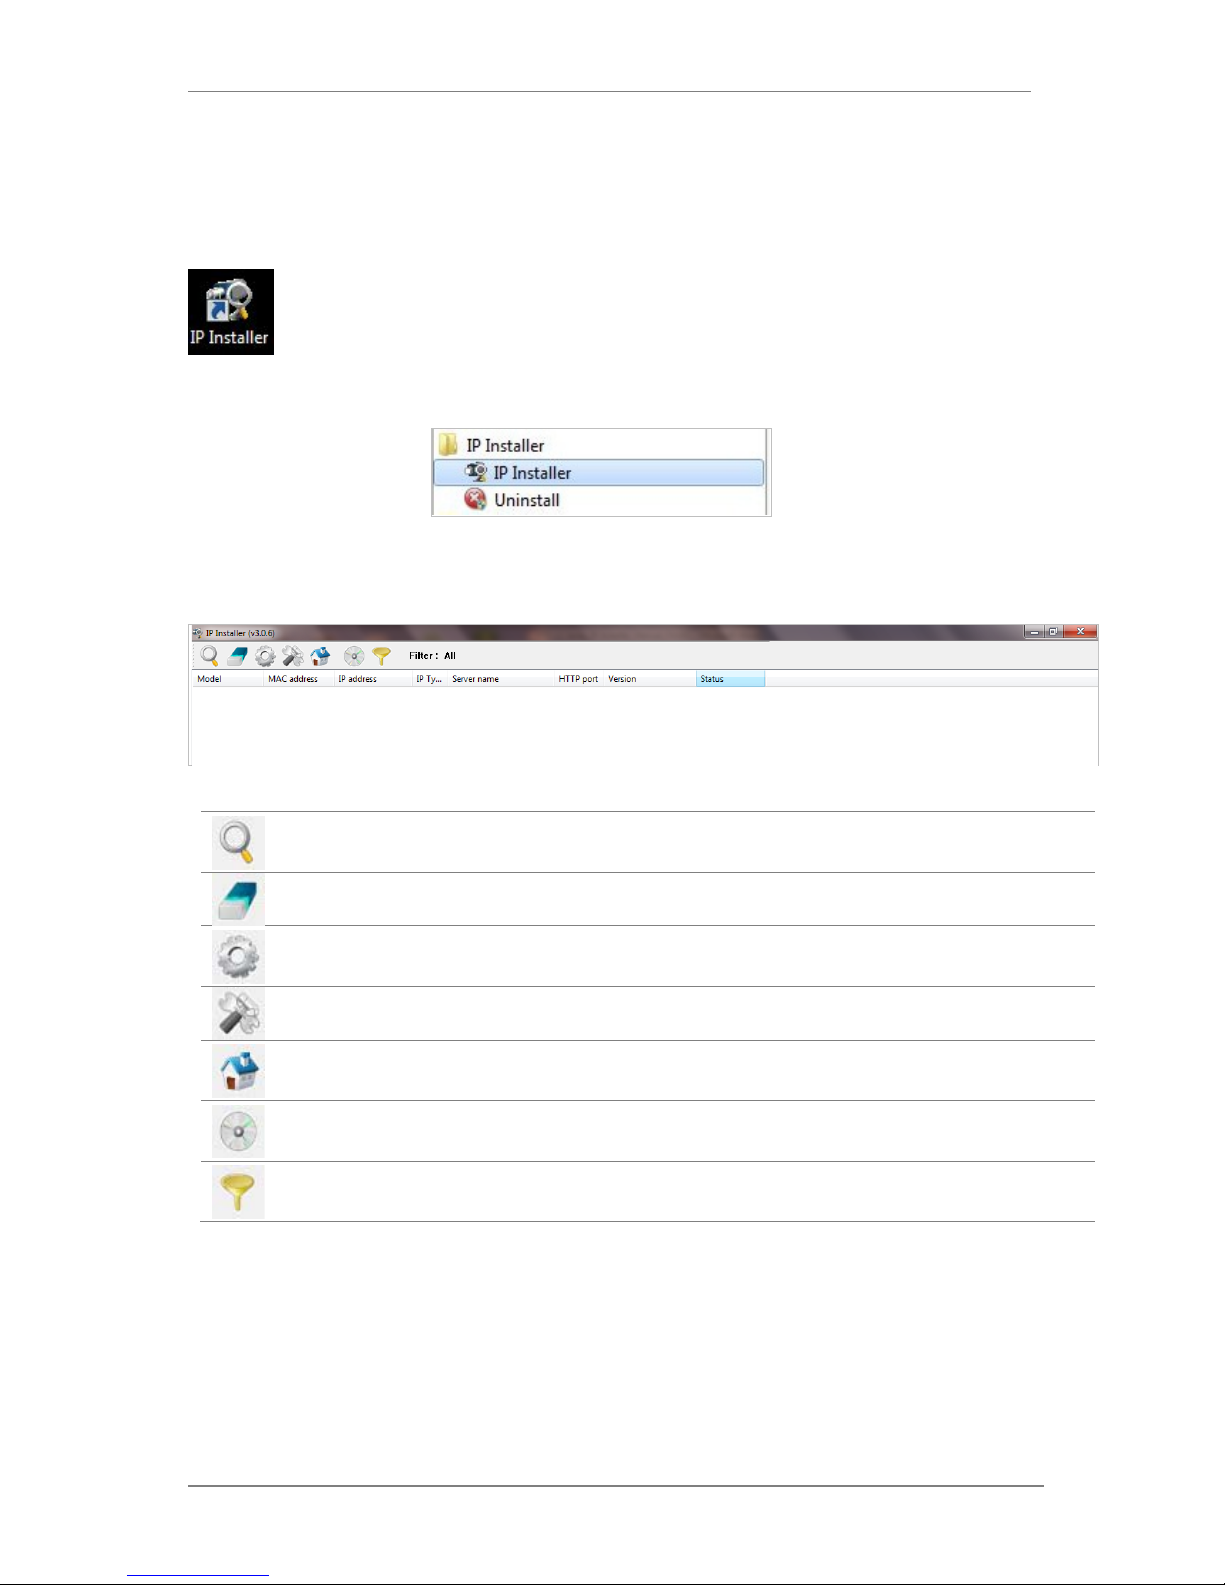
10.1. Starting the Program
Once IP Installer program has been installed on your computer, a shortcut icon
should be created on the desktop of your computer.You can star t IP Installerby
double clicking the icon.
Or you can also st art the program by cl icking Start > All Programs > IP Installer > IP
Installeras shown below.
After the program has started, the main window of IP Installer program will appear on the
screen as shown below. There are no network devices shown,as it is the first time running the
program and nothing has been registered.
Search Product
Scan the network and shows the list of all the Vitek products that IP
Installer program found.
Clear Product List Clear the Vitek products list created by searching the network.
Automatic IP Setup Configure the network setting of selected IP device in Automatic mode.
Manual IP Setup Configure the network setting of selected IP device in Manual mode.
Connect Product
Homepage
Connect to the server homepage of the selected IP device.
Update Firmware Update the firmware of the selected IP device.
Filter Configuration Define the range of MAC and IP addresses to search.
ENVI Series: VTD-13FN / VTD-13VN / VTD-20VN
24
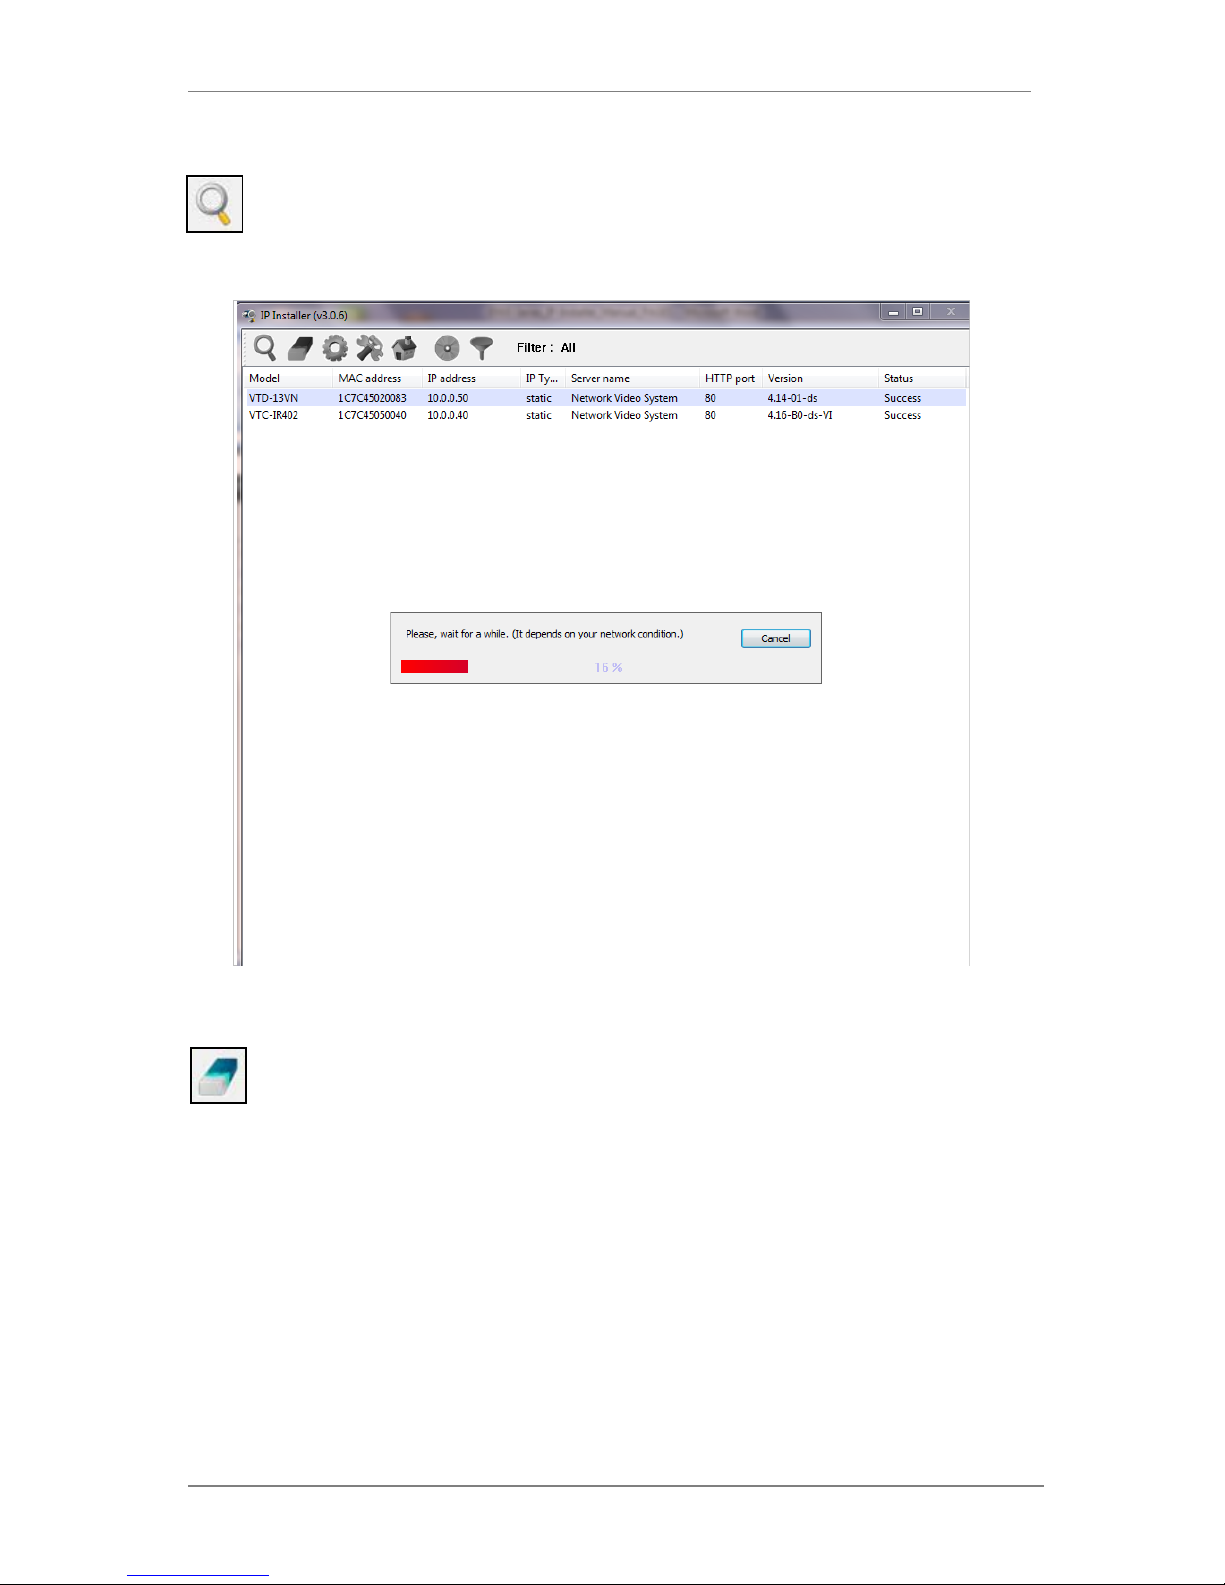
10.2. Search Product
Make sure that your Vitek products are powered and connected to the network, and then
click the Search Product button. A status window will pop up to show the progress of
the search. Wait until it reaches 100%, or you may press the Cancel button to stop the
search at any given timeand proceed with the results made until that moment.
After searching is completed 100%, the IP Installer program will display the IP devices found.
If you want to clear the list of the IP Devices from the window, click Clear Product List
button from the Main Toolbar.
ENVI Series: VTD-13FN / VTD-13VN / VTD-20VN
25
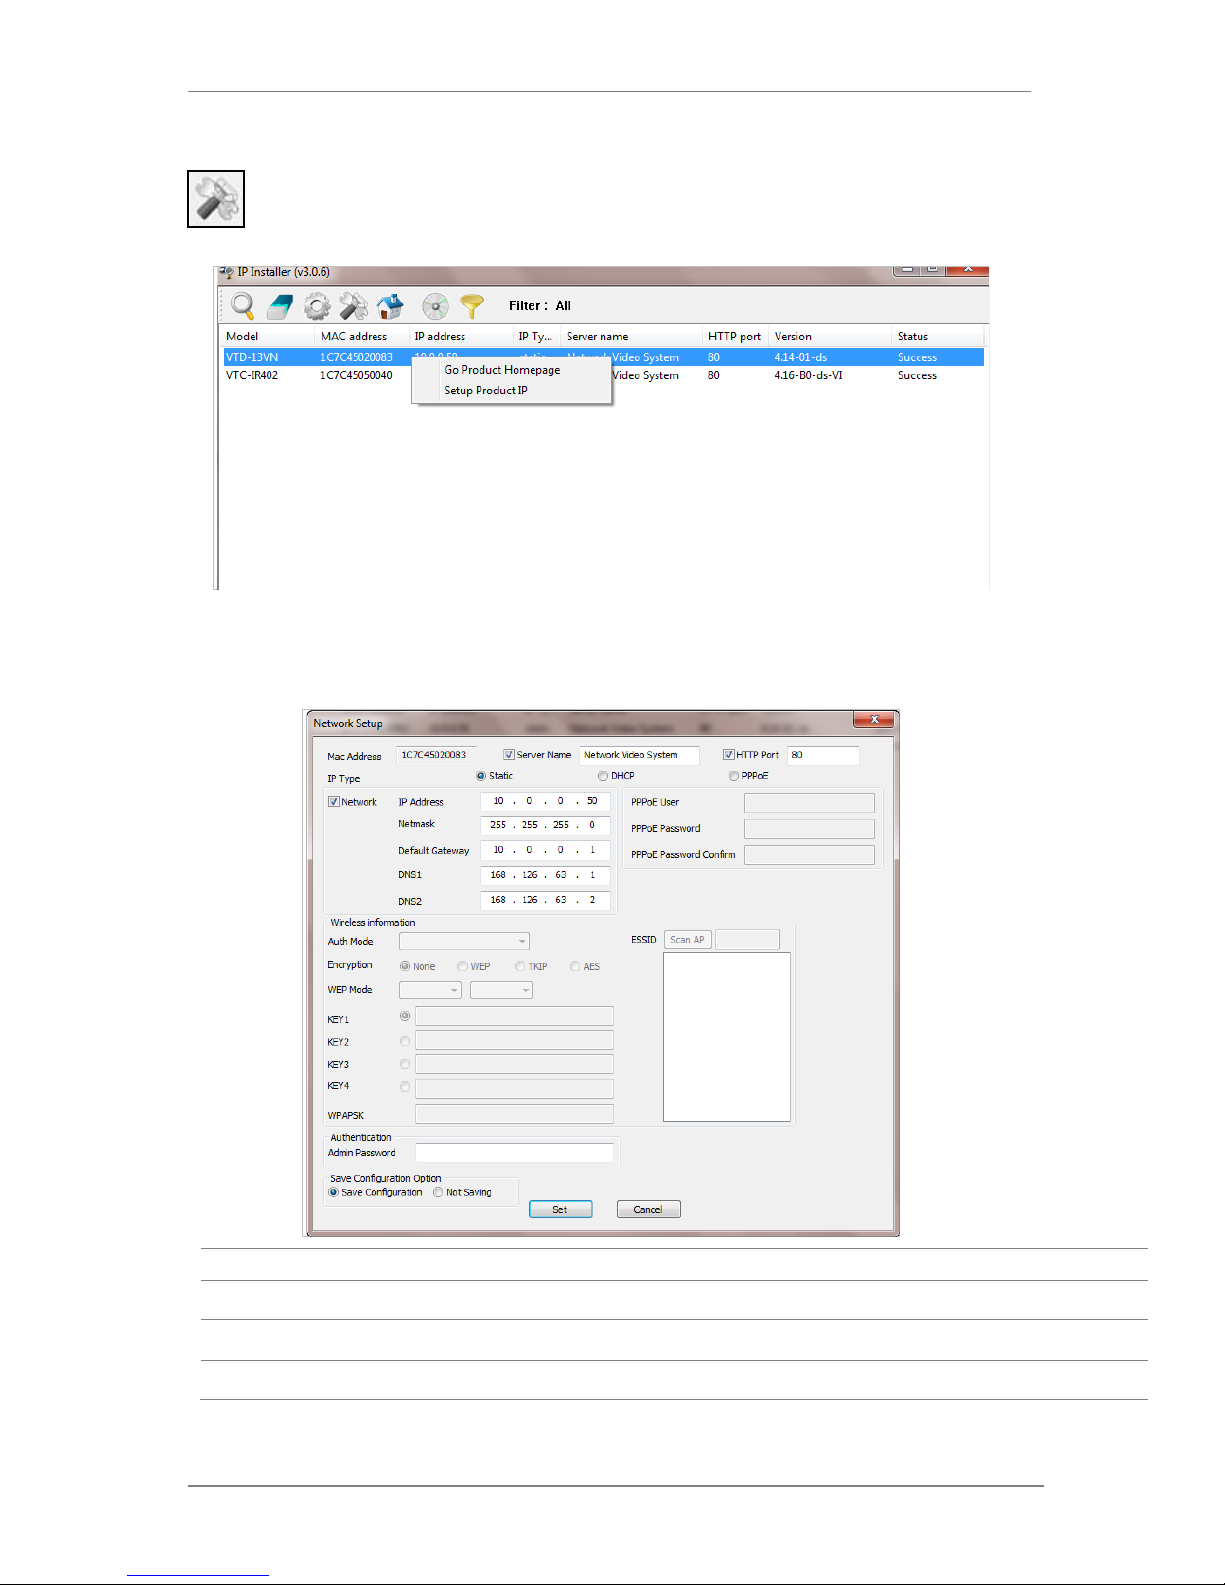
10.3. Manual Network Setup
Configuring the network parameters of the devices in the list can be started either by
highlighting and right clickingmouse button or by clicking Manual IP Setupbutton on the
main Toolbar.
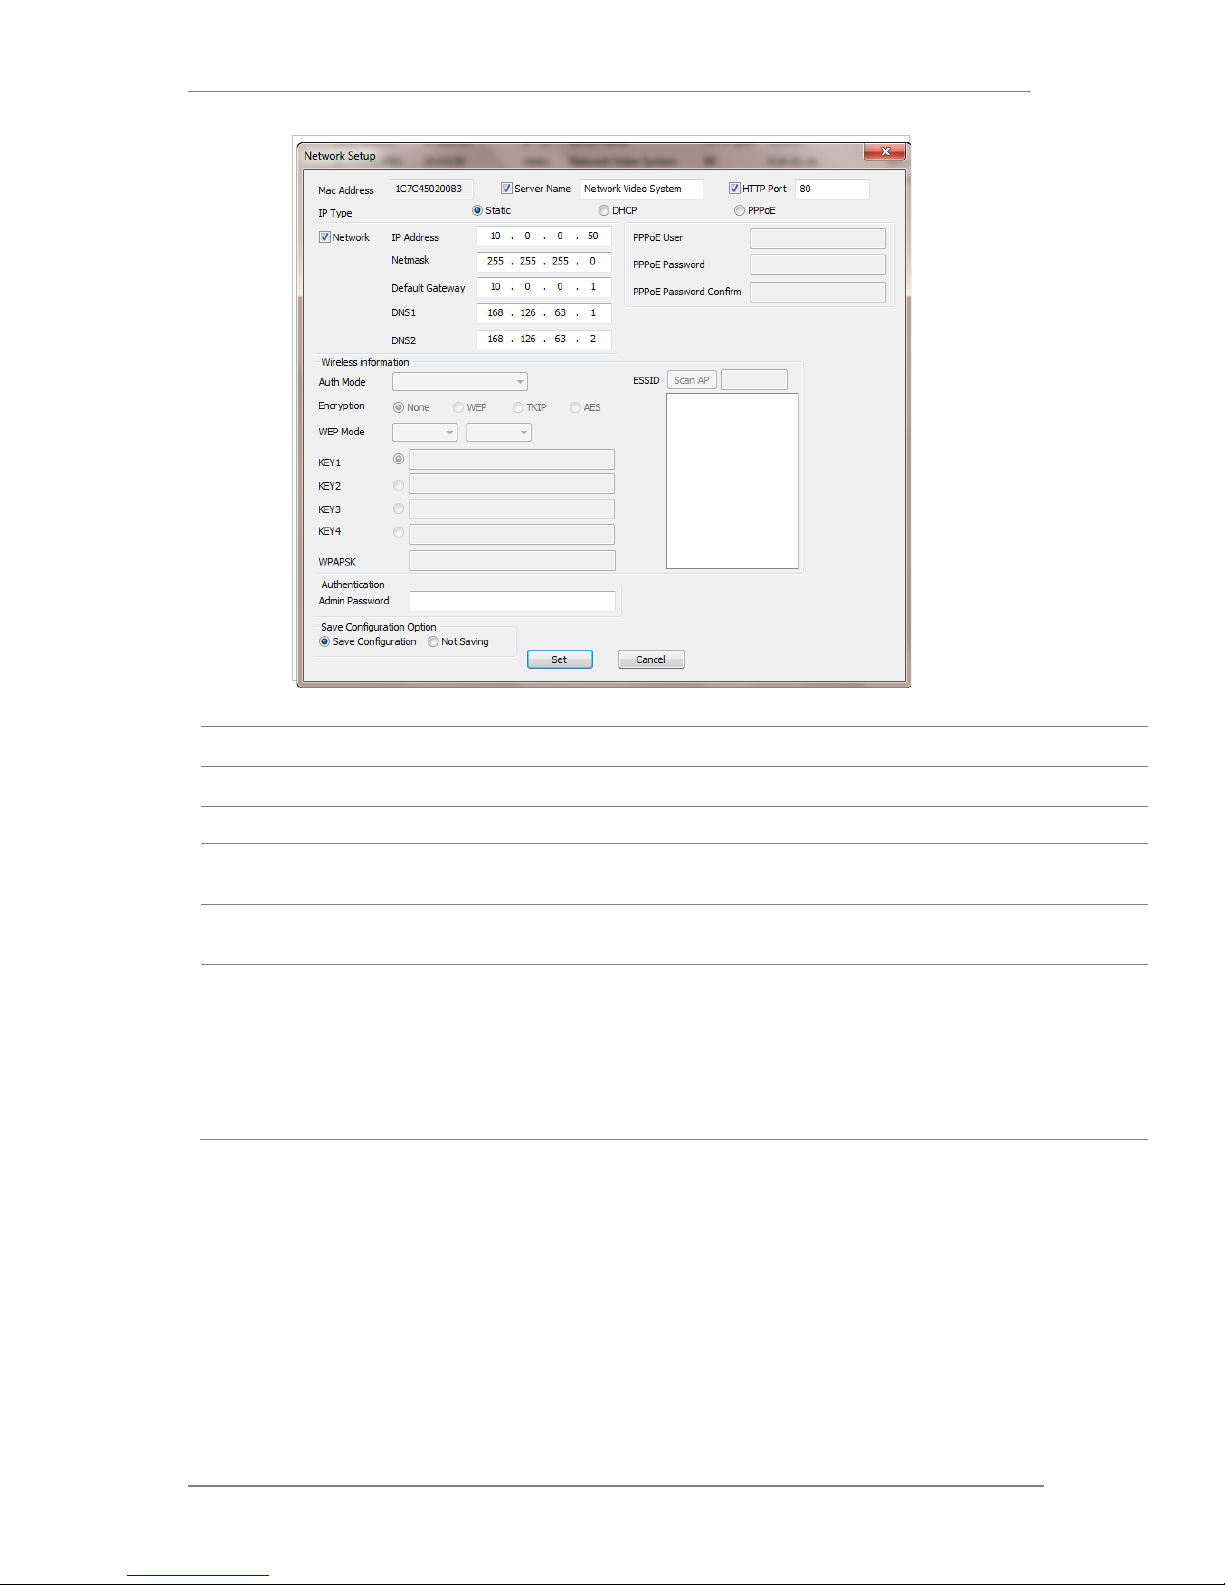
When one IP device is selected, the following screen will appear
MAC Address MAC address of the selected device is shown.
Server Name Input desired name of camera i.e. Lunch Room
HTTP Port Input port number to access IP devices homepage via web. Default port is 80
IP Type Select the type of address (Static / DHCP / PPPoE) Use STATIC for manual IP setup
ENVI Series: VTD-13FN / VTD-13VN / VTD-20VN
26
Network
General network parameters are required in this part. Please contact your network
administrator for detail.(IP Addr ess , Netmask, Default Gateway, DNS1, DNS2)
Authentication
(Admin Password)
Password for the IP d evice.
(Default password for Vitek products is “root” unless already changed)
Save Configuration
Option
Select whether the configured contents is to be saved in the Camera memory or not.
• Save Configuration: Changed values will be saved in the Camera memory of the
device, which means the changes are permanent.
• Not Saving: Changed values will not be sa ved in the Camera memory, which
means if the IP device is turned off the changes are lost and the previous setting
will be applied back.
Click Set button to app ly the changed values to IP device. If you don’t want it, click Cancel button.
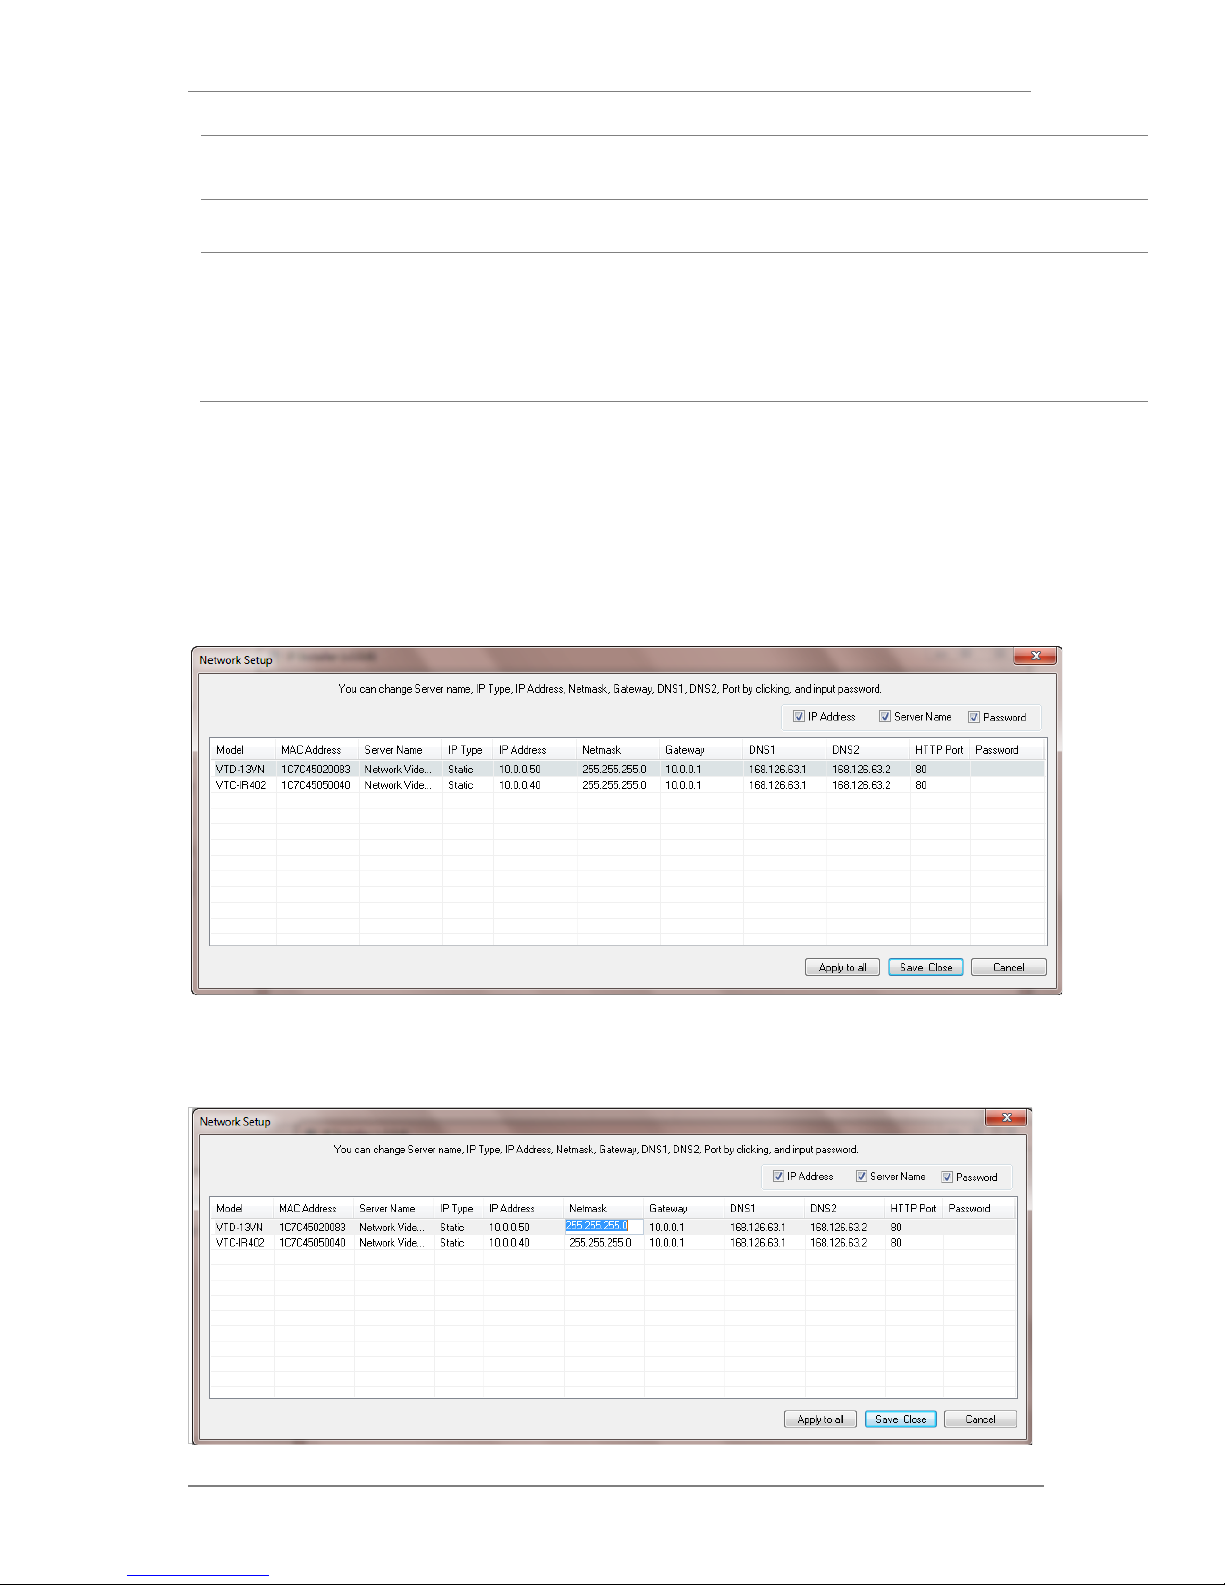
When two or more IP devices are selected
You can select two or more IP devices at the same time by clicking one after another while CTRL
key is pressed. The result is shown as below.
To configure the network parameters of those devices, click the right mouse button or click
Manual IP Setup icon on the main Toolbarwith multiple IP devices selected as shown abo ve.
Then the following window will show up.
You can modify the value of each changeable field by clicking it. The following shows an example
of entering a new value to a field.
ENVI Series: VTD-13FN / VTD-13VN / VTD-20VN
27
Model Model Numbers of the IP devices that you selected.
MAC Address MAC address of the selected device is shown.
Server Name Name of the selected IP device.
IP Type
How to assign IP address to the device (Select
Static
here for Manual IP
Setup)
IP address, Netmask,
Gateway, DNS1, DNS2
General network parameters are required in this part. Please contact your
network administrator for detail.
HTTP Port HTTP port number of the IP device for web access to homepage.
Password Password for the IP device.(Default password for Vitek products is “root”)
If you click Apply to all button after changing just a field of one IP device, the remaining IP
devices will have the same value for that parameter. In this case, each device’s Server name and
IP Address field will have +1 incremented value added to the original value. For example, if the
first IP device has been given the server name of NetCam and Apply to all button is pressed, it
will be automatically changed to NetCam1 and the next IP device will have NetCam2 and so on.
The same applies to the IP address field.
For Password field, the entered information doesn’t increment but will use the same data.
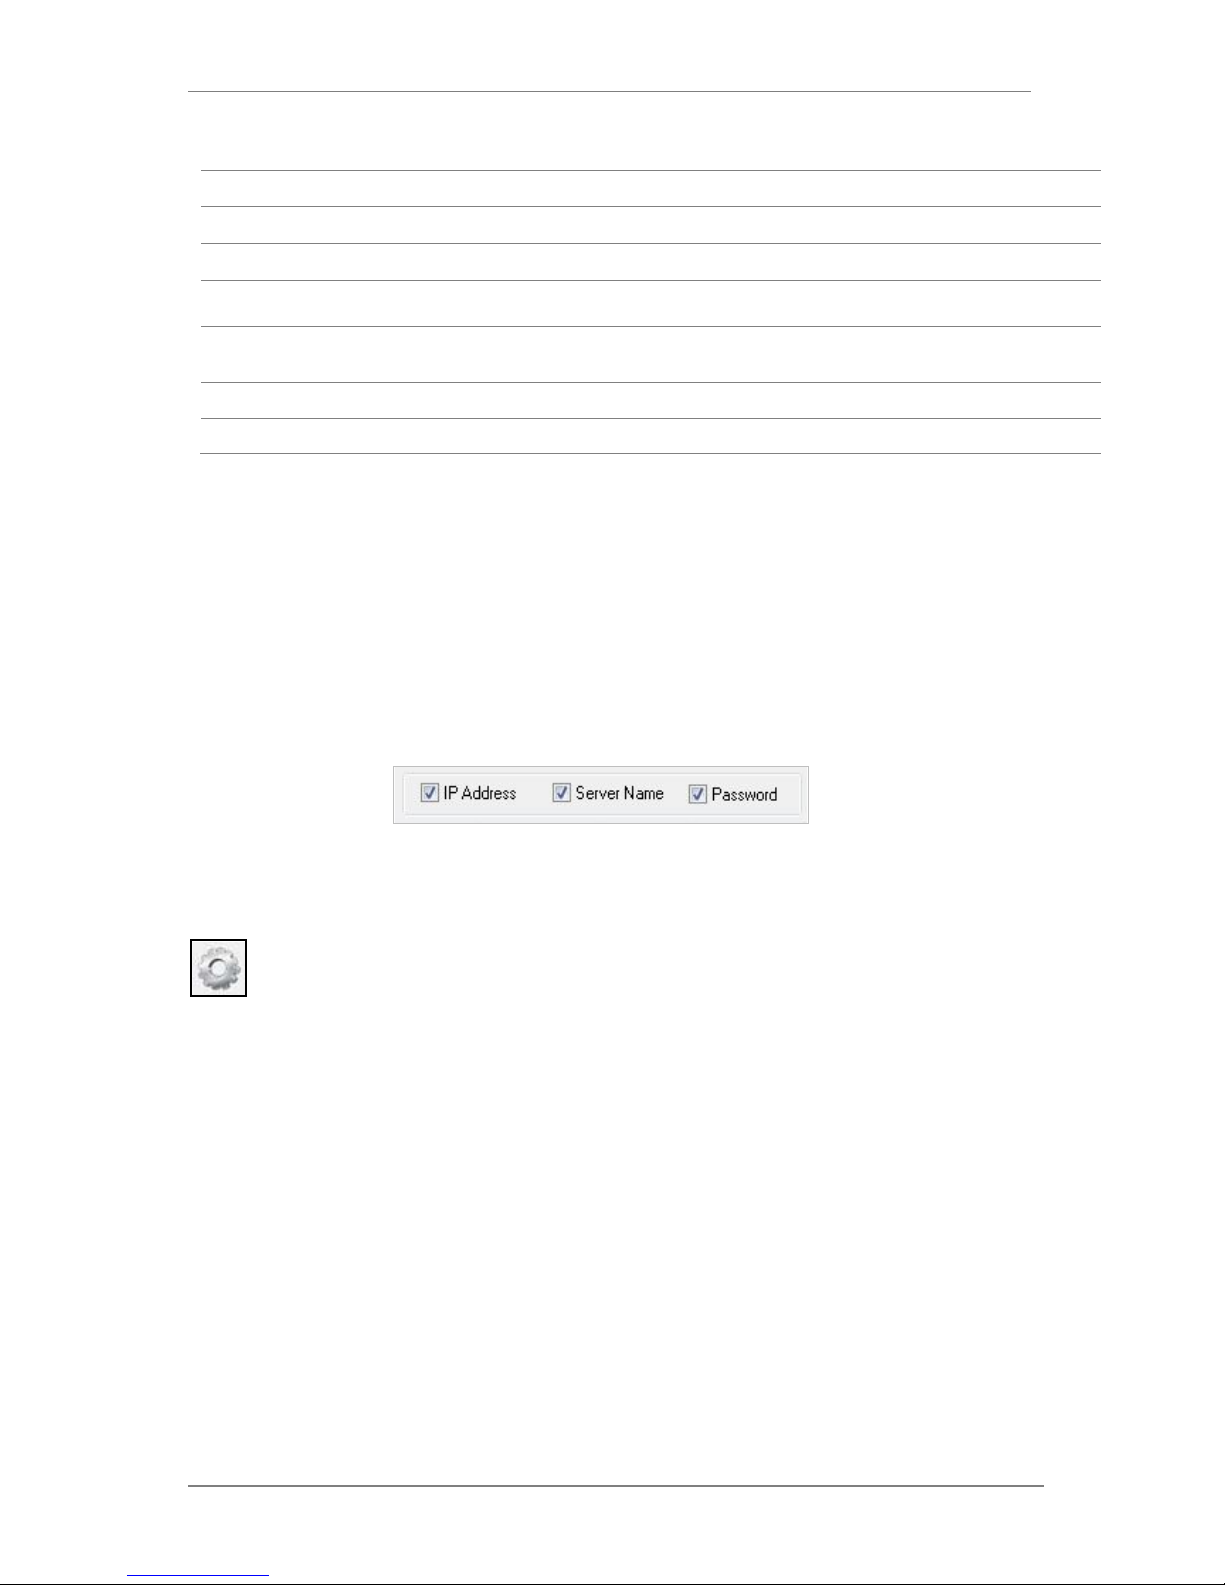
In using Apply to all, you can choose which fiel d is affected. Put check marks only on t he field
you want to use this automatic action as below.
Click Save & Close button to save the changed values in the camera memory of all the IP devices
and close the Network setup window.
10.4. Automatic Network Setup
Configuring the network parameters of the devices in the list can be started either by
clicking right mouse button or by clicking Automatic IP Setupbutton on the main
Toolbar. Before starting the setup, you first need to choose the one to be configured. In
this setup mode, IP Installer program checks your local network and assigns available IP addresses
to the IP devices. You have a choi c e of using those automatically assigned IP addresses, or you
can just enter other IP addresses as you desire.
ENVI Series: VTD-13FN / VTD-13VN / VTD-20VN
28
Server Name Name of the selected IP device.
HTTP Port HTTP port number of the IP device for web access to homepage.
IP Type How to assign IP address to the device (Select Static here for M anual IP Setup)
Network
General network parameters are required in this part. Please contact your network
administrator for detail. (IP Address, Netmask, Default Gateway, DNS1, DNS2)
Authentication
(Admin Password)
Password for the IP device. (Default password for Vitek products is “root”)
Save Configuration
Option
Select whether the configured contents is to be saved in the Camera memory or not.
• Save Configuration: Changed values will be saved in the Camera memory of the
device, which means the changes are permanent.
• Not Saving: Changed values will not be sa ved in the Camera memory, which
means if the IP device is turned off the changes are lost and the previous setting
will be applied back.
Click Set button to apply the changed va lues to IP device. If you don’t want it, click Cancel button
to restore the previous values.
ENVI Series: VTD-13FN / VTD-13VN / VTD-20VN
29
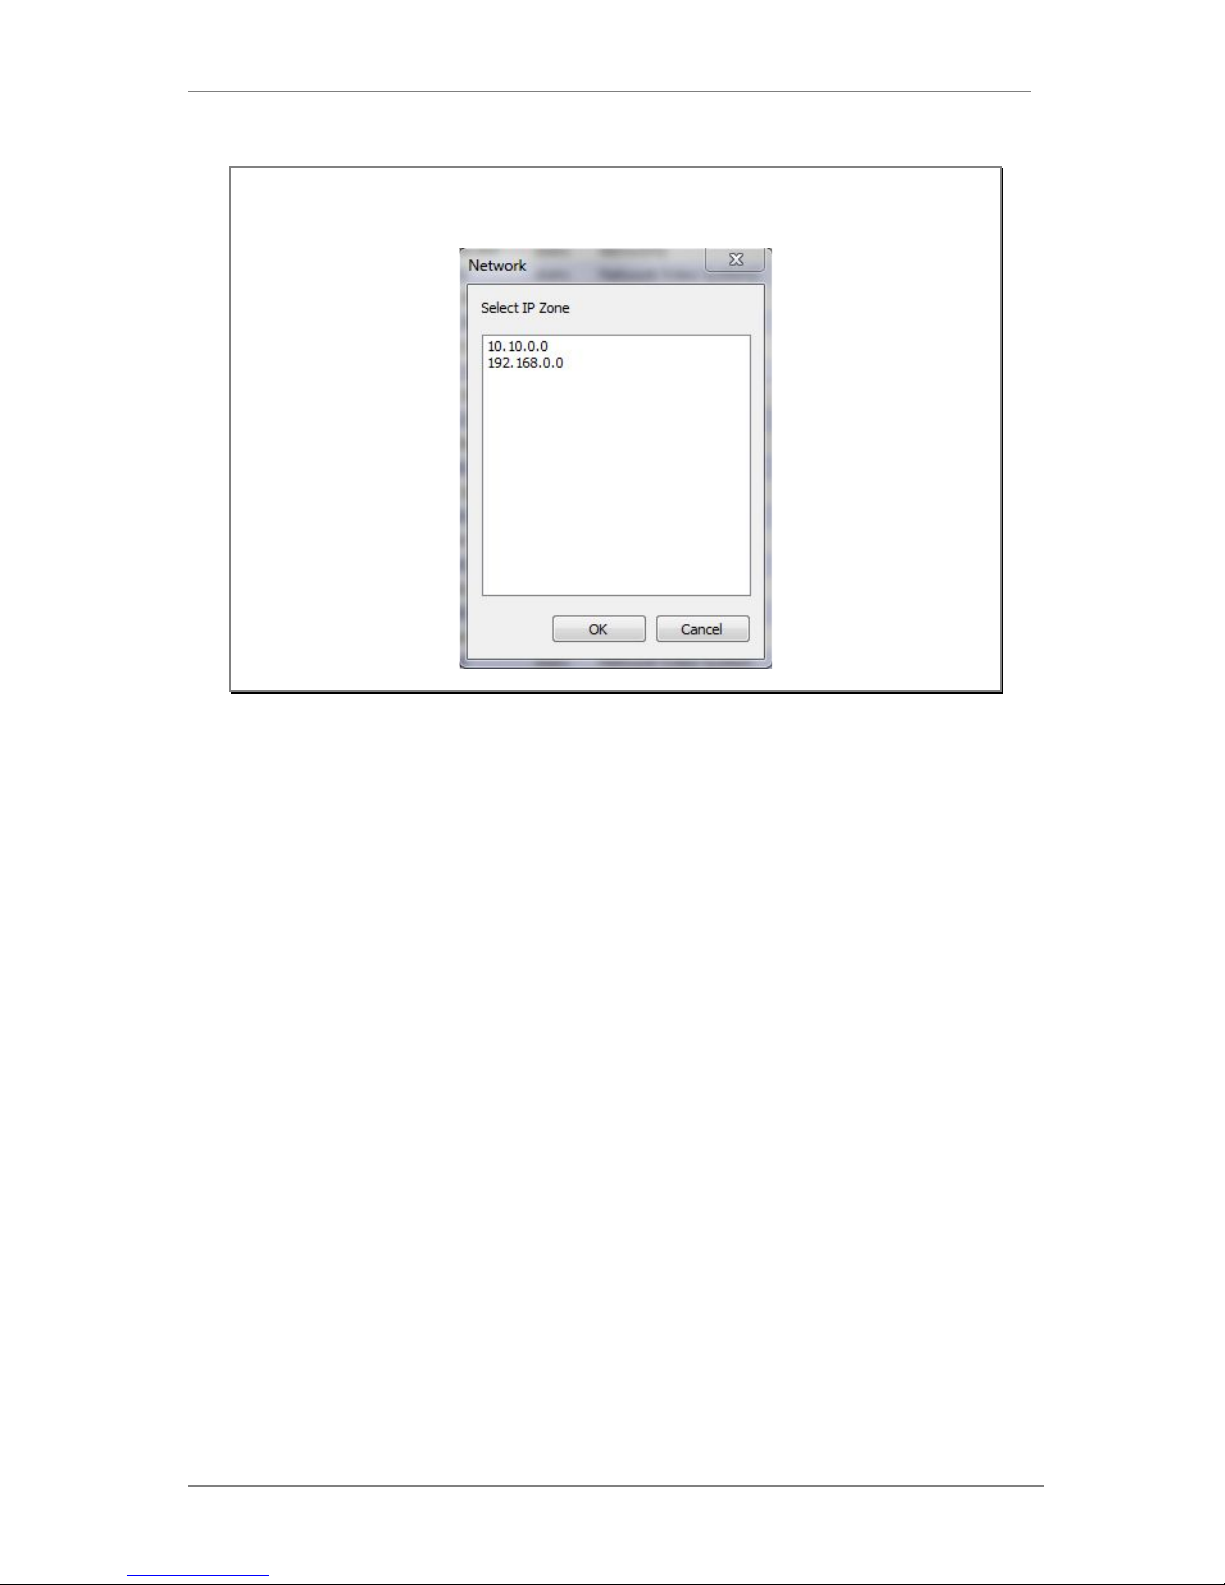
Note: If your network has more than one IP address Zone at the same time, the
confirmation window will be displayed as below. You need to choose the one you
are going to use for your IP devices.
 Loading...