

Visual Comfort CHC 4125 Installation Manual
CHC 4125
ASSEMBLY & INSTALLATION GUIDE
WE RECOMMEN D INSTALLATION OF THIS LIGHTING FIXTUR E BE DON E BY A LICENS ED ELECTRICIAN.
WARNING *** SWITCH OFF THE MAIN ELECTRICAL SUPPLY FROM THE MAIN FUS E BOX/CIRCUIT
BREAKER BE FORE I NSTALLATION.
INSPECT ITEM CAREFULLY BEFORE ATTEMPTING TO INSTALL. IF THE RE IS ANY DAMAGE OR
OBVIOUS DEFECT, DO NOT INSTALL.
ITEM MAY NOT BE RETURNED ONCE IT HAS B EEN INSTALLED.
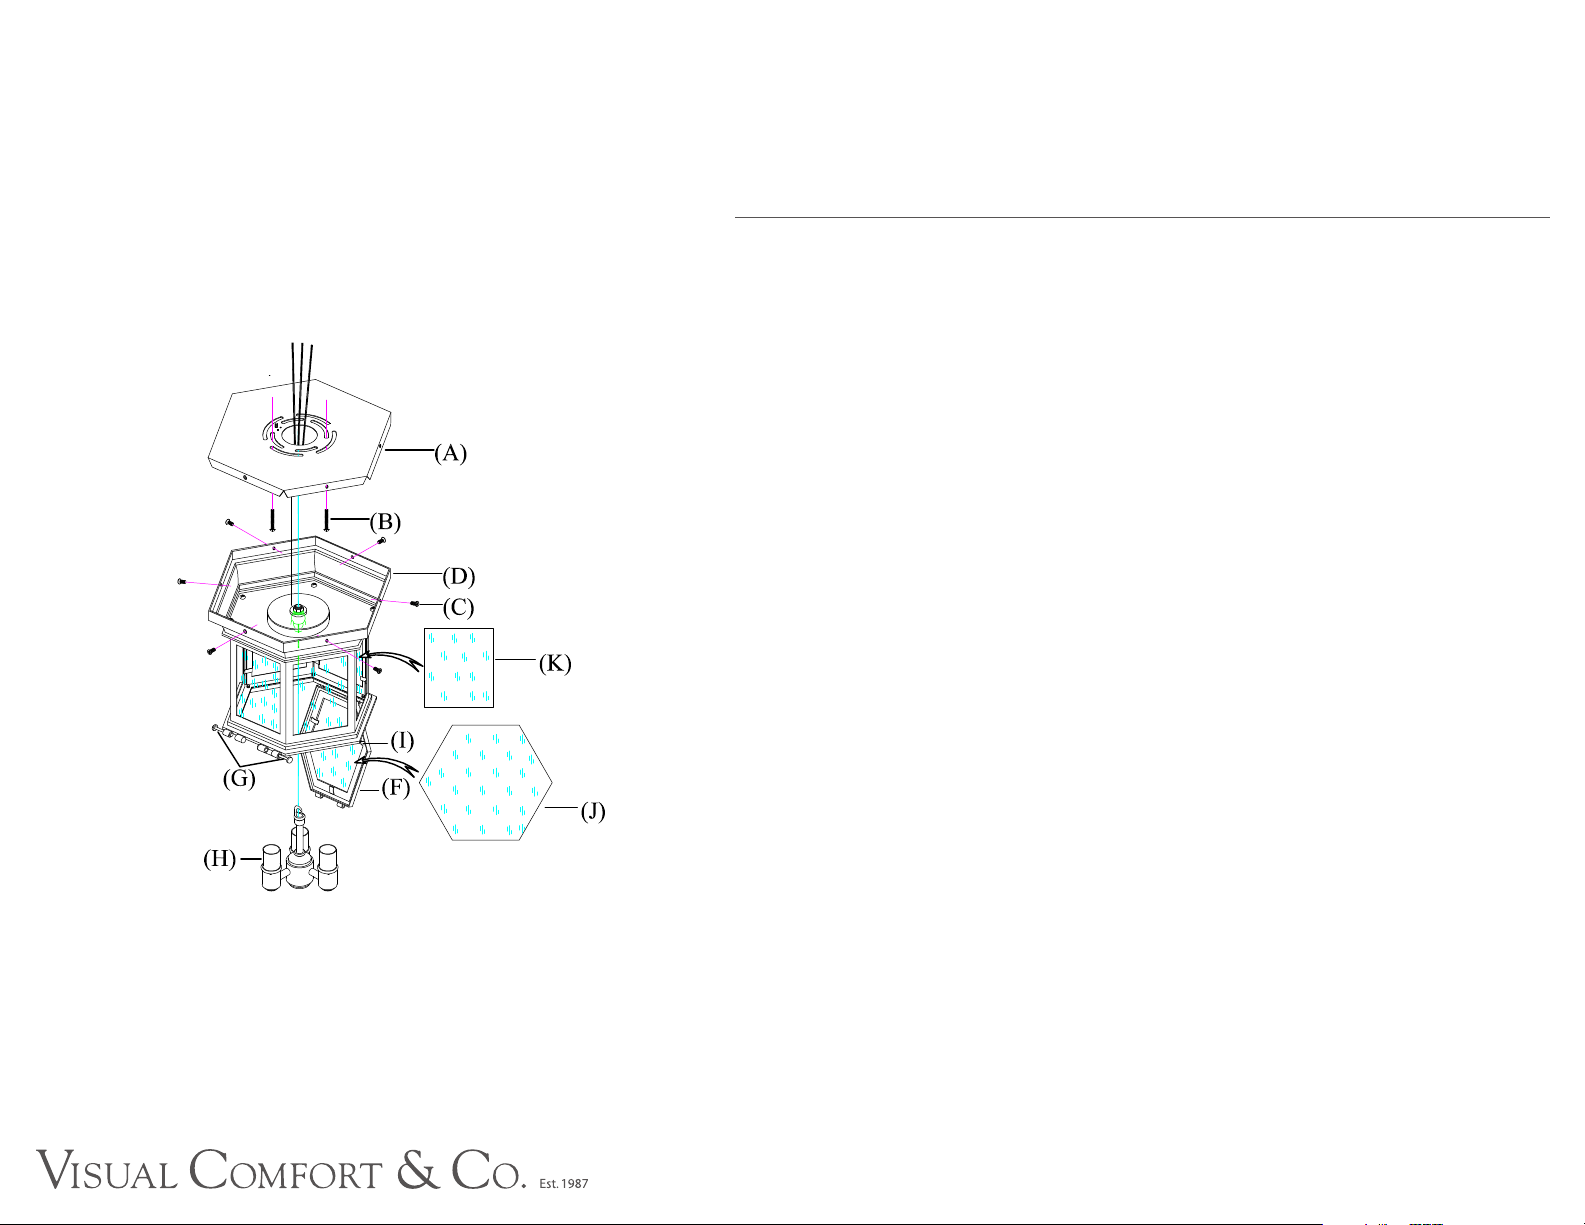
1. Open the door (F) by loosen locking pins (G).
2. To install glass panel (J) provided to front frame (D), make sure metal tabs (I) are flipped against the opening of the
frame. Place glass panel (J) to front frame and secure glass panel (J) by bending back metal tabs (I) towards the
glass panel. To install rest six glass panels (K) into side frames and secure with the metal tabs on the frame.
3. Attach the top hook on the candelabra assembly (H) to the loop (E).
4. Remove back plate (A) from lantern base (D) by removing base screws (C) and set aside.
5. Connect the hot wire from the fixture (with words on surface) to the junction box wire from the outlet box (usually
WHITE). Fasten them together with a plastic wire connector provided and wrap connection with electrical tape.
6. Repeat this procedure for the neutral wire from the light fixture (without words on surface) to the wire from the outlet
box (usually BLACK).
7. Connect the ground wire from the light fixture (bare copper) to the ground wire from the outlet box.
8. Attach back plate (A) to ceiling outlet box and tighten with back plate screws (B).
9. Attach lantern base (D) to affixed back plate (A) and tighten with base screws (C).
10. Insert light bulbs into sockets. Close the door (F) by inserting locking pins (G).
 Loading...