

Vista Viper 4, Viper 16, Viper 8 Quick Installation Manual

VIPER quick ser guide V1.0 1
Real Time Full HD, PoE
Network Video Recorders
(4/8/16CH)
QUICK INSTALLATION GUIDE
Please read this manual thoroughly before use, and keep it handy for future reference.
This document is a QUICK START GUIDE. For detailed information, please refer to your user manual.

VIPER quick ser guide V1.0 2
VIPER quick ser guide V1.0 3
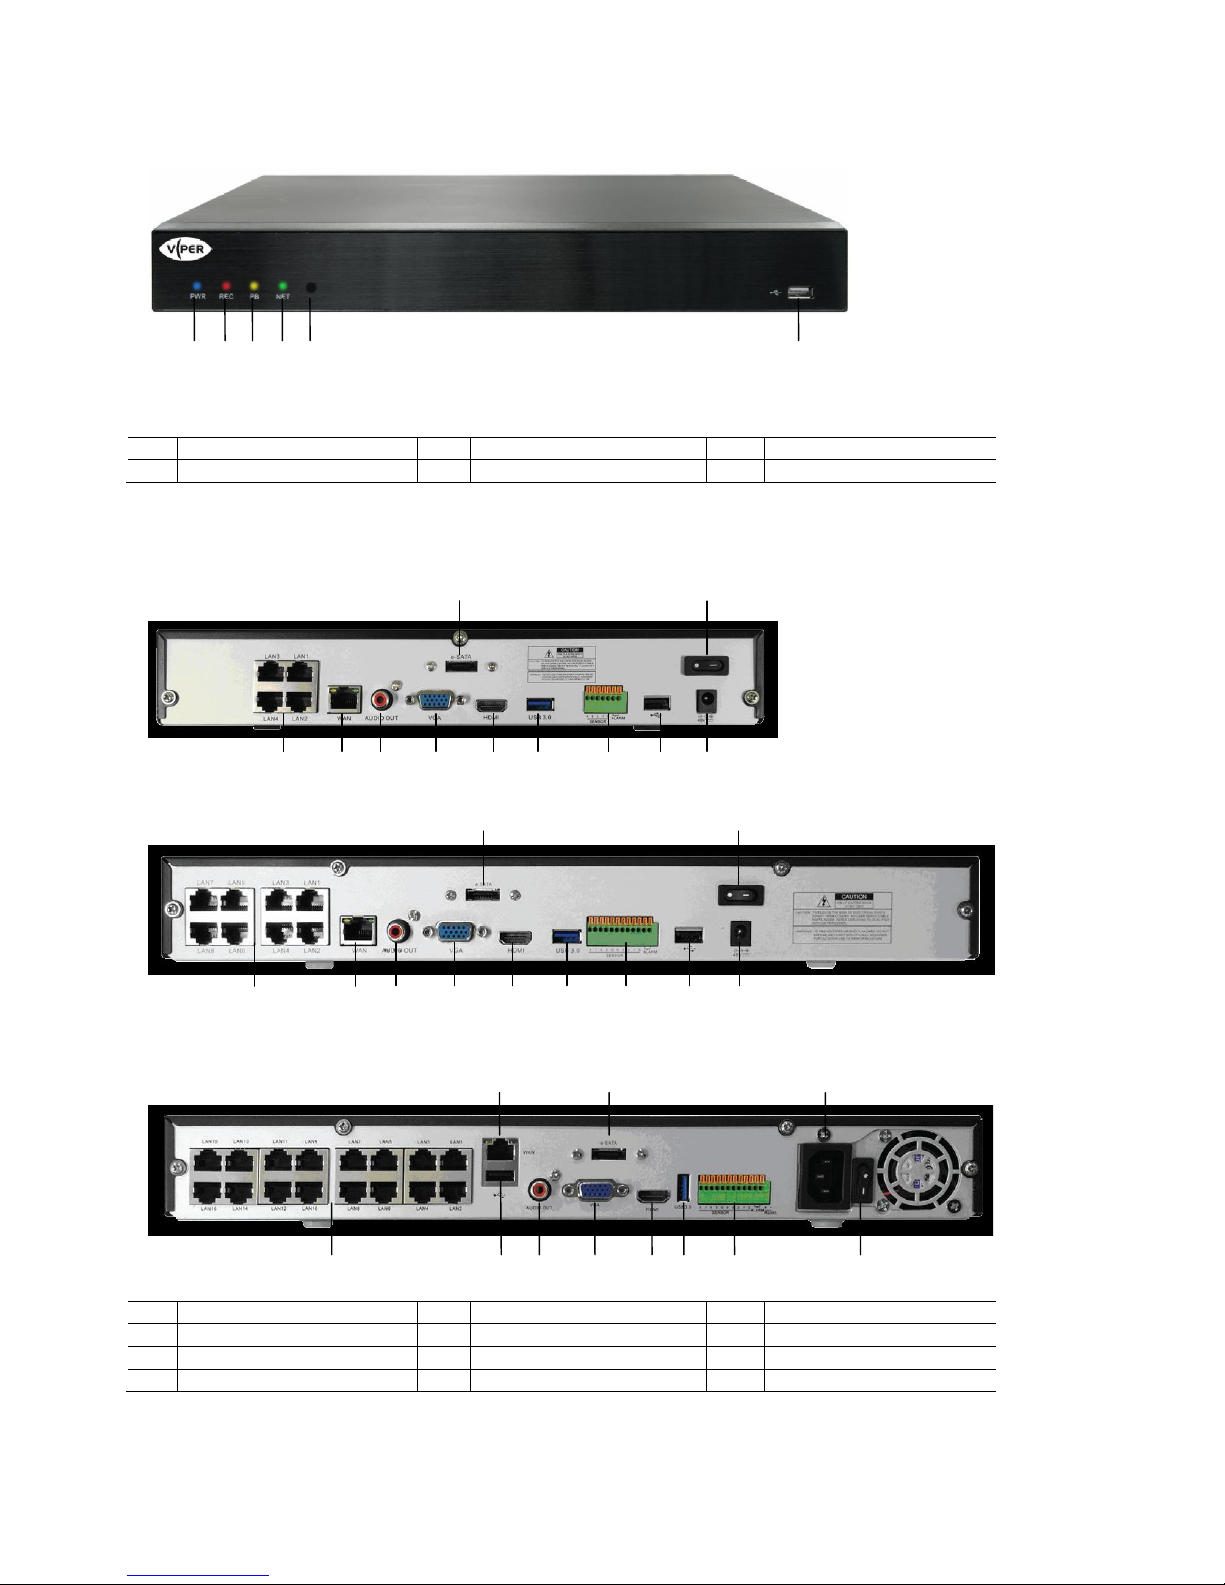
Front Panel
1 2 3 4 5 6
1
Power LED
2
Record LED
3
Playback LED
4
Network LED
5
IR Remote sensor
6
USB 2.0 Port
Rear Panel
* VIPER04
* VIPER08
* VIPER16
1
IP camera inputs
5
eSATA
9
USB 2.0
2
Network port
6
HDMI
10
Power input
3
Audio out
7
USB 3.0
11
Power switch
4
VGA out
8
Sensor/Alarm I/O
5 11
1 2 3 4 6 7 8 9 10
5 11
1 2 3 4 6 7 8 9 10
2 5 10
1 9 3 4 6 7 8 11

VIPER quick ser guide V1.0 4
System Setup
When power is turned on, you will see the boot up screen, it may take up to one minute to complete. After initializing is
complete, an Easy Setup screen will appear.
Easy Setup Wizard
An Easy Setup screen will appear. If you don’t want to go through the setup steps at this time click the Exit button and the
system will go to the main live screen. When you want to set up the system, just click the Easy Setup Menu or Main menu
in the right-click mouse menu. When the Easy Setup is finished the NVR returns to the live screen, the auto connected
camera image will be displayed on the live screen. The NVR system will record automatically as regular recording.
* For basic system setup and configuration it is recommended to complete all the setup steps.
IP Camera Registration
Registering cameras on the VIPER NVR can be achieved using 4 different methods. The chosen method is
dependant on the camera make and model, and whether it is connected directly to the NVRs in built PoE switch.
The 4 methods are as follows:
1. Auto Detection
This is the simplest and quickest method, it can be used for all cameras within the Vista VK2 range, or for other
third party manufacturers camera that support “Zero Config”.
This method only works for cameras that are connected directly to the NVRs PoE ports and have ID and
Password of “admin”. This is the default settings for the VK2 range.
2. NVR Search and manual registration
This method can be used for cameras ( Including VK2 range ) that are connected via a switch to the WAN port
on the rear of the NVR, and for cameras that do not support “zero config” but are connected to the in built PoE
switch.
3. Manual adding of ONVIF cameras
This method can be used to try and connect cameras that cannot be connected by either of the 2 previous
methods. Cameras must be Onvif compliant to version S for this method to operate.
4. Manual adding of cameras RTSP streams
This method can be used to try and connect cameras that cannot be connected by any of the 3 previous
methods.
The following sections describe the process for registering camera by each method:

VIPER quick ser guide V1.0 5
Auto Detection
This is the simplest method of registering cameras; it can be used with any of the Vista VK2 range of cameras
or third party manufacturer’s cameras that support “Zero Config”
The cameras must be connected directly to the PoE ports of the NVRs built in switch, and the cameras ID and
Password must both be set to “admin”, and the network settings, set to DHCP( This is the default setting for the
VK2 range.)
Connect the cameras to the PoE ports of the NVR, the physical port numbers relate to the screen segments on
the 16 way split screen display: 1 = top left, 16 = bottom right.
Power up the NVR, it will take a minute or so to boot up, then will automatically detect the connected cameras
and apply IP address using DHCP.
Wait for a short while, icons showing a camera and rotating blue dots will be displayed in screen segments
relating to port positions on which cameras have been detected.
After a couple of minutes the images from the cameras will be displayed.
Once all the cameras are displayed, the stream and image settings can be configured using the IP Camera
Setup” and “Image Setup” sections with in the NVRs main menu. For more details see the following sections in
this manual.

VIPER quick ser guide V1.0 6
NVR search and manual registration
Used to register cameras connected via the WAN port, or cameras on the PoE ports which do not support “Zero
Config”
To register cameras using this method the “Auto Detection” function must be turned “off” for the relevant
channels. To do this got to:
Main Menu > Audio / Video > IP Camera Registration
The following screen will be displayed:
Click on the “Auto / Manual” button, the following screen will appear:
Any channel with a “tick” in the box is set to Auto Detection, click on the box to remove the tick for the channels
that require a manual set up, then click on “OK”.
Next click on the “Add” button in the bottom left of the screen, to display the Camera Registration menu page. If
cameras have previously been connected they will be displayed in the list with their channel numbers in the
Registration column.
VIPER quick ser guide V1.0 7
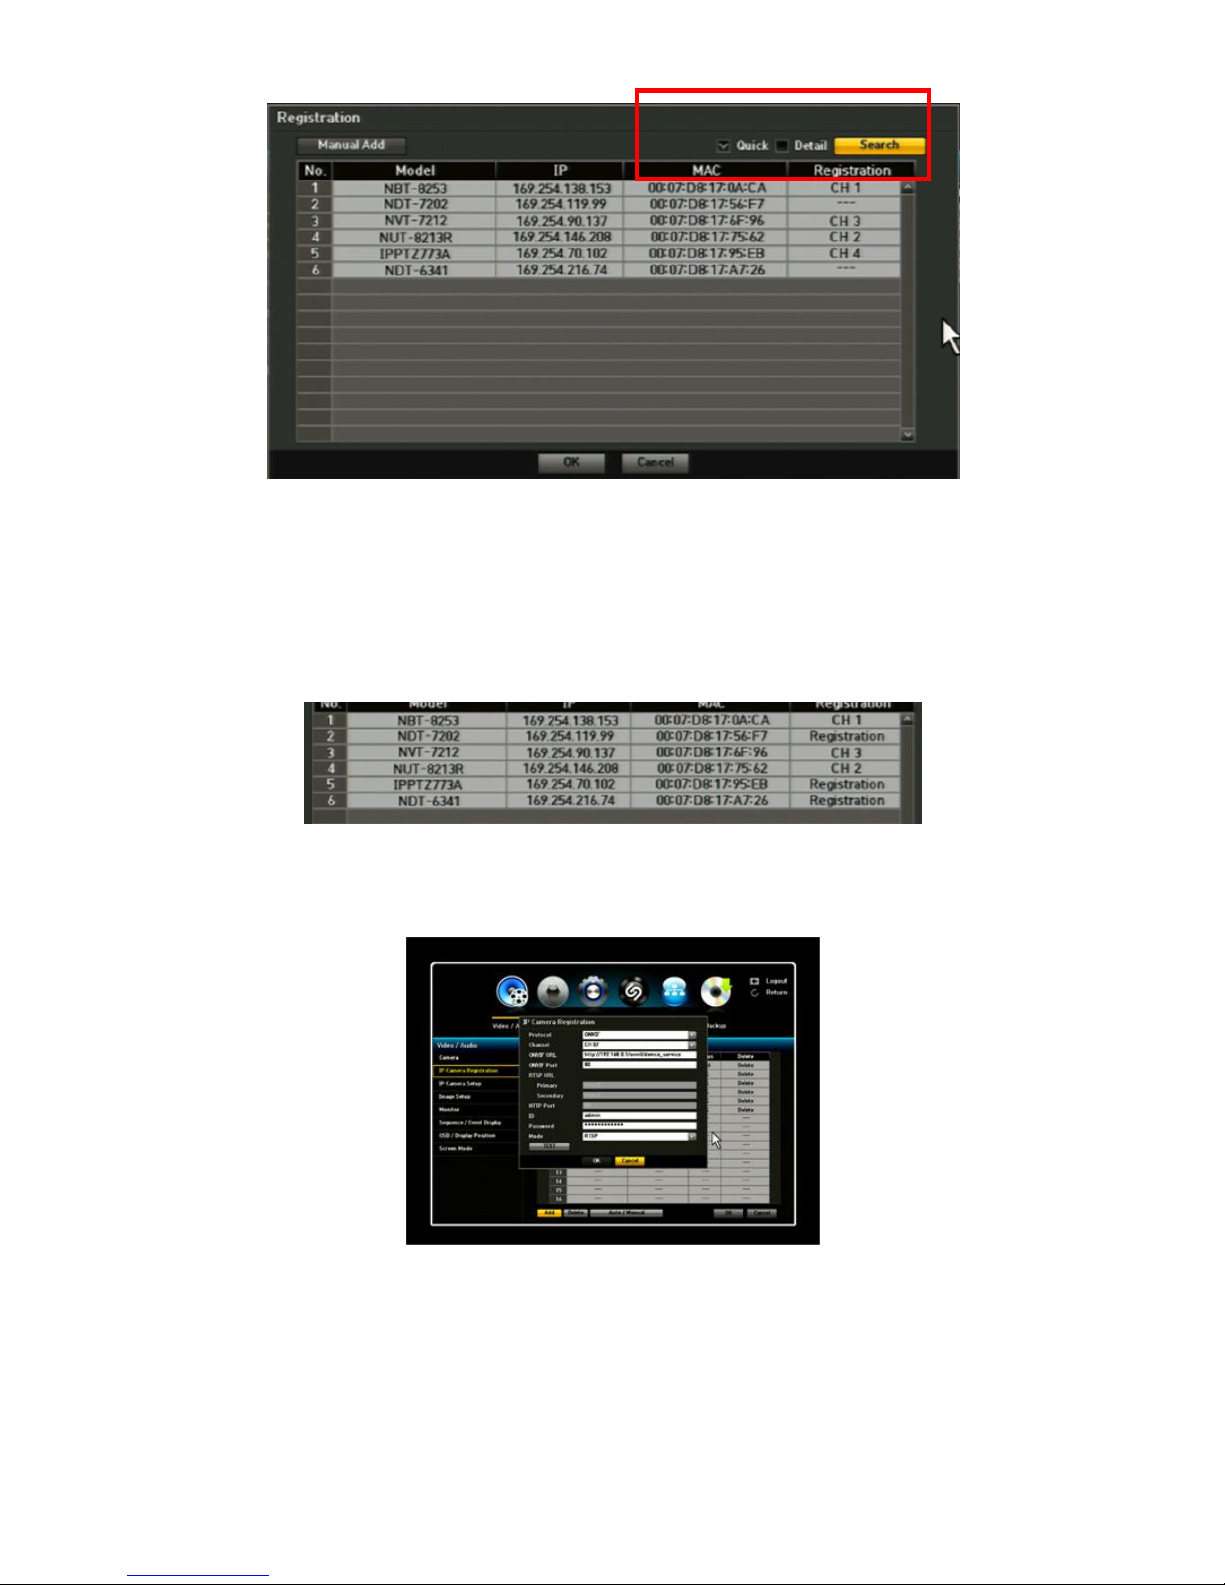
To search for more cameras on the system either a “Quick” or “Detailed” search can be used.
If the “Detail” box is ticked, and the “Search” button is pressed the NVR will search the network for other
cameras and try to interrogate their ID and Password.
If the “Quick” box is ticked then the NVR will only search for the cameras identity and IP address.
Once the search is completed the list will appear as below:
cameras which have not been allocated to the NVR will have the word “Registration” displayed in the Right
hand Registration column.
To allocate cameras to certain channels click on the word “Registration” the following box will appear:
Select the channel number required, channels that have already been allocated will be greyed out.
If a “Quick” search has been run then the camera ID and Password will be blank and will need to be added
manually, click on the box to display the on screen keyboard and enter the ID and Password.
If a “Detailed” search has been run then the cameras ID and Password will automatically be filled in on screen,
so simply select the required channel number.
 Loading...