

Page 1
Quick Start Guide for the PowerMax Plus
Thank you for choosing the Visonic PowerMax Plus security system. Please follow these instructions
to ensure your system is setup properly.
1. Locate your PowerMax unit within 6 feet of a power plug and a phone jack.
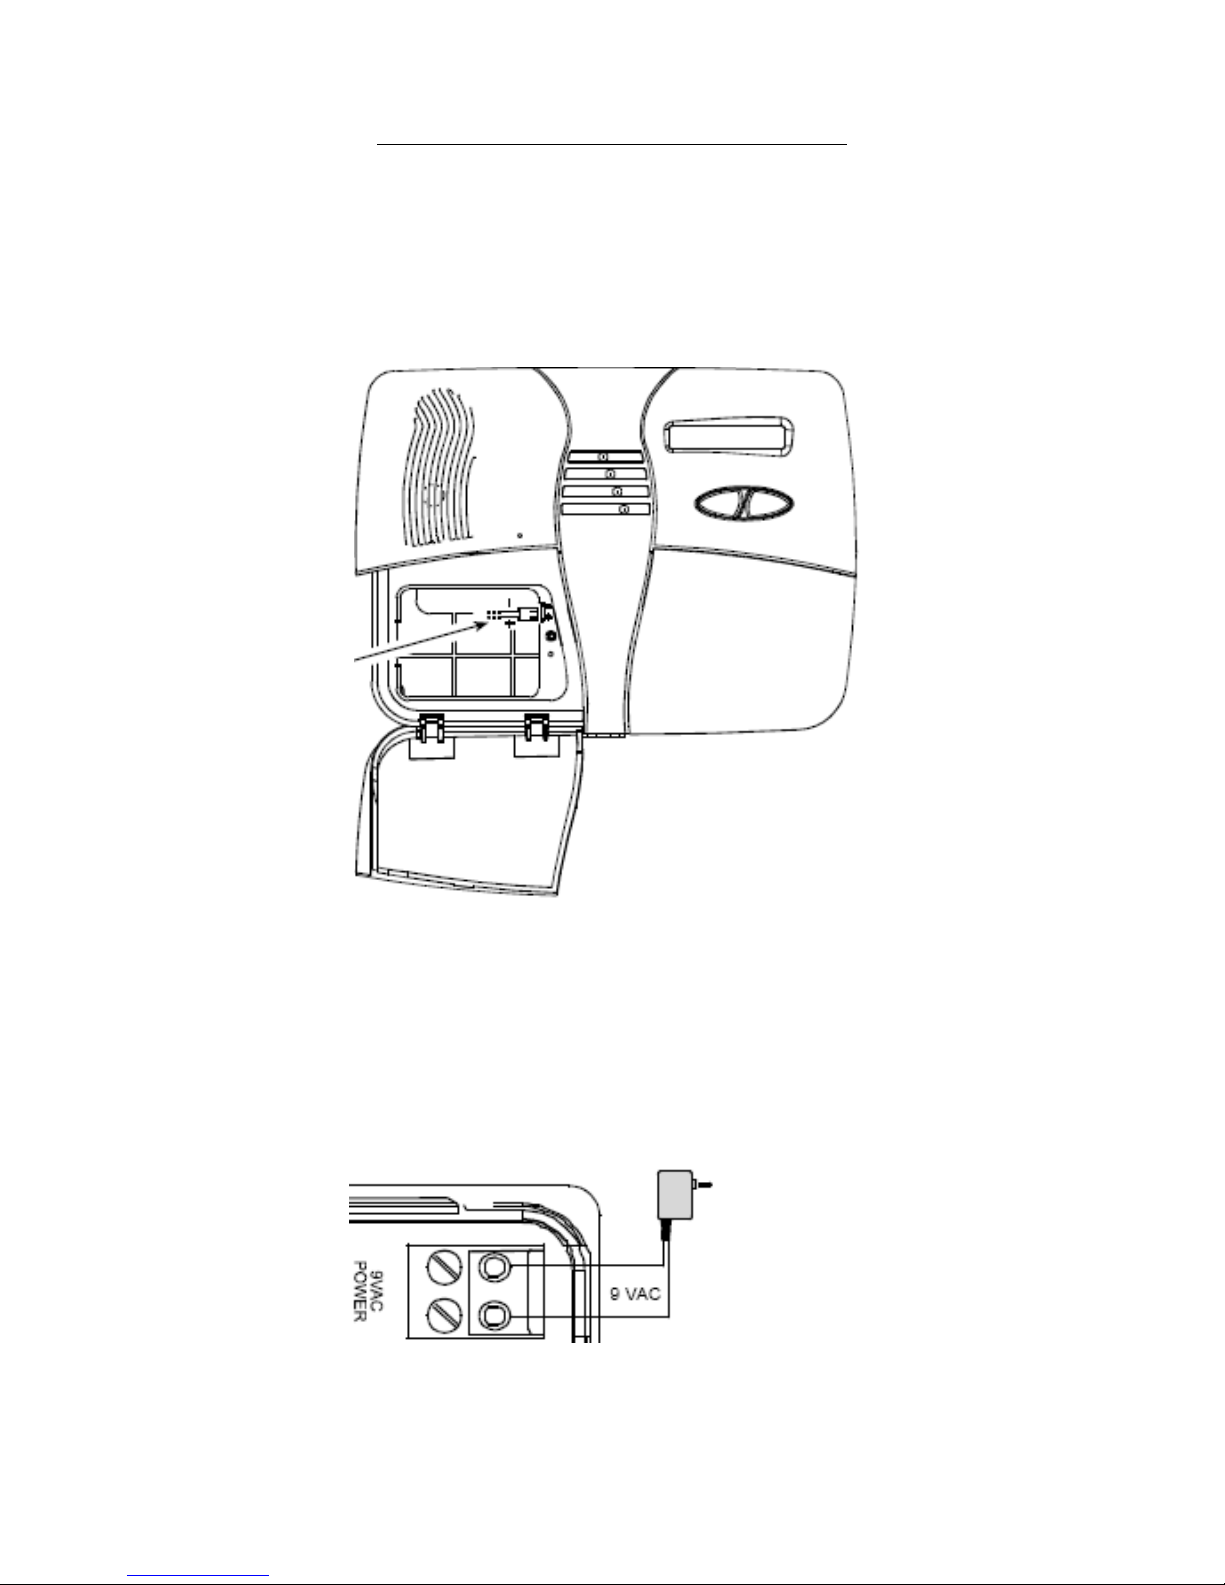
2. Open the PowerMax battery door with a philips screw driver, as shown in the diagram below.
3. Once you have opened the Unit, plug the battery in as shown below and close the door,
screwing the retaining screw in tight.
4. Now, remove the retaining screw from the back bracket of the PowerMax Plus unit, once the
screw is removed, remove the cover plate. You will now need to connect the AC power supply
transformer. Strip away ¼ inch of the wire insulation, exposing copper on either end of the
wire. Connect one end to the transformer terminals, and the other end to the Panel AC terminals
in the upper right hand corner shown below. This is AC power, so no polarity is observed.
5. If mounting the PowerMax Plus to the wall, you will need to mount the back cover to the wall
first before re-connecting it to the Powermax unit. When doing so, remember to replace the
retaining screw and screw it tight.
1
Page 2
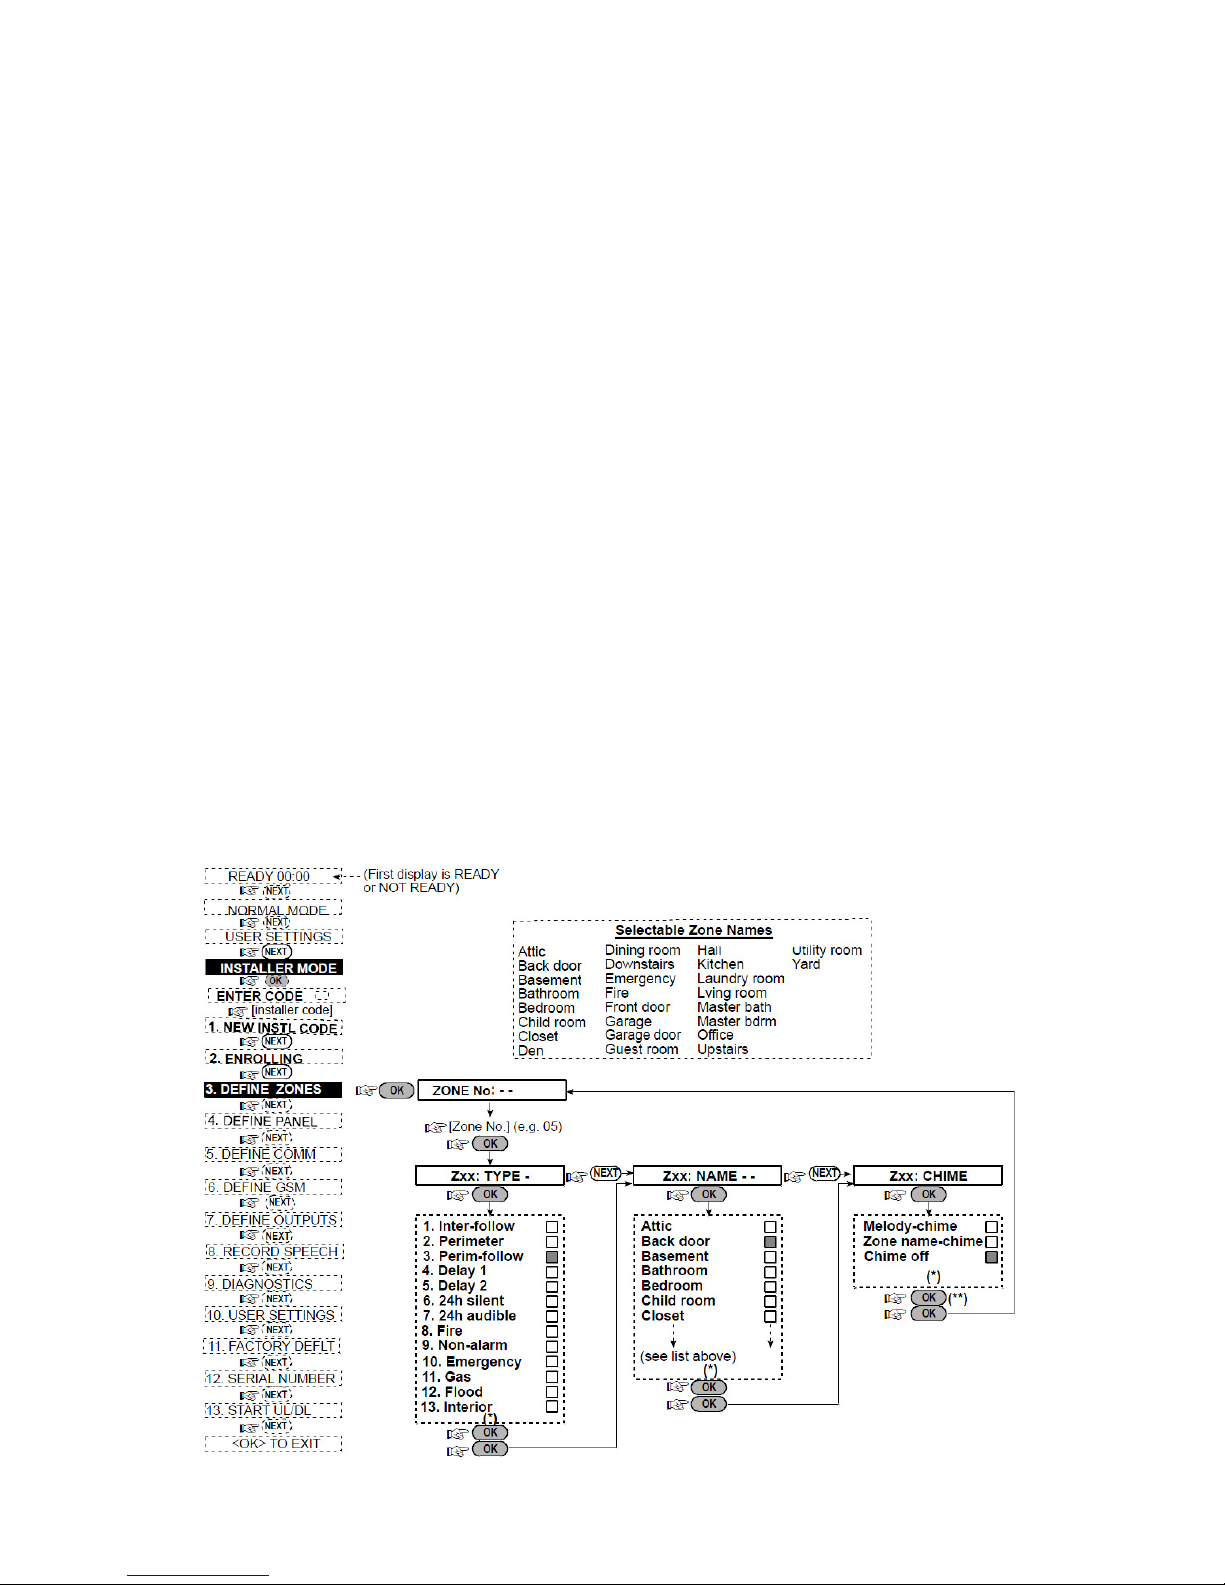
Now that your panel is mounted and powered up, you are ready to learn in your sensors.
First you will need to get into Installer mode on your panel.
1. The first display will be Not Ready or Ready, press the Next key until the display reads
Installer Mode, when it does, press Show/OK. You will now be prompted to enter the Installer
Code, which is 9999 by default; press Show/OK when done.
2. When you see New Instl Code, press Next and you will see Enrolling. Press Show/OK to
select.
3. When you see Enrolling Type, press Next and you will see Enroll WL Device. Press Show/OK
to select, then press Show/OK repeatedly till you see Zone --. Press Next once to select the
zone 1.
4. Press Show/OK to accept, and it will display Transmit Now. You will now need to transmit a
signal from the device you are enrolling.
5. If it is a door sensor, open and close the sensor, or if a motion detector wave your hand in front
of it. At this point your panel should beep several times and you should see a black box next the
the word Zone 1.
6. Press Next to select the next zone and repeat steps 4 and 5 for the enrollment of the next device.
7. If enrolling a Keychain remote, follow the above steps up to step 3; and instead of selecting
Enroll WL Device, press next one more time to select Enroll Keyfob, when prompted to
transmit now simply hold down any one of the buttons on the keychain remote till the system
beeps.
8. At any point in programming you can back up a step by pressing the HOME button; when you
are done enrolling your devices, you can press the HOME key repeatedly to exit out of
programming, pressing the Show/OK button when prompted.
Now, you can define your desired zones
2
Page 3

You are now ready the mount your sensors and get your system operational.
This Diagram shows how door and window
sensors are to be mounted. Note that you
should have the magnet and transmitter less
than ½ inch apart. The magnet is omnidirectional, use this to your advantage when
choosing a location for it.
This Diagram shows how Motion Detectors
are to be mounted. Select a location on your
wall that will have the ideal line of sight.
Corner mounting is optimal. Note that motion
detectors need to be mounted a minimal of 6-8
feet high. Be sure to keep these away from any
heating and cooling vents.
If you have a Smoke Detector, you will need to mount it centrally in a room on the ceiling. Mount it
away from anything that could produce smoke or heat in a natural occurrence (i.e. kitchen, living room
with a fireplace, etc.)
Your system should be ready to use now. Test your door sensors by activating the door Chime (press
and hold the 8 Key till it beeps). When arming and disarming your system, you will need to use the
Default Master Code which is 1111. Thank you for choosing the Powermax Plus to secure your home.
If you have any questions please call Safemart at 800-628-6093.
3
 Loading...