

Page 1

- 1 -
TVP-B_TVP-P
Price Computing Scales
Version 1.08_1.15g
09/09/2019
Page 2

TVP-B_TVP-P Price Computing Scales Technical Manual
- 2 -
CONTENTS
1. PRECAUTIONS
2. SPECIFICATIONS
3. INTRODUCTION
4. INSTALLATION
5. Parts Description
5.1 Overall View
5.2 Key board
6. OPERATION
1. Power ON/OFF
2. Zero
3. Tare
4. Sample weighing
5. Unit Price Setting
6. Unit Price Memory
7.Back light
.........................................................................................................................................
.........................................................................................................................................
...........................................................................................................................
........................................................................................................................
.........................................................................................................................
...........................................................................................................................
.....................................................................................................................
..........................................................................................................................
..............................................................................................................................
.............................................................................................................................
........................................................................................................................
..................................................................................................................................
...................................................................................................................
...................................................................................................................
.................................................................................................................
- 3 -
- 5 -
- 8 -
- 9 -
- 11 -
- 11 -
- 12 -
- 14 -
- 14 -
- 14 -
- 14 -
- 15 -
- 15 -
- 15 -
- 16 -
8.Automatic Unit Price Clear
9.Change unit
10. Accumulation
11.Give change
12.Commodities Without Weighing
7. PARAMETER
7.1 PARAMETERSETTING
7.2 PARAMETER MENU BLOCK
8. CALIBRATION
9. RS 232 OUTPUT
9.1. Print Format
10. ERROR CODES
11. DRAWING
12. SEALING METHOD
12.1 Sealing chart
..............................................................................................................................
........................................................................................................................
...........................................................................................................................
............................................................................................................................
..........................................................................................................................
.......................................................................................................................
.........................................................................................................................
.......................................................................................................................
..............................................................................................................................
.......................................................................................................................
......................................................................................................
............................................................................................................
...................................................................................................
.................................................................................................................
...........................................................................................
- 17 -
- 17 -
- 17 -
- 18 -
- 18 -
- 19 -
- 19 -
- 20 -
- 23 -
- 25 -
- 25 -
- 26 -
- 28 -
- 32 -
- 32 -
Page 3
TVP-B_TVP-P Price Computing Scales Technical Manual
- 3 -
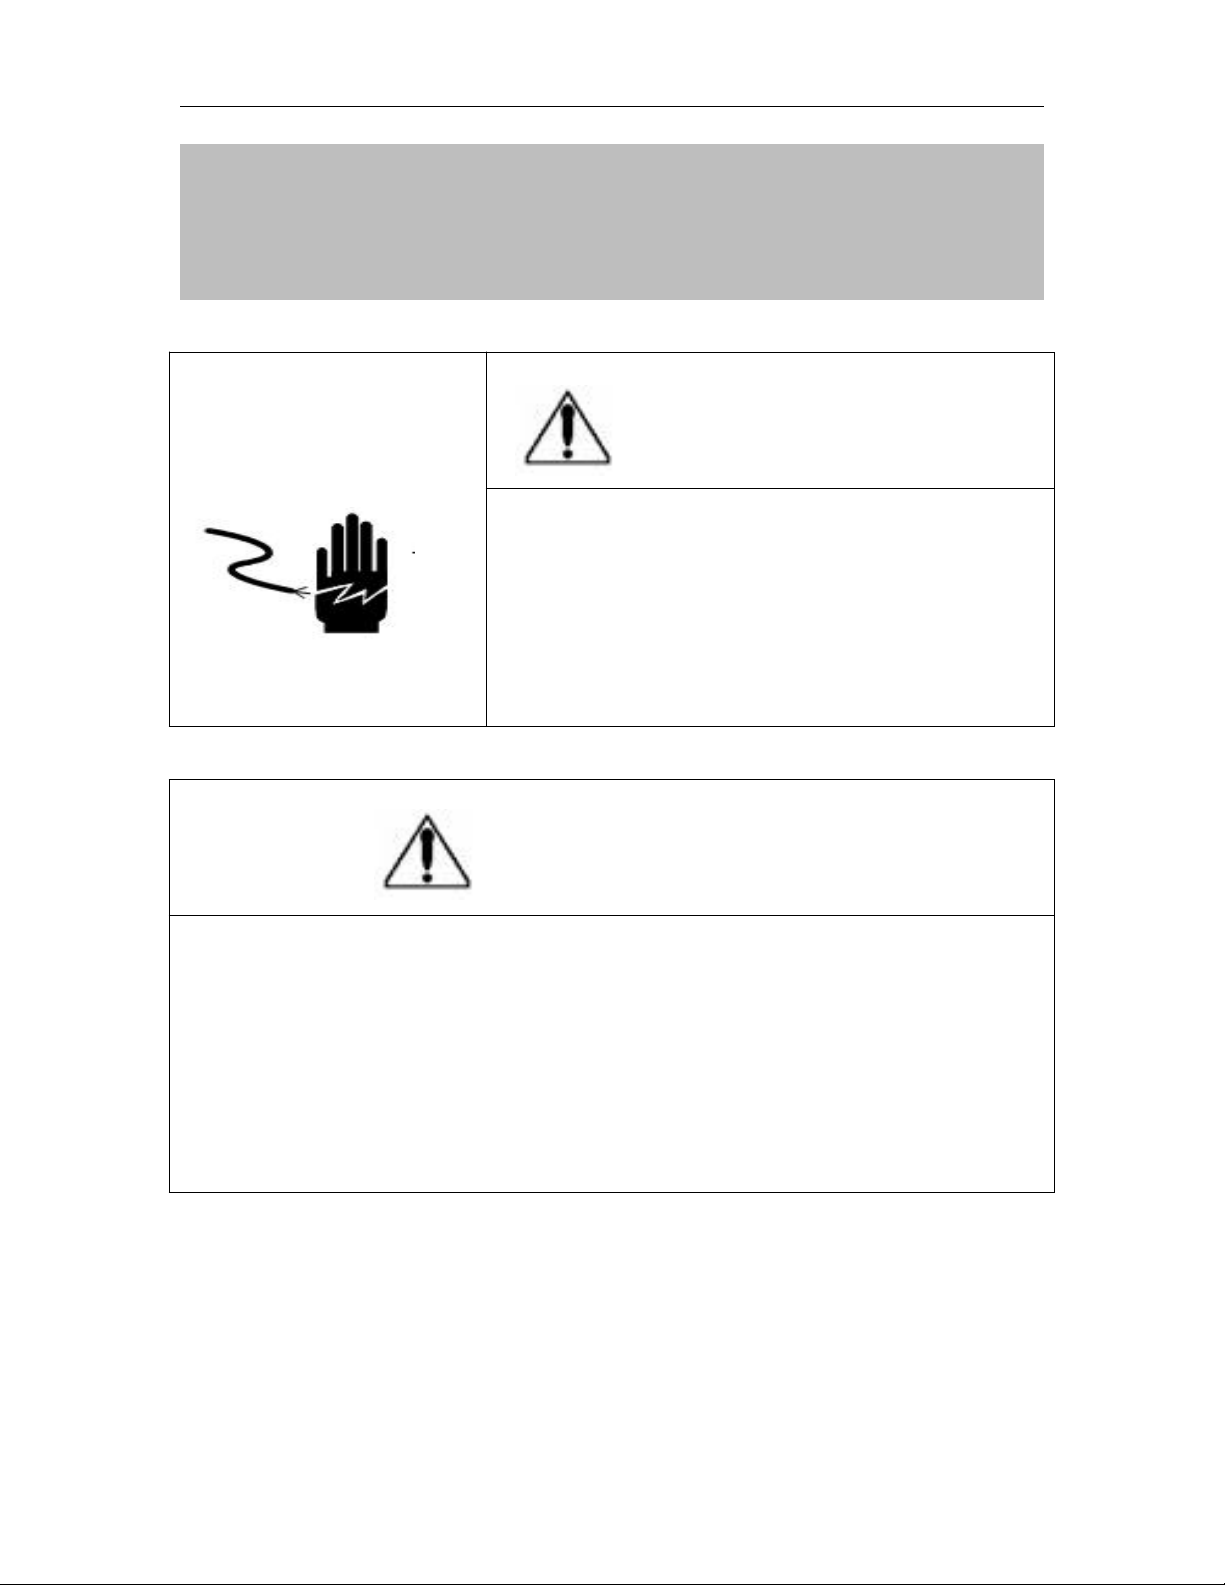
WARNING
DISCONNECT ALL POWER TO THIS UNIT
BEFORE INSTALLING, CLEANING, OR
SERVICING. FAILURE TO DO SO COULD
RESULT IN BODILY HARM OR DAMAGE THE
UNIT.
CAUTION
Permit only qualified persons to service the instrument
Before connecting or disconnecting any components, remove the
power.
Failure to observe these precautions bodily harm or damage to or
destruction of the equipment.
1. PRECAUTIONS
The price computing scale is a precision electronic
instrument, handle it carefully.
Do not install the scale in direct sunlight.
Verify the local voltage and receptacle type are correct for
Page 4

TVP-B_TVP-P Price Computing Scales Technical Manual
- 4 -
the scale.
Only use original adaptor, other could cause damage to the
scale.
Pluggable equipment must be installed near an easily
accessible socket outlet.
Avoid unstable power sources. Do not use near large users
of electricity such as welding equipment or large motors.
Avoid sudden temperature changes, vibration, wind and
water.
Avoid heavy RF noise.
Keep the scale clean
Page 5

TVP-B_TVP-P Price Computing Scales Technical Manual
- 5 -
MODEL
TVP-B
TVP-P
Display
0.59inch/15mm LCD Display with white LED back Light
Gross weight
9lb(4.1kg)
9.9lb(4.5kg)
Capacity
12lb(6kg)
30lb(12kg)
60lb(30kg)
Readability
0.002lb(1g)
0.005lb(2g)
0.01lb(5g)
Max. Divisions
6000e
Weighing Units
kg/lb
Pan size
8x10.5inch/204x265mm
Housing
ABS Plastic and Stainless Steel pan
Interface
RS232 Output standard
Operation Temperature
14°F - 104°F/-10°C -+ 40°C
Stabilisation Time
1 Seconds typical
Power
Ac Adaptor 12V/500mA , Rechargeable Battery
6V/3.2Ah
Keypad
20 keys
2. SPECIFICATIONS
Page 6
- 6 -
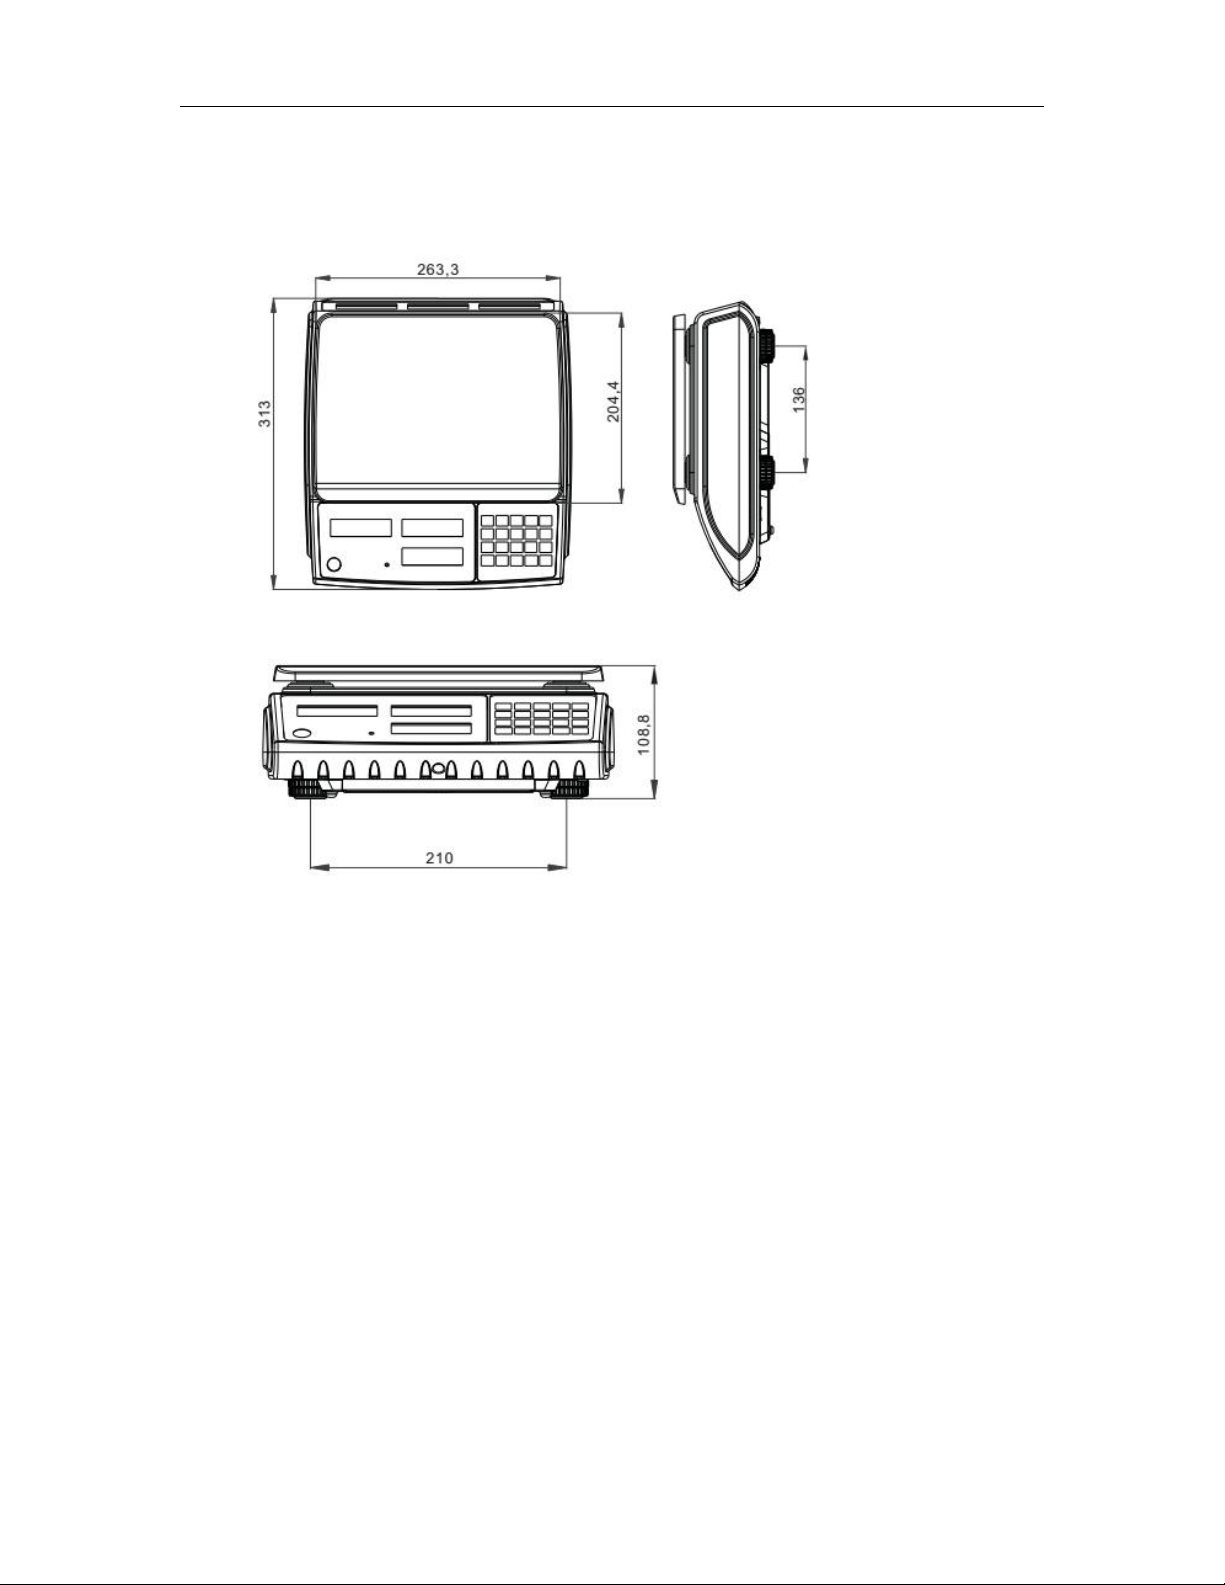
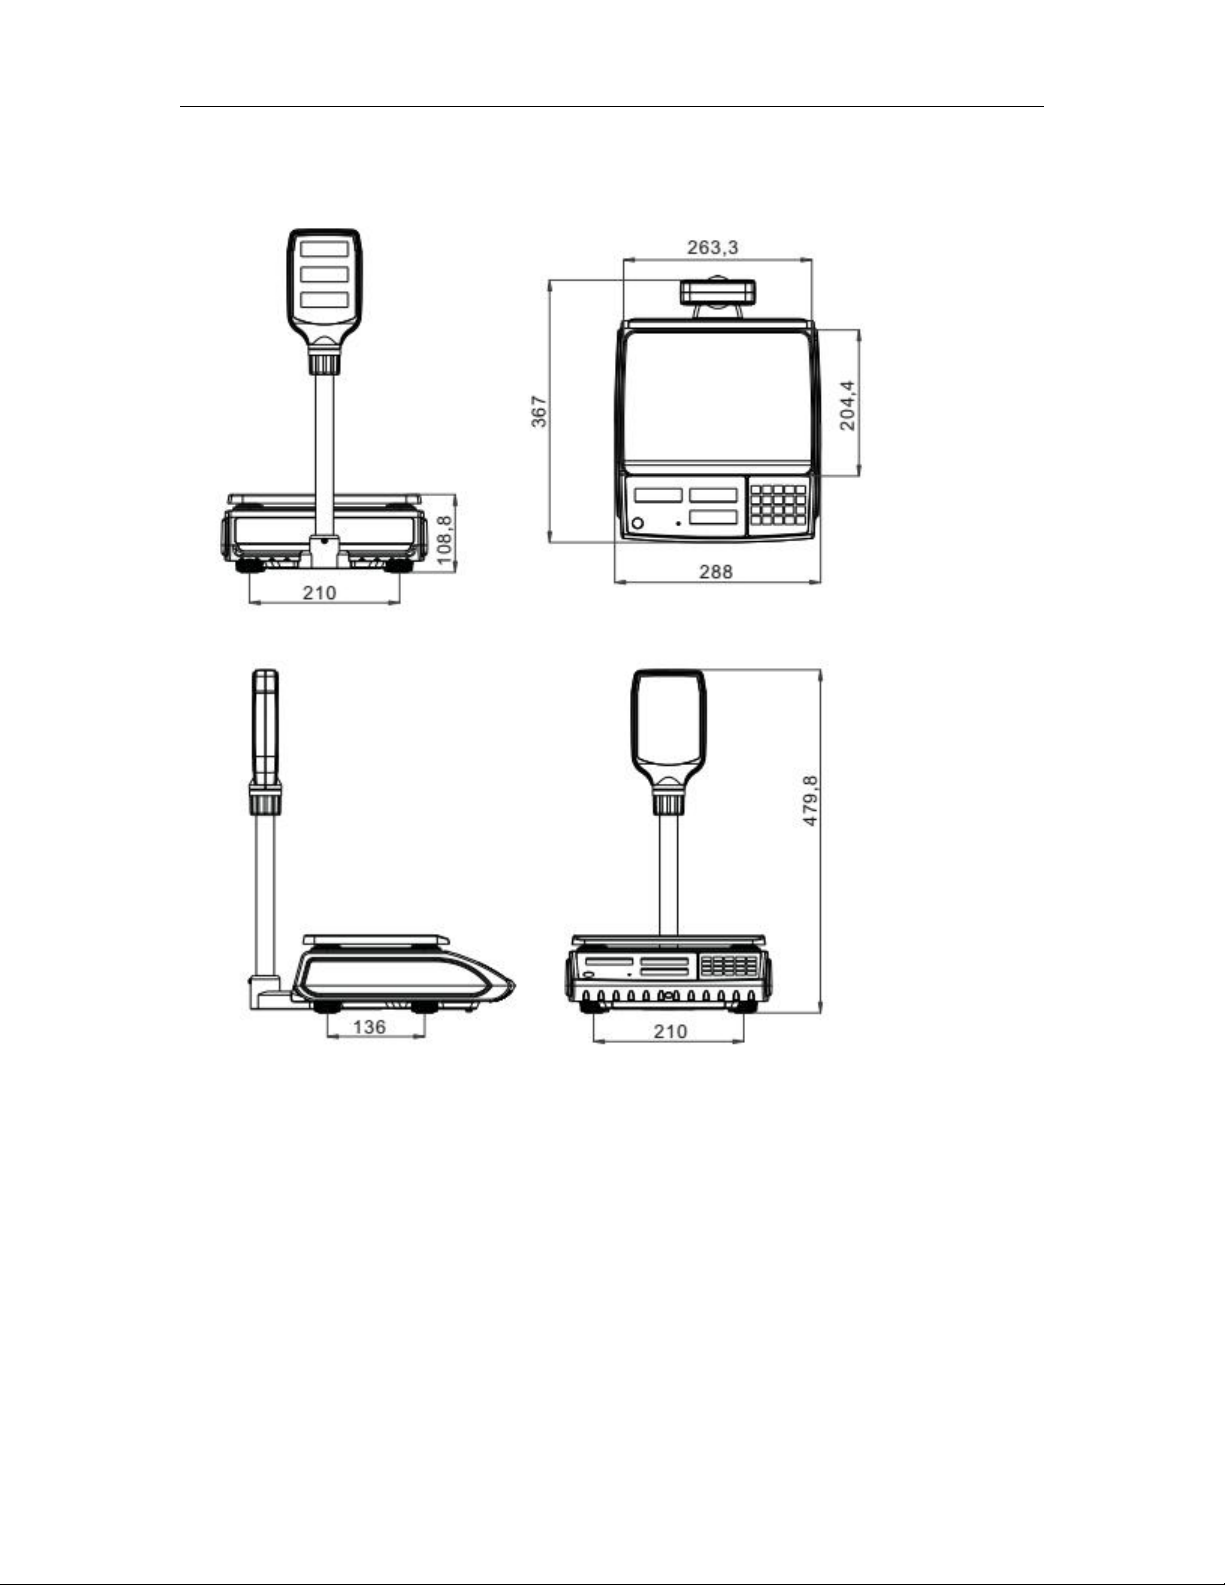
DIMENSIONS
TVP-B_TVP-P Price Computing Scales Technical Manual
Page 7
TVP-B_TVP-P Price Computing Scales Technical Manual
- 7 -
Page 8

TVP-B_TVP-P Price Computing Scales Technical Manual
- 8 -
3. INTRODUCTION
TVP-B, TVP-P series of economic price computing scales are very compact,
reliable , high accuracy and much stable.
It use LCD display with white LED back light, with the different back light
operation.
10 indirect PLU ,it can store 10 unit price values
Accumulation and change function
Auto unit price clear operation
Weighing units conversion(kg/lb/oz)
Standard RS-232 can be connect to receipt and label printer
Page 9

TVP-B_TVP-P Price Computing Scales Technical Manual
- 9 -
4. INSTALLATION
4.1 Unpacking
Carefully take the scale out of its package, make it sure its not damaged and all
accessories are included.
Accessories,
1. Scale
2. Adaptor
3. Stainless steel pan
4. Product manual
Keep the packaging material for your future use.
4.2 Level Adjusting
Place the scale on a table.
Check the water mark. If, bubble is not centre adjust the leveling feet until reach
centre. Check the level when you change the location.
Page 10
TVP-B_TVP-P Price Computing Scales Technical Manual
- 10 -
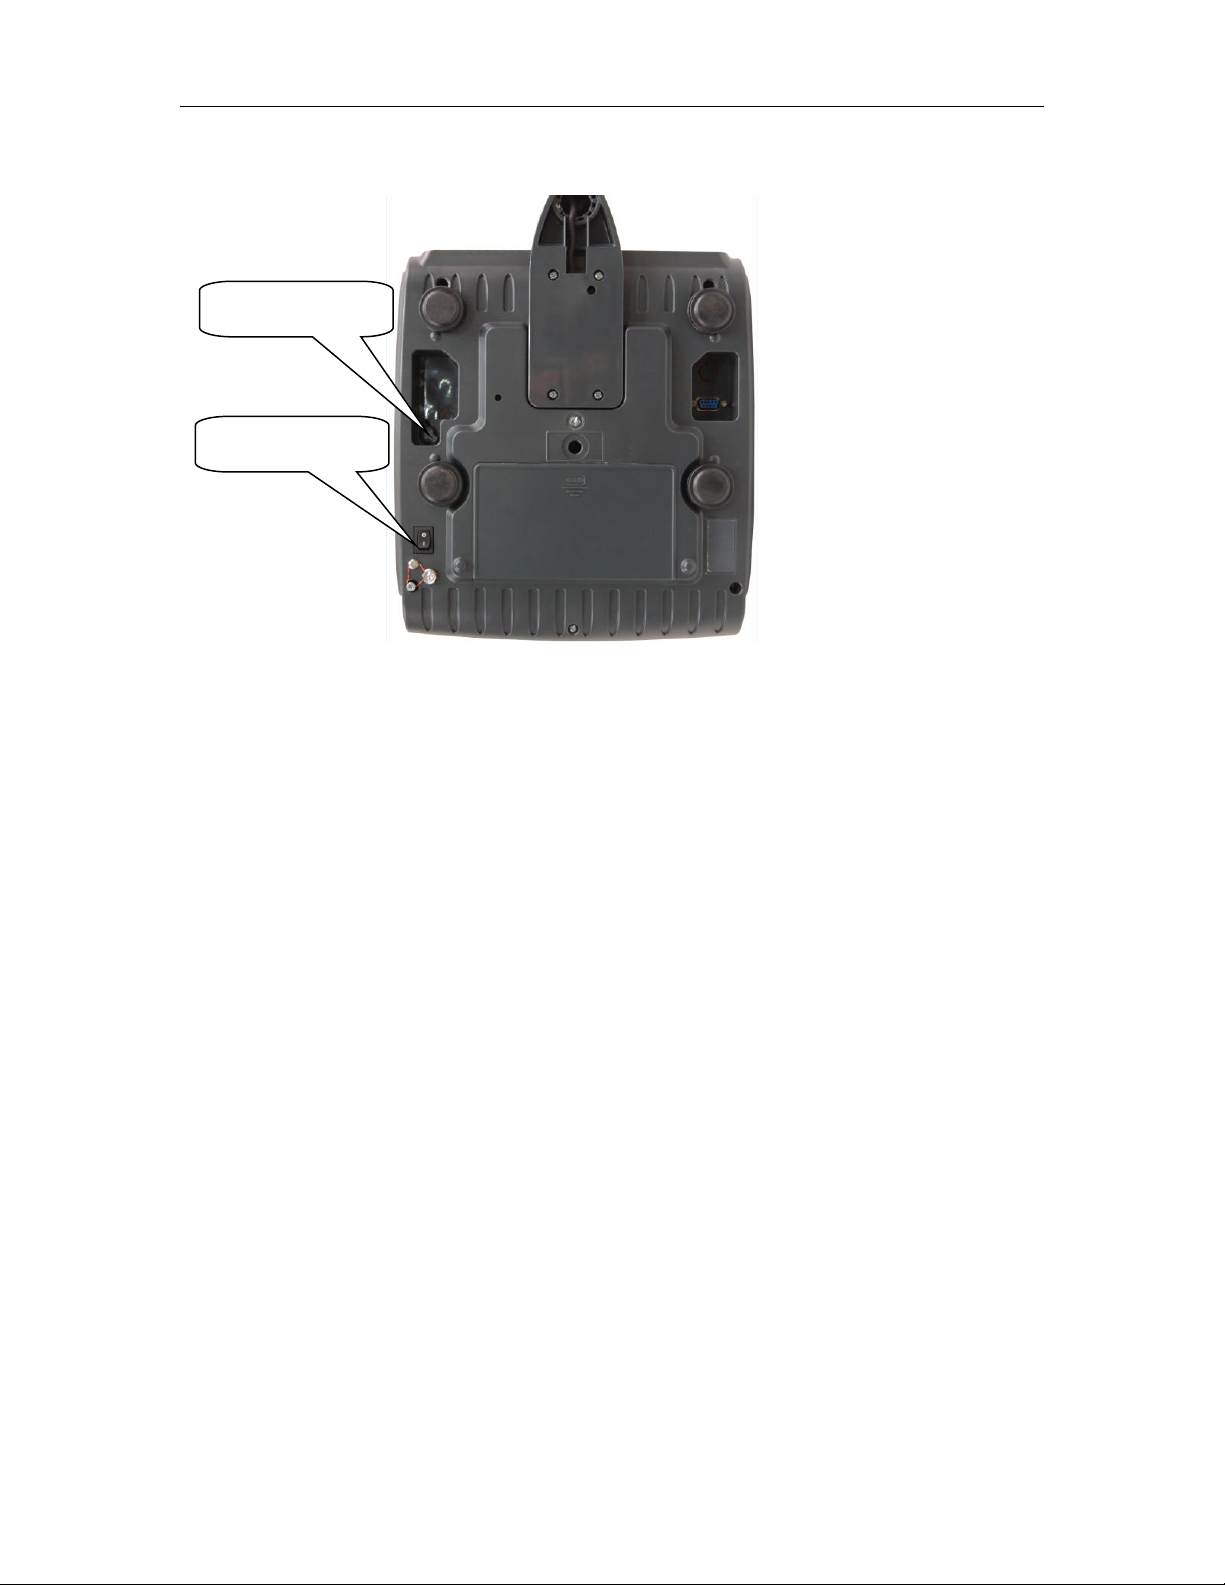
Adaptor Jack
Power Key
4.3 Connect Adaptor
To charge the battery insert the adaptor pin to jack. Adaptor simply plug into
the mains power. The scale no needs to be turned on.
The battery should be charged for 12 hours for full capacity.
Left side of the display there is an LED to indicate the status of battery
charging. When the scale is plugged into the mains power the internal
battery will be recharged. If the LED is green, the battery has a full charge.
If it is red, the battery is nearly discharged and if yellow, the battery is
being charged.
Do not use any other type of power adaptor than the one supplied with the
scale.
Verify that the AC power socket outlet is properly protected.
Note: Please charge the battery before using the scale for the first time.
Page 11
TVP-B_TVP-P Price Computing Scales Technical Manual
- 11 -
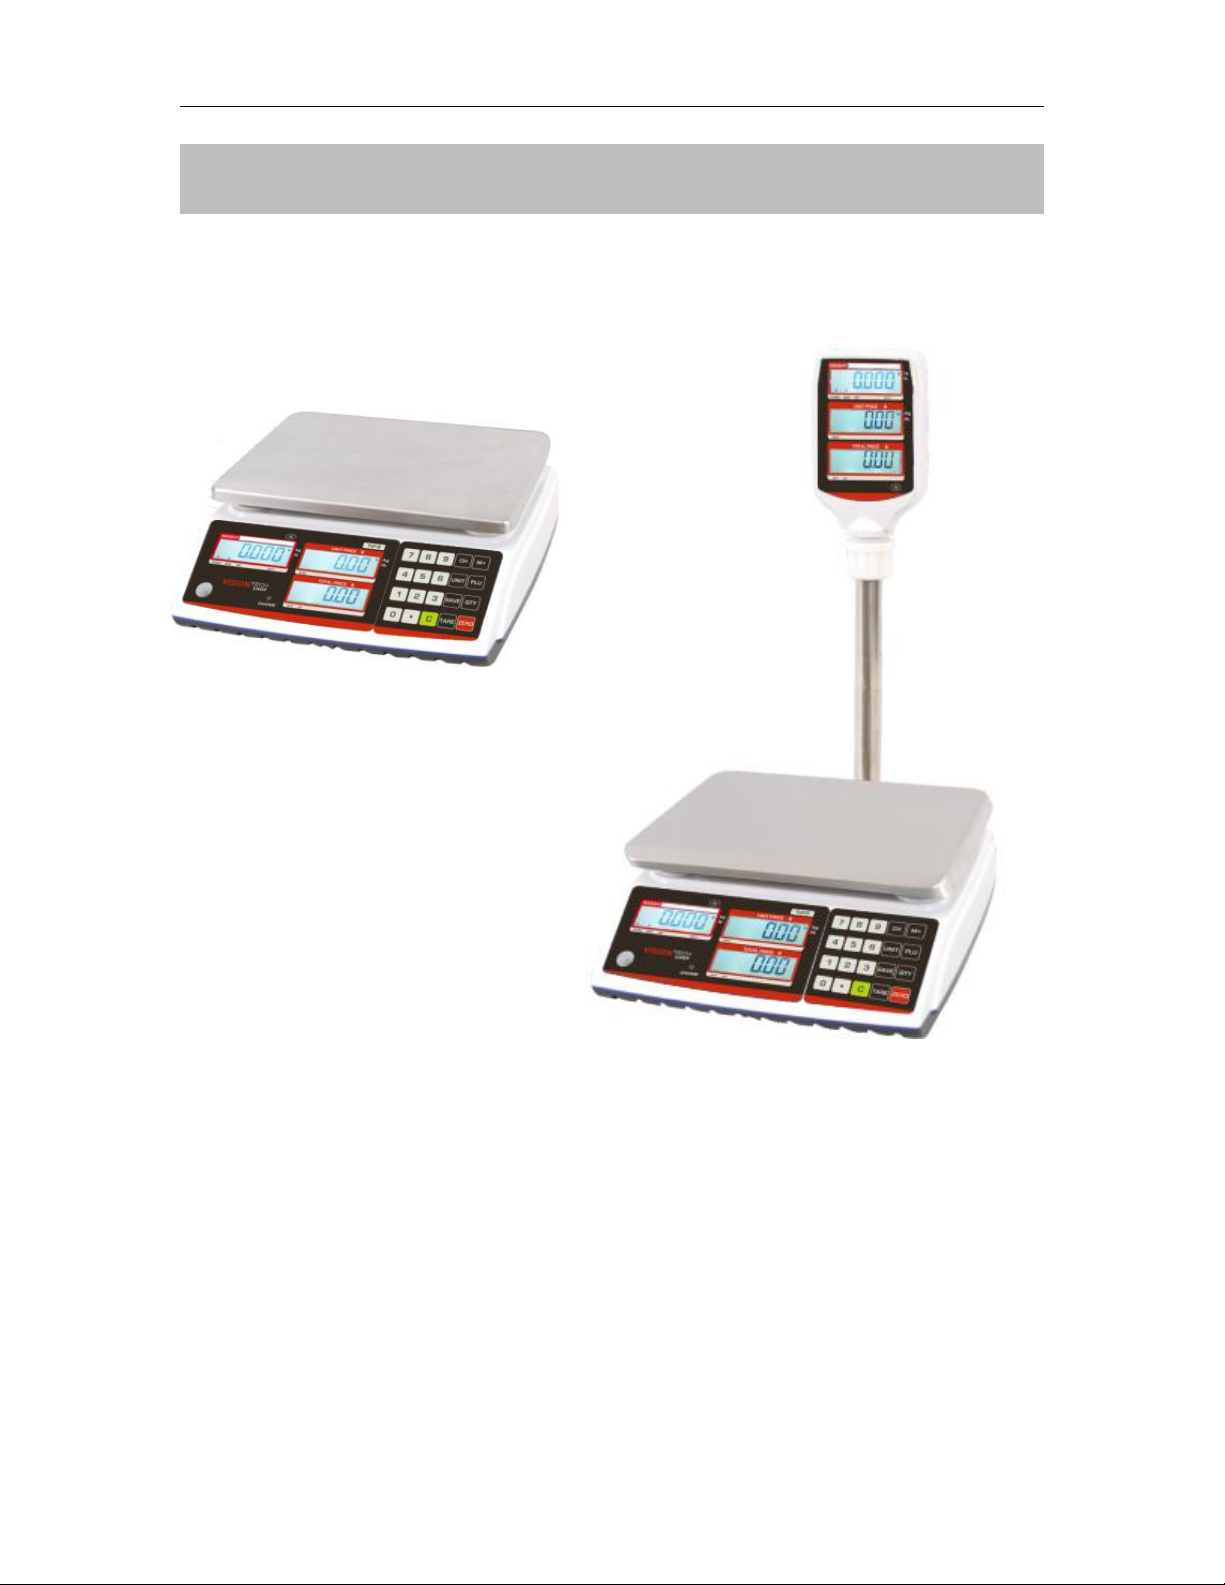
5. Parts Description
5.1 Overall View
Page 12
TVP-B_TVP-P Price Computing Scales Technical Manual
- 12 -
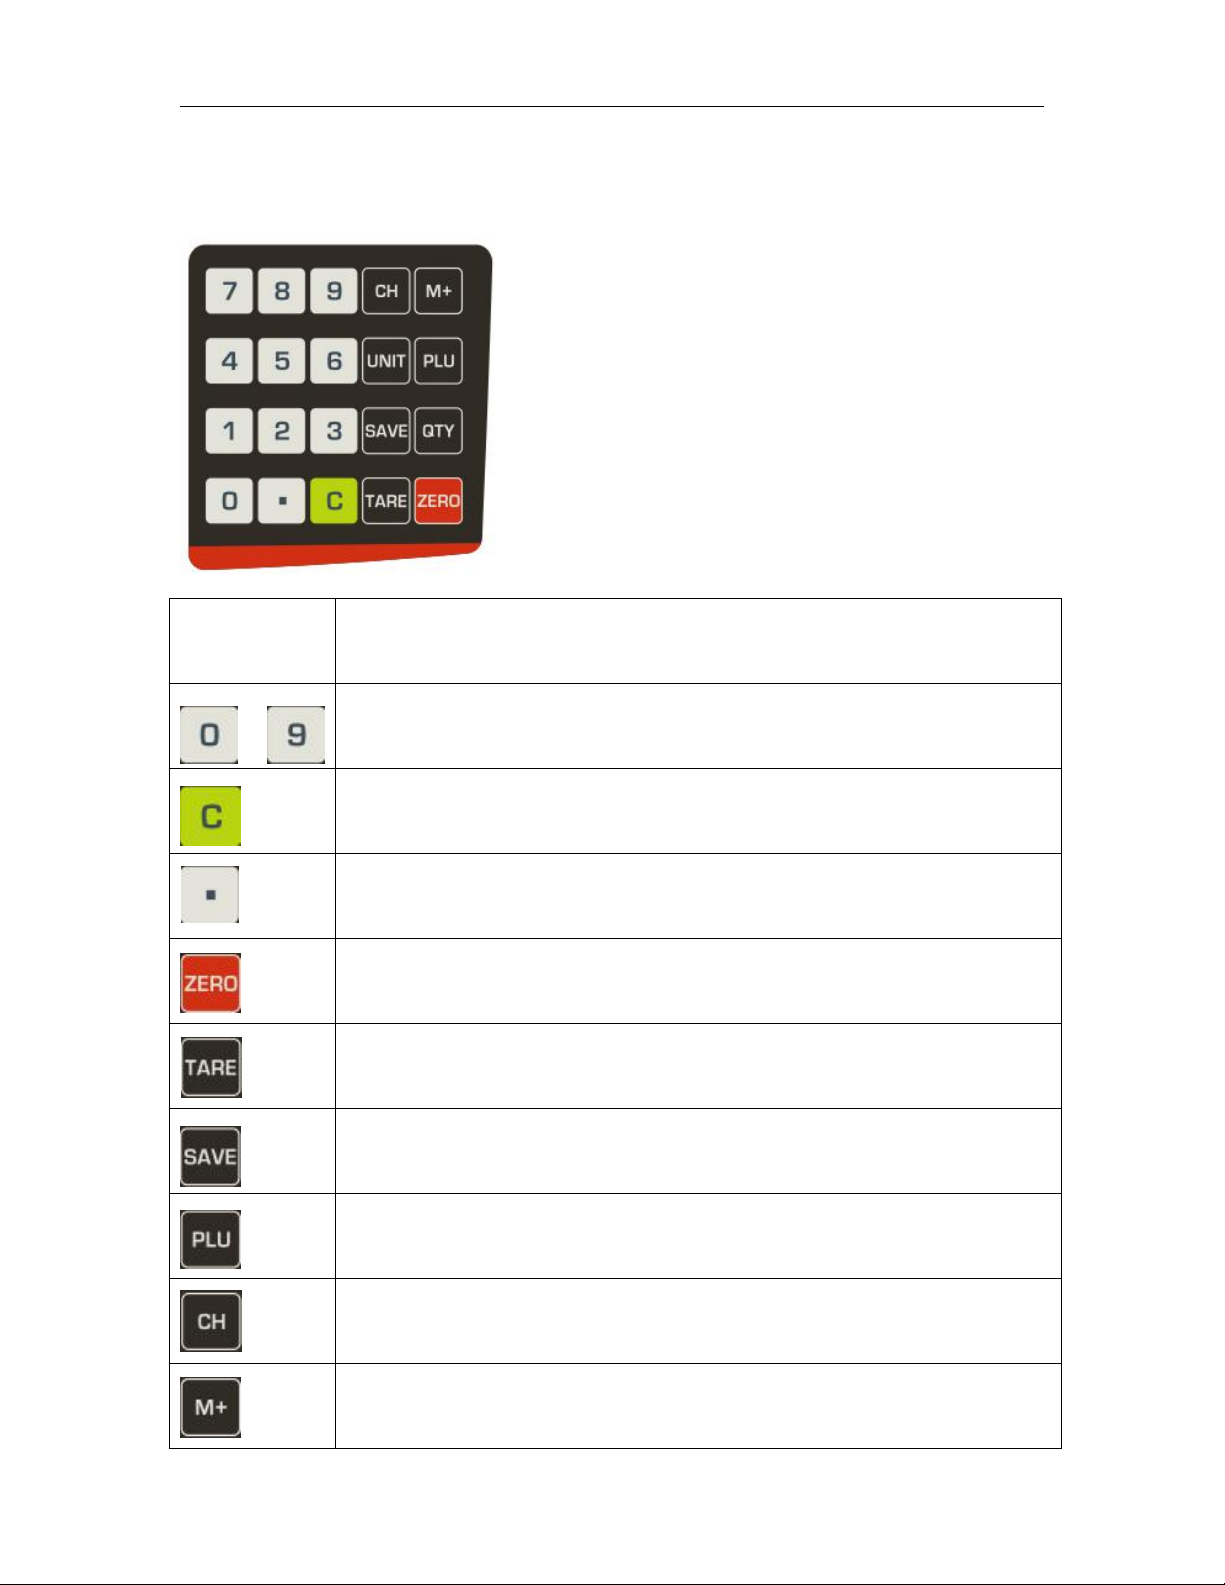
Keys
Press this key to
Numeric Keys, enter unit price / PLU;In setting mode ,press
Clear incorrect entries and error conditions
Set unit price in fix mode,press the key to input double zero;set
unit price in float mode,press the key to input decimal point
Returns the display to zero.In parameter settings,to escape from
the menu
Subtracts the tare values, change to gross to net mode and enter
parameter settings.
Enter to auto clear mode
Used to store or recall unit price,In parameter setting mode,used
to scroll down the menu
Used to give change operation
Add the current data aggregated.In parameter setting mode,used
to scroll up the menu
5.2 Key board
Key board
Page 13
TVP-B_TVP-P Price Computing Scales Technical Manual
- 13 -
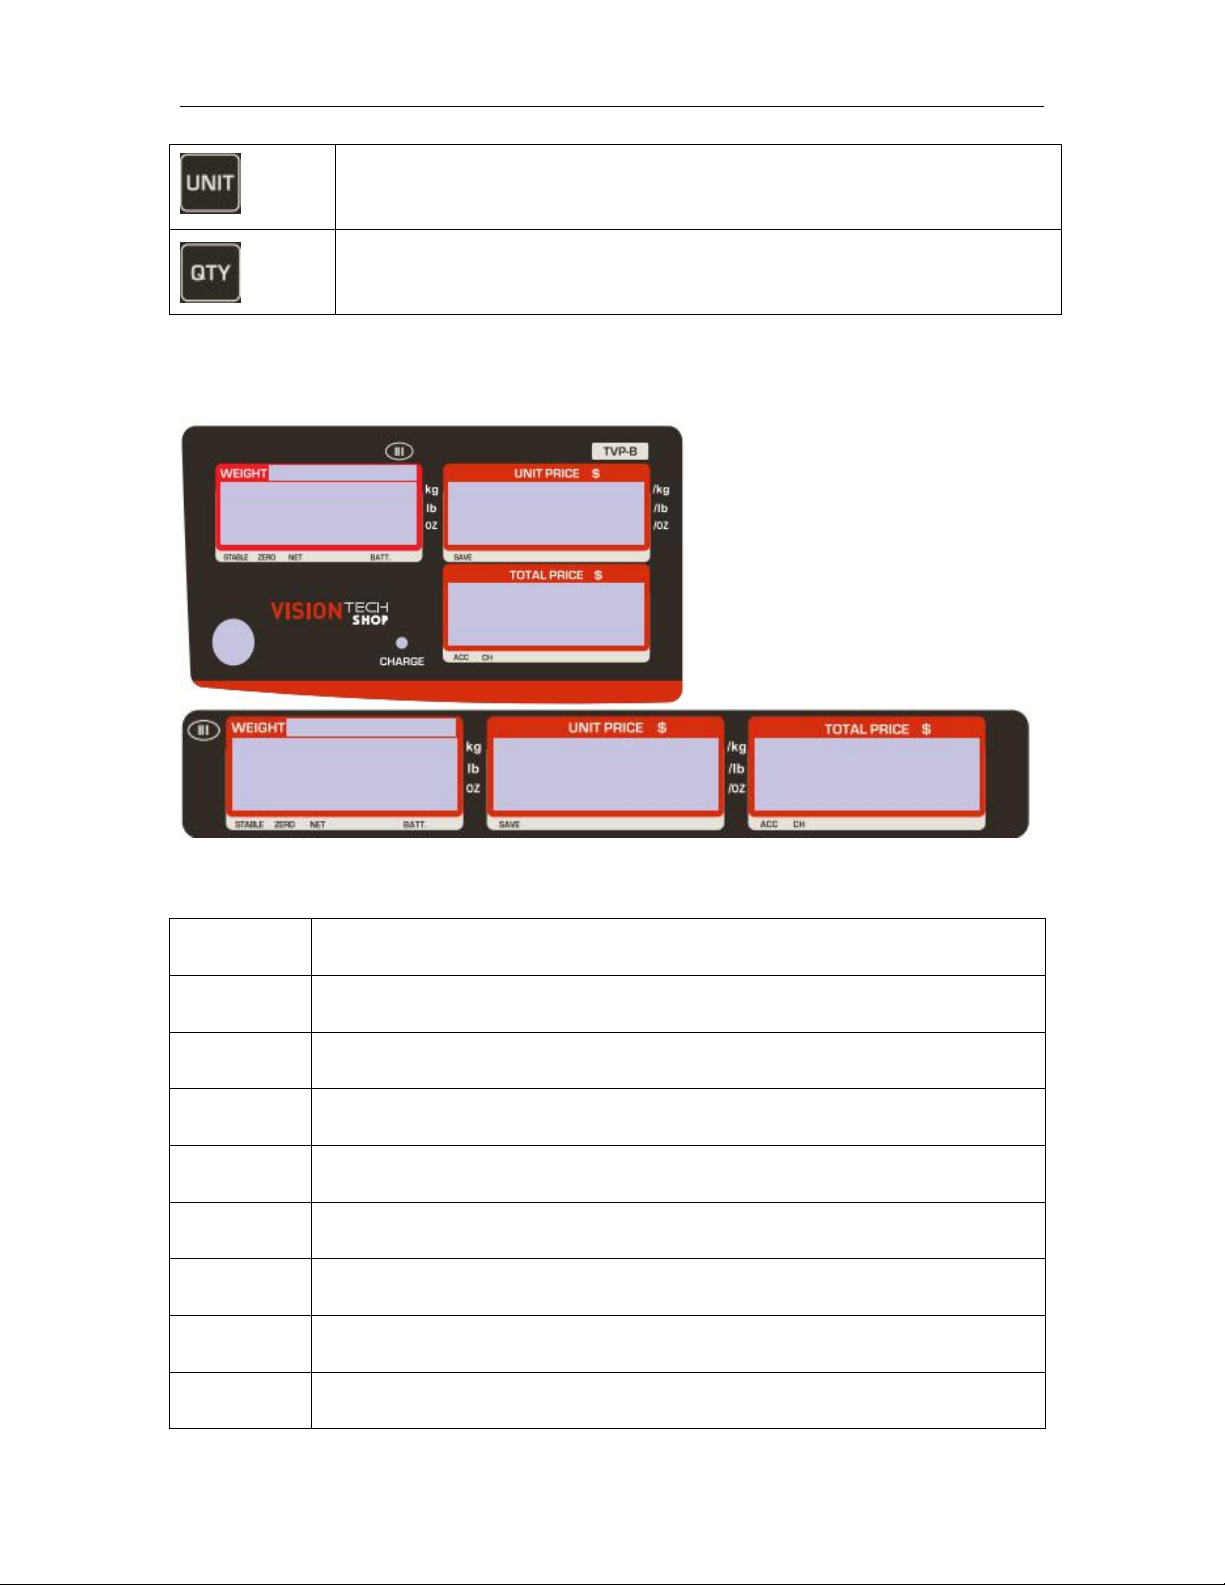
Used to change unit (kg/lb/oz)
Quantity key, use for without weighing.
BATT.
Battery indicator. When it’s illuminated, battery should be recharge
NET
Net Weight
STABLE
Stable indicator. When it’s illuminated, the scale is stable
ZERO
Zero indicator. When it’s illuminated, the scale is in Zero point
kg/lb/oz
Current weighing unit
SAVE
Save Indicator
CHARGE
Battery charging indicator
ACC
Accumulation indicator
CH
Check out indicator
Display Overlay
Display Symbols
Page 14
TVP-B_TVP-P Price Computing Scales Technical Manual
- 14 -
6. OPERATION
Initial Start-Up
Warm-up time of 15 minutes stabilizes the measured values after switching on.
1. Power ON/OFF
Power switch is located below the right side of the scale. Switch on the
scale by pressing on/off. The display is switched on and the self test is
started. If you want to switch off press again the key.
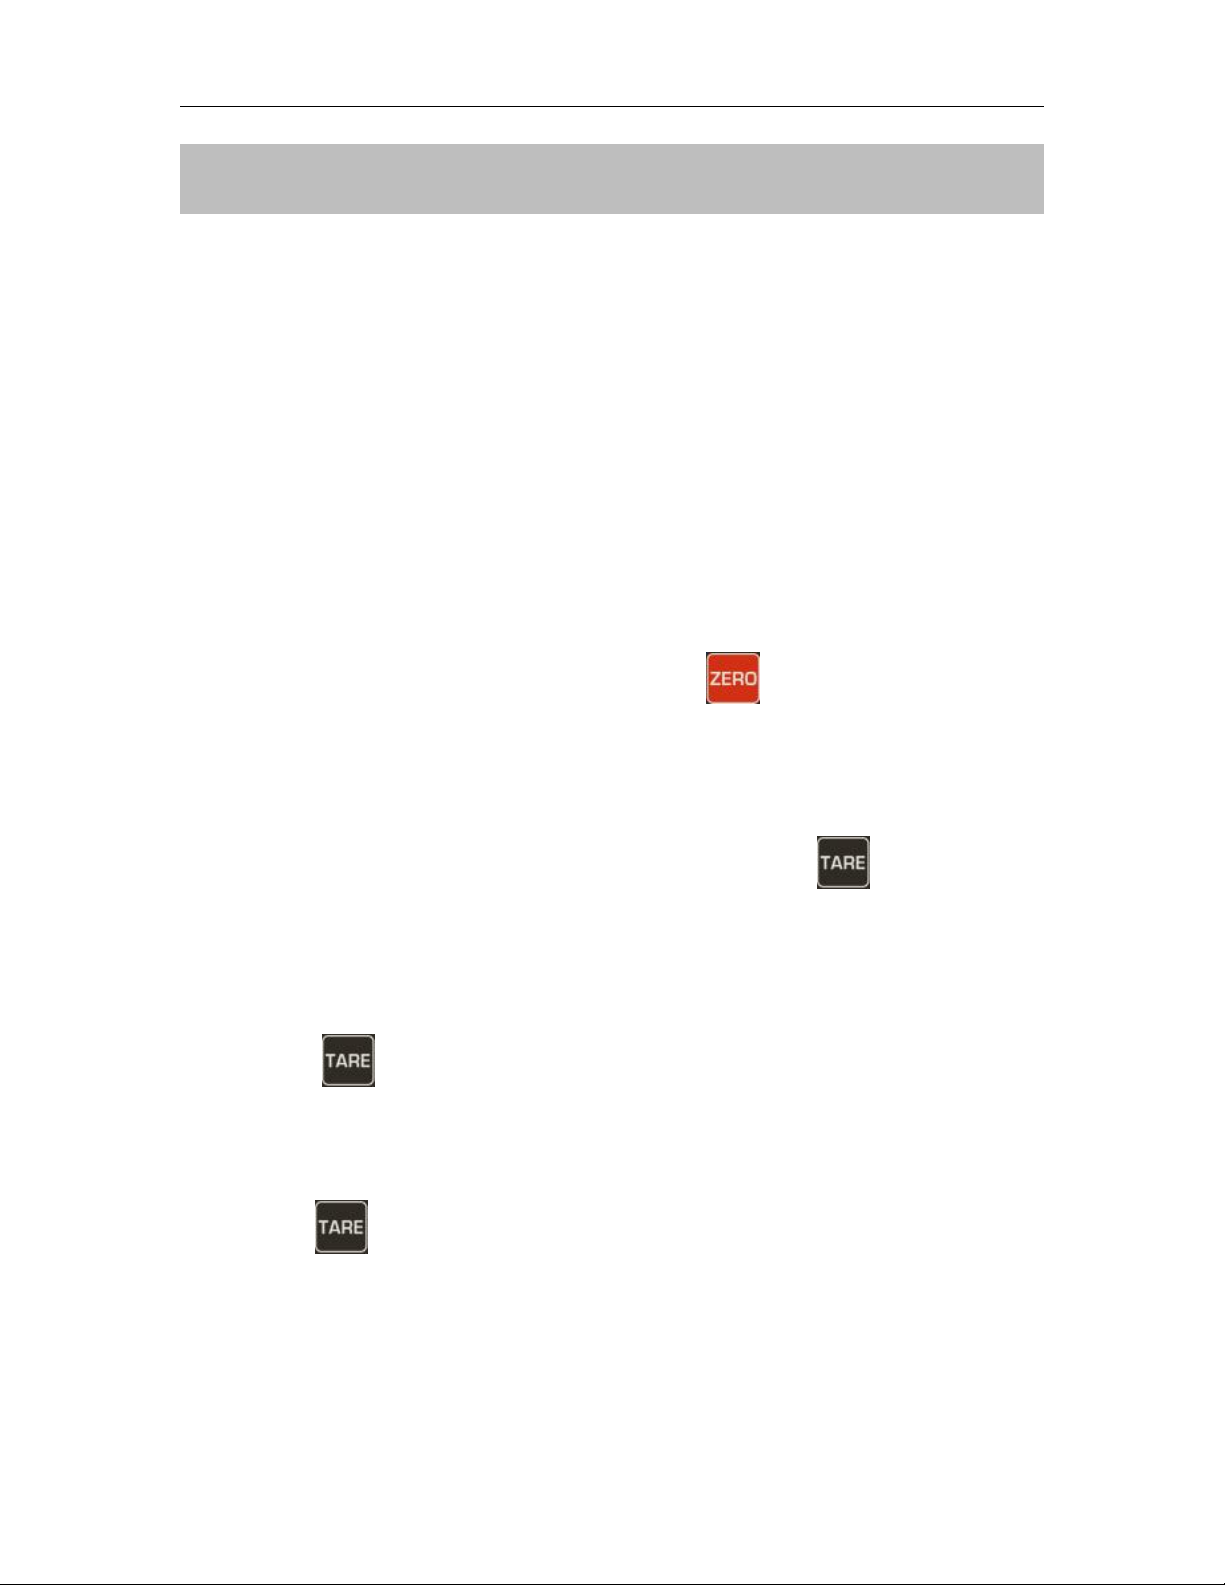
2. Zero
Environmental conditions can lead to the balance exactly zero in spite
of the pan not taking any strain. However, you can set the display of
your balance to zero any time by pressing key and therefore
ensure that the weighing starts at zero.
3. Tare
The weight of any container can be tared by pressing key, so that
with subsequent weighing the net weight of the object being weighed is
always displayed.
Load weight on the pan.
Press key. Zero is displayed, and tare is subtracted.
Remove weight from the platform. Tared weight is displayed. It can set
only one tare value. It can display with a minus value.
Press key. Zero is displayed, tare weight is cleared.
Page 15
TVP-B_TVP-P Price Computing Scales Technical Manual
- 15 -
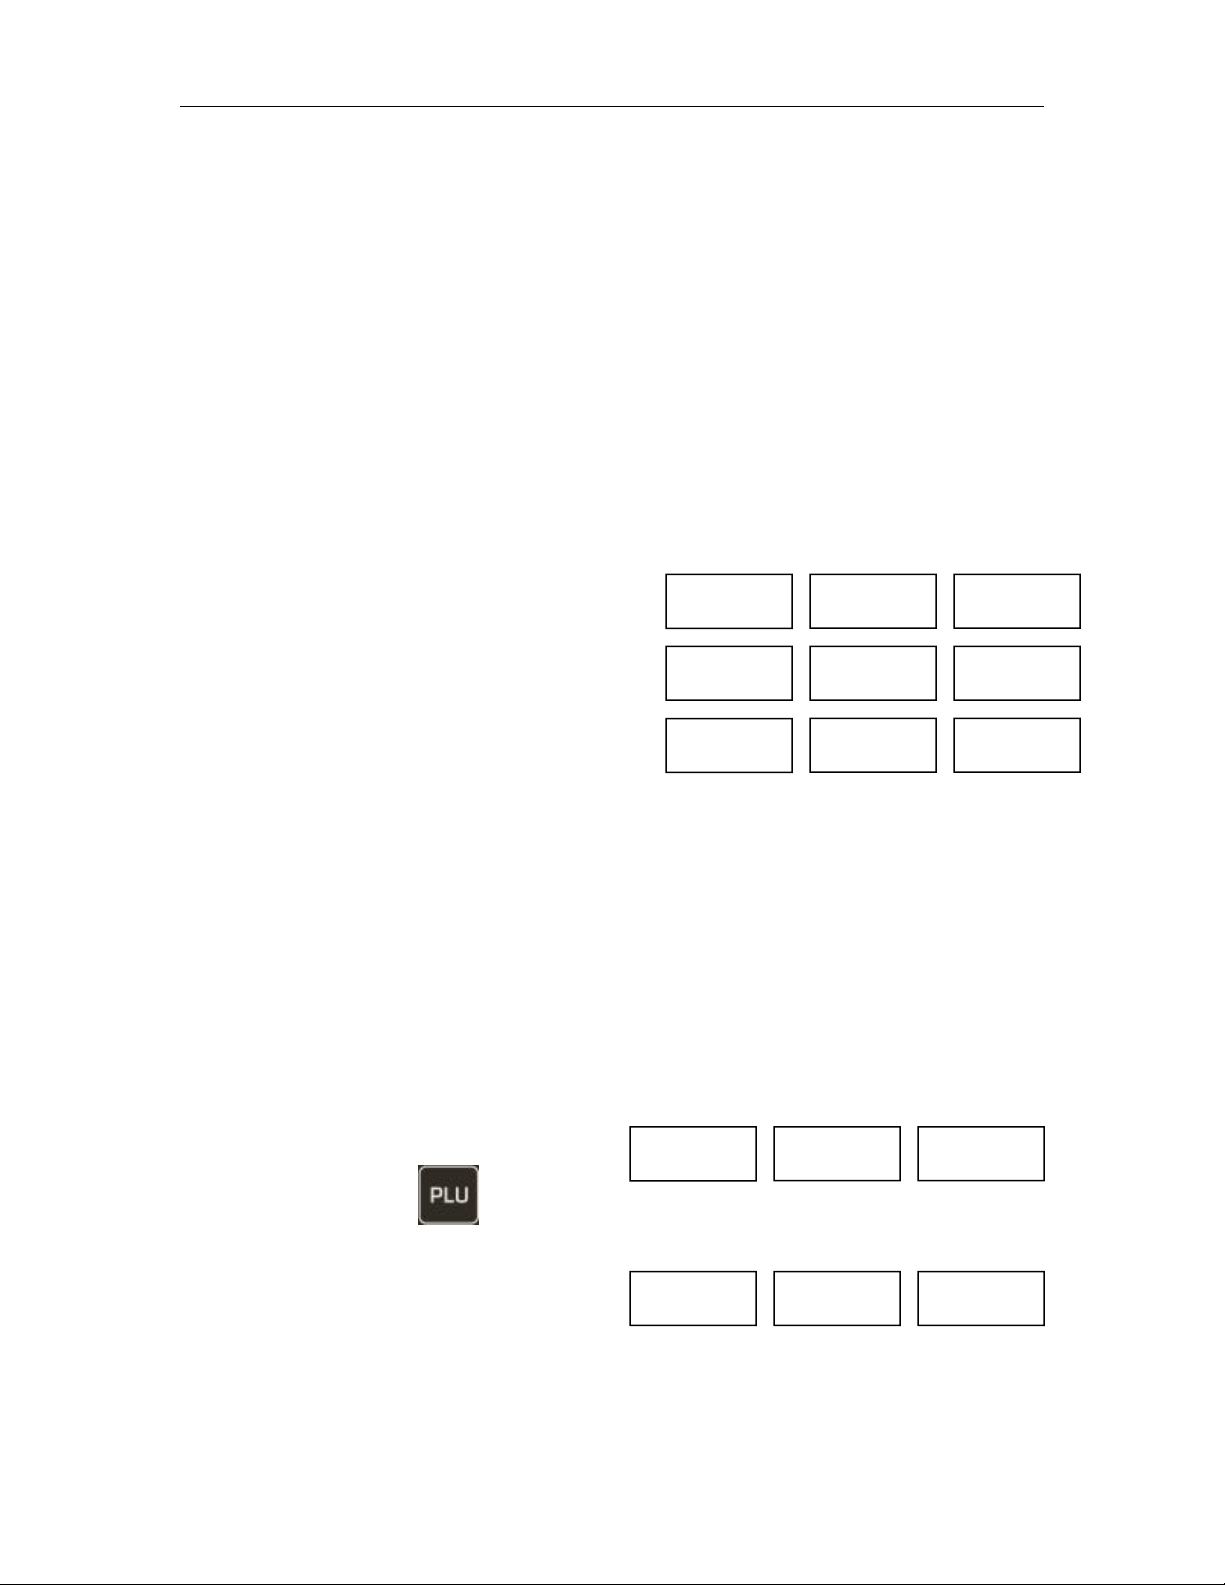
Make sure platform is empty and
display is zero.
Place goods to be weighed on the
platform.
0. 000
0. 00
0. 00
1 500
0. 00
0. 00
1 500
5. 00
750
0000
10
0
save
pos
Ps 0-9
4. Sample weighing
Place goods to be weighed on the platform.
Wait few seconds for stability display.
Read the result.
Avoid overloading. When display appears “ol” reduce the load or
unload.
5. Unit Price Setting
Weight Unit Price Total Price
Enter the unit price by pressing numeric keys. Total price will be calculate
automatically.
6. Unit Price Memory
It can store 10 unit price values. It can select from 0 to 9 numeric keys.
Save to memory
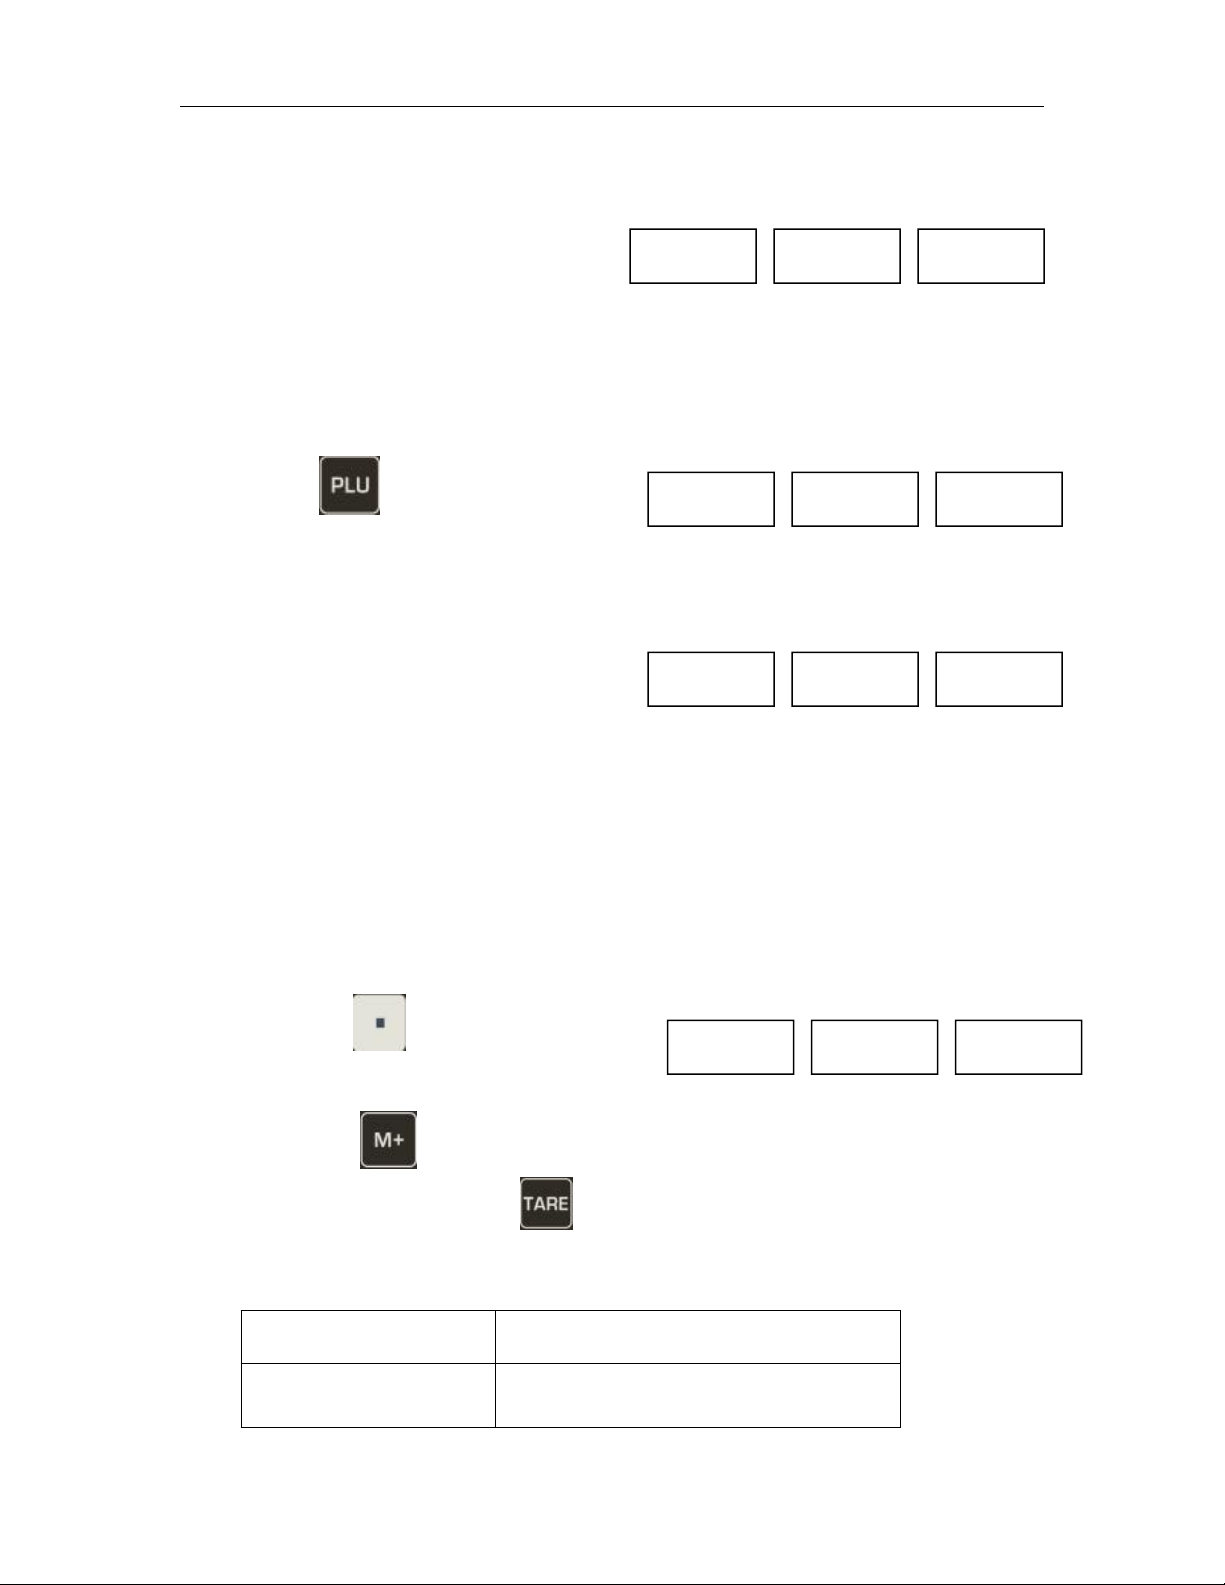
By pressing numeric keys enter the unit price 10.
Press and hold , display will be shown
Page 16
TVP-B_TVP-P Price Computing Scales Technical Manual
- 16 -
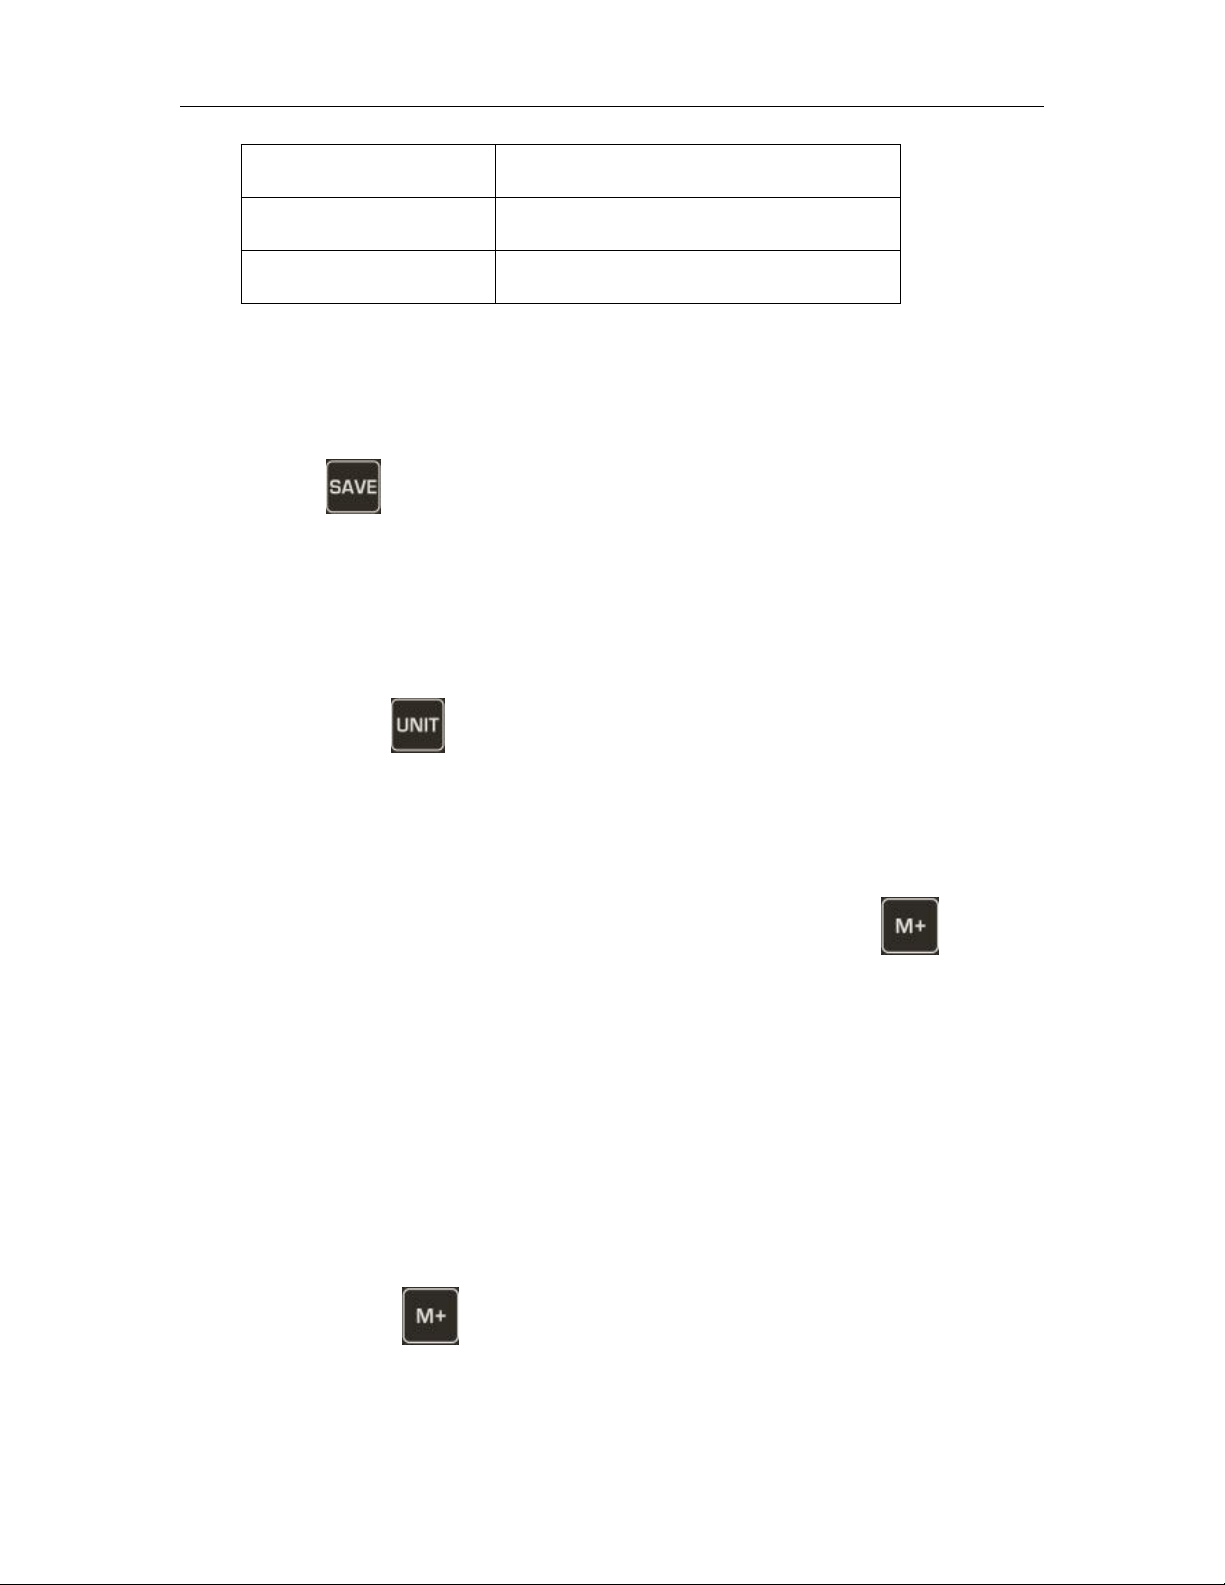
When in normal weighing mode,
Press and hold key until to show
the display
Display
Description
bLSEt ModE AUto
Backlight will be turned on, when
start to use or when weight is not in
Plu
saved
load
pos
Ps 0-9
10
0000
0
BLSEt
ModE
AUto
Press numeric key 0 to 9, to select location.
If want to select to numeric key 1, press 1.
Unit price 10 saved into numeric key 1.
Re-Cal Unit Price
When you want to weigh stored unit price weighment,
Press , display will be shown
Press the numeric key, which you stored in 0 to 9.
If want to use stored in 1, press 1.
Display will be shown, which unit
price is stored.
Place the load on the platform, total price will be calculate automatically.
7.Back light
It has an option to choose the back light operation.
Press the key to change the settings back light display mode to
Auto / On /Off. Press the key to confirm.
Page 17
TVP-B_TVP-P Price Computing Scales Technical Manual
- 17 -
zero.
bLSEt ModE on
Backlight will be turned always on
bLSEt ModE oFF
Backlight function will be turned off
8.Automatic Unit Price Clear
It can set automatic unit price clear.
Press key to save indicator turn on or off.
When save indicator on, unit price appear after return to zero.
When save indicator off, unit price will be clear automatically.
9.Change unit
By pressing key to change unit kg to lb or oz during the normal
weighing mode.When change the unit, unit indicator will be shown in unit price
display.
10.Accumulation
The scale can be set to accumulate manually by pressing key,To
enable the accumulation function on,see parameters
F11RS232>mode>EP50
Before enter parameters,press the calibration switch,switch is locating
below the scale
Before operation scale should be stable and return to zero, only when
weight more than 20d
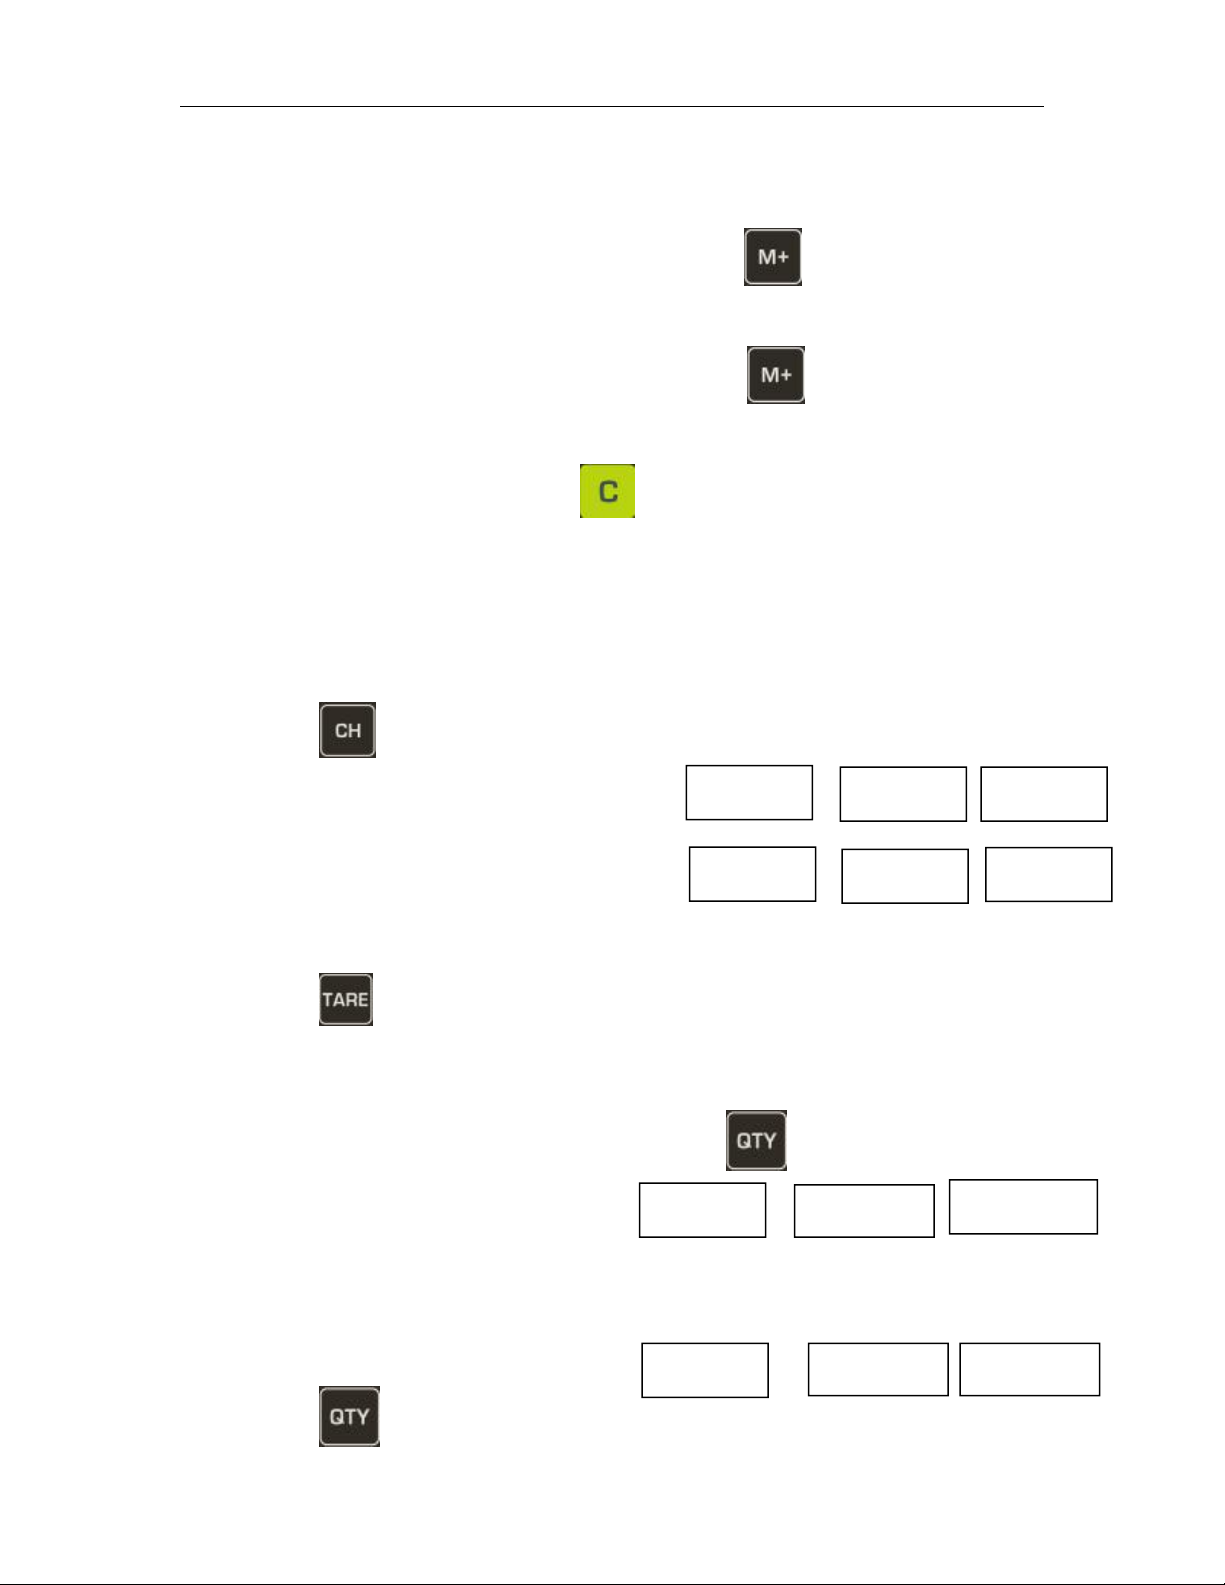
The values (price) displayed may be added to the values aggregated by
pressing the key. The "Total Price" display will show the total price.
These values will appear for 2 seconds.
Page 18
TVP-B_TVP-P Price Computing Scales Technical Manual
- 18 -
2460
0
-------
2460
3000
540
0
5. 00
0. 00
3
5. 00
15. 00
The scale must return to zero or a negative value before another sample
can be stored.
Other products may be added by pressing the key. It may take up to
99 entries or until it reaches the maximum displayable digits.
To view the total price stored, by pressing the when the scale is in
zero point. The total will be displayed for 2 seconds.
To clear memory, by pressing to clear all values.
11.Give change
After finish the accumulation, can use the account operation.,
To enable the function on, please see the parameters F12>change >on
Press key ,and the CH indicator will be on.Weight display shown
summation price
By pressing numeric keys enter the amount, which is given customer.
If enter 3000, remaining balance will be shown in Total price display.
Press key to return weighing mode and clear the account memory.
12.Commodities Without Weighing
Using numeric keys to input unit price ,Press key,
the display will be show
Using numeric keys to input quantity in the weight window,the total price
will be show automatically
Press key to return normal weighing mode.
Page 19
TVP-B_TVP-P Price Computing Scales Technical Manual
- 19 -
7. PARAMETER
7.1 PARAMETERSETTING
Enter into the Menu
Turn on the scale. Press and hold key during the self test.
Display will show “Pn” briefly PIN is activated. Press the PIN number to
get into the parameter menu.
The default PIN number is “0000”
Press numeric key 0 four times , display will be shown Pn - - - -
Press key to confirm, It will enter into the parameter settings and will to
show “ menu unit kg” .
Enter to Selected Menu
Press , it can confirm which will be shown displayed.
Select the Menu
Press or . It can choose menu block one by one.
Return to Weighing Mode
Press escape from the menu and exit to weighing mode
Active Parameter
If want to change the settings
tare , grA , reset before enter the parameters ,should press CAL
switch to access . CAL switch is locating bottom of the scale
cal , res , cap , speed , SCSIUE
Page 20
TVP-B_TVP-P Price Computing Scales Technical Manual
- 20 -
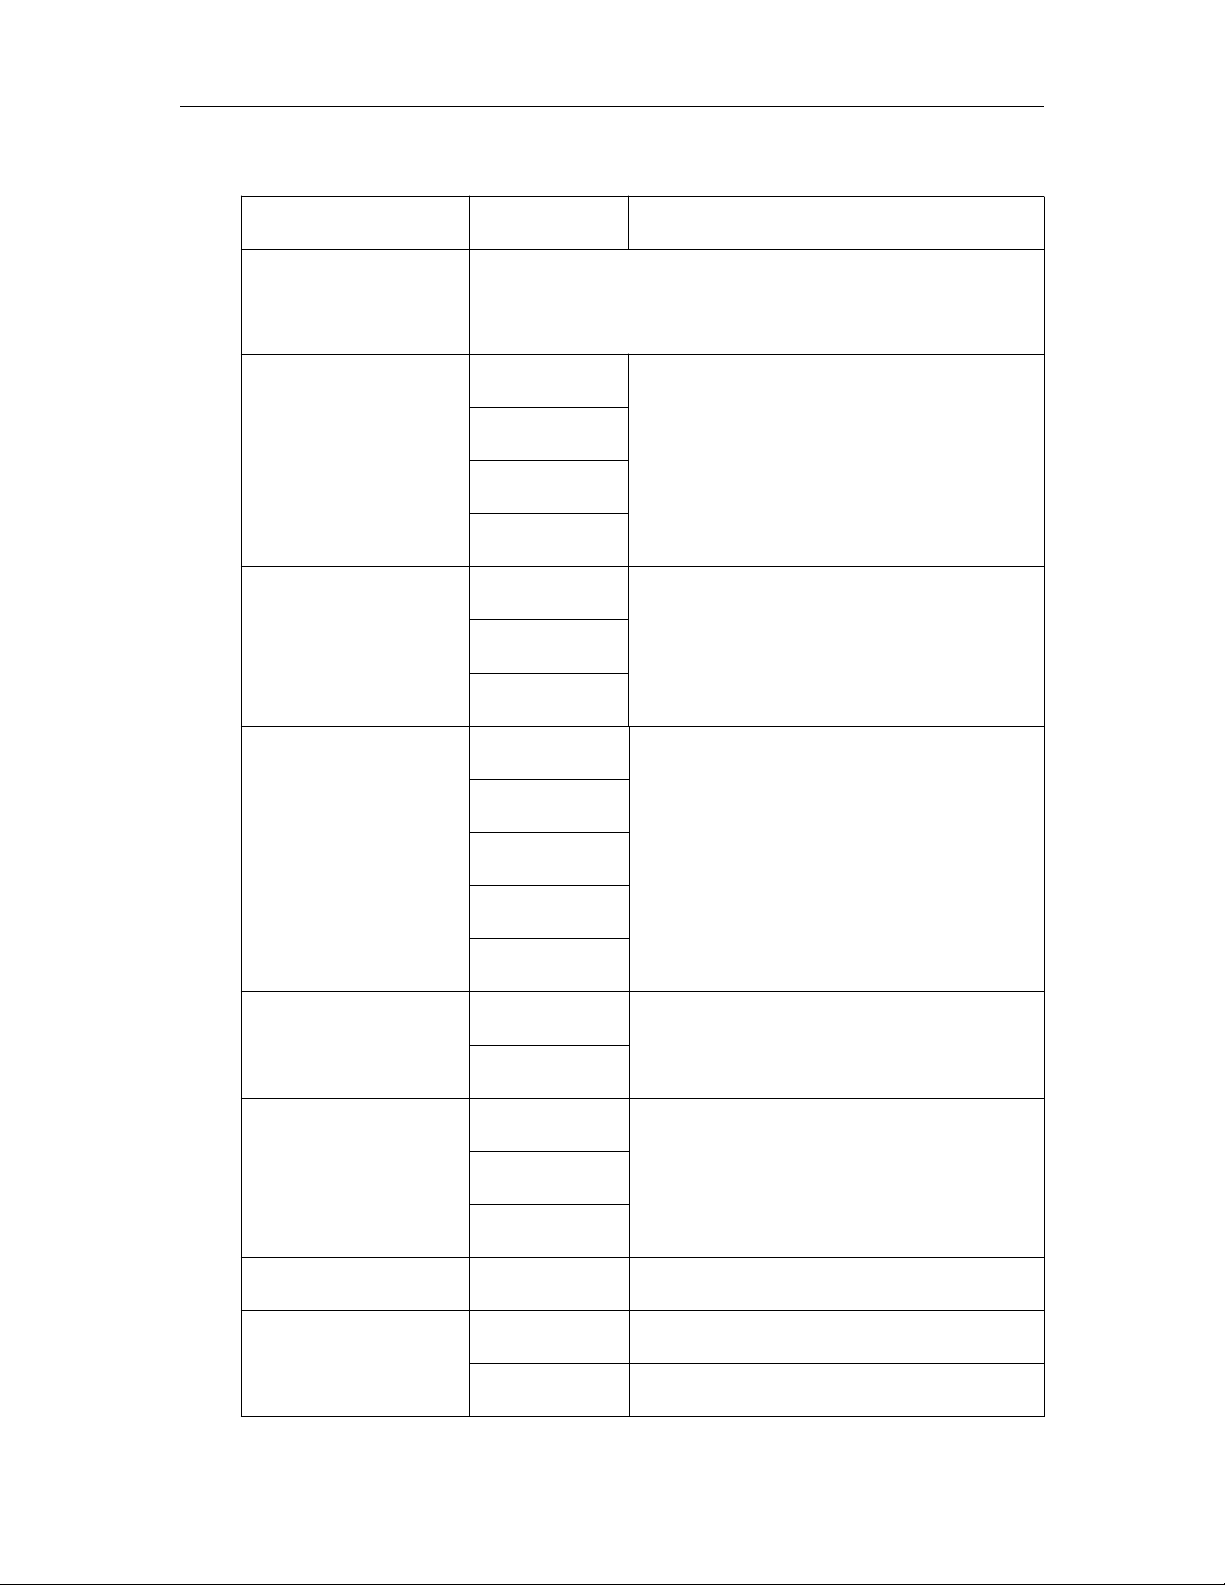
Menu
Sub-Menu
DESCRIPTION
F0 CAL
Calibration
F1 rES
3000
Set external resolution
6000
Dual-i
Dual-r
F2 CAP
6KG/12lb
Set Scale Capacity
12KG/30lb
30kg/60lb
F3 PdECi
0
Set Price Decimal Point
0. 0
0. 00
0. 000
0. 0000
F4 PdESC
FIX
Set unit Price to FIX or FLOATING
FLOAT
F5 SPEED
Slow
To select A/D speed
Medium
Fast
F6 Min coin
Set the minimum coin to 1
F7 SCSIUE
tare
ON
Multi - Tare function ON
OFF
Multi - Tare function OFF
7.2 PARAMETER MENU BLOCK
Page 21
- 21 -
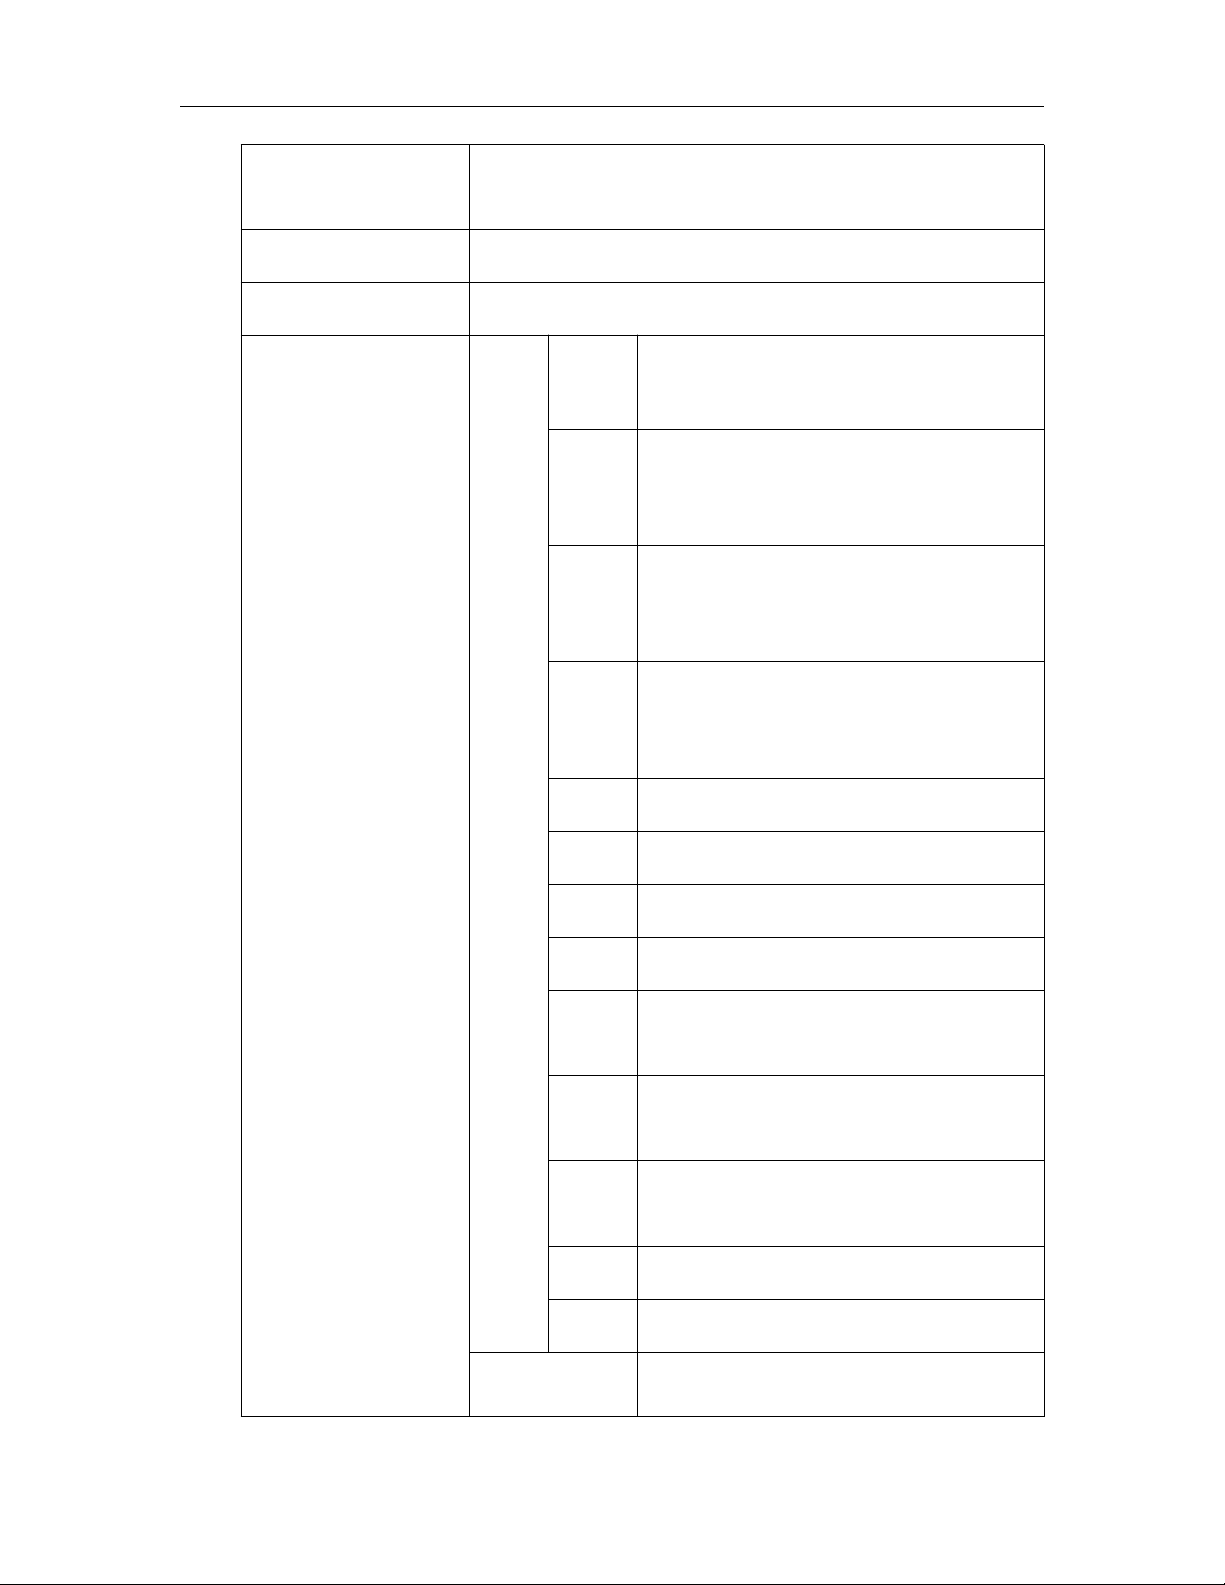
F8 ISN
This display will show XXXXX for indicating the
internal counts.
F9 Gra
To set your local gravity value.
F10 Reset
Factory default settings
F11 rS232
Mod
E
PC100
Protocol Type :CAS
prin
tr
The scale RS232 protocol will be
determined by the Baud & Pr
settings
EP50
accumulation function enable,and
press M+ key to send data to
receipt printer
Lp50
accumulation function enable,and
press M+ key to send data to label
printer
POS
Protocol Type :POS
oFF
RS232 function disable
Cont
Continues data transmission
StC
Stable data sending continues
tole
do
Protocol Type 1: Toledo
ncie
cr
Protocol Type 2: NCI-ECR
ncig
en
Protocol Type 3: NCI-General
tec
Protocol Type 4: TEC
easy
Protocol Type 5: Easy Weigh
baud
Set baud rate
to( 1200/2400/4800/9600/19200/38
TVP-B_TVP-P Price Computing Scales Technical Manual
Page 22
TVP-B_TVP-P Price Computing Scales Technical Manual
- 22 -
400/115200)
Pr
8n1
8 data bits, no verify, 1 stop bit
7E1
7 data bits, Even verify, 1 stop bit
7o1
7 data bits, Odd verify, 1 stop bit
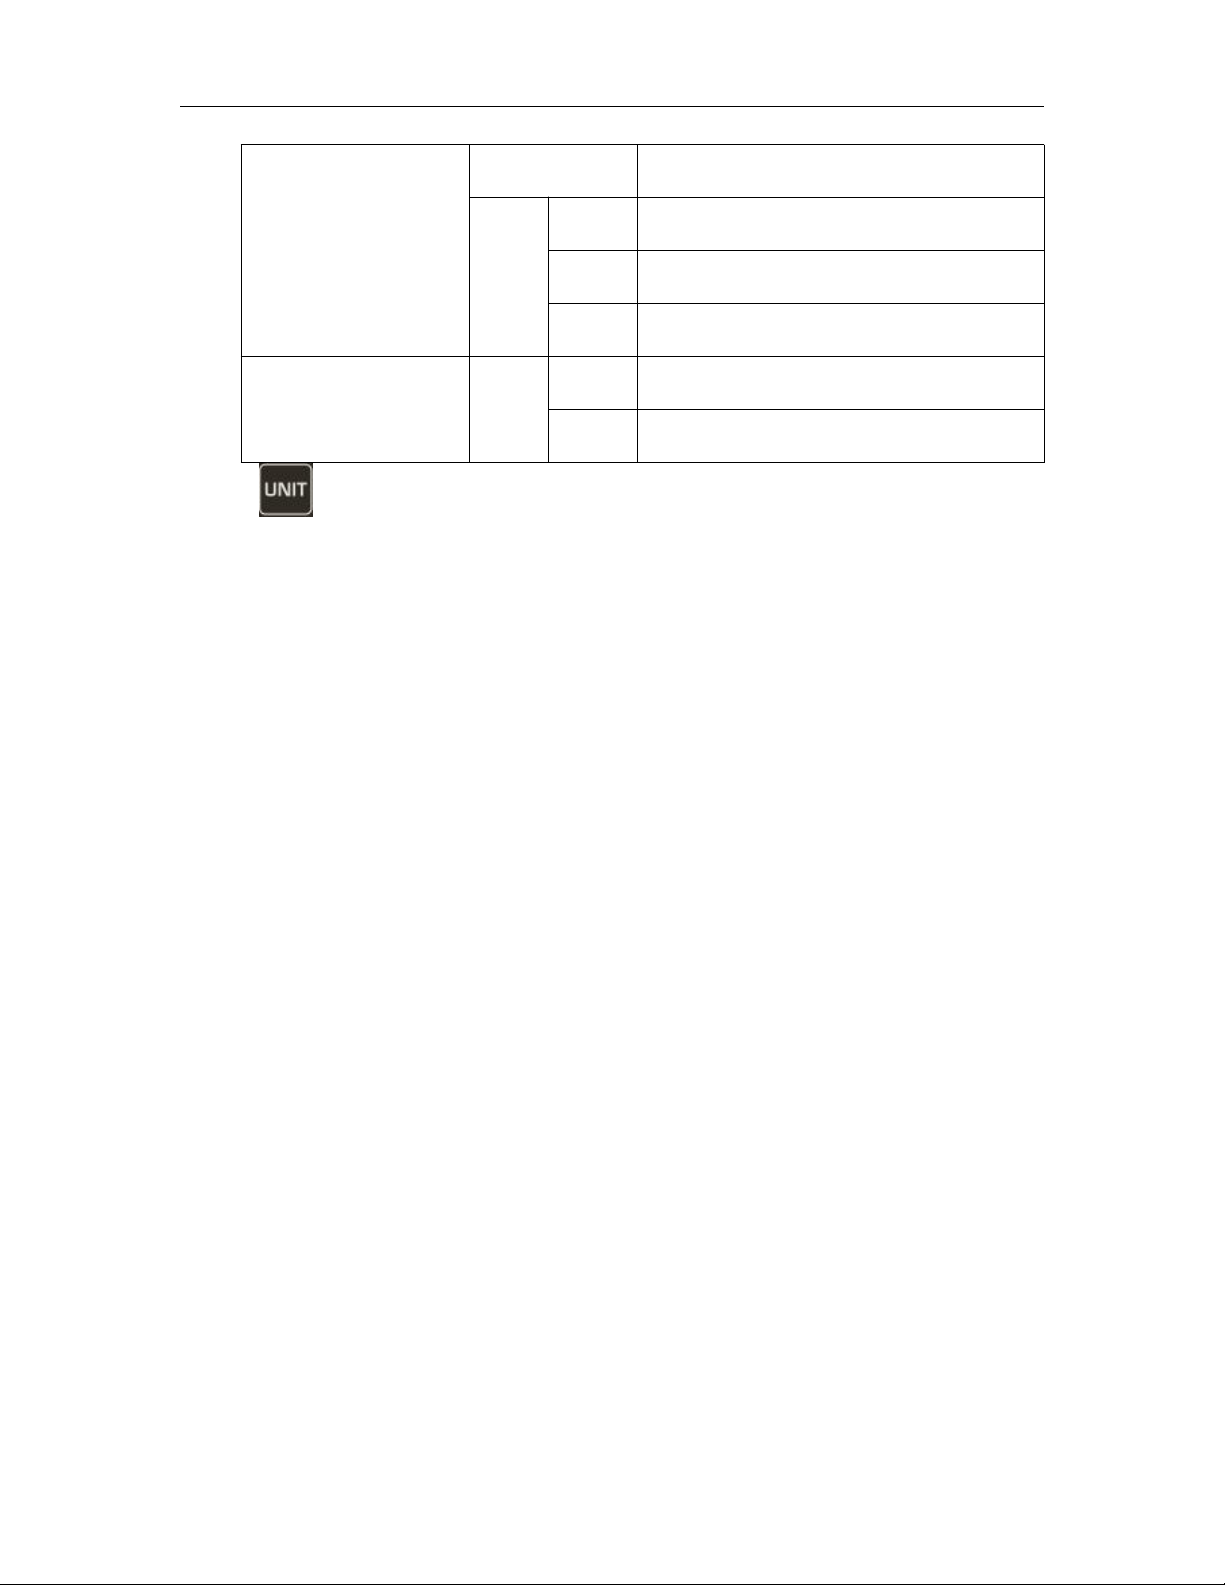
F12 change
CHA
NGE
ON
To set change function on
OFF
To set change function off
Press key to choose "kg" ,"lb" or "oz” unit in normal weighing mode,
capacity will be show in kg , lb or oz values.
Page 23
TVP-B_TVP-P Price Computing Scales Technical Manual
- 23 -
8. CALIBRATION
Turn on the scale. Press and hold key during the self test.
Display will show “Pn” briefly PIN is activated. Press the PIN number to get into
the parameter menu.
The default PIN number is “0000”
1.Press numeric key 0 four times , display will be shown Pn - - - -
2.Press key to confirm, It will enter into the parameter settings and will be
Show “
a.If calibrating in kg.,continue step 3
b.If calibrating in lb.,press key ,lb will be show on the display
3.Press key to confirm , display will be show “f0 cal”
Press calibration switch to enable settings,the calibration switch is locating
below the scale
4.Remove the goods from the platform and make sure STABLE indication shows
on the display.
5.Press key to confirm,display will be show “unload”
6.Press key to confirm ,display will be show ,
menu unit kg
”
CAP load
XX
7.If necessary, press key to select the calibration weight value and then
place the calibration weight on the platform.
8.Press key to confirm when display gets stable, display will be show
“
PASS
9.Calibration finished and display will come to
”
F0 Cal
Page 24

TVP-B_TVP-P Price Computing Scales Technical Manual
- 24 -
10.Remove calibration weight from the platform.
11.Press key to go back to the weighing mode.
If display will be shown any error or incorrect value, repeat the procedure again.
Page 25
TVP-B_TVP-P Price Computing Scales Technical Manual
- 25 -
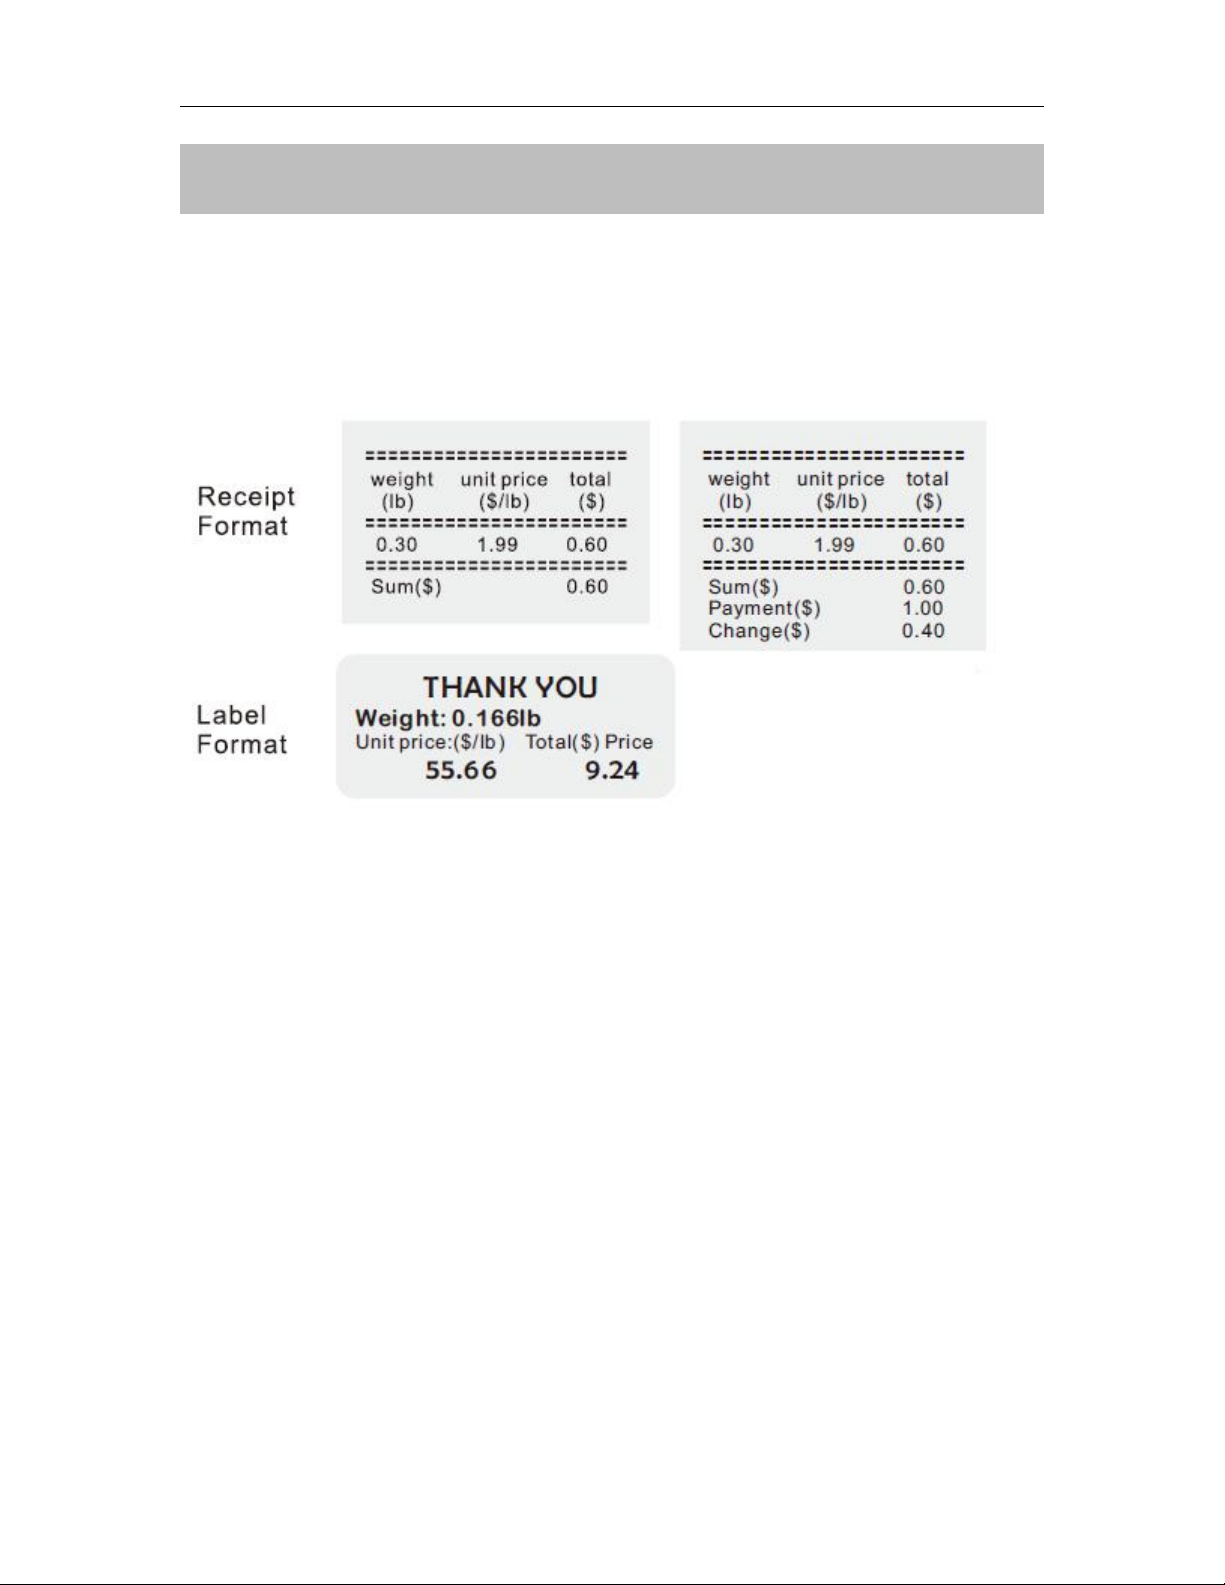
9. RS 232 OUTPUT
The TVP-B& TVP-P Series of scales can be ordered with a standard RS-232
output. It can be connected to DEP-50 receipt printer &DLP-50 label printer
9.1. Print Format
Page 26

TVP-B_TVP-P Price Computing Scales Technical Manual
- 26 -
Error Message
Description
Solution
-----
Maximum load exceeded
Unload or reduce weight
Err 1
Incorrect date
Enter the date by using format
“yy;mm:dd”
Err 2
Incorrect time
Enter the time by using format
“hh:mm:ss”
Err 4
Zero setting error
Zero setting range exceeded
due to switching on.(4%max)
Make sure platform empty.
Err 5
Key board error
Check the keys and
connecter.
Err 6
A/D value out of range
Make sure platform empty and
check the pan is installed
proper. Check the load cell
connectors.
Err 7
Percentage error
Value should be (0.01%
weight must > 0.5d)
Err 9
Unstable Reading
Check any air variation,
vibration, RF noise and
touching some where.
Check the load cell and
connectors.
Err 10
Communication error
No data (RS-232, continuous
communication)
Err 15
Enter gravity error
Gravity rang(0.9~1.0)
10. ERROR CODES
Page 27

TVP-B_TVP-P Price Computing Scales Technical Manual
- 27 -
Err 17
Tare out of range
Remove the load and restart
scale again.
Err19
Initialize zero error
Calibration the scale.
--ol--
Over range
Remove the load.
Re calibrate
Fai l h
/
fai l l
Calibration Error
Re calibrate
Err p
Printer error
Check the printer and settings
Ba lo /
lo ba
Battery low
Re charge battery, check the
voltages.
Page 28
TVP-B_TVP-P Price Computing Scales Technical Manual
- 28 -
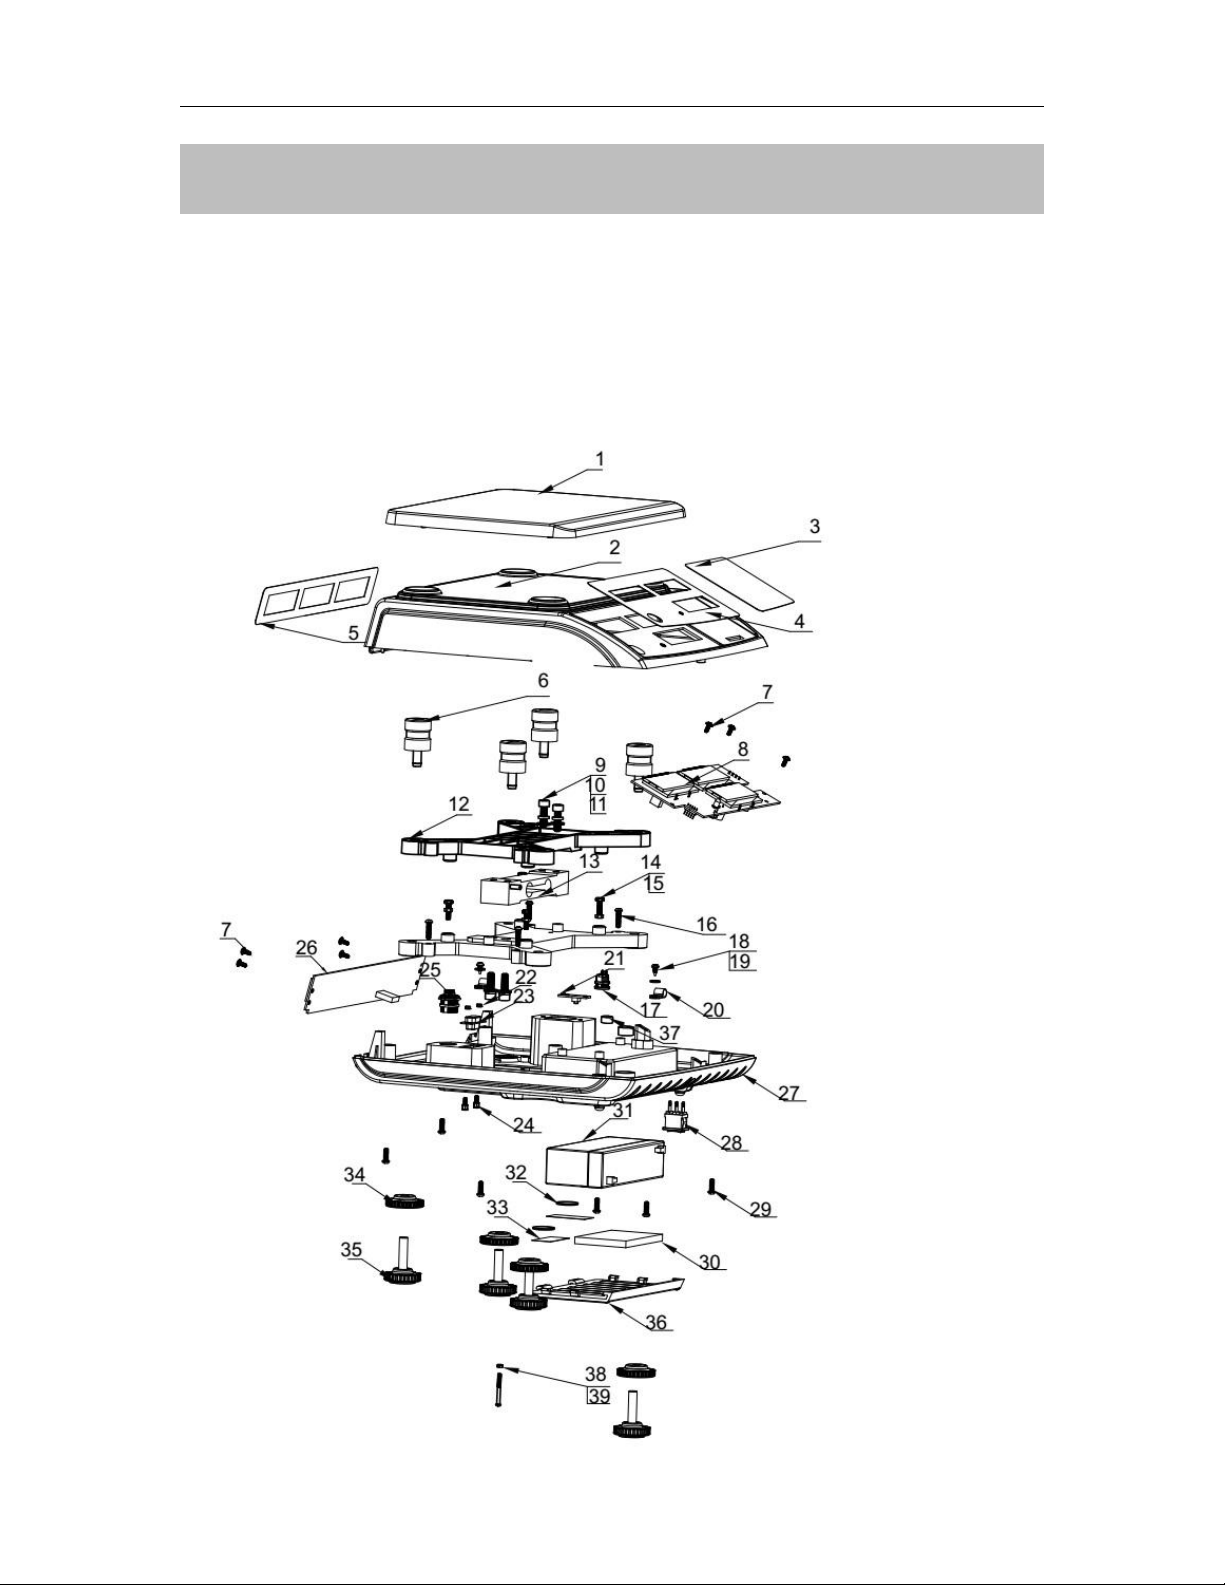
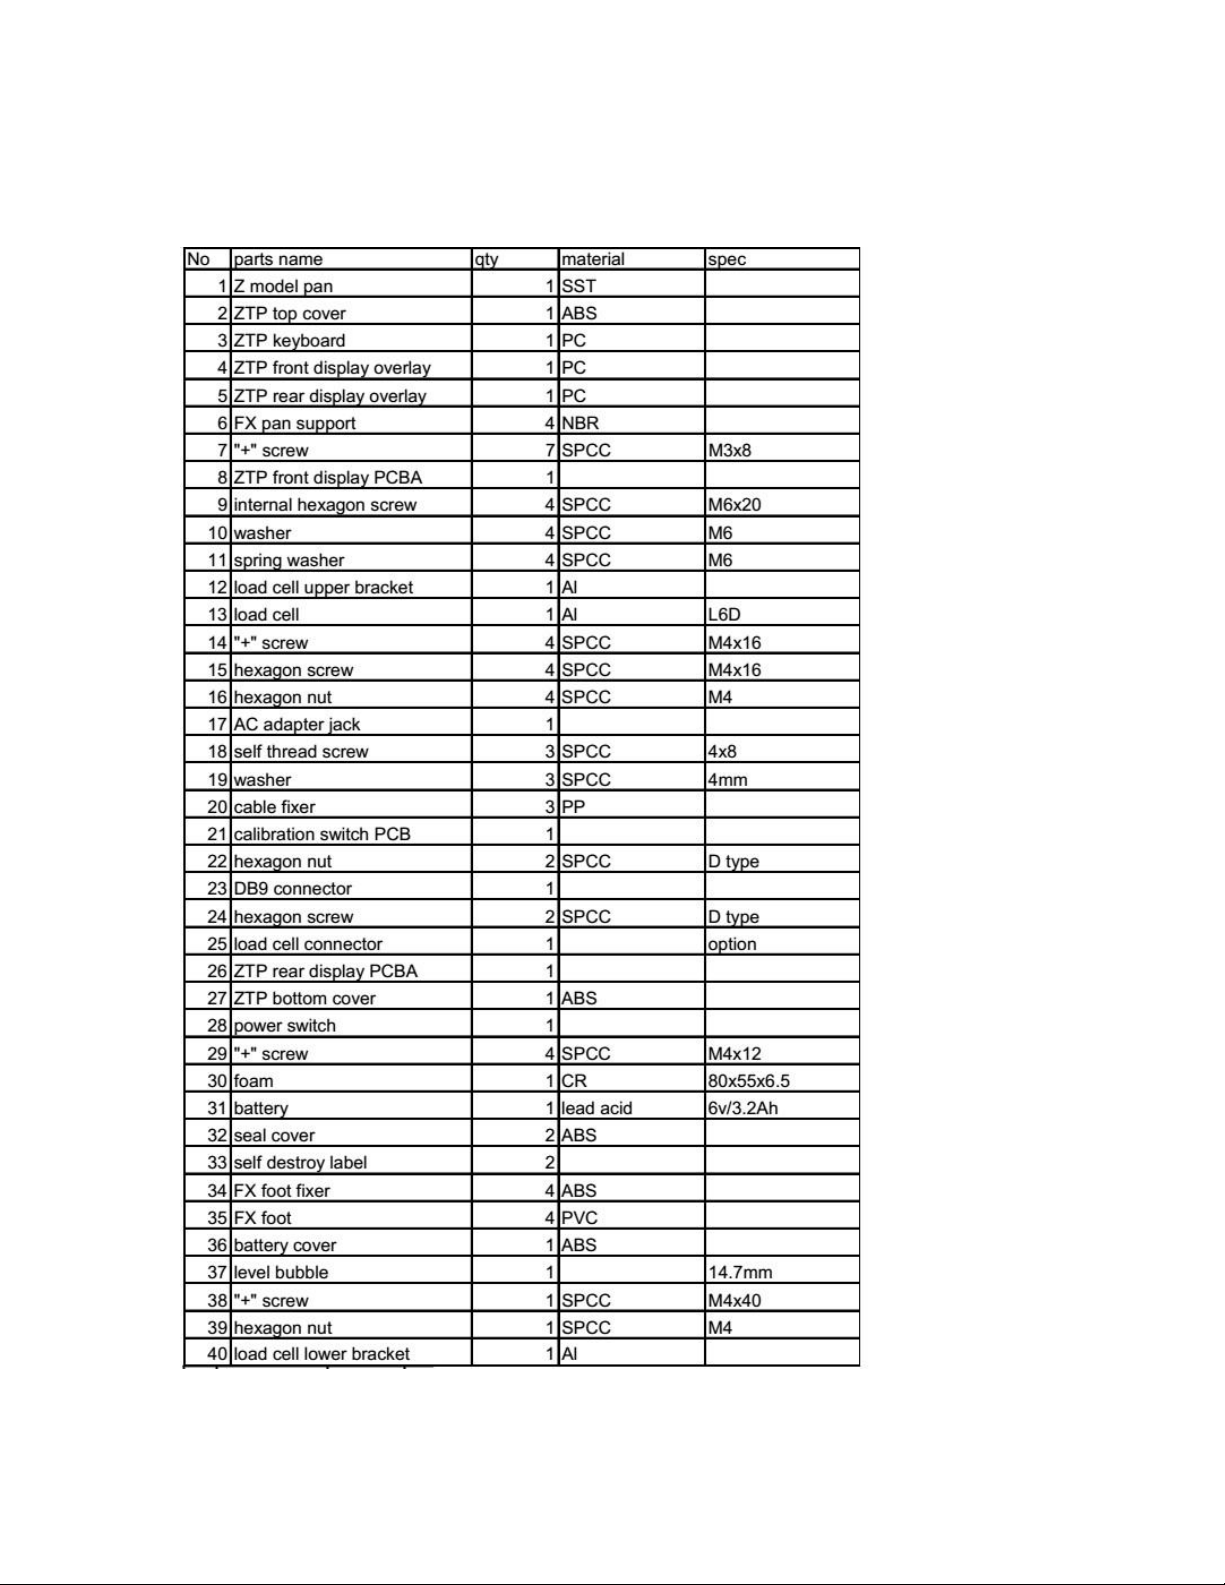
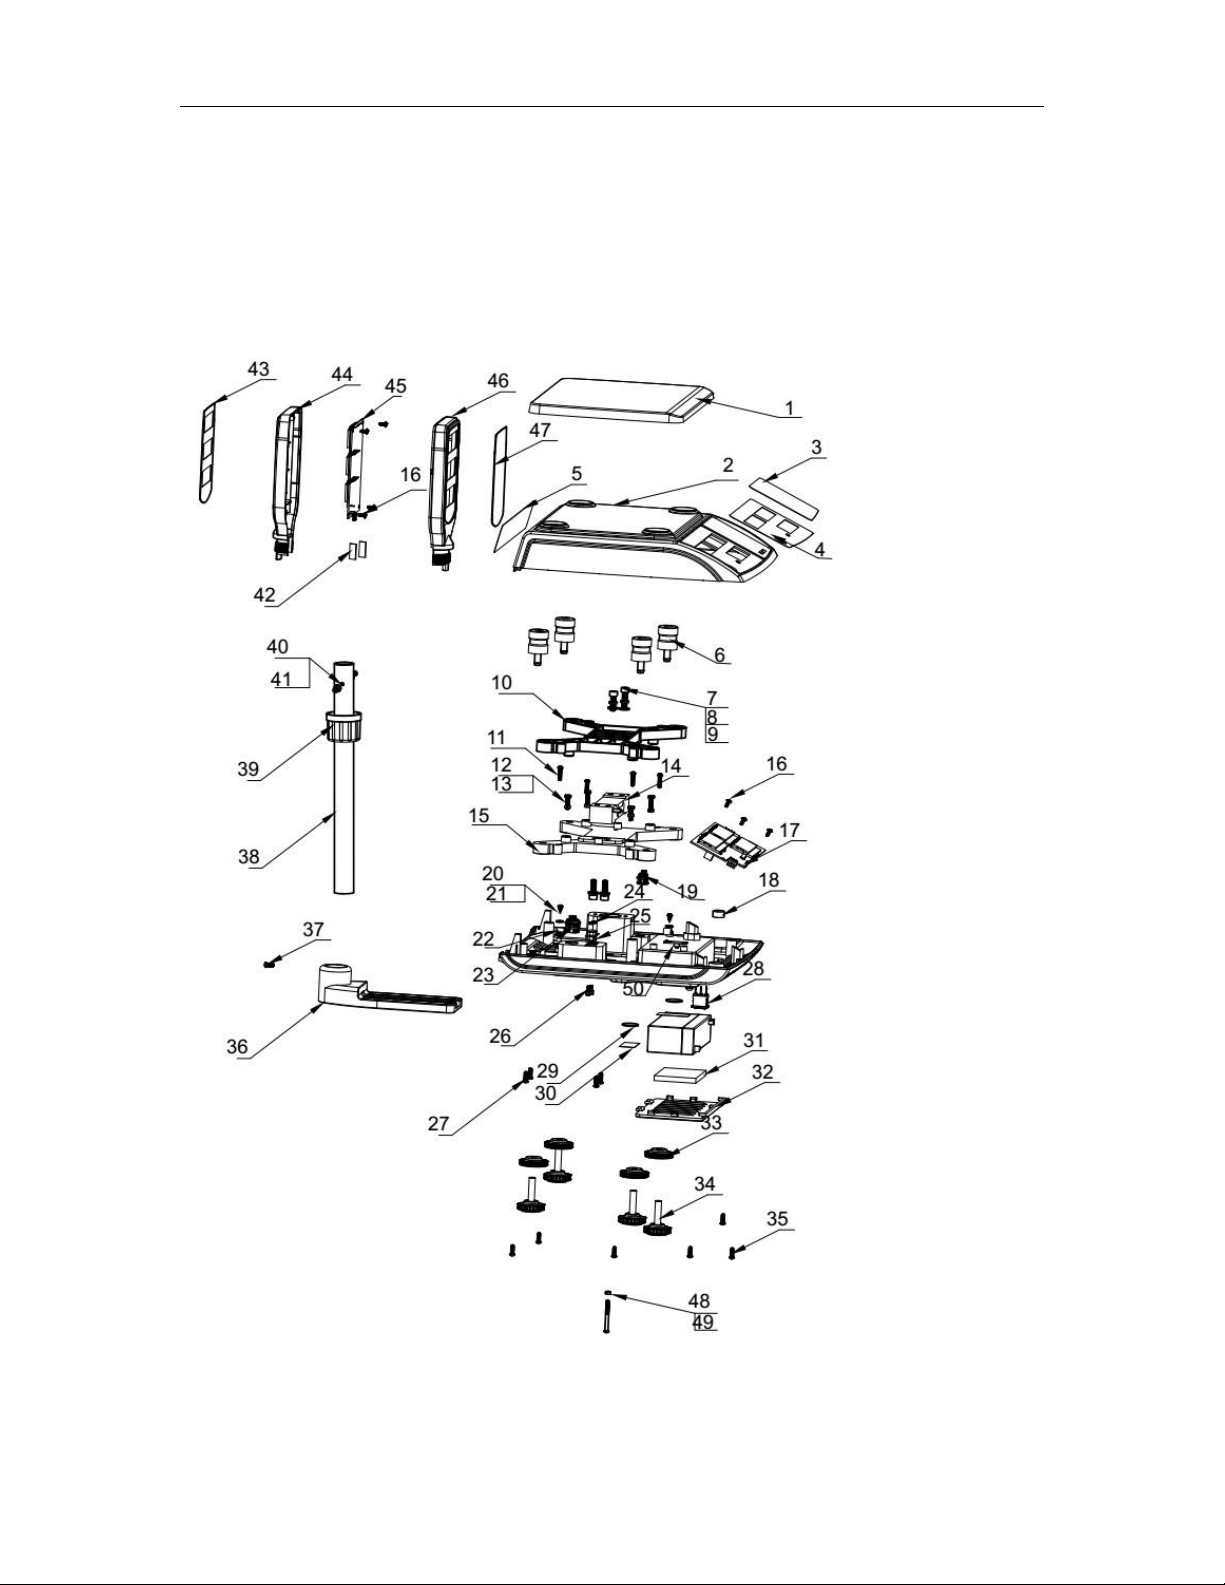
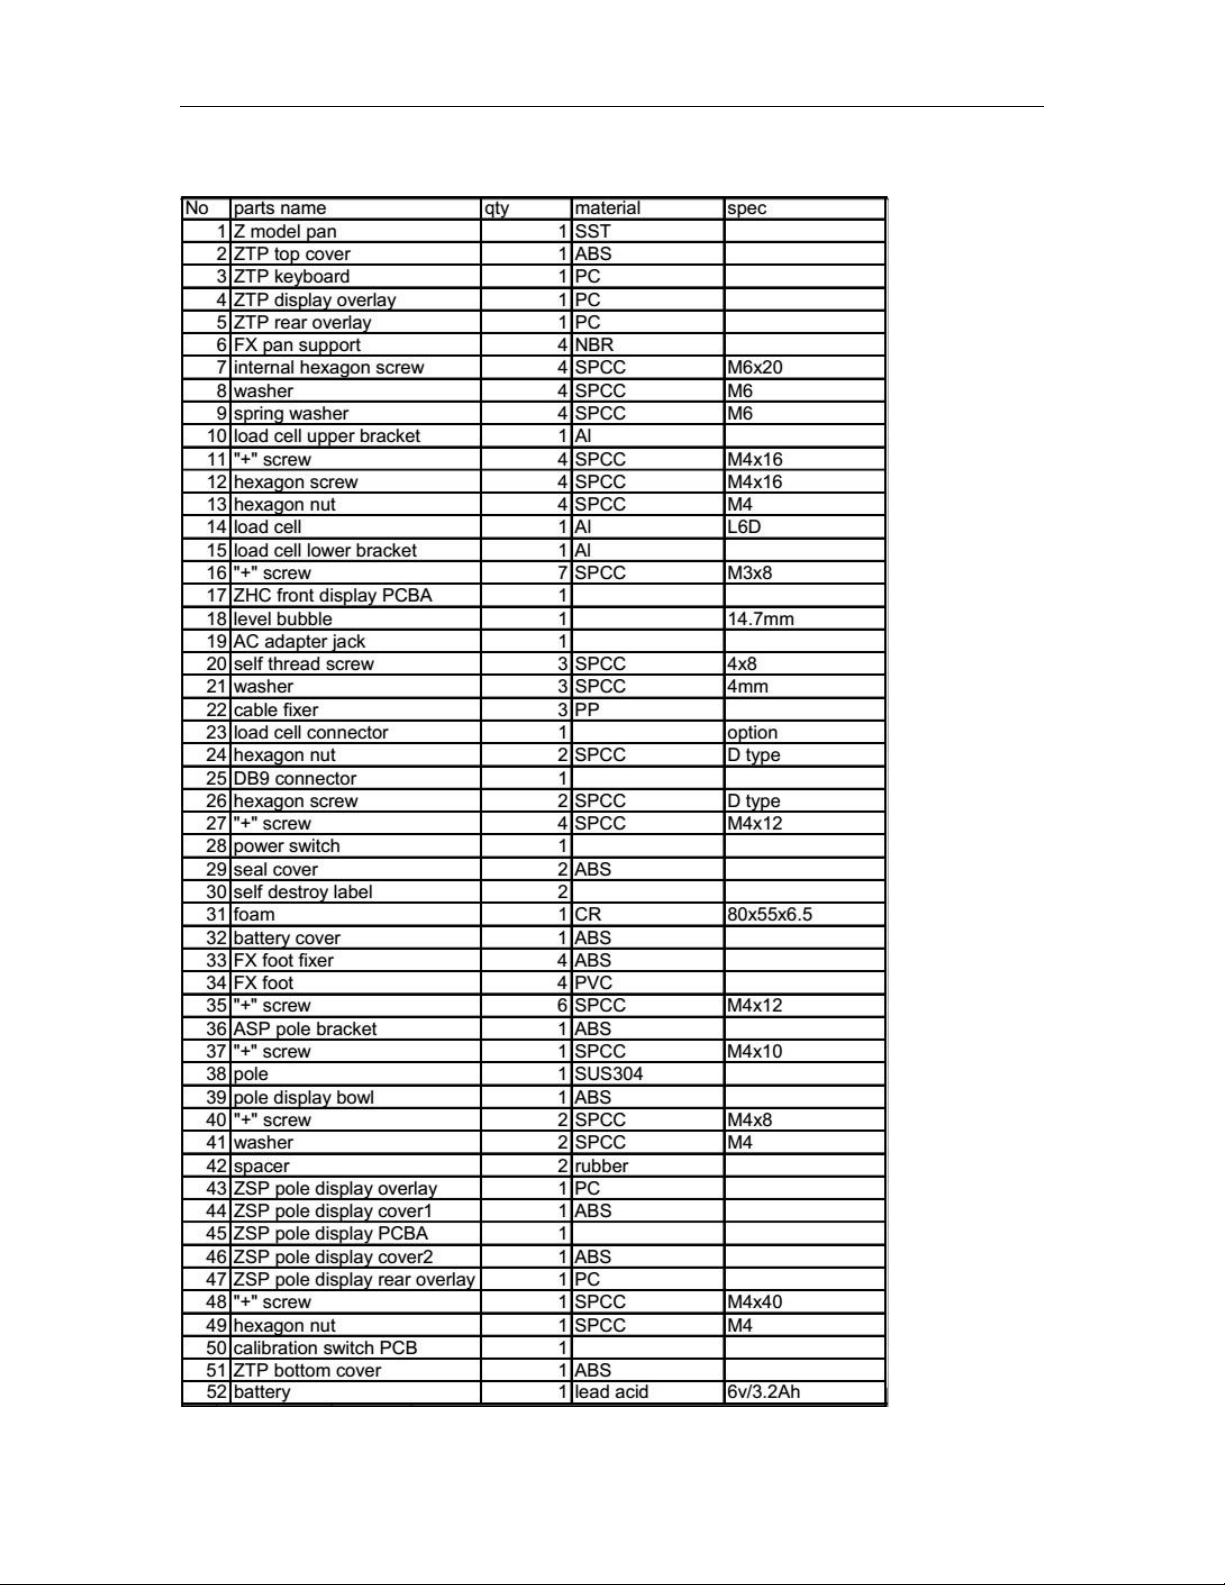
11. DRAWING
TVP-B
Page 29
- 29 -
Page 30
- 30 -
TVP-P
TVP-B_TVP-P Price Computing Scales Technical Manual
Page 31
TVP-B_TVP-P Price Computing Scales Technical Manual
- 31 -
Page 32
- 32 -
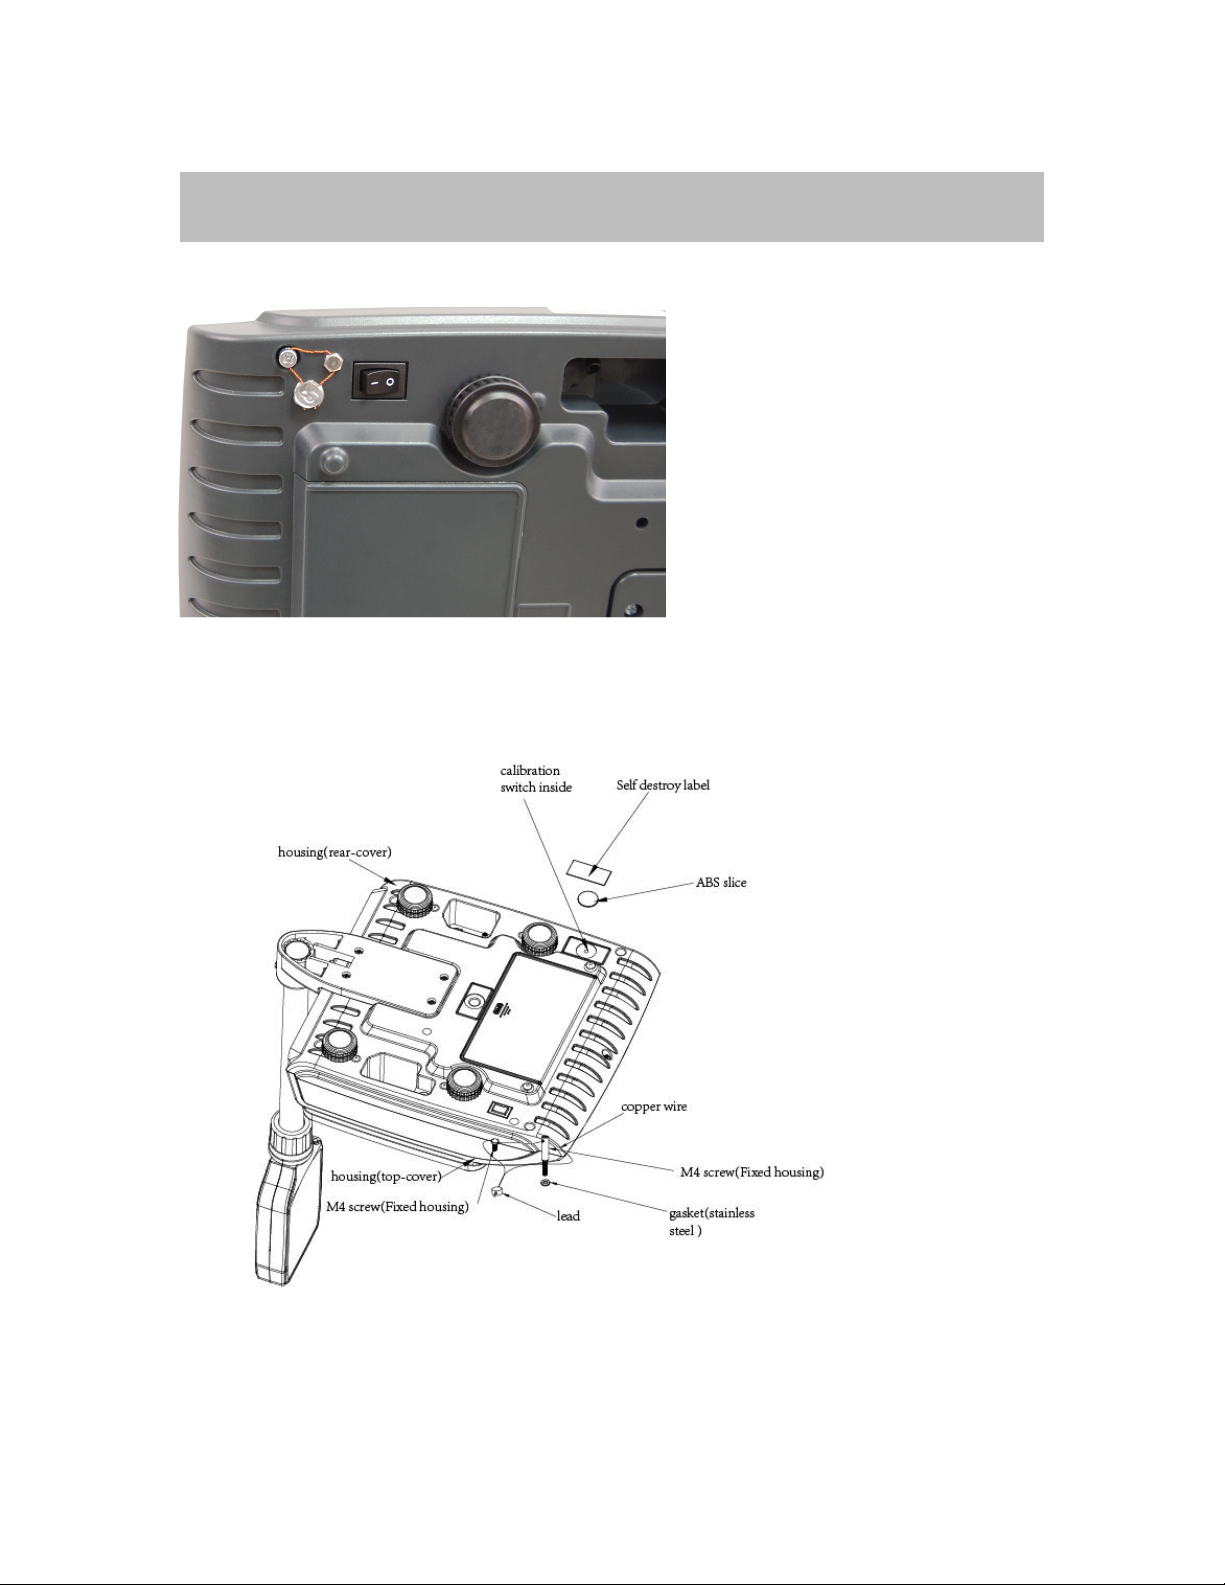
A wire seal is passed
through the holes in two
sealing screws mounted on
the bottom of the scale.
12.1 Sealing chart
TVP-B/TVP-P
12. SEALING METHOD
Page 33

TVP-B_TVP-P Price Computing Scales Technical Manual
- 33 -
 Loading...