

Page 1
viscount
Manuale d'uso - IT
User manual - EN
Ver. 1.0
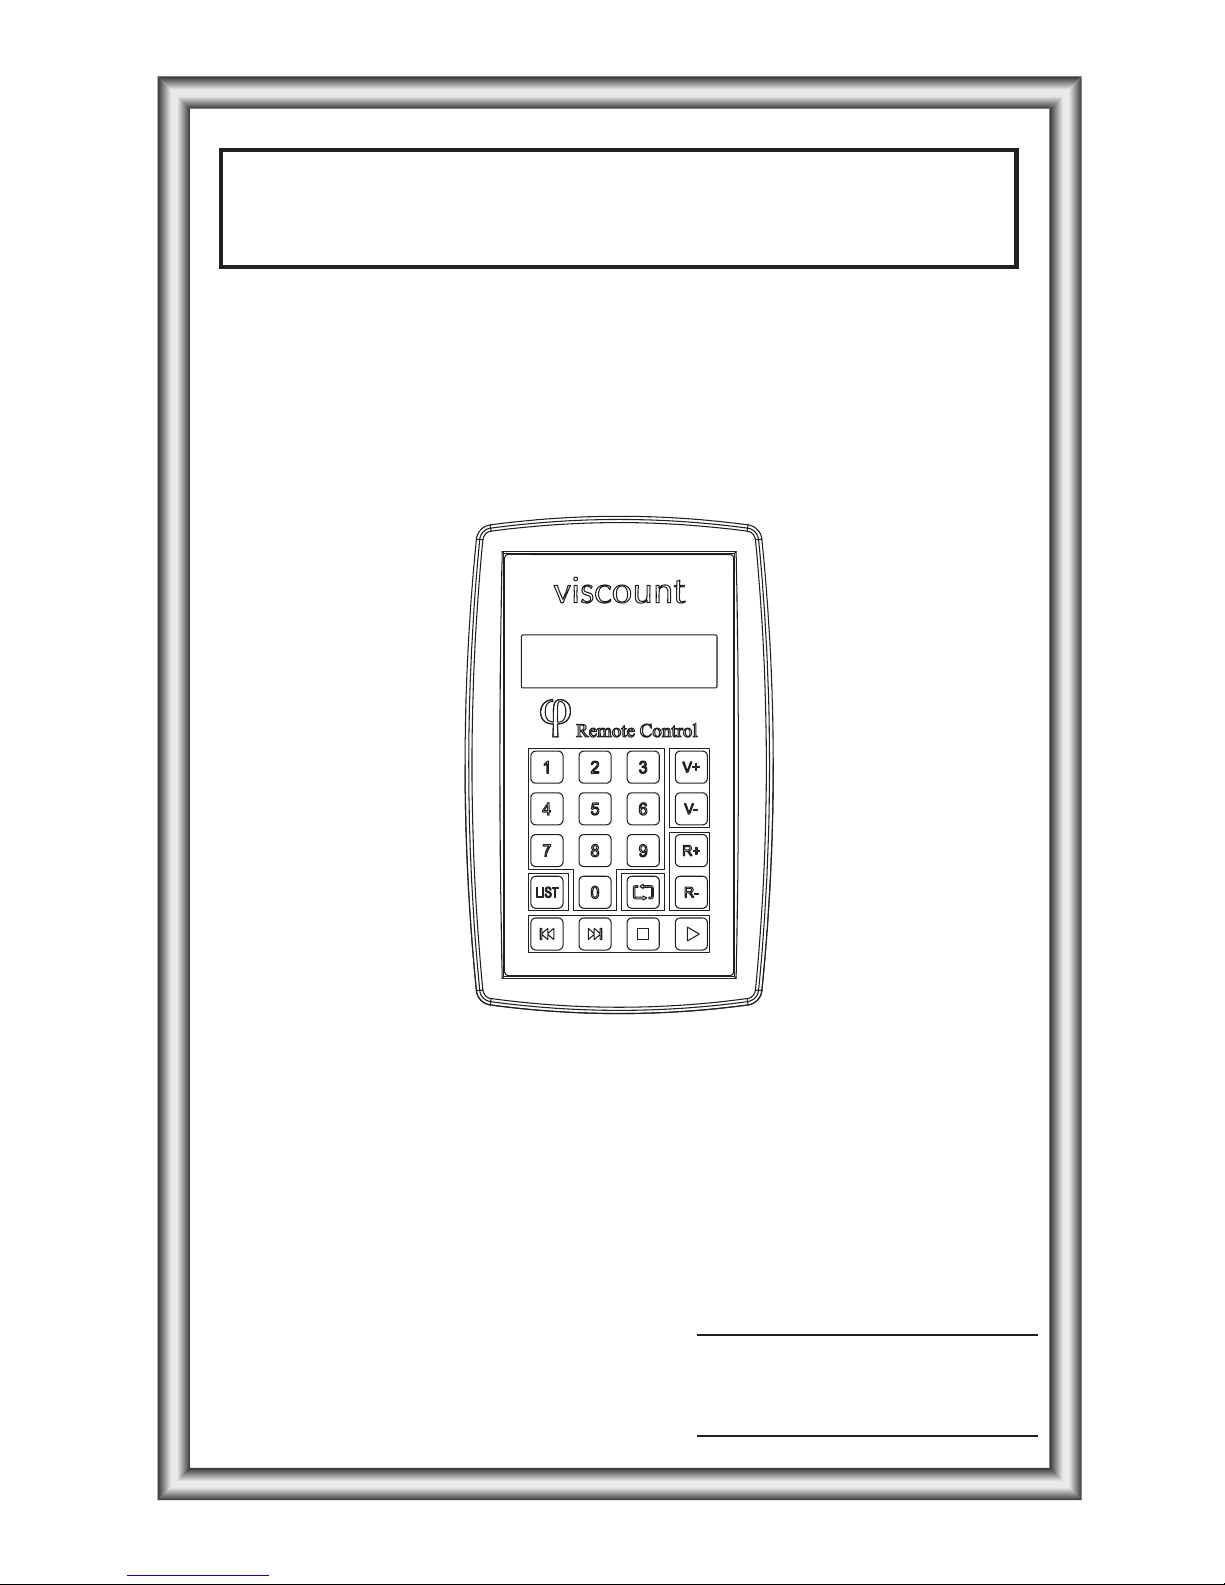
REMOTE RADIO CONTROLLER
Unico Series
Page 2
WARNING: READ THIS FIRST!
WARNING
AVIS
RISK OF ELECTRIC SHOCK
DO NOT OPEN
RISQUE DE CHOC ÉLECTRIQUE
NE PAS OUVRIR
This symbol is intended to alert the user to the
presence of uninsulated “dangerous voltage”
within the product’s enclosure that may be of
sufficient magnitude to constitute a risk of
electric shock to persons.
This symbol is intended to alert the user to
the presence of important operating and
maintenance (servicing) instructions in the
literature accompanying the appliance.
WARNING:
TO REDUCE THE RISK OF FIRE OR ELECTRIC SHOCK:
DO NOT EXPOSE THIS APPARATUS TO RAIN OR MOISTURE
AND OBJECTS FILLED WITH LIQUIDS, SUCH AS VASES,
SHOULD NOT BE PLACED ON THIS APPARATUS.
DO NOT REMOVE COVER (OR BACK)
NO USER-SERVICEABLE PARTS INSIDE
REFER SERVICING TO QUALIFIED SERVICE PERSONNEL
"INSTRUCTIONS PERTAINING TO A RISK OF FIRE,
ELECTRIC SHOCK OR INJURY TO PERSONS"
IMPORTANT SAFETY INSTRUCTIONS
SAVE THESE INSTRUCTIONS
WARNING:
1) Read these instructions.
2) Keep these instructions.
3) Heed all warnings.
4) Follow all instructions.
5) Do not use this apparatus near water.
6) Clean only with dry cloth.
7) Do not block any ventilation openings. Install in accordance with the manufacturer’s instructions.
8) Do not install near any heat sources such as radiators, heat registers, stoves
or other apparatus (including amplifiers) that produces heat.
9) Do not defeat the safety purpose of the polarized or grounding-type plug. A polarized plug has two blades with one
wider than the other. A grounding type plug has two blades and a third grounding prong. The wider blade or the third
prong are provided for your safety. If the provided plug does not fit in to your outlet, consult an electrician for
replacement of the obsolete outlet.
10)Protect the power cord from being walked on or pinched, particularly at plugs, convenience receptacles,
and the point where they exit from the apparatus.
11) Only use attachments/accessories specified by the manufacturer.
12)Use only with the cart, stand, tripod, bracket, or table specified by
the manufacturer, or sold, with the apparatus. When a cart is used,
use caution when moving the cart/apparatus combination to avoid
injury from tip-over.
13)Unplug this apparatus during lightning storms or when unused for long periods of time.
14)Refer all servicing to qualified service personnel. Servicing is required when the apparatus has been damaged
in any way, such as power-supply cord or plug is damaged, liquid has been spilled or objects have fallen into
the apparatus, the apparatus has been exposed to rain or moisture, does not operate normally, or has been
dropped.
NOTE: The socket-outlet shall be installed near the equipment and shall be easily accessible.
Page 3

19
Viscount UNICORadio Remote Control
INDEX
Important notes ................................................................................................................................19
Guide to the remote control ...........................................................................................................21
Control panel.....................................................................................................................................22
Main screen........................................................................................................................................23
How to select and play a MIDI sequence.....................................................................................24
How to select and play a Songlist ..................................................................................................25
The Repeat button............................................................................................................................26
Alternative funcionts of the Register buttons .............................................................................27
Display backlight...............................................................................................................................27
Firmware update ...............................................................................................................................28
How to install the remote receiver inside the organ ...................................................................30
IMPORTANT NOTES
LOOKING AFTER THE PRODUCT
• Do not apply excessive force to the organ’s structures or the controls (knobs, stops, pushbuttons, etc.).
• When possible, do not place the instrument close to units which generate strong interference,
such as radios, TVs, computer videos, etc.
• Do not place the organ close to heat sources, in damp or dusty places or in the vicinity of
strong magnetic fields.
• Do not expose the instrument to direct sunlight.
• Never insert foreign bodies inside the instrument or pour liquids of any kind into it.
• For cleaning, use only a soft brush or compressed air; never use detergents, solvents or
alcohol.
• Always use good quality screened cables for connection to amplification or diffusion systems.
When disconnecting cables from sockets, always take hold of the connector and not the
cable itself; when winding cables, do not knot or twist them.
• Before making the connections ensure that the other units (especially amplification and
diffusion systems) you are about to connect are switched off. This will prevent noisy or
even dangerous signal peaks.
• Connect the net cable to an earthed socket.
• Check that the voltage corresponds to the voltage shown on the serial number plate of the
organ.
• If the organ is to be out of use for lengthy periods, disconnect the plug from the power
socket.
Page 4

20
Viscount UNICO Radio Remote Control
BATTERIES
• Use only batteries AA type, alkaline or rechargeable.
• Do not place batteries near or in direct flame.
• Do not let batteries come into contact with water (e.g. sea water) or other liquids.
• Do not attempt to disassemble, alter or apply heat to batteries.
• Avoid dropping or subjecting batteries to severe impacts.
• Before you discard batteries, cover the terminals with tape or other insulators. Contacting
other metal materials in waste containers may lead to fire or explosions.
• Dispose of batteries in appropriate containers.
• Remove and store the batteries when you are not using the device for lenghty periods.
If the batteries are left inside the device, damage caused by leakage may occur.
• This may cause explosions or leaks, resulting in fire, injury and damage to the surroundings.
In the event that a battery leaks and the eyes, mouth, skin or clothing contacts these
substances, immediately flush with water and seek medical assistance.
NOTES ABOUT THE MANUAL
• Take good care of this manual.
• This manual is an integral part of the instrument. The descriptions and illustrations in this
publication are not binding.
• While the instrument’s essential characteristics remain the same, the manufacturer reserves
the right to make any modifications to parts, details or accessories considered appropriate
to improve the product or for requirements of a constructional or commercial nature, at
any time and without undertaking to update this publication immediately.
• All rights reserved; the reproduction of any part of this manual, in any form, without the
manufacturer’s specific written permission is forbidden.
• All the trademarks referred to in this manual are the property of the respective
manufacturers.
• Please read all the information carefully, sothat you obtain the best performance and will
from your instrument.
• The codes or numbers in square brackets ([]) indicate the names of the buttons, sliders,
trimmers and connectors on the instrument. For example, [ENTER] refers to the ENTER
button.
• Illustrations and screens showed are for information purposes only and may differ from
your product.
Page 5
21
Viscount UNICORadio Remote Control
GUIDE TO THE REMOTE CONTROL
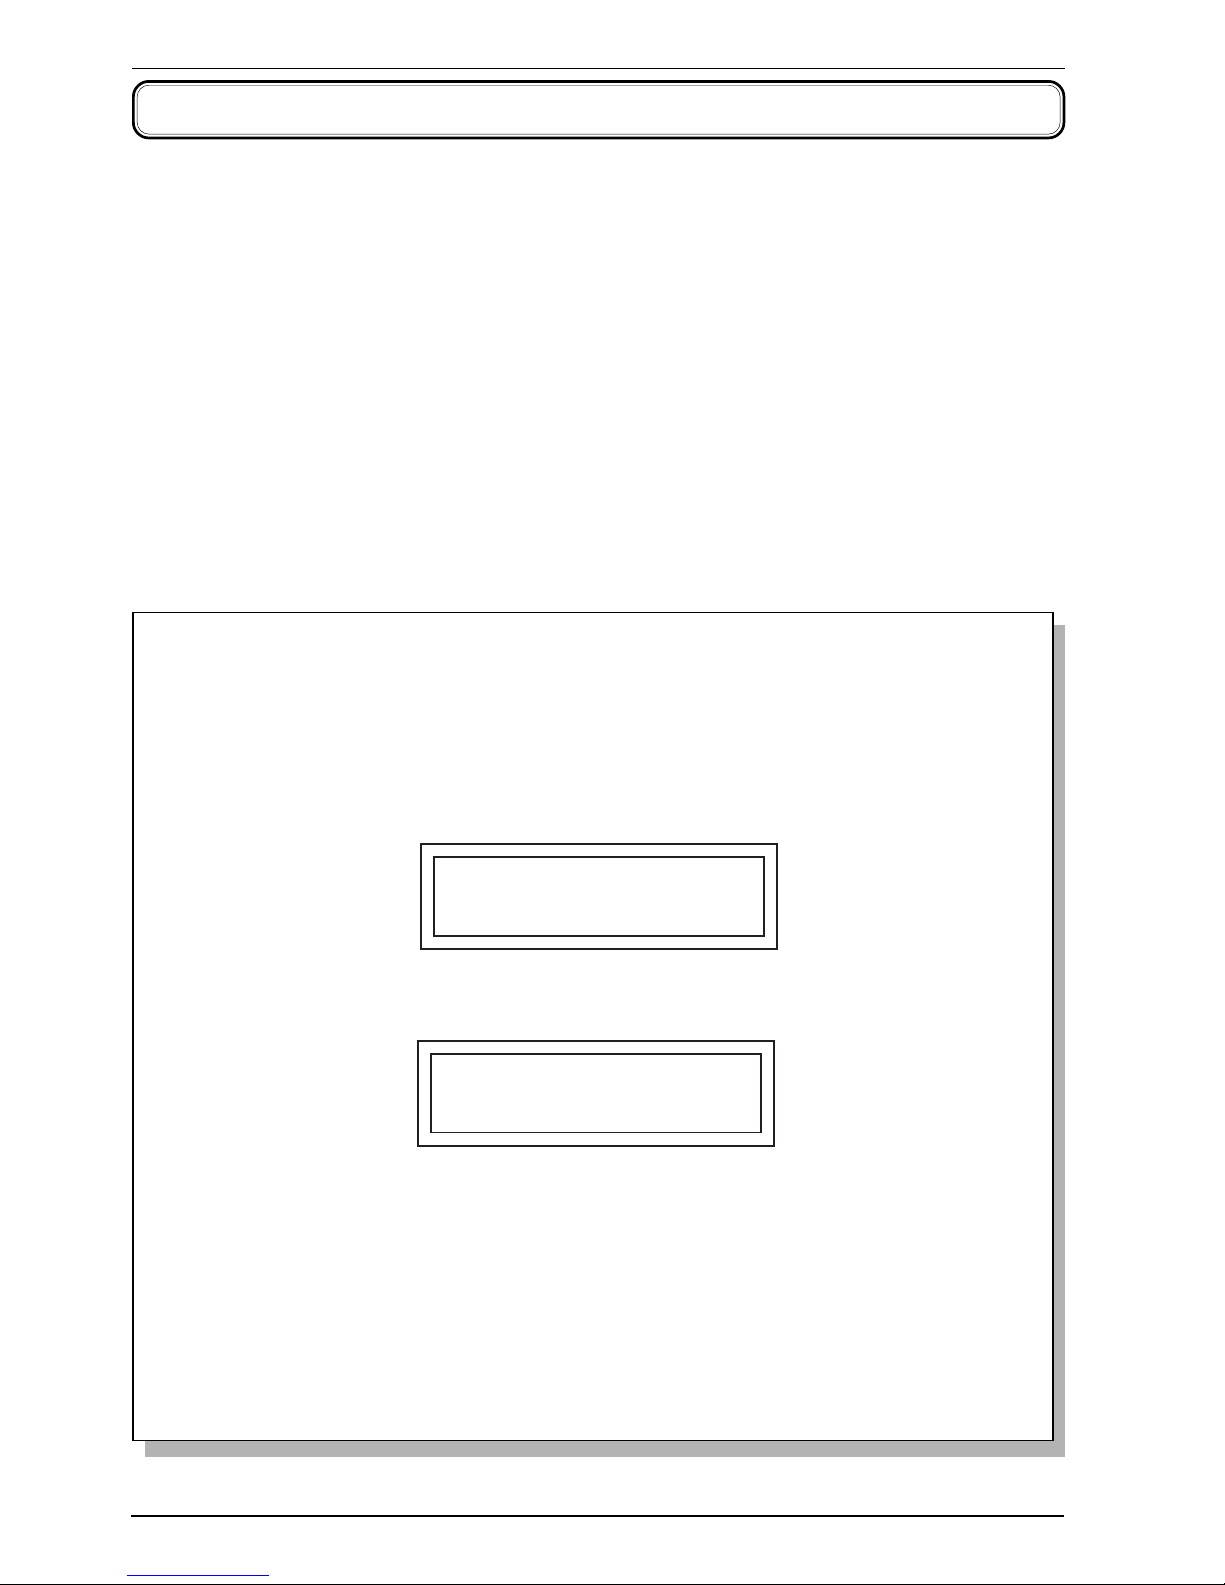
The Unico Radio Remote Control commands the internal sequencer of the Unico organs,
to easily play MIDI tracks from distance.
The remote control has a maximum range of 50 metres, when batteries are fully charged. It
only works with four alkaline batteries AA type, 1.5 V. Batteries are included; when they are
exhausted (the display will blink when this occurs), open the lid on the back of the remote
control and replace the batteries.
In order to reduce energy consumption, the remote control has three different operating
modes:
- Working, display backlight on: this mode will be active as soon as a button is pressed.
- Working, display backlight off: when inactive for more than three seconds, the backlight
will turn off.
- Stand-by: when inactive for more than 10 seconds.
WARNING:
- You cannot activate the sequencer via remote control while there is a pop-up message
on the organ display, while the sequencer is recording, or when using the Songlist
function on the File Management menu. In this case, the remote control display
will show a message informing that the sequencer is not available:
SEQUENCER
NOT AVAILABLE
- When the display shows the following message:
ORGAN
NOT CONNECTED
it means the remote control cannot establish a connection with the organ. Check
that the instrument is not switched off, and that both remote and organ are in the
operating range, that is 50 metres when the batteries are completely full. Should
the batteries of the remote control have only half of their original energy, the
maximum range will be approximately 20 metres. Should this inconvenient happen
frequently, check that the area is not subject to electromagnetic or radio
interferences. Please not that while connecting to the organ, the buttons of the
controller are disabled.
Page 6
22
Viscount UNICO Radio Remote Control
CONTROL PANEL
1
2
3
7
8
9
4 5 6
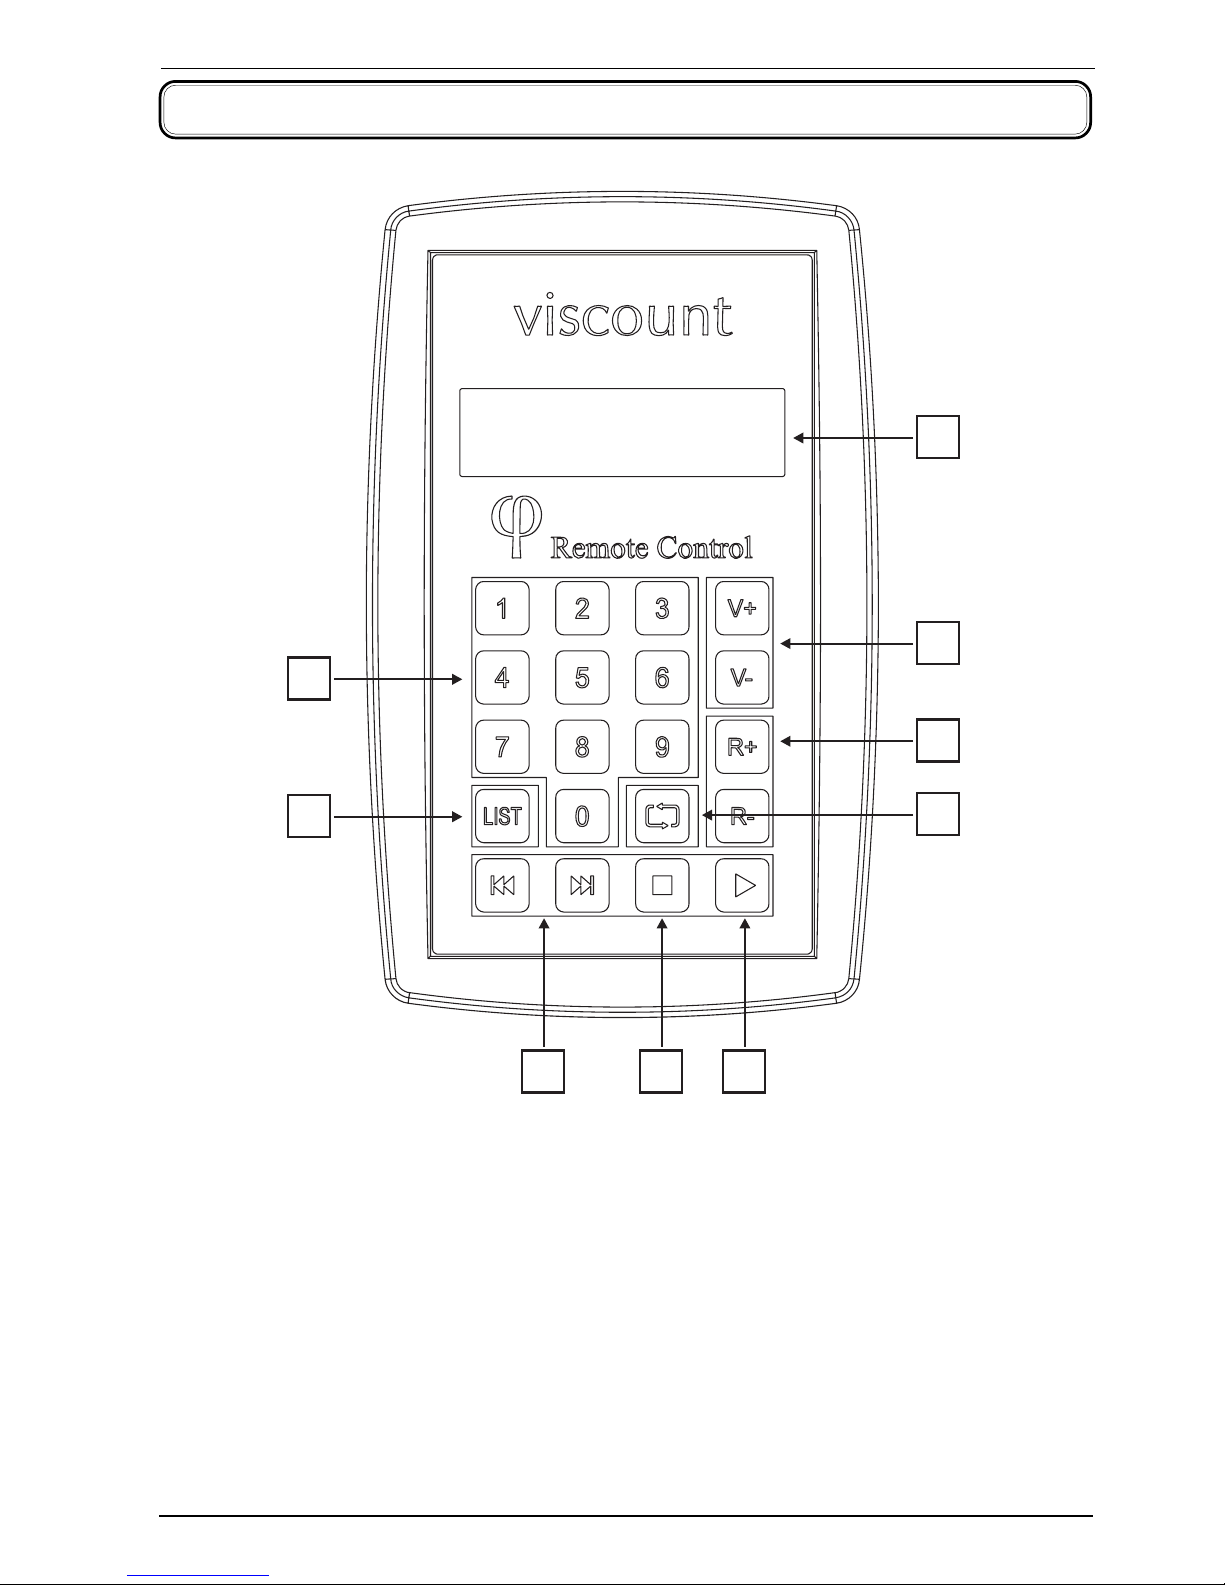
1. Backlit display
2. Digit buttons: use to dial the code of the MIDI file or songlist you wish to play.
3. [LIST] button: enables sonsglists selection.
4. [SONG PREV.] and [SONG NEXT] buttons: select the previous or next song
5. [STOP]: Stops playing the current song.
6. [PLAY]: Plays a song. When pressed again, it alternatively pauses (still) and resumes playing.
7. [REPEAT]: Activates/deactivates the repeat mode, i.e. the current song/songlist will be
played again.
8. Register buttons: control the active stops. [R+] increases the number of stops currently
in use, while [R-] decreases them. Number and type of registers increased/decreased
depends on the current MIDI track.
9. Volume buttons: control the overall volume. Press [V+] to increase, [V-] to decrease.
Page 7
23
Viscount UNICORadio Remote Control
MAIN SCREEN
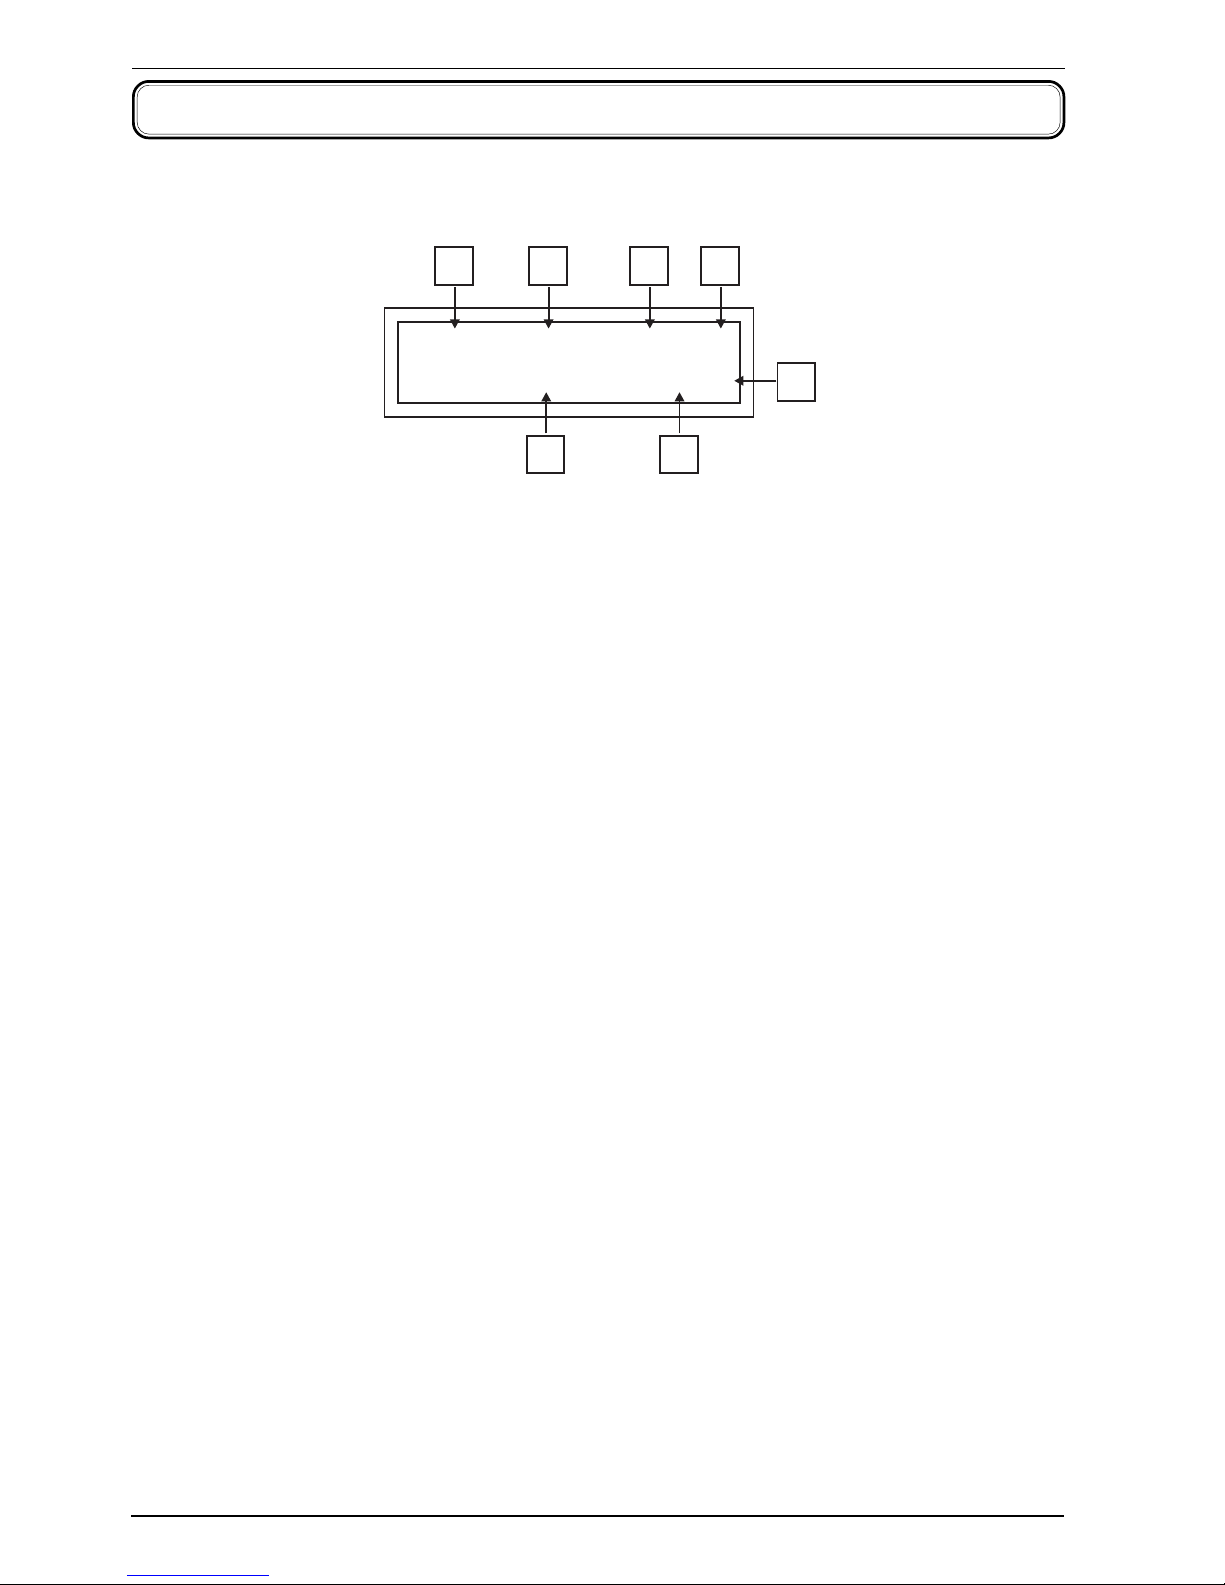
Activate the remote control by pressing one of the buttons. The following screen will show:
Containing these fields:
1. File list indicator: shows the file list currently selected (the first three digits of the .LST
file name). Pressing the [LIST] button on this field a “LIST” signal will appear, meaning
that the next command pressed will affect file lists and not MIDI tracks (.MID files).
2. General volume: it can be adjusted through the volume buttons.
3. Stops indicator: displays the amount of stops in use by the current song; it can be modified
through the register buttons.
4. Battery level: when the batteries are completely exhausted, this symbol blinks
5. Current MIDI sequence: this shows the name and number of the .MID file currently
loaded (or playing).
6. Reproduction mode: shows the current state of the sequencer.
?
: Stop
Ù: Play
—: Pause
7. Repeat mode: shows which repeat mode (if any) is currently active. When a song list is
loaded, set the sequencer Play Options (for further information read the paragraph: “The
Repeat button”).
ú-26 óg16 ý
_CONCERT1 Ý
1 2 3 4
5 6
7
Page 8
24
Viscount UNICO Radio Remote Control
HOW TO SELECT AND PLAY A MIDI SEQUENCE
In order to play a MIDI sequence, first load the desired .MID file. Please remember that these
files are saved in an USB drive or inside the internal memory of the organ, in the
nnn_songname.mid format; “nnn” stands for the three digits automatically set by the organ,
that from now on will be called “index”.
To select a .MID file remotely, dial the three index digits. However, although each MIDI file
has a three-digit index, it is not always necessary to dial them all on the remote: you can
- dial all the digits, if the track index is a number larger than 099 (e.g. press [1] – [2] – [3] for
123)
- dial two digits, when the index is between 010 and 099 (e.g. [1] – [6] for 16)
- dial one digit, when the index is between 000 and 009 (e.g. [8] for 8).
The dialled digits will appear on the bottom left of the screen.
ú-26 óg5 ý
¢§
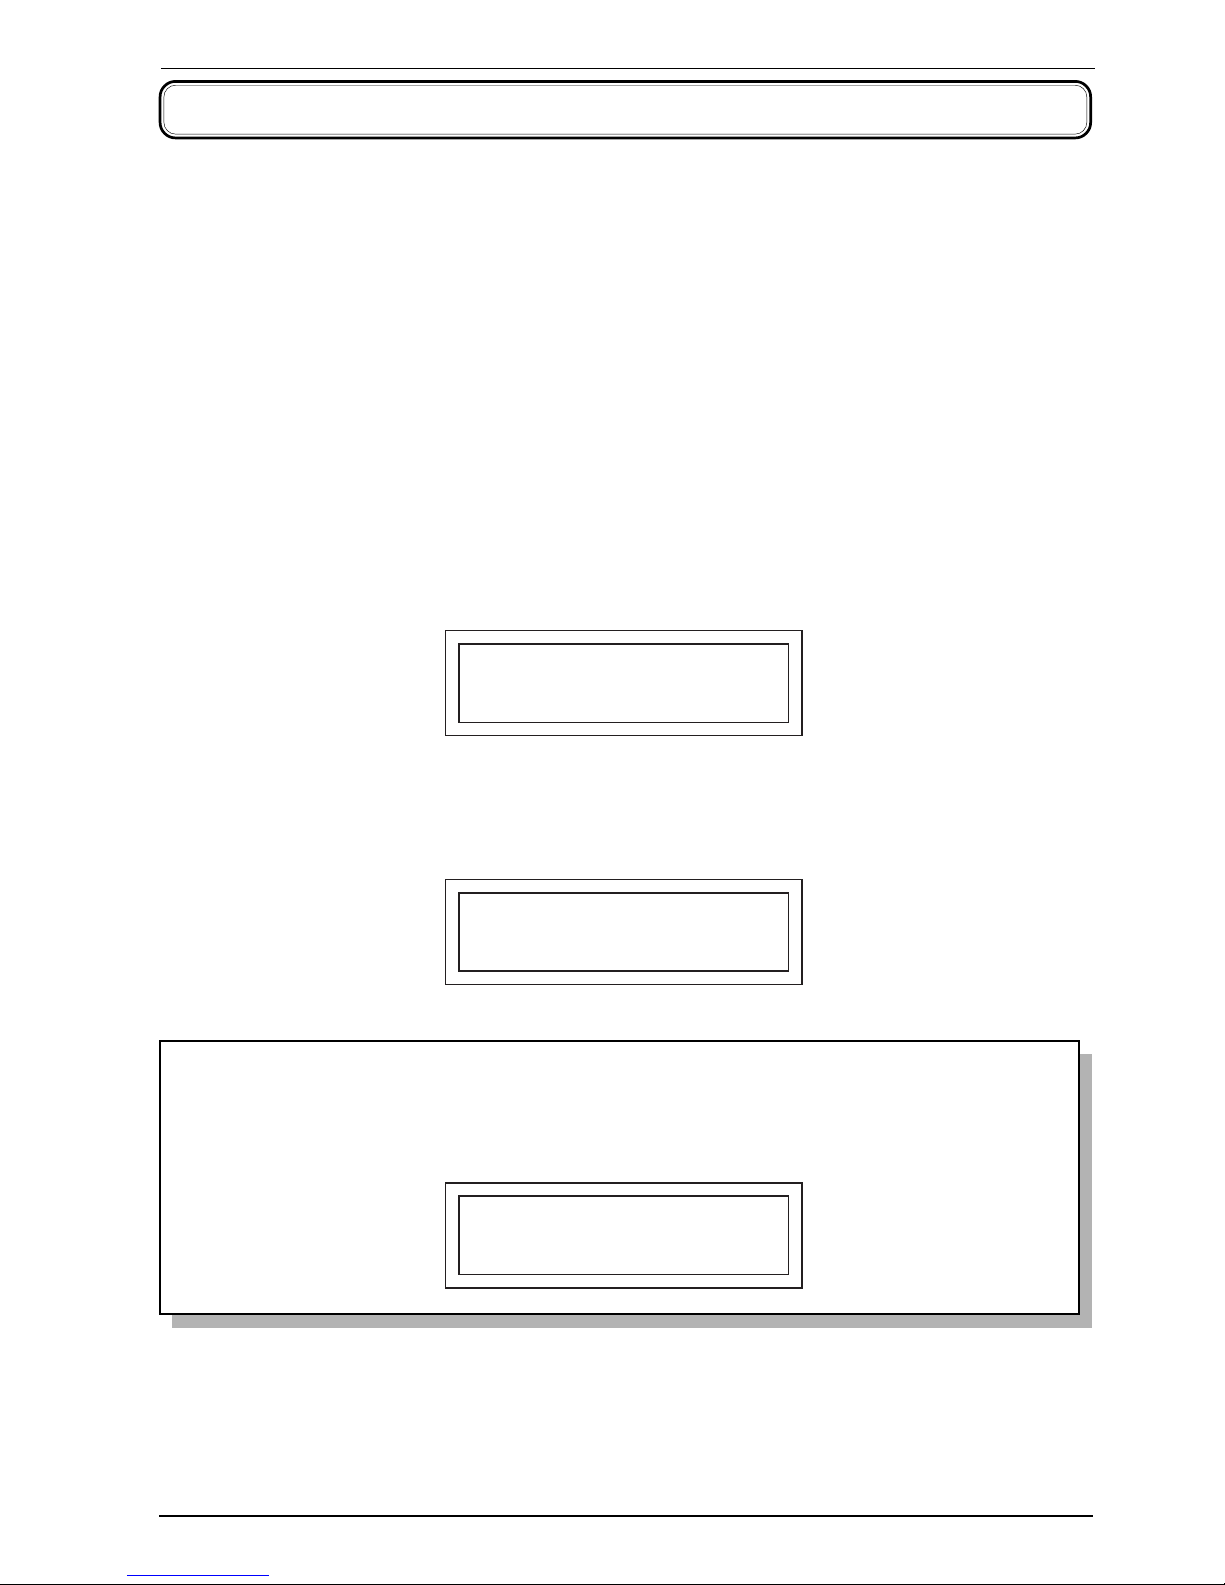
After dialling the index, the system will take a few seconds to search and load the MIDI file on
the sequencer. If it works correctly, the file name will appear on the screen:
ú-26 óg16 ý
_CONCERT1 Ý
N.B.
If you dial a wrong index (or, at least, the index of a MIDI file which is not on the
currently active memory) the screen will show the following message:
ú-26 óg5 ý
SongNOPresent
The track can also be selected by pressing the [SONG PREV.] (previous song) and [SONG
NEXT] (next song) buttons. Previous and next always refer to the song’s index.
Whenever no .MID file has been selected yet, [SONG PREV.] will select the file with lowest
index number. [SONG NEXT] will select the song with higher index number instead.
Page 9
25
Viscount UNICORadio Remote Control
To start playing the selected piece, press the [PLAY] button. Press it again to pause the song;
a third pressure will resume the song.
To stop playing press [STOP].
New MIDI files can be loaded whether in play, pause or stop condition.
HOW TO SELECT AND PLAY A SONGLIST
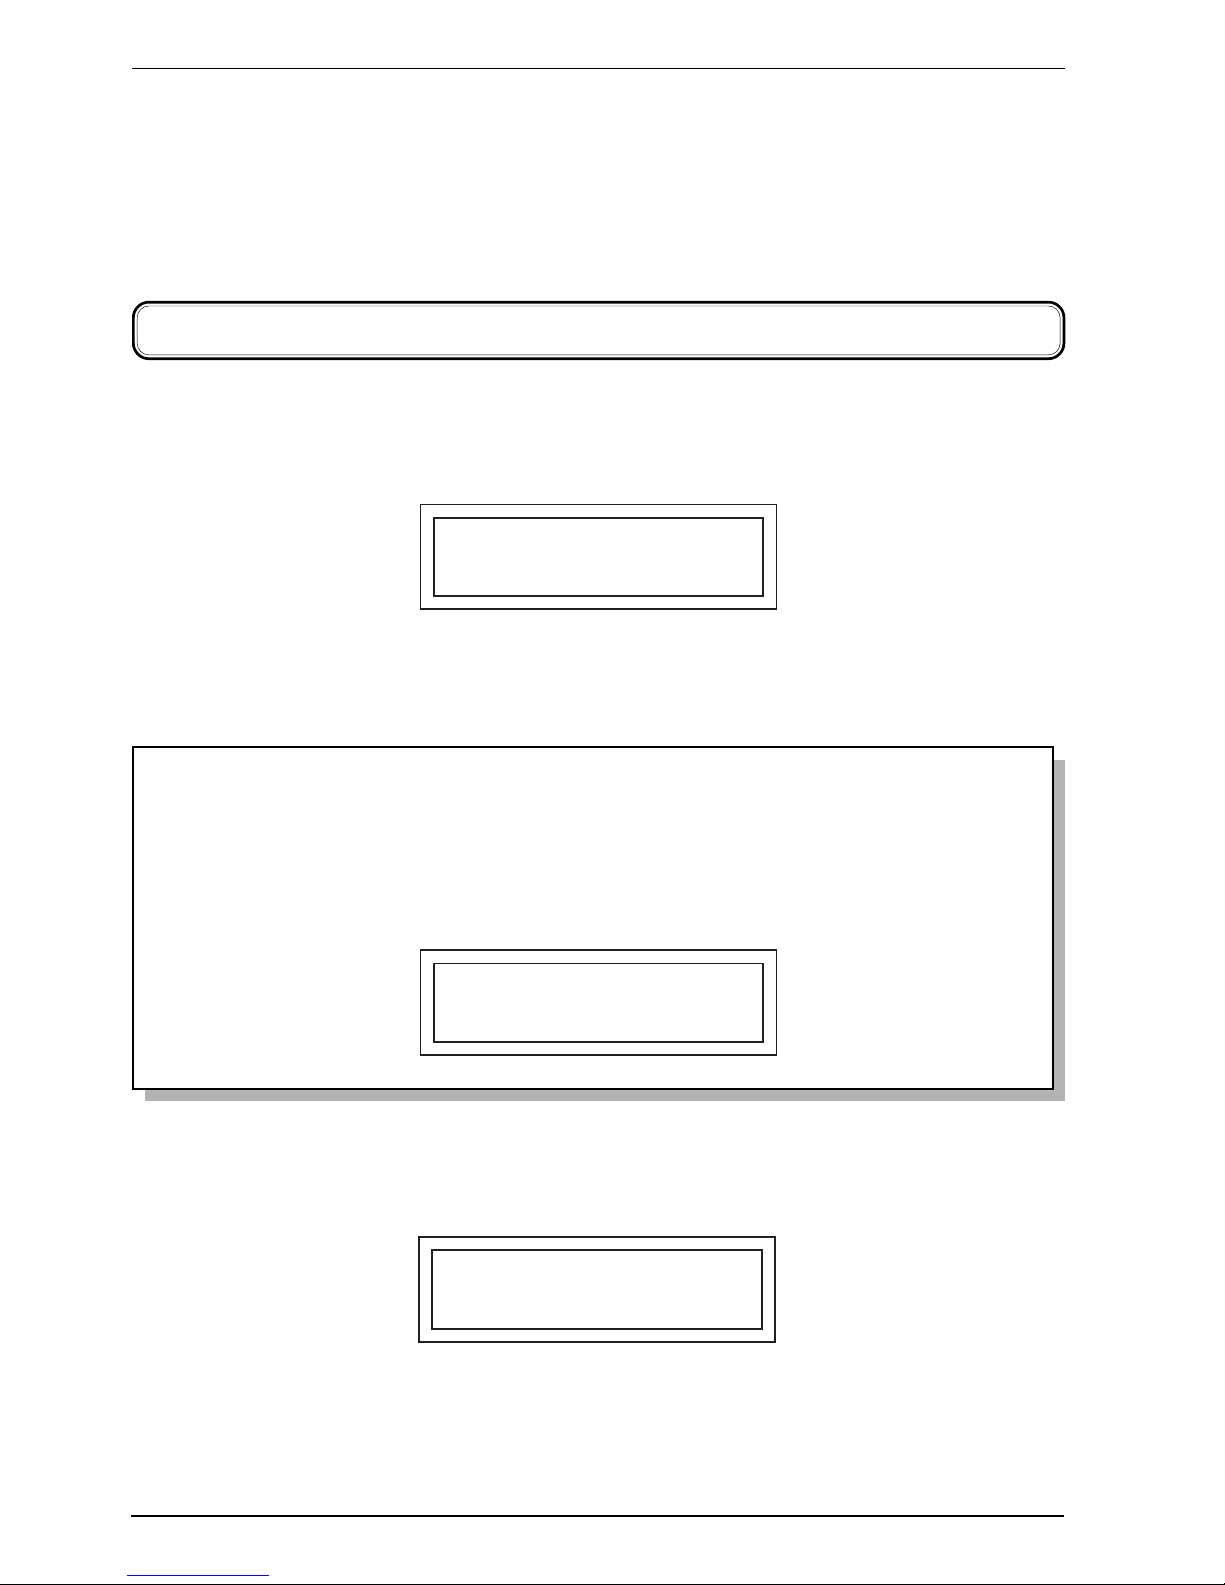
Press the [LIST] button to select a song list (.LST file). A “LIST” message will appear on the
top left of the screen.
LIST ú-26 óg5 ý
Dial now the index (the first three digits of the .LST file) of the desired song list with the
digit buttons.
N.B.
- Song lists cannot be selected while a MIDI track is playing. Press the [STOP]
button first and then select the song list.
- If the index is incorrect, or the desired song list is not in the current memory unit,
the display shows the following message:
LIST ú-26 óg5 ý
îî£ListNOPresent
Wait for a few seconds, while the system loads the .LST file. The name of the song list is
shown on the lower line of the display.
LIST ú-26 óg5 ý
îî£_List2
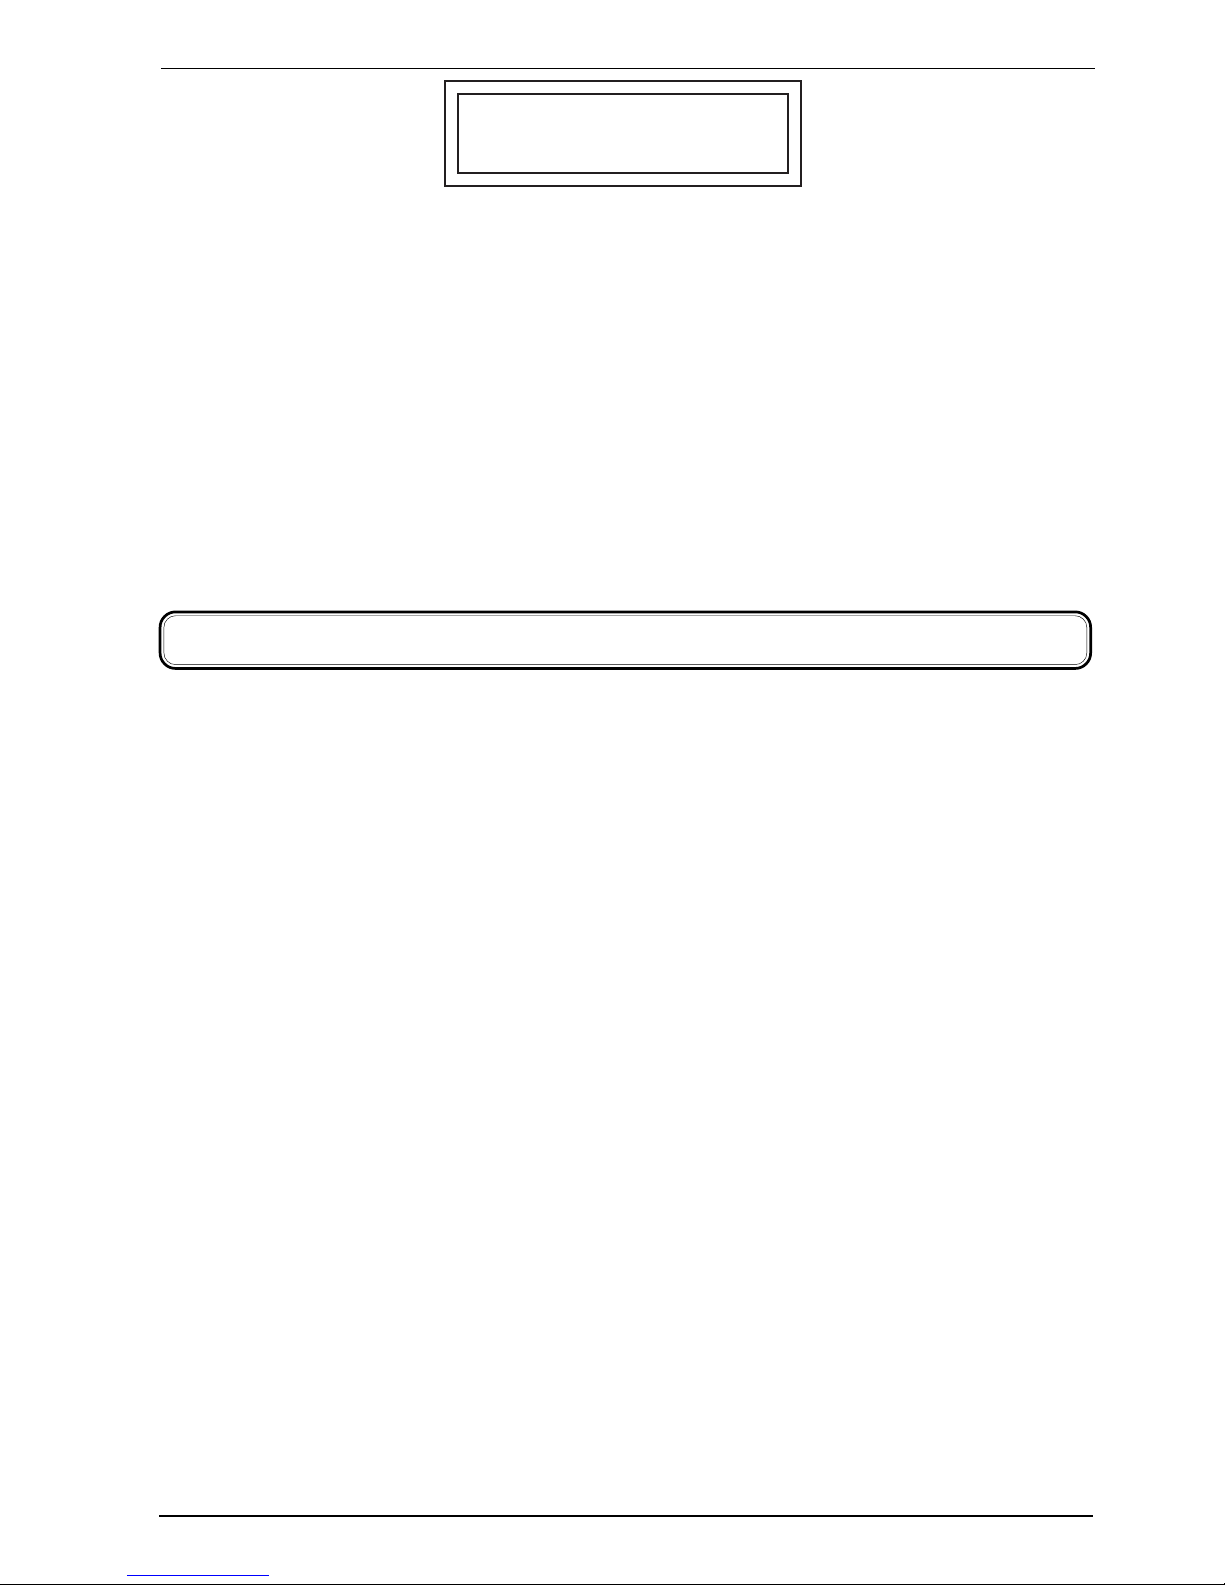
Now Press [PLAY] to confirm the selected song list and load the first MIDI track of the list
on the sequencer. The name of the .MID file will be shown on the display.
Page 10
26
Viscount UNICO Radio Remote Control
L ú-26 óg5 ý
îî _MENUET
îî£
î
To start playing the selected piece, press the [PLAY] button. Press it again to pause the song;
a third pressure will resume the song.
To stop playing press [STOP].
At the end of the track, the system will load the next piece in the song list. However, the
sequencer may play it automatically or wait for the user to press the [PLAY] button, according
to the Play Options (see par. “the [REPEAT] button”). The [SONG PREV] and [SONG
NEXT] buttons will select the previous or next track on the song list.
Use the digit buttons to select another song list.
To select single MIDI track press the [LIST] button again.
THE REPEAT BUTTON
This button has different effects, depending on which mode is currently in use, either the
MIDI track or songlist.
With MIDI tracks:
Press once to activate the repeat mode, twice to deactivate it. When the repeat mode is on,
the × symbol will show on the display, and when the song is over, it will be played again.
With song lists:
Press the [REPEAT] button once to automatically play the next song of the list when the
previous one is over (Autoplay function). In this case, the symbol will appear on the remote
display.
Press the button again to activate the List Loop function, which plays the whole song list
again once it is over. When this function is active, the × symbol will appear on the bottom
right of the display.
Press the button a third time to activate both the Autoplay and List Loop functions; the
symbol will appear on the display.
Pressing the button a fourth time will deactivate both functions.
ş
Ş
Page 11
27
Viscount UNICORadio Remote Control
ALTERNATIVE FUNCTIONS OF REGISTER BUTTONS
The Register button usually control the active stops while playing a MIDI track, but they can
also adjust the speed or transposition of a song.
To switch to the alternative functions, press and hold the [REPEAT] button. The display will
show what function the stops button are now allocated to.
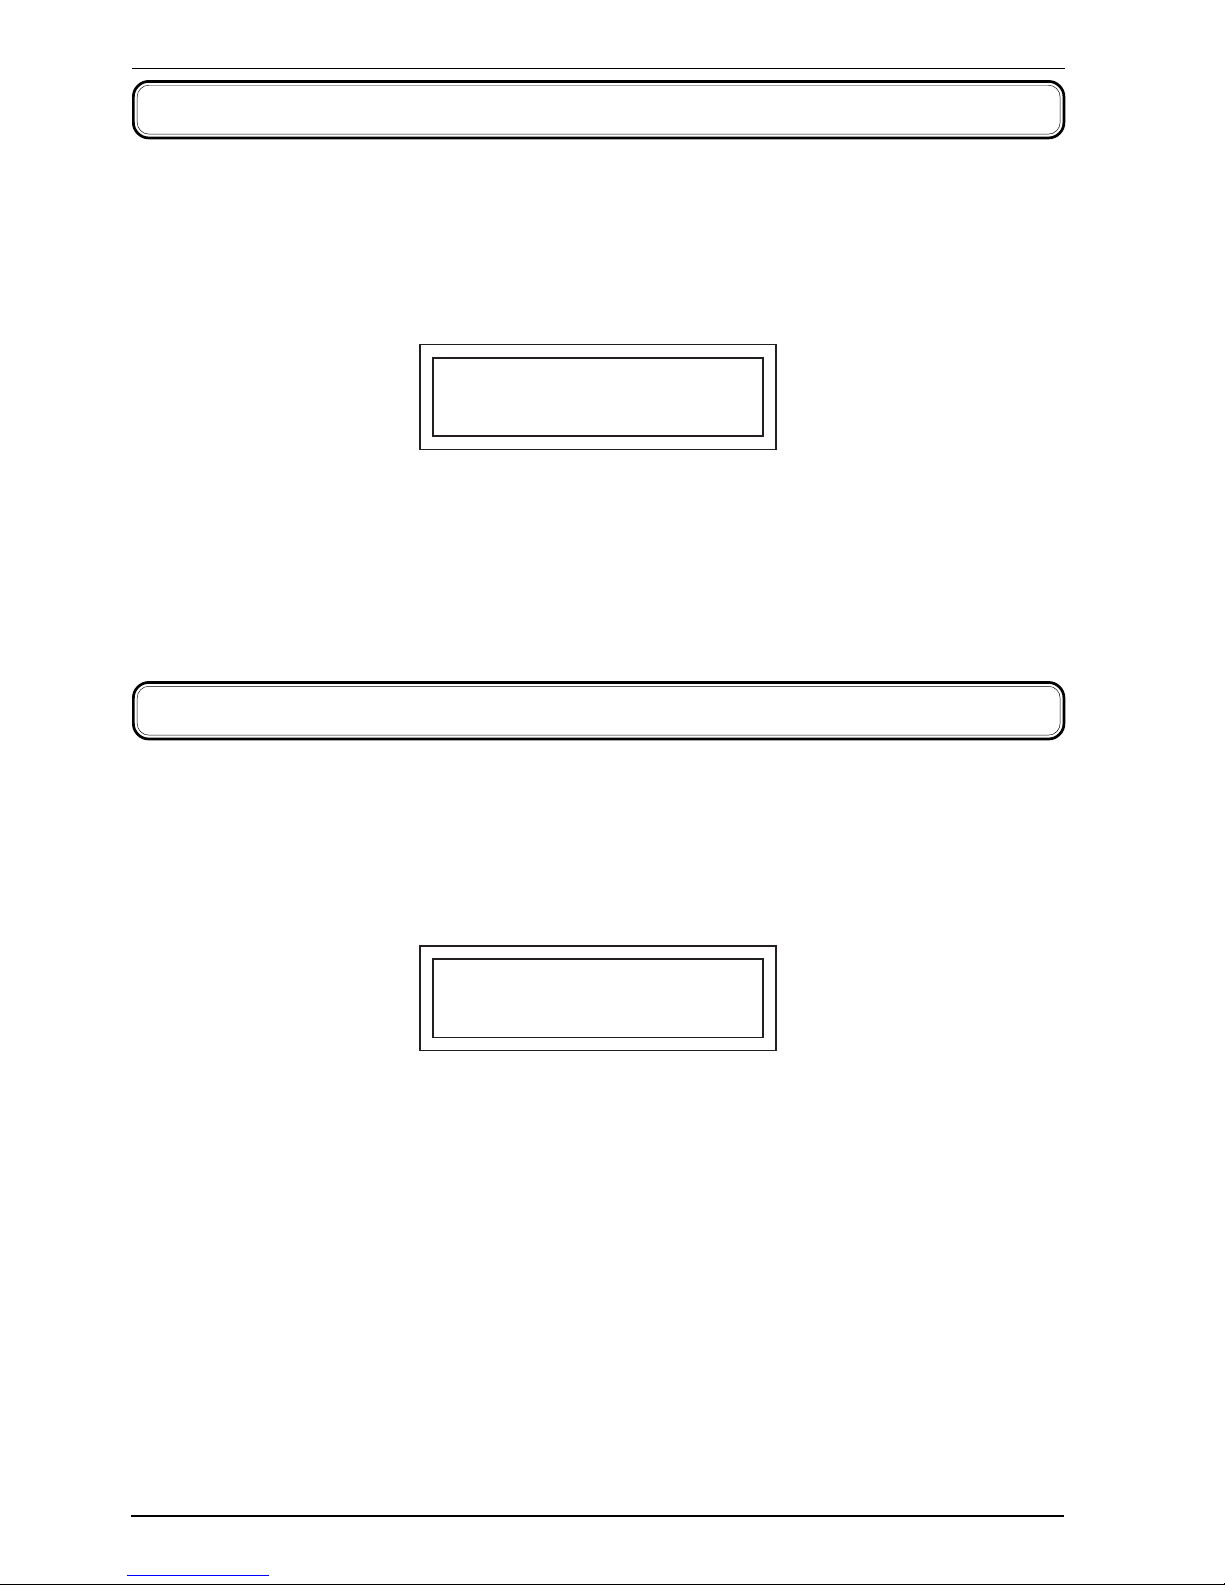
SET FUNCTION
REGISTER
To assign a different function, press the [R+] or [R-] buttons: TRANSPOSE regulates the
transposer of the sequencer (and not the keyboard transposer); TEMPO adjusts the play
speed (percentage). To confirm your choice and exit this screen wait a few seconds or press
either [PLAY] or [STOP].
DISPLAY BACKLIGHT
The display backlight turns on when a button is pressed, and stays on for three seconds
thereafter. This reduces the energy consumption when the remote is not in use.
To increase even further the batteries life span, the backlight can be turned off completely.
To do so, press and hold the [LIST] button.
SET BACKLIGHT
ON
Press [R+] or [R-] and then select YES to keep the standard backlight mode, NO to disable
the backlight. To confirm, wait for a few seconds or press either [PLAY] or [STOP].
Page 12
28
Viscount UNICO Radio Remote Control
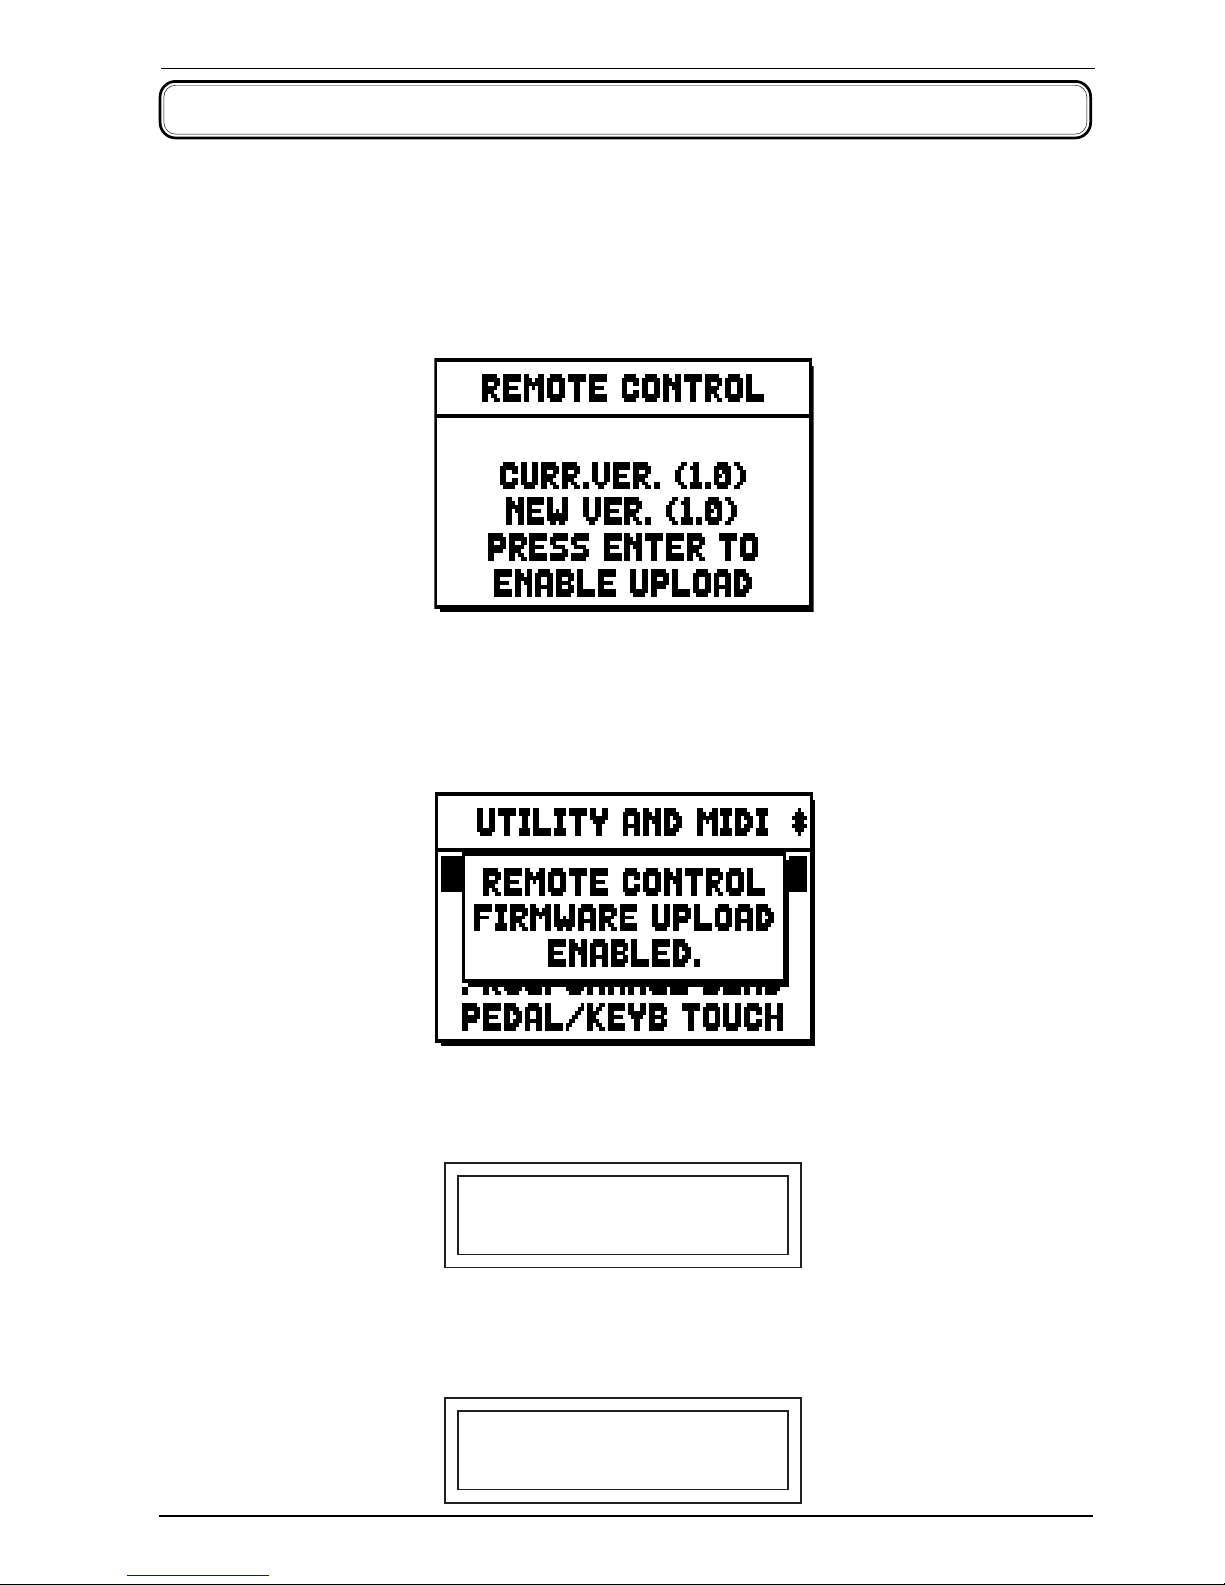
REMOTE CONTROL
UPLOADING SFTW *
FIRMWARE UPDATE
Whenever a firmware update is necessary, Viscount will release an update pack, to load on the
organ via USB drive. This procedure is described in the organ user manual.
After the organ has been updated, the new system has to be loaded on the remote control as
well. To do so, access the MIDI & UTILITY menu of the organ, then select the REMOTE
CONTROL function:
The CURR. VER. field indicates the firmware version currently installed on the remote control,
while the NEW VER. indicates the latest one. Press [EXIT] to abort the procedure, or
[ENTER] to start updating the remote control. The following screen will show:
Now press and hold the [STOP] button on the remote control:
OpSys Ver. 1.00
Tx Channel: 7
Then press either [SONG PREV.] or [SONG NEXT]. The controller is now receiving the
firmware update.
Page 13
29
Viscount UNICORadio Remote Control
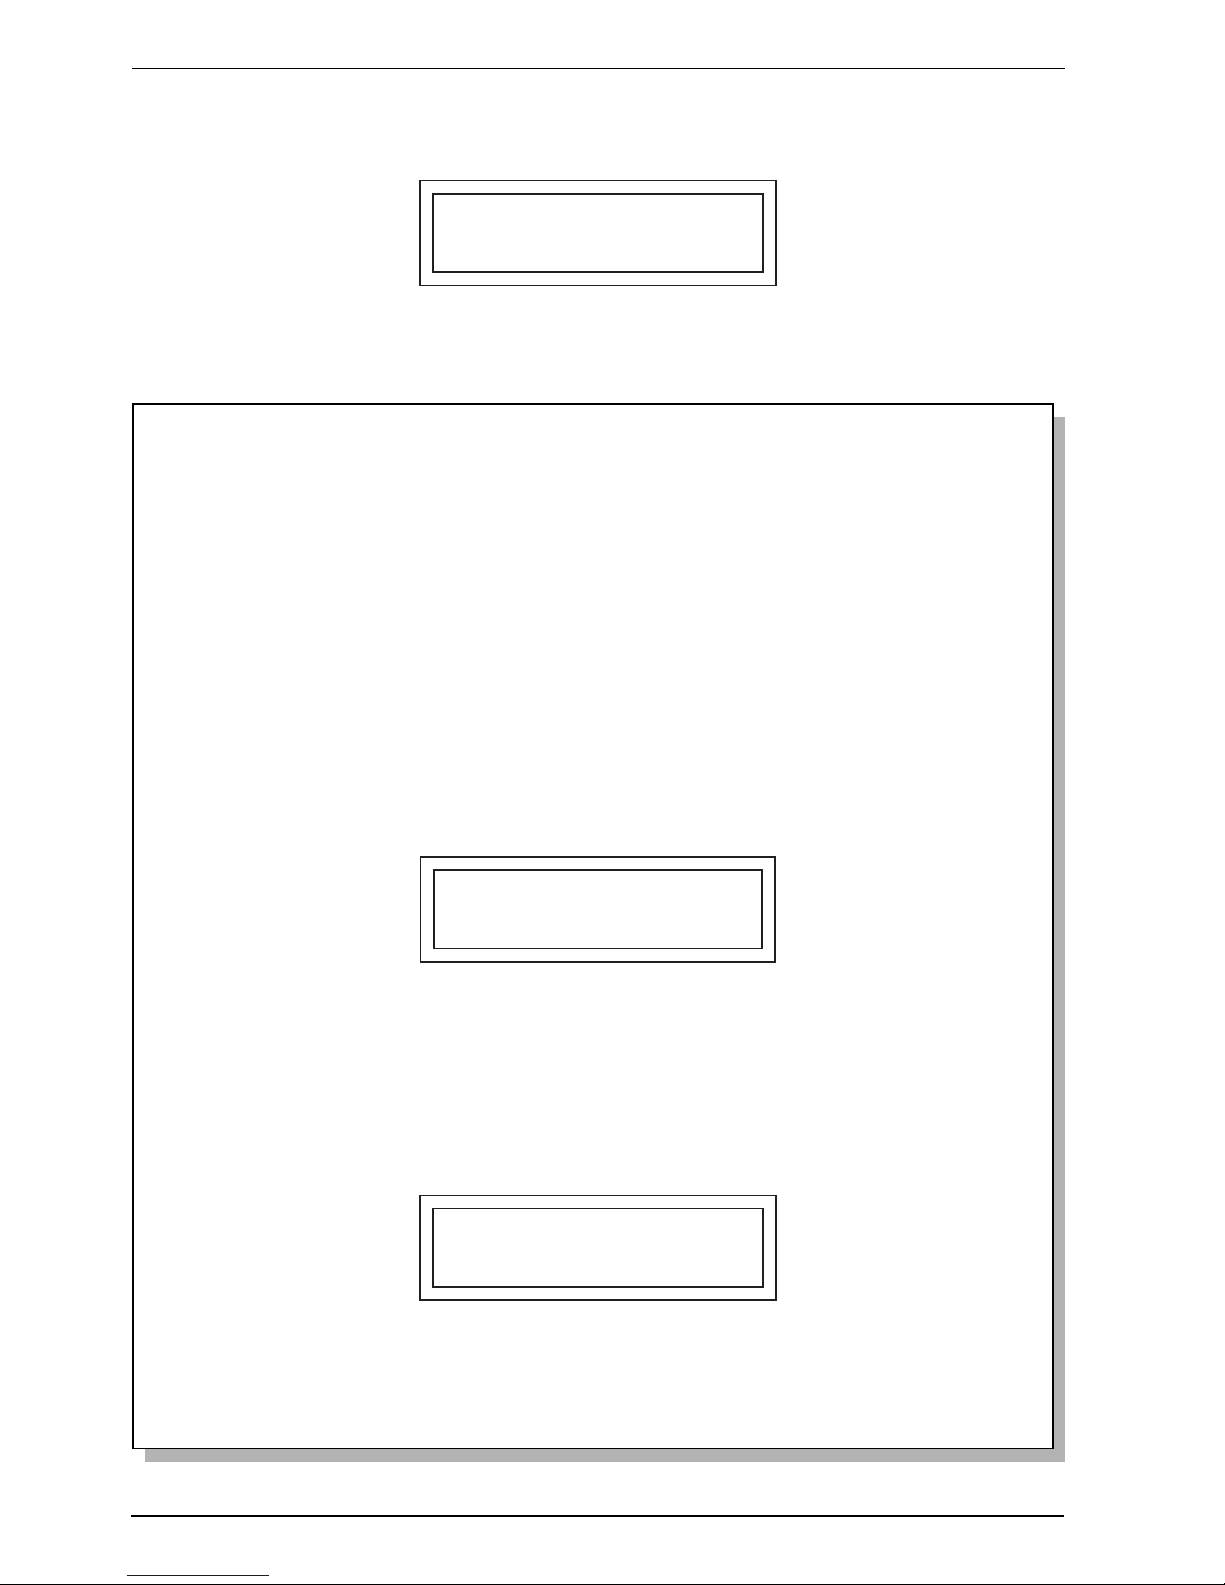
The symbol moving on the bottom right indicates that data is being received. When the
process is complete, the following message will appear:
UPLOADING SFTW
SUCCESFULLY
Fifteen seconds later, the system will reboot.
ATTENZIONE
- If you cannot find the REMOTE CONTROL field on the organ display, it might
mean that the receiver of the organ is not properly connected, or that it is not
working.
- After installing the receiver, and each time the organ is switched on thereafter, you
need to press any button on the remote control in order to see the REMOTE
CONTROL screen. Otherwise, the message REMOTE CONTROL NOT PRESENT
will appear. The same error message will also show if the controller is too far
away from the organ or not working.
- While updating the firmware, the update symbol on the remote display might stop:
this means that the controller is not connected to the organ anymore. If the
connection is not resumed in time, the controller aborts the update and shows the
following message:
ORGAN
NOT CONNECTED
please check that the organ is working and the remote control not outside its
maximum range. Should this inconvenient happen frequently, the area might be
subject to electromagnetic or radio interference.
- Should critical verifying/ writing memory errors occur when updating the firmware,
the display will show the following message:
UPLOADING SFTW
SEVERE ERROR
The remote control will reboot in a few seconds. Repeat the update procedure.
Should the same error occur again, please contact our customer service by e-mail
at [email protected].
Page 14
30
Viscount UNICO Radio Remote Control
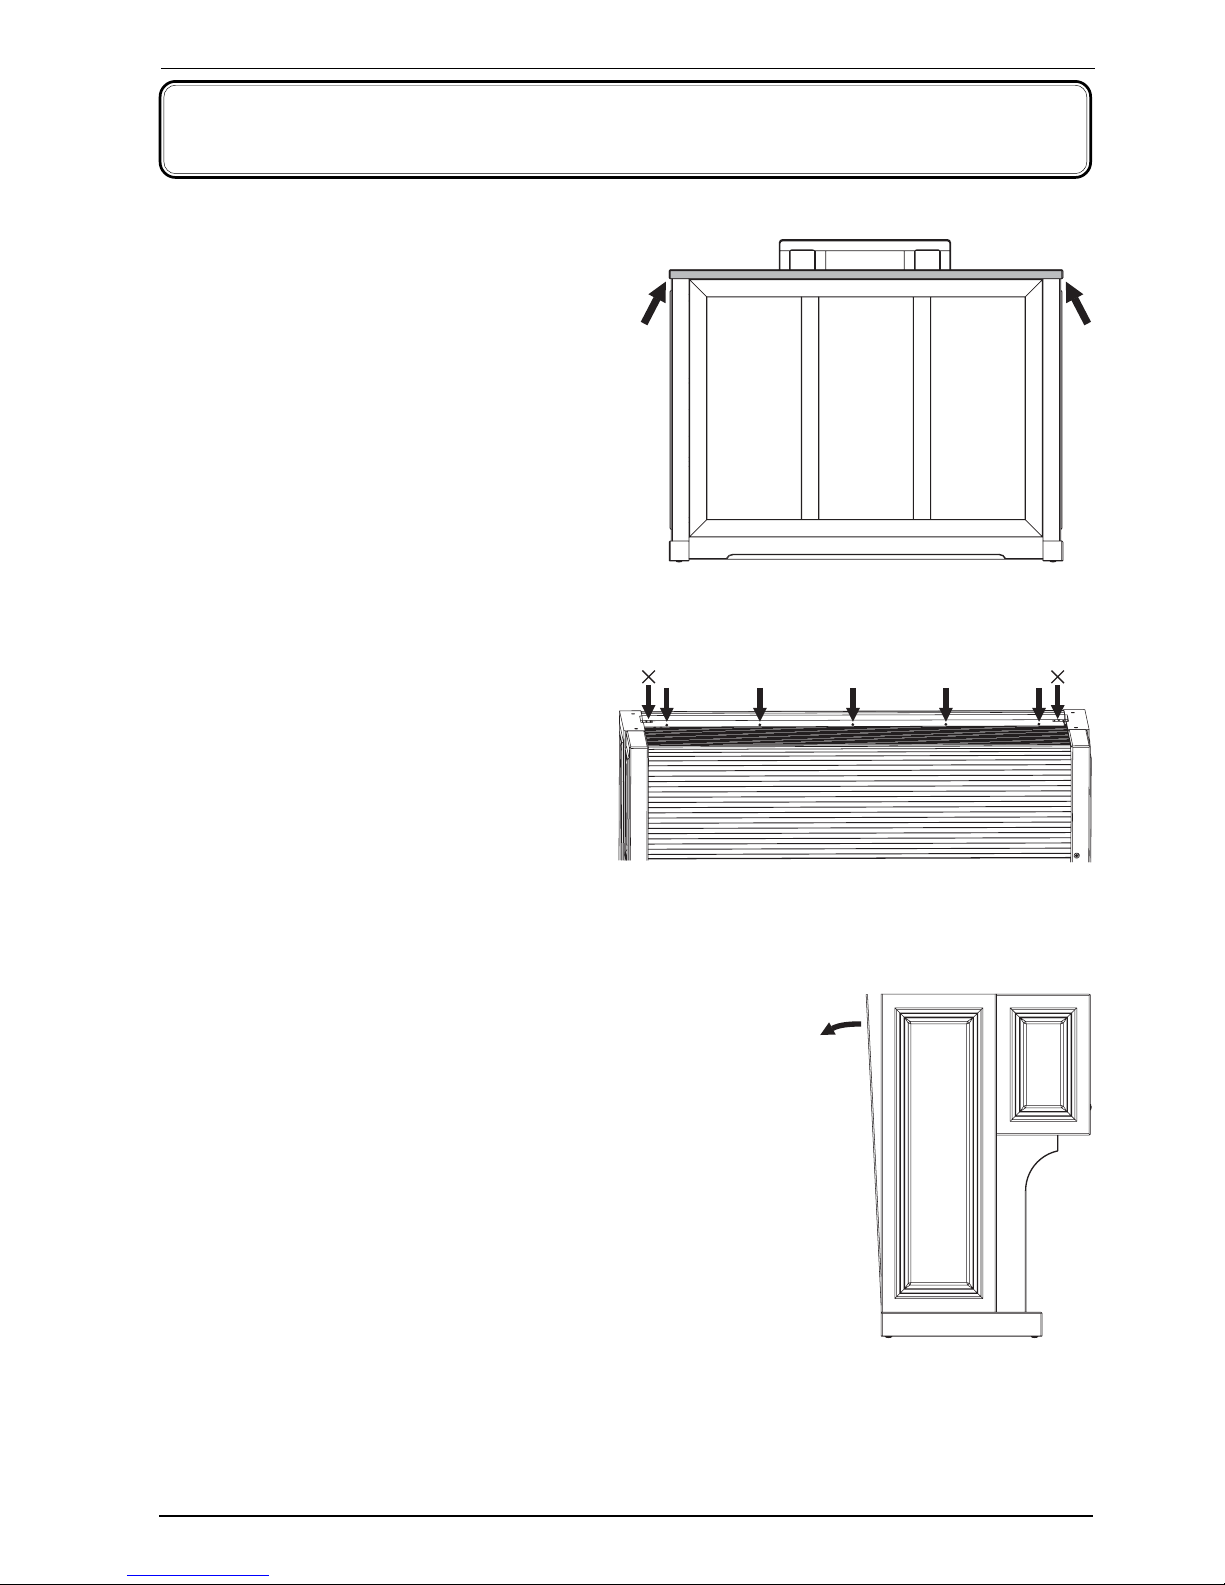
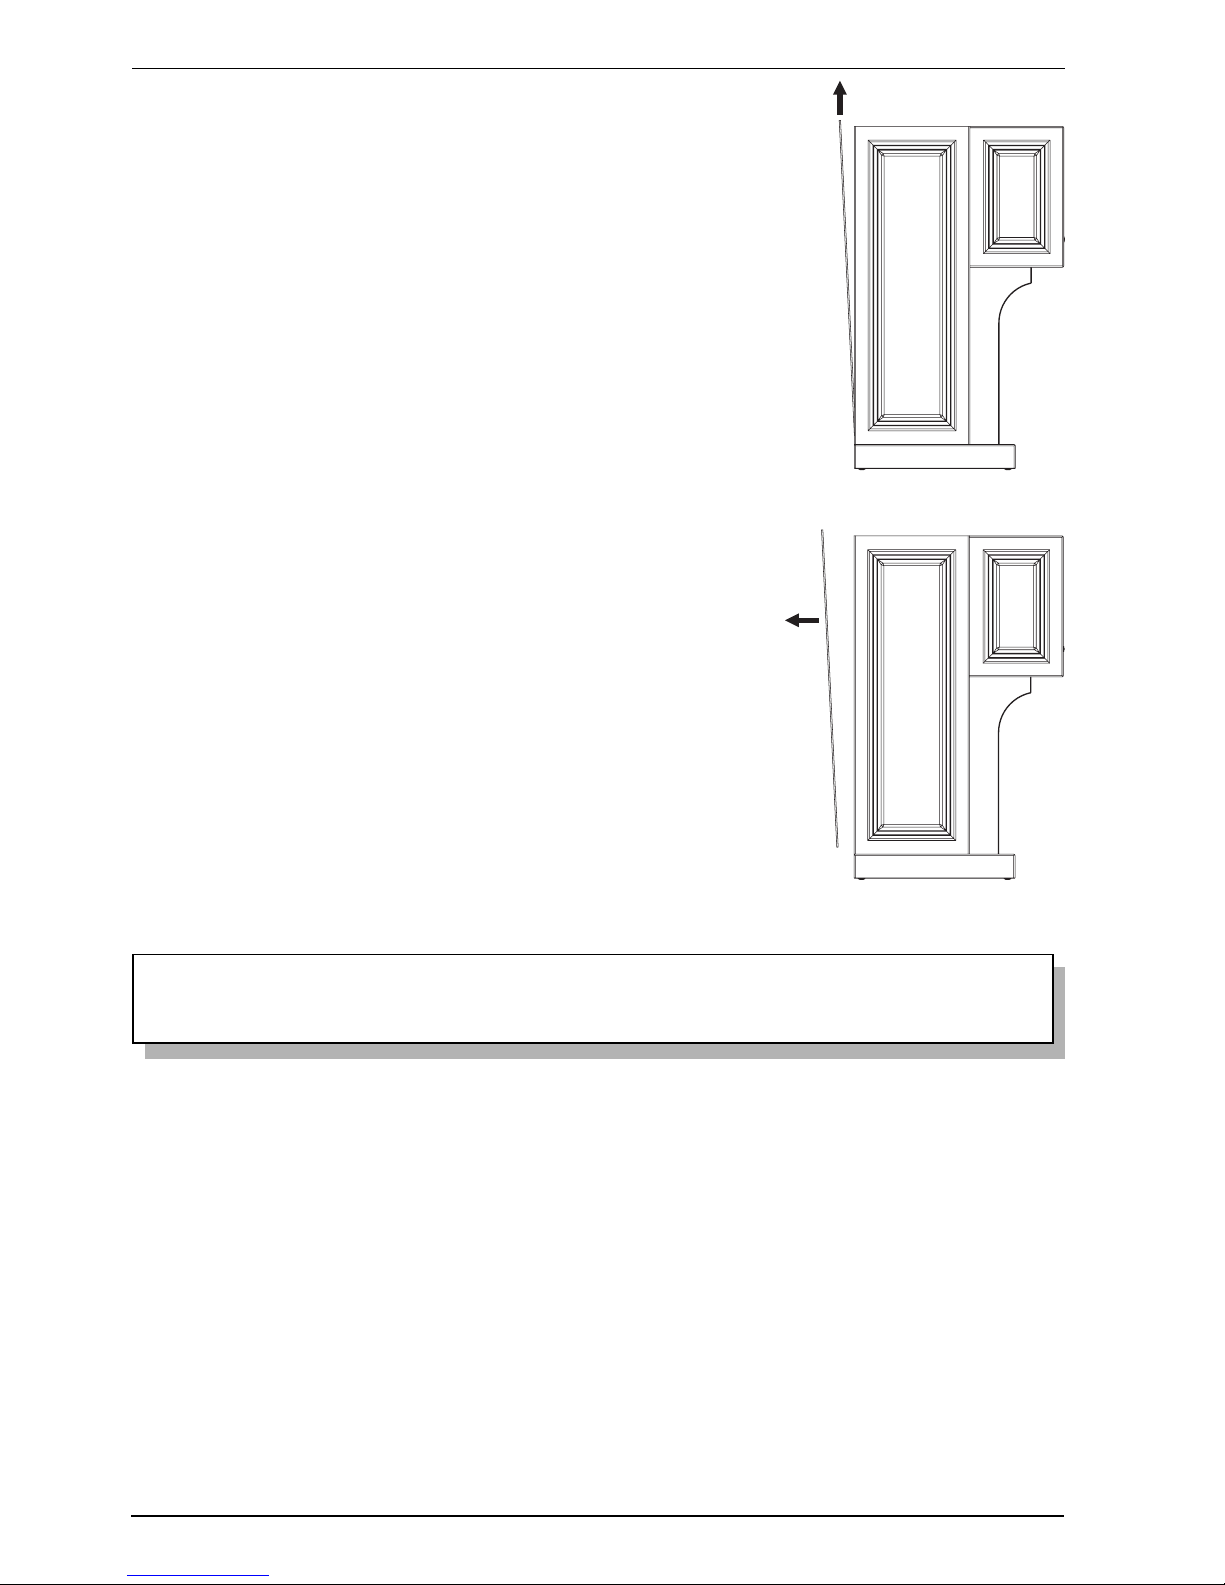
2. Grab the panel from the top and pull it slightly until it is
completely free from the Velcro tape.
HOW TO INSTALL THE REMOTE RECEIVER
INSIDE THE ORGAN
1. Unscrew the screws of the back panel.
On Unico 500 first remove the upper lid
shown in the picture, holding it as
indicated by the arrows. Carefully lift the
lid by holding it on both sides.
Remove the screws in the picture while
holding the panel. Do NOT remove
the screws marked with an X in the
picture.
Page 15
31
Viscount UNICORadio Remote Control
3. Once the panel is free from the Velcro tape, lift it slightly to
pull it off from the trail.
4. Pull the panel until it comes out of the instrument.
N.B.
We strongly advice to perform these action with help from another person.
Page 16
32
Viscount UNICO Radio Remote Control
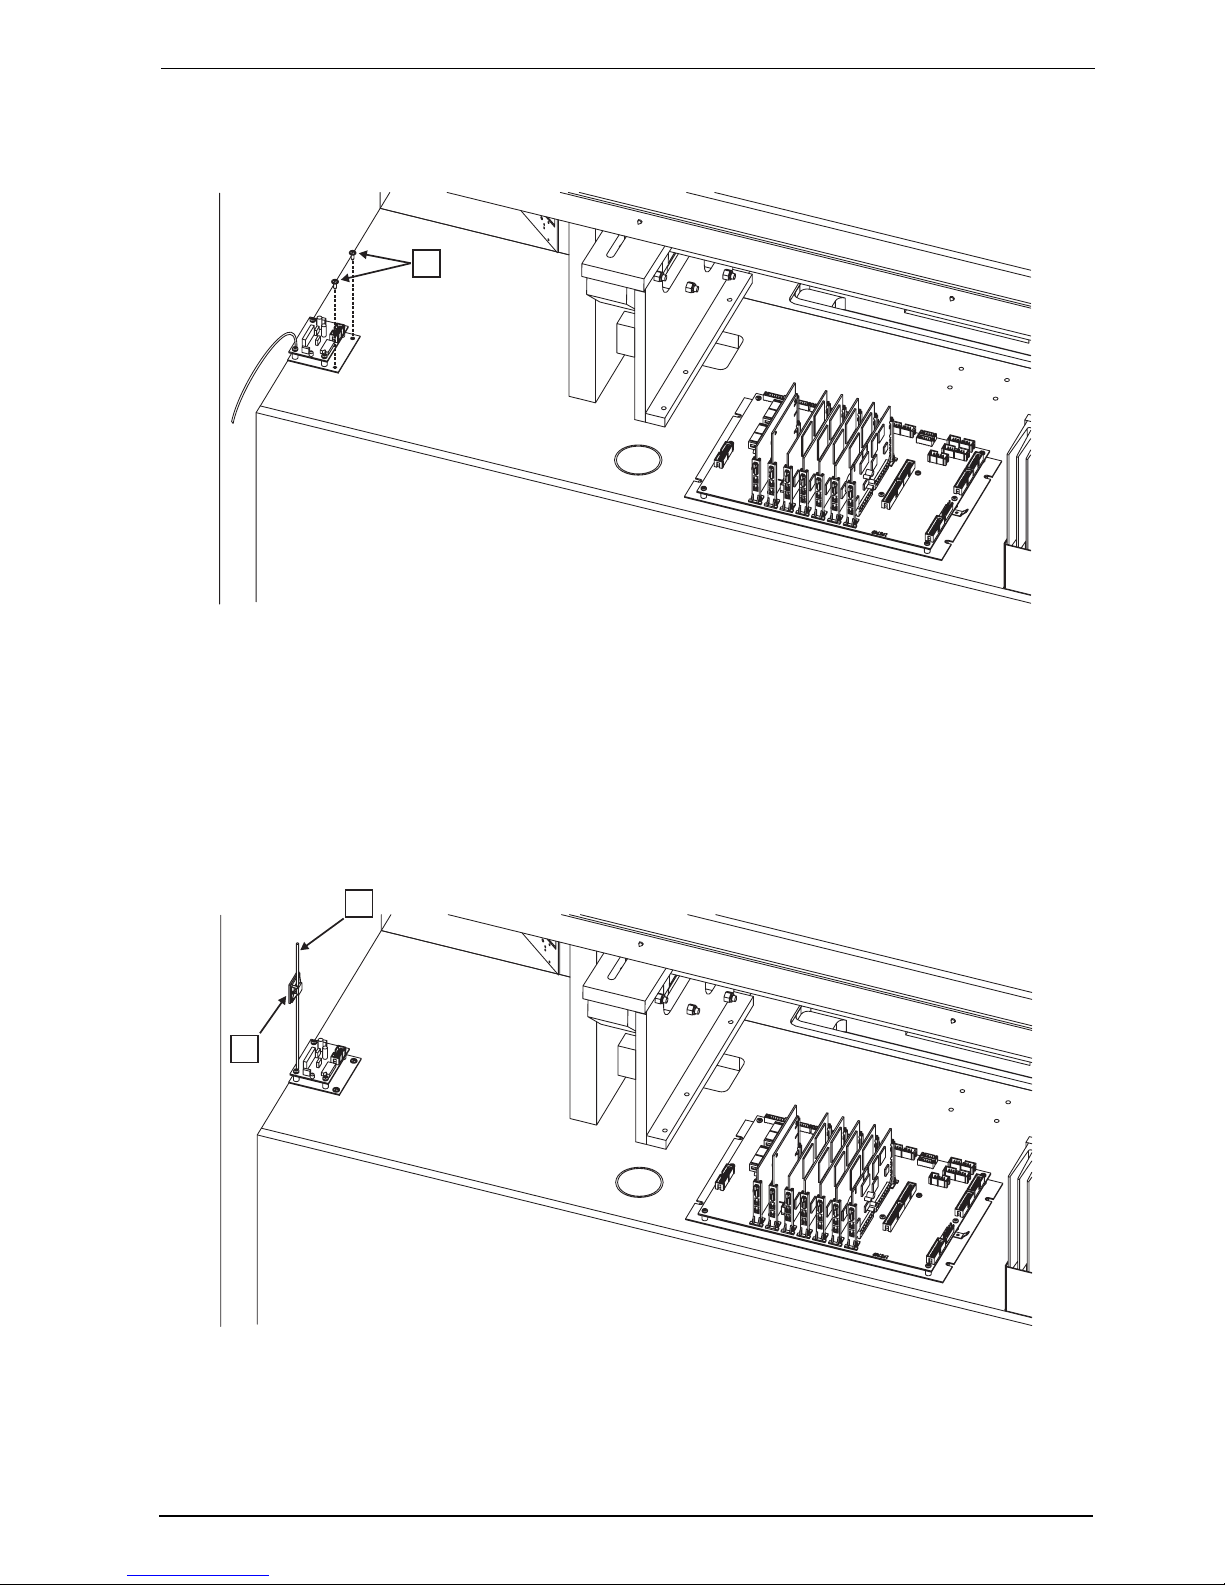
5. Place the receiver inside the organ as shown in figure, then fix it to the wooden panel using
two screws [1] included in the kit.
1
6. Insert the antenna cable [2] of the receiver in the adhesive support [3]. Fix the support to
the side panel of the instrument as shown in figure, approximately 15 cm above the receiver.
2
3
Page 17
33
Viscount UNICORadio Remote Control
8. Place the back panel back in position.
WARNING
After installing the receiver, and each time the organ is switched on thereafter, press
any button on the remote control to show the REMOTE CONTROL screen on your
organ display. Otherwise, the organ will show the error message REMOTE CONTROL
NOT PRESENT, as if the remote were not available, either too distant or broken.
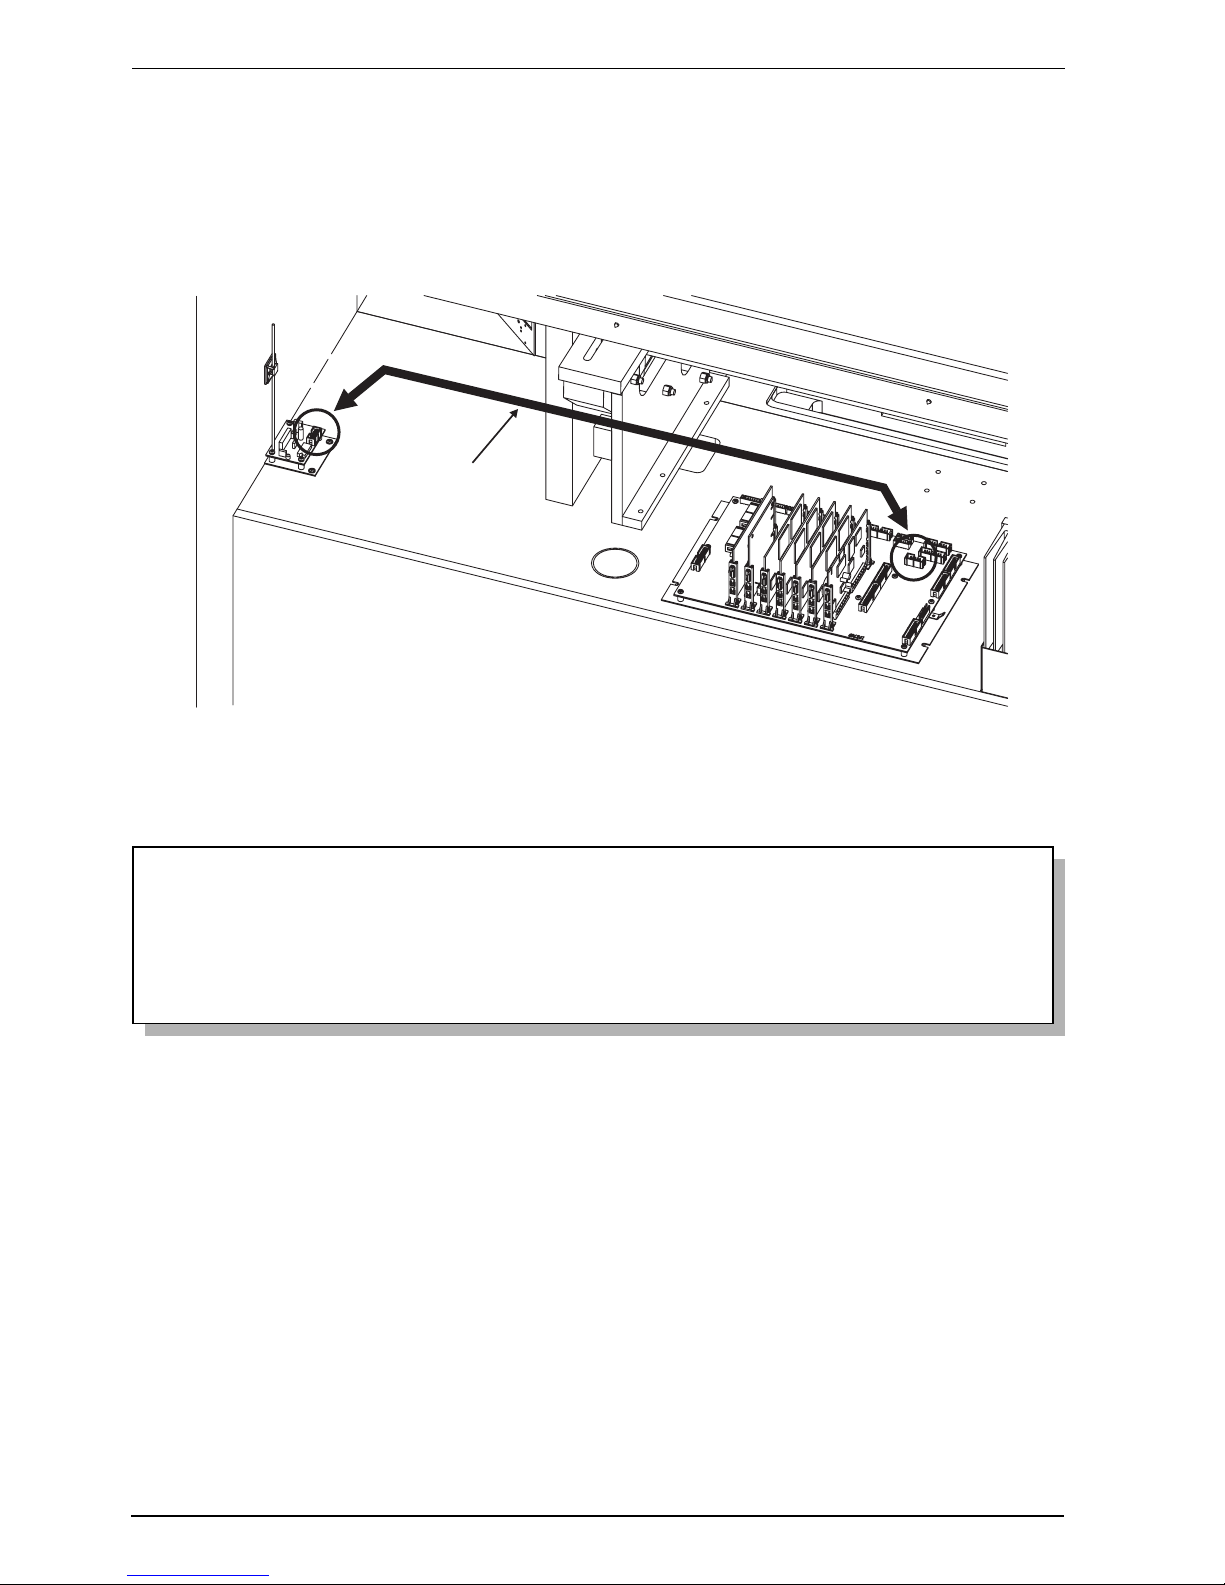
7. Link the flat cable to the CN1 connector of the remote receiver and to the CN28 RF
MODULE connector of the organ CPU. Before you insert the connectors, place the flat
cable together all the other electric wires between the CPU board and the circuits on the
right side of the organ (looking the organ from behind). Bind the wires with the cable ties
already inside the instrument.
CN28
RF MODULE
CN1
Flat cable
Page 18
Disposal of old Electrical & Electronic Equipment (Applìcable throughout the European Union
and other European countries with separate collection programs)
Dir. 2002/95/CE, 2002/96/CE e 2003/108/CE
This syrnbol, found on your product or on its packaging, indicates that this product should not be
treated as household waste when you wish to dispose of it. Instead, it should be handed overt to an
applicable collection point for the recycling of electrical and electronic equipment. By ensuring this
product is disposed of correctly, you will help prevent potential negative consequences to the
environment
and human health, which could otherwise be caused by inappropriate disposal of this product. The
recycling of materials will help to conserve natural resources. For more detailed information about the
recycling of this product, please contact your local city offi ce, waste disposal service or the retail store
where you purchased this product.
This product complies with the requirements of EMCD 2004/108/EC and LVD 2006/95/EC.
Page 19

Page 20

viscount
Viscount International S.p.A.
Via Belvedere Fogliense 154 – 47836 Mondaino (RN), ITALY
Tel: +39-0541-981700 Fax: +39-0541-981052
Website: www.viscount.it -
www.physisorgans.com
Distribuito in Italia da
TITAN MUSIC S.A.
Strada Genghe di Atto, 80
47892 Acquaviva - Repubblica di San Marino
Tel. 0549-999164
fax 0549-999490
 Loading...