

Vintec V4O.IC2ESS User Manual
Armoire
i vin.
Wine
Preservation Technology
USER
MANUAL
V4O.IC2ESS
WARNING
The information in this document is
suDlecf to
modifrcation without any
pior
notice.
VINTEC offers no
guarantee
for our wine cellar if it is
being used for any
purpose
other than that for which it
was
specifically designed. VINTEC cannot be held
responsible
for any error in this manual. VINTEC is not
responsible or liable for any
spoilage or damage to wines
or any other contents incidental
or consequential to
possible
defects of the wine
cellar. Warranty applies t0
the wine cellar only and not to the content
of the wine
ceilar.
This appliance
is not intended for use by
persons
(including
children) with reduced
physical,
sensory or
mental capabilities, or lack
of
experience
and knowledge,
unless they have been
given
supervision or instruction
concerning use ofthe appliance by a
person
responsible
for their safety.
Children should be supervised to ensure that they do not
play
with the appliance.
R6()OA WARNINGS
This unit uses a small
quantity
of R600A
(iso-butane)
flammable
refrigerant in it's sealed system - 28grams.
For
your
safety
observe the following recommendations.
.
This appliance
contains a small
quantity
of
R600A refrigerant
which is environmentally
friendly, but flammable.
lt does not damage
the ozone iayer, nor does it increase
the
greenhouse
effect.
.
During transportation and installation,
ensure
that the tubing of the refrigerant circuit is not
damaged.
.
Avoid using or manipulating sharp
objects
nearby the appliances.
.
Leaking refrigerant can ignite and may
damage the eyes.
.
In the event any damage does occur, avoid
exposure
to open fires and any device which
creates a spark.
Disconnect the appliance
from the mains
power.
.
Thoroughly ventilate
the room in which the
aDDliance is located
for several minutes.
.
Notify
Customer Seruice for necessary action
and advice.
.
The room for installing the appliance must be
at least l
cubic metre
per
I
grams
of
refrigerant. The refrigerant
quantity
contained
in this appliance
is listed above in
grams;
it is
also noted on the Ratino Plate
of the
aDDliance.
It is hazardous for anyone other than an Authorised
Service
Person to carry out servicing or repairs to
this appliance. In
Queensland
the authorized
person
must hold a
Gas Work Authorisation for
hydrocarbon refrigerants, before
carrying out
servicing or repairs which
involve the removal of
covers.
cODE: V40lC2ESS
-
WARNING: Keep ventilation openings, in the appliance
enclosure or in the built-in structure, clear of obstruction.
-
WARNING: Do not use mechanical devices or other
means
to accelerate the defrosting
process,
other than
those recommended
by the manufacturer.
-
WARNING: Do not damage
the
refrigerant
circuit.
The environment and
personal
safety must be
considered when disposing of this appliance.
Please
ensure the appliance is taken to a recycle
center for safe
recycling. DO NOT dispose of the appliance
in land flll
as
the insulation and refrigerant
gas
contained in these
appliances
are flammable.
Allow 24 hours before
switching on the wine cellar.
During this time we recommend that
you
leave the
door open to clear any-residual odors,
BEFORE LOADING & PLUGGING
IN THE WINE CELLAR
IMPORTANT: Place
you
wine
cabinet
in
a location which
is strong enough to support the weight of
the fully loaded
cabinet. The
structure supporting the V4o-lc2Ess
must be able
to sustain a minimum weight of
105
KG.
It is recommended that
you
remove
all internal & external
packaging
& clean the interior of the appliance
before
first use, using a solution of bicarbonate
of soda & warm
water & then thoroughly dry the interior.
The unit
may have residual odors at first,
they will
disaoDear
as the unit cools.
Recommendations: Refer to installation
instructions
The location
you
have selected for
your
wine cellar
should:
-
be well away from any heat
source and direct
sunlight;
-
not be too damp
(laundry,
pantry,
bathroom
etc.);
-
have a flat surtace,
- have a standard and reliable electricity supply
(standard
socket to country standards, lanked t0 the
ground),
it
is
NOT recommended to use a multi-
socket or extension lead.
-
have a surge
protectorfitted
to the electrical
outlet
-
away from the microwave. Certajn microwave
ovens do not have wave interference shield. When
placed
within a 1 meter vicinity of the wine cabinet,
they may affect the operation ofthe wine cabinet.
Notes:
The wine cellar should be Dlaced
where the ambient
temperature is between 1ooc
to 350c. lf the ambient
temperature is above or below this range,
the
performance
of the unit may be affected. Placing
your
unit in extreme cold or hot conditions may cause interior
temperatures to fluctuate. The ideal range of
temperature may
not be reached.
(See
Climate Class at
the end ofthis manual)
GROUNDING INSTRUCTIONS
The wine cellar
must be
grounded
in case of an electrical
short
circuit. Grounding reduces the risk of electrical
shock. The wine cellar is equipped
with a
power
cord
having a
grounding
wire and
plug.
The wine cellar
plug
must be
plugged
into
a
properly
affixed and
grounded
electrical outlet.
Note:
/n /ocaflons where there is frequent lightning, it is
advisable to use surge
protectors.
lmproper use of the
grounding
plug
can result in the risk
of electric shock. Consult a
qualified
electrician or
servace
person
if the
grounding
instructions
are
not
completely understood.
lf the supply
cord is damaged, it must be replaced by a
qualified person
in order to avoid electrical hazard.
INSTALLING YOUR
WINE
CELLAR
UnDack and remove all of the
orotection and adhesive
strips from the
packaging
around and inside the
wine
ceilar..
The wane cellar must be
positioned
such that
the
plug
is
accessible. Release the
power
cord. l\4ove
your
wine
cellar to its final
location. The wine cellar should be
installed in a suitable
place
where the compressor will
not be subject
to
physical
contact.
Leveling
your
wine cellar: Wne cellar must be leveled
BEFORE loading
your
wines. To level the unit, adjust the
front leveling legs at the bottom of
the unit.
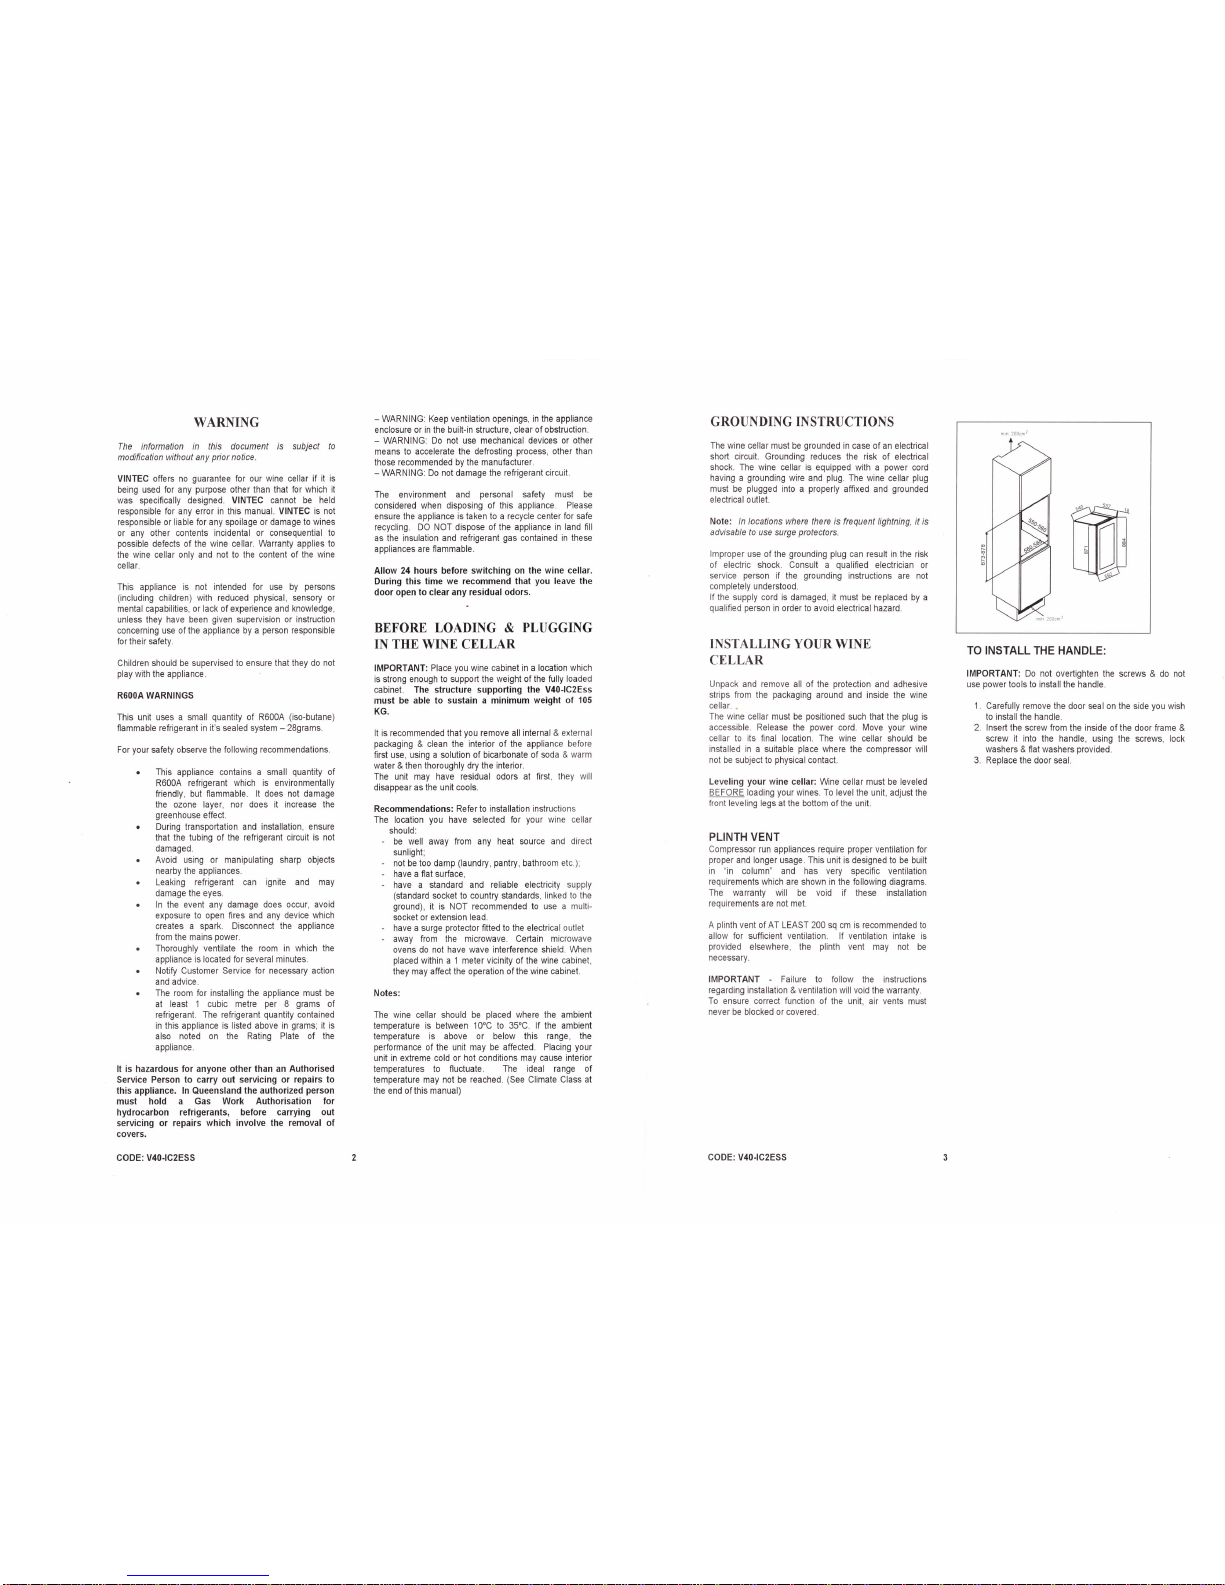
PLINTH VENT
Compressor run appliances require
proper
ventilation for
proper
and longer usage. This unit is designed to be built
in
"in
column"
and has very specific ventilation
requirements
which are shown in the following diagrams.
The
warranty will be void if these installation
requirements are not met.
A
plinth
vent
ofAT LEAST 200 so cm is recommended to
allow
for
sufficient ventilation.
lf ventilation intake is
provided
elsewhere,
the
plinth
vent may not be
necessary.
IMPORTANT - Failure to follow the instructions
regarding installation & ventilation will void the
warranty.
To ensure correct function of the
unit, air vents must
never be blocked or covered.
TO INSTALL THE HANDLE:
IMPORTANT: Do not overtighten the
screws & do not
use
power
tools to install the handle.
1. Carefully remove the door seal on the side
you
wish
to install the handle.
2. Insert the screw from the
inside
of
the door frame &
screw it into the handle,
using the screws, lock
washers & flat washers
provided.
3. Replace the
door seal.
CODE:
V40-lC2ESS
 Loading...