

Viking VK280 User Manual
VK280 FLX MOVING HEAD
USER MANUAL
Rev 2.01
CAUTION ! EYE DAMAGE !
Avoid looking directly into the light source!
This device has left our premises in absolutely perfect condition. In order to maintain this condition and to ensure a safe operation, it is absolutely necessary for the user to follow the safety instructions and warning notes
written in this manual.
The manufacturer will not accept liability for any resulting damages caused by the non-observance of this
manual or any unauthorized modification to the device.
Please consider that damages caused by manual modifications to the device are not subject to warranty.
1. Safety instructions
Make sure that the available voltage is not higher than stated on the rear panel of the fixture.
This fixture should be operated only from the type of power source indicated on the label. If you are not
sure of the type of power supplied, consult your authorized distributor or local power company.
Always disconnect the fixture from AC power before cleaning, removing or installing the fuses, or any part.
The power plug has to be accessible after installing the fixture. Do not overload wall outlets and extension cords
as this can result in fire or electric shock.
Do not allow anything to rest on the power cord. Do not locate this fixture where the cord may be damaged by
persons walking on it.
Make sure that the power cord is never crimped or damaged by sharp edges. Check the fixture and the power
cord from time to time.
Refer servicing to qualified service personnel.
Do not connect this fixture to a dimmer pack.
During the initial start-up some smoke or smell may arise. This is a normal process and does not necessarily
mean that the device is defective.
Do not touch the device’s housing with bare hands during its operation (housing becomes
hot)!
For replacement use lamps and fuses of same type and rating only.
FOR YOUR OWN SAFETY, PLEASE READ THIS USER MANUAL CAREFULLY
BEFORE YOU INITALLY START
This light was designed for indoor use and it is intended for
professional application only. It is not for household use.
CAUTION!
Disconnect the fixture from mains before you remove any cover of the fixture.
With a high voltage you can suffer a dangerous electric shock when touching
live wires and electrical parts under covers!
This fixture falls under protection class I. Therefore this fixture has to be connected to
a mains socket outlet with a protective earthing connection.
If the fixture has been exposed to drastic temperature fluctuation (e.g. after transportation), do not switch it on
immediately. The arising condensation water might damage your device. Leave the device switched off until
it has reached room temperature.
Do not shake the fixture. Avoid brute force when installing or operating the fixture.
This fixture was designed for indoor use only; do not expose this unit to rain or use near water.
When choosing the installation spot, please make sure that the fixture is not exposed to extreme heat, moisture
or dust.
Air vents and slots in the fixture´s head and base are provided for ventilation, to ensure reliable operation of
the device and to protect it from overheating.
Do not block the front objective lens with any object when the fixture is under operation.
The openings should never be covered with cloth or other materials, and never must be blocked.
The fixture becomes very hot during operation. Allow the fixture to cool approximately 20 minutes prior to
examination.
This fixture should not be placed in a built-in installation unless proper ventilation is provided.
Only operate the fixture after having checked that the housing is firmly closed and all screws are tightly
fastened.
Always use a secondary safety cable when mounting this fixture.
Make sure that the area below the installation place is blocked when rigging, derigging or servicing the
fixture.
The maximum ambient temperature 45°C must never be exceeded.
Operate the device only after having familiarized with its functions. Do not permit operation by persons not
qualified for operating the device. Most damages are the result of unprofessional operation!
Please use the original packaging if the device is to be transported.
Warning
The minimum distance between light output and the illuminated surface must be more
than 10 meters.
CAUTION!
The lens has to be replaced when it is obviously damaged,
so its function is not impaired, e. g. due to cracks or deep scratches!
CAUTION!
The lamp has to be replaced when it is damaged
or deformed due to the heat!
CAUTION!
Fast on-off-cycles (e.g. 10 min. on / 10 min. off) will reduce lamp life.
2. Installation
2.1 Connection to the mains
The VK280 FLX is equipped with auto-switching power supply that automatically adjusts to any 50-60Hz
AC power source from 100-240 Volts.
This fixture must be earthed. To use the fixture, a plug must be fixed.
The correct assembly of a sufficient plug may be done by professional persons only.
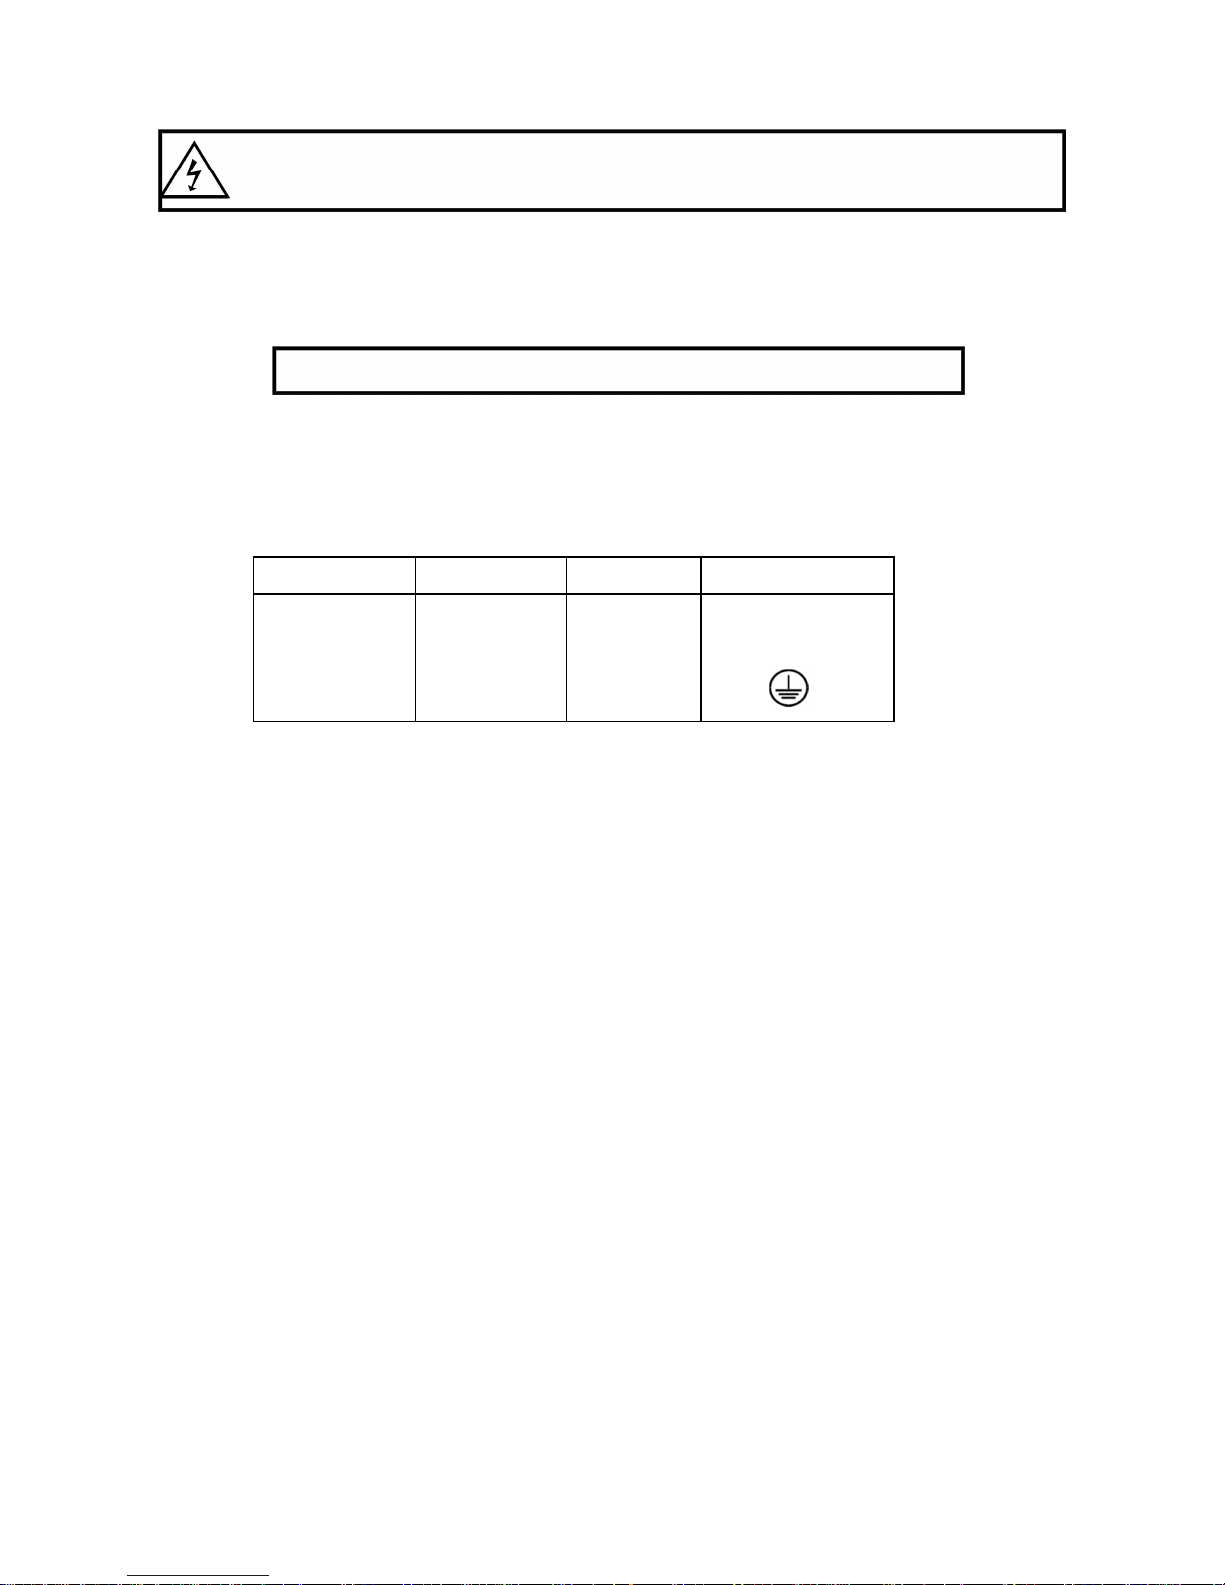
The conductors in the cable are marked by the following table.
Core (EU) Core (US) Connection Plug Terminal Marking
Brown
Light blue
Green /Yellow
Black
White
Green
Live
Neutral
Earth
L
N
Fixtures must be installed by a qualified electrician in accordance with all
national and local electrical and construction codes and regulations.
For protection from electric shock, the fixture must be earthed!
2.2 Changing the lamp
To insert a new lamp.
1.
Disconnect the fixture from mains and allow it to cool at least 20 minutes.
2.
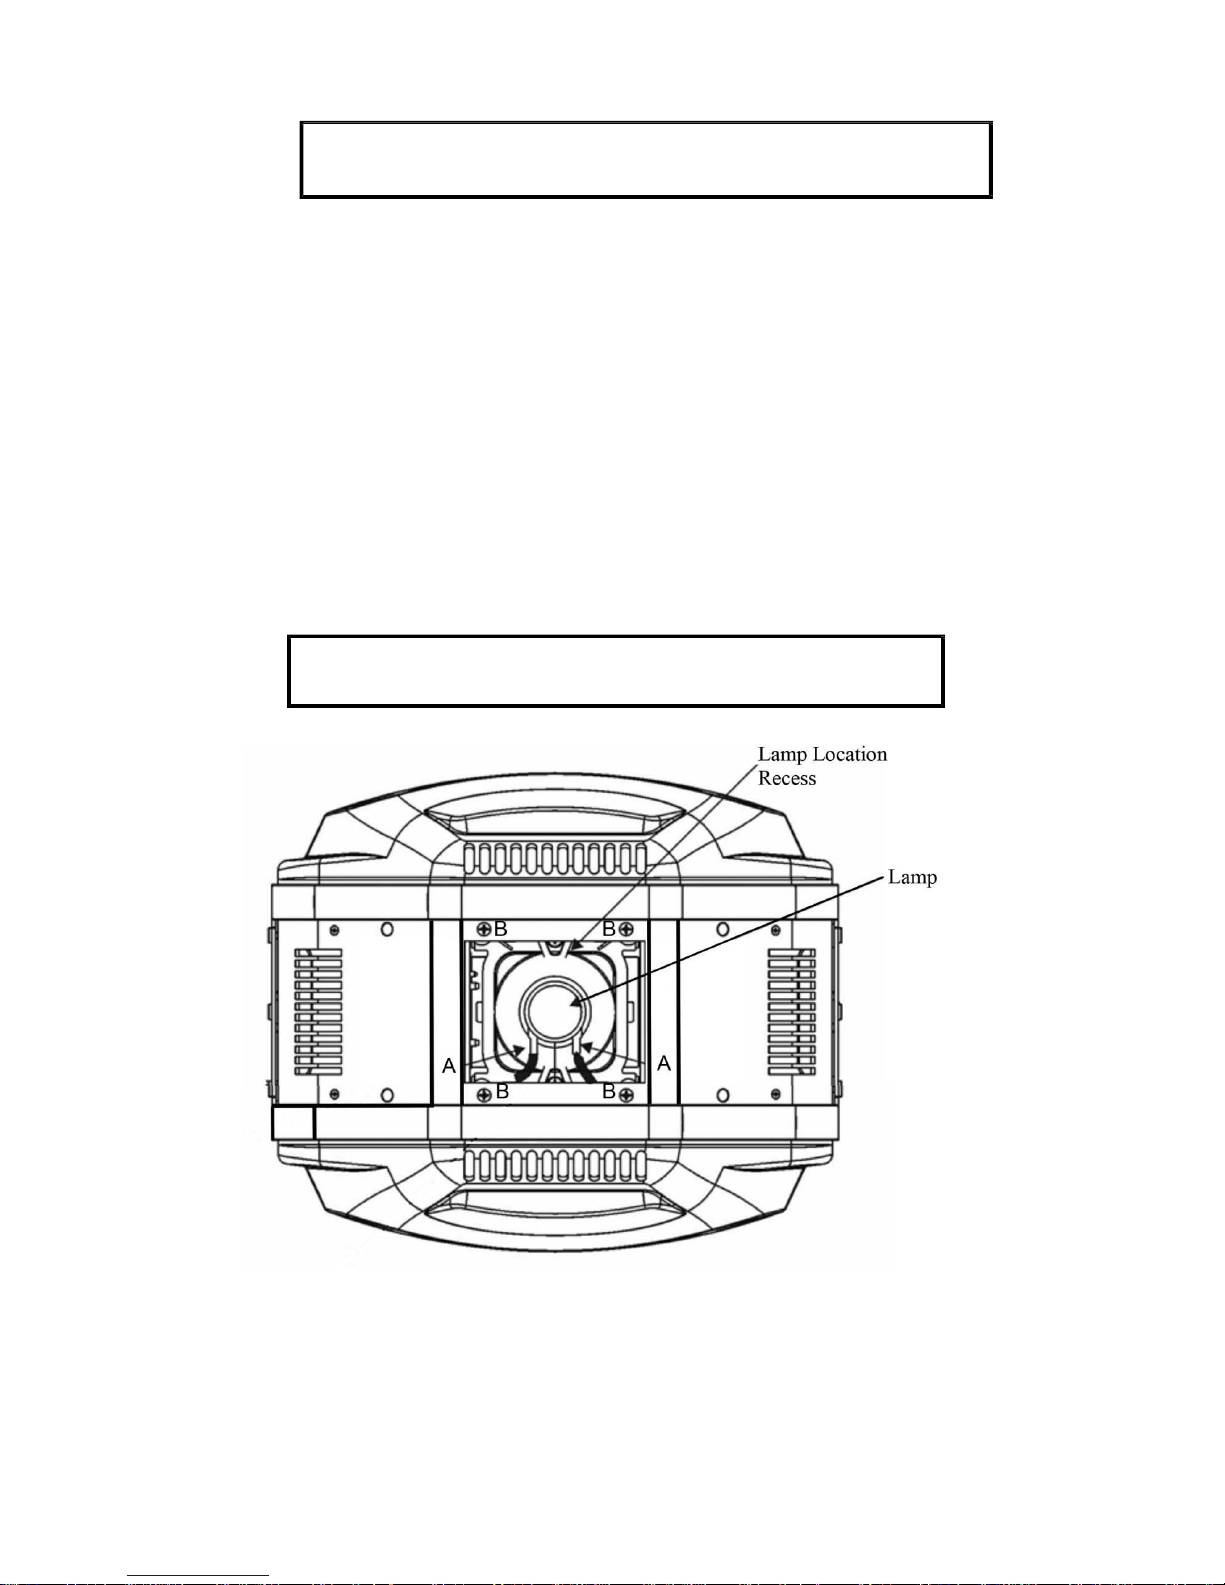
Remove the 4 Crosshead screws labeled (B) in diagram below that secure the lamp access cover and
remove the square cover to gain access to the lamp compartment.
3.
Remove both Spade Crimp Connectors (A) from the flat terminal blades on the lamp.
4.
Holding the lamp by its ceramic base carefully pull the lamp outwards until you break force of
spring locks keeping the lamp in the lamp location recess.
5 Holding the new lamp by its ceramic base , gently insert the lamp into lamp compartment until it snaps into
spring locks in the lamp location recess
Do not install a lamp with a higher wattage! A lamp like this generates temperatures the device is not designed
for. Damages caused by non-observance are not subject to warranty. Please follow the lamp manufacturer‘s
notes!
Warning: do not touch the lamp’s envelope with bare hands. Should this happen, clean the bulb with a cloth
soaked in alcohol and dry it
6.
Slide both leads with Crimp connectors (A) onto the lamp blades and check this connection
7.
Re-insert the lamp cover and tighten the four cross heads screws (B).
8.
Connect the fixture to the mains.
9.
Reset the "Lamp On Time” and "Lamp Strikes” counters in the menu "Information”.
DANGER !
Install the lamp with the fixture unplugged from mains !
Never operate this fixture without the lamp!
Do not operate this fixture without the lamp cover!
2.3 Lamp adjustment
The lamp holder is aligned at the factory. Due to differences between lamps, the fine adjustment may improve
light performance.
For lamp adjustment there are four crosshead screws in position
B below that allow the centering of the lamp within the Lamp
Location Recess
To adjust the lamp in the fixture.
1.
Connect the fixture to the mains, switch on the lamp, open shutter and dimmer, set zoom and focus (Static
gobo wheel a rotating gobo wheel should be set at 0 DMX) and check the image on the wall
2.
Disconnect the fixture from mains.
3.
Remove the lamp cover as per fitting new lamp above to get into lamp compartment.
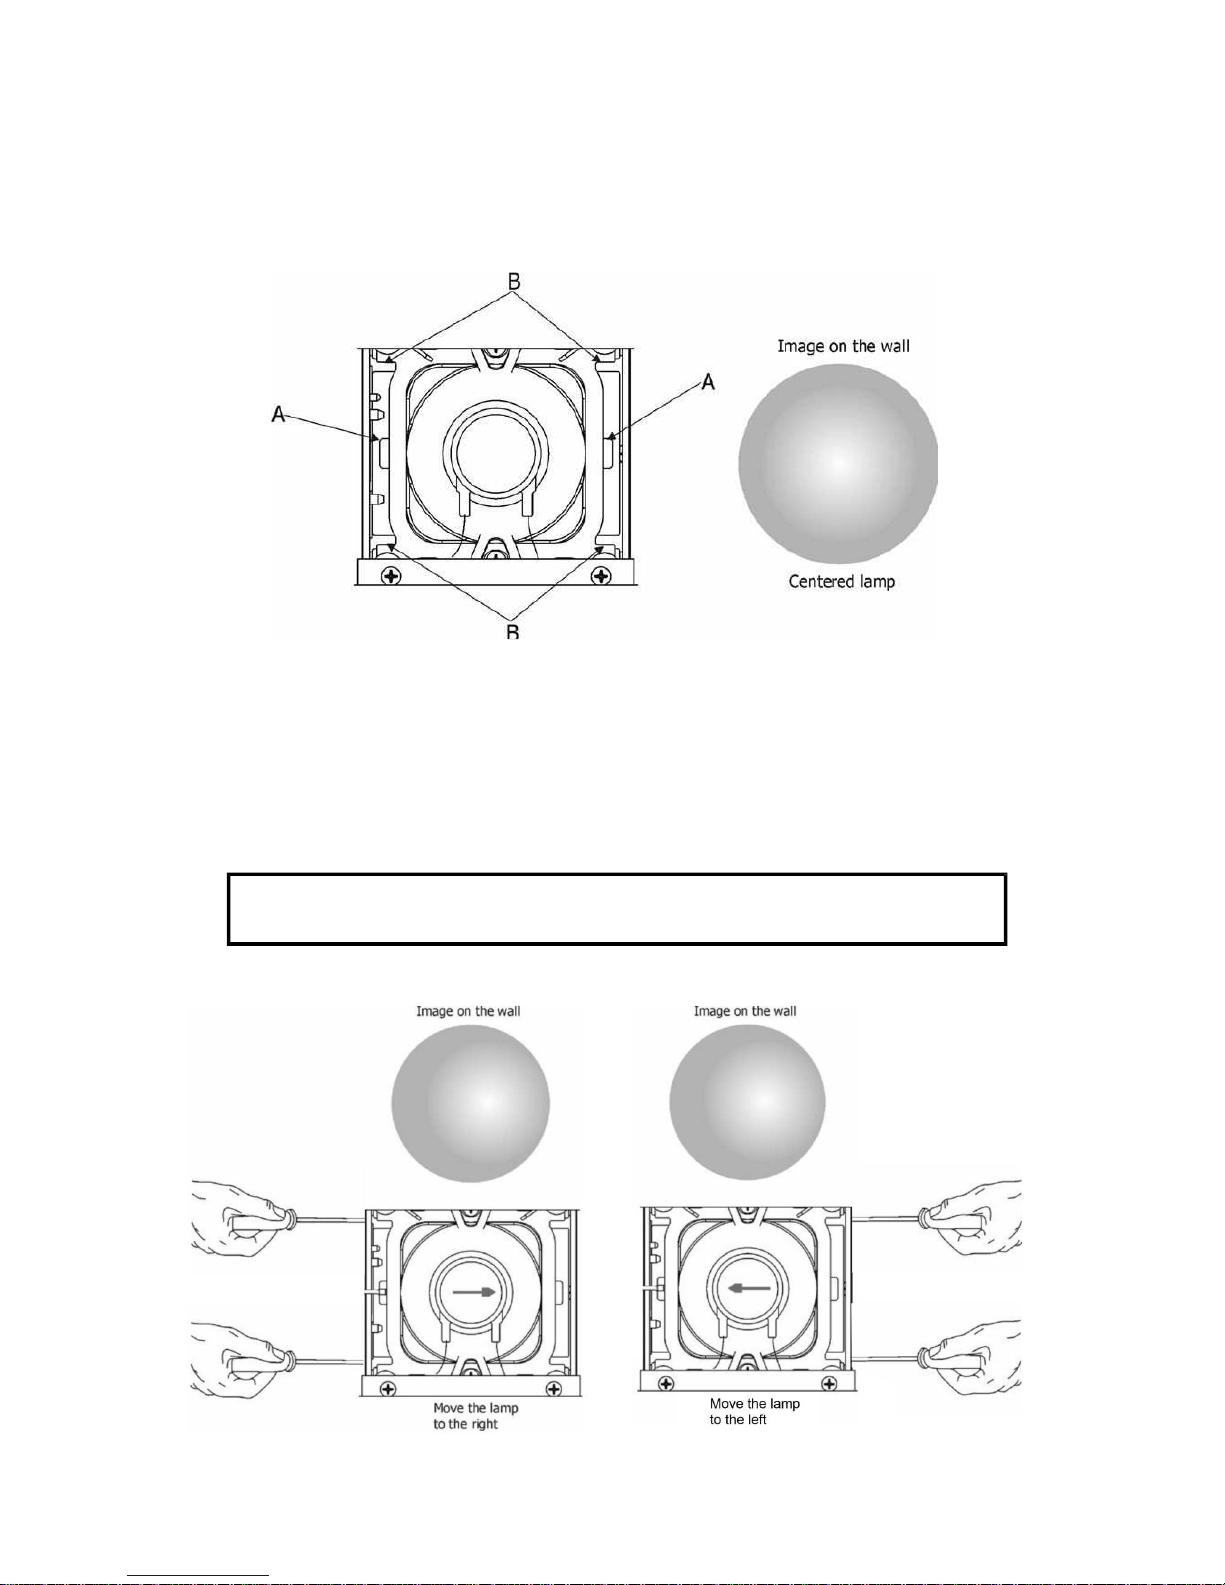
4.
Move the lamp into desired position by using a suitable screwdriver inserted in the appropriate screws (B).
5.
Replace the lamp cover and tighten the four crosshead screws.
6.
Connect the fixture to the mains and check if the adjustment has been correctly made.
7.
If you need to continue in adjusting, disconnect the fixture from mains and repeat steps 2-5.
Note: Due to light refraction in the fixture, the lamp has to be moved into direction of shifted hot-spot - see
pictures below.
The lamp must be adjusted with the fixture disconnected from mains!
Do not operate this fixture without the lamp cover!

Note!
The adjusted hot-spot may move during the first 100 hours of the lamp operation
(lamp stabilizes its burning) and the lamp adjusting has to be repeated.
(In some cases, the lamp adjusting has to be made every 100 hours of lamp operation.)
2.4 Replacing rotating gobos
1.
Disconnect the fixture from mains and allow it to cool.
2.
Remove the bottom plastic cover of the head by loosening the 4 quarter-turn fasteners on the cover.
3.
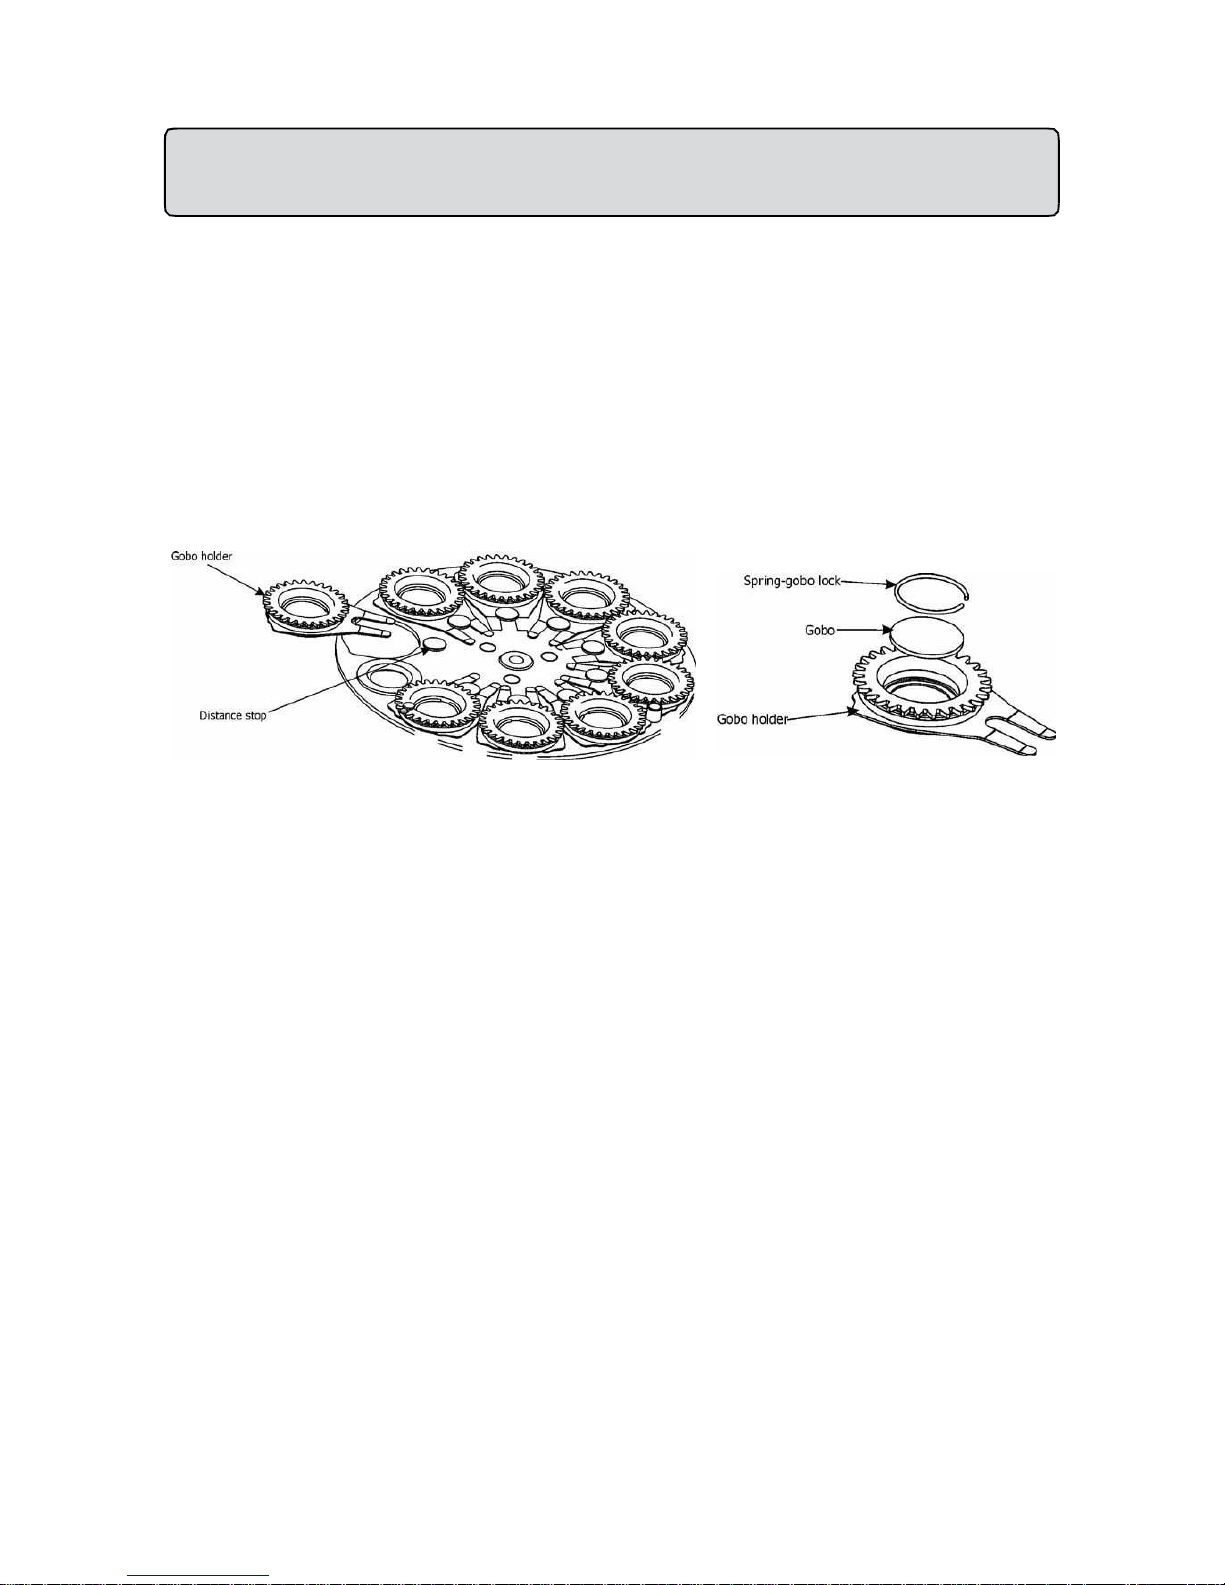
Gently pull up the gobo holder from the rotation gobo wheel.
4.
Carefully remove the gobo and the spring gobo-lock from the gobo holder by pushing to the gobo from the side
without toothed wheel. Do not touch the surface of the pattern of the glass gobo - use a suitable glove.
Be careful! Glass!
5.
Insert the new gobo (glazy side towards the lamp). Insert the spring-gobo lock
to secure it in the gobo holder.
6.
Insert the gobo holder back into rotating gobo wheel.
7.
Replace the bottom cover before applying power.
DANGER!
Replace gobos with the device switched off only.
Unplug from mains before!
 Loading...