

Viking VIRECTWODWRH160 Installation manual

Installation Guide
Guide d'installation
Guía de Instalación
LPKVGC
LP/Propane Conversion Kit
Ensemble de conversion au PL/propane
Kit de conversión de propano/LP
2
IMPORTANT–Please Read and Follow!
• Before beginning, please read these instructions completely and carefully.
• Installation and service must be performed by a qualified installer, service agency or the gas supplier.
Parts List - LPKVGC
(1) PA070005 LP Regulator
Drill Dia. mm
(1) PB040199 #56 .046 1.17
(2) PB040202 #63 .037 0.94
(1) 044710-000 ----- .030 0.76
(1) PB040275 #70 .028 0.71
(1) 044711-000 ---- .034 0.86
(1) F21264 Installation Instructions
(1) PF030377 Conversion Label
This conversion kit shall be installed by a qualified
service agency in accordance with the
manufacturer’s instructions and all applicable
codes and requirements of the authority having
jurisdiction. If the information in these instructions
is not followed exactly, a fire, explosion, or
production of carbon monoxide may result causing
property damage, personal injury or loss of life.
The qualified service agency is responsible for the
proper installation of this kit. The installation is
not proper and complete until the operation of the
converted appliance is checked as specified in the
manufacturer’s instructions supplied with the kit.
WARNING
Gas Conversion
Before proceeding with conversion, turn off gas supply to
the appliance prior to disconnecting the electrical power.
CAUTION
1. Disconnect electrical power to cooktop.
2. Remove the surface grates.
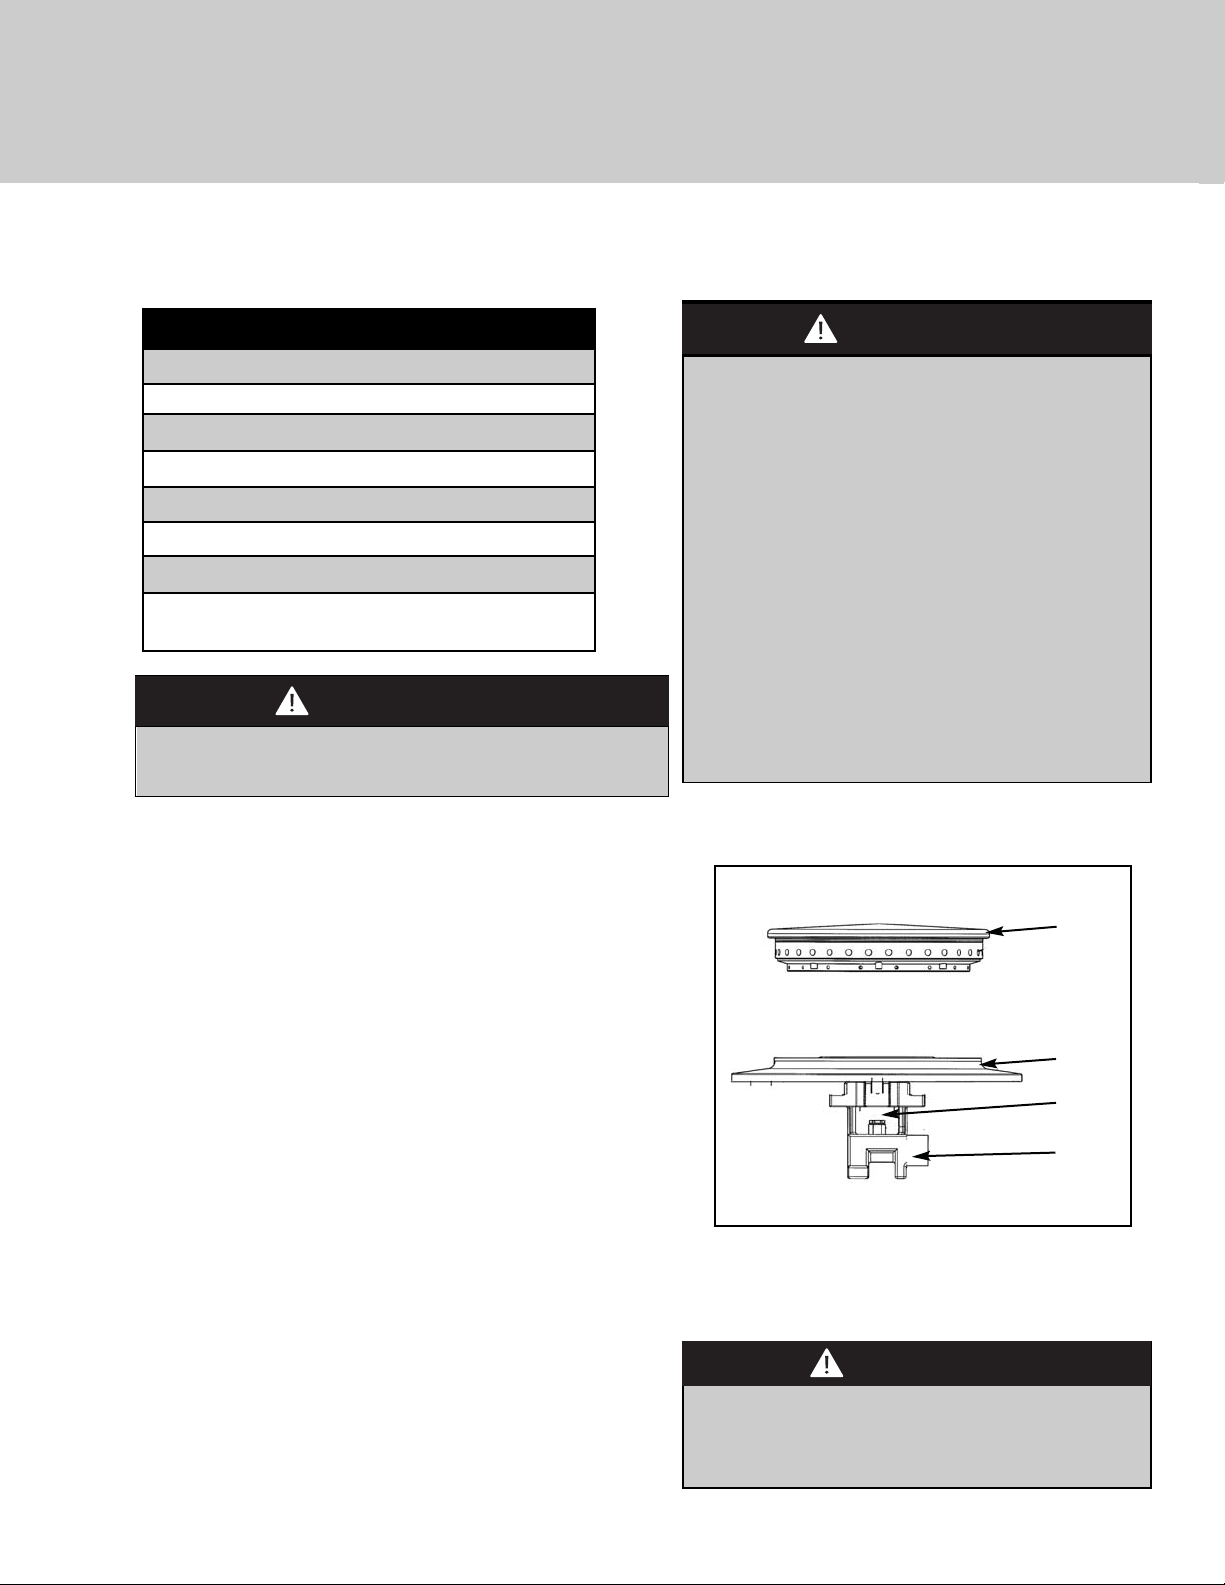
3. Remove the burner caps (Item 1) by lifting up.
4. Use a small socket or nut driver to go down through the
burner base (Item 2) to remove the orifice (Item 3). (Tip:
Ball up a small piece of masking tape or some putty and
put in the end of your socket to stick to the orifice for
removal and replacement). If you do not have a tool
small enough to fit through the burner base (Item 2),
remove the burner base to get access to the jet holder
(Item 4).
5. Remove the regulator in the rear right from underneath
the unit. Replace the gas regulator with the supplied
regulator and reassemble. Sealant on all pipe joints must
be resistive to natural or LP/Propane gas.
6. Manifold pressure should be checked with a manometer
and requires 10.0” W.C.P for LP gas. Incoming line
pressure upstream from the regulator must be 1” W.C.P.
higher than the manifold pressure in order to check the
regulator. The regulator used on this cooktop can
withstand a maximum input pressure of 1/2 PSI (14.0”
WCP). If the line pressure is in excess of that amount, a
step-down regulator will be required.
7. Replace the burners and grates.
Item 1
Item 2
Item 3
Item 4
Before placing the cooktop into operation, always
check for gas leaks with a soapy water solution.
DO NOT use an open flame to check for leaks!
CAUTION
3
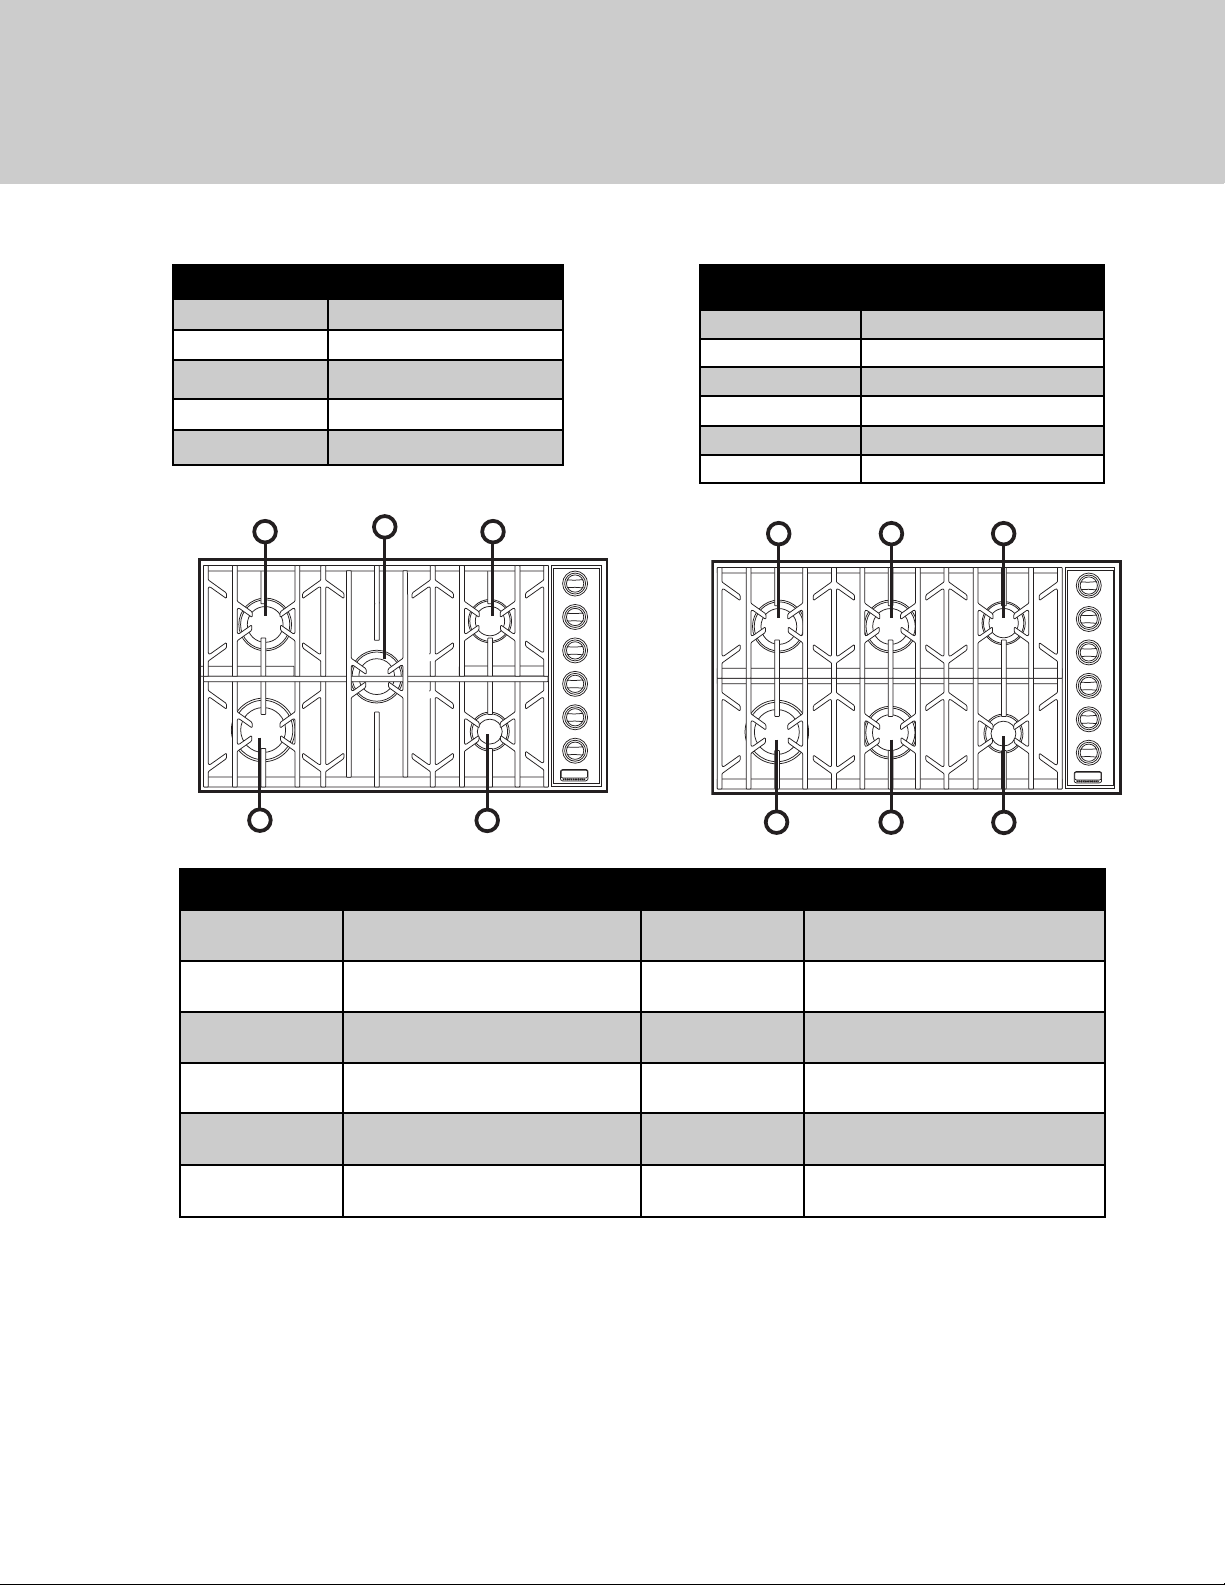
VGC/CVGC Orifice Locations
*Burner rates will be lowered by 4% per 1000 ft. above altitudes of 2000 ft.
When the conversion is completed, complete the enclosed conversion label and place it next to the rating label.
The rating label for your cooktop is located on the exterior bottom panel of the burner box in the right rear corner.
PROPER LIGHTING AND SHUTDOWN INSTRUCTIONS
1. To ignite the surface burners, turn the knob counter clockwise to any position.
2. Upon ignition of the surface burner, turn the knob to the desired position, (HI, Med, or Low).
3. To shutdown the burner, turn knob clockwise to the OFF position.
4. In case of failure, shut the gas OFF using the installer supplied manual shut-off valve.
Burner LP
Left Front (A) .046 (1.17mm) PB040199
Left Rear (B) .034 (0.86 mm) 044711-000
Center Rear (C) .037 (0.94 mm) PB040202
Center Front (C) .037 (0.94 mm) PB040202
Right Rear (E) .030 (0.76 mm) 044710-000
Right Front (D) .028 (0.71 mm) PB040275
Burner LP
Left Front (A) .046 (1.17mm) PB040199
Left Rear (B) .037 (0.94 mm) PB040202
Center (B)
.037 (0.94 mm) PB040202
Right Rear (C) .030 (0.76 mm) 044710-000
Right Front (D) .028 (0.71 mm) PB040275
Burner 30”W. Model Burner 36”W. Model
Left Front (A)
16,500 BTU LP
(4.9 kW LP)
Left Front (A)
16,500 BTU LP
(4.9 kW LP)
Left Rear (B)
11,000 BTU LP
(3.3 kW LP)
Left Rear (B)
9,000 BTU LP
(2.7 kW LP)
Center (B)
11,000 BTU LP
(3.3 kW LP)
Center Rear (C)
11,000 BTU LP
(3.3 kW LP)
Center Front (C)
11,000 BTU LP
(3.3 kW LP)
Right Rear (C)
7,000 LP
(2.1 kW LP)
Right Rear (E)
7,000 LP
(2.1 kW LP)
Right Front (D)
6,000 BTU LP
(1.8 kW LP)
Right Front (D)
6,000 BTU LP
(1.8 kW LP)
VGC/CVGC530
VGSU/CVGSU530
VGC/CVGC536
VGSU/CVGSU536
B
B
C
B C E
A
D
CA
D
 Loading...