

Page 1
®
TURBOCHEF® SPEEDCOOK OVEN COOKBOOK
PROVEN COMMERCIAL PERFORMANCE FOR YOUR HOME
™
Page 2
TABLE OF CONTENTS
Introduction . . . . . . . . . . . . . . . . . . . . . . . . . . . . . . . . 3
Recipes . . . . . . . . . . . . . . . . . . . . . . . . . . . . . . . . . . . . . . . . 5
Appetizers . . . . . . . . . . . . . . . . . . . . . . . . . . . . . . . . . . . .6
Seafood . . . . . . . . . . . . . . . . . . . . . . . . . . . . . . . . . . . . 11
Eggs, Poultry, and Meats . . . . . . . . . . . . . . . . . . . . 16
Vegetables and Sides . . . . . . . . . . . . . . . . . . . . . . . 24
Pizza and Pasta . . . . . . . . . . . . . . . . . . . . . . . . . . . . . 31
Desserts and Sweets . . . . . . . . . . . . . . . . . . . . . . . . 36
Index . . . . . . . . . . . . . . . . . . . . . . . . . . . . . . . . . . . . . . . . 44
TABLE OF CONTENTS
TABLE OF CONTENTS 2
Page 3

Welcome to
Commercial Performance for Your Home
The Viking Professional TurboChef Speedcook Oven is a high performance commercial inspired oven
designed speci cally for today’s home cook. No other oven provides a greater combination of performance,
quality, and simplicity. These ingredients empower you to be the cook you want to be without sacri cing
quality, avor, or enjoyment. They bring to your kitchen a new sense of wonder, magic, and delight. And most
importantly, they bring people back together at the dinner table to enjoy good company and great food.
Your Viking Professional TurboChef oven delivers unrivaled performance. As you will see in this cookbook,
fresh, creative, and avorful dishes that would take hours to prepare and cook can now be delivered in a
fraction of the time. In fact, entire meals can be cooked in the time you would typically take for a single dish.
Whether it is an elegant evening dinner cooked in less than 25 minutes or an entire Thanksgiving feast
INTRODUCTION
cooked in little more than an hour, Viking Professional TurboChef provides you with abilities unmatched in
the world of cooking.
Of course, speed without quality is meaningless. It’s the quality worthy of four-star kitchens that truly sets
Viking Professional TurboChef apart. That quality is what turns world-renowned chefs into Viking Professional
TurboChef enthusiasts. And, it is what consistently elevates an otherwise ordinary meal into an extraordinary
one. Meats come out caramelized, moist, and tender. Baked goods are golden brown, aky, and perfect.
Vegetables are crisp, avorful, and nutritious.
Best of all, you can deliver these results with remarkable simplicity and peace of mind. You can interact with
the oven’s high performance technology through a simple interface that guides you e ortlessly through the
settings for all your favorite dishes and recipes, taking guesswork out of the equation and delivering picture-
perfect, delicious food in minutes.
Speed. Simplicity. Purity. These are the characteristics of high performance commercial-type appliances.
They are the qualities that make the Viking Professional TurboChef oven unique. And, they are the qualities
that will help make your kitchen and your cooking remarkable.
INTRODUCTION 3
Page 4

Using your Viking Professional TurboChef Cookbook
This cookbook includes sixty recipes—merely a handful of the thousands of dishes our chef’s have created
in the Viking Professional TurboChef oven. We’ve selected this brief collection to share with you for your
enjoyment.
To make things simple, this recipe collection resides in your oven’s controller—the touchscreen —for easy
reference and single-touch selection. Just select “Bake” on your touchscreen, choose “Cookbook Recipes” in
the menu, then select the item you are preparing from the list of choices. The preparation is up to you, but
you can consider the cooking as easy as pressing the “Start” button. Each recipe and its setting is tested and
approved by our chefs for a perfect outcome every time.
Of course, if you are like most of us, you’ll want to add your personal magic to these recipes with a signature
spice or twist of the ingredients. In fact, we know that when it comes to your family, our meatloaf recipe
INTRODUCTION
may not hold a candle to yours. Feel free to make it your own and use the prescribed setting. The outcome
should still be spectacular.
We hope you will savor this collection of great food as much as we have. Perhaps a few will even make their
way into your repertoire of family favorites. Enjoy.
Making the Most of Your Entire Cooking Experience
While you are sure to be tempted to use only the speedcooking abilities of the top oven of the TurboChef,
do not forget about the capabilities of the bottom oven.
Your bottom oven o ers a variety of attractive bene ts as well. It is a high-end conventional/ convection
oven that will also yield exceptional cooking results in a more conventional time frame. Use it in
conjunction with your top oven to perfectly orchestrate a meal. While cooking a single 20-minute dish in
the bottom oven, you can prepare a few appetizers and a portion of your main course in the top oven. Or,
use the “Warm” setting on your bottom oven to hold speedcook items at the perfect temperature until the
entire meal is ready to be served. Or, if you have time for a traditionally slow-cooked meal, you can certainly
do that too.
The entire oven has been designed to maximize your e ciency in the kitchen without any sacri ce of
quality. Use this outstanding kitchen tool to your advantage.
INTRODUCTION 4
Page 5

Recipes
RECIPES
RECIPES 5
Page 6

Appetizers
Southwestern Beef Empanadas 7
Stuffed Portobello Mushrooms 7
Cheese Bites 8
Salmon en Croute 8
Stuffed Mushrooms 9
Beef Filet on Parmesan Crostini 9
Zucchini “Crostini” 10
RECIPES
RECIPES • APPETIZERS 6
Page 7

Southwestern Beef Empanadas
Stuffed Portobello Mushrooms
PREP TIME: Approximately 10 minutes
COOK TIME: TurboChef : 4-1/2 minutes
Conventional : 25 minutes
An empanada is a stu ed pastry. Originally from Galicia, Spain,
empanadas were imported to Latin America with the large
number of Galician immigrants, primarily to Argentina and
Uruguay. Today, Spain, Portugal, the Caribbean, and most Latin
American countries have a version of empanada. In this recipe we
have added a Southwestern twist to the lling.
INGREDIENTS
1 tablespoon olive oil
1/2 pound ground beef
1/2 cup diced onion
1/4 cup diced canned
green chilies
1/2 teaspoon freshly ground
black pepper
CHIPOTLE SAUCE
3/4 cup sour cream
1/4 teaspoon kosher salt
1 teaspoon ground dried ancho
chili peppers
1/2 teaspoon ground chipotle
pepper
2 tablespoons minced
1/2 teaspoon kosher salt
1/8 teaspoon dried chipotle
powder
2 10-inch unbaked
prepared pie crusts
1-1/2 cups grated pepper
jack cheese
green chilies
1 green onion, minced
1 clove garlic, minced
1 tablespoon tomato paste
1. Select “Cookbooks” on the touchscreen. Select
“Appetizers” followed by “Southwestern Beef Empanadas.” Press
“Preheat” to begin the preheat cycle.
2. Heat the olive oil in a skillet and sauté the ground beef and
diced onion. Add green chilies, pepper, salt, and chipotle
powder. Cook until the beef is browned and the onions are
transparent. Strain o any excess fat.
3. Combine all the ingredients for the Chipotle Sauce and
refrigerate until needed.
4. Place one of the pie crusts onto a clean surface and roll out to a
circle about 12 inches in diameter. Cut 3 pastry rounds out of it,
each measuring about 5 inches in diameter ( nd a small plate
to use as a guide). Repeat with the second pie shell. You will
now have 6 pastry rounds.
5. Moisten the edges of the pastry with water using a pastry
brush. On half of the pastry round, spoon about 1/4 cup of the
beef mixture and top with about 1/4 cup of pepper jack
cheese. Fold over the other half of the pastry and seal the
edges with a fork, making a decorative edge. Place empanadas
on a sheet pan and place in the oven.
6. Press “Start” and bake for 4-1/2 minutes.
7. Serve one empanada with a ramekin of Chipotle Sauce as an
appetizer. For an entrée, serve two per person with Chipotle
Sauce, beans, and rice.
PREP TIME: Approximately 15 minutes
COOK TIME: TurboChef : 3 minutes
Conventional : 20 minutes
Portobello mushrooms have a meaty texture and pair nicely with
beef but often substitute for it on a vegetarian menu. These are an
excellent appetizer and also serve well as an accompaniment to a
main course.
INGREDIENTS
3 tablespoons olive oil
1 6-ounce red onion, thinly
sliced
2 large portobello mushrooms,
6-ounces each
1/2 pound fresh spinach
2 cloves garlic, minced
1/2 teaspoon kosher salt
1/2 teaspoon freshly ground
black pepper
1/4 cup pine nuts
1/2 cup grated Parmesan
cheese
4-5 slices roasted red pepper
1/2 cup shredded Manchego
cheese
1. Select “Cookbooks” on the touchscreen. Select “Appetizers”
followed by “Stu ed Portobello Mushrooms.” Press “Preheat” to
begin the preheat cycle.
2. In a sauté pan over a medium heat, add 1 tablespoon olive oil
and onions. Stir for about 10 minutes, until onions are softened
and lightly browned.
3. Clean mushrooms. Remove stems and gills and set aside.
4. Cut spinach into thick strips. Place in a mixing bowl along
with the onions, garlic, salt, pepper, pine nuts, and
Parmesan cheese. Toss with 1 tablespoon of olive oil. Mix
well.
5. Brush sheet pan with remaining tablespoon of olive oil and
put the mushrooms on the pan, top side down. Place 2
mounds of spinach mixture into each mushroom cap and
top each with slices of roasted red pepper. Sprinkle with
Manchego cheese and place in the oven.
6. Press “Start” and bake under “Stu ed Portobello
Mushrooms” for 3 minutes. Cut into quarters to serve as
an appetizer.
Yield: 4 appetizer servings
Helpful Hint : To serve as a side dish, cut mushrooms in halves.
For an entrée, serve one cap per person.
RECIPES
Yield: 6 servings as an appetizer or 3 as an entrée
RECIPES • APPETIZERS 7
Page 8
Cheese Bites
PREP TIME: Approximately 5 minutes
COOK TIME: TurboChef : 2-1/2 minutes
Conventional : 11 minutes
These delicious cheese stu ed bites are great for a snack or as an
accompaniment for your favorite pasta dish. Let the kids help
make them for some family fun.
INGREDIENTS
prepared biscuit dough,
refrigerated
2 sticks string cheese
2 tablespoons grated
Parmesan cheese
1. Select “Cookbooks” on the touchscreen. Select “Appetizers”
followed by “Cheese Bites.” Press “Preheat” to begin the preheat
cycle.
2. Cut 5 biscuits into 4 pieces each, yielding 20 pieces total.
3. Cut each stick of string cheese into 10 pieces, 20 pieces total.
4. Roll out each dough piece to about 1-inch in diameter. Wrap the
dough around a small piece of cheese. Roll in your palms to
form a ball. Dip the top of each ball in Parmesan cheese. Place
on a sheet pan, 4 across and 5 down, with the cheese side up.
Place sheet pan in the oven and press “Start.” Bake for 2-1/2
minutes. Serve hot.
Yield: 10 servings
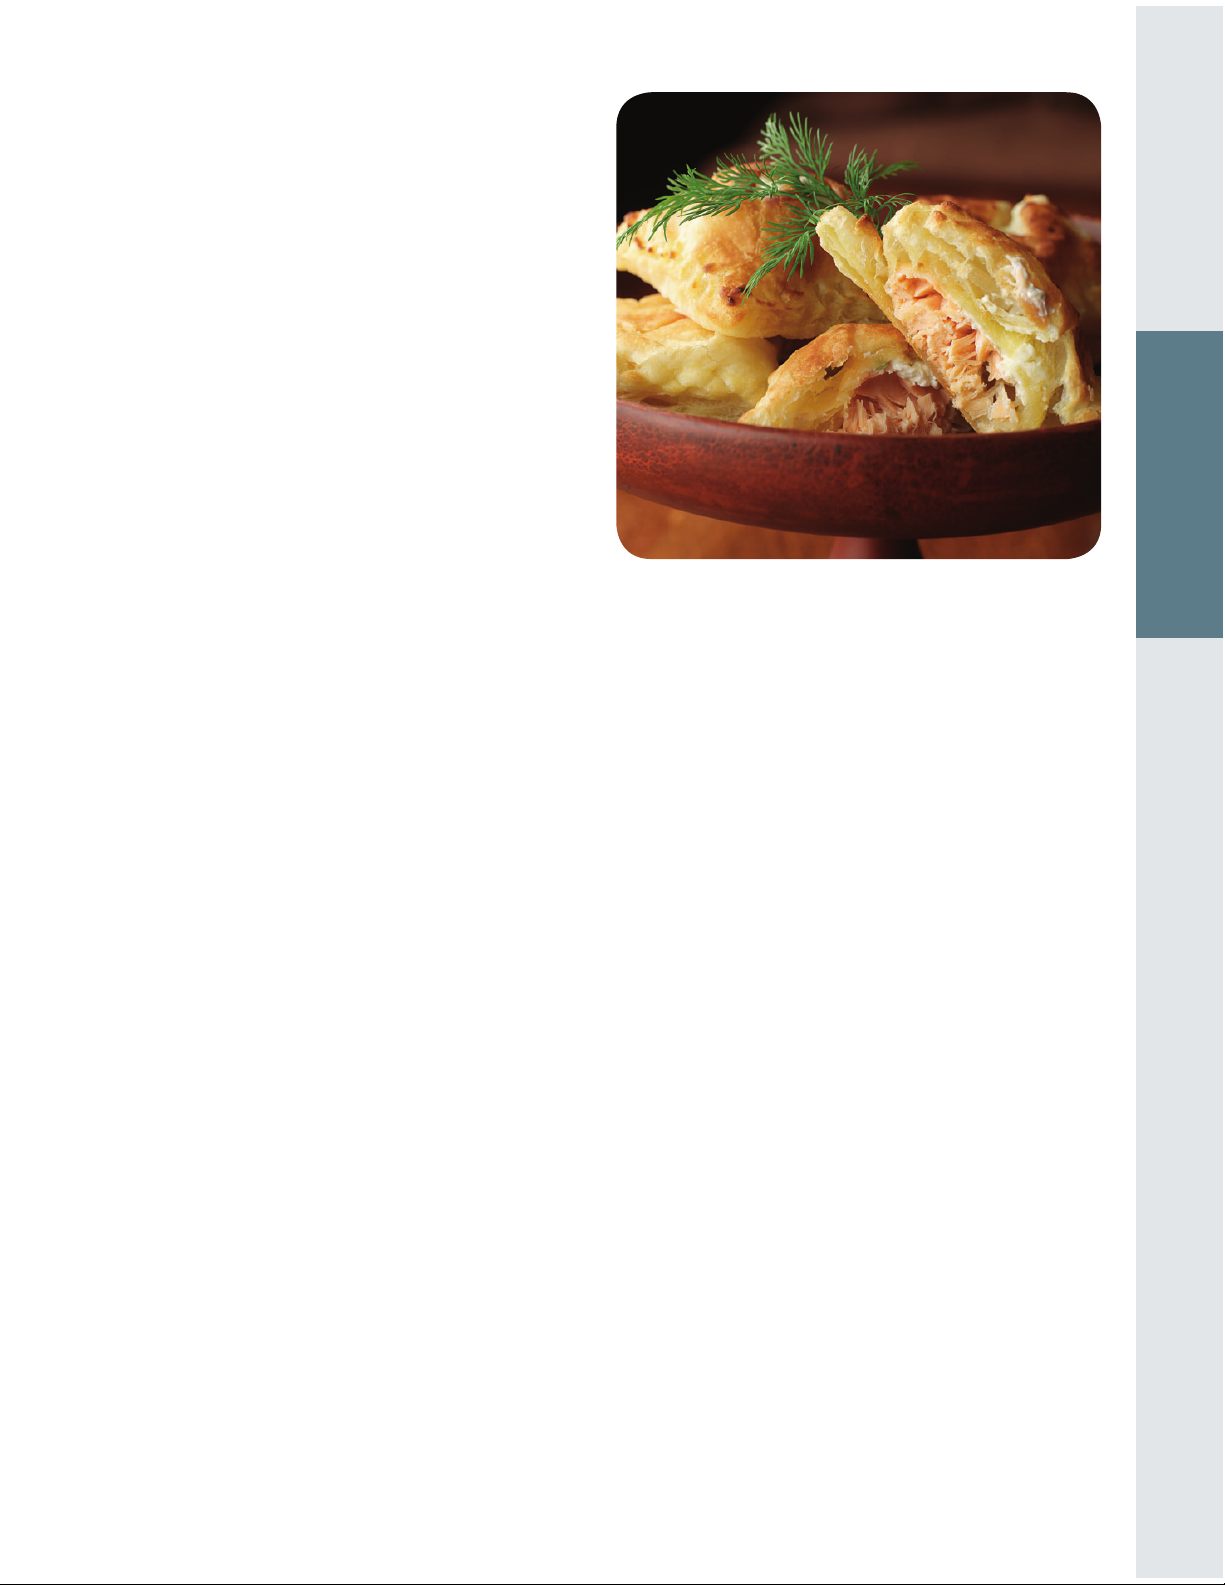
Salmon en Croute
PREP TIME: Approximately 10 minutes
COOK TIME: TurboChef : 4 minutes
Conventional : 30 minutes
RECIPES
SALMON EN CROUTE
3. Cut the salmon into 12 pieces about 1-inch square and
1/2 inch thick. Place the salmon pieces onto the thawed
pu pastry, 3 across the width of the pastry and 4 down the
length. Top each piece with about 2 teaspoons dill-cream
cheese mix and place second sheet of pu pastry on top. Cut
around the edges, leaving a 1/4-inch border. To create a
decorative edge use a pastry wheel or ravioli cutter.
4. Place on a TurboChef Te on Screen or cookie sheet and put in
the oven. Press “Start” and bake under “Salmon en Croute” for 4
minutes. Use the “Cook More” function at the end of the cook
cycle if you want your salmon more well done. Remove Salmon
en Croute from the oven and garnish with the sliced lemon and
the remaining teaspoon of fresh dill.
Yield: 12 servings
En croute describes food that is wrapped in pastry and baked. The
pastry seals in the natural moisture and avor of the sh. In this
recipe, we wrap the pu pastry around fresh salmon, but you
might also want to try sea bass or halibut.
INGREDIENTS
4 ounces cream cheese,
softened
2 teaspoons minced fresh dill
1 teaspoon fresh lemon juice
1 teaspoon grated lemon zest
2 5 to 6-ounce boneless,
skinless salmon lets, each
about 1-1/4 -inch thick
2 sheets packaged, frozen
pu pastry, thawed
1 lemon, sliced
1. Select “Cookbooks” on the touchscreen. Select “Appetizeers”
followed by “Salmon en Croute” and then press “Preheat” to
begin the preheat cycle.
2. Combine the softened cream cheese, 1 teaspoon dill, lemon
juice, and lemon zest in a small bowl. Set aside.
RECIPES • APPETIZERS 8
Page 9

Stuffed Mushrooms
PREP TIME: Approximately 25 minutes
COOK TIME: TurboChef : 3-1/2 minutes
Conventional : 30 minutes
These mushrooms cook in no time at all, making them a perfect
dish to pass around at a cocktail party, serve as an
accompaniment to a roast, or include as part of a vegetarian
bu et.
INGREDIENTS
1 1-1/4 pounds large fresh
mushrooms (about 20,
roughly the size of a half
dollar)
1 cup grated Parmesan cheese
1/2 cup nely chopped
parsley
1/2 cup bread crumbs
STUFFED MUSHROOMS
1/2 cup grated onion
3 cloves garlic, minced
1 teaspoon salt
1 teaspoon freshly ground
black pepper
1 teaspoon dried oregano
2/3 cup olive oil
5. Place mushrooms on a sheet pan. Before baking, drizzle
a small amount of the remaining olive oil over the top. Press
“Start” and bake for 3-1/2 minutes. Serve hot.
Yield: 10 servings
Beef Filet on Parmesan Crostini
PREP TIME: Approximately 10 minutes
COOK TIME: TurboChef : 11 minutes
Conventional : 35 minutes
Beef tenderloin makes an excellent appetizer. Ask your butcher to
cut out the center portion of the tenderloin, known as the
“châteaubriand.” This is the leanest and tenderest part of the
beef—perfect for an hors d’oeuvre. The marinade, if you choose to
use it, adds avor to the beef and makes it even more tender.
INGREDIENTS
2 tablespoons
Worcestershire sauce
2 tablespoons soy sauce
2 cloves garlic, minced
2 teaspoons cracked black
pepper
2 pounds beef tenderloin,
center cut
1 loaf french bread
2 tablespoons olive oil
1/4 cup grated Parmesan
cheese
1 cup sour cream
4 tablespoons prepared
horseradish
1/2 cup minced chives
RECIPES
1. Select “Cookbooks” on the touchscreen. Select “Appetizers”
followed by “Stu ed Mushrooms.” Press “Preheat” to begin the
preheat cycle.
2. Wash mushrooms and remove stems from the tops. Finely
chop stems for the stu ng mix.
3. In a mixing bowl, combine chopped stems, Parmesan cheese,
parsley, bread crumbs, grated onion, garlic, salt, black pepper,
oregano, and 1/3 cup of the olive oil. Mix well.
4. Place about 1 tablespoon stu ng mix in each mushroom cap.
1. To prepare the marinade combine the Worcestershire
sauce, soy sauce, garlic, and black pepper in Ziploc bag. Add
the beef tenderloin, seal the bag, and let marinate
1 to 24 hours. The longer you leave the beef in the marinade,
the stronger the avor. If you prefer not to marinate the meat,
simply season with salt, pepper, and garlic before cooking.
2. Select “Cookbooks” on the touchscreen. Select “Appetizers”
followed by “Beef Filet on Parmesan Crostini.” Press “Preheat” to
begin the preheat cycle.
3. Drain the beef and place it in a large ceramic oval dish. Place
dish in the oven and press “Start.” Cook for 11 minutes
(medium-rare). For a more done piece of beef, use the “Cook
More” function to add additional cooking time. When done, the
outside of the meat will be roasted and dark, the inside moist
and tender. Allow the beef to rest at least 5 minutes and then
chill for a few hours.
4. Select “Cook Mode” on the touchscreen. Select “Toast” followed
by “Bread”. Press “Preheat” to begin the preheat cycle.
5. Cut bread into 1/2-inch thick pieces and place on a sheet pan.
Brush each piece with olive oil, and sprinkle with Parmesan
cheese. Place pan in the oven. Press “Start” to toast for 1
minute.
6. Mix sour cream and horseradish. This may be prepared up to 2
days ahead and stored in the refrigerator.
7. Slice the beef tenderloin very thin. Place beef slice on toasted
crostini and top with horseradish sauce. Garnish with chives.
Yield: 20 servings
RECIPES • APPETIZERS 9
Page 10

Zucchini “Crostini”
PREP TIME: Approximately 15 minutes
COOK TIME: TurboChef : 2-1/2 minutes
Conventional : 30 minutes
Unlike traditional crostini, which use bread, these pass-around
morsels use a zucchini slice as the base for a topping. They’re
really good and will appeal to the carbo-phobes among your
guests.
INGREDIENTS
olive oil
1 cup bread crumbs
1/4 cup grated Parmesan
cheese
1 teaspoon salt
1/2 teaspoon freshly ground
black pepper
1 egg, beaten
1/2 pound zucchini
1 ounce sun dried tomatoes,
cut into strips
3 ounces fresh goat cheese
fresh oregano for garnish
(optional)
1. Select “Cookbooks” on the touchscreen. Select “Appetizers”
followed by “Zucchini Crostini.” Press “Preheat” to begin the
preheat cycle.
2. Oil a sheet pan and set aside.
3. In a shallow dish mix bread crumbs, Parmesan cheese, salt, and
pepper to make the breading.
4. Slice the zucchini diagonally into 1/4-inch thick disks to make
18 pieces.
5. Dip the slices into beaten egg and then roll them in the
breading to cover completely. As each piece is done, place it on
the oiled sheet pan.
6. Place pan in the oven and press “Start.” Bake for 2-1/2 minutes.
7. Remove from the oven. Place a small mound of goat cheese,
topped with a strip of sun dried tomato on the “Crostini.”
Garnish with fresh oregano and serve.
RECIPES
Yield: 6 servings
RECIPES • APPETIZERS 10
Page 11

Seafood
Scallops on Rosemary Skewers 13
Sesame-Crusted Tuna on Field Greens 14
Ginger Salmon with Baby Bok Choy 15
Snapper en Papillote 12
Parmesan-Crusted Tilapia 13
RECIPES
Shrimp Skewers 15
RECIPES • SEAFOOD 11
Page 12

Snapper en Papillote
PREP TIME: Approximately 30 minutes
COOK TIME: TurboChef : 7 minutes
Conventional : 35 minutes
Like the pu pastry in Salmon en Croute (page 8), the paper
wrapping (papillote) for the sh ensures its moist texture after it’s
cooked. The crab and shrimp in combination with the snapper
create a luxurious main course. This recipe also works well with
grouper, halibut, and sea bass in place of the snapper.
CAJUN CREAM SAUCE
4 tablespoons butter
1 clove garlic, minced
1 tablespoon minced
parsley
2 tablespoons thinly sliced
green onions
1/4 cup minced shallots
1 teaspoon paprika
1 teaspoon salt
1/2 teaspoon cayenne
1/2 teaspoon freshly ground
black pepper
1/4 teaspoon freshly ground
white pepper
1/2 teaspoon dried thyme
1/2 teaspoon dried oregano
6 tablespoons our
1 cup white wine
1-1/2 cups heavy cream
RECIPES
SNAPPER EN PAPILLOTE
SNAPPER EN PAPILLOTE
4 tablespoons butter
6 ounces fresh mushrooms,
sliced (about 2 cups)
6 ounces fresh chanterelle
or shiitake mushrooms,
sliced (about 2 cups)
1/2 cup diced onion
3 cups Cajun Cream Sauce
1 teaspoon salt
1 teaspoon freshly ground
black pepper
6 5-ounce fresh snapper
lets
6 ounces medium sized
shrimp, cooked
6 ounces crab meat, cooked
2 tablespoons chopped
parsley
6 pieces parchment paper
1. Select “Cookbooks” on the touchscreen. Select “Seafood”
followed by “Snapper en Papillote.” Press “Preheat” to begin the
preheat cycle.
2. Melt 4 tablespoons butter in a sauté pan. Add the minced
garlic, parsley, green onions, shallots, and spices. Sauté about 1
minute. Add our and continue to cook for an additional 2
minutes to make a roux.
3. Slowly add 1-1/2 cups water, stirring constantly with a whisk,
until the sauce is thick. Add wine and turn the heat up to bring
the sauce to a boil and reduce the volume by half.
4. Lower the heat slightly, add cream, and continue to reduce until
the sauce coats the back of a spoon, thickly like custard.
5. While the sauce is cooking, melt 4 tablespoons butter in a
sauté pan. Add mushrooms and onions and sauté for 5 to 7
minutes—until onions are transparent and mushrooms are
somewhat soft.
6. Sprinkle salt and pepper onto snapper and set aside. Slice
cooked shrimp in half lengthwise and set aside.
7. Cut a large heart shape—about 12 inches at the widest part
across the top—out of a each piece of parchment paper.
8. Assemble the Snapper en Papillote by placing 1 piece of
snapper on one side of the parchment paper. Place 1/4 cup of
mushroom and onions on top of each snapper. Evenly
distribute 1/2 cup of shrimp and crab on top of mushrooms.
Place 1/2 cup of the Cajun Cream Sauce on top of the shrimp
and crab. Sprinkle with parsley and fold parchment paper in
half to cover the sh. Roll up the sides of the parchment to seal.
9. With a large spatula slide snapper onto a baking sheet and
place in the oven. Press “Start” and bake for 7 minutes.
Yield: 6 servings
Time Saver Tip : If you’re in a hurry, substitute 3 cups prepared
alfredo sauce with 3 tablespoons prepared blackened seasoning
for the Cajun Cream Sauce.
RECIPES • SEAFOOD 12
Page 13

Parmesan-Crusted Tilapia
PREP TIME: Approximately 15 minutes
COOK TIME: TurboChef : 7 minutes
Conventional : 30 minutes
Tilapia is a mild- avored at sh that is successfully farmed in this
country. You can also use ounder or sole for this recipe.
INGREDIENTS
2 medium red onions, thinly
sliced
1/2 cup olive oil
8 small red potatoes, thinly
sliced
1 tablespoon chopped fresh
rosemary
1 teaspoon salt
1/2 teaspoon freshly ground
pepper
4 chanterelle or other
mushrooms
1/2 cup seasoned bread crumbs
1/2 cup grated Parmesan
cheese
6 6-ounce tilapia llets
12 strips roasted red pepper
1 lemon
2 sprigs fresh rosemary
4. On a plate, combine bread crumbs and Parmesan cheese. Dip
both sides of the tilapia llets in the bread crumbs and set
aside.
5. Place the potatoes in six mounds on a lightly oiled sheet pan.
Divide the caramelized onions and roasted red pepper strips
between the 6 potato bundles.
6. Place the tilapia llets, breaded side up, on top of each mound
and place the sheet pan in the oven.
7. Press “Start” and bake for 7 minutes. Remove the sheet pan
from oven. Using a spatula place each serving onto a serving
plate. Squeeze fresh lemon juice over each serving. Garnish
with sautéed mushrooms and rosemary sprigs.
Yield: 6 servings
Scallops on Rosemary Skewers
PREP TIME: Approximately 20 minutes
COOK TIME: TurboChef : 2-1/2 to 4-1/2 minutes
Conventional : 10 to 15 minutes
RECIPES
1. Select “Cookbooks” on the touchscreen. Select “Seafood”
followed by “Parmesan-Crusted Tilapia.” Press “Preheat” to begin
the preheat cycle.
2. On the stove top, caramelize onion with 1/4 cup of olive oil for
10 minutes in a sauté pan. In a separate sauté pan, cook red
potatoes, chopped rosemary, salt, and pepper in 1/4 cup of
olive oil for 5 to 6 minutes, until potatoes are just beginning to
soften.
3. Remove potatoes and in the same pan sauté the mushrooms
until tender, 4 to 5 minutes. Set aside.
PARMESANCRUSTED TILAPIA
Using rosemary stalks as skewers gives these scallops a delightful,
subtle avor. In addition, they create an unusual presentation.
INGREDIENTS
2 medium red onions, thinly
sliced
1/2 cup olive oil
8 small red potatoes, thinly
sliced
1 tablespoon chopped fresh
rosemary
1 teaspoon salt
1/2 teaspoon freshly ground
pepper
4 chanterelle or other
mushrooms
1/2 cup seasoned bread crumbs
1/2 cup grated Parmesan
cheese
6 6-ounce tilapia llets
12 strips roasted red pepper
1 lemon
2 sprigs fresh rosemary
1. Lightly oil a ridged grill pan and place in the oven to heat.
Select “Cookbooks” on the touchscreen. Select “Seafood”
followed by “Scallops on Rosemary Skewers” and the number
of skewers you are cooking—2, 4 or 10. Press “Preheat” to begin
the preheat cycle.
2. In a mixing bowl, combine olive oil, lemon juice, zest, garlic,
shallots, and salt to make the marinade. Place scallops in
marinade and set aside for at least 10 minutes and up to 1
hour.
3. Remove some leaves from the rosemary skewer to make
space for the scallops. Place 2 to 3 marinated scallops onto
each rosemary sprig. Skewer the scallops through the side so
the large round surface is facing out. Grind a small amount of
pepper onto each skewer.
4. Using oven mitts, as the pan will be very hot, remove the grill
pan from oven. Place skewers onto the hot surface of the pan
to sear the outside. Place pan back in the oven.
5. Press “Start” and bake under “Scallops on Rosemary Skewers”
for appropriate length of time—2-1/2 to 4 -1/2 minutes.
RECIPES • SEAFOOD 13
Page 14

6. Remove pan from the oven. Squeeze fresh lemon onto each
skewer before serving.
CILANTRO SOY VINAIGRETTE
Yield: 6 servings as an appetizer or 3 as an entrée
Sesame-Crusted Tuna on
Field Greens
PREP TIME: Approximately 11 minutes
COOK TIME: TurboChef : 4 minutes
Conventional : 7 minutes
This avorful preparation is slightly tropical in taste, but the
delicious results have universal appeal.
INGREDIENTS
14-16 cups assorted eld
greens or your favorite mix
of arugula, radicchio,
mustard greens, mizuna,
frisee, oak leaf, red chard,
and Belgian endive
1 fresh papaya, peeled and
diced into 1-inch pieces
1 fresh mango, peeled and
diced into 1-inch pieces
1/2 red onion, thinly sliced
1 avocado, sliced
1/2 cup snow peas, cut into
thirds
1/4 cup fresh cilantro leaves
2 6 to 7-ounce tuna steaks,
1-1/4 to 1-1/2-inches thick
2 tablespoons toasted sesame
seeds
2 tablespoons black sesame
seeds
2 tablespoons toasted sesame
seed oil
1/2 cup Cilantro Soy Vinaigrette
(see recipe)
3 cup soy sauce
1 tablespoon lemon zest
1 tablespoon grated fresh
ginger
1/4 cup rice wine vinegar
2 tablespoons honey
2/3 cup olive oil
1 tablespoon minced cilantro
Using a blender, add soy sauce, lemon zest, ginger, rice wine
vinegar, and honey in the blender container. Blend 30 seconds.
Slowly drizzle olive oil into the container until blended and
slightly thickened. Add cilantro and stir. Serve on the salad.
RECIPES
1. Lightly oil a ridged grill pan and place in the oven. Select
“Cookbooks” on the touchscreen. Select “Seafood” followed by
“Sesame-Crusted Tuna” and press “Preheat” to begin the preheat
cycle.
2. In a large mixing bowl place eld greens. Place the papaya
(reserving 3 or 4 pieces), mango (also reserving 3 or 4 pieces),
red onion, avocado, snow peas, and cilantro in a mixing bowl.
3. Brush each piece of tuna with sesame oil and press into a
mixture of toasted and black sesame seeds.
4. Using oven mitts, as the grill pan will be very hot, remove
the pan from the oven. Place tuna on the pan and place the
pan back in the oven.
5. Press “Start” and bake for 4 minutes.
6. Toss the eld greens with some of the Cilantro Soy
Vinaigrette. Place greens on a platter and top each salad with
the remaining mango and papaya pieces. When tuna is done,
slice and place along edge of the salad. Drizzle each serving of
tuna with the remaining dressing.
Yield: 2 servings as an entrée or 4 as a side dish
SESAMECRUSTED TUNA ON FIELD GREENS
RECIPES • SEAFOOD 14
Page 15

Ginger Salmon with Baby Bok Choy
Shrimp Skewers
PREP TIME: Approximately 20 minutes
COOK TIME: TurboChef : 7 minutes
Conventional : 20 minutes
The grilled bok choy is a wonderful foil for the Asian- avored
salmon. The marinade penetrates the sh’s esh and highlights its
ne taste.
MARINADE
1/2 cup nely chopped fresh
ginger
grated peel of 2 limes
2 tablespoons fresh lime juice
2 cloves garlic, minced
GINGER SALMON WITH BABY BOK CHOY
4 5 to 6-ounce boneless
salmon lets, about 1-1/4 to
1-1/2 -inch thick
4 heads baby bok choy, about
4 ounces each
2/3 cup rice wine vinegar
2/3 cup soy sauce
1/4 cup toasted sesame oil
6 tablespoons dark brown sugar
2 cups snow peas
2 tablespoons peanut or
canola oil
1. Lightly oil a ridged grill pan. Place it in the oven to heat. Select
“Cookbooks” on the touchscreen. Select “Seafood” followed by
“Ginger Salmon with Baby Bok Choy.” Press “Preheat” to begin
the preheat cycle.
2. Combine all the marinade ingredients in a large bowl. Place
salmon lets in the marinade and set aside for 30 minutes.
3. Bring a saucepan of water to a boil. Add the bok choy and snow
peas and blanch for approximately 1 minute—just enough to
soften slightly and brighten the color. Remove the vegetables
with tongs and plunge into cold water. Hold until needed.
4. Using oven mitts, as the grill pan will be very hot, remove the
pan from the oven. Remove the salmon lets from the
marinade, brush with peanut or canola oil, and place onto the
sizzling hot grill pan. Using tongs place the blanched baby bok
choy and snow peas next to the salmon. Place the pan back in
the oven.
5. Press “Start.” Bake under “Ginger Salmon with Baby Bok Choy”
for 7 minutes—you will have a medium rare piece of salmon,
for more well done sh, use the “Cook More” function. When
salmon, bok choy, and snow peas are cooked, remove from
oven, plate, and serve.
Yield: 4 servings
PREP TIME: Approximately 10 minutes
COOK TIME: TurboChef : 3-1/2 minutes
Conventional : 10 to 15 minutes
These marinated shrimp are a quick and easy preparation. You can
abbreviate the time in the marinade and have a dinner entrée in
15 minutes.
INGREDIENTS
1 pound jumbo shrimp, peeled
with tails on
1/4 cup olive oil
1 tablespoon fresh lemon juice
1 tablespoon Herbs de
Provence
1 teaspoon minced fresh thyme
1 clove garlic, minced
1/2 teaspoon kosher or sea salt
pinch freshly ground pepper
4 lemon wedges
6 bamboo skewers
Herbs de Provence Dipping
Sauce (see recipe below)
1. Select “Cookbooks” on the touchscreen. Select “Seafood”
followed by “Shrimp Skewers.” Press “Preheat” to begin the
preheat cycle.
2. Place shrimp in mixing bowl, add olive oil, lemon juice,
Herbs de Provence, thyme, and garlic to make a marinade. Toss
and set aside. Allow shrimp to marinade at least 10 minutes
and up to 4 hours.
3. Place 3 marinated shrimp onto each skewer —skewering right
above the tail and again toward the top of the shrimp so the
shrimp forms a “C.” Grind a small mount of pepper onto each
skewer and sprinkle with sea salt. Place skewers onto a sheet
pan and place pan in the oven.
4. Press “Start.” Bake under “Shrimp Skewers” for 3-1/2 minutes.
Serve with Herbs de Provence Dipping Sauce.
Yield: 6 servings as an appetizer or 3 as an entrée
HERBS DE PROVENCE DIPPING SAUCE
2 cups mayonnaise
1/4 cup cocktail sauce
2 tablespoons Herbs de
Provence
Combine mayonnaise, cocktail sauce, Herbs de Provence, and
mustard. Refrigerated, this sauce will keep for up to 30 days and is
also good with seafood steaks.
1 tablespoon Dijon mustard
RECIPES
RECIPES • SEAFOOD 15
Page 16

Eggs, Poultry, and Meats
Chicken and Mushroom Wild Rice Bake 19
Lemon-Rosemary Roasted Chicken 20
Quiche Lorraine 17
Strata 17
Roast Turkey 18
Chicken Rollatini 19
Pork Tenderloin with Ginger-Apricot Sauce 23
Châteaubriand Dinner 20
Stuffed Flank Steak 21
Old-Fashioned Meatloaf 22
Rack of Lamb 22
Ciabatta Sandwich 23
RECIPES
RECIPES • EGGS, POULTRY, AND MEAT 16
Page 17

Quiche Lorraine
PREP TIME: Approximately 15 minutes
COOK TIME: TurboChef : 15 to 25 minutes
Conventional : 1 to 1-1/2 hours
Quiche Lorraine is named for the medieval region of western
Europe, where it originated. Lorraine is now a part of eastern
France. The dish is enjoyed throughout France and, indeed,
throughout the world.
Helpful Hint : You may want to extend the shelf in the oven,
put the pan in the oven and pour the batter into the shell to avoid
spilling.
Strata
PREP TIME: Approximately 10 minutes
COOK TIME: TurboChef : 20 minutes
Conventional : 1 hour
9 x 13/4inch PIE
12 strips bacon
1 cup diced onion
1 9-inch unbaked prepared
pie crust
1-1/2 cups grated Gruyère
cheese
8 eggs
DEEP DISH PIE 10 x 2-inches
14 strips bacon
1-1/4 cups diced onion
2 9-inch unbaked prepared
pie crusts
1-3/4 cups grated Gruyère
cheese
12 eggs
3/4 cup heavy cream
1/8 teaspoon grated nutmeg
1/4 teaspoon freshly ground
white pepper
1/4 teaspoon salt
1 cup heavy cream
1/4 teaspoon grated nutmeg
1/2 teaspoon freshly ground
white pepper
1/2 teaspoon salt
1. Select “Cookbooks” on the touchscreen. Select “Eggs, Poultry &
Meats” followed by “Quiche Lorraine.” Select “9-Inch” or
“Deep-Dish” and press “Preheat” to begin the preheat cycle.
2. In a sauté pan, cook bacon strips until crisp. Remove and dice.
3. Reserve about 1 tablespoon of the bacon drippings. Add the
onions and sauté for about 10 minutes.
4. Roll out the pie crust into a 10-inch diameter and form into
a 9 x 1-1/4 -inch metal pie tin. If using the deep-dish pan, roll
two pie crusts together to a 13-inch diameter circle and form
into a 10 x 2-inch pie pan. Place bacon, then onions, then
cheese into the pie crust.
5. In a mixing bowl, using an electric mixer, beat the eggs,
cream, and spices until frothy and volume increases. Pour over
the bacon, onions, and cheese. Place pan in the oven carefully
as it will be very full.
6. Press “Start” and bake under “Quiche Lorraine” for 15 minutes
(9-inch) to 25 minutes (deep-dish). While cooking, the center of
the quiche should pu up and brown on top and the crust
should turn a nice golden brown.
7. When cooking is complete, insert a knife or toothpick into
the quiche’s center to check for doneness —it should come out
clean. If needed, use the “Cook More” function to add
additional cook time.
Yield: 6 to 8 servings
Sunday brunch is easy with these make-ahead stratas. Don’t limit
your stratas to Sunday or to brunch—they sometimes hit the spot
for supper or lunch, too. With these three variations, you’ll look for
meals at which to serve a strata.
INGREDIENTS
8 cups 1-inch cubes sour
dough bread
1 recipe strata ingredients
(see below)
2 cups cheese (see individual
recipes)
6 eggs
BACON AND SWISS STRATA
1 cup chopped green onion
2 cups diced bacon
HAM AND CHEESE STRATA
1 cup diced fresh red bell
pepper
1/2 cup chopped green onions
SPINACH AND ONION STRATA
1-1/2 cups diced onion
20 ounces frozen spinach,
thawed and well drained
1 quart milk
1 teaspoon Dijon mustard
1/2 teaspoon salt
1/2 teaspoon freshly grated
white pepper
1/8 teaspoon grated nutmeg
1/4 cup minced parsley
2 cups grated Gruyère cheese
2 cups 1/2-inch cubes ham
2 cups grated sharp cheddar
cheese
1 14-1/2-ounce can diced
tomatoes, well drained
2 cups grated Gruyère cheese
1. Place half of the cubed bread in the bottom of a greased (9 x
13-inch) ceramic or Pyrex dish.
2. Mix together the ingredients listed under the speci c strata
being made and sprinkle on top of the bread cubes. (For the
Spinach & Onion Strata, sauté the onions for about 15 minutes
or until they turn golden brown. Top bread cubes with onions
and spinach.)
3. Sprinkle with cheese and top with remaining bread cubes. (For
the Spinach & Onion Strata, also top with diced tomatoes.)
4. Whisk together eggs, milk, mustard, salt, pepper, nutmeg, and
parsley. Pour batter over bread mixture. Cover with plastic wrap
and refrigerate at least 4 hours or up to 12 hours.
5. To cook the strata, select “Cookbooks” on the touchscreen.
Select “Eggs, Poultry & Meats ” followed by “Strata.” Press
RECIPES
RECIPES • EGGS, POULTRY, AND MEAT 17
Page 18

“Preheat” to begin the preheat cycle.
6. Once the preheating cycle is complete, remove plastic wrap
from the dish and place in the oven. Press “Start” and bake
under “Strata” for 20 minutes.
Yield: 8 to 10 servings
Roast Turkey
PREP TIME: Approximately 10 minutes
COOK TIME: TurboChef : 42 minutes
Conventional : 4 hours
Turkey is meant for a TurboChef oven—the results are just
amazing. You don’t need to baste the turkey because it is not in the
oven long enough to dry out the white meat. The turkey will be
moist with a crisp golden brown skin. It can almost be considered
a “last-minute meal.”
INGREDIENTS
RECIPES
1 11 to 12-pound turkey
1-1/2 fresh lemons
5 to 6 sprigs fresh rosemary
1 tablespoon olive oil
1 teaspoon kosher salt
1 teaspoon cracked black
pepper
1. Set oven rack in the middle position. Select “Cookbooks” on the
touchscreen. Select “Eggs, Poultry & Meats” followed by “Roast
Turkey.” Press “Preheat” to begin the preheat cycle.
2. Empty and rinse the turkey’s cavity. Use a paper towel to pat
dry. Tuck the wings under so the tips fold in.
3. Quarter the lemons and place them in the cavity.
4. Surround the lemons with whole sprigs of rosemary and tie the
legs together loosely. Rub olive oil over top of turkey. Sprinkle
with kosher salt and cracked black pepper.
5. Place turkey on a rack in a roasting pan. Place in the oven and
press “Start.” Bake under “Turkey” for 42 minutes. Turkey is done
when thermometer reads at least 165ºF in the thigh and juices
run clear. If necessary, use the “Cook More” function at the end
of the cook cycle to add a few more minutes to the cook time.
Let turkey rest 10 to 20 minutes before serving.
Yield: 8 to 10 servings
1. Melt butter in a saucepan. Add our and stir constantly until
TURKEY GRAVY
2 tablespoons unsalted butter
1 tablespoon our
2 to 3 cups turkey drippings
salt
freshly ground black pepper
ROAST TURKEY
3. Whisk gravy until smooth. Adjust thickness by adding
additional drippings or reduce by simmering.
4. Season with salt and pepper to taste.
Helpful Hints : The TurboChef 30” can handle up to a
24 pound turkey. To cook a turkey up to 24 pounds, select “Cook
Mode” then “Roast” then “Chicken & Fowl” followed by “Turkey,”
“Whole,” and “Unstu ed.” Select the turkey’s weight. The oven
automatically adjusts the cook time for the selected weight. If the
turkey is over 20 pounds, you will want to use the lower oven rack
position. You will also have the option to cook a stu ed turkey.
mixed. Heat slowly until bubbly, for about 5 minutes.
2. Pour turkey drippings into a measuring cup. Pour o fat that
oats to the top and use only the “juice” from the drippings.
You may also substitute chicken broth. Mixing constantly with
a wire whisk, slowly add turkey drippings to the butter and
our mix.
RECIPES • EGGS, POULTRY, AND MEAT 18
Page 19

Chicken and Mushroom
Wild Rice Bake
PREP TIME: Approximately 40 minutes
COOK TIME: TurboChef : 17 minutes
Conventional : 1 hour
Wild rice is native to the Great Lakes region of the United States. It
is only distantly related to white rice. Though no longer wild, it
still has a complex taste and texture that more than justi es its
price.
INGREDIENTS
1 cup uncooked wild rice
2 ounces shiitake mushrooms,
thinly sliced (about 1 cup)
2 ounces baby bella
mushrooms, thinly sliced
(about 1 cup)
8 tablespoons (1 stick) butter
1/4 cup our
1/2 cup chicken stock
1/2 cup half-and-half or
light cream
1/2 teaspoon salt
1 cup sour cream
1/2 cup dry sherry
4 4 to 5-ounce boneless,
skinless chicken breasts
1/2 cup grated Parmesan
cheese
1. In a saucepan, bring 4 cups of water to a boil. Add wild rice and
reduce heat to a simmer. Cover and cook 30 to 40 minutes—
until kernels open and are tender but not mushy.
2. Select “Cookbooks” on the touchscreen. Select “Eggs, Poultry &
Meats” followed by “Chicken and Mushroom Wild Rice Bake.”
Press “Preheat” to begin the preheat cycle.
3. While rice is cooking, sauté the mushrooms in butter until
tender. Add our and continue to cook until thick and bubbly.
Slowly add the chicken stock, stirring with a whisk until thick
and smooth. Slowly add the half-and-half and salt. Continue to
stir until thick. Cool the mushroom sauce and add the sour
cream and sherry.
4. Spread cooked wild rice in a buttered ceramic or Pyrex dish (11
x 7 x 2-inch). Spread half of the mushroom sauce over the rice.
5. Place chicken breasts on top of the sauced rice, and spread
remaining half of mushroom sauce over the chicken. Top with
Parmesan cheese.
6. Place dish in the oven and press “Start.” Bake for 17 minutes.
When done, cheese should be golden brown and the chicken
cooked throughout—at least 165°F.
Yield: 4 servings
CHICKEN AND MUSHROOM WILD RICE BAKE
Chicken Rollatini
PREP TIME: Approximately 15 minutes
COOK TIME: TurboChef : 8 minutes
Conventional : 1 hour
Created with family dinner in mind, this dish is great when
accompanied by the Italian Zucchini Casserole (page 26) and Garlic
Bread (page 28). Use the bottom oven as a warming drawer to
keep the chicken warm while you prepare the sides.
1. Select “Cookbooks” on the touchscreen. Select “Eggs, Poultry &
Meats” followed by “Chicken Rollatini.” Press “Preheat” to begin
INGREDIENTS
4 6-ounce boneless, skinless
chicken breasts
1 cup bread crumbs
1/3 cup grated Parmesan
cheese
4 slices prosciutto or Black
Forest ham, sliced thin
8 leaves fresh basil
1/4 ounce sun dried tomato
paste
4 ounces Manchego cheese,
cut into 4 2 x 1/4-inch sticks
RECIPES
Time Saver Tip : Prepare a day ahead and store in the refrigerator
until ready to cook. If refrigerated, use the “Cook More” function at
the end of the cook cycle to
add a few more minutes to the cook time.
the preheat cycle.
2. Flatten the chicken breasts to an even 3/8-inch thickness.
3. On a sheet pan, mix the bread crumbs and Parmesan. Press
chicken into the breading, making sure to coat both sides.
4. Top breaded chicken with a slice of ham and two fresh basil
leaves. On top of the basil leaves, squeeze a line of sun dried
tomato paste down the center of the chicken and top with a
piece of Manchego cheese.
5. Roll chicken around the lling like a pinwheel. Top with a
sprinkle of Parmesan and place, seam side down, on an oiled
sheet pan.
RECIPES • EGGS, POULTRY, AND MEAT 19
Page 20

1. Bread both sides of the
chicken with the crumb/
Parmesan mixture.
2. Place ham, basil, tomato,
and cheese in center of
chicken.
3. Roll the chicken around
the lling.
4. Place pan in the oven and press “Start.” Bake for 21 minutes. The
chicken is done when thermometer reads at least 165ºF in the
thigh and juices run clear. If necessary, use the “Cook More”
function at the end of the cook cycle to add a few more
minutes to the cook time.
Yield: 6 servings
Time Saver Tip : If you are in a hurry and don’t have time to wait,
or you just want a di erent avor, try a seasoning rub. Made ahead
of time, this rub will last up to a week in the refrigerator. To
make the rub, combine all ingredients listed below.
6. Place the pan in the oven and press “Start.” Bake under “Chicken
Rollatini” for 8 minutes.
Yield: 4 servings
Lemon-Rosemary Roasted Chicken
PREP TIME: Approximately 5 to 15 minutes
COOK TIME: TurboChef : 21 minutes
Conventional : 1 to 1-1/2 hours
Roast chicken is a favorite comfort food. The lemon-rosemary
seasoning gives the chicken a little kick.
1. To make the marinade combine olive oil, lemon juice, zest,
garlic, shallots, and rosemary in a mixing bowl large enough to
hold the chicken or in a Ziploc bag. Empty and rinse the
INGREDIENTS
1/2 cup olive oil
2 tablespoons fresh lemon
juice (about 1/2 lemon)
2 teaspoons grated lemon zest
2 cloves garlic, minced
3 tablespoons minced shallots
3 teaspoons chopped fresh
rosemary
1 4-1/2 to 5-pound whole
chicken
kosher salt
freshly ground black pepper
Helpful Hint : Use this same marinade or seasoning rub on
chicken portions. To cook chicken portions—bone-in, skin-on or
boneless, skinless—Select “Cook Mode” then “Roast” then “Chicken
RUB INGREDIENTS
2 tablespoons olive oil
1 tablespoon paprika
1 tablespoon ground
coriander seed
1/2 teaspoon dried thyme
2 teaspoons kosher salt
1 teaspoon freshly ground
black pepper
2 cloves garlic, minced
1 tablespoon fresh lemon juice
& Fowl” then “Chicken”. Select either “Bone-In Portions” or
“Boneless” and the number of portions you are cooking. If you
select “Cut Whole” under “Bone-In Portions”, you will either select
“Breaded” or “Unbreaded”.
Châteaubriand Dinner
PREP TIME: Approximately 15 minutes
COOK TIME: TurboChef : 20 minutes
Conventional : 1 hour
Châteaubriand is the center of the tenderloin 5 or 6 inches long.
It’s a tender and delicious cut that is showcased beautifully in this
recipe.
INGREDIENTS
5 tablespoons olive oil
1 beef tenderloin, 2-3 pounds,
center cut
2 teaspoons kosher salt
2 teaspoons cracked black
pepper
2 teaspoons minced garlic
1 pound carrots
1 pound small red potatoes
1/2 pound pearl onions
RECIPES
chicken’s cavity. Place chicken in the marinade and let set at
least 10 minutes and up to one hour.
2. Select “Cookbooks” on the touchscreen. Select “Eggs, Poultry &
Meats” followed by “Lemon-Rosemary Roasted Chicken.” Press
“Preheat” to begin the preheat cycle.
3. Remove chicken from the marinade and place in a small
roasting pan. Grind a small amount of pepper onto the chicken
and sprinkle with a pinch of kosher salt.
1. Select “Cookbooks” on the touchscreen
. Select “Eggs, Poultry &
Meats” followed by “Châteaubriand Dinner.” Press “Preheat” to
begin the preheat cycle.
2. Rub 1 tablespoon olive oil over the top of the beef. Sprinkle
with 1 teaspoon kosher salt, 1 teaspoon black pepper, and the
minced garlic. Place in a 10 x 14 x 2-inch ceramic dish.
3. Peel and cut carrots diagonally into 1-inch thick pieces. Cut
potatoes into 1-inch thick pieces, and peel the pearl onions.
RECIPES • EGGS, POULTRY, AND MEAT 20
Page 21

CHÂTEAUBRIAND DINNER
4. Toss onions, carrots, and potatoes with remaining black
pepper, salt, garlic, and 4 tablespoons olive oil. To ensure even
roasting, spread the seasoned vegetables in a single layer
around the beef.
5. Place dish in the preheated oven. Press “Start” and bake
for 20 minutes. This setting produces a medium-rare piece of
beef. The onions, potatoes, and carrots will get roasted and
slightly browned.
6. If serving a dinner party, use the lower preheated oven as a
warming drawer and allow beef to rest at least 5 minutes before
cutting and serving. While the meat is resting, use the upper
oven to bake or warm your favorite bread.
3. Roll the ank steak like a pinwheel and tie string around the
rolled up steak to secure it in place.
4. Place the beef, seam side down, in a ceramic oval dish and
spread with olive oil and a little more salt and pepper.
5. Place dish in the oven and press “Start.” Bake under “Stu ed
Flank Steak” for 9 minutes (medium-rare). When done, the
outside of the beef will be roasted and dark with a tender and
moist inside. For well-done meat, use the “Cook More” function
to add additional cook time.
6. Allow beef to rest at least 5 minutes before cutting. Remove
string and cut into pinwheel pieces.
Yield: 4 servings
RECIPES
Helpful Hints : For the roasted red pepper, you can make your
own or use jarred store-bought ones.
1. Scatter the spinach, red
pepper, cheese, salt, and
pepper over the meat.
2. Staring at the short end, roll
the meat into a cylinder.
3. Secure the lling with string
tied around the roll in two or
three places.
Yield: 6 to 8 servings
Stuffed Flank Steak
PREP TIME: Approximately 5 minutes
COOK TIME: TurboChef : 9 minutes
Conventional : 35 minutes
Flank steak is a delicious, lean beef. Stu ed Portobello Mushrooms
(page 7) make a great accompaniment.
INGREDIENTS
1 2 to 2-1/2-pound ank steak
1 ounce fresh baby spinach
1/2 cup roasted red pepper
strips (see Helpful Hints)
1 ounce blue cheese
1. Select “Cookbooks” on the touchscreen. Select “Eggs, Poultry &
Meats” followed by “Stu ed Flank Steak.” Press “Preheat” to
begin the preheat cycle.
2. Place steak on a clean cutting board or counter and top with
fresh baby spinach, roasted red pepper, and cheese. Sprinkle
over a teaspoon of salt and a few grinds of the pepper mill.
1-1/2 teaspoons kosher salt
1-1/2 teaspoons cracked black
pepper
1 tablespoon extra virgin olive
oil
STUFFED FLANK STEAK
RECIPES • EGGS, POULTRY, AND MEAT 21
Page 22

Old-Fashioned Meatloaf
PREP TIME: Approximately 20 minutes
COOK TIME: TurboChef : 33 minutes
Conventional : 1 hour, 15 minutes
Meatloaf is the ultimate comfort food. This one’s a classic, but you
can vary it with ground poultry or just one meat.
INGREDIENTS
2 eggs
1/3 cup crushed tomatoes
1/2 cup bread crumbs
1-1/2 teaspoons dried thyme
1/2 teaspoon ground black
pepper
1 teaspoon kosher salt
1 pound ground beef, 80% fat
or less
1/2 pound ground veal
1/2 pound ground pork
1/2 cup chopped fresh parsley
1/3 cup coarsely cut onion
3-4 slices of bacon, cut in half
2. Using a sharp knife, remove most of the fat cap and silver skin
from the lamb. Leave about 1/8
-
inch of fat on the eye of the
lamb but scrape o any fat from the bones; they should be
clean.
3. Mix together the mustard, soy sauce, garlic, and mint. Brush a
light coating over the lamb, making sure not to cover the
bones. Let the lamb marinate for up to 30 minutes at room
temperature. Place the racks of lamb into a ceramic or Pyrex
dish and place in the oven.
4. Press “Start” and bake under “Rack of Lamb” for 7 minutes.
Remove from the oven and let rest for 4 to 5 minutes. Cut racks
between every other bone to make 2 chop portions. Garnish
with fresh mint or rosemary.
Yield: 6 servings
RECIPES
1. Select “Cookbooks” on the touchscreen. Select “Eggs, Poultry &
Meats” followed by “Old-Fashioned Meatloaf.” Press “Preheat” to
begin the preheat cycle.
2. In a medium bowl, combine eggs, crushed tomatoes, bread
crumbs, thyme, pepper, and salt. Add ground meats, parsley,
and chopped onion. Using clean hands, mix until well blended.
3. Spread the meatloaf into an ungreased metal loaf pan
(9 x 5 x 3-inch). Drape the bacon over the meatloaf and place
pan in the oven.
4. Press “Start” and bake for 33 minutes. When complete, the
bacon should be crisp and the beef cooked throughout but still
moist. Use the “Cook More” function at the end of the cook
cycle to add additional time and produce a more done
meatloaf. Allow meatloaf to rest for 5 minutes before cutting.
Yield: 5 to 6 servings
Rack of Lamb
PREP TIME: Approximately 5 minutes
COOK TIME: TurboChef : 7 minutes
Conventional : 30 minutes
This elegant and simple main course is great for entertaining.
We have borrowed some tips from Anna Pump, the talented
owner of Loaves & Fishes, a shop in Bridgehampton, on Long
Island, that o ers excellent take-out food and catering.
INGREDIENTS
RACK OF LAMB
2 racks of lamb, 8 bones,
french-cut (about 3 pounds )
1/4 cup Dijon mustard
1 tablespoon soy sauce
2 cloves garlic, minced
1/4 cup chopped fresh mint
leaves or rosemary
1. Select “Cookbooks” on the touchscreen. Select “Eggs, Poultry &
Meats” followed by “Rack of Lamb.” Press “Preheat” to begin the
preheat cycle.
RECIPES • EGGS, POULTRY, AND MEAT 22
Page 23

Pork Tenderloin
with Ginger-Apricot Glaze
PREP TIME: Approximately 5 minutes
COOK TIME: TurboChef : 9 minutes
Conventional : 45 minutes
The sweet-tart contrast of the glaze sets this dish apart from
most other pork tenderloin recipes. It’s an unexpected and most
welcome taste surprise.
Ciabatta Sandwich
PREP TIME: Approximately 1 minute
COOK TIME: TurboChef : 1 minute, 15 seconds
Conventional : 10 to 15 minutes
Ciabatta is an Italian bread (the word means “slipper”), with a ne
crisp crust, large holes, and a tender interior texture. It’s relatively
at and shapeless, and perfect for sandwiches.
EACH SANDWICH
INGREDIENTS
1-1/2 teaspoons olive oil
1/4 teaspoon freshly ground
white pepper
GLAZE
1/2 cup apricot jam
1 tablespoon Dijon mustard
2 cloves garlic, minced
1 pork tenderloin, 16-18 ounces
1 tablespoon minced fresh
ginger
1 tablespoon soy sauce
1. Select “Cookbooks” on the touchscreen. Select “Eggs, Poultry &
Meats” followed by “Pork Tenderloin with Ginger-Apricot Glaze.”
Press “Preheat” to begin the preheat cycle.
2. Rub olive oil, garlic, and white pepper over the top of the
tenderloin. Place pork in a ceramic or Pyrex dish and put the
dish in the oven. Press “Start.” Roast under “Pork Tenderloin with
Ginger-Apricot Glaze” for 9 minutes.
3. Combine the glaze ingredients.
4. At 80% of the cooking time, when the signal goes o , spread
glaze over the pork loin and put it back in the oven for about 2
minutes. Pork should be seared and brown on the outside and
tender and cooked throughout on the inside. Serve with Baked
Acorn Squash (page 29) or your favorite side dishes.
Yield: 4 servings
1 3 x 5-inch ciabatta roll or
bread
olive oil
1 ounce sliced Genoa salami
2 ounces sliced Black Forest
ham
2 slices provolone cheese
PARMESAN MAYO
1/2 cup mayonnaise 2 tablespoons grated Parmesan
2 tablespoons Parmesan Mayo
(see recipe below)
2 leaves fresh basil
1 leaf of leaf lettuce
2 slices fresh tomato
cheese
1. Select “Cookbooks” on the touchscreen. Select “Eggs, Poultry &
Meats” followed by “Ciabatta Sandwich” and press “Preheat” to
begin the preheat cycle.
2. Cut roll crosswise and place open-faced on a baking sheet.
3. Spread top piece of bread with olive oil. On the bottom piece,
place salami, ham, and provolone cheese. Make sure to cover
all the meat with cheese. Build a second sandwich the same
way.
4. Place pan with sandwiches in the oven and press “Start.” Cook
under “Ciabatta Sandwich” for 1-1/4 minutes. When done, the
bread should be toasted and the cheese melted.
5. Remove sandwiches from the oven. Spread Parmesan Mayo
evenly over the toasted bread. Place lettuce, basil, and tomato
on top of melted cheese. Close sandwich and cut in half on the
diagonal to serve. Serve with your favorite soup for a light
supper or with your favorite chips as a lunch.
RECIPES
Parmesan Mayo :
Combine mayonnaise and Parmesan cheese. Parmesan Mayo goes
well with many sandwiches, so you might consider making a
batch to keep in the refrigerator. It will keep for up to 30 days.
Yield: 2 sandwiches
Helpful Hint : If you cannot nd sandwich size rolls of ciabatta,
use a whole loaf of ciabatta bread and cut it into thirds to create
the right size bread for your sandwich.
RECIPES • EGGS, POULTRY, AND MEAT 23
Page 24

Vegetables and Sides
Roasted Red Pepper and Asparagus 27
Steamed Asparagus 25
Green Beans Amandine 25
Corn Poblano Casserole 26
Italian Zucchini Casserole 26
Sweet Potato Soufflé 27
Oven-Roasted Rosemary Potatoes 28
Scalloped Potatoes 28
Garlic Bread 28
Herbs de Provence Biscuits 29
Baked Acorn Squash 29
Creamed Spinach Gratin 30
RECIPES
RECIPES • VEGETABLES AND SIDES 24
Page 25

Steamed Asparagus
PREP TIME: Approximately 1 minutes
COOK TIME: TurboChef : 45 seconds
Conventional : 7 to 10 minutes
This quick preparation makes it a perfect dish for entertaining. Put
them in the oven when your guests sit
down and serve perfect asparagus every time. You’ll be hooked on
this method the rst time you try it.
INGREDIENTS
20 fresh asparagus spears,
pencil thin preferred
2 tablespoons butter (optional)
1. Select “Cookbooks” on the touchscreen. Select “Vegetables &
Sides” followed by “Asparagus.” Press “Preheat” to begin the
preheat cycle.
2. Remove the bottom woody part of the asparagus stalks by
bending the stalks and allowing them to break naturally where
the woody and more tender parts meet (the natural break
point)—usually about 1-1/2 to 2 inches from the bottom of the
stalk.
3. Rinse asparagus and wrap in a wet paper towel. Use a piece of
parchment paper to wrap around the wet paper towel/
asparagus bundle. This protects the vegetable from the oven’s
heat and provides steam. Place the asparagus package in the
oven.
4. Press “Start” and bake under “Asparagus” for 45 seconds. Take
asparagus out of the oven and remove the parchment paper
and paper towel. Top with butter and salt or Herbs de Provence
Herbs de Provence Butter
(page 29) (optional)
Butter. For softer vegetables, use the “Cook More” function to
add additional cook time.
Yield: 4 to 5 servings
Chef’s Suggestion : Serve your asparagus at room temperature
with the Lemon and Garlic Sauce below.
LEMON AND GARLIC SAUCE
1 tablespoon fresh lemon juice
1 teaspoon sesame oil
1 tablespoon soy sauce
1 clove garlic, minced
1 tablespoon toasted or black
sesame seeds
Combine the lemon juice, sesame oil, soy sauce, and garlic. Pour
over the asparagus and sprinkle with sesame seeds.
Green Beans Amandine
PREP TIME: Approximately 2 minutes
COOK TIME: TurboChef : 6 minutes
Conventional : 20 minutes
The familiar green bean contains immature seeds, which we eat
along with the pod. This bean is enormously versatile and
responds well to a myriad of cooking techniques. This one is a
classic.
INGREDIENTS
2 pounds fresh green beans
2 tablespoons chicken stock or
water
1/2 teaspoon salt (optional)
2 tablespoons butter
1/2 cup chopped almonds
RECIPES
STEAMED ASPARAGUS
1. Select “Cookbooks” on the touchscreen. Select “Vegetables &
Sides” followed by “Green Beans Amandine.” Press “Preheat” to
begin the preheat cycle.
2. Top and tail the beans after rinsing them. Place beans in a
covered casserole dish (7 x 9 x 2-inch), add stock or water, and
butter, cut into bits.
3. Place dish in the oven and press “Start.” Bake under “Green
Beans Amandine” for 6 minutes. Remove from the oven and top
with the chopped almonds.
Yield: 6 servings
RECIPES • VEGETABLES AND SIDES 25
Page 26

Corn Poblano Casserole
Italian Zucchini Casserole
PREP TIME: Approximately 20 minutes
COOK TIME: TurboChef : 11 minutes
Conventional : 1 hour
This delicious dish is a treat, summer or winter, and it can be made
with fresh or frozen corn.
INGREDIENTS
1/2 cup diced poblano peppers
1/4 cup diced onion
8 tablespoons (1 stick)
unsalted butter
2 cups corn, frozen and thawed
or cut from the cob
3/4 cup yellow corn meal
1/4 cup our
1/2 cup bread crumbs
1/4 cup sugar
1 tablespoon baking powder
1/2 cup corn syrup
2 eggs
1 cup half and-half or light
cream
1/2 teaspoon salt
1/2 teaspoon freshly ground
black pepper
1. Select “Cookbooks” on the touchscreen. Select “Vegetables &
Sides” followed by “Corn Poblano Casserole.” Press “Preheat” to
begin the preheat cycle.
2. Sauté poblano peppers and onions in butter for 5 minutes or
until onions are transparent. Add corn and continue to sauté
for an additional 2 minutes. Remove from heat and allow to
cool.
3. Combine all the remaining ingredients in a large bowl and stir
until blended. Add sautéed vegetables.
4. Pour mixture into an ovenproof ceramic or Pyrex casserole dish
(2-1/2 x 7 x 11-inch).
5. Place casserole in the oven and press “Start.” Bake under “Corn
Poblano Casserole” for 11 minutes. When cooked, the casserole
should be browned on top, and when a knife is inserted in the
center, it should come out clean.
Yield: 6 to 8 servings
PREP TIME: Approximately 15 minutes
COOK TIME: TurboChef : 9 minutes
Conventional : 1 hour
Zucchini is a thin-skinned summer squash whose culinary uses
are almost in nite. They are best small and young, unblemished,
without dents and soft spots. This recipe highlights zucchini’s
versatility and avor.
INGREDIENTS
2 tablespoons olive oil
3 cups julienned onion
2 cloves fresh garlic, minced
1 pound zucchini, cut into
1/4-inch thick medallions
1 pound yellow squash, cut into
1/4-inch thick medallions
1 pound tomatoes, seeded and
cut into large pieces or
1 28-ounce can diced
tomatoes, drained
2 tablespoons chopped basil
2 teaspoons salt
1 tablespoon dried oregano
1 teaspoon chopped dried
rosemary
1/4 cup bread crumbs
1/2 cup grated Parmesan
cheese
1/2 cup grated cheddar cheese
1. Select “Cookbooks” on the touchscreen. Select “Vegetables &
Sides” followed by “Italian Zucchini Casserole.” Press “Preheat” to
begin the preheat cycle.
2. Heat the oil in a large sauté pan over medium to high heat.
Stirring, sauté the onion and garlic until onions are transparent.
Add the zucchini and yellow squash. Continue to sauté for 5 to
7 minutes, until zucchini begins to soften but is not fully
cooked. Add the drained tomatoes and spices; cook, stirring, an
additional minute.
3. Remove the zucchini with a slotted spoon, leaving the juices in
the sauté pan, and place half in a 3 x 8 x 11-inch oval casserole
dish. Sprinkle bread crumbs and half of the Parmesan cheese
over the zucchini mix. Place the other half of zucchini over the
bread crumbs—again making sure to drain o any juices. Top
the casserole with cheddar and the remaining Parmesan
cheese.
4. Place the casserole in the oven and press “Start.” Bake under
“Italian Zucchini Casserole” for 9 minutes. When cooked, the
cheese on top of the casserole will be nicely browned and the
inside will be hot and bubbling around the edges.
RECIPES
Yield: 6 to 8 servings
RECIPES • VEGETABLES AND SIDES 26
Page 27

Roasted Red Pepper and Asparagus
Sweet Potato Soufflé
PREP TIME: Approximately 2 minutes
COOK TIME: TurboChef : 2 minutes
Conventional : 15 minutes
Roasting vegetables is a great way to enhance avor and texture.
In this recipe, before you can say “abracadabra,” the vegetables are
done.
INGREDIENTS
20 fresh asparagus spears,
pencil thin preferred
1 fresh red pepper, seeded
and sliced
2 tablespoons olive oil
1 teaspoon kosher salt
1/2 teaspoon freshly ground
black pepper (optional)
1. Lightly coat a ridged grill pan with olive oil and place in the
oven. Select “Cookbooks” on the touchscreen. Select
“Vegetables & Sides” followed by “Roasted Red Pepper and
Asparagus.” Press “Preheat” to begin the preheat cycle.
2. Remove the bottom woody part of the asparagus stalks by
bending the stalks and allowing them to break naturally where
the woody and more tender parts meet (the natural break
point)—usually about 1-1/2 to 2 inches from the bottom of the
stalk. Rinse asparagus and cut each into 2 to 3 pieces.
3. Remove seeds and stem from the red pepper and cut into
strips, about 2 inches long and 1/2-inch wide.
4. Toss asparagus and red pepper in oil and seasonings. Remove
the grill pan from the oven (use oven mitts, the pan will be hot)
and place the seasoned vegetables on the pan.
5. Place the pan back into the oven and press “Start.”
Bake under “Roasted Red Pepper and Asparagus” for
2 minutes. Remove the pan from the oven and serve
immediately.
Yield: 4 to 5 servings
Chef’s Suggestion : Try di erent vegetables. Cauli ower,
broccoli, turnips, parsnips, and carrots are delicious and healthy.
Simply drizzle with some olive oil and season to taste.
PREP TIME: Approximately 15 minutes
COOK TIME: TurboChef : 6 minutes
Conventional : 35 to 45 minutes
This recipe makes (8) 6-ounce individual sou és, which makes for
an elegant presentation. If you prefer a one-dish family-style
preparation, you can use a casserole dish.
INGREDIENTS
4 sweet potatoes (about
12 ounces each)
1 cup sugar
1/2 teaspoon salt
2 eggs, beaten
TOPPING
1 cup brown sugar
1/4
cup our
4 tablespoons unsalted butter,
at room temperature
1/2 cup milk (whole or 2%)
1 teaspoon vanilla extract
1 cup chopped pecans
4 tablespoons unsalted butter
1. Select “Cookbooks” on the touchscreen. Select “Vegetables &
Sides” followed by “Baked Sweet Potatoes” and the number of
potatoes being cooked (“4”). Press “Preheat” to begin the
preheat cycle.
2. Rinse and clean the potatoes. Place them directly on the
oven rack. Press “Start” and bake under “Baked Sweet Potatoes”
for 10 minutes or until fully cooked.
3. Prepare the topping while the sweet potatoes are baking.
Combine all topping ingredients in a medium sized bowl. Mix
with a fork until the topping resembles coarse crumbs.
4. Remove potatoes from the oven and allow to cool just long
enough to be able to handle. Remove the skins and mash the
potatoes—you’ll need 3 cups of mashed sweet potatoes for the
sou é.
5. Still under “Cookbooks” on the touchscreen, select “Vegetables
& Sides” followed by “Sweet Potato Sou é.” Press “Preheat” to
begin the preheat cycle.
6. In a large bowl, mix together 3 cups of mashed sweet potatoes,
SWEET POTATO SOUFFLÉ
RECIPES
RECIPES • VEGETABLES AND SIDES 27
Page 28

sugar, salt, eggs, butter, milk, and vanilla. Set aside.
7. Butter the bottom of (8) 6-ounce ramekins. Sprinkle sugar on
the bottom and sides of each dish. This creates a “sugar crust”
on the inside of the sou é dish and allows the sou é to rise
properly.
8. Fill each sou é ramekin about 7/8 full with the sweet potato
mixture. Top with 2 tablespoons of the topping.
9. Place the sou és in the oven directly on the rack and press
“Start.” Bake under “Sweet Potato Sou é” for 6 minutes. When
done, sou és should be crispy on top— like a pecan praline—
with a hot and moist interior.
Scalloped Potatoes
PREP TIME: Approximately 15 minutes
COOK TIME: TurboChef : 20 minutes
Conventional : 1-1/2 hours
Scalloped potatoes are an American variation on the French
gratin. No matter what you call them, most people would rather
eat this accompaniment than the food it accompanies.
INGREDIENTS
Yield: 8 servings
Oven-Roasted Rosemary Potatoes
PREP TIME: Approximately 5 minutes
COOK TIME: TurboChef : 6 minutes
Conventional : 1 hour
Oven-roasted potatoes are a family favorite. In fact, potatoes of all
kinds and preparations are probably America’s favorite vegetable.
INGREDIENTS
2-1/2 pounds small red
potatoes, cut in squares
1/4 cup olive oil
1 to 2 teaspoons minced garlic
1. Select “Cookbooks” on the touchscreen. Select “Vegetables &
Sides” followed by “Oven-Roasted Rosemary Potatoes.” Press
“Preheat” to begin the preheat cycle.
2. Place potatoes on a sheet pan and drizzle with olive oil.
Sprinkle the garlic, salt, pepper, and rosemary over the
potatoes.
3. Place pan in the oven and press “Start.” Bake under “OvenRoasted Rosemary Potatoes” for 6 minutes. Potatoes should be
browned on top and soft in the center.
1/2 teaspoons kosher salt
1/2 to 1 teaspoon cracked
black pepper
1 tablespoon fresh rosemary
4 tablespoons unsalted butter
4 potatoes (about 12 ounces
each), peeled and sliced
1/16-inch thin, with a
mandolin, if you have one
1/2 cup sliced onions
1-1/2 teaspoons salt
1 teaspoon freshly ground
white pepper
1 cup grated Gruyère cheese
2 cups heavy cream
1. Select “Cookbooks” on the touchscreen. Select “Vegetables &
Sides” followed by “Scalloped Potatoes” and press “Preheat” to
begin the preheat cycle.
2. In a lightly buttered 9 x 13-inch ceramic or Pyrex dish, evenly
layer the potatoes, remaining butter, salt, pepper, and cheese.
Pour cream over the top and place in the oven.
3. Press “Start.” Bake under “Scalloped Potatoes” for 20 minutes.
Remove from the oven and let set 5 minutes before serving.
Yield: 6 to 8 servings
Garlic Bread
PREP TIME: Approximately 5 minutes
COOK TIME: TurboChef : 2 minutes
Conventional : 10 minutes
Garlic bread, a standby of old-fashioned Italian restaurants, is
divine when homemade and given a little ourish of parsley and
mozzarella.
RECIPES
Yield: 8 to 10 servings
ROASTED GARLIC
1 head of garlic 1 tablespoon olive oil
GARLIC BUTTER
1 tablespoon mashed roasted
garlic
1 tablespoon minced fresh
parsley
GARLIC BREAD
1 loaf French or Italian bread
4 tablespoons garlic butter
RECIPES • VEGETABLES AND SIDES 28
8 tablespoons (1 stick) butter,
softened at room
temperature
2 tablespoons minced fresh
parsley
1/2 cup shredded mozzarella
cheese
Page 29

1. Preheat the lower oven to 300ºF.
2. Cut the top of the entire garlic bulb but leave attached at
the root end.
3. Bake in the preheated oven for about 1 hour, until the garlic
turns golden brown and develops a sweet, nutty taste and
aroma. Set aside.
4. Select “Cookbooks” on the touchscreen. Select “Vegetables &
Sides” followed by “Garlic Bread.” Press “Preheat” to begin
preheat cycle.
5. Peel and mash 3 to 4 cloves of the roasted garlic, enough to
yield 1 tablespoon or a little more. Mix with the parsley and
softened butter.
6. Cut bread in half lengthwise. Spread garlic butter over bread.
Sprinkle with minced parsley and mozzarella cheese.
7. Place garlic bread on a sheet pan and place in the oven. Press
“Start” and bake under “Garlic Bread” for 2 minutes. Remove
from oven when done and serve warm.
Yield: 6 to 8 servings
1. Mix the dried spices with the olive oil. Let stand at least 10
minutes. Add the garlic and the softened butter. Herbs de
Provence Butter can be made up to 30 days ahead and stored
in the refrigerator.
2. Select “Cookbooks” on the touchscreen. Select “Vegetables &
Sides” followed by “Herb de Provence Biscuits.” Press “Preheat”
to begin the preheat cycle.
3. Cut 5 biscuits into quarters. Roll each quarter into a ball and
place on a sheet pan covered with a piece of parchment paper.
Brush balls with Herbs de Provence Butter and place pan in the
oven.
4. Press “Start” and bake under “Herb de Provence Biscuits”
for 2-1/2 minutes. Remove from the oven and brush biscuits
with about 1 tablespoon more butter. Allow the butter to melt
over the top of the hot biscuits. Serve warm.
Yield: 8 to 10 servings
Baked Acorn Squash
RECIPES
Herbs de Provence Biscuits
PREP TIME: Approximately 5 minutes
COOK TIME: TurboChef : 2-1/2 minutes
Conventional : 11 minutes
These delicious little biscuits complement the fanciest meal but
are easy enough to make every day.
HERBS DE PROVENCE BUTTER
1 tablespoon Herbs de
Provence spice blend
1 teaspoon fresh thyme
(or 1/2 teaspoon dried)
1 tablespoon olive oil
BISCUITS
prepared biscuit dough 1/4 cup Herbs de Provence
1/2 teaspoon mashed roasted
garlic (See Garlic Bread)
8 tablespoons (1 stick)
butter, softened at room
temperature
Butter
PREP TIME: Approximately 2 minutes
COOK TIME: TurboChef : 10 minutes
Conventional : 1 hour
Acorn squash (Cucurbita pepo) is a winter squash, which means
it’s harvested in fall and stored until spring. Thick skinned, with
large, inedible seeds, they come in an assortment of bright colors
and delicious avors.
INGREDIENTS
1 1-1/2 to 2 pound acorn
squash
2 tablespoons butter
2 tablespoons brown sugar
pinch of ground cinnamon
(optional)
1. Select “Cookbooks” on the touchscreen. Select “Vegetables &
Sides” followed by “Acorn Squash.” Press “Preheat” to begin the
preheat cycle.
2. Cut squash into halves. Remove seeds and place butter and
sugar in the well of the squash. If desired, add cinnamon for
additional avor. Place squash halves on a sheet pan or in a
shallow baking dish and place in the oven.
3. Press “Start” and bake under “Acorn Squash” for 10 minutes.
When done, squash should be soft in the center and ake easily
with a fork. Cut halves in half again for individual servings.
HERBS DE PROVENCE BISCUITS
Yield: 4 servings
RECIPES • VEGETABLES AND SIDES 29
Page 30

Creamed Spinach Gratin
PREP TIME: Approximately 15 minutes
COOK TIME: TurboChef : 3 minutes
Conventional : 20 minutes
The our in this recipe keeps the spinach from “weeping,” and the
rest of the ingredients provide the delicious taste of this favorite
vegetable preparation.
INGREDIENTS
6 slices bacon, chopped into
1/2-inch pieces
4 cups diced onions
2 pounds fresh spinach
4 tablespoons butter
1/4 cup our
1-1/4 teaspoons salt
1-1/4 teaspoons freshly ground
black pepper
1-1/2 cups milk (whole or 2%)
1 cup grated Gruyère cheese
1/4 teaspoon grated nutmeg
1/2 cup grated Parmesan
cheese
1. Select “Cookbooks” on the touchscreen. Select “Vegetables &
Sides” followed by “Creamed Spinach Gratin.” Press “Preheat” to
begin the preheat cycle.
2. Place chopped bacon in a skillet and cook until browned and
crispy, remove to paper towels to drain and set aside.
3. Remove all but 1 tablespoon of bacon fat from skillet. Add the
onions and sauté approximately 2 minutes, until onions are
soft. Add spinach and cook approximately 1 minute until
spinach is wilted, but not fully cooked. Remove skillet from
stove and set aside.
4. Over a medium heat, melt the butter in a saucepan. Add the
our, salt, and pepper. Cook for 2 minutes, stirring constantly.
Slowly stir in the milk using a whisk. When the mixture has
thickened, add the nutmeg and shredded Gruyère. Stir until
cheese is melted.
5. Mix the cheese sauce into the spinach mixture and pour into a
7 x 9 x 2-inch Pyrex or ceramic dish. Sprinkle with Parmesan
cheese and the reserved bacon.
6. Place dish in the oven. Press “Start.” Bake under “Creamed
Spinach Gratin” for 3 minutes or until hot and bubbly.
RECIPES
Yield: 6 to 8 servings
RECIPES • VEGETABLES AND SIDES 30
Page 31

Pizza and Pasta
Chicago Deep-Dish Pizza 32
Basic Pizza Dough 32
Pesto Pizza 33
Thai Pizza 34
Baked Rigatoni 34
Tortellini Alfredo 35
RECIPES
RECIPES • PIZZA AND PASTA 31
Page 32

Basic Pizza Dough
Chicago Deep-Dish Pizza
PREP TIME: Approximately 2 hours
Make multiple pizzas for a crowd—you can double the dough
recipe in way less than double the time. The toppings are the easy
part. Use the lower oven as a proof box and the upper oven to
bake the pizza. If you are making multiple pizzas, you can turn the
lower oven into a warming oven after you have proofed the
dough.
INGREDIENTS
3 teaspoons active dry yeast
1 tablespoon sugar
2-3/4 cups bread our
1-1/2 teaspoons salt
1 tablespoon olive oil
1. Set the lower oven to “Bake” and then select “Proof” on the
temperature dial. Place a pan of water under the lowest rack to
create a heated proof box (95 to 105ºF).
2. Dissolve yeast in 1 cup warm water (100 to 110ºF). Add sugar
and stir to dissolve. This is a very important step. You should
use a thermometer to measure the water’s temperature. Yeast
will die at 113ºF, and the dough will fail if the water is too hot
or cold.
3. Sift the our and place it in a food processor. Add salt and pulse
to mix the our and salt. Add oil and pulse to mix oil into our
and salt. Once mixed, slowly add the bubbling yeast. Using the
pulse function on the food processor, blend the ingredients
together until the dough becomes very sticky and begins to
form a ball.
4. Remove the dough and place on a oured surface. Gently
knead into a ball. Add our if the dough is too sticky. Knead
dough for approximately 5 minutes or until it is smooth and
elastic. Place in an oiled bowl, cover with a towel or plastic
wrap, and place in the proof box.
5. Proof dough until it doubles in size—about 20 minutes.
Remove from the proof box. Punch dough down. Proof again
until it doubles in size—about 20 minutes. The dough is now
ready to be rolled out and placed into the pan for a deep-dish
pizza or stretched into a pizza crust.
PREP TIME: Approximately 15 minutes
COOK TIME: TurboChef : 6-1/2 minutes
Conventional : 45 minutes
Deep-dish pizza is legendary in Chicago. Loaded with cheese and
topped with tomatoes and spices instead of a traditional sauce
makes the Chicago deep-dish pizza unique.
INGREDIENTS
1 recipe Basic Pizza Dough
olive oil
1 teaspoon corn meal
6 ounces fresh hot or sweet
Italian sausage
3 cups grated mozzarella
3/4 teaspoon ground fennel
seed
1-1/2 teaspoons dried oregano
1 clove garlic, minced
1 cup sliced mushrooms
(optional)
1 14-ounce can diced
tomatoes, drained
1/2 cup grated Parmesan
cheese
1. Follow instructions for making the Basic Pizza Dough.
2. Select “Cookbooks” on the touchscreen. Select “Pizza & Pasta”
followed by “Chicago Deep-Dish Pizza.” Press “Preheat” to begin
the preheat cycle.
3. Coat a deep-dish pizza pan (11-inch bottom diameter,
12-inch top diameter, and 1-1/2 inch deep) very lightly with
olive oil. Sprinkle bottom of the pan with corn meal, with a
heavier concentration in the center of the pan.
RECIPES
Yield: 1 deep-dish or hand-stretched pizza crust
CHICAGO DEEPDISH PIZZA
RECIPES • PIZZA AND PASTA 32
Page 33

4. Remove proofed dough, place on a oured board and roll
out with a rolling pin until it is about 13 to 14-inches in
diameter. Gently transfer to the pizza pan. Press dough into the
pan making a ridge. Place in the proof box for about 10
minutes until it pu s to about 1-inch thick.
5. While dough is proo ng for the last time, cut sausage into
medallions and sauté until done, about 3 to 4 minutes.
6. Remove the proofed dough from the proof box and top pizza
with cheese, then sprinkle with the spices. Add the sausage
and mushrooms (optional). Top with well-drained diced
tomatoes and Parmesan cheese.
7. Press “Start” and bake under “Chicago Deep-Dish Pizza” for
6-1/2 minutes until hot and bubbly and the crust is golden
brown. Cut the pizza into 8 slices and serve.
Yield: 6 to 8 servings
Chef’s Suggestion : Make a vegetarian deep-dish pizza.
Thaw 10 ounces of frozen, chopped spinach under running water
or overnight in the refrigerator and squeeze it to remove as much
moisture as possible. Follow the Chicago Deep-Dish recipe
substituting spinach for the sausage and 1/4-cup diced red onions
for the mushrooms. When you build the pizza, rst place 1/2-cup
of your favorite pizza or marinara sauce on the crust before
sprinkling with cheese, spinach, spices, tomatoes, diced red
onions, and Parmesan. Bake as instructed.
Pesto Pizza
PREP TIME: Approximately 15 minutes
COOK TIME: TurboChef : 4 minutes
Conventional : 30 minutes
Make a hand-stretched pizza out of the same basic dough. Basil
pesto combines nicely with fresh mozzarella cheese and sun dried
tomatoes. It’s a variation on the popular “Margherita” pizza.
INGREDIENTS
3/4 cup smoked or regular sun
dried tomatoes
1 14-1/2 -ounce can diced
tomatoes, drained
1 recipe Basic Pizza Dough
1 teaspoon corn meal
1/4 cup pine nuts
1. Combine the sun dried tomatoes and drained diced tomatoes.
For best results, refrigerate overnight. This mixture can be held
refrigerated for up to 30 days.
2. After the second proo ng of the dough, on a clean surface
sprinkled with corn meal, roll out the dough into a 12 to
13-inch round. Stretch the dough to form a raised edge on the
outside and a thinner crust in the center. Place the dough on a
pizza screen or a TurboChef Te on Screen for a crisp crust. For a
softer crust, place dough on a pizza pan.
3. On a stove top, toast pine nuts until lightly golden brown.
In a food processor tted with a blade, add basil, toasted pine
nuts, 1/4 cup Parmesan cheese, and garlic. Run the food
processor until the basil and other ingredients have formed a
paste, about 1 minute. Drizzle in the olive oil and lemon juice
with the motor running.
4. Select “Cookbooks” on the touchscreen. Select “Pizza & Pasta.”
Select “Pesto Pizza” and press “Preheat” to begin the preheat
cycle.
5. Spread pesto sauce evenly over the pizza crust. Place fresh
mozzarella cheese, sun dried tomato mix, and the remaining
1/4 cup Parmesan cheese over the pesto sauce.
6. Place pizza in the oven. Press “Start” and bake for 4 minutes.
2 cups loosely packed fresh
basil leaves
1/2 cup grated Parmesan
cheese
2 cloves garlic
2 teaspoons fresh lemon juice
8-9 thin slices fresh mozzarella
cheese
RECIPES
Yield: 6 to 8 servings
RECIPES • PIZZA AND PASTA 33
Page 34

Thai Pizza
PREP TIME: Approximately 15 minutes
COOK TIME: TurboChef : 4 minutes
Conventional : 30 minutes
This pizza is a delicious twist of avors on a hand-stretched crust.
The Thai Peanut Sauce can be made in advance and used for this
pizza and as a dipping sauce for grilled chicken, shrimp, or beef.
THAI PIZZA
THAI PIZZA
1 recipe Basic Pizza Dough
1 teaspoon corn meal
1/2 cup Thai Peanut Sauce
(recipe below)
1 cup grated mozzarella
1 4-ounce chicken breast,
grilled and cubed or sliced
(about 1 cup)
2 tablespoons shredded carrots
THAI PEANUT SAUCE
1 cup Cream of Coconut
3 tablespoons seasoned rice
wine vinegar
2 tablespoons soy sauce
1 teaspoon crushed red pepper
akes
3 cloves garlic, minced
2 tablespoons fresh bean
sprouts
2 tablespoons chopped
red onion
10 julienne slices fresh red
bell pepper
2 tablespoons chopped
peanuts
2 tablespoons chopped
fresh cilantro
2 tablespoons fresh ginger,
minced
2 tablespoons toasted
sesame oil
1/4 cup canola oil
1 cup peanut butter
2 tablespoons chopped fresh
cilantro
1. In a food processor, blend Cream of Coconut, rice wine vinegar,
soy sauce, garlic, ginger, and red pepper akes. Blend for 30 to
45 seconds or until ginger and garlic are minced into ne
pieces.
2. Slowly add oil to mixture while continuing to blend. Add
peanut butter and cilantro and blend until smooth. Cilantro
should still be in visible pieces.
3. Transfer to a clean container and refrigerate until needed —up
to 30 days.
4. After the second proo ng of the dough, on a clean surface
sprinkled with corn meal, roll out the dough into a 12 to 13inch round. Stretch the dough to form a raised edge on the
outside and a thinner crust in the center. Place the dough on a
pizza screen or a TurboChef Te on Screen for a crisp crust. For a
softer crust, place dough on a pizza pan.
5. Select “Cookbooks” on the touchscreen. Select “Pizza & Pasta.”
Select “Thai Pizza” and press “Preheat” to begin the preheat
cycle.
6. Spread Thai Peanut Sauce evenly over the pizza crust. Cover the
sauce with mozzarella, chicken, carrots, bean sprouts, red
onion, and red bell pepper.
7. Place in the oven. Press “Start” and bake for 4 minutes. After
baking, remove pizza from the oven and sprinkle with chopped
peanuts and cilantro.
Yield: 6 to 8 servings
Baked Rigatoni
PREP TIME: Approximately 12 minutes
COOK TIME: TurboChef : 4 minutes
Conventional : 20 minutes
Rigatoni is a short, hollow pasta with a large hole in the middle.
The name comes from the ridges around the sides. It’s good for
almost any sauce you want to pair it with.
INGREDIENTS
12 ounces uncooked rigatoni
noodles
24 ounces prepared marinara
sauce
1. Select “Cookbooks” on the touchscreen. Select “Pizza & Pasta”
followed by “Baked Rigatoni.” Press “Preheat” to begin the
preheat cycle.
2. In a large quantity of water, boil pasta until just cooked al
dente, about 12 minutes. Drain well and mix with marinara
sauce. Transfer to a 1-1/2 to 2-inch deep ceramic or Pyrex dish.
Top with mozzarella and place the dish in the oven.
3. Press “Start” and cook for 4 minutes. When done, the top of the
cheese will be a golden brown and the inside should be hot
and bubbling around the edges. If using a deeper pan, increase
the cook time by using the “Cook More” function.
2 cups grated mozzarella
RECIPES • PIZZA AND PASTA 34
RECIPES
Page 35

BAKED RIGATONI
Tortellini Alfredo
PREP TIME: Approximately 5 minutes
COOK TIME: TurboChef : 4 minutes
Conventional : 20 minutes
This cheese- lled tortellini mixed with rich alfredo sauce is a
gourmet macaroni and cheese.
INGREDIENTS
Yield: 6 servings
20 ounces cheese- lled
tortellini
15 ounces prepared alfredo
sauce
1 cup diced prosciutto
2 cups grated mozzarella
1. Select “Cookbooks” on the touchscreen. Select “Pizza & Pasta”
followed by “Tortellini Alfredo” and press “Preheat” to begin the
preheat cycle.
2. Boil pasta according to package directions and drain.
3. Spread 1/4 cup of the sauce evenly on the bottom of a
2 x 7 x 9-inch deep ceramic or Pyrex dish.
4. In a large bowl, combine the cooked tortellini, prosciutto, and
remaining alfredo sauce. Spread mixture evenly into the dish.
Sprinkle mozzarella over the top, making sure to cover all the
tortellini.
5. Place dish in the oven, press “Start.” Cook under “Tortellini
Alfredo” for 4 minutes. When done, the top of the cheese will
be a golden brown and the inside should be hot and bubbling
around the edges. If using a deeper pan, increase the cook time
by using the “Cook More” function.
Yield: 6 servings
RECIPES
RECIPES • PIZZA AND PASTA 35
Page 36

Desserts and Sweets
Chocolate Cake 37
Peanut Butter Bars 37
Chocolate Soufflé 38
Crumbed-Topped Apple Pie 38
Fruit Tart 39
Bread Pudding with Whiskey Sauce 40
Cinnamon Streusel Coffee Cake 40
Banana Nut Muffins 41
Lemon Tart 41
Bananas Foster Rollups 42
Pumpkin Pie 43
Cranberry-Orange Mini Loaves 43
RECIPES
RECIPES • DESSERTS AND SWEETS 36
Page 37

Chocolate Cake
PREP TIME: Approximately 1 hour
COOK TIME: TurboChef : 23 minutes
Conventional : 45 minutes
This makes a wonderful celebratory cake, even if you’re just
celebrating dinner with the family.
CAKE BATTER
Helpful Hints : Store this cake under a glass dome at room
temperature for up to 2 days or 4 days in the refrigerator.
Peanut Butter Bars
PREP TIME: Approximately 10 minutes
COOK TIME: TurboChef : 6-1/2 minutes
Conventional : 25 minutes
1/2 pound (2 sticks) unsalted
butter
2-1/2 cups our
1-1/2 teaspoons ground
cinnamon
3/4 cup sugar
3/4 cup cocoa powder
1 cup cold brewed co ee
CHOCOLATE FROSTING
3 cups semisweet chocolate
pieces
12 tablespoons (1-1/2 sticks)
butter
2 cups sugar
2 teaspoons vanilla extract
1 cup sour cream
1 teaspoon baking soda
1/2 teaspoon salt
5 egg whites
1-1/2 cups sour cream
7 to 7-1/2 cups confectioners’
sugar
1. Select “Cookbooks” on the touchscreen. Select “Desserts &
Sweets” followed by “Chocolate Cake.” Press “Preheat” to begin
the preheat cycle.
2. Lightly grease and our (2) 9-inch round cake pans. Set aside.
3. In a small bowl, combine cinnamon, sugar, cocoa powder, and
cold co ee; set aside.
4. In the bowl of a standing mixer tted with a whisk, or in a large
bowl using a hand mixer, cream together the sugar and butter.
Add the cocoa mixture along with the vanilla and sour cream.
Mix together until blended. Add our, baking soda, and salt.
Continue to beat until well blended.
5. Place egg whites in a clean, stainless steel bowl, discard the
yolks or save them for a custard. Whip the egg whites until they
form soft peaks. Fold egg whites into the chocolate cake batter
being careful not to loose all the
air in the egg whites. Divide the batter evenly between the 2
pans and place the pans in the oven.
6. Press “Start” and bake for 23 minutes or until a toothpick,
inserted in the center of the cake, comes out clean.
7. While the cake is baking, prepare the frosting. Melt the
chocolate and butter in a double boiler. Stir to blend and let
cool for 10 minutes. In the bowl of a standing mixer tted with
a whisk, add sour cream, sugar, and chocolate. Whip until u y.
8. Remove cake pans from the oven and cool. Run a knife around
the edge of the cake and invert each cake onto a cake rack. Flip
over so the cakes are right side up. Allow cakes to cool
completely.
9. Place one cake layer, right side up, on a serving platter. Spread
the top with chocolate frosting. Place the second layer on top
of the rst and frost the top and sides of the cake using a metal
cake spatula. Smooth the sides of the cake and create a
decorative top by pulling the frosting up into peaks.
These chewy morsels are excellent paired with a glass of cold
milk—delicious—and the combination will make you feel like a
kid again. They’re also good with fruit or ice cream as part of
dessert or all by themselves for an afternoon pick-me-up.
INGREDIENTS
1 cup granulated sugar
1 cup packed brown sugar
1 cup peanut butter (creamy or
chunky)
1/2 pound (2 sticks) butter,
softened
2 large eggs
2-1/2 cups our
1-1/2 teaspoons baking soda
1 teaspoon baking powder
1/2 teaspoon salt
12 ounces chocolate chips
1. Select “Cookbooks” on the touchscreen. Select “Desserts &
Sweets” followed by “Peanut Butter Bars.” Press “Preheat” to
begin the preheat cycle.
2. In a large bowl with an electric mixer, beat granulated sugar,
brown sugar, peanut butter, butter, and eggs. Stir in the our,
baking soda, baking powder, and salt. Press dough into an
ungreased 16 x 12-inch sheet pan until even in thickness. Place
pan in the oven.
3. Press “Start” and bake for 6-1/2 minutes.
4. Remove pan from the oven and sprinkle over the chocolate
chips. Place an inverted sheet pan over the pan of bars to trap
heat and allow the chocolate chips to melt. Once melted,
spread chocolate over the bars as a frosting. Allow to cool
before serving.
5. Cut bars 5 across and 6 down to yield 30 portions. These will
last at room temperature up to 5 days.
Yield: 30 servings
RECIPES • DESSERTS AND SWEETS 37
RECIPES
Page 38

Chocolate Soufflé
PREP TIME: Approximately 15 minutes
COOK TIME: TurboChef : 5 minutes
Conventional : 20 minutes
Sou és are a little bit of heaven, right there on your plate. Their
reputation for being di cult to prepare is undeserved, as you’ll
see after making this delectable chocolate version. Please do use
the two di erent chocolates as they create the balance of avors
that make these sou és so remarkable.
INGREDIENTS
5 tablespoons unsalted butter
7-1/2 ounces 99% cocoa butter
dark chocolate
7-1/2 ounces 70% cocoa butter
dark chocolate
13 large eggs
1. Select “Cookbooks” on the touchscreen. Select “Desserts &
Sweets” followed by “Chocolate Sou é” and press “Preheat” to
begin the preheat cycle.
2. In a double boiler over, not touching, simmering water, melt
the butter and chocolate, stirring to blend. Remove top pan of
the double boiler and let set at room temperature.
3. Separate the eggs, putting the whites in a clean, stainless
steel bowl. In a separate bowl, place 4 egg yolks. Discard the
remaining yolks (or save them for use within a couple of days
for a custard or to thicken a soup). Whip the egg whites until
they begin to thicken and become u y. Slowly add sugar, salt,
and cream of tartar. Continue to whip until egg whites form
soft peaks.
4. Mix 1/2 cup water into the egg yolks. Add a little bit of the
warm chocolate to the egg mixture to temper it and then, little
by little, beat the yolks mixture into the chocolate. Don’t let the
chocolate become cool or it will leave lumps in the sou é
batter. You can prepare the two sou é mixtures up to this
point and keep them separately at room temperature for up to
2 hours.
5. Butter the bottom and sides of (8) 6-ounce sou é dishes with
softened but not melted butter. Add sugar and rotate the dish
so the sugar coats the entire inside of the dish.
6. When ready to bake, fold about one quarter of the meringue
into the chocolate to make a smooth mixture. Gently fold the
remaining meringue into the chocolate, making sure not to
lose the air in the whites that will cause the sou é to rise to its
impressive heights.
7. Fill each dish about 7/8 full with the sou é batter and place
the 8 dishes in the oven—directly onto the rack. Press “Start”
and bake under “Chocolate Sou é” for 5 minutes. Sou é
should come up about 1/2-inch over the top of the sou é dish
and be set, but still soft in the center. Serve them in the sou é
dishes. Dust with confectioners’ sugar, if desired.
1 cup sugar
1/2 teaspoon cream of tartar
pinch of salt
confectioners’ sugar (optional)
1. Melt butter and
chocolate in the top of
a double boiler, stirring
with a spatula.
2. Carefully, fold the beaten
egg whites into the
chocolate mixture.
3. Fill individual sou é
dishes almost to capacity
– 7/8 full.
Crumb-Topped Apple Pie
PREP TIME: Approximately 1 hour
COOK TIME: TurboChef : 30 minutes
Conventional : 1 hour, 10 minutes
Select a rm apple with a tart taste for best results— Cortland,
McIntosh, Macoun are good and so are New Zealand Jazz, Pink
Lady, or the always-available Granny Smith. The crumb topping on
this pie coupled with tart apples makes this taste like an oldfashioned favorite.
CRUST
1-3/4 cups unbleached our
10 tablespoons butter, cut
into 6 pieces
FILLING
9 cups peeled, cored, and
sliced apples
1/2 cup brown sugar
3 tablespoons unbleached our
TOPPING
1 cup packed brown sugar
1/4 cup unbleached our
1 tablespoon sugar
1 tablespoon fresh lemon juice
1/2 teaspoon ground cinnamon
1 tablespoon fresh lemon juice
1/2 cup raisins (optional)
1/4 teaspoon ground cinnamon
4 tablespoons butter, softened
at room temperature
RECIPES
Yield: 8 servings
RECIPES • DESSERTS AND SWEETS 38
Page 39

1. Select “Cookbooks” on the touchscreen. Select “Desserts &
Sweets” followed by “Crumb-Topped Apple Pie.” Press “Preheat”
to begin the preheat cycle.
2. To prepare the pie crust, place our, butter, and sugar into the
bowl of a food processor tted with a metal blade. Pulse for 5
seconds. With the motor running, add the lemon juice and 6
tablespoons water. Continue to mix until the pastry starts to
cling together.
3. Remove the pastry from the bowl and shape it into a ball.
Cover with plastic wrap and chill for at least 30 minutes or up
to 24 hours. When ready to bake, turn it onto a oured surface
and roll out to a 13-inch circle.
4. Gently transfer the dough to a 10 x 2-inch pie pan, trim the
crust 1/2-inch beyond the pan. Make a decorative edge with
the tines of a fork or your index nger.
5. To prepare the lling, combine apples, brown sugar, our,
cinnamon, and lemon juice. You should have about 9 to 9-1/2
cups of apple lling. Spread evenly over the pie crust.
6. For the topping, combine brown sugar, our, cinnamon, and
butter. Mix with a fork or pastry cutter until the butter is about
the size of peas and the mix is crumbly. Sprinkle the topping
over the pie lling, and place the pie in the oven.
7. Press “Start.” Bake under “Crumb-Topped Apple Pie”
for 30 minutes. Bake until the crust is golden brown, the
topping is melted and bubbling, and the apples are tender.
Cool slightly before serving.
Yield: 6 to 8 servings
Fruit Tart
PREP TIME: Approximately 20 minutes
COOK TIME: TurboChef : 10 minutes
Conventional : 20 minutes
The shortbread-crusted tart, with its mixed fruit topping, is a
delicious and almost-healthy dessert.
CRUST
1/2 pound (2 sticks) unsalted
butter
1/2 cup confectioners’ sugar
TOPPING
3 ounces cream cheese,
softened
2 tablespoons confectioners’
sugar
2 teaspoons fresh lemon juice
1 teaspoon vanilla extract
GLAZE
5 tablespoons confectioners’
sugar
1 tablespoon water
2 cups our
1/4 teaspoon salt
1-1/2 cups sliced strawberries
3 kiwi fruits, peeled and sliced
1/2 cup blueberries
1/2 cup green grapes
1/2 cup raspberries or
blackberries
1 teaspoon fresh lemon juice
1-1/2 teaspoons cornstarch
RECIPES
FRUIT TART
1. Select “Cookbooks” on the touchscreen. Select “Desserts &
Sweets” followed by “Fruit Tart.” Press “Preheat” to begin the
preheat cycle.
2. To prepare the crust, cream together butter and sugar. Add
our and salt and blend well. Gather dough into a ball and roll
out to an 11-inch disk, about 1/4-inch thick. Place dough into
an 11 x 1-1/2 -inch uted-edge tart pan and build up the edges
about 1-inch.
3. Place crust in the oven and press “Start.” Bake under “Fruit Tart”
for 10 minutes. Remove from the oven and cool.
4. To prepare the topping, beat the cream cheese, confectioners’
sugar, lemon juice, and vanilla extract until smooth.
5. Combine all glaze ingredients in a small saucepan and bring to
a boil stirring constantly. When glaze becomes transparent and
is no longer cloudy (about 1 minute) remove from heat and let
cool.
6. Spread sweetened cream cheese over the crust. Starting from
the outside and moving toward the center, attractively arrange
the fruit over the crust. Brush glaze over fruit. Serve
immediately or refrigerate up to 2 hours.
Yield: 6 to 8 servings
RECIPES • DESSERTS AND SWEETS 39
Page 40

Bread Pudding with Whiskey Sauce
Cinnamon Streusel Coffee Cake
PREP TIME: Approximately 15 minutes
COOK TIME: TurboChef : 5 minutes
Conventional : 1 hour
Bread pudding is a great way to use leftover bread. This version is
accompanied by a superb Whiskey Sauce.
WHISKEY SAUCE
1-1/2 teaspoons cornstarch
1/4 cup milk
2 tablespoons butter
BREAD PUDDING
3/4 cup milk
1/4 cup cream sherry
1 egg, beaten
1/2 cup sugar
1-1/2 teaspoons vanilla extract
1/4 cup sugar
2 tablespoons whiskey (Jack
Daniel’s or Maker’s Mark)
1/4 cup raisins
2-1/2 cups packed diced French
bread
1 tablespoon butter
1. In a bowl, combine the cornstarch and 1 tablespoon cold
water; stir until blended. In a small saucepan, combine the milk,
butter, and sugar. Heat, stirring, until the sugar is dissolved and
the mixture is bubbly. Add cornstarch mixture and continue
stirring. Add the whiskey and continue stirring until the sauce
is thick and well blended. Remove the saucepan from the heat.
Let cool slightly.
2. Select “Cookbooks” on the touchscreen. Select “Desserts &
Sweets” followed by “Bread Pudding with Whiskey Sauce” and
press “Preheat” to begin the preheat cycle.
3. In a large bowl, combine milk, sherry, egg, sugar, vanilla, and
raisins. Add diced bread and let soak for 10 to 15 minutes.
4. Butter (4) 6-ounce sou é cups. Evenly distribute batter among
the cups and place on a sheet pan.
5. Place pan in the oven and press “Start.” Bake under “Bread
Pudding with Whiskey Sauce” for 5 minutes. Remove from the
oven and serve in the sou é cup with Whiskey Sauce.
Yield: 4 servings
PREP TIME: Approximately 10 minutes
COOK TIME: TurboChef : 25 minutes
Conventional : 1 hour
Co ee cake is a universal favorite, not too sweet, with a
comforting texture and familiar taste. It’s versatile enough for
dessert, for tea, or for a snack.
CINNAMON STREUSEL
1 cup brown sugar
1/4 cup our
4 tablespoons butter, at room
temperature
COFFEE CAKE BATTER
3 cups unbleached our
1-1/2 teaspoons baking powder
1 teaspoon baking soda
3/4 teaspoon salt
1-1/2 cups sugar
1-1/2 teaspoons ground
cinnamon
1 cup chopped pecans
12 tablespoons (1½ sticks)
unsalted butter
4 large eggs, at room
temperature
2 cups sour cream
1. Combine all the ingredients for the streusel in a mixing bowl.
Mix with a fork or pastry cutter until the butter is about the size
of peas and the mix is crumbly. Set aside. Makes about 2 cups.
2. Select “Cookbooks” on the touchscreen. Select “Desserts &
Sweets” followed by “Cinnamon Streusel Co ee Cake.” Press
“Preheat” to begin the preheat cycle.
3. Lightly grease a 9 x 13-inch cake pan.
4. In a large bowl mix our, baking powder, baking soda, and salt;
set aside.
5. In the bowl of a standing mixer tted with the whisk
attachment, combine the sugar, butter, and vanilla. Add eggs,
one at a time. Scrape the sides of the bowl occasionally and
mix for 2 minutes.
6. On low speed, add the our mixture and sour cream alternately
to the sugar mixture until well blended. Pour
4 cups of the batter into the pan and spread evenly.
7. Sprinkle 1 cup of the cinnamon streusel on top of the batter.
Pour remaining 2 cups of batter over cinnamon streusel and
top with the rest of the streusel.
8. Place the pan in the oven and press “Start.” Bake under
“Cinnamon Streusel Co ee Cake” for 25 minutes. Remove pan
from the oven, and cool slightly before serving.
RECIPES
Yield: 8 to 10 servings
Time Saver Tip : This co ee cake can be made ahead of time and
kept in an airtight container for 1 day at room temperature
or 3 days in the refrigerator. Warm in the oven before
serving.
RECIPES • DESSERTS AND SWEETS 40
Page 41

Banana Nut Muffins
PREP TIME: Approximately 15 minutes
COOK TIME: TurboChef : 13 minutes
Conventional : 25 minutes
If you have bananas that are getting too ripe to eat use them in
these mu ns—a welcome dessert for an informal meal.
INGREDIENTS
LEMON TART
1 cup sugar
10 tablespoons canola oil
2 large eggs
2 ripe bananas
1 cup unbleached our
1 teaspoon ground cinnamon
1/2 teaspoon grated nutmeg
1/2 teaspoon baking soda
1 teaspoon baking powder
1/2 teaspoon salt
1/2 cup chopped walnuts
1. Select “Cookbooks” on the touchscreen. Select “Desserts &
Sweets” followed by “Banana Nut Mu ns” and press “Preheat”
to begin the preheat cycle.
2. In a large bowl, blend sugar and oil together. Add the eggs, one
at a time, beating after each egg.
3. Mash the bananas and add to the sugar mixture, stirring well to
blend.
4. In a separate bowl, combine all the dry ingredients. Add to the
wet ingredients, stirring just enough to moisten the dry
ingredients. Batter should be lumpy, not too smooth. Fold in
the walnuts.
5. Prepare the mu n tins with paper liners (or grease and our
the bottom and sides of each compartment). Using 1/2 cup
mu n tins, ll each compartment with about
1/4 cup of batter or about 1/2 full. Place tin in the oven.
6. Press “Start” and bake under “Banana Nut Mu ns” for
13 minutes or until a toothpick, inserted in the center of the
middle mu n, comes out clean. Allow the fully baked mu ns
to cool 5 minutes before removing from mu n pan.
Yield: 12 mu ns
Lemon Tart
PREP TIME: Approximately 25 minutes
COOK TIME: TurboChef : 19-1/2 minutes
Conventional : 55 minutes
This tart has a wonderfully fresh taste. It’s a great dessert after a
serious meal.
CRUST
1/2 pound (2 sticks) unsalted
butter
1/2 cup confectioners’ sugar
FILLING
1/4 cup unbleached our
1/2 teaspoon baking powder
1/4 teaspoon salt
4 large eggs
GLAZE
1 tablespoon grated lemon zest
2 cups unbleached our
1/4 teaspoon salt
2 tablespoons grated lemon
zest
1/4 cup fresh lemon juice
1 cup aked coconut
1-1/4 cups sugar
RECIPES
1 cup confectioners’ sugar
1 teaspoon grated lemon zest
3 tablespoons fresh lemon juice
1. Select “Cookbooks” on the touchscreen. Select “Desserts &
Sweets” followed by “Lemon Tart” and “Crust.” Press “Preheat” to
begin the preheat cycle.
2 To prepare the crust, cream the butter, sugar, and lemon zest in
the bowl of a standing electric mixer or in a large bowl using a
hand-held mixer. Add our and salt and blend well.
3. Gather dough into a ball and press into an 11 x 1-1/2-inch tart
pan, building up the sides about 1-inch.
4. Place pan in the oven and press “Start.” Bake under “Crust” for
6-1/2 minutes. Crust should be lightly golden and set like a
shortbread when done. Set aside.
RECIPES • DESSERTS AND SWEETS 41
Page 42

5. Still under “Cookbooks”, select “Desserts & Sweets ” followed by
“Lemon Tart” and “Tart.” Press “Preheat” to begin the preheat
cycle. The oven will adjust its temperature as needed.
6. To prepare the lling, whisk together all the lling ingredients in
a clean bowl. Pour lling into baked crust.
7. Place pan in the oven and press “Start.” Bake under “Tart” for 13
minutes. Test the center of the lling by pressing lightly. If you
don’t leave an indentation in the lling the tart is done. Use the
“Cook More” function if the lling is still loose. Let cool before
topping with glaze.
8. Combine the confectioners’ sugar with the zest and lemon
juice. Glaze should be about the thickness of corn syrup but
not as thick as frosting. The consistency should allow you to
drizzle the glaze over the tart. If needed, add a small amount of
water—1/2 teaspoon at a time—to thin the glaze. Drizzle the
glaze over the tart and continue to cool until ready to serve.
3. In a mixing bowl, combine rum and brown sugar. Roll each
banana piece into the brown sugar/rum mix to coat outside.
4. Place one banana piece at the bottom of a spring roll
wrapper. Fold ends toward the center and roll wrapper like a
burrito. As each is done, place on a sheet pan. Brush melted
butter onto each rollup. Bake immediately or store in the
refrigerator for up to 24 hours. You should have 12 rollups.
5. Select “Cookbooks” on the touchscreen. Select “Desserts &
Sweets” followed by “Bananas Foster Rollups.” Press “Preheat”to
begin the preheat cycle.
6. Brush the rollups with melted butter. Place pan in the oven and
press “Start.” Bake under “Bananas Foster Rollups” for 2 minutes.
7. For presentation, place a scoop of vanilla ice cream in the
center of a plate or dessert bowl. Place 3 to 4 Bananas Foster
Rollups in a pyramid over the ice cream. Drizzle with Caramel
Rum Sauce. If desired, garnish with fresh mint.
RECIPES
Yield: 8 to 10 servings
Chef’s Suggestion : Make lemonade. You will need a lot of lemon
zest for this recipe. Use 7 to 8 lemons to get the amount of zest
you need and use the lemons for the fresh lemonade. Add sugar
and water to taste to the lemon juice to make lemonade.
Bananas Foster Rollups
PREP TIME: Approximately 15 minutes
COOK TIME: TurboChef : 2 minutes
Conventional : 10 minutes
Bananas Foster are thought to have originated at Brennan’s, the
famous New Orleans restaurant, and named for Richard Foster, a
very good customer. This is a variation on that legendary
preparation.
CARAMEL RUM SAUCE
8 tablespoons (1 stick) butter
1 cup brown sugar
1/4 cup dark corn syrup
ROLLUPS
1/2 cup heavy cream
1 teaspoon rum
Yield: 4 to 5 servings
Helpful Hints : Spring roll pastry wrappers can be found in
Asian grocery stores. If you can not nd these wrappers, you may
substitute phyllo dough.
2 bananas
2 teaspoons rum
1 cup packed brown sugar
16 Imperial spring roll pastry
wrappers (see Helpful Hint)
4 tablespoons butter, melted
vanilla ice cream
fresh mint leaves (optional)
1. In a pan, melt butter over low heat. Add brown sugar and stir
to combine. Add the corn syrup and stir until blended.
Continue to cook over low heat while slowly adding the cream.
Add rum and stir. Set aside.
2. Cut bananas in half crosswise. Cut halves lengthwise into
quarters to yield 8 pieces per banana, measuring
approximately 1/2 x 3 inches.
1. Roll each banana
piece in brown sugar
and rum.
2. Place one banana
piece at the bottom of a
spring roll wrapper. Fold
ends toward the center
and roll like a burrito.
3. The dazzling nished
dessert.
RECIPES • DESSERTS AND SWEETS 42
Page 43

Pumpkin Pie
Cranberry-Orange Mini Loaves
PREP TIME: Approximately 15 minutes
COOK TIME: TurboChef : 20 to 30 minutes
Conventional : 1 to 1-1/2 hours
Pumpkin is a hard-skinned squash whose avor is often less
impressive than its amboyant exterior. Never mind—canned
pumpkin, usually processed from butternut or other avorful
squash, makes this pie utterly delicious.
9INCH
3/4 cup sugar
1/2 teaspoon salt
1 teaspoon ground cinnamon
1 teaspoon ground ginger
1/2 teaspoon ground cloves
1/2 teaspoon grated nutmeg
DEEP DISH
1-1/4 cups white sugar
3/4 teaspoon salt
1-1/2 teaspoons ground
cinnamon
1-1/2 teaspoons ground ginger
3/4 teaspoon ground cloves
3/4 teaspoon grated nutmeg
2 large eggs
1 15-ounce can pure pumpkin
1 12-ounce can evaporated milk
1 9-inch unbaked prepared
pie crust
3 large eggs
1-1/2 15-ounce cans pure
pumpkin (22½ ounces)
1-1/2 12-ounce cans
evaporated milk (18 ounces)
2 9-inch unbaked prepared
pie crusts
1. Select “Cookbooks” on the touchscreen. Select “Desserts &
Sweets” followed by “Pumpkin Pie” and “9-Inch” or “Deep-Dish.”
Press “Preheat” to begin the preheat cycle.
2. In a small bowl, mix sugar, salt, cinnamon, ginger, cloves, and
nutmeg.
3. In a large bowl, beat eggs. Stir in pumpkin and add sugar and
spice mixture. Stirring constantly with a whisk, gradually add
evaporated milk.
4. Form a pie crust into a 9 x 1-1/4 -inch metal pie tin or use two
pie crusts and roll out to make about a 12-inch shell that ts
into 10 x 2-inch a pie pan. Add the batter and place pie in the
oven.
5. Press “Start” and bake under “Pumpkin Pie” for 20 minutes
(9-inch) to 30 minutes (deep-dish). Insert a knife or toothpick
into the pie’s center to check for doneness—it should come out
clean. If needed, use the “Cook More” function to add
additional cooking time. Cool for 1 to 2 hours. Serve at room
temperature within 2 to 4 hours of baking. Refrigerate
leftovers.
PREP TIME: Approximately 15 minutes
COOK TIME: TurboChef : 9 minutes
Conventional : 1 hour
This makes a perfect hostess or holiday gift. It’s a lovely sweet to
serve with afternoon or morning tea, and with a little ice cream,
well, it’s a ne dessert.
INGREDIENTS
2 cups unbleached our
1/2 teaspoon salt
1/2 teaspoon baking soda
1-1/2 teaspoons baking powder
1 cup sugar
grated peel from 1 orange
1/2 cup orange juice
2 tablespoons canola oil
1/4 cup boiling water
1 large egg
1 cup chopped cranberries
1 cup chopped walnuts
1. Select “Cookbooks” on the touchscreen. Select “Desserts &
Sweets” followed by “Cranberry-Orange Mini Loaves” and press
“Preheat” to begin the preheat cycle.
2. In a large bowl combine our, salt, baking soda, baking
powder, and sugar.
3. Combine orange peel, orange juice, oil, and boiling water
in a small bowl.
4. Blend liquid mixture into the dry ingredients. Once blended,
add the egg and beat well. Fold in the cranberries and nuts.
5. Pour batter into 2 greased 3-1/2 x 5-3/4 x 2-1/4-inch mini loaf
pans and place in the oven. Press “Start” and bake under
“Cranberry-Orange Mini Loaves” for 9 minutes or until browned
on the outside and cooked in the center. Test for doneness by
inserting a toothpick in the center of the bread, if it comes out
clean, the bread is done. Allow the fully baked loaves to cool 10
minutes before removing from pans. These mini loaves will
keep up to 2 days.
Yield: 6 to 8 servings
RECIPES
Yield: 6 servings for 9-inch pie or 10 servings for deepdish pie
RECIPES • DESSERTS AND SWEETS 43
Page 44

Page references in italic refer to photographs.
A
Acorn Squash, Baked, 29
Appetizers, 6–10
Beef Empanadas, Southwestern, 7
Beef Filet on Parmesan Crostini, 9–10
Cheese Bites, 8
Mushrooms, Stu ed,
Portobello Mushrooms, Stu ed, 7
Salmon en Croute,
Scallops on Rosemary Skewers, 13–14
Shrimp Skewers, 15
Tuna, Sesame-Crusted, on Field Greens,
Zucchini “Crostini,” 10
Apple Pie, Crumb-Topped, 38–39
Apricot-Ginger Glaze, 23
Asparagus:
Roasted Red Pepper and, 27
Steamed,
25, 25
9, 9
8, 8
14, 14
B
Baby Bok Choy, Ginger Salmon with, 15
Bacon & Swiss Strata, 17–18
Banana(s):
Foster Rollups,
Nut Mu ns, 41
Bars, Peanut Butter, 37
Beef:
Châteaubriand Dinner, 20–21,
Empanadas, Southwestern, 7
Filet on Parmesan Crostini, 9–10
Old-Fashioned Meatloaf, 22
Stu ed Flank Steak,
Biscuit(s):
dough, in Cheese Bites, 8
Herbs de Provence,
Bread(s).
Banana Nut Mu ns, 41
Ciabatta Sandwich, 23
Cranberry-Orange Mini Loaves, 43
Garlic, 28–29
Herbs de Provence Biscuits,
Parmesan Crostini, Beef Filet on, 9–10
Pudding with Whiskey Sauce, 40
Brunch:
Banana Nut Mu ns, 41
Cinnamon Streusel Co ee Cake, 40
Cranberry-Orange Mini Loaves, 43
Quiche Lorraine, 17
Strata, 17–18
See also Pizza
42, 42
21
21, 21
29, 29
29, 29
C
Cajun Cream Sauce, 12
Cakes:
Chocolate, 37
Cinnamon Streusel Co ee, 40
Caramel Rum Sauce, 42
Casseroles:
Chicken & Mushroom Wild Rice Bake,
Corn Poblano, 26
Creamed Spinach Gratin, 30
Scalloped Potatoes, 28
Zucchini, Italian, 26
Châteaubriand Dinner, 20–21,
Cheese. See also Parmesan
Bites, 8
Strata, 17–18
Chicago Deep-Dish Pizza,
Chicken:
Lemon-Rosemary Roasted, 20
and Mushroom Wild Rice Bake,
Rollatini, 19–20,
Thai Pizza, 34, 34
Chipotle Sauce, 7
Chocolate:
Cake, 37
Frosting, 37
Peanut Butter Bars, 37
Sou é,
Ciabatta Sandwich, 23
Cilantro Soy Vinaigrette, 14
Cinnamon Streusel Co ee Cake, 40
Corn Poblano Casserole, 26
Cranberry-Orange Mini Loaves, 43
Creamed Spinach Gratin, 30
Crostini, Parmesan, Beef Filet on, 9–10
“Crostini,” Zucchini, 10
Crumb-Topped Apple Pie, 38–39
38, 38
20
D
Desserts and Sweets, 36–43
Apple Pie, Crumb-Topped, 38–39
Banana Nut Mu ns, 41
Bananas Foster Rollups,
Bread Pudding with Whiskey Sauce, 40
Chocolate Cake, 37
Chocolate Sou é,
Cinnamon Streusel Co ee Cake, 40
Cranberry-Orange Mini Loaves, 43
Fruit Tart,
39, 39
38, 38
21
32, 32–33
19, 19
42, 42
Index
19, 19
INDEX
INDEX 44
Page 45

Index
Desserts and Sweets (continued)
Lemon Tart,
Peanut Butter Bars, 37
Pumpkin Pie, 43
41, 41–42
E
Eggs, Poultry and Meats 16–23
Eggs:
Quiche Lorraine, 17
Strata, 17–18
Empanadas, Southwestern Beef, 7
Entrées:
Beef Empanadas, Southwestern, 7
Châteaubriand Dinner, 20-21,
Chicken, Lemon-Rosemary Roasted, 20
Chicken and Mushroom Wild Rice Bake,
Chicken Rollatini, 19–20,
Ciabatta Sandwich, 23
Flank Steak, Stu ed,
Lamb, Rack of,
Meatloaf, Old-Fashioned, 22
Pizza, Chicago Deep-Dish,
Pizza, Pesto, 33
Pizza, Thai,
Pork Tenderloin with Ginger-Apricot Glaze, 23
Portobello Mushrooms, Stu ed, 7
Quiche Lorraine, 17
Rigatoni, Baked, 34–35,
Salmon, Ginger, with Baby Bok Choy, 15
Scallops on Rosemary Skewers, 13–14
Shrimp Skewers, 15
Snapper en Papillote,
Strata, 17–18
Tilapia, Parmesan-Crusted,
Tortellini Alfredo, 35
Tuna, Sesame-Crusted, on Field Greens,
Turkey, Roast,
34, 34
21, 21
22, 22
12, 12
18, 18
21
19, 19
20
32, 32–33
35
13, 13
14, 14
F
Flank Steak, Stu ed, 21, 21
Frosting, Chocolate, 37
Fruit Tart,
39, 39
G
Garlic Bread, 28-29
Ginger:
Apricot Glaze, 23
Salmon with Baby Bok Choy, 15
Gravy, Turkey, 18
Green Beans Amandine, 25
H
Ham and Cheese Strata, 17–18
Herbs de Provence Biscuits,
Herbs de Provence Butter, 29
Herbs de Provence Dipping Sauce, 15
29, 29
I
Italian Zucchini Casserole, 26
L
Lamb, Rack of, 22, 22
Lemon:
Rosemary Roasted Chicken, 20
Tar t,
41, 41–42
M
Mayo, Parmesan, 23
Meatloaf, Old-Fashioned, 22
Mu ns, Banana Nut, 41
Mushroom(s):
Chicken &, Wild Rice Bake,
Portobello, Stu ed, 7
Stu ed,
9, 9
19, 19
O
Onion & Spinach Strata, 17–18
Orange-Cranberry Mini Loaves, 43
P
Parmesan:
Crostini, Beef Filet on, 9-10
-Crusted Tilapia,
Mayo, 23
Pasta:
Baked Rigatoni, 34–35,
Tortellini Alfredo, 35
See also Pies; Tarts
Pastry.
Bananas Foster Rollups, 42, 42
Salmon en Croute,
Southwestern Beef Empanadas, 7
Peanut:
Butter Bars, 37
Sauce, Thai, 34
Pesto Pizza, 33
Pies:
Apple, Crumb-Topped, 38–39
Pumpkin, 43
13, 13
35
8, 8
INDEX
INDEX 45
Page 46

Index
Pizza, 31–34
Chicago Deep-Dish,
Dough, Basic, 32
Pesto, 33
Thai,
Poblano Corn Casserole, 26
Pork Tenderloin with Ginger-Apricot Glaze, 23
Portobello Mushrooms, Stu ed, 7
Potatoes:
Oven-Roasted Rosemary, 28
Scalloped, 28
Pudding, Bread, with Whiskey Sauce, 40
Pumpkin Pie, 43
34, 34
32, 32–33
Q
Quiche Lorraine, 17
R
Red Pepper and Asparagus, Roasted, 27
Rigatoni, Baked, 34–35,
Rosemary:
Lemon Roasted Chicken, 20
Potatoes, Oven-Roasted, 28
Skewers, Scallops on, 13–14
Rum Caramel Sauce, 42
35
S
Salmon:
en Croute,
Ginger, with Baby Bok Choy, 15
Sandwich, Ciabatta, 23
Sauces:
Cajun Cream, 12
Caramel Rum, 42
Chipotle, 7
Cilantro Soy Vinaigrette, 14
Ginger-Apricot Glaze, 23
Herbs de Provence, 15
Lemon and Garlic, 25
Parmesan Mayo, 23
Peanut, Thai, 34
Turkey Gravy, 18
Whiskey, 40
Scalloped Potatoes, 28
Scallops on Rosemary Skewers, 13–14
8, 8
Seafood, 11–15
Salmon, Ginger, with Baby Bok Choy, 15
Salmon en Croute,
Scallops on Rosemary Skewers, 13–14
Shrimp Skewers, 15
Snapper en Papillote,
Tilapia, Parmesan-Crusted,
Tuna, Sesame-Crusted, on Field Greens,
Sesame-Crusted Tuna on Field Greens,
Shrimp Skewers, 15
See Vegetables and Sides
Sides.
Skewers:
Rosemary, Scallops on, 13–14
Shrimp, 15
Snapper en Papillote,
Sou és:
Chocolate,
Sweet Potato,
Southwestern Beef Empanadas, 7
Soy Cilantro Vinaigrette, 14
Spinach:
Gratin, Creamed, 30
and Onion Strata, 17–18
Starters.
Strata, 17–18
Stu ed Flank Steak,
Stu ed Mushrooms,
Stu ed Portobello Mushrooms, 7
Sweet Potato Sou é,
Sweets.
Swiss & Bacon Strata, 17–18
38, 38
See Appetizers
See Desserts and Sweets
8, 8
12, 12
13, 13
14, 14
12, 12
27, 27–28
21, 21
9, 9
27, 27–28
T
Tarts:
Fruit,
Lemon,
Thai Pizza,
Tilapia, Parmesan-Crusted,
Tortellini Alfredo, 35
Tuna, Sesame-Crusted, on Field Greens,
Turkey, Roast,
39, 39
41, 41–42
34, 34
13, 13
14, 14
18, 18
V
Vegetables and Sides, 24–30
Acorn Squash, Baked, 29
Asparagus, Steamed,
Corn Poblano Casserole, 26
Garlic Bread, 28–29
Green Beans Amandine, 25
Herbs de Provence Biscuits,
25, 25
29, 29
14, 14
INDEX
INDEX 46
Page 47

Vegetables and Sides (continued)
Mushrooms, Stu ed,
Portobello Mushrooms, Stu ed, 7
Potatoes, Oven-Roasted Rosemary, 28
Potatoes, Scalloped, 28
Red Pepper & Asparagus, Roasted, 27
Spinach Gratin, Creamed, 30
Sweet Potato Sou é,
Zucchini Casserole, Italian, 26
Vinaigrette, Cilantro Soy, 14
9, 9
27, 27–28
W
Whiskey Sauce, 40
Wild Rice Bake, Chicken & Mushroom,
19, 19
Z
Zucchini:
Casserole, Italian, 26
“Crostini,” 10
Index
INDEX
PRECAUTIONS TO AVOID POSSIBLE EXPOSURE TO EXCESSIVE MICROWAVE ENERGY
• DO NOT attempt to operate the top oven with the door open since open-door operation can result in harmful exposure
to microwave energy. It is important NOT to defeat or tamper with the safety interlocks.
• DO NOT place any object between the oven front face and the door or allow soil or cleaner residue to accumulate on
sealing surfaces.
• The oven should not be adjusted or repaired by anyone except properly quali ed personnel.
• DO NOT operate the oven if is damaged. It is particularly important that the oven door close properly and that there is
no damage to the: (1) door (bent), (2) hinges and latches (broken or loosened), (3) door seals and sealing surfaces.
INDEX 47
 Loading...