


Hybrid Digital Video Recorder
User Manual
Issue
Date
V1.0
2016-12-22
Hybrid Digital Video Recorder
User Manual About This Document
About This Document
Purpose
This document describes the hybrid digital video recorder (HDVR) in terms of product features, hardware installation, network access,
network configuration, routine maintenance, and common fault analysis.
Intended Audience
This document is intended for:
z
Technical support engineers.
z
Maintenance engineers
z
Network V ideo Manger S ystem operators
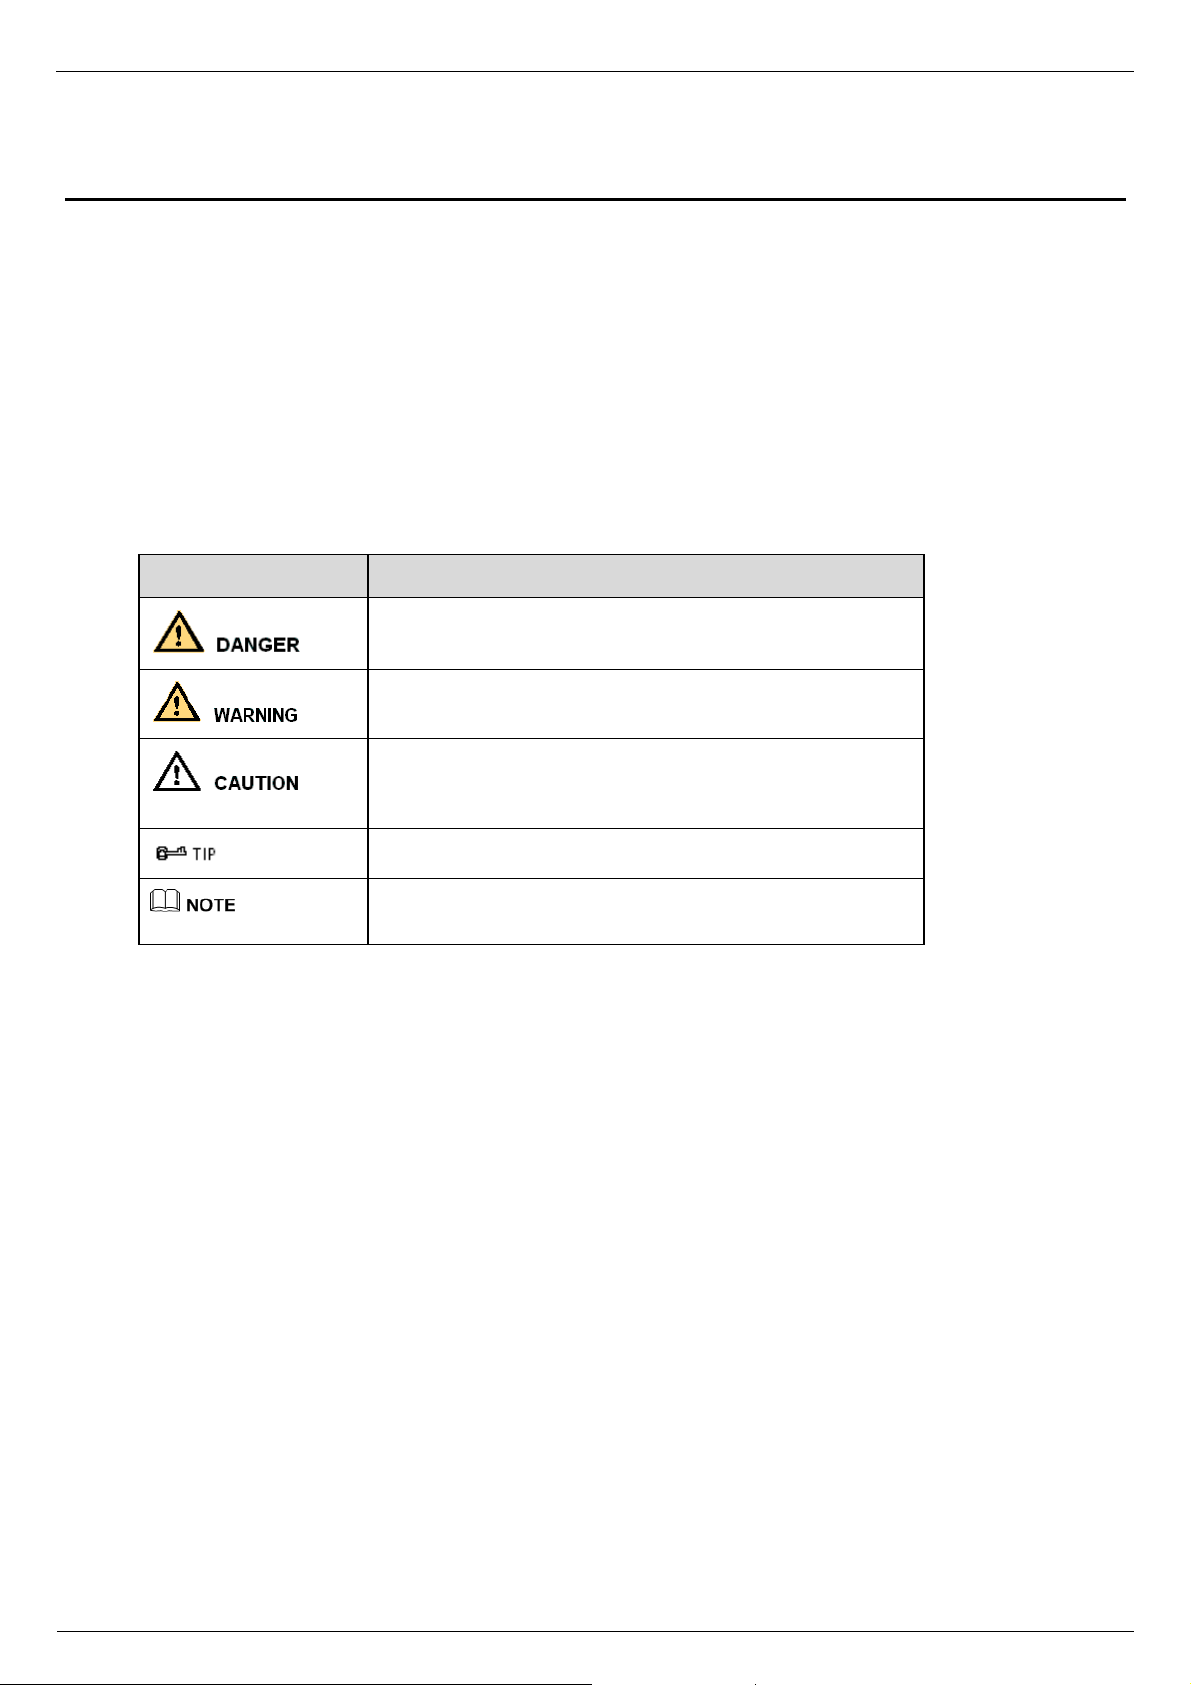
Symbol conventions
The symbols that may be found in this document are defined as follows:
Symbol Description
Important Statement
Users are required to enable and maintain the lawful interception (LI) interfaces of video surveillance products in strict compliance with
relevant laws and regulations. Installation of surveillance devices in an office area by an enterprise or individual to monitor employee
behavior and working efficiency outside the permitted scope of the local law and use of video surveillance devices for eavesdropping of
illegal purposes constitute behaviors of unlawful interception.
Alerts you to a high risk hazard that could, if not avoided.
Alerts you to a medium or low risk hazard that could, if not
avoided, result in moderate or minor injury.
Alerts you to a potentially hazardous situation that could, if not
avoided, result in equipment damage, data loss, performance
deterioration, or unanticipated results.
Provides a tip that may help you solve a problem or save time.
Provides additional information to emphasize or supplement
important points in the main text.
IssueV1.0 (2016-12-22) i

Contents
Hybrid Digital Video Recorder
User Manual
Contents
About This Document ................................................................................................ i
Contents ........................................................................................................................ ii
Preface ........................................................................................................................... 1
Important Notes .................................................................................................................... 1
About This User Manual ...................................................................................................... 1
Installation Environment and Precautions ............................................................................ 1
2 Basic Operations ...................................................................................................... 3
Powering on the Device ....................................................................................................... 3
2.2 Powering off the Device ................................................................................................. 4
2.3 Logging In to the System ............................................................................................... 4
2.4 Adding Cameras ............................................................................................................. 5
3 Quick Navigation..................................................................................................... 6
3.1 Playback ......................................................................................................................... 7
3.2 Search ............................................................................................................................. 8
3.3 Picture Grid .................................................................................................................. 10
3.4 Event ............................................................................................................................. 11
3.5 Main Menu .................................................................................................................... 11
4 Camera Management ............................................................................................ 12
4.1 Camera Management .................................................................................................... 12
4.1.1 Binding a Camera ............................................................................................. 12
4.1.2 Unbinding a Camera ........................................................................................ 13
4.2 Picture Param ............................................................................................................... 14
4.3 Encode Param ............................................................................................................... 15
4.4 Alarm Setup .................................................................................................................. 16
4.5 Motion Detection.......................................................................................................... 17
4.6 Privacy Area ................................................................................................................. 18
5 Setting ...................................................................................................................... 19
5.1 Basic ............................................................................................................................. 19
5.1.1 System .............................................................................................................. 19
5.1.2 Time ................................................................................................................. 20
ii Issue V1.0 (2016-12-22)

Hybrid Digital Video Recorder
User Manual Contents
5.2 Alarm ............................................................................................................................ 21
5.2.1 Surveillance ...................................................................................................... 21
5.2.2 Sensor ............................................................................................................... 22
5.3 Record .......................................................................................................................... 22
5.4 Privacy ......................................................................................................................... 24
5.4.1 Protect .............................................................................................................. 24
5.4.2 Modify Password ............................................................................................. 25
5.5 Network ........................................................................................................................ 25
5.5.1 IPv4 .................................................................................................................. 25
5.5.2 DDNS ............................................................................................................... 27
5.6 Disk ...................................................................................................................... ........ 28
5.6.1 Viewing Disk Information ................................................................................ 28
5.6.2 Clearing Disk Data ........................................................................................... 29
5.7 App ............................................................................................................................... 29
5.8 Shutdown ..................................................................................................................... 30
6 Log Center ............................................................................................................... 31
7 Alarm ........................................................................................................................ 33
7.1 Event ............................................................................................................................ 33
7.2 Timeline ....................................................................................................................... 34
7.3 Clear alarm ................................................................................................................... 35
文档版本 V1.0 (2016-12-22)
iii

0Preface
Important Notes
Thank you for choosing the HDVR. Please read the user manual carefully before
using this product.
The HDVR is a complex system-based device. T o avoid misoperations and
malfunctions caused by environmental factors and human factors during installation,
commissioning, and application, note the following points when installing and using
this product:
Read the user manual carefully before installing and using this product.
z
Use Seagate or Western Digital hard disks as the storage devices of the HDVR with
high stability and competitive price/performance ratios (the quality of hard disks
sold on markets varies greatly with different brands and models).
z
Do not open the enclosure of this product unless performed by a professional
person to avoid damage and electric shock.
z
We are not liable for any video data loss caused by improper installation,
configuration, operation, and hard disk errors.
Hybrid Digital Video Recorder
User Manual
Preface
About This User Manual
Please note the following points before using this user manual:
z
This user manual is intended for persons who operate and use the HDVR.
z
The information in this user manual applies to the full series HDVR, here uses
4ch,1HDD HDVR as an example for description.
z
Read this user manual carefully before using the HDVR and follow the methods
described in this manual when using the HDVR.
z
If you have any doubts when using the HDVR, contact your product seller.
z
In the case of product upgrade, the information in this document is subject to
change without notice.
Installation Environment and Precautions
Installation environment
Table 1-1 defines the installation environment of the HDVR.
Issue V1.0 (2016-12-22) 1

Hybrid Digital Video Recorder
User Manual 0Preface
Table 1-1 Installation environment
Item Description
Electromagnetism
The HDVR meets the national standards of electromagnetic
radiation and does not cause harm to the human body.
Temperature –10oC to +45oC
Humidity 20% to 80%
Atmospheric pressure 86 kPa to 106 kPa
Power supply
12V 2A(1 HDD)或 12V 4A(2 HDDs)
Power consumption <15W (excluding the hard disk)
Installation precautions
Note the following points when installing and operating the HDVR:
z
The power adapter of the HDVR uses DC12V±20% input. Do not use the HDVR
when voltage is too high or too low.
z
Install the HDVR horizontally.
z
Avoid direct sunlight on the HDVR and keep away from any heat sources and hot
environments.
z
Connect the HDVR to other devices correctly during installation.
z
The HDVR is not configured with any hard disk upon delivery. Install one or more
hard disks when using the HDVR for the first time.
z
The HDVR identifies hard disk capacity automatically and supports mainstream
hard disk models. You are advised to use good brands of hard disk so that the
HDVR can operate stably and reliably.
Other precautions
z
Clean the HDVR with a piece of soft and dry cloth. Do not use chemical solvents.
z
Do not place objects on the HDVR.
The HDVR meets the national standards of electromagnetic radiation and does not
cause electromagnetic radiation to the human body.
2 Issue V1.0 (2016-12-22)
2 Basic Operations
Powering on the Device
Hybrid Digital Video Recorder
User Manual
2 Basic Operations
z
Ensure that the HDVR is correctly connected to a power supply, and a display is
correctly connected to the high definition multimedia interface (HDMI) or video
graphics array (VGA) port of the HDVR before power-on.
z
In some environments, abnormal power supply may cause the failure of the HDVR
to work properly and even damage the HDVR in severe cases. It is recommended
to use a regulated power supply to power the HDVR in such environments.
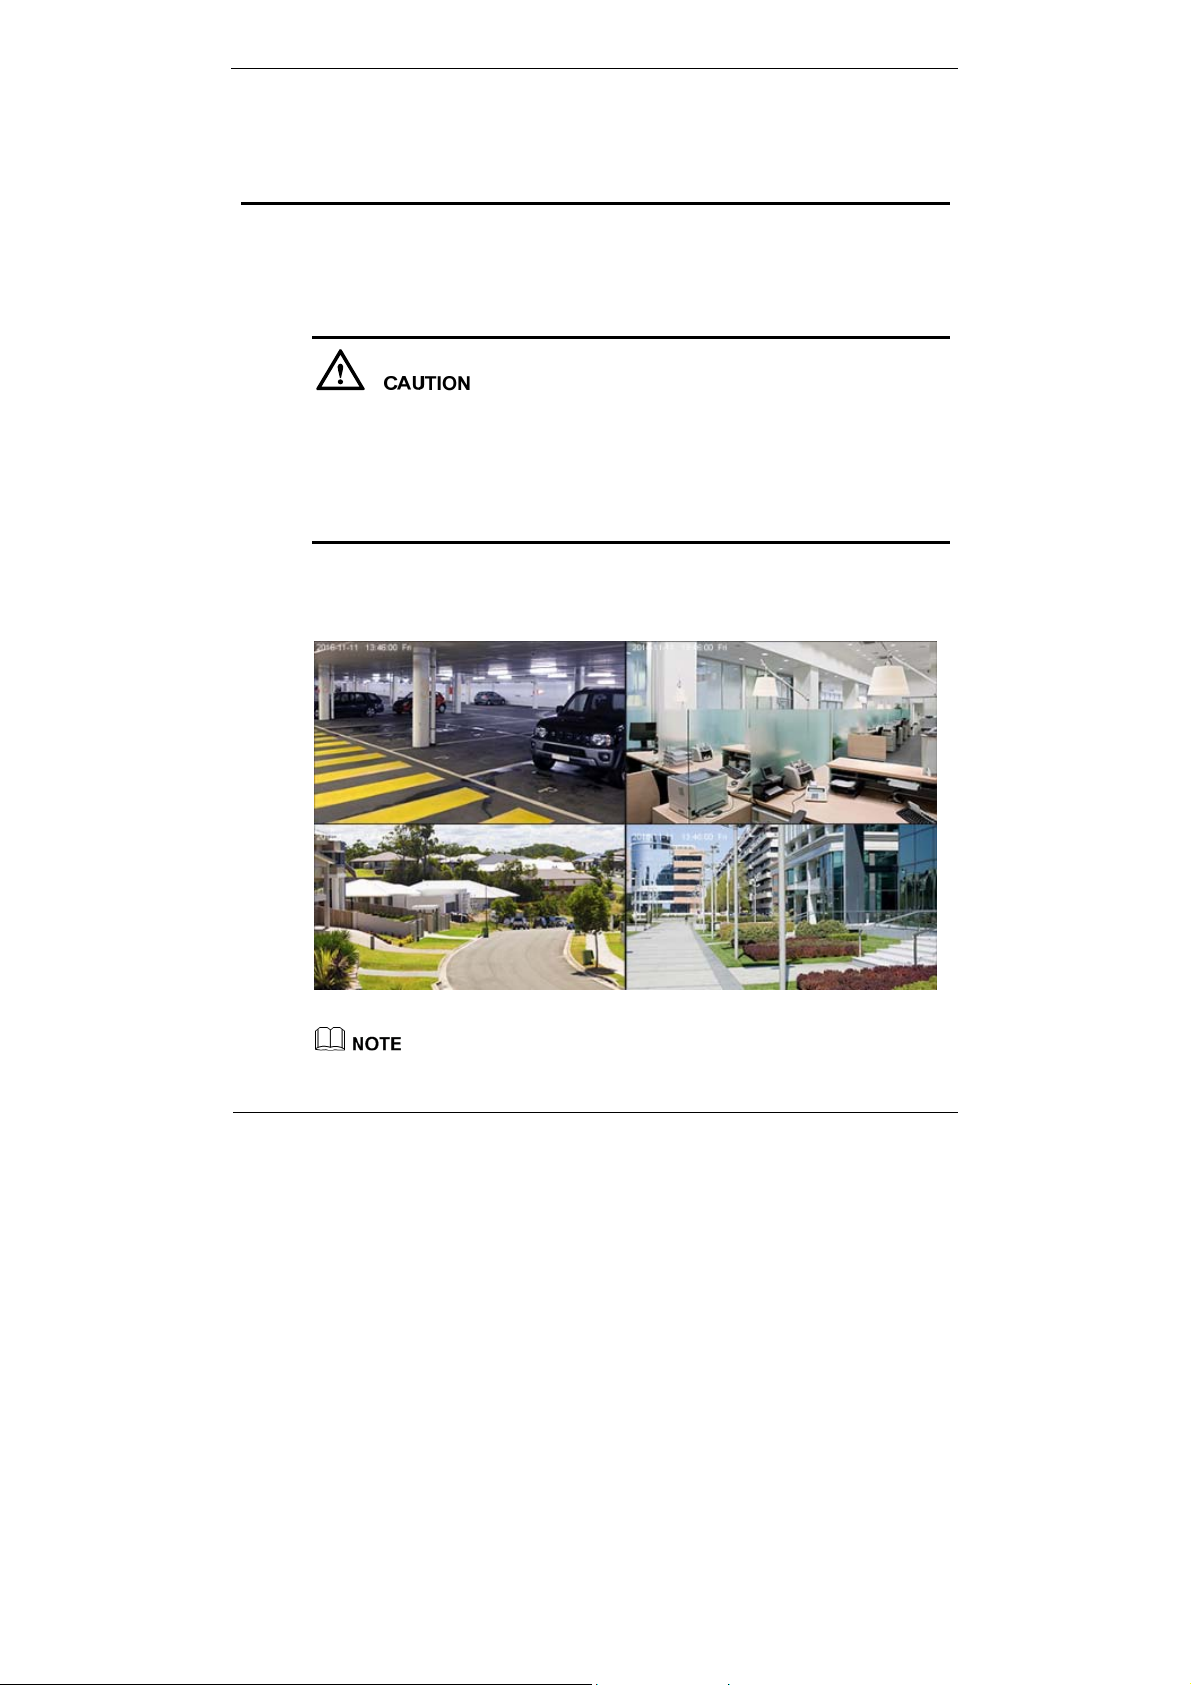
After the HDVR is connected to a power supply, the power indicator is steadily on.
Start the HDVR. The real-time video screen is displayed, as shown in Figure 2-1.
Figure 2-1 Real-time video scr een
Users need to provide a hard disk for the HDVR. The hard disk is strictly detected during
device startup. If the detection result failed, the possible causes are as follows:
Issue V1.0 (2016-12-22) 3
Hybrid Digital Video Recorder
User Manual 2 Basic Operations
z
The hard disk is new and is not formatted. Log in to the system and format the hard disk.
z
The hard disk is formatted, but the file system is inconsistent with the file system
supported by the HDVR. Format the hard disk.
z
The hard disk is damaged.
2.2 Powering off the Device
Click the main menu and choose Setting > Shutdown to power off the HDVR. If there
is a power switch on the rear panel of the HDVR, you can turn off the power switch to
disconnect the HDVR from the power supply.
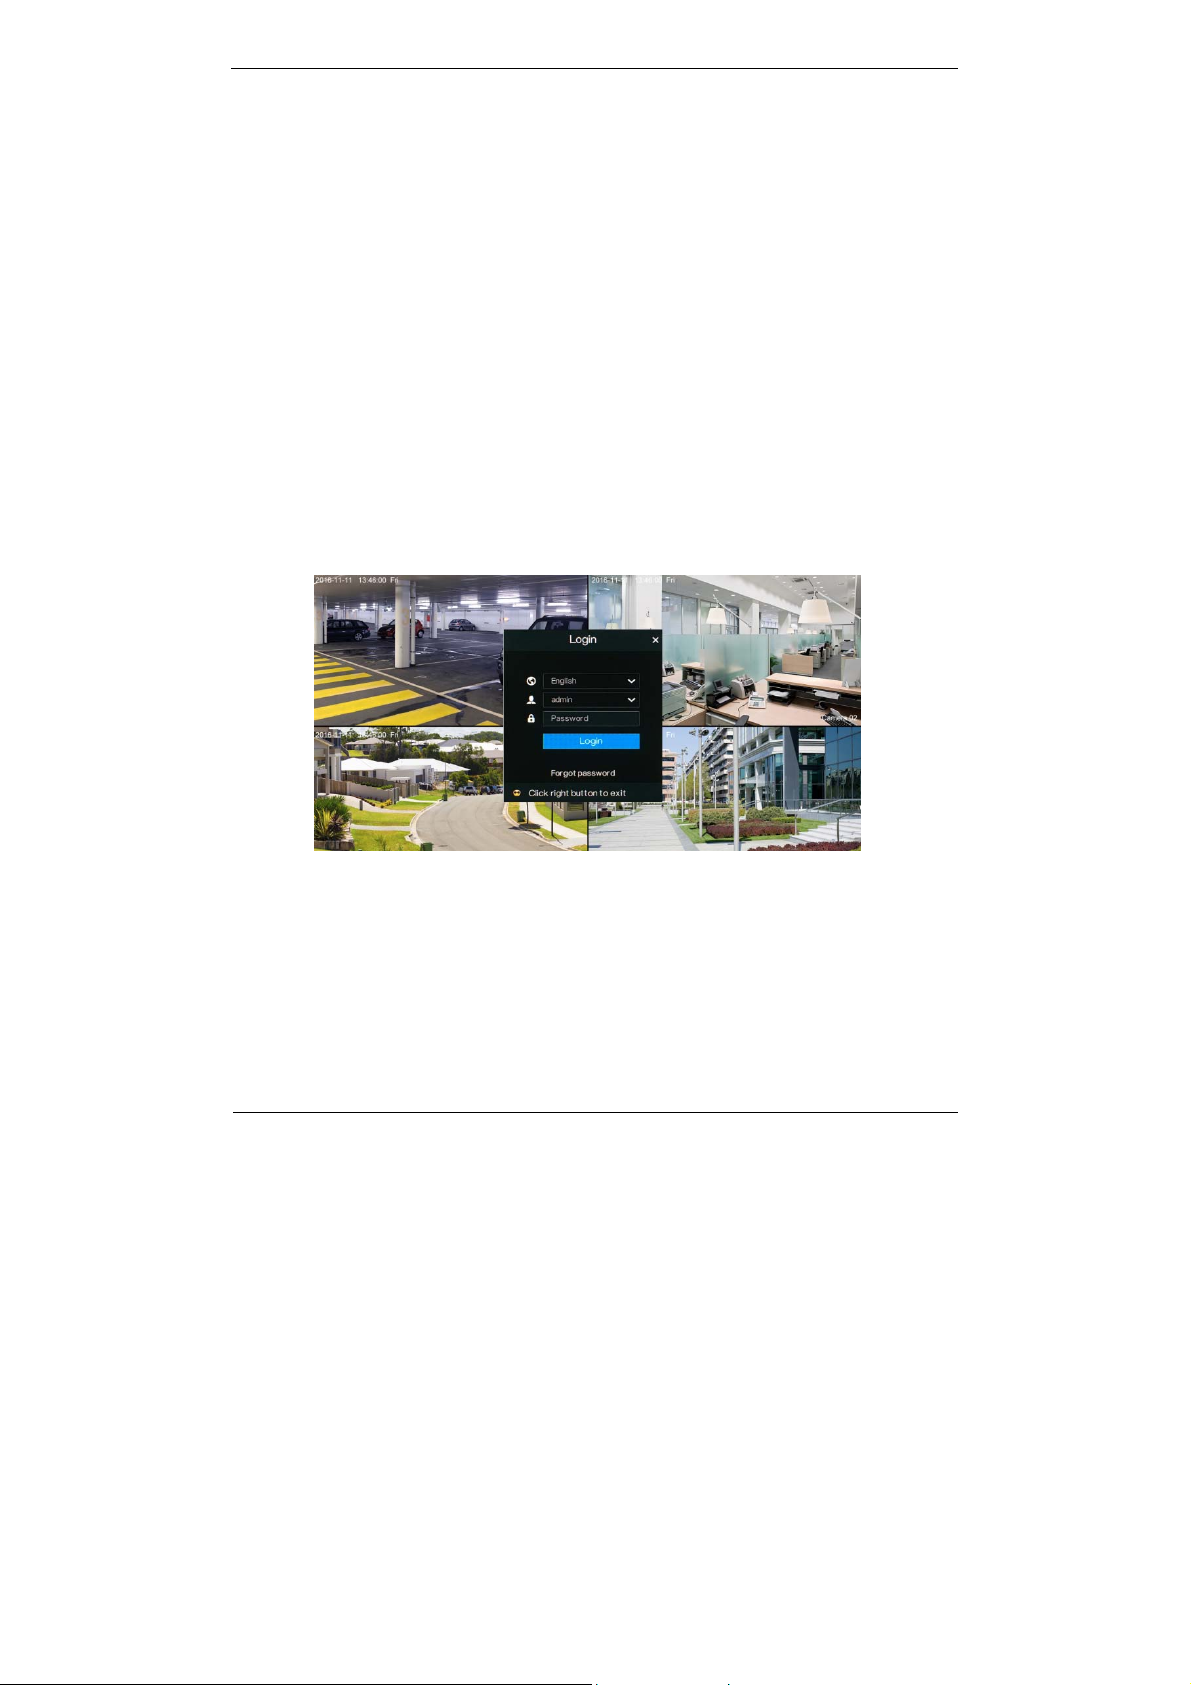
2.3 Logging In to the System
Logging In to the Device
Step 1 On the HDVR login page, select the language, as shown in Figure 2-2.
Figure 2-2 Login page
Step 2 Enter the username and password.
4 Issue V1.0 (2016-12-22)
2 Basic Operations
r
z
The username and password are both admin.
z
If you forget password, click Forgot password. There are two methods of retrieving the
password:
1. Scan the UUID QR code on the device and send the QR code to your seller to retrieve
password.
2. Click Send Password. A password retrieval email will be sent to your email address
(for details, see Step 2 in 5.4.1 "Protect" in 5.4 "Privacy"). Then, you can retrieve
password by following operations described in the email.
Step 3 Click Login to access the main User Interface (UI).
----End
2.4 Adding Cameras
This HDVR can be connected to both analog cameras and network cameras.
The HDVR can be directly connected to analog cameras through bayonet nut connector
(BNC) cables.
After the HDVR is connected to a Dynamic Host Configuration Protocol (DHCP)
network, it automatically obtains an IP address, and searches for and adds network
cameras in the same network segment.
If an analog camera and network camera coexist in the same network segment, the
HDVR gives preference to the access of the analog camera by default.
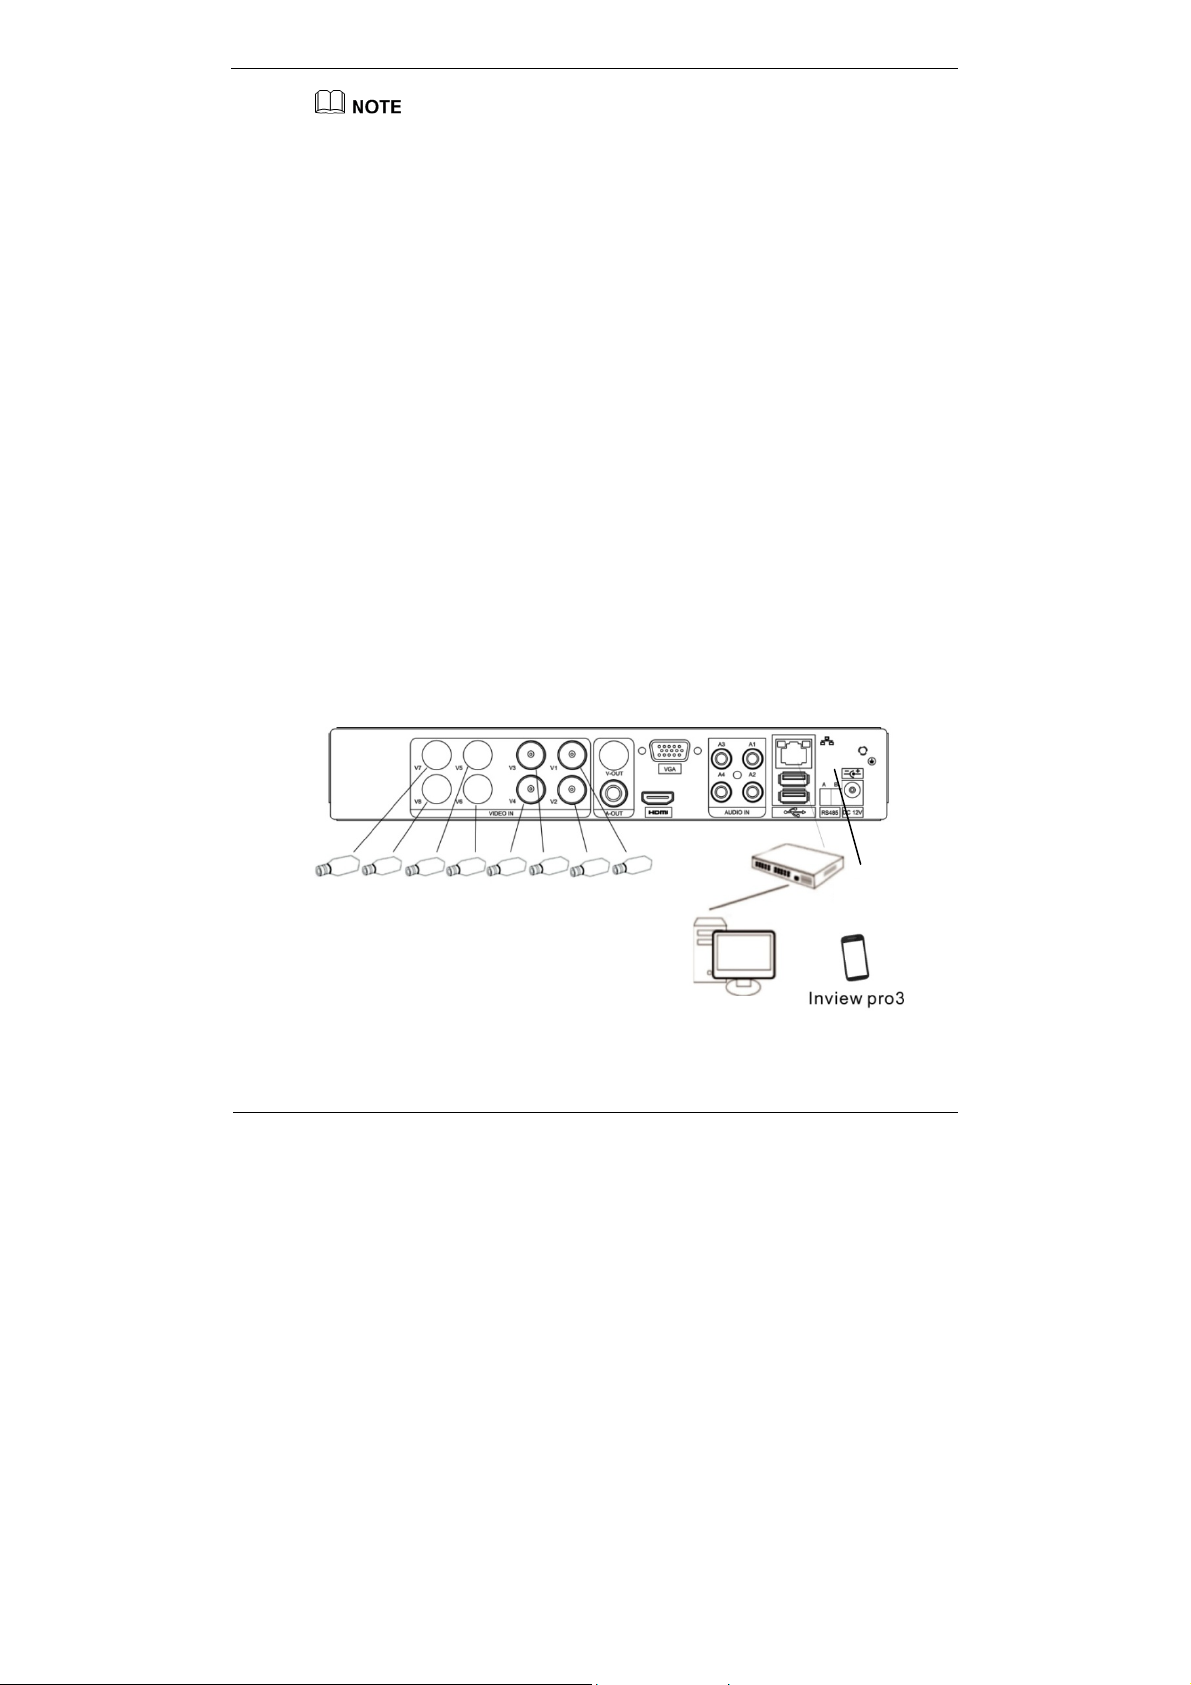
Figure 2-3 shows the topology of the HDVR.
Hybrid Digital Video Recorder
User Manual
Figure 2-3 HDVR topology
Switch
Remote monito
----End
Issue V1.0 (2016-12-22) 5
Hybrid Digital Video Recorder
User Manual 3 Quick Navigation
3 Quick Navigation
After the HDVR operation screen is displayed, right-click on the screen or move the
cursor to the topmost or downmost position of the HDVR screen. The HDVR floating
menu bar is displayed.
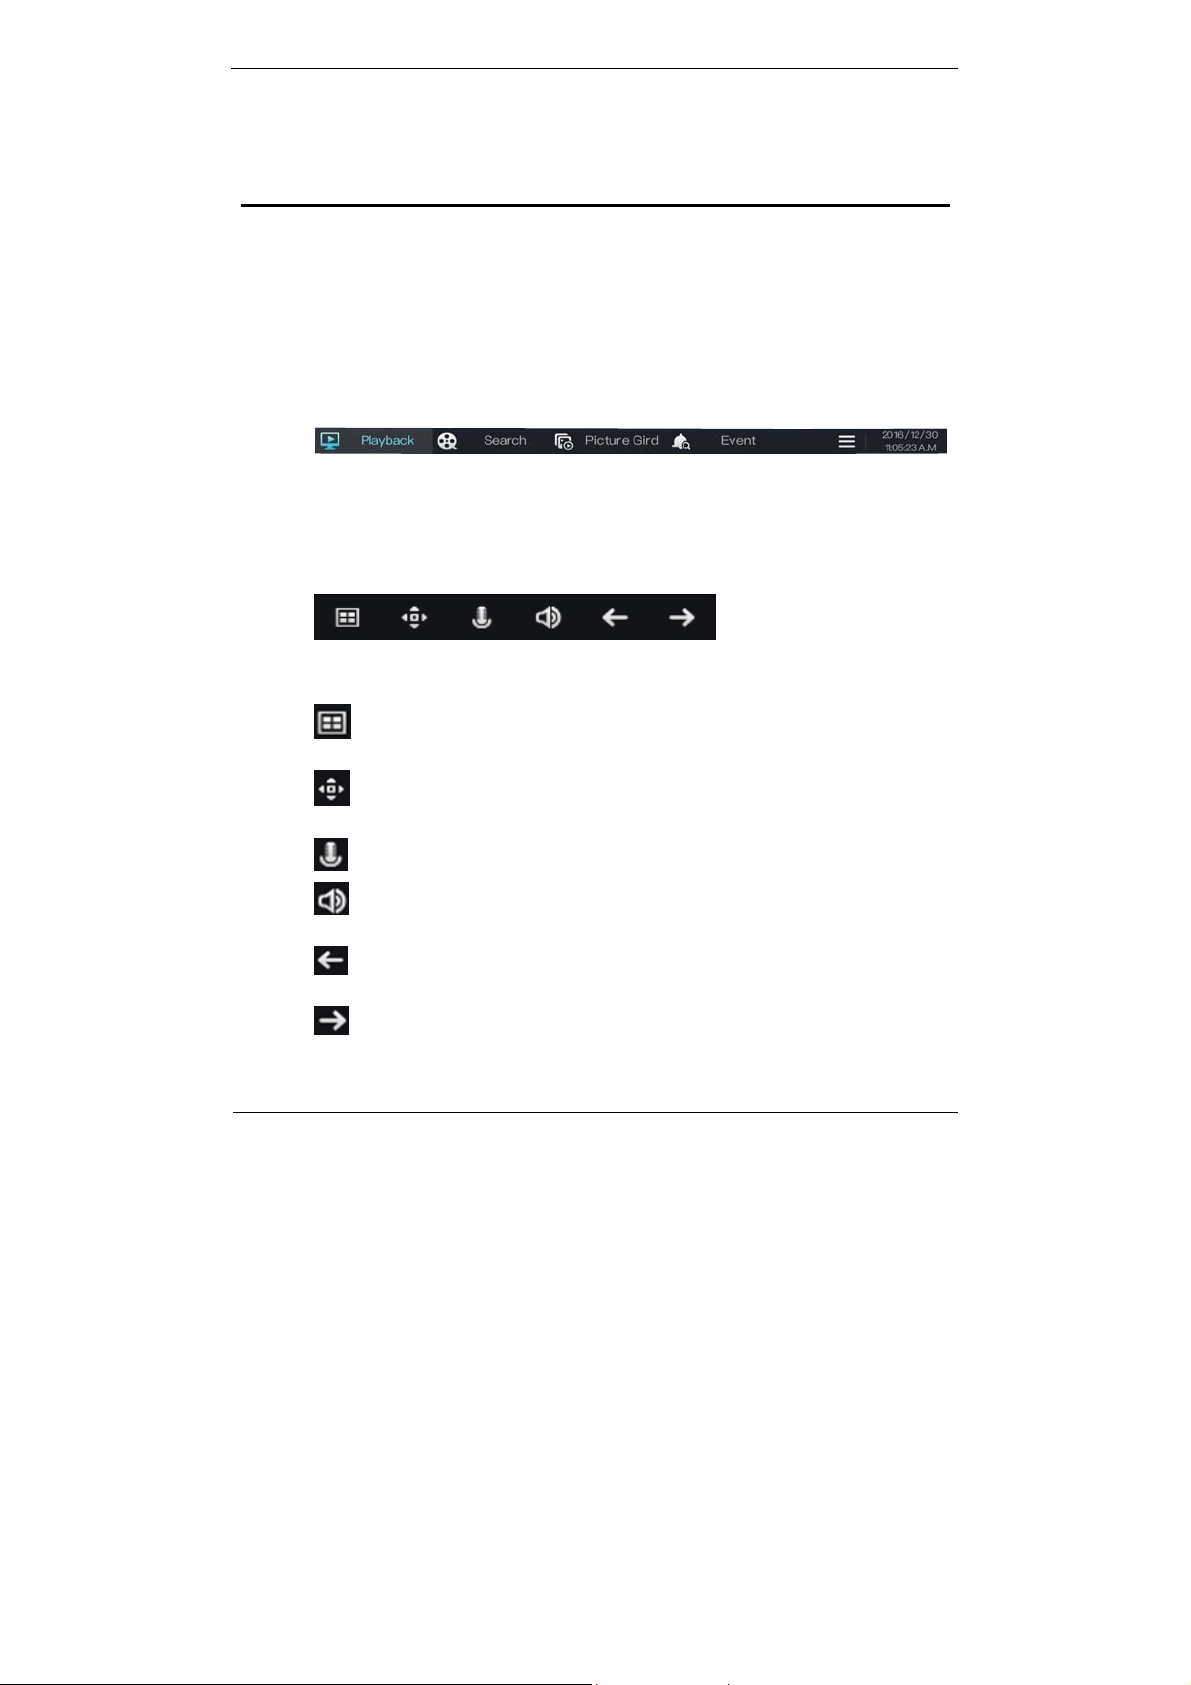
A quick navigation bar is displayed in the topmost position of the HDVR screen. The
navigation bar provides Playback, Search, Picture Grid, Event, main menu, and
HDVR time display, as shown in Figure 3-1.
Figure 3-1 Quick navigation bar
The real-time video toolbar is displayed in the downmost position of the HDVR screen.
The video tool bar provides video window switching, pan-tilt-zoom (PTZ) control,
voice intercom, audio, and single-channel browse, as shown in Figure 3-2.
Figure 3-2 Real-time video toolbar
The real-time video toolbar is described as follows:
: Live button. After this button is clicked, the real-time video window is switched
between the single-screen mode and multi-screen mode.
: PTZ button. After this button is clicked, the PTZ operation screen is displayed,
where you can adjust the PTZ to control cameras.
: Talk button. After this button is clicked, voice intercom is enabled or disabled.
: Audio button. After this button is clicked, the audio function is enabled or
disabled.
: Previous button. After this button is clicked, the window switches to single-
screen mode and plays the view of the previous channel.
: Next button. After this button is clicked, the window switches to single-screen
mode and plays the view of the next channel.
6 Issue V1.0 (2016-12-22)
3 Quick Navigation
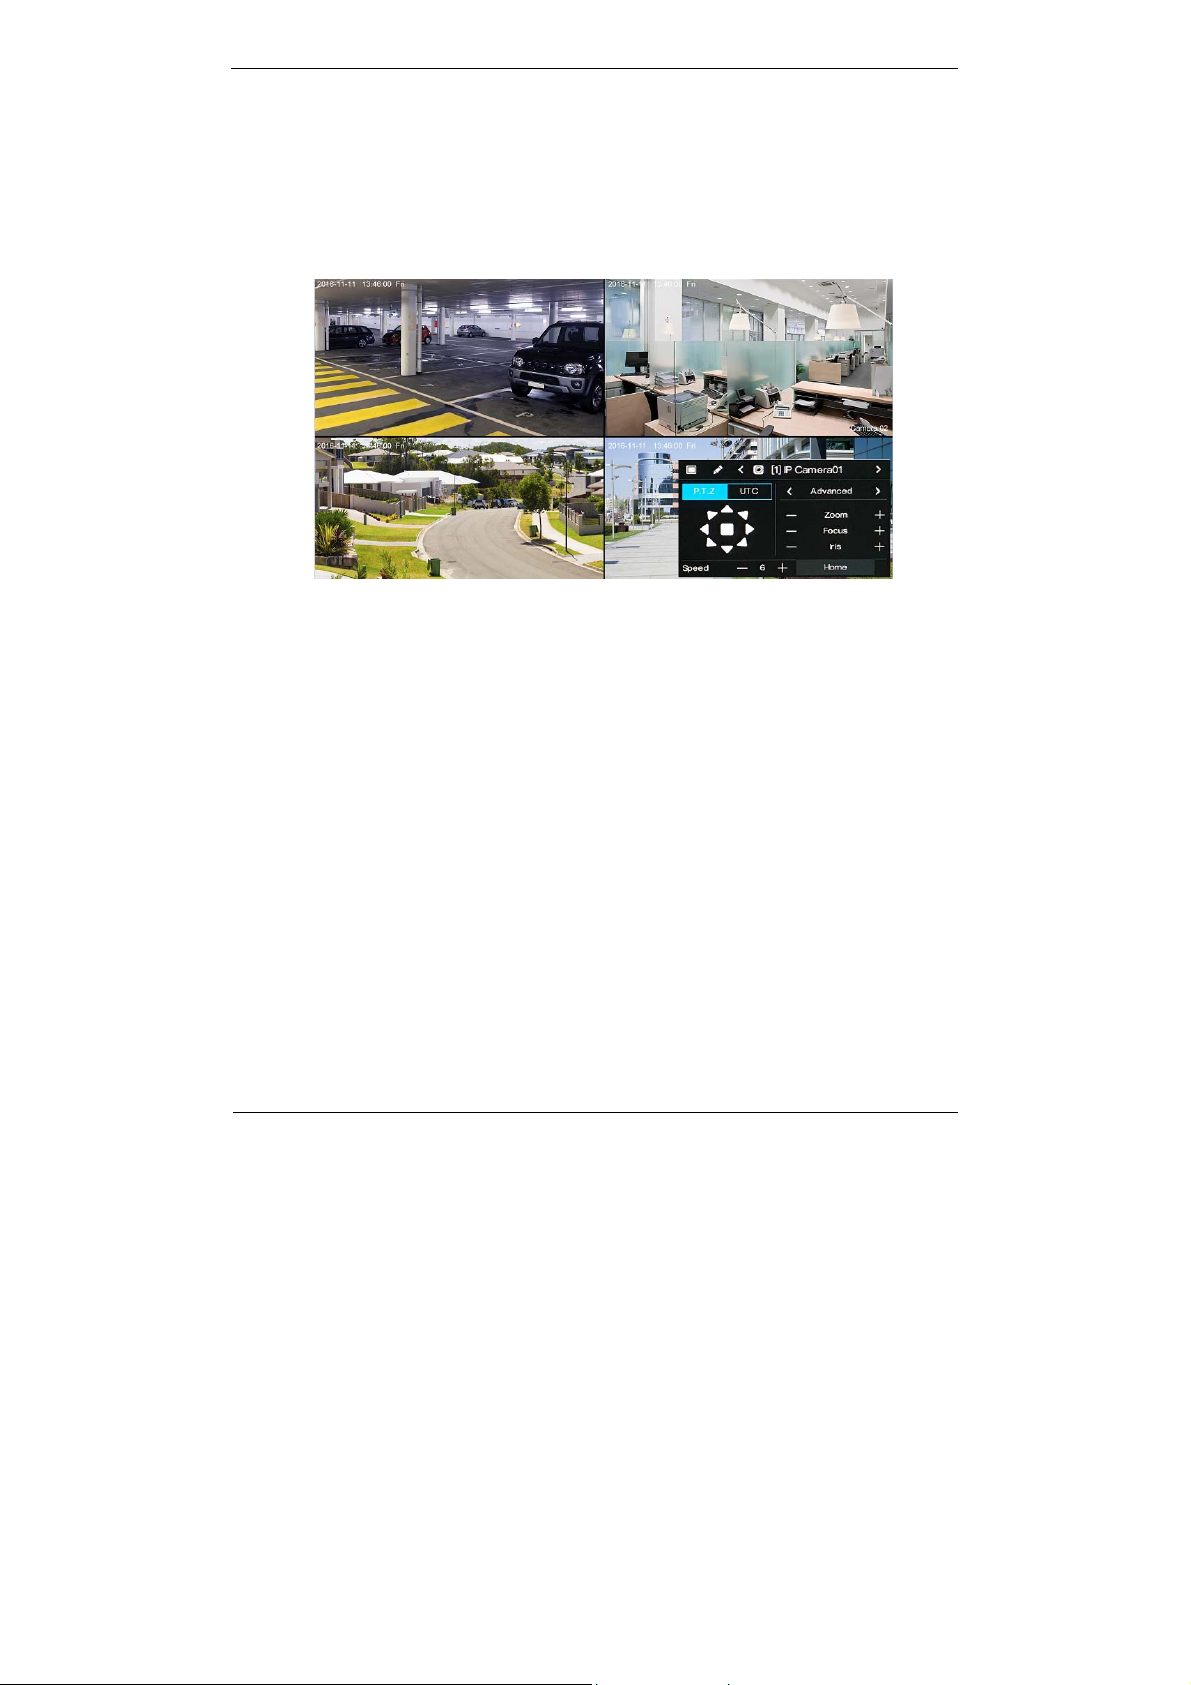
PTZ Operations
The PTZ control and function settings are applicable only to high-speed PTZ cameras
and cameras externally connected to PTZs.
Click the PTZ button on the real-time video toolbar. The PTZ control screen is
displayed, as shown in Figure 3-3. On this screen, you can set the PTZ direction, zoom,
focus, camera preset position, and other parameters.
Figure 3-3 PTZ control screen
Hybrid Digital Video Recorder
User Manual
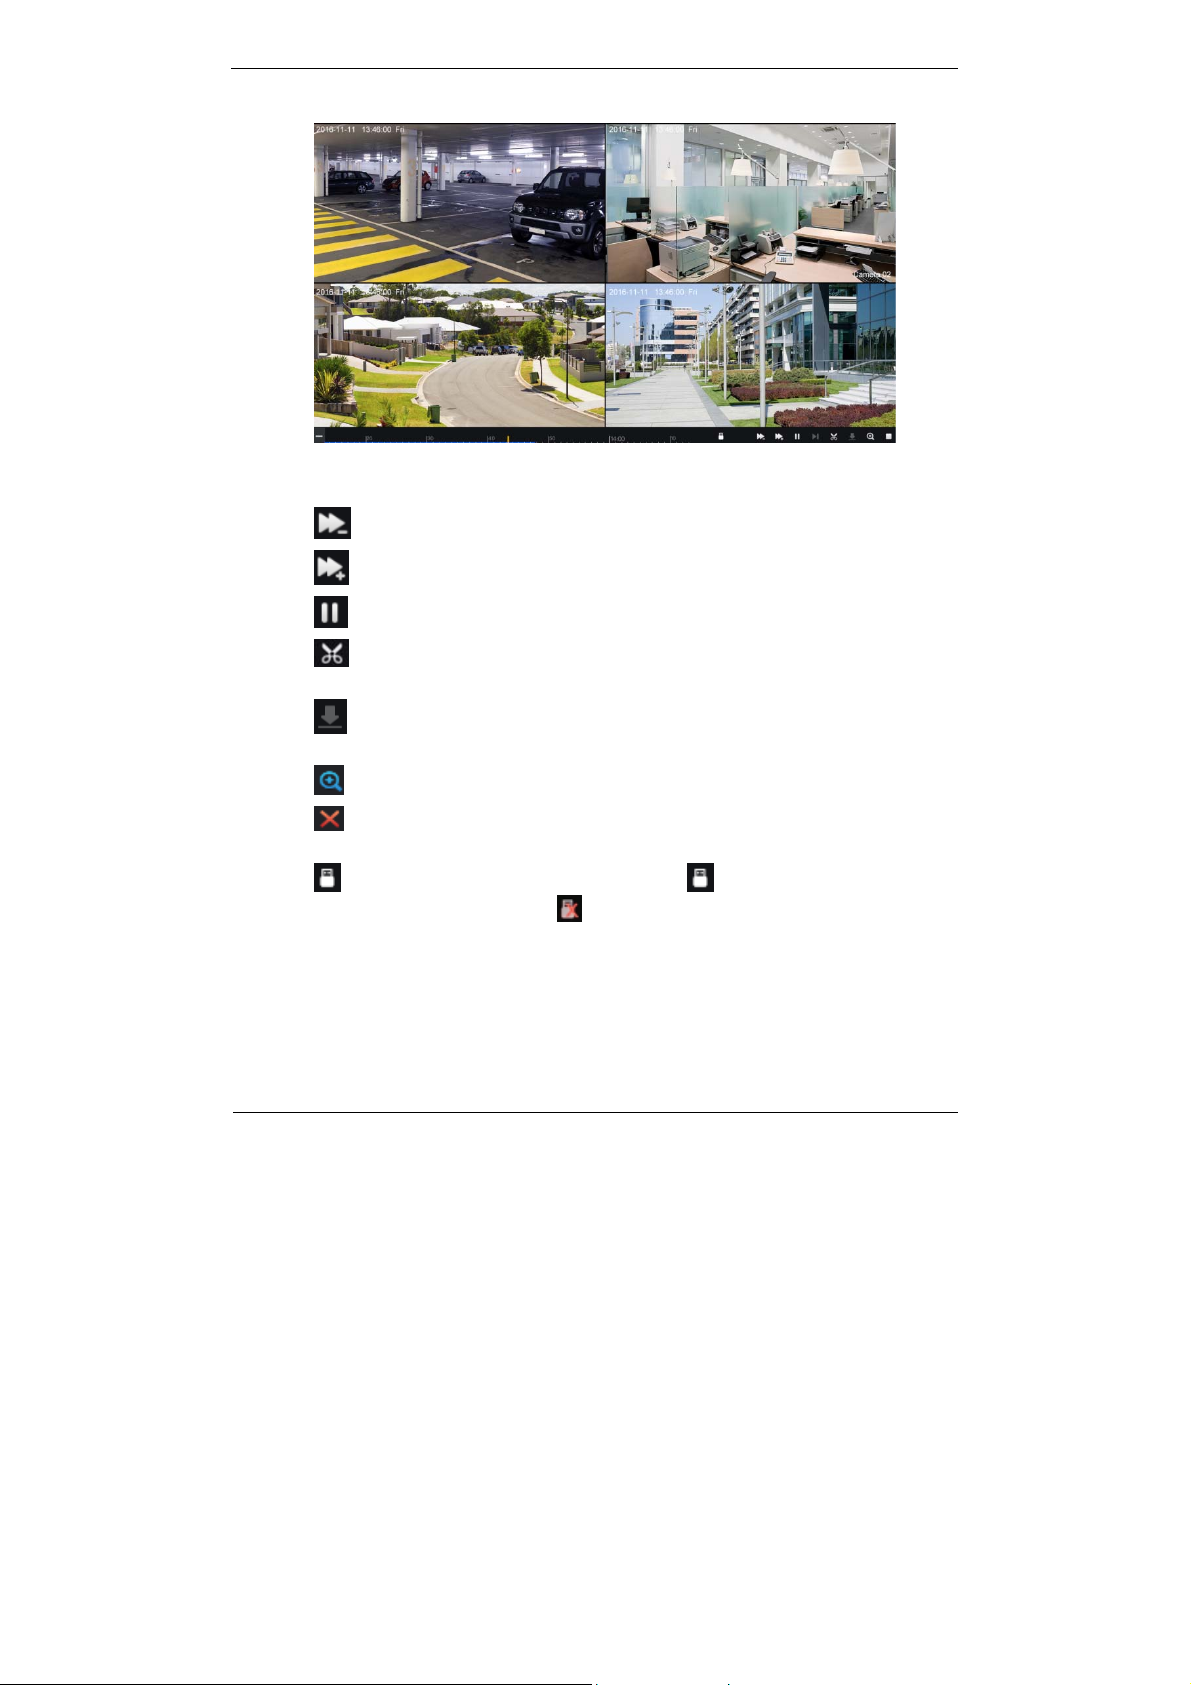
3.1 Playback
Playback refers to playing back a video.
Click Playback in the quick navigation bar to access the playback screen, as shown in
Figure 3-4.
Issue V1.0 (2016-12-22) 7
Hybrid Digital Video Recorder
User Manual 3 Quick Navigation
Figure 3-4 Playback screen
The toolbar at the bottom of the playback screen is described as follows:
: Slow play
: Fast forward
: Pause
: Backup. After this button is clicked, the video backup starts. This function is
available after a USB flash drive is connected to the HDVR.
: Download. After this button is clicked, the backup ends. This function is
available after the backup function is enabled.
: Magnify. After this button is clicked, the device plays a video in full-screen mode.
: Full screen off. After this button is clicked, the device returns to the real-time
video screen.
: Indicates whether to insert a USB flash drive. indicates that a USB flash
drive is inserted into the HDVR.
indicates that no USB flash drive is inserted into
the HDVR.
3.2 Search
Search refers to searching for a video by date and time.
8 Issue V1.0 (2016-12-22)

3 Quick Navigation
Operation Description
Click Search in the quick navigation bar to access the search screen, as shown in
Figure 3-5.
Figure 3-5 Search screen
The toolbar at the bottom of the play window is described as follows:
Hybrid Digital Video Recorder
User Manual
: Slow play
: Fast forward
: Pause
: Backup. After this button is clicked, the video backup starts. This function is
available after a USB flash drive is connected to the HDVR.
: Download. After this button is clicked, the backup ends. This function is available
after the backup function is enabled.
: Intelligent motion detection. After this button is clicked, the device automatically
locates a moving target.
: Full screen. After this button is clicked, the device plays a video in full screen.
Operation Steps
Step 1 Select a camera in the camera list on the left side of the search screen. The video view
of the selected camera is displayed in the play window.
Issue V1.0 (2016-12-22) 9

Hybrid Digital Video Recorder
User Manual 3 Quick Navigation
Step 2 Select a date in the calendar on the right side of the search screen.
Step 3 Click
or on the left side of the time axis below the play window to
switch the time axis, and then select time. Then, the play window plays the video in
the specified time range.
indicates that videos are searched on a minute basis.
indicates that videos are searched on an hourly basis.
----End
3.3 Picture Grid
Picture grid refers to evenly dividing the video of a chan nel by time range and
searching for a video based on thumbnails divided by time range.
Click Picture Grid on the quick navigation bar to access the picture grid screen, as
shown in Figure 3-6.
Figure 3-6 Picture grid screen
Operation Steps
Step 1 Select a camera in the camera list on the left side of the picture grid screen. Videos shot
by the camera in the earliest time range on the current day are displayed as thumbnails
in the window on the right side.
Step 2 Select a day of a week on the right of
10 Issue V1.0 (2016-12-22)
.

3 Quick Navigation
Hybrid Digital Video Recorder
Step 3 Select a time range on the right of . For example, if you select 7, it indicates
that the selected time range is 07:00:00-08:00:00.Videos in this time range are
displayed as 12 thumbnails at an interval of 5 minutes in the window on the right.
Step 4 Select a required thumbnail, double-click it or right-click it and choose Play from
the shortcut menu to play the video.
----End
3.4 Event
Click Event on the quick navigation bar to access the alarm event screen. For details
about the screen and operations on this screen, see 7.1 "Event".
3.5 Main Menu
Click in the upper right corner on the main UI. The main menu as shown in
Figure 3-7 is displayed. The main menu includes Camera, Setting, Log Center, and
Alarm.
Figure 3-7 HDVR main menu
User Manual
----End
Issue V1.0 (2016-12-22) 11

Hybrid Digital Video Recorder
User Manual 4 Camera Management
4 Camera Management
Camera management mainly involves analog cameras and coaxial high-definition
cameras. Cameras can be directly connected to input channels of the HDVR. When
analog cameras are insufficient, the HDVR automatically searches for and adds (that is,
binds) network cameras in the same Local Area Network (LAN).
Camera management includes camera adding (binding) or deletion (unbinding), picture
parameter settings, encode management, motion detection, and privacy masking.
Operation Description
Click Camera in the main menu to access the camera management screen, as shown in
0.
Figure 4-1 Camera management screen
4.1 Camera Management
4.1.1 Binding a Camera
On the camera management screen, check the binding status of network cameras in the
camera list on the right side. If the binding status of a network camera is , this
camera needs to be bound.
12 Issue V1.0 (2016-12-22)

4 Camera Management
Hybrid Digital Video Recorder
Operation Steps
Step 1 Select a network camera to be bound in the camera list on the right side. The real-
time video and basic information of the network camera are displayed on the left
side.
Step 2 Click the button next to Bind below the play window. The button turns blue and
the binding status is changed to
in the camera list on the right side, indicating
that the camera is bound successfully.
z
Analog addresses directly connected to the HDVR are bound preferentially and are
assigned the IP address 127.0.0.1. When channels of the HDVR are insufficient for the
access of analog cameras, they automatically occupy the channels of network cameras.
z
If all channels of the HDVR are bound to cameras, you need to unbind cameras that do
not need to be bound.
z
You can choose Click Add to automatically add cameras of all channels.
z
If a network camera is added, enter the username and password of the camera below the
play window. The video of the camera can be viewed only after successful login.
4.1.2 Unbinding a Camera
Operation Steps
Step 1 Select a camera to be unbound in the camera list on the right side. Information
about the camera is displayed below the play window.
Step 2 Click the button next to Bind below the play window. The button turns white and
the binding status is changed to
indicating that the camera is unbound successfully.
in the camera list on the right side,
User Manual
If you click Clear, a message as shown in Figure 4-2 is displayed. Click OK to unbind
network cameras of all channels of the HDVR.
Figure 4-2 Unbinding confirmation message
Issue V1.0 (2016-12-22) 13

Hybrid Digital Video Recorder
User Manual 4 Camera Management
4.2 Picture Param
Picture parameters refer to basic attributes of a picture, including the luminance,
saturation, sharpness, and contrast. You can set picture parameters for each channel
based on scenarios.
Operation Description
Click Picture Param next to Camera in the main menu or cl ick Menu in the upper
left corner of the camera management screen and choose Picture Param to access the
Picture Param screen, as shown in Figure 4-3.
Figure 4-3 Picture Param screen
The picture parameters are described as follows:
Luma: picture luminance
Saturation: brilliance of the picture color
Contrast: picture transparency
Sharpness: picture clarity
Operation Steps
Step 1 Select a camera in the camera list on the left side of the Picture Param screen.
Step 2 Select camera scenario from the drop-down list. The default values of picture
parameters vary with scenarios.
Step 3 Set the camera luminance, contrast, saturation, and sharpness.
Step 4 Click OK to save picture parameter settings or click Apply to all to apply the
parameter settings to cameras of all channels.
14 Issue V1.0 (2016-12-22)

4 Camera Management
----End
4.3 Encode Param
The system allows you to set the main video resolution, sub video resolution, and
image quality (low-quality, medium-quality, high-quality, or best-quality) for cameras
in a channel, and view the frame rate and stream size in Encode Param.
Operation Description
Click Menu in the upper left corner of the camera management screen and choose
Encode Param to access the Encode Param screen, as shown in Figure 4-4.
Figure 4-4 Encode Param scre en
Hybrid Digital Video Recorder
User Manual
Operation Steps
Step 1 Select a camera in the camera list on the left side of the Encode Param screen.
Step 2 Select Main Video or Sub Video.
Step 3 Set Resolution, Quality, and Bitrate.
Step 4 Click OK to save encode parameter settings or click Apply to all to apply the
parameter settings to cameras of all channels.
----End
Issue V1.0 (2016-12-22) 15

Hybrid Digital Video Recorder
User Manual 4 Camera Management
4.4 Alarm Setup
The system allows you to set alarm types for cameras of channels in Alarm Setup.
Operation Description
Click Menu in the upper left corner of the camera management screen and choose
Alarm Setup to access the Alarm Setup screen, as shown in Figure 4-5.
Figure 4-5 Alarm Setup screen
The alarm setup parameters are described as follows:
Motion: An alarm is triggered when an image in a specified area changes.
Tamper: An alarm is triggered when the lens of a camera is covered.
Disconnected: An alarm is triggered when a camera is disconnected from the HDVR.
Operation Steps
Step 1 Select a camera in the camera list on the left side of the Alarm Setup screen.
Step 2 Click buttons next to Static, Motion, Tamper, and Disconnected to enable or
disable the alarm function according to alarm requirements.
Step 3 Click OK to save alarm settings or click Apply to all to apply the parameter
settings to cameras of all channels.
----End
16 Issue V1.0 (2016-12-22)

4 Camera Management
4.5 Motion Detection
Motion detection refers that an alarm is triggered when an image in a specified area
changes.
Operation Description
Click Menu in the upper left corner of the camera management screen and choose
Motion Detection to access the Motion Detection screen, as shown in Figure 4-6.
Figure 4-6 Motion Detection screen
Hybrid Digital Video Recorder
User Manual
Operation Steps
Step 1 Select a camera in the camera list on the left side of the Motion Detection screen.
Step 2 In the video window, hold down and drag the left mouse button to draw a motion
detection area.
Step 3 Select a value from the drop-down list next to Sensitivity.
Step 4 Click OK to save motion detection settings or click Apply to all to apply the
motion detection settings to cameras of all channels.
After a motion detection area is selected, you can double-click it to delete the selected area.
----End
Issue V1.0 (2016-12-22) 17

Hybrid Digital Video Recorder
User Manual 4 Camera Management
4.6 Privacy Area
The system allows you to mask images in a specified area and this area is called
privacy area.
Operation Description
Click Menu in the upper left corner of the camera management screen and choose
Privacy area to access the Privacy area screen, as shown in Figure 4-7.
Figure 4-7 Privacy Area screen
Operation Steps
Step 1 Select a camera in the camera list on the left side of the Privacy area screen.
Step 2 In the video window, hold down and drag the left mouse button to draw a privacy
area.
Step 3 Click OK to save privacy area settings or click Apply to all to apply the privacy
area settings to cameras of all channels.
----End
18 Issue V1.0 (2016-12-22)

5 Setting
Hybrid Digital Video Recorder
User Manual
5 Setting
The system allows you to set basic information, alarms, video, privacy, network, disk
management, and other parameters for the system in Setting. Figure 5-1 shows the
system setting screen.
Figure 5-1 Setting screen
5.1 Basic
The system allows you to view the firmware version and device name, set the display
resolution, system language, time zone, time and date, and restore factory defaults in
Basic.
5.1.1 System
Operation Steps
Step 1 On the Setting screen, choose Basic > System to access the Setting screen, as
shown in Figure 5-1.
Step 2 Select a proper resolution from the Display drop-down list based on the adopted
monitor.
Step 3 Select a required language from the Language drop-down list.
Issue V1.0 (2016-12-22) 19

Hybrid Digital Video Recorder
User Manual 5 Setting
Step 4 Click Restore Defaults to restore current settings to factory defaults.
Step 5 Click OK to save system settings or click Cancel to cancel settings.
After you click Restore Defaults and save the settings, the HDVR will restart.
----End
5.1.2 Time
Operation Steps
Step 1 On the Setting screen, choose Basic > Time to access the time setting screen, as
shown in Figure 5-2.
Figure 5-2 Time setting screen
Step 1 Select a required time zone from the Time Zone drop-down list.
Step 2 Select a required date format from the Date Format drop-down list.
Step 3 Click the button next to 24 Hour to disable the 24-hour system. Then, the 12-hour
system is enabled. If 24 Hour is set to On, the 24-hour system is used and is
enabled by default.
Step 4 Click the button next to Sync Time to disable time synchronization. Time
synchronization is enabled by default. Time is synchronized with the PC time.
Step 5 After Sync Time is disabled, you can manually set the system time:
Click Date and scroll the mouse scroll wheel to select the year, month, and date.
1. Click Time and scroll the mouse scroll wheel to select the hour, minute, and
second.
20 Issue V1.0 (2016-12-22)

5 Setting
Hybrid Digital Video Recorder
2. Click Modify Time to save the time settings.
Step 6 Click OK to save settings or click Cancel to cancel settings.
----End
5.2 Alarm
The system allows you to set alarm surveillance and alarm sensor in Alarm.
5.2.1 Surveillance
Operation Steps
Step 1 On the Setting screen, choose Alarm > Surveillance to access the surveillance
setting screen, as shown in Figure 5-3.
Figure 5-3 Surveillance setting screen
User Manual
Step 2 Click the button next to Surveillance to enable the surveillance function.
Step 3 Click buttons next to Relay, Push Message, and Pop Message Box to enable or
disable the functions.
Step 4 Select Full Day or Repeat from the Schedule drop-down list.
Step 5 If you select Repeat, you need to set the repeated time:
Day: Set the alarm start time an d end ti me with a day on a daily basis.
Week: Select any one day or several days in a week to set the alarm start time and
end time on a weekly basis.
Step 6 Click OK to save surveillance settings or click Cancel to cancel settings.
Issue V1.0 (2016-12-22) 21

Hybrid Digital Video Recorder
User Manual 5 Setting
----End
5.2.2 Sensor
Operation Steps
Step 1 On the Setting screen, choose Alarm > Sensor to access the sensor setting screen,
as shown in Figure 5-4.
Figure 5-4 Sensor setting screen
Step 2 Select a channel in Sensor.
Step 3 Click the buttons next to Enable and NC to enable or disable the functions.
Step 4 Click OK to save sensor settings or click Cancel to cancel settings.
----End
5.3 Record
Operation Steps
Step 1 On the Setting screen, choose Record to access the record screen, as shown in
Figure 5-5.
22 Issue V1.0 (2016-12-22)

5 Setting
Hybrid Digital Video Recorder
User Manual
Figure 5-5 Record setting screen
Step 2 Select a value from t h e Record expiration drop-down list.
If you select one week or two weeks from the Record expiration drop-down list, a message
indicating that some video data may be deleted and asking you whether to continue the
operation, is displayed. Click OK and select one week or two weeks.
Step 3 Click the button next to Record if alarm to enable or disable the function of
recording a video if an alarm is generated.
Step 4 Click the button next to Enable schedule record to enable or disable the function
of scheduled recording. The function is enabled by default.
Step 5 Set Schedule.
Day: Set the recording start time and end time on a daily basis.
Week: Select any one day or several days in a week to set the recording start time and
end time on a weekly basis.
Step 6 Click OK to save record settings or click Cancel to cancel settings.
----End
Issue V1.0 (2016-12-22) 23
Hybrid Digital Video Recorder
User Manual 5 Setting
5.4 Privacy
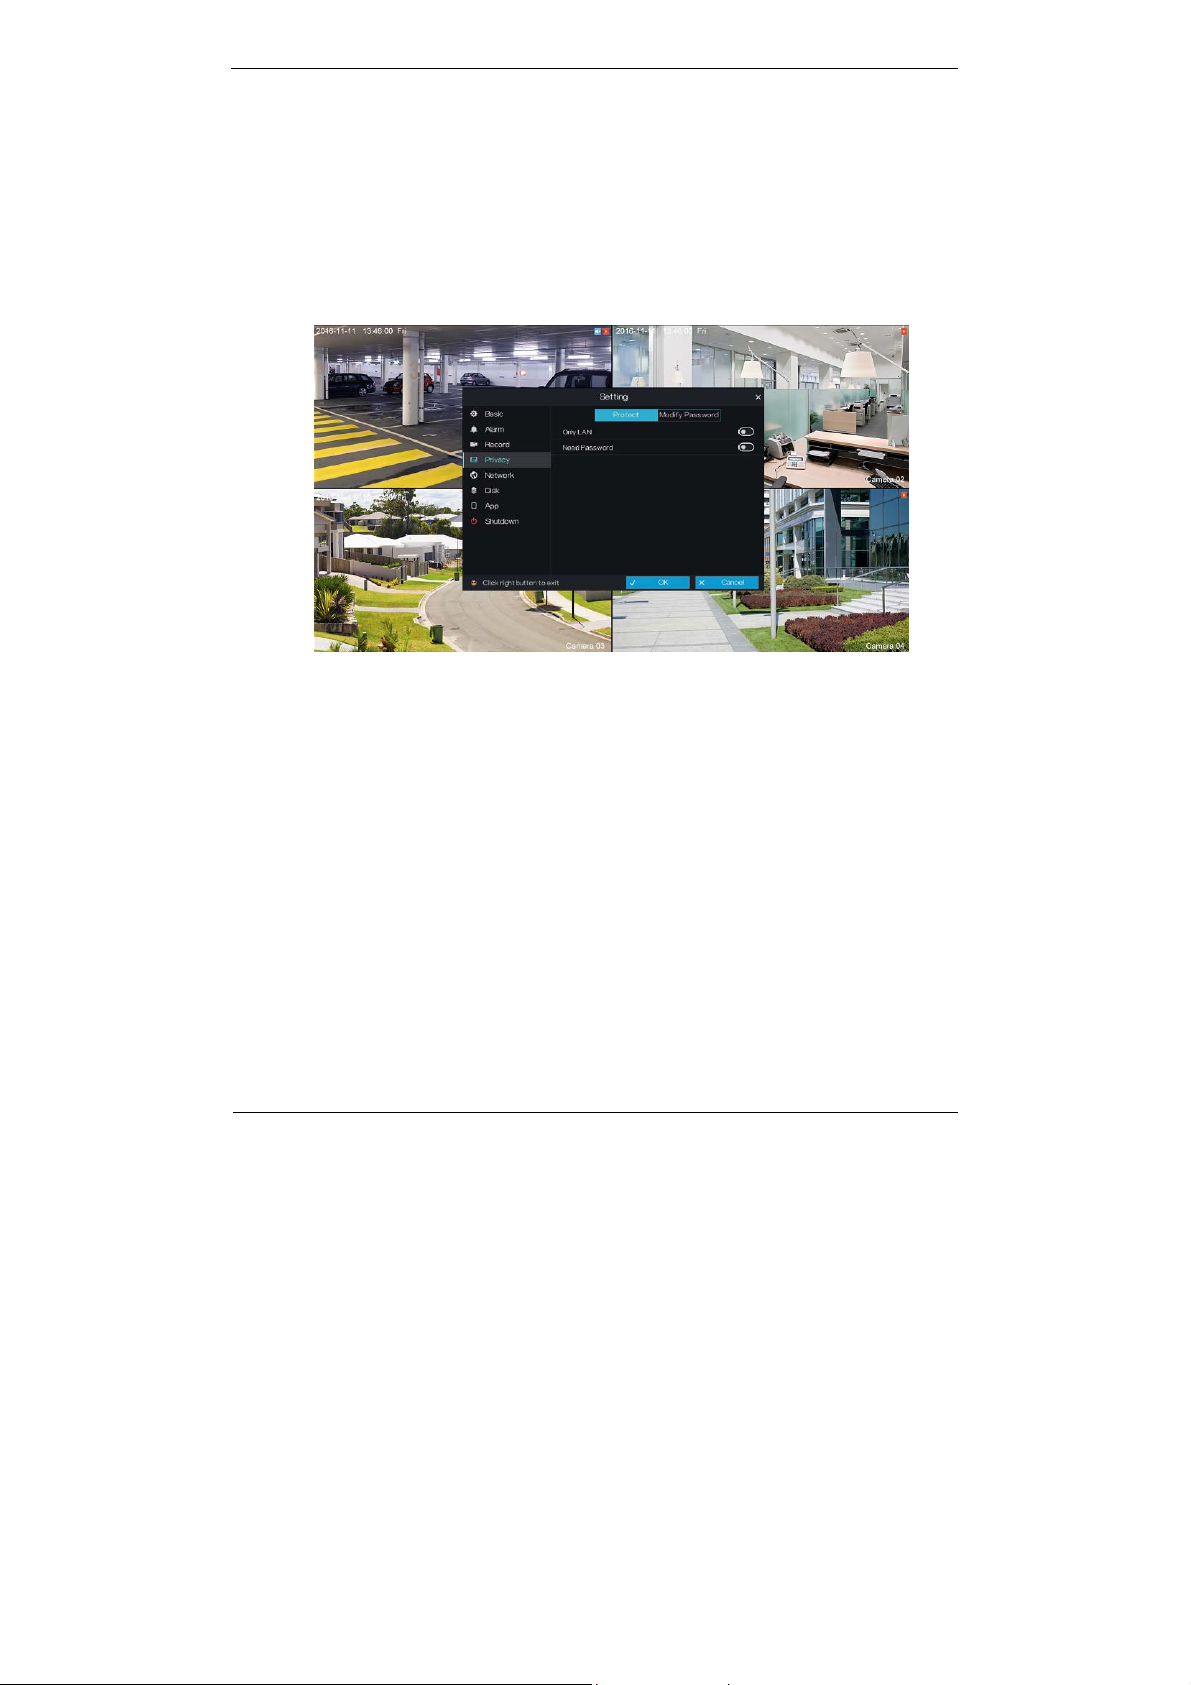
5.4.1 Protect
Operation Steps
Step 1 On the Setting screen, choose Privacy to access the privacy setting screen, as
shown in Figure 5-6.
Figure 5-6 Privacy setting screen
Step 2 Click Protect.
1. Click the button next to Only LAN to enable or disable the only LAN access
function. The function is disabled by default.
2. Click the button next to Need Password to enable or disable the password function.
The function i s enabled by default .
3. After Need Password is set to On, you can set an email address for retrieving the
password.
Enter an email address and click Check. A prompt, indicating that the verification code
has been sent to your email address, is displayed. Check your email, find the
verification code, enter the verification code on the privacy setting screen, and click
Submit. The password is set successfully if a setting success prompt is displayed.
Step 3 Click OK to save system prote ction settings or click Cancel to cancel settings.
24 Issue V1.0 (2016-12-22)

5 Setting
Hybrid Digital Video Recorder
5.4.2 Modify Password
Operation Steps
Step 1 On the privacy setting screen, click Modify Password to access the password
modification screen, as shown in Figure 5-7.
Figure 5-7 Password modification screen
Step 2 Enter the correct old password, new password, and confirm password, and click
Modify. The password is modified successfully.
----End
User Manual
5.5 Network
5.5.1 IPv4
Operation Steps
Step 1 On the Setting screen, choose Network to access the IPv4 network setting screen,
as shown in Figure 5-8.
Issue V1.0 (2016-12-22) 25

Hybrid Digital Video Recorder
User Manual 5 Setting
Figure 5-8 IPv4 network setting screen
Step 2 Click the button next to Get IP Automatically to enable or disable the function of
automatically getting an IP address. The function is enabled by default.
If the function is disabled, click input boxes next to IP, Netmask, and Gateway to
set the parameters as required.
Step 3 Click the button next to Get DNS Automatically to enable or disable the function
of automatically getting a DNS address. The function is enabled by default.
If the function is disabled, click input boxes next to DNS1 and DNS2, delete
original addresses, and enter new addresses.
Step 4 Click Check. The system automatically checks network settings and the dialog box
as shown in Figure 5-9 is displayed. Check and connect the network based on
network check results.
26 Issue V1.0 (2016-12-22)

5 Setting
Hybrid Digital Video Recorder
Figure 5-9 Network check screen
Step 5 Click OK to save IPv4 network settings or click Cancel to cancel settings.
----End
5.5.2 DDNS
User Manual
Operation Steps
Step 1 On the Setting screen, choose Network > DDNS to access the DDNS network
setting screen, as shown in Figure 5-10.
Figure 5-10 DDNS setting screen
Issue V1.0 (2016-12-22) 27

Hybrid Digital Video Recorder
User Manual 5 Setting
Step 2 Click the button next to Enable to enable the DDNS function. It is disabled by
default.
Step 3 Select a required value from the Protocol drop-down list.
Step 4 Set URL, Account, and Password.
Step 5 Click Check. The system automatically checks network settings and the dialog box
as shown in Figure 5-9 is displayed. Check and connect the network based on
network check results.
Step 6 Click OK to save DDNS network settings or click Cancel to cancel settings.
An external network can access an address specified in the DDNS settings to access the
HDVR.
----End
5.6 Disk
The system allows you to view the total capacity, used capacity, and SNs of disks, and
clear all video data in a disk in disk management.
5.6.1 Viewing Disk Information
Operation Description
Step 1 On the Setting screen, choose Disk to access the disk management screen, as
shown in Figure 5-11.
Figure 5-11 Disk management screen
28 Issue V1.0 (2016-12-22)

5 Setting
Hybrid Digital Video Recorder
Step 2 You can view the total capacity, used capacity, and SN of a disk on the disk
management screen.
----End
5.6.2 Clearing Disk Data
Click Clear in the lower part of the disk management screen. A message, indicating
that all video data will be cleared and asking you whether to continue the operation, is
displayed. Click OK to delete all video data on the disks.
5.7 App
You can use application software that supports QR code scanning to scan the QR code
in App to download the application for mobile phones. Then, you can perform
operations on the HDVR by using the App.
Operation Description
On the Setting screen, choose App to access the mobile phone App screen, as shown in
Figure 5-12.
Figure 5-12 Mobile phone Ap p screen
User Manual
QR codes are described as follows:
iOS QR code: used by iOS-based devices to download the App client.
Android QR code: used by Android-based devices to download the App client.
UUID QR code: After the mobile phone App is installed, you can scan the UUID QR
code to add an HDVR.
Issue V1.0 (2016-12-22) 29

Hybrid Digital Video Recorder
User Manual 5 Setting
5.8 Shutdown
Operation Description
On the Setting screen, choose Shutdown. The message "Click OK to power off" is
displayed, as shown in Figure 5-13. Click OK to power off the HDVR.
Figure 5-13 Shutdown message box screen
----End
30 Issue V1.0 (2016-12-22)

6 Log Center
Hybrid Digital Video Recorder
User Manual
6 Log Center
The system allows you to set and view records of any operations performed on the
HDVR in Log Center, including power-on, parameter settings, and camera
management.
Operation Steps
Step 1 Click Log Center in the main menu to access the Log Center screen, as shown in
Figure 6-1.
Figure 6-1 Log Center screen
Step 2 Select an object whose logs need to be queried on the left side of the Log Center
screen. The logs include system logs and logs of a camera in a channel.
Step 3 Set the log start time and end time on the right side of the Log Center screen.
Step 4 Click Refresh to query logs.
Step 5 Double-click a log to play the video generated at the log time point, as shown in Figure
6-2.
Issue V1.0 (2016-12-22) 31

Hybrid Digital Video Recorder
User Manual 6 Log Center
Figure 6-2 Log play screen
----End
32 Issue V1.0 (2016-12-22)

Hybrid Digital Video Recorder
7 Alarm
7 Alarm
The system allows you to view alarm events, set the timeline, and clear alarms in
Alarm.
7.1 Event
Operation Steps
Step 1 Click Alarm in the main menu to access the Event Center screen, as shown in
Figure 7-1.
Figure 7-1 Event Center s cre en
User Manual
Step 2 Select an object whose alarms need to be queried on the left side of the Event
Center screen. The object may be all cameras or a camera in a channel.
Step 3 Select the event type below Event in the lower right part of the Event Center
screen. All event types are selected by default. You can click one event type to
deselect it.
Step 4 Set the alarm start time and end time in the upper right part of the Event Center
screen.
Step 5 Click Refresh to query alarm events.
Step 6 Double-click an alarm event to play the alarm video, as shown in Figure 7-2.
Issue V1.0 (2016-12-22) 33

Hybrid Digital Video Recorder
User Manual 7 Alarm
Figure 7-2 Alarm video play screen
----End
7.2 Timeline
The system allows you to set the timeline to play alarm videos presented by time on
each day of a week.
Operation Steps
Step 1 Choose Alarm > Timeline in the main menu to access the Timeline screen, as
shown in Figure 7-3.
34 Issue V1.0 (2016-12-22)

7 Alarm
Figure 7-3 Timeline screen
Step 2 Select the alarm time to view the alarm records on that day.
Step 3 Double-click an alarm picture to play the alarm video.
----End
Hybrid Digital Video Recorder
User Manual
7.3 Clear alarm
Step 1 When the buzzer be eps, click Clear alarm in the main menu to stop the alarm.
----End
Issue V1.0 (2016-12-22) 35
 Loading...