

Page 1
VMAC-1
ViewSonic® Macintosh® Adapter
User’s Guide
Quick Start Installation
1With the monitor and computer
turned OFF, open the shielding
door of the adapter.
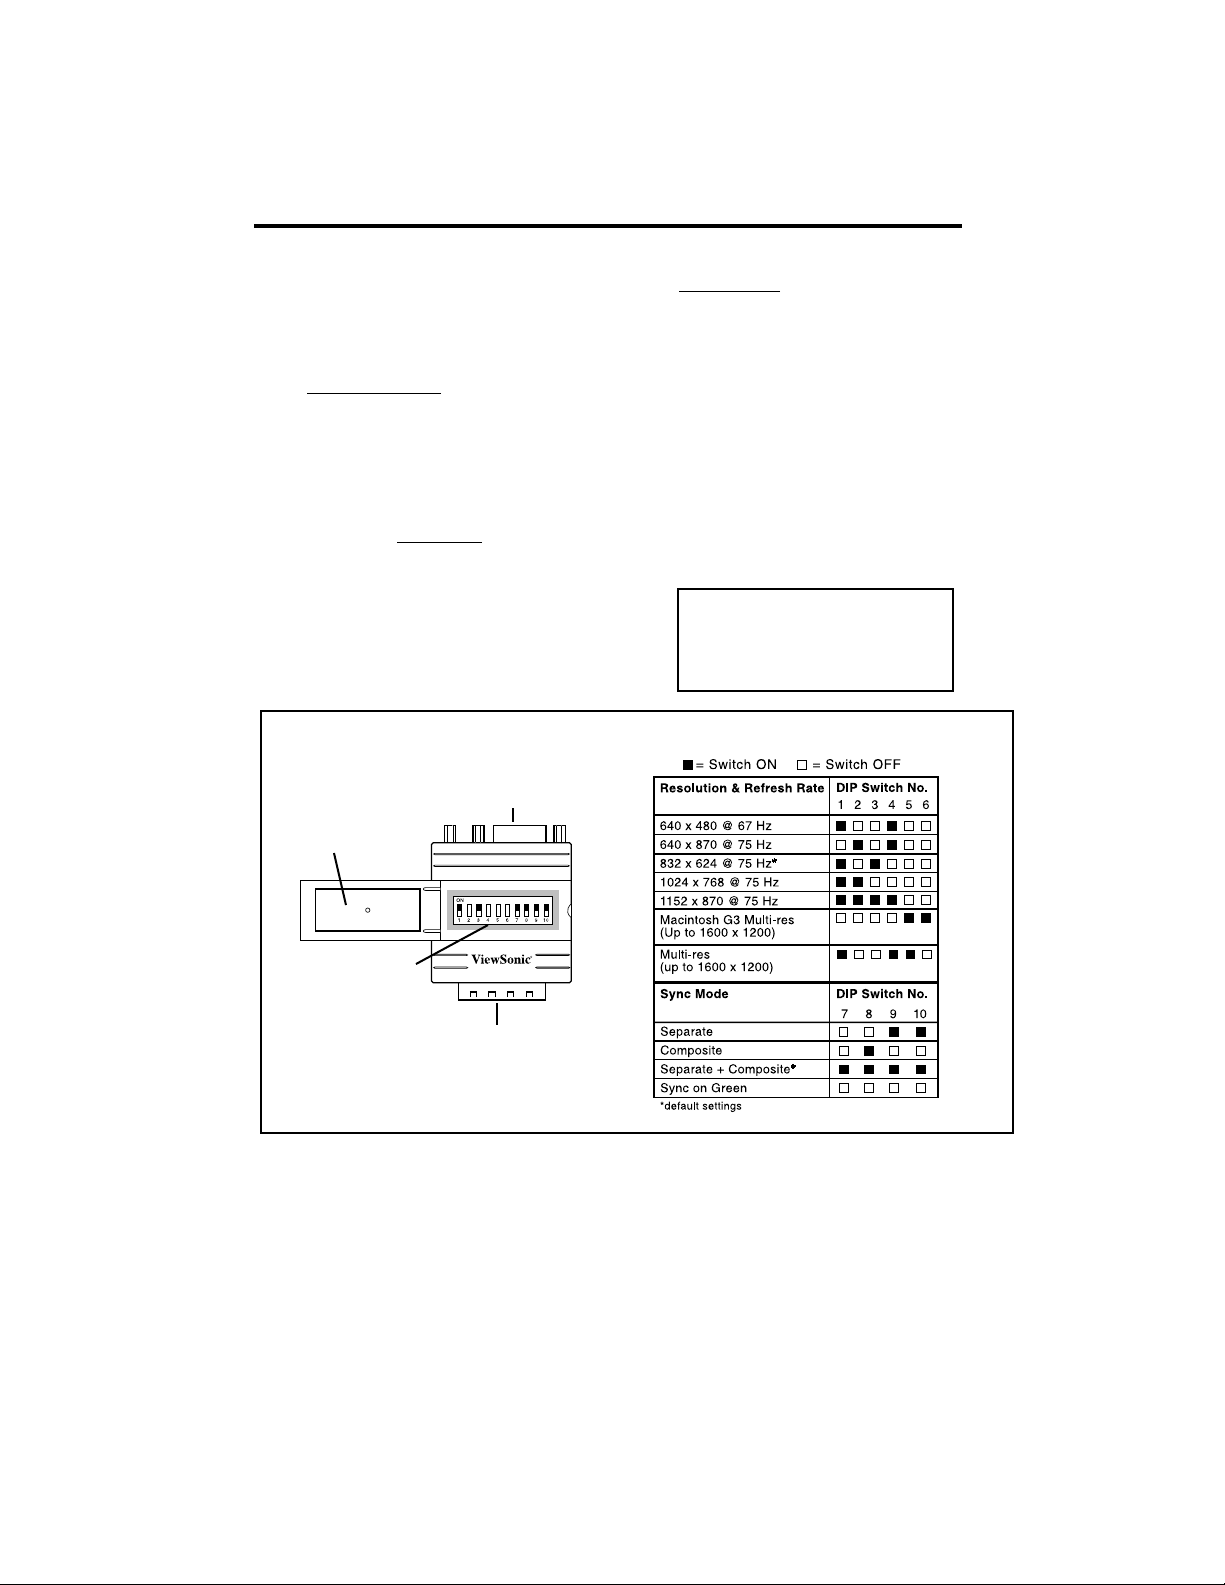
2Make sure all dip switchs are set
to default settings as shown in
the illustration to the right.
(Resolution = 832 x 624 and
Sync Mode = “Separate +
Composite”)
3Close the shielding door.
4Connect the male side of the
adapter to the monitor port on
the back of the computer.
Tighten the two adapter thumb
screws until snug.
DO NOT
OVER-TIGHTEN.
Top View with shielding door open
Female video
connector pins
Shielding
door
5Connect the video cable to the
female side of the adapter, then
connect the other end of the
cable to the back of your monitor.
Tighten the thumb screws at both
ends of the video cable until
snug.
DO NOT OVER-TIGHTEN.
6Turn on the computer and the
monitor.
NOTE: To set the adapter to the
highest resolution your Macintosh
computer can use, follow the
Advanced Settings procedure to
the right.
To reach ViewSonic Customer Support
call (800) 888-8583 or (909) 444-8800
VMAC-1 Dip Switch Settings
Default Dip Switch
Settings
Up position = On
(black)
CAUTION: Be careful not to bend the
video connector pins.
Male video
connector pins
Advanced Settings
1With the monitor and computer
turned OFF, open the shielding
door of the adapter.
2Check your monitor’s user guide
for the maximum resolutions the
monitor will support and then
select the appropriate resolution
from the Dip Switch Settings
chart (to the left).
Copyright © ViewSonic Corporation, 1998. All rights reserved.
ViewSonic is a registered trademark of ViewSonic Corporation.
Macintosh is a registered trademark of Apple Computer, Inc.
NOTE: Your Macintosh computer
may not support the maximum
resolutions of your monitor.
3Using the tip of a pen, set each
numbered dip switch on the
adapter to ON or OFF according to
the resolution you selected from
the Dip Switch Settings chart.
4Close the shielding door.
5Turn on the computer and the
monitor.
 Loading...