

Page 1

Service Manual
ViewSonic VG910s/b-1
Model No. VLCDS27944-3W/-4W
19” Color TFT LCD Display
ViewSonic
(VG910s/b_SM_721 Rev. 1a Mar. 2004)
381 Brea Canyon Road, Walnut, California 91789 USA - (800) 888-8583
Page 2
Copyright
Copyright
reproduced, transmitted, transcribed, stored in a retrieval system, or translated into any language or
computer language, in any form or by any means, electronic, mechanical, magnetic, optical, chemical,
manual or otherwise, without the prior written permission of ViewSonic Corporation.
Disclaimer
ViewSonic makes no representations or warranties, either expressed or implied, with respect to the
contents hereof and specifically disclaims any warranty of merchantability or fitness for any particular
purpose. Further, ViewSonic reserves the right to revise this publication and to make changes from time
to time in the contents hereof without obligation of ViewSonic to notify any person of such revision or
changes.
Trademarks
Optiquest is a registered trademark of ViewSonic Corporation.
ViewSonic is a registered trademark of ViewSonic Corporation.
All other trademarks used within this document are the property of their respective owners.
2003 by ViewSonic Corporation. All rights reserved. No part of this publication may be
¤
Revision History
Revision Date Description Of Changes Approval
1a 03/03/04 Initial Release DCN-3605 Angela Luh
ViewSonic Corporation Confidential
i
-
Do Not Copy VG910s/b
Page 3

TABLE OF CONTENTS
1. Precautions and Safety Notices
2. Specification
3. Front Panel Function Control Description
4. Circuit Description
5. Adjusting Procedure
6. Trouble Shooting Flow Chart
7. Recommended Spare Parts List
8. Exploded Diagram And Spare Parts List
9. Block Diagram
10. Schematic Diagrams
11. PCB Layout Diagrams
1
2
13
19
20
23
29
47
51
52
62
ViewSonic Corporation Confidential
ii
-
Do Not Copy VG910s/b
Page 4

1. Precautions and Safety Notices
Prior to using this manual, please ensure that you have carefully followed all the procedures outlined in the
user manual for this product.
• Read all of these instructions.
• Save these instructions for later use.
• Follow all warnings and instructions marked on the product.
• Do not use this product near water.
• This display should be installed on a solid horizontal base.
• When cleaning, use only a neutral detergent cleaner with a soft damp cloth. Do not spray with liquid or
aerosol cleaners.
• Do not expose this display to direct sunlight or heat. Hot air may cause damage to the cabinet and other
parts.
• Adequate ventilation must be maintained to ensure reliable and continued operation and to protect the
display from overheating. Do not block ventilation slots and openings with objects or install the display
in a place where ventilation may be hindered.
• Do not install this display near a motor or transformer where strong magnetism is generated. Images on
the display will become distorted and the color irregular.
• Do not allow metal pieces or objects of any kind fall into the display from ventilation holes.
Slots and openings in the cabinet and the back or bottom are provided for ventilation, to ensure reliable
operation of the product and to protect it from overheating, those openings must not be blocked or covered.
The openings should never be blocked by placing the product on a bed, sofa, rug, or other similar surface.
This product should never be placed near or over a radiator or heat register. This product should not be
placed in a built-in installation unless proper ventilation is provided.
ViewSonic Corporation Confidential
1
-
Do Not Copy VG910s/b
Page 5
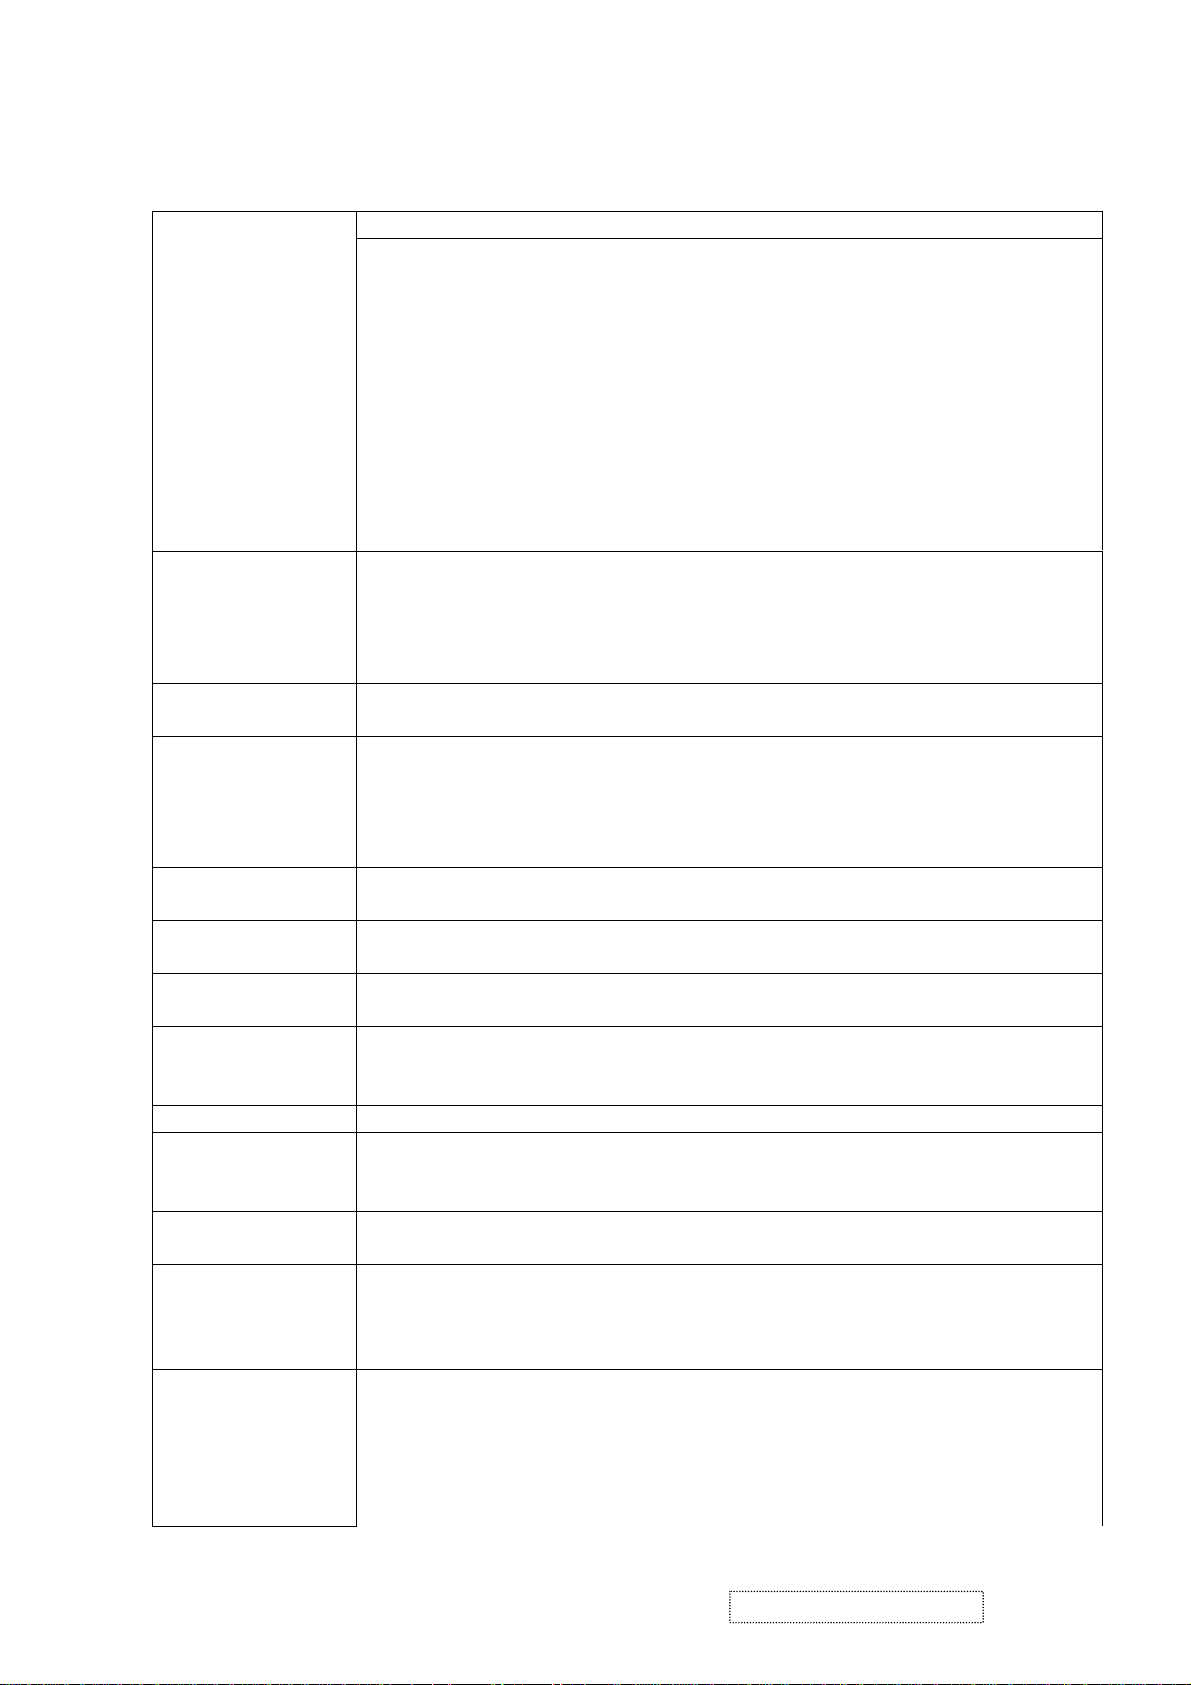
2. Specification
2.1 General Description
LCD
Fujitsu
FLC48SXC11V
AU
M190EN02V2
Active matrix thin-film-transistor (TFT) Type No: FLC48SXC11V/M190EN02V2
Active screen Size
Effective Display Size
Pixel Pitch
Pixel Format
Brightness
Contrast Ratio
Color (8 bits)
Viewing Angle range
(CR≧10, at Ta=25°C)
19.0 inches diagonal
376.32mm (H) × 301.056mm (V)
0.294mm (H) × 0.294mm(V)
1280×1024 (SXGA )
250cd/m
2
600:1 (Typ.)
16,777,216 colors
Up 85° Down 85°(type)
Left 85° Right 85°(type)
Backlight
4 CCFL
Input Signals
Analog RGB 0.7Vp-p / 75Ω
Digital RGB DVI Ver1.0 (TMDS Single Link)
H/V Separate sync. Sync 2.0~5.0Vp-p, Positive/Negative, 2.2KΩ
Input connector Analog D-sub 15 pin *1
Digital DVI-D 24pin *1
Synchronization Horizontal
Vertical
Non-interlaced
30 kHz to 82 kHz
50 Hz to 85 Hz
Maximum Pixel
Rated 135MHz
Resolution Horizontal
Vertical
Active Display Area Horizontal
Vertical
Power Supply
Voltage Rating
AC Power
Consumption
AC input
DC 12V
less than 60W
less than 1W
less than 1W
1280 dots
1024 lines
376.32 mm (typical, panel depends)
301.056 mm (typical, panel depends)
AC 100V~240V / 2A, 47.5~63Hz
5A.
On mode.
Active OFF mode.
DC Power OFF.
Current Rating AC input 2A @AC 100~240V.
Net
Dimensions
Gross
Depth(head only)
Weight
Environmental
Conditions
Net
Gross
Operating Temperature
Operating Humidity
Storage Temperature
Storage Humidity
Accessories AC cable
User Guide
CD Rom
Warranty Card
HD15 - HD15 cable
DVI(D) - DVI(D) cable
422.4(W) x 382.1(H) x62.0 (D) mm
422.4(W) x 438.48(H) x 180.56(D) mm (With stand base)
180.56mm
7.5 Kg
10.2 Kg
0 to 40°C
20 to 85%
-20 to 60°C
5 to 85% (non-condensation)
1.8m
English
1
1
1
1
(Ty
p. )
(automatically)
(automatically)
ViewSonic Corporation Confidential
2
-
Do Not Copy VG910s/b
Page 6
Regulatory Standards UL, cUL, FCC-B, CB, CE, EPA, NOM, TUV/GS, TUV ERGO (covers ISO13406-2 &
MPRII), NEMKO, SEMKO, DEMKO, FIMKO, GOST-R + 20 ORIGINAL COPIES
HYGIENIC, PCBC, VCCI, BSMI, CCEE, PSB,C-TICK, TUV-S, TCO'99(VG910b),
TCO'03(VG910s), Energy, Energy Star, PCT, Taiwan Green Mark
Others Tilt Angle 20° up / 5° down
VESA DDC 2B compatible
2.2 Electrical Characteristics
2.2.1 Power Supply
AC Input Voltage AC 100~240V / 47.5~63Hz
Power Consumption:
Less than 60W On mode
Less than 1W Active Off mode
Less than 1W DC power Off
Current Rating 2A @ AC 100~240V
Inrush Current
Less than 50 Amp(peak) for 120 VAC
Less than 100 Amp(peak) for 220 VAC
Power cord:detachable, 3P, 1.8m
2.2.2 LCD
LCD Active matrix thin-film-transistor (TFT)
Active screen size 19.0 inches (376.32mm × 301.056mm) diagonal
Pixel Format 1280 x 1024 (SXGA )
R.G.B. stripe arrangement
Display method TFT, normally Black
Pixel pitch 0.294 (H) x 0.294 (V) mm
Dot number 1280 x 1024 x 3 dots
Backlight Edge-lighting type with 4 CCFL
(Cold Cathode Fluorescent Lamp)
Brightness 250 cd/m
Contrast ratio 600:1 (Typ.
2
(Typ.)
)
Display color 16,777,216 colors
viewing angle typical Up 85° / down 85° / right 85° / left 85°
(Contrast ratio≧10 at Ta=25°C / 77°F)
Response time Rise time 15mS, Fall time 10mS (Typ. at Ta=25°C)
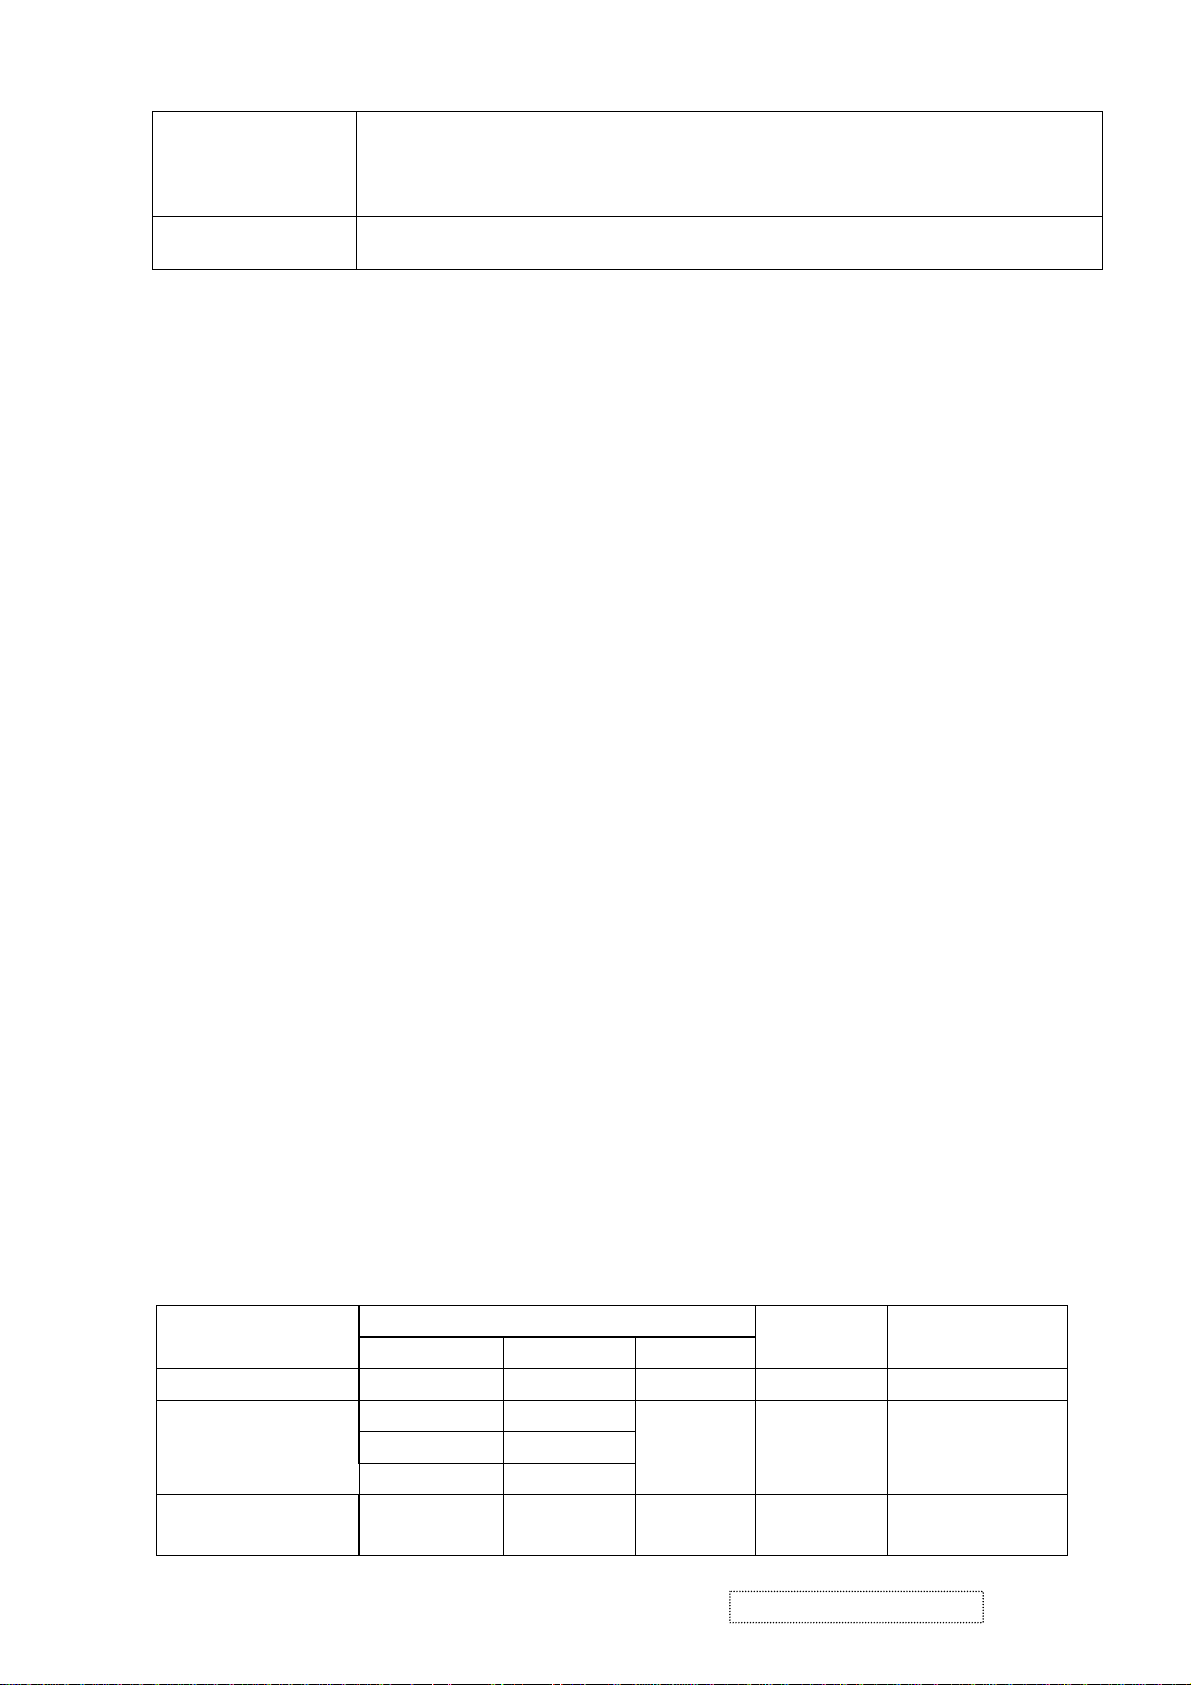
2.2.3 Power Management
VG910 will enter power saving mode under the following conditions:
Power Management condition and status in AC 240V
State
Signals
Horizontal Vertical Video
Power
Supply
On Pulses Pulses Active <60W Green
Active off
Pulse No Pulse
No Pulse Pulse
Blank
<1W
No Pulses No Pulses
Out off scan range
<30KHz ,
>82KHz
<50Hz ,
>85Hz
-
<60W
LED
Amber
Green
ViewSonic Corporation Confidential
3
-
Do Not Copy VG910s/b
Page 7

AC power Off - - - Off Off
DC power Off - - - <1W Off
2.3 Video alignment
2.3.1 COLOR TEMPERATURE ALLIGMENT
a. APPLY VESA 1280x1024 / 60Hz , FULL WHITE PATTERN.( INPUT SIGNAL LEVEL
=0.7Vp-p )
b. AUTO WHITE BANLANCE MUST BE FINISH AT 32 GRAY PATTERN BEFORE AUTO
ALIGNMENT,
c. SET DEFAULT Æ CONTRAST TO 70% , BRIGHTNESS TO 100%
9300°K, 6500°K,:R G B SUB-BRIGHTNESS SET AS BELOW
R SUB-BRIGHTNESS 128 128 128 128
G SUB-BRIGHTNESS 128 128 128 128
B SUB-BRIGHTNESS 128 128 128 128
SET BRIGHTNESS = 255, BLACKLEVEL = 255 AT FACTORY DEFAULT.
2.3.2 DIGITAL ALIGNMENT
2.3.2.1 APPLY VESA 1280x1024 / 60Hz , FULL WHITE PATTERN ,
2.3.2.2 ADJUST R, G, B SUB-CONTRAST TO MEET FOLLOWING CHROMATICITY
SPEC.
x = 0.313 ±0.003 , y = 0.329 ±0.003
2.3.3 ANALOG ALIGNMENT
2.3.3.1 9300°K HIGH LUMINANCE ALIGNMENT
2.3.3.1.1 APPLY VESA 1280x1024 / 60Hz , FULL WHITE PATTERN.
2.3.3.1.2 ADJUST R, G, B SUB-CONTRAST TO MEET FOLLOWING
2.3.3.2 6500°K HIGH LUMINANCE ALIGNMENT
2.3.3.2.1 APPLY VESA 1280x1024 / 60Hz , FULL WHITE PATTERN.
2.3.3.2.2 ADJUST R, G, B SUB-CONTRAST TO MEET FOLLOWING
2.3.3.3 5400°K HIGH LUMINANCE ALIGNMENT
2.3.3.3.1 APPLY VESA 1280x1024 / 60Hz , FULL WHITE PATTERN.
2.3.3.3.2 ADJUST R, G, B SUB-CONTRAST TO MEET FOLLOWING
9300°K 6500°K 5400°K 5000°K
CHROMATICITY SPEC.
9300°K → x = 0.283 ±0.003, y = 0.298 ±0.003 , Y > 155 cd/m
CHROMATICITY SPEC.
6500°K → x = 0.313±0.003, y = 0.329 ±0.003 , Y > 190 cd/m
2
CHROMATICITY SPEC.
5400°K → x = 0.335 ±0.003, y = 0.350 ± 0.003 , Y > 180cd/m
2
2
2.3.3.4 5000°K HIGH LUMINANCE ALIGNMENT
2.3.3.4.1 APPLY VESA 1280x1024 / 60Hz , FULL WHITE PATTERN.
2.3.3.4.2 ADJUST R, G, B SUB-CONTRAST TO MEET FOLLOWING
CHROMATICITY SPEC.
5000°K → x = 0.346 ±0.003, y = 0.359 ±0.003 , Y > 180cd/m
ViewSonic Corporation Confidential
4
2
-
Do Not Copy VG910s/b
Page 8
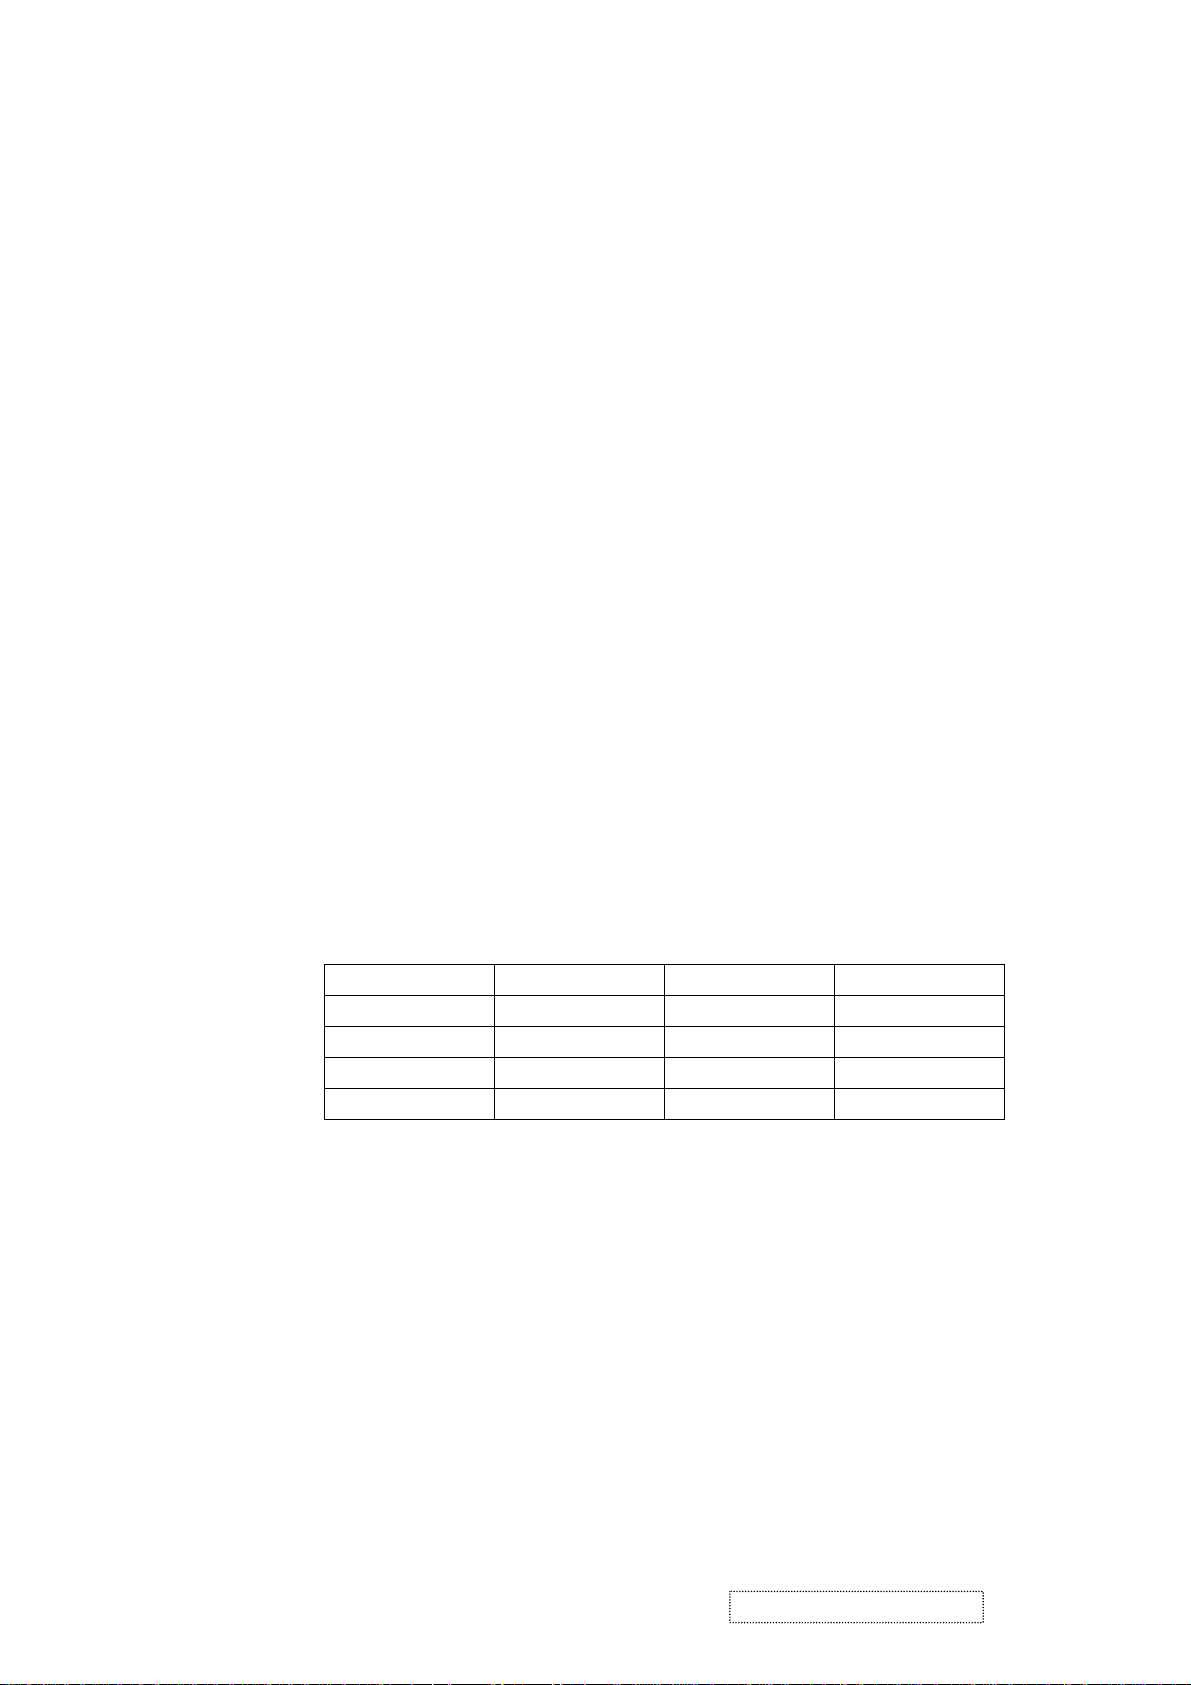
2.3.4 LUMINANCE TEST
2.3.4.1 SET COLOR Temperature TO 9300°K
APPLY VESA 1280x1024/60Hz , APPLY FULL WHITE PATTERN, ADJUST
OSD BRIGHTNESS = 100%, CONTRAST = 70%.
1. THE LUMINANCE MEASURE SHOULD BE OVER 155cd/m
2.3.4.2 SET COLOR Temperature TO 6500°K
APPLY VESA 1280x1024 / 60Hz , APPLY FULL WHITE PATTERN, ADJUST
OSD BRIGHTNESS = 100%, CONTRAST = 70%
1. THE BRIGHTNESS MEASURE SHOULD BE OVER 190cd/m
2. SET BRIGHTNESS =100% , CONTRAST=100% ,THE LUMINANCE
2.3.4.3 SET COLOR Temperature TO 5400°K
APPLY VESA 1280x1024 / 60Hz , APPLY FULL WHITE PATTERN, ADJUST
OSD BRIGHTNESS = 100%, CONTRAST = 70%
1. THE BRIGHTNESS MEASURE SHOULD BE OVER 180cd/m
2.3.4.4 SET COLOR Temperature TO5000°K
APPLY VESA 1280x1024 / 60Hz , APPLY FULL WHITE PATTERN, ADJUST
OSD BRIGHTNESS = 100%, CONTRAST = 70%
1. THE BRIGHTNESS MEASURE SHOULD BE OVER 180 cd/m
2.3.4.5 APPLY VESA 1280x1024/60Hz , APPLY FULL WHITE PATTERN, ADJUST
OSD BRIGHTNESS 100%, CONTRAST 70% ,
MEASURE SHOULD BE OVER 220cd/m
2
2
2
2
2
MEASUREMENT AT CENTER OF SCREEN
MODE X y Y
9300°K 0.283±0.010 0.298 ±0.010
6500°K 0.313 ±0.010 0.329 ±0.010
5400°K 0.335 ±0.010 0.350 ±0.010
5000°K 0.346 ±0.010 0.359 ±0.010
OVER 155 cd/m
OVER190 cd/m
OVER 180 cd/m
OVER 180 cd/m
2
2
2
2
ViewSonic Corporation Confidential
5
-
Do Not Copy VG910s/b
Page 9
2.4 Key function define
Key
“Vol -”
○
Key
“Vol +”
○ ○
Key “1”
○
○ ○
○
○ ○
Key
“DOWN
”
○
Key
“UP”
○ ○ ○
○
Key “2” power functions
○ ○
○
○
○
Factory mode
Burn in off
Burn in on
All mode recall
Lock(Unlock)
Power Key
Lock(Unlock)
Osd Key
Read EDID
ViewSonic Corporation Confidential
6
-
Do Not Copy VG910s/b
Page 10

2.5 EDID SERIAL NO. FORMAT
2.5.1 EDID for VG910s
2.5.1.1 Analog EDID
128 BYTES OF EDID CODE:
0 1 2 3 4 5 6 7 8 9
0 00 FF FF FF FF FF FF 00 5A 63
10 18 DA 01 01 01 01 01 0D 01 03
20 0E 26 1E 78 2E 5E 35 A4 59 4A
30 98 25 10 50 54 BF EF 80 81 80
40 81 40 71 4F 01 01 01 01 01 01
50 01 01 01 01 30 2A 00 98 51 00
60 2A 40 30 70 13 00 78 2D 11 00
70 00 1E 00 00 00 FF 00 41 33 31
80 30 33 30 31 30 30 30 30 31 0A
90 00 00 00 FD 00 32 4B 1E 52 0E
100 00 0A 20 20 20 20 20 20 00 00
110 00 FC 00 56 47 39 31 30 73 0A
120 20 20 20 20 20 20 00 7B
2.5.1.2 Digital EDID
128 BYTES OF EDID CODE:
0 1 2 3 4 5 6 7 8 9
0 00 FF FF FF FF FF FF 00 5A 63
10 18 DA 01 01 01 01 01 0D 01 03
20 80 26 1E 78 2E 5E 35 A4 59 4A
30 98 25 10 50 54 BF EF 80 81 80
40 81 40 71 4F 31 0A 01 01 01 01
50 01 01 01 01 30 2A 00 98 51 00
60 2A 40 30 70 13 00 78 2D 11 00
70 00 1E 00 00 00 FF 00 41 33 31
80 30 33 30 31 30 30 30 30 31 0A
90 00 00 00 FD 00 32 4B 1E 52 0E
100 00 0A 20 20 20 20 20 20 00 00
110 00 FC 00 56 47 39 31 30 73 0A
120 20 20 20 20 20 20 00 D0
ViewSonic Corporation Confidential
7
-
Do Not Copy VG910s/b
Page 11

2.5.2 EDID for VG910b
2.5.2.1 Analog EDID
128 BYTES OF EDID CODE:
2.5.2.2 Digital EDID
128 BYTES OF EDID CODE:
0 1 2 3 4 5 6 7 8 9
0 00 FF FF FF FF FF FF 00 5A 63
10 18 DB 01 01 01 01 01 0D 01 03
20 0E 26 1E 78 2E 5E 35 A4 59 4A
30 98 25 10 50 54 BF EF 80 81 80
40 81 40 71 4F 01 01 01 01 01 01
50 01 01 01 01 30 2A 00 98 51 00
60 2A 40 30 70 13 00 78 2D 11 00
70 00 1E 00 00 00 FF 00 41 33 32
80 30 33 30 31 30 30 30 30 31 0A
90 00 00 00 FD 00 32 4B 1E 52 0E
100 00 0A 20 20 20 20 20 20 00 00
110 00 FC 00 56 47 39 31 30 62 0A
120 20 20 20 20 20 20 00 8A
0 1 2 3 4 5 6 7 8 9
0 00 FF FF FF FF FF FF 00 5A 63
10 18 DB 01 01 01 01 01 0D 01 03
20 80 26 1E 78 2E 5E 35 A4 59 4A
30 98 25 10 50 54 BF EF 80 81 80
40 81 40 71 4F 31 0A 01 01 01 01
50 01 01 01 01 30 2A 00 98 51 00
60 2A 40 30 70 13 00 78 2D 11 00
70 00 1E 00 00 00 FF 00 41 33 32
80 30 33 30 31 30 30 30 30 31 0A
90 00 00 00 FD 00 32 4B 1E 52 0E
100 00 0A 20 20 20 20 20 20 00 00
110 00 FC 00 56 47 39 31 30 62 0A
120 20 20 20 20 20 20 00 DF
ViewSonic Corporation Confidential
8
-
Do Not Copy VG910s/b
Page 12
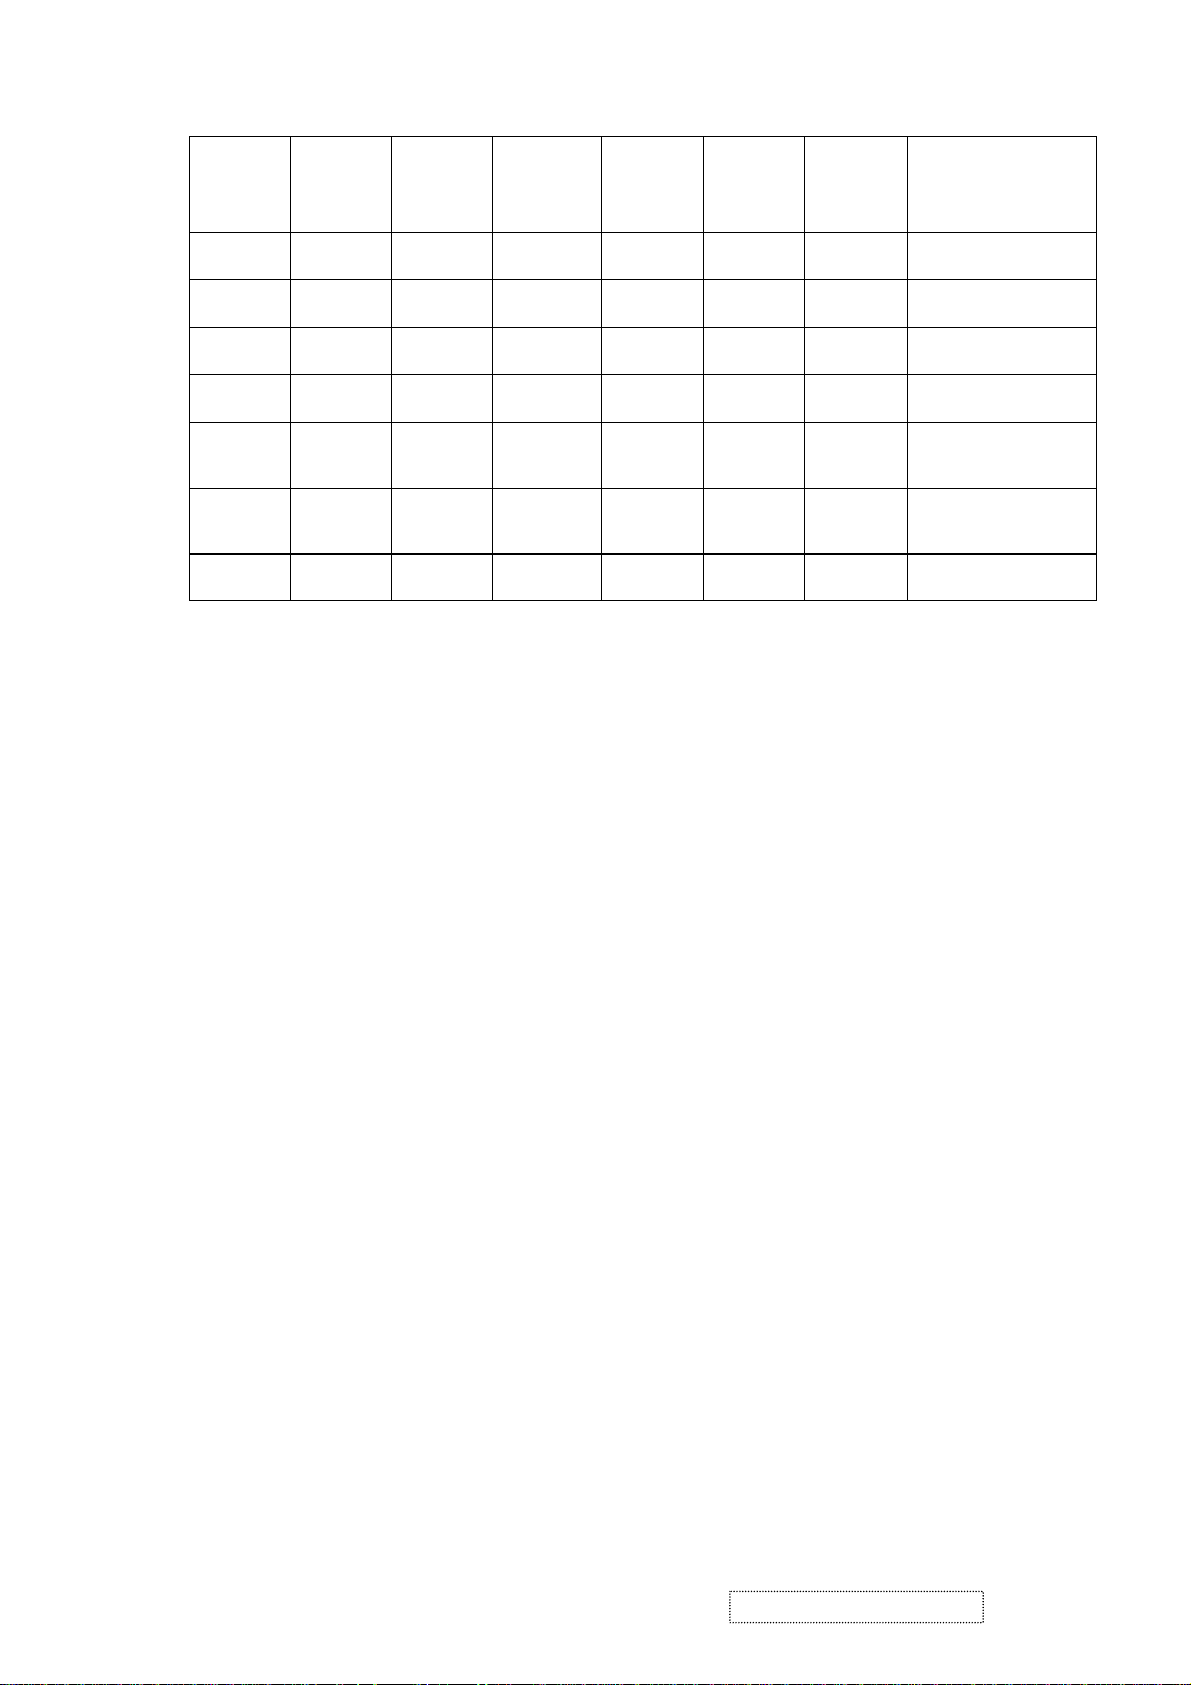
APPENDIX A : PRESET TIMING CHART
Analog Mode
1 2 3 4 5 6 7
Signal name
H-frequency (kHz) 31.468 31.469 31.468 35.001 37.5 37.862 43.269
V-frequency (Hz)
Pixel rate (MHz)
H-sync Ths
H-back porch Thb
Count num (H-total) Thd
H- front porch Thf
V-sync Tvs
V-back porch Tvb
Count num (V-total) Tvd
V-front porch Tvf
H-sync. Polarity
V-sync Polarity
H-resolution (dots)
V-resolution (lines)
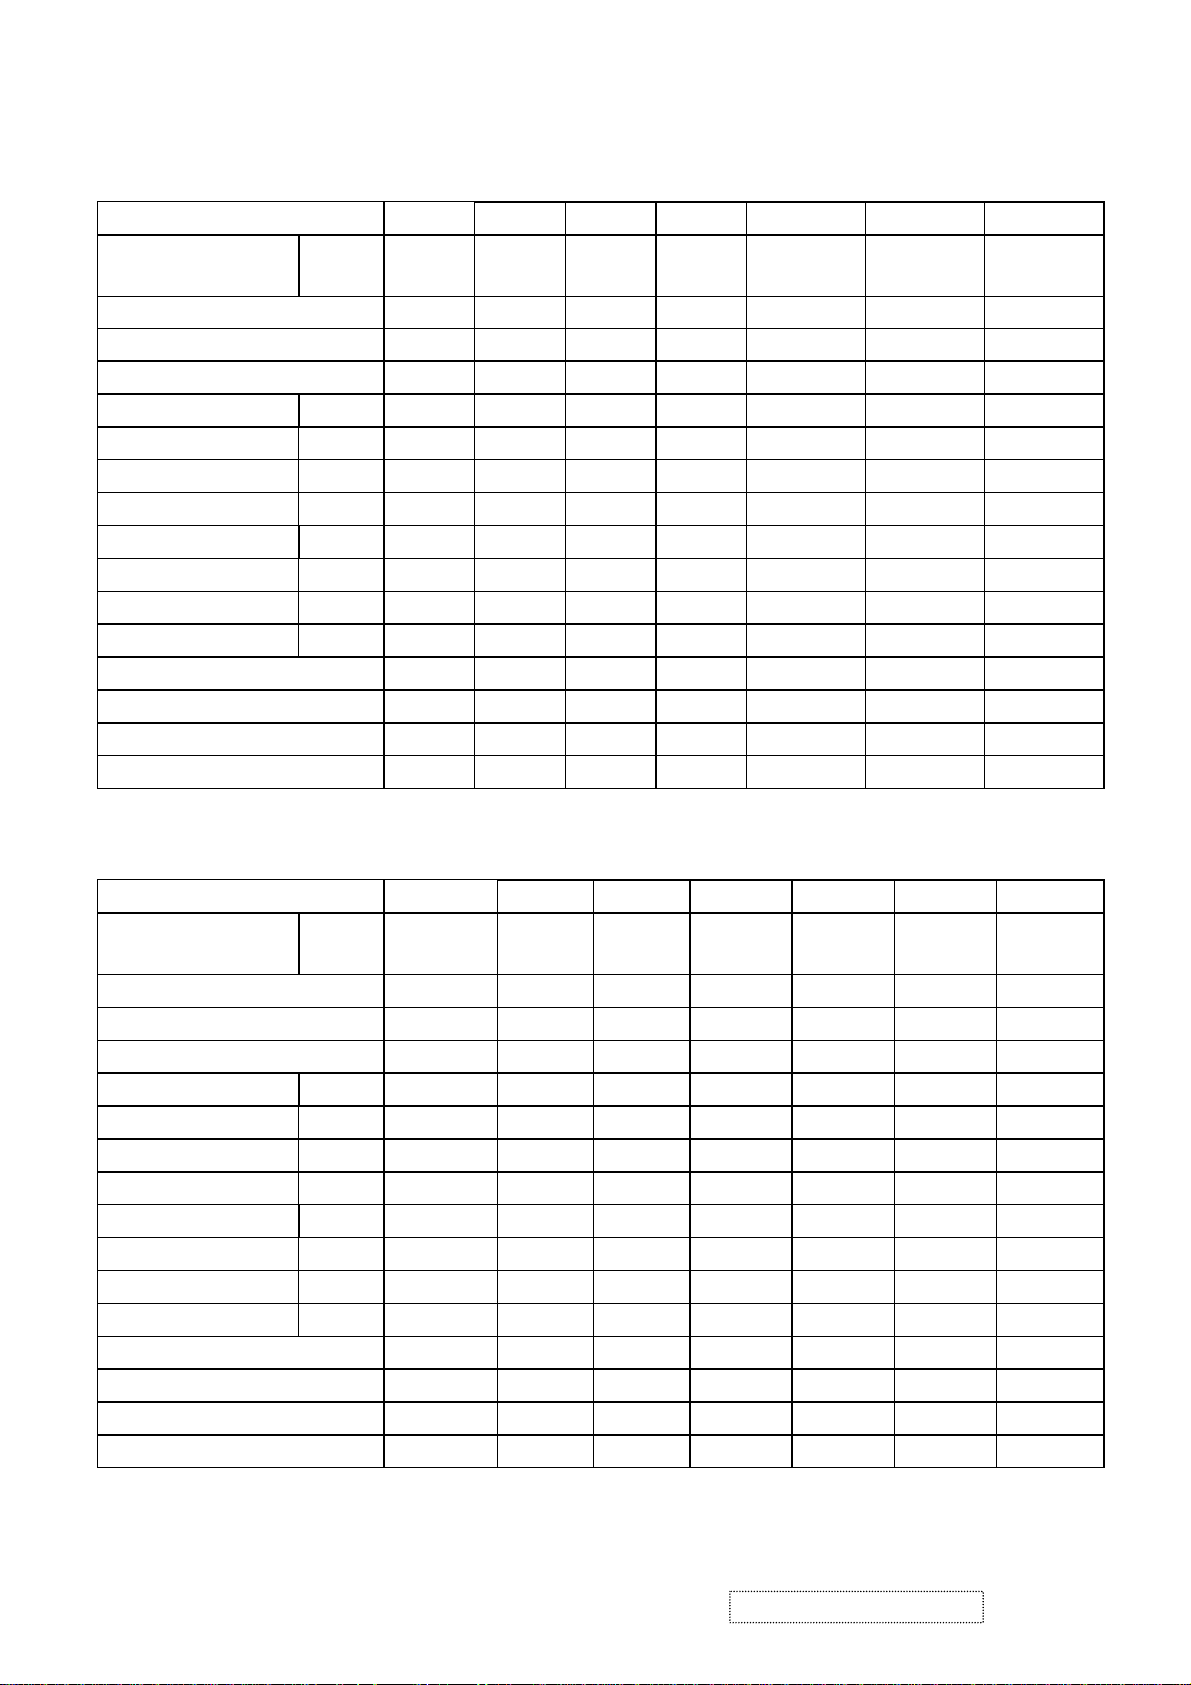
8 9 10 11 12 13 14
Signal name Symbol
H-frequency (kHz) 35.156 37.879 48.077 46.875 53.674 49.725 48.363
V-frequency (Hz) 56.250 60.317 72.188 75.000 85.061 74.5 60.004
Pixel rate (MHz) 36.000 40.000 50.000 49.500 56.250 57.283 65.000
H-sync Ths 72 128 120 80 64 64 136
H-back porch Thb 128 88 64 160 152 224 160
Count num (H-total) Thd 1024 1056 1040 1056 1048 1152 1344
H- front porch Thf 24 40 56 16 32 32 24
V-sync Tvs 2 4 6 3 3 3 6
V-back porch Tvb 22 23 23 21 27 39 29
Count num (V-total) Tvd 625 628 666 625 631 667 806
V-front porch Tvf 1 1 37 1 1 1 3
H-sync. Polarity Negative Positive Positive Positive Positive Negative Negative
V-sync Polarity Negative Positive Positive Positive Positive Negative Negative
H-resolution (dots) 800 800 800 800 800 832 1024
V-resolution (lines) 600 600 600 600 600 624 768
symbol
TEXT
mode
70.087 70.087 59.941 66.667 75 72.807 85.005
25.175 28.322 25.175 30.240 31.5 31.501 36.000
96 108 96 64 64 40 56
48 54 48 96 120 128 80
800 900 800 864 840 832 832
16 18 16 64 16 24 56
2 2 2 3 3 3 3
60 35 33 39 16 28 25
449 449 525 525 500 520 509
37 12 10 3 1 9 1
Positive Negative Negative Negative Negative Negative Negative
Negative Positive Negative Negative Negative Negative Negative
640 720 640 640 640 640 640
350 400 480 480 480 480 480
IBM-8514
A
TEXT
mode
SVGA SVGA SVGA SVGA MAC 16" XGA
VGA MAC-II VESA-VGA VESA-VGA VESA-VGA
ViewSonic Corporation Confidential
9
-
Do Not Copy VG910s/b
Page 13
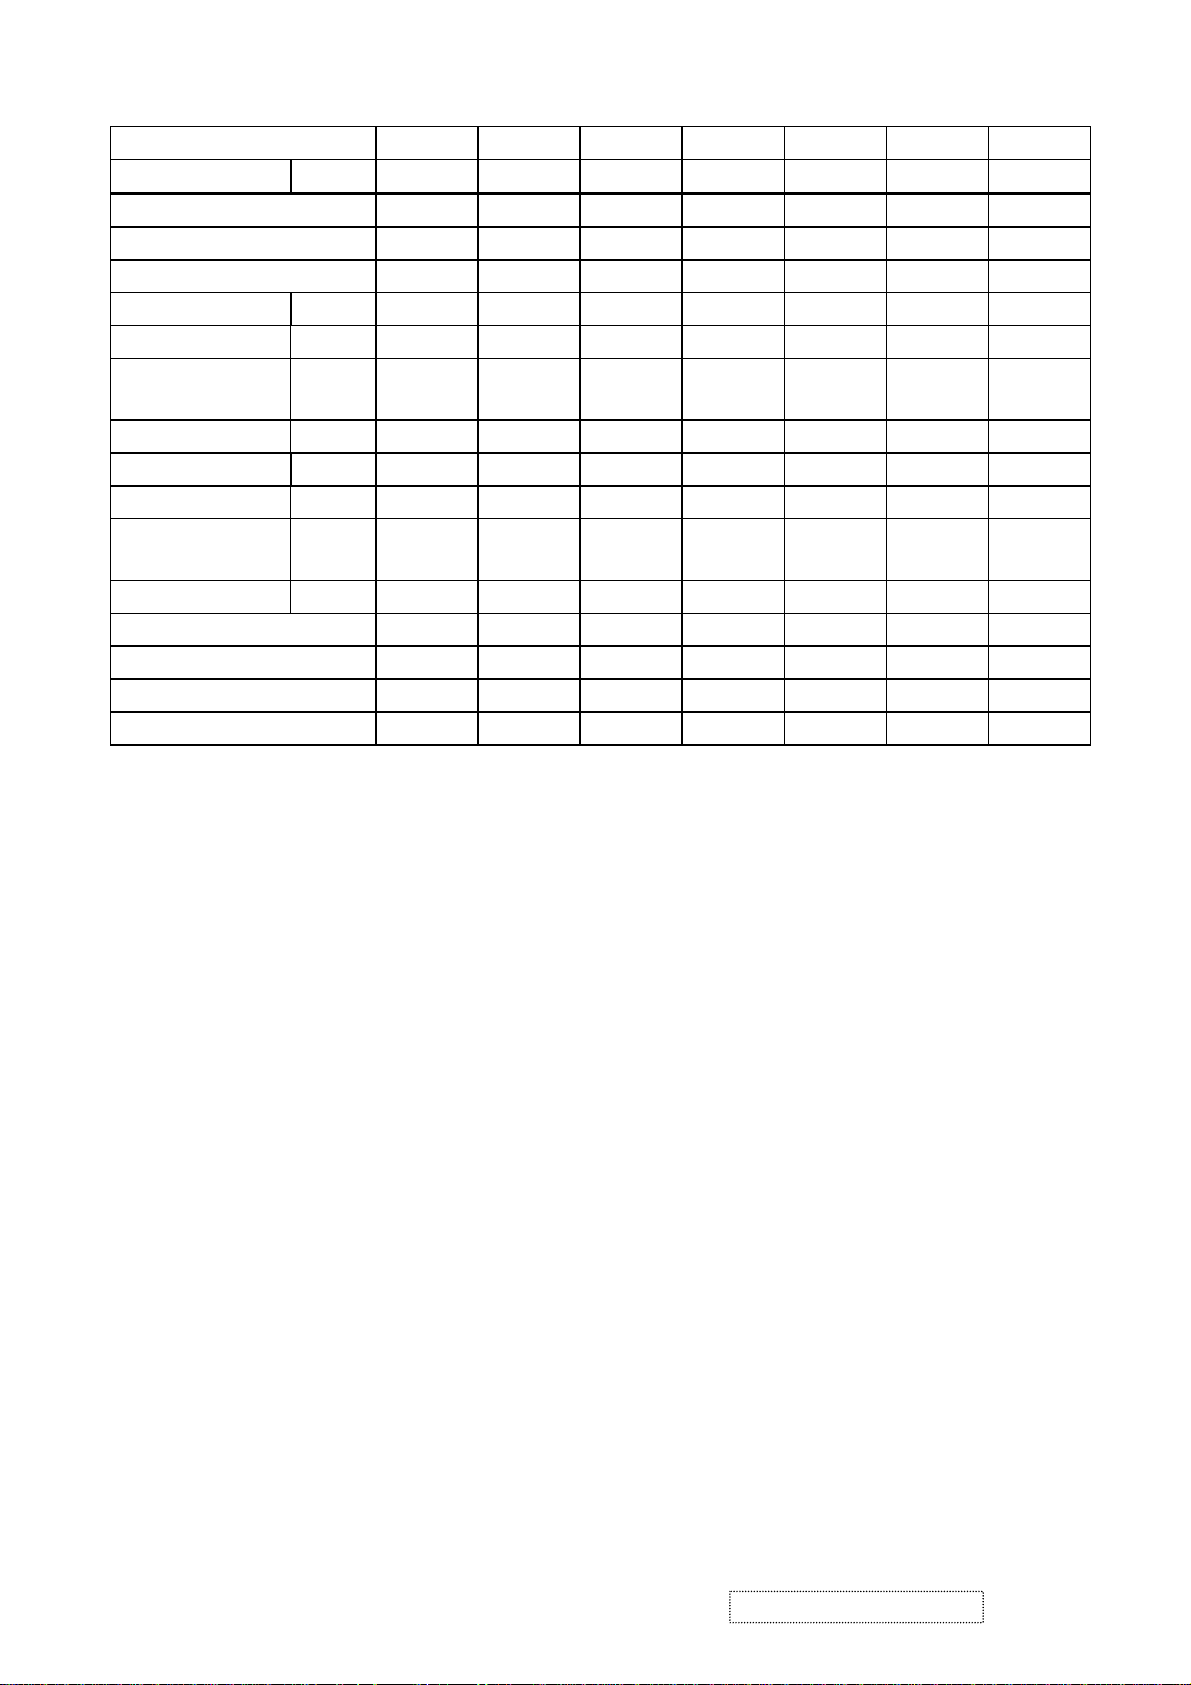
15 16 17 18 19 20 21
Signal name Symbol XGA XGA XGA XGA SXGA 720P SXGA
H-frequency (kHz) 56.476 58.099 60.023 68.677 63.981 45.000 79.976
V-frequency (Hz) 70.069 72.082 75.029 84.997 60.02 60.00 75.025
Pixel rate (MHz) 75.000 78.084 78.750 94.500 108 74.250 135
H-sync Ths 136 136 96 96 112 40 144
H-back porch Thb 144 160 176 208 248 270 248
Count num
(H-total)
H- front porch Thf 24 24 16 48 48 60 16
V-sync Tvs 6 6 3 3 3 5 3
V-back porch Tvb 29 29 28 36 38 20 38
Count num
(V-total)
V-front porch Tvf 3 3 1 1 1 5 1
H-sync. Polarity Negative Negative Positive Positive Positive Negative Positive
V-sync Polarity Negative Negative Positive Positive Positive Negative Positive
H-resolution (dots) 1024 1024 1024 1024 1280 1280 1280
V-resolution (lines) 768 768 768 768 1024 720 1024
Notes: Because this model no support FRC and in order to meet the panel spec of vertical frequency,
some timing can not full screen in vertical size.
Ex:640x400/70Hz;640x350/70Hz ;720x400/70Hz ;640x480/85Hz;800x600/85Hz;
1024x768/85Hz.
Thd 1328 1344 1312 1376 1688 1658 1688
Tvd 806 806 800 808 1066 750 1066
ViewSonic Corporation Confidential
10
-
Do Not Copy VG910s/b
Page 14

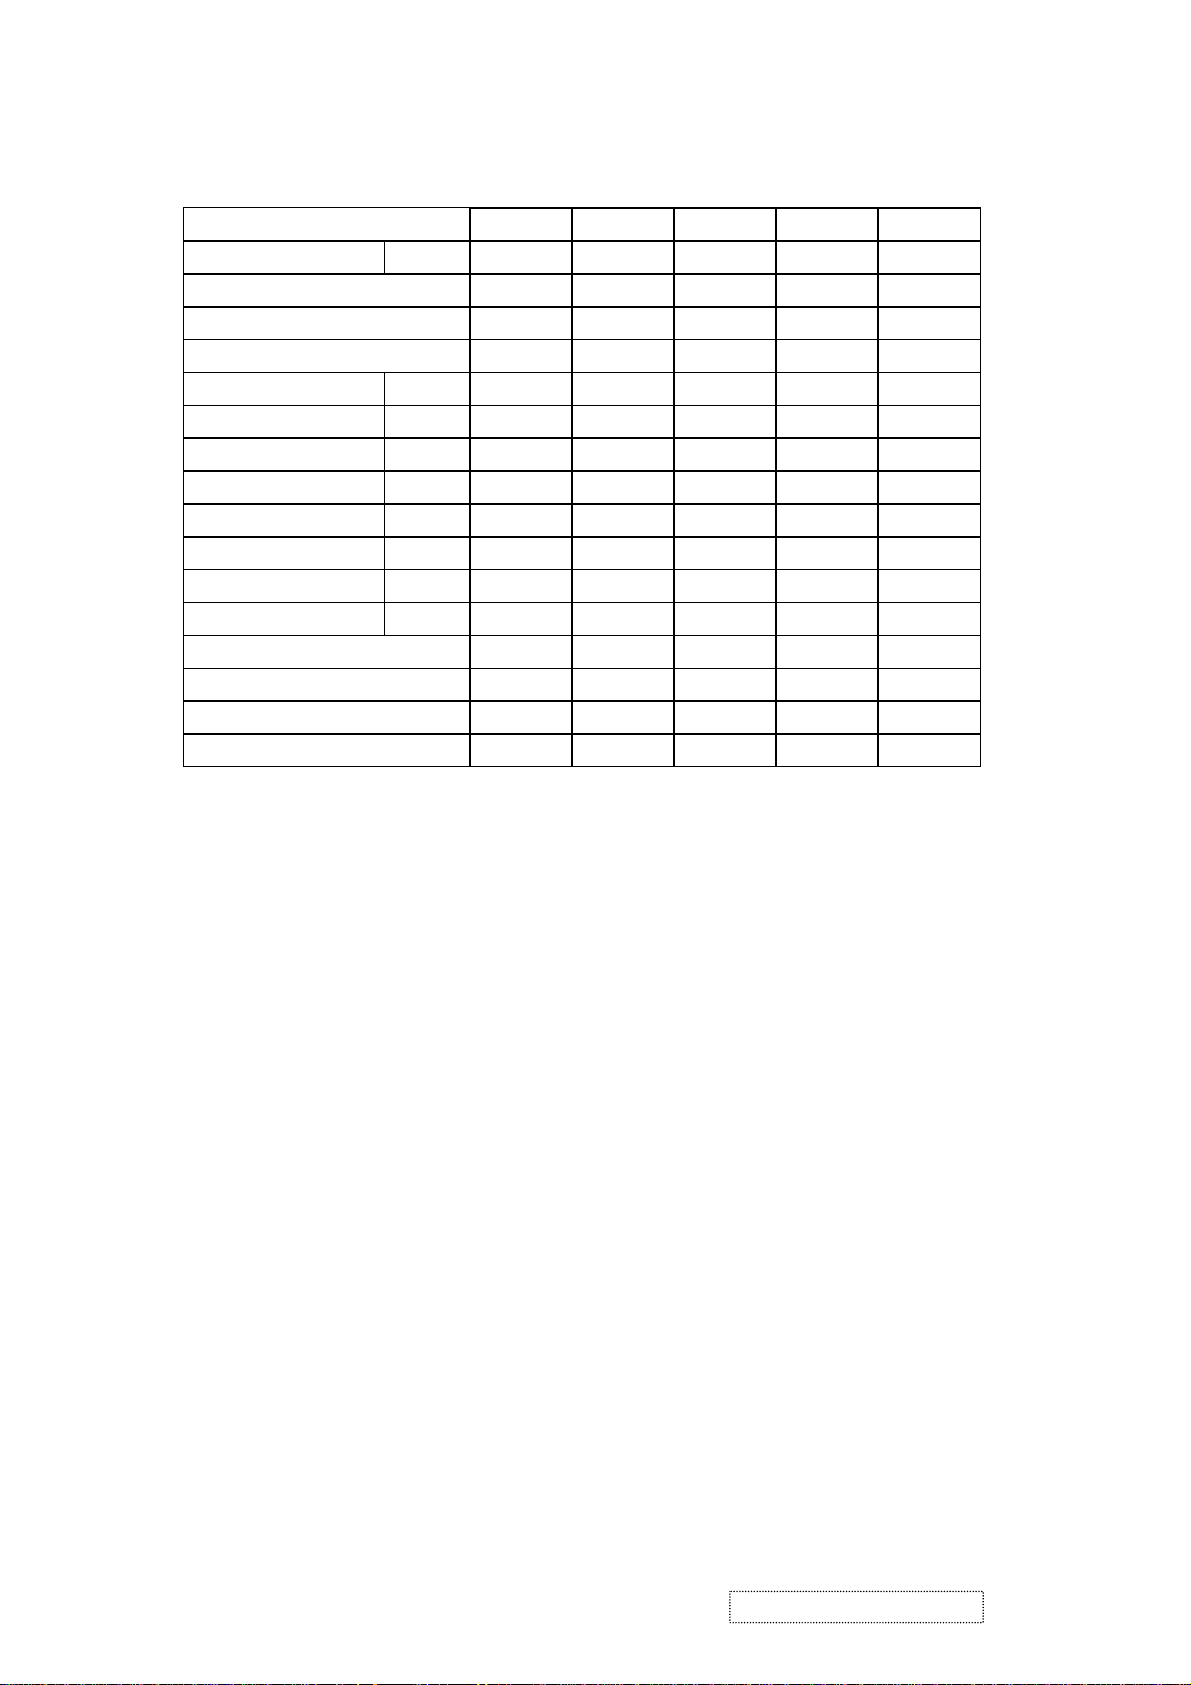
Digital Mode
1 2 3 4 5 6 7
Signal name symbol TEXT
mode
H-frequency (kHz) 31.468 31.469 31.468 31.468 37.5 37.862 43.269
V-frequency (Hz) 70.087 70.087 70.000 59.941 75 72.807 85.005
Pixel rate (MHz) 25.175 28.322 25.175 25.175 31.5 31.501 36.000
H-sync Ths 96 108 96 96 64 40 56
H-back porch Thb 48 54 48 48 120 128 80
Count num (H-total) Thd 800 900 800 800 840 832 832
H- front porch Thf 16 18 16 16 16 24 56
V-sync Tvs 2 2 2 2 3 3 3
V-back porch Tvb 60 35 35 33 16 28 25
Count num (V-total) Tvd 449 449 449 525 500 520 509
V-front porch Tvf 37 12 10 6 1 9 1
H-sync. Polarity Positive Negative Negative Negative Negative Negative Negative
V-sync Polarity Negative Positive Negative Negative Negative Negative Negative
H-resolution (dots) 640 720 640 640 640 640 640
V-resolution (lines) 350 400 400 480 480 480 480
8 9 10 11 12 13 14
Signal name Symbol IBM-8514A SVGA SVGA SVGA SVGA XGA XGA
TEXT
mode
VGA VGA VESA-VGA VESA-VGA VESA-VGA
H-frequency (kHz) 35.156 37.879 48.077 46.875 53.674 48.363 56.476
V-frequency (Hz) 56.250 60.317 72.188 75.000 85.061 60.004 70.069
Pixel rate (MHz) 36.000 40.000 50.000 49.500 56.250 65.000 75.000
H-sync Ths 72 128 120 80 64 136 136
H-back porch Thb 128 88 64 160 152 160 144
Count num (H-total) Thd 1024 1056 1040 1056 1048 1344 1328
H- front porch Thf 24 40 56 16 32 24 24
V-sync Tvs 2 4 6 3 3 6 6
V-back porch Tvb 22 23 23 21 27 29 29
Count num (V-total) Tvd 625 628 666 625 631 806 806
V-front porch Tvf 1 1 37 1 1 3 3
H-sync. Polarity Negative Positive Positive Positive Positive Negative Negative
V-sync Polarity Negative Positive Positive Positive Positive Negative Negative
H-resolution (dots) 800 800 800 800 800 1024 1024
V-resolution (lines) 600 600 600 600 600 768 768
ViewSonic Corporation Confidential
11
-
Do Not Copy VG910s/b
Page 15
15 16 17 18 19
Signal name Symbol XGA XGA XGA SXGA HD-720P
H-frequency (kHz) 58.099 60.023 68.677 63.981 45.000
V-frequency (Hz) 72.082 75.029 84.997 60.02 60.00
Pixel rate (MHz) 78.084 78.750 94.500 108 74.250
H-sync Ths 136 96 96 112 40
H-back porch Thb 160 176 208 248 270
Count num (H-total) Thd 1344 1312 1376 1688 1658
H- front porch Thf 24 16 48 48 60
V-sync Tvs 6 3 3 3 5
V-back porch Tvb 29 28 36 38 20
Count num (V-total) Tvd 806 800 808 1066 750
V-front porch Tvf 3 1 1 1 5
H-sync. Polarity Negative Positive Positive Positive Negative
V-sync Polarity Negative Positive Positive Positive Negative
H-resolution (dots) 1024 1024 1024 1280 1280
V-resolution (lines) 768 768 768 1024 720
Notes: Because this model no support FRC and in order to meet the panel spec of vertical frequency,
some timing can not full screen in vertical size.
Ex:640x400/70Hz;640x350/70Hz ;720x400/70Hz ;640x480/85Hz;800x600/85Hz;
1024x768/85Hz.
ViewSonic Corporation Confidential
12
-
Do Not Copy VG910s/b
Page 16

3. Front Panel Function Control Description
Adjusting the Screen Image:
Use the buttons on the front control panel to display and adjust the OnView
®
controls which display on the screen. The OnView controls are explained at the
top of the next page and are defined in “Main Menu Controls” on page 9.
Main Menu with OnView controls
Front Control Panel shown
below
Speaker Speaker
Scrolls through menu options and
adjusts the displayed control.
Also a shortcut to display the
Contrast adjustment control
screen.
Displays the Main Menu
or exits the control screen
and saves adjustments
Decreases or
increases volume
Audio Mute button
turns the sound off.
Displays the control
screen for the highlighted
control.
Also toggles between two
controls on some
screens.
Also a shortcut to toggle
between analog and
digital connections.
Power light
Green = ON
Orange = Power
Saving
Power
On/Off
ViewSonic Corporation Confidential
13
-
Do Not Copy VG910s/b
Page 17
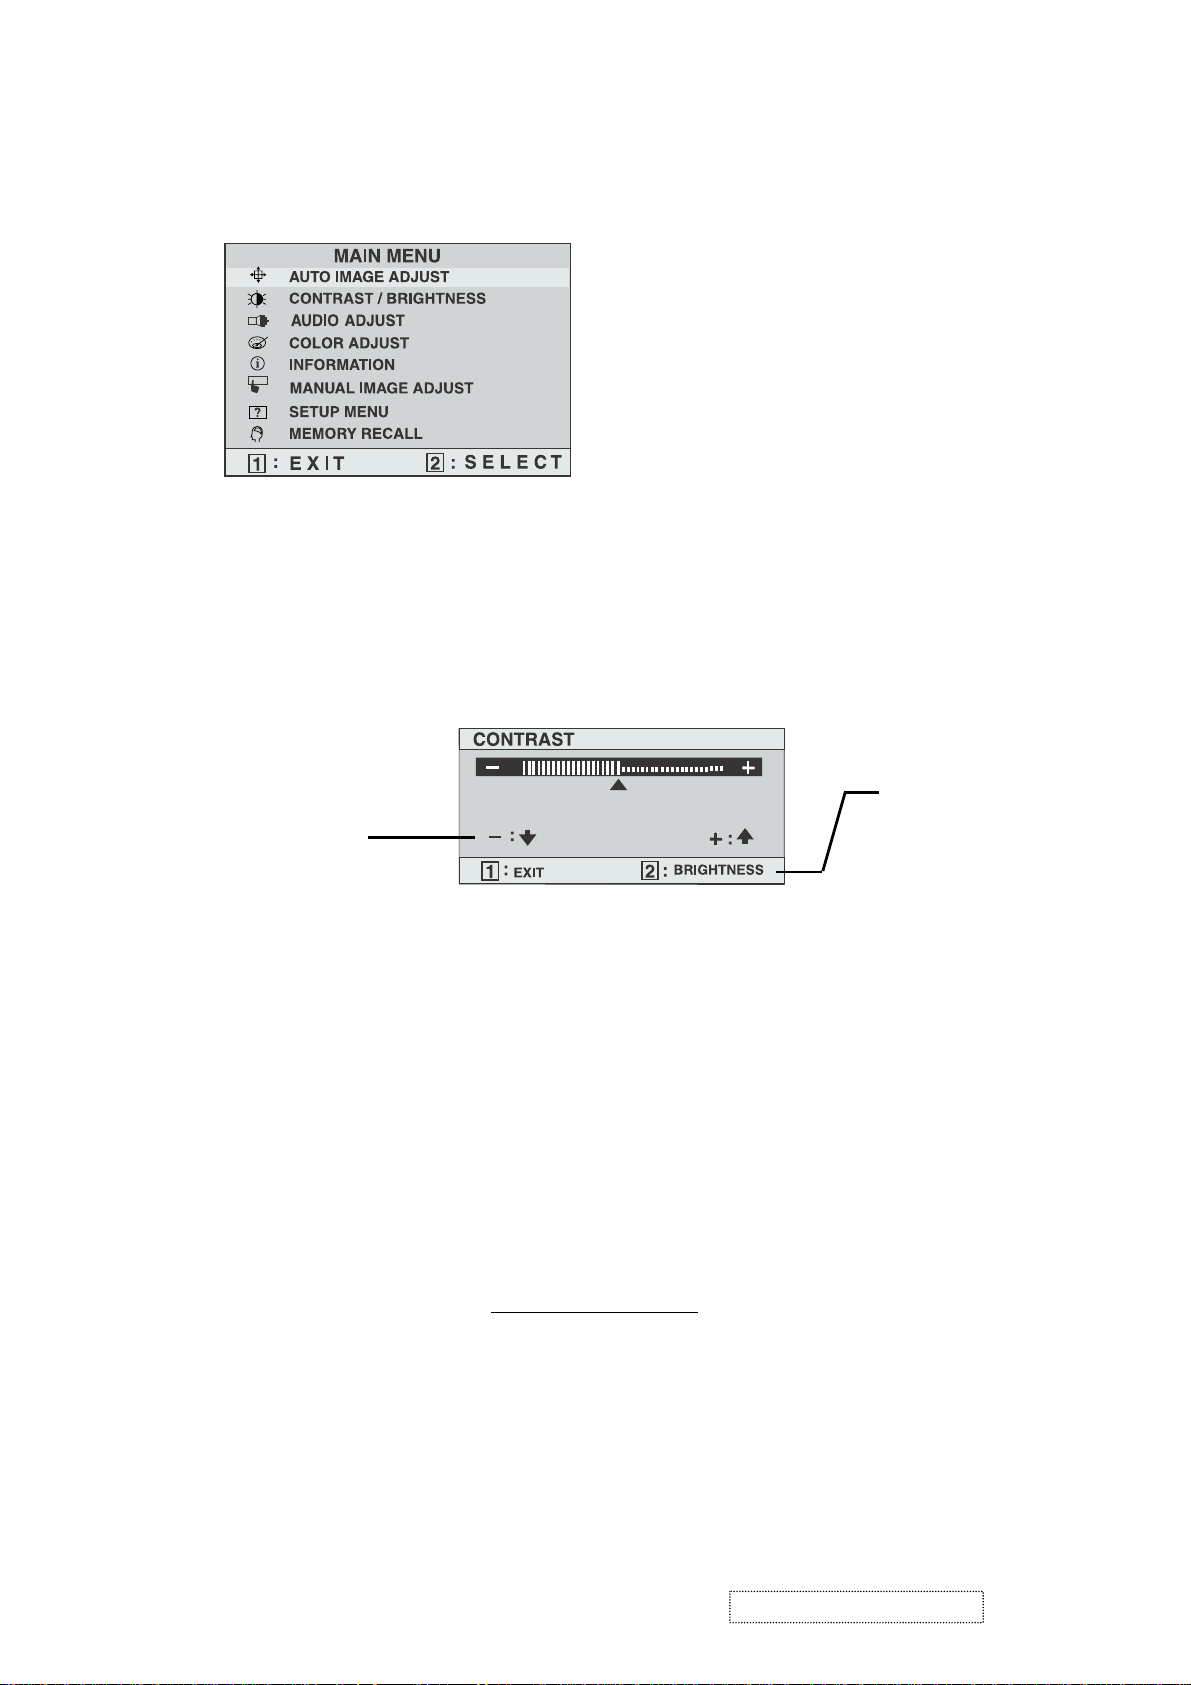
Do the following to adjust the screen image:
To display the Main Menu, press button [1].
1
NOTE:
All OnView menus and adjustment screens disappear automatically
after about 30 seconds.
To select a control you want to adjust, press ▲ or ▼ to scroll up or down the
2
Main Menu.
After the control is selected, press button [2]. A control screen like the one
3
shown below appears.
The ▼down
arrow decreases,
▲
up arrow
increases
To adjust the control, press the up ▲ or down ▼ buttons.
4
To save the adjustments and exit the menu, press button [1]
5
The following tips may help you optimize your display:
The line at the
bottom of the
screen tells you
what you can do
next: Exit or select
the Brightness
control.
.
twice
• Adjust your computer's graphic card so that it outputs a video signal 1280 x
1024 @ 60 Hz to the LCD display. (Look for instructions on "changing the
refresh rate" in your graphic card's user guide.)
• If necessary, make small adjustments using H POSITION and V POSITION
until the screen image is completely visible
. (The black border around the
edge of the screen should barely touch the illuminated "active area" of the
LCD display.)
ViewSonic Corporation Confidential
14
-
Do Not Copy VG910s/b
Page 18
Main Menu Controls
Adjust the menu items shown below by using the up ▲ and down ▼ buttons.
ControlExplanation
Auto Image Adjust
automatically sizes, centers, and fine tunes
the video signal to eliminate waviness and distortion.
Press the [2] button to obtain a sharper image.
NOTE: Auto Image Adjust works with most common video
cards. If this function does not work on your LCD display, then
lower the video refresh rate to 60 Hz and set the resolution to its
pre-set value.
Contrast
adjusts the difference between the image background
(black level) and the foreground (white level).
Brightness
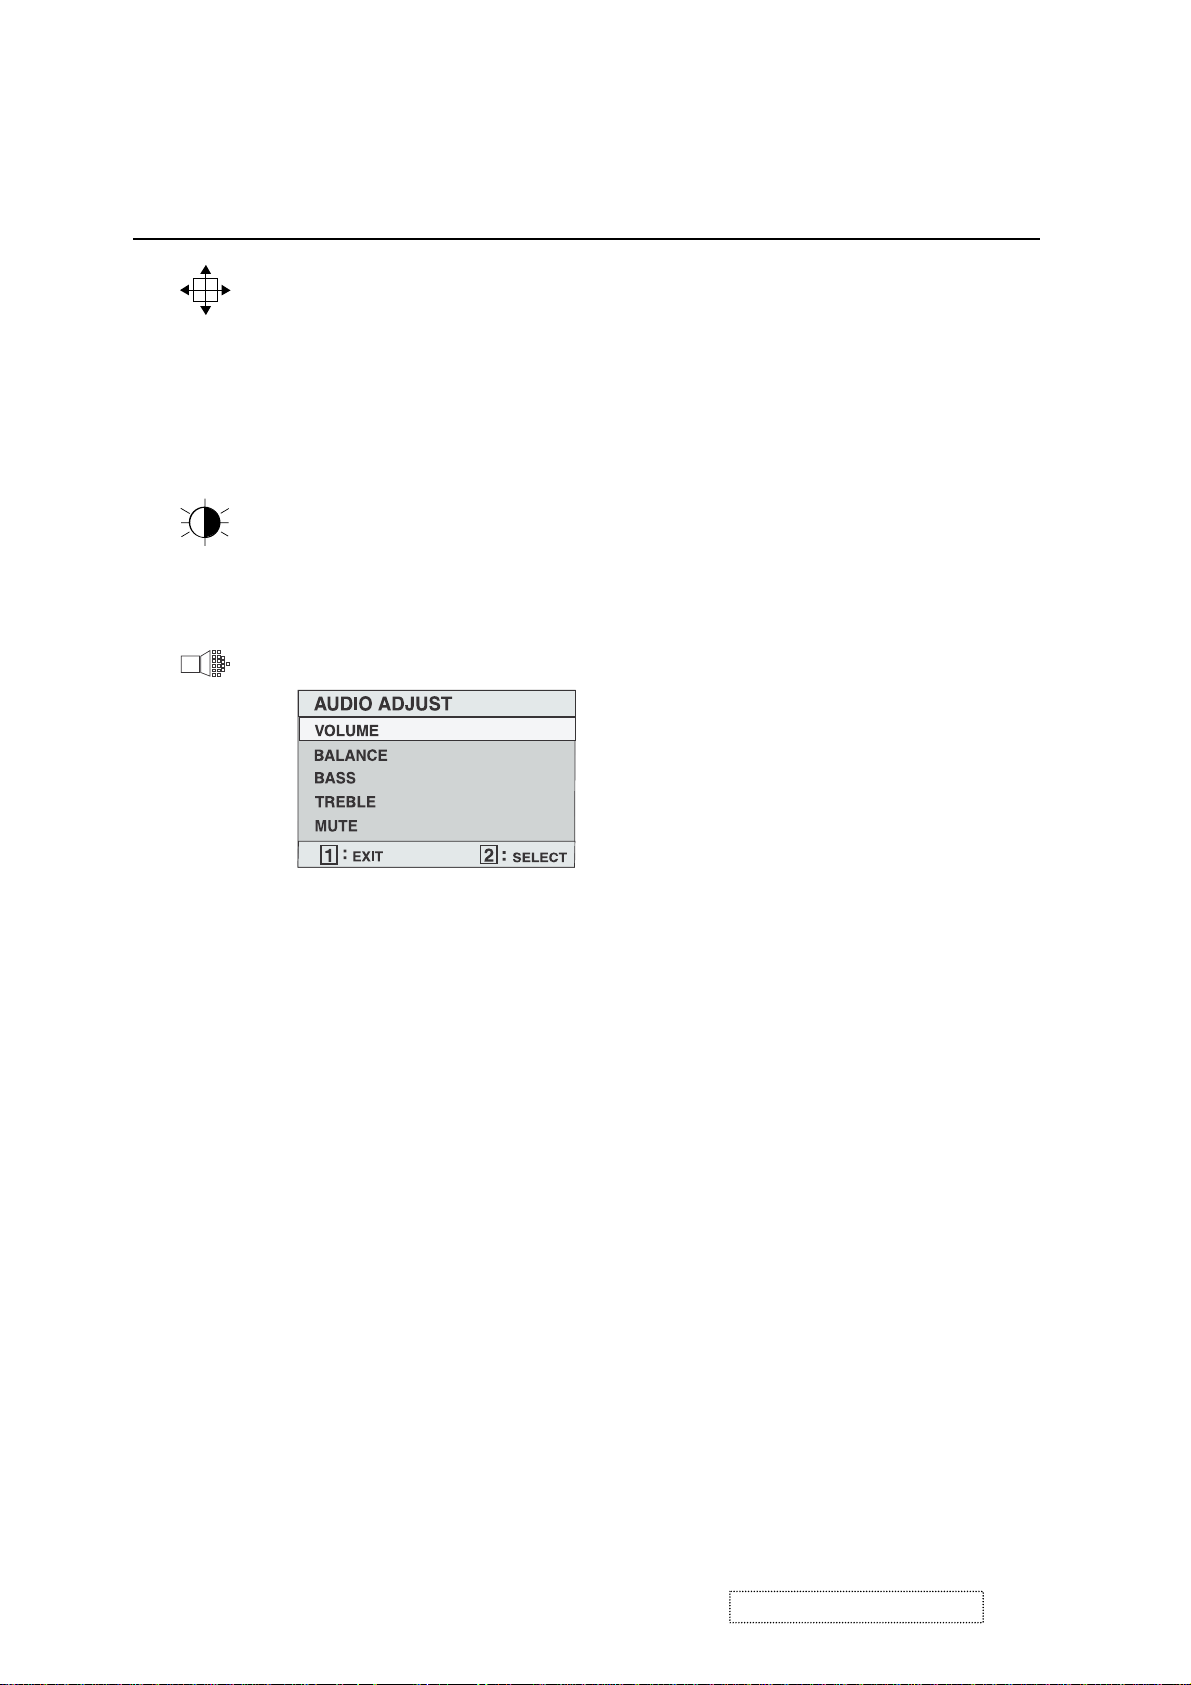
Audio Adjust
adjusts background black level of the screen image.
Volume
increases the volume, decreases the volume, and mutes
the audio.
Balance
speaker.
Bass
Tre bl e
Mute
adjusts the low (bass) frequency audio output.
adjusts the high (treble) frequency audio output.
temporarily silences audio output.
adjusts the proportion of sound coming from each
ViewSonic Corporation Confidential
15
-
Do Not Copy VG910s/b
Page 19
ControlExplanation
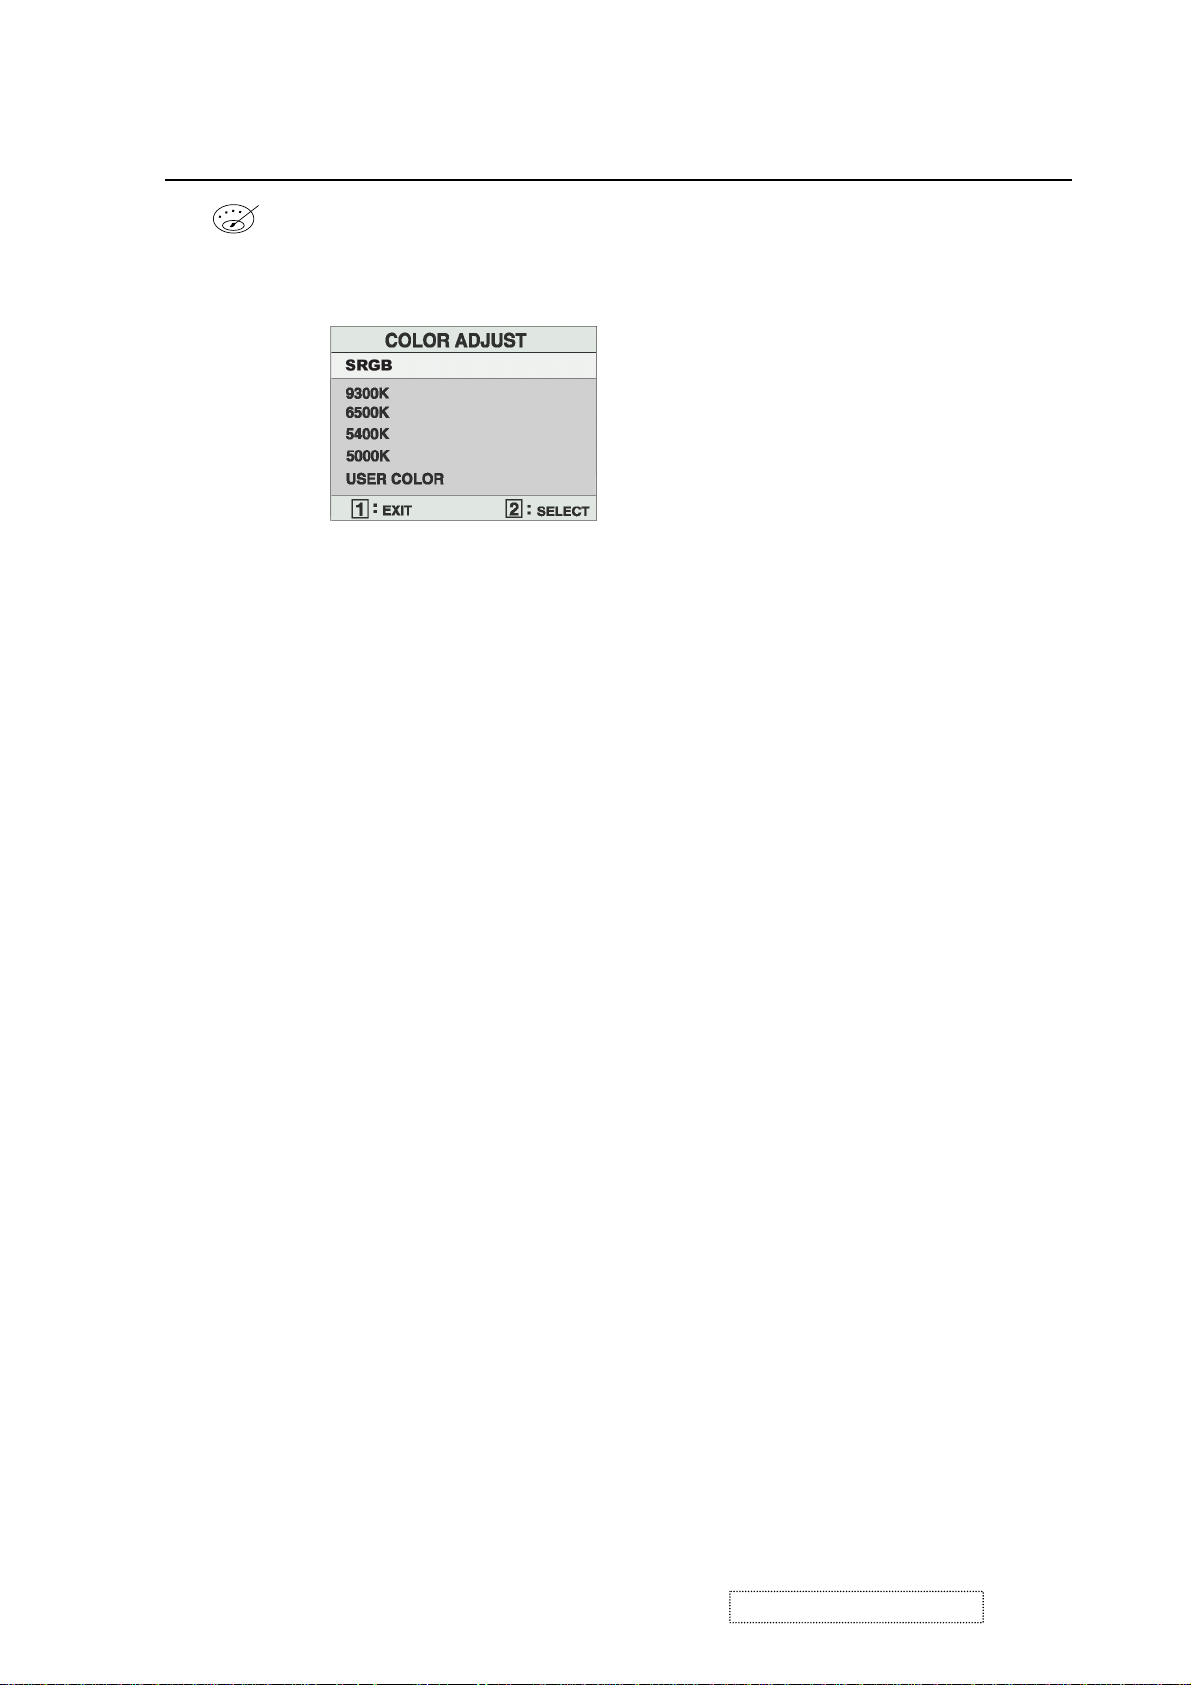
Color Adjust
color temperatures and
provides several color adjustment modes: preset
RGB
which allows you to adjust red (R),
green (G), and blue (B) separately. The factory setting for this
product is 6500K (6500 Kelvin).
sRGB
— sRGB is quickly becoming the industry standard for
color management, with support being included in many of the
latest applications. Enabling this setting allows the LCD display
to more accurately display colors the way they were originally
intended. Enabling the sRGB setting will cause the Contrast and
Brightness adjustments to be disabled.
9300K
— Adds blue to the screen image for cooler white (used
in most office settings with fluorescent lighting).
6500K
— Adds red to the screen image for warmer white and
richer red.
5400K
5000K
— Adds green to the screen image for a darker color.
— Adds blue and green to the screen image for a darker
color.
User Color
and blue (B)
To select color (R, G or B) press button [2].
1
To adjust selected color, press ▲ or ▼.
2
Important
— Individual adjustments for red (R), green (G),
.
: If you select RECALL from the Main Menu when
the product is set to a Preset Timing Mode, colors return to the
6500K factory preset.
ViewSonic Corporation Confidential
16
-
Do Not Copy VG910s/b
Page 20
ControlExplanation
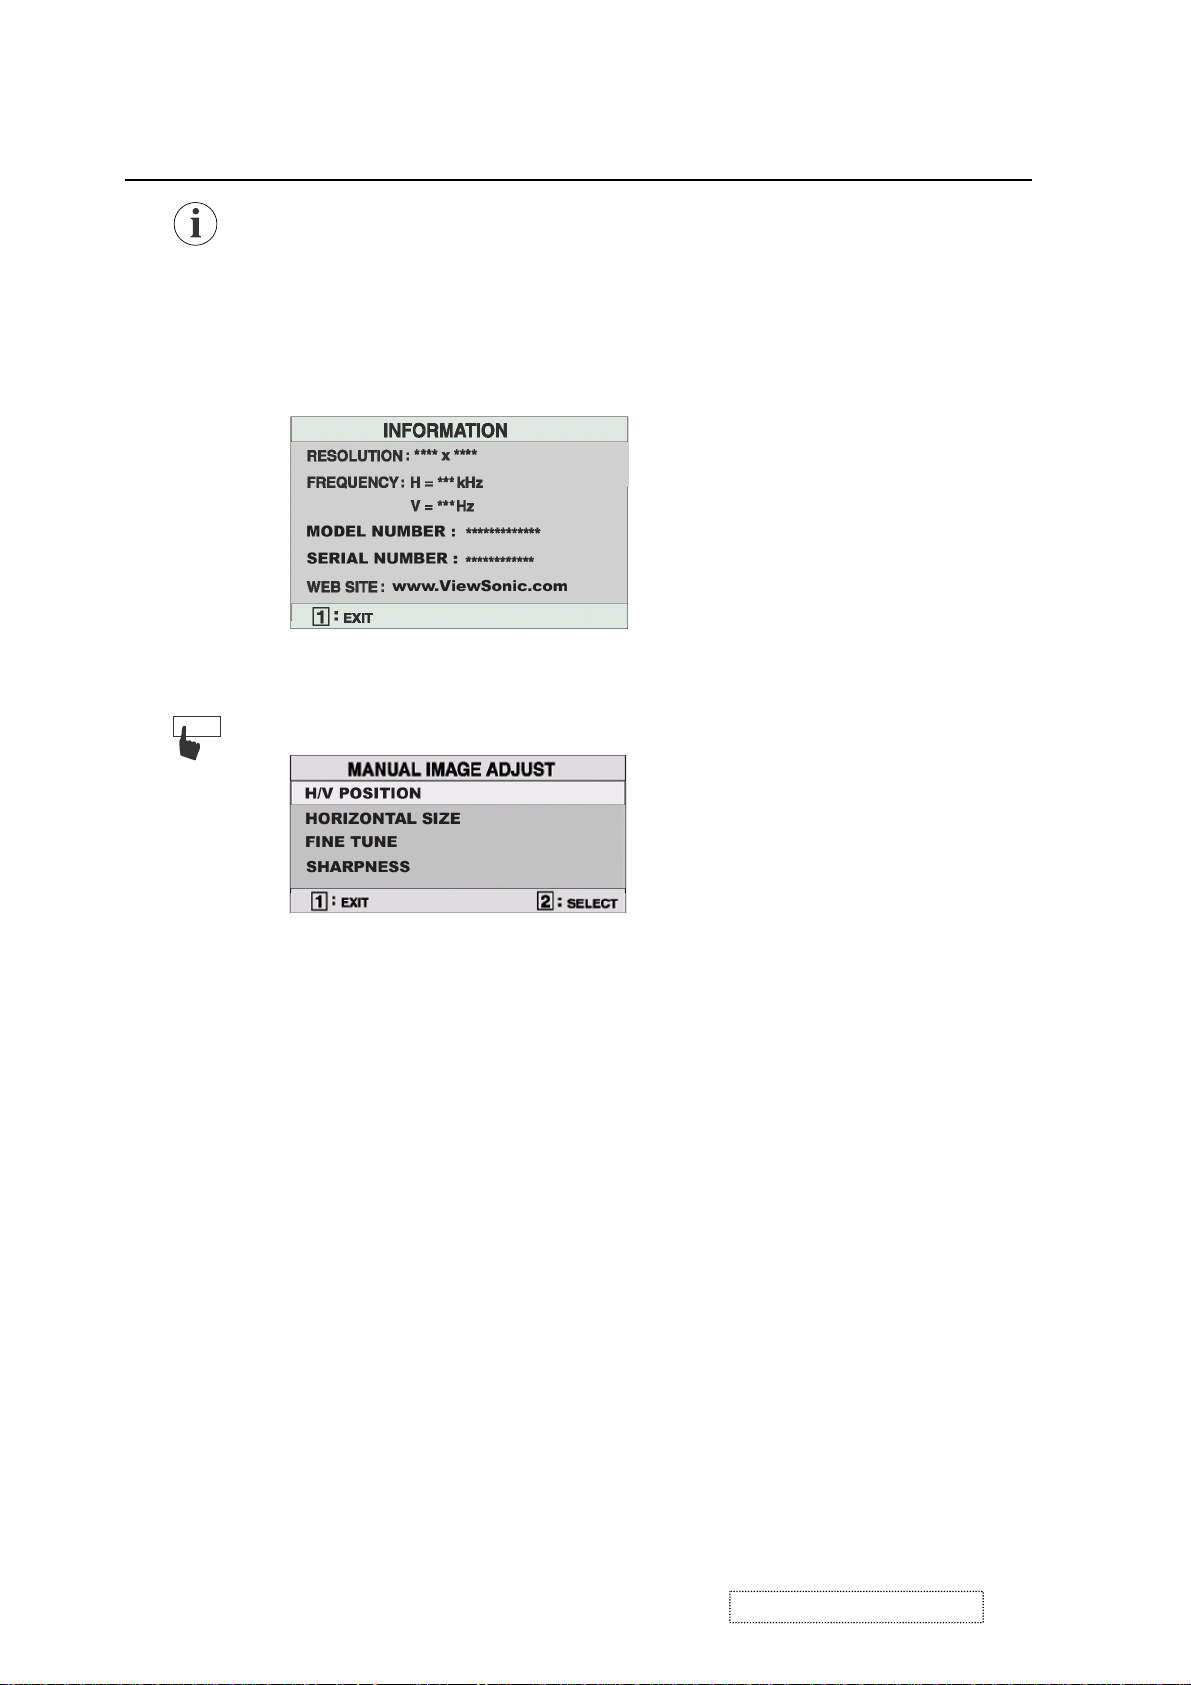
Information
displays the timing mode (video signal input)
coming from the graphics card in your computer. See your
graphic card’s user guide for instructions on changing the
resolution and refresh rate (vertical frequency).
NOTE:
VESA 1280 x 1024 @ 60 Hz (recommended) means
that the resolution is 1280 x 1024 and the refresh rate is 60
Hertz.
Manual Image Adjust
displays the Manual Image Adjust menu.
The
Manual Image Adjust
Horizontal Position
Vertical Position
Horizontal Size
Fine Tune
sharpens focus by aligning the illuminated text and/
moves the screen image left or right.
moves the screen image up or down.
adjusts the width of the screen image.
or graphic characters.
Sharpness
adjusts the clarity and focus of the screen image.
controls are explained below:
ViewSonic Corporation Confidential
17
-
Do Not Copy VG910s/b
Page 21
ControlExplanation
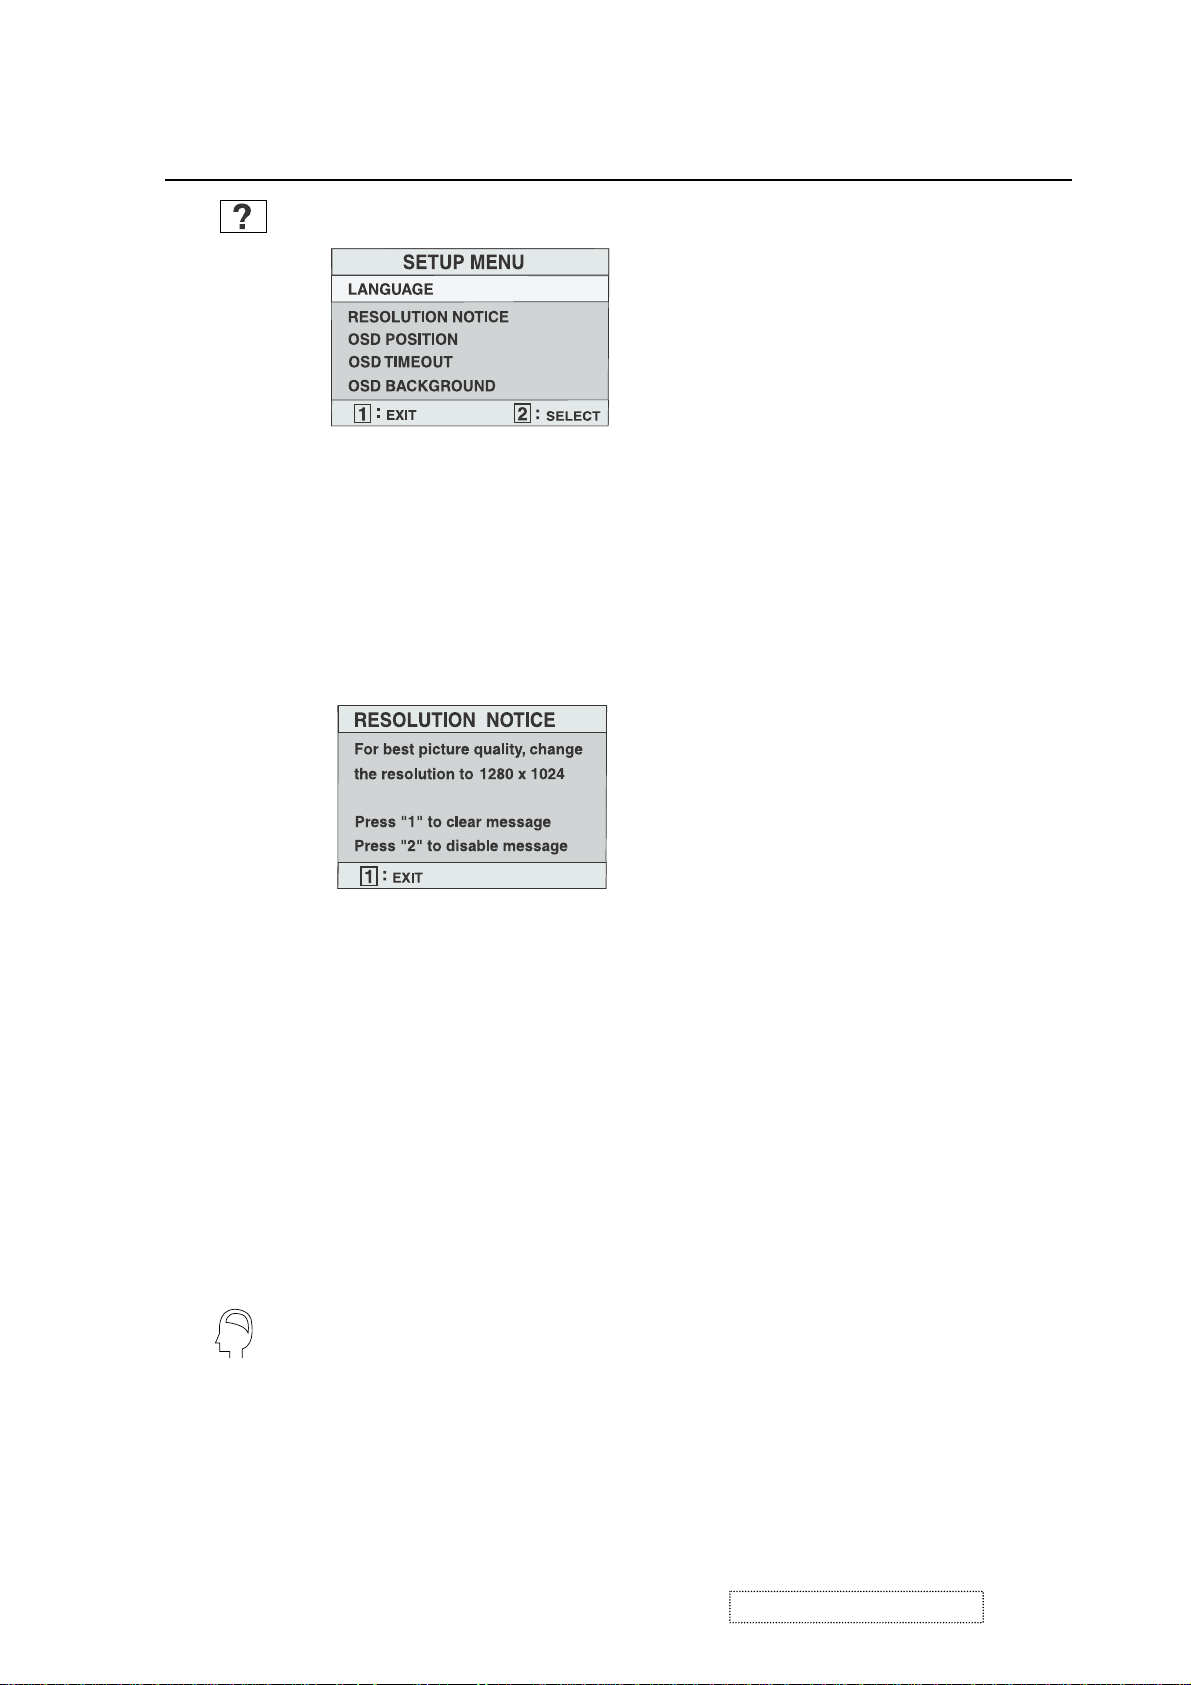
Setup Menu
The
Setup Menu
Language
displays the menu shown below.
controls are explained below:
allows you to choose the language used in the menus
and control screens.
Resolution Notice
below.
displays the Resolution Notice menu shown
Resolution Notice
OSD Position
advises the optimal resolution to use.
allows you to move the on-screen display menus
and control screens.
OSD Timeout
sets the length of time an on-screen display
screen is displayed. For example, with a “15 second” setting, if
a control is not pushed within 15 seconds, the display screen
disappears.
OSD Background
allows you to turn the On-Screen-Display
background on or off.
Memory Recall
returns adjustments to the original factory
settings if the display is operating in a factory Preset Timing
Mode listed in this user guide.
Exception:
This control does not affect changes made with the
User Color control.
ViewSonic Corporation Confidential
18
-
Do Not Copy VG910s/b
Page 22

4. Circuit Description
4.1 Power supply (DC/DC Converter):
4.1.1 IC251 MP1583 is a switching regulator controller that uses PWM method. That can be used for DC to
DC conversion for step-down. It converts a 12V DC into regulated and stable output voltage of 5V.
4.1.2 Regulator:
IC253 function is to convert a 5V into regulated and stable O/P 3.3V.
D252, D253 are 3.3V convert 2.5V.
4.2 DDC data select:
4.2.1 IC601(AT24C02) saves D-SUB DDC data.
4.2.2 IC602(AT24C02) saves DVI, DDC data.
4.3 MCU
The MTV312M micro-controller is an 8051 CPU core embedded device especially tailored for CRT/LCD Monitor
application. It includes an 8051 CPU core, 1024-byte SRAM, 14 built-in PWM DACs, VESA DDC interface,
4-channel A/D converter, and a 64K-byte internal program Flash-ROM.
The MCU controls the keyboard signal and audio signal.
4.4 Scalar
The MST9131A is a high performance, and fully intergrated graphics processing IC solution for LCD monitors
with resolutions up to SXGA. It is configured with an integrated triple-ADC/PLL, a high quality scaling engine,
an on-screen display controller, a built-in output clock generator, an integrated DVI receiver, and LVDS display
interface. To further reduce system costs, the MST9131A also integrates intelligent power management control
capability for green-mode requirements and spread-spectrum support for EMI management.
The analog input (CN602) signal and DVI-D input(CN601) signal are designed to be connected directly to scalar
IC, The MST9131A built-in LVDS transmitter, is designed to be connected directly to panel.
4.5 Audio processor
IC802(PT2313L) is a four-channel digital control audio processor utilizing CMOS Technology. Volume, Bass,
Treble and Balance, Front/Rear Fader Processor are incorporated into a single chip. Loudness function and
Selectable input gain are also provided to build a highly effective electronic Audio processor having the highest
performance and reliability with the least external components. All functions are programmable using the I
Bus.
Volume signal through IC802 pin34(right) pin25(left) into audio amplifier.
4.6 Audio amplifier
IC803(TDA1517) is an integrated class-B dual output amplifier, It contains two identical amplifier differential
input stages. The gain of each amplifier is fixed at 20dB.
Pins 1 and 9 are right and left channel inputs respectively. Pins 4 and 6 are right and left channel outputs which
connect to two 4OHM speakers.
Pin 8 is the mute/stand-by.
2
C
ViewSonic Corporation Confidential
19
-
Do Not Copy VG910s/b
Page 23

5. Adjusting Procedure
5.1 General.
1. All specification must be met over line voltage range of 90V
to 264V
AC
50Hz / 60Hz, unless otherwise
AC
specified.
2. Operating temperature range is 0
o
C to 40oC with a relative humidity of 10% or less to 80%.
3. The monitor must be operational in a usable state within 30 minutes after turn-on.
4. All signal levels are measured assuming termination at the monitor’s input jacks or in its characteristic
impedance.
5. All controls must have excess range (no control may be left at an end stop when proper alignment is
completed).
6. The monitor is not required to meet specs during the following but must tolerate, without damage to the LCD
or circuits, any sequence or combination of power on and off, signal on and off, erratic, wrong frequency or
noisy inputs while at any possible unplugging of power or signal, settings of user accessible controls likewise,
the monitor should survive extended periods of operation with line voltage reduced below the specified
minimum.
7. An isolation transformer should be used when performing alignment and tests, Portions of the power supply
board are hot ground, The remaining boards are cold ground.
8. Ambient condition:
8.1 Illumination: In usual inspection of electric performance and mechanical performance, it shall be 150 ~
260lux.
8.2 Environmental noise: Less than 60dB.
8.3 Interference of EMI: The inspection shall be carried out in the place where a set is not disturbed by
external unnecessary electric wave and magnetic field.
8.4 Temperature: 24 ± 2
o
C.
8.5 Humidity: 65 ± 20%.
ViewSonic Corporation Confidential
20
-
Do Not Copy VG910s/b
Page 24

5.2 Instrument alignment.
5.2.1 Adjustment procedure.
Input
D-SUB
Push "2"
Input
D-SUB
Input
1280x1024 / 60Hz
16 Grays pattern
Push
"DOWN + 2 + DC power"
3 second
Push
"1 + DC power"
3 second
Select
"RGB Reset"
function
Input
1280x1024 / 60Hz
Full white pattern
Push
"1 + DC power"
3 second
Select "Color Adjust"
to adjust
"9300K" , "6500K"
"5400K" , "5000K"
Push "1"
Exit adjust OSD
Push "2" + DC power
to close factory mode
Push
"1 + DC power"
3 second
Select "Color Adjust"
to adjust
"9300K" , "6500K"
"5400K" , "5000K"
Push
Exit adjust OSD
ViewSonic Corporation Confidential
21
-
Do Not Copy VG910s/b
Page 25

5.2.2
Video alignment.
5.2.1.1 Preset condition.
5.2.1.1.1 Setting the contrast to 70%, brightness to 100%.
5.2.1.1.2 Input 1280x1024 / 60Hz, 16 gray pattern (input level 100IRE 0.7Vp-p), then press
“RGB RESET”.9300K / 6500K / 5400K / 5000K, R G B offset preset as below:
9300K 6500K 5400K 5000K
Analog DVI Analog DVI Analog DVI Analog DVI
R sub-contrast 128 128 128 128 128 128 128 128
G sub-contrast 128 128 128 128 128 128 128 128
B sub-contrast 128 128 128 128 128 128 128 128
5.2.1.2 9300K alignment:
5.2.1.2.1 Input 1280x1024 / 60Hz & full white pattern at 100IRE.
5.2.1.2.2 Adjust R, G, and B sub-contrast to meet following chromaticity spec:
9300K → x = 0.283 ± 0.005, y = 0.298 ± 0.005, Y > 155cd/m
2
(Both analog & DVI).
5.2.1.3 6500K alignment:
5.2.1.3.1 Input 1280x1024 / 60Hz & full white pattern at 100IRE.
5.2.1.3.2 Adjust R, G and B sub-contrast to meet following chromaticity spec:
6500°K → x = 0.313 ±0.005, y = 0.329 ± 0.005, Y > 190cd/m
2
(Both analog & DVI).
5.2.1.4 5400K alignment:
5.2.1.4.1 Input 1280x1024 / 60Hz & full white pattern at 100IRE.
5.2.1.4.2 Adjust R, G, and B sub-brightness to meet following chromaticity spec:
5400K → x = 0.335 ± 0.005, y = 0.350 ± 0.005, Y > 180cd/m
2
(Both analog & DVI).
5.2.1.5 5000K alignment:
5.2.1.5.1 Input 1280x1024 / 60Hz & full white pattern at 100IRE.
5.2.1.5.2 Adjust R, G and B sub-contrast to meet following chromaticity spec:
5000°K → x = 0.346 ±0.005, y = 0.359 ± 0.005, Y > 180cd/m
2
(Both analog & DVI).
5.2.1.6 64grays & 16grays pattern check:
5.2.1.6.1 Input 1280x1024 / 60Hz & 64 grays pattern at 100IRE, adjust brightness 100%, and
contrast 70%.
5.2.1.6.2 9300K / 6500K / 5400K / 5000K, the 64 grays can 2steps saturation.
5.2.1.6.3 Input 1280x1024 / 60Hz & 16 grays pattern at 100IRE, adjust brightness 100%, and
contrast 100%.
5.2.1.6.4 9300K / 6500K / 5400K / 5000K, the 16 grays only had 4 grays can saturation.
ViewSonic Corporation Confidential
22
-
Do Not Copy VG910s/b
Page 26

6. Trouble Shooting Flow Chart
6.1 No power.
Check that CN251 pin1, 2 are approximately 12V
Yes
Check that FB251, FB252, F251 are 12V
FB251, FB251, F251 failure
Yes
Check that C255 positive is at 5V.
No
Failure point
1. Power board failure.
2. Disconnected between CN251 and power board.
No
Failure point
No
Failure point
P251, IC251, L251 failure
Yes
Check:
1. C262 is O/P 2.5V.
2. IC253 is O/P 3.3V.
ViewSonic Corporation Confidential
23
-
Do Not Copy VG910s/b
Page 27

6.2 No display on screen (Screen is black, LED is off).
AC power on and DC power on
no picture
LED is off
Yes
Check that C255 positive is at 5V
Yes
Check CN302 pin8 is
12V, pin3 is 5V
Yes
Inverter failure
1. Check Q309, Q310 pin.
2. Check FB315, FB316
IC251 failure
No
Yes
No
Check that the voltage level of
CN251 is approximately 12V
No
Power board failure
ViewSonic Corporation Confidential
24
-
Do Not Copy VG910s/b
Page 28

6.3 No display on screen (LED is green).
Is the backlight lit?
Yes
Check that the cable is
fully connected to CN401
Yes
Check:
1. C262 is O/P 2.V.
2. IC253 is O/P 3.3V.
Yes
Check C255 is O/P 5V.
No
IC251. D251 failure
No
The cable is disconnected
1. D252, D253 failure.
2. IC253 failure.
Failure point
No
Failure point
No
Check that the cable is fully
connected between the inverter
and interface board.
Yes
Check CN302 pin8 is 12V,
pin3 is 5V
Yes
Inverter failure
No
Failure point
The cable is disconnected
No
1. Check Q309, Q310.
2. Check FB315, FB316
ViewSonic Corporation Confidential
25
-
Do Not Copy VG910s/b
Page 29

6.4 Show “No signal” on screen.
Check that signal level of R612, R613, R614, R641, R642, R643, R644, R645, R646, R647, R648
Yes
Check the Hsync and Vsync
6.5 Keypad cannot work.
No
Failure point
No
1. IC401 failure.
2. Signal cable is disconnected.
Check the the cable is fully conneted between the interface
board and key board
Yes
Failure point
1. D305, D306 ~ D311, D312 failure.
2. TACT switch failure.
Failure point
The cable is disconnected.
No
ViewSonic Corporation Confidential
26
-
Do Not Copy VG910s/b
Page 30

6.6 Figure of Waveform
ViewSonic Corporation Confidential
27
-
Do Not Copy VG910s/b
Page 31

ViewSonic Corporation Confidential
28
-
Do Not Copy VG910s/b
Page 32

7. Recommended Spare Parts List
VG910b Recommended Spare Parts List
Item ViewSonic P/N Ref. P/N Description Location Q'ty
1 A-PC-0106-0193 3070000501 AC POWER CORD L1800 BLACK EURO 1
2 M-MS-0808-9140 3070168334 HEADER NYLON66 94V-0 3P P3.96 CN101 1
3 A-AU-0120-0033 3080005100 CABLE AUDIO L=1800 BLK PC99 1
4 A-VC-0101-0359 3080426400 CABLE D-SUB/D-SUB L1800 BLK 20276 1
5 M-FC-0809-0790 3080517603 CABLE FFC 30P P1.0 L270 T2 PANEL TO I/F 1
6 A-PC-0106-0150 3090107600 AC POWER CORD L=1800 BLACK UL/CSA 1
7 M-SCW-0824-0410 3100300600 SCREW M M3*0.5*6 PAN C S+P S20C ZN I/V+PANEL BKT 10
8 M-SCW-0824-0734 3102710800 SCREW M M4*0.7*8 PAN C S S18C ZN YEL AC SOCKET GND 1
9 M-SCW-0824-0690 3105051501 SCREW M #4-40*7 HEXH #4-40*3 S18C NI CONN. D-SUB 4
10 M-SCW-0814-0691 3105120100 SCREW M M4*0.7*12 PAN C S+P S10C ZN YEL STAND ASSY+cabinet back 6
11 M-SCW-0814-0692 3105124000 SCREW M M4*0.7*6 PAN C S18C NI HINGE R&L+BKT ARM 6
12 M-SCW-0824-6793 3105125300 SCREW M M4*0.7*6 FF C S18C ZN BLK NYLCOK Cabinet Back+Panel BKT 2
13 M-SCW-0824-6793 3105125300 SCREW M M4*0.7*6 FF C S18C ZN BLK NYLCOK BKT ATM+BKT BASE 3
14 M-SCW-0824-6793 3105125300 SCREW M M4*0.7*6 FF C S18C ZN BLK NYLCOK BKT BASE+COVER BASE 4
15 M-SCW-0824-0776 3105221000 SCREW M M3*0.5*6 FF C S18C ZN Panel BKT+BKT Hinge 2
16 M-SCW-0824-6796 3105223600 SCREW M M3*0.5*8 FF C S18C ZN PANEL+Panel BKT 4
17 M-SCW-0824-0777 3105225300 SCREW M M3*0.5*4 FF C S18C ZN CABLE CLAMP+PANEL BKT 8
18 M-SCW-0824-0778 3105229400 SCREW M M3*0.5*10 FF C S18C ZN 2
19 M-SCW-0824-0007 3109010100 SCREW T f3*0.5*8 BIND C S18C ZN I/F BD+IC803 1
20 M-SCW-0824-0413 3109011400 SCREW T M3*0.5*6 BIND C S18C ZN YEL ARM REAR+BKT ARM 1
21 M-SCW-0824-0779 3109017700 SCREW T M3*2.7*7.5 FF C S18C ZN YEL F/B+K/B 7
22 M-SCW-0824-0620 3109020500 SCREW T f4*1.6*10 PAN C S18C ZN YEL Cabinet Back+BKT Hinge 4
23 M-SCW-0824-0620 3109020500 SCREW T f4*1.6*10 PAN C S18C ZN YEL ARM FRONT+BKT ARM 4
24 M-SCW-0824-6795 3109023700 SCREW T M4*1.6*8 FPH C S18C ZN YEL Speaker R&L+F/B 4
25 M-MS-0808-9125 3110110900 NUT M3*0.5 AISI1018 2
26 M-MS-0808-8040 3110250000 WASHER SPRING SWRT CONN DVI-D 4
27 M-LB-0813-0785 3200158900 LABEL STICKER OD10 WHT HI-POT 1
28 M-LB-0813-0712 3200449700 LABEL WARING BY AIR SHIPPING,STICK ON TUBE, 0.125
29 M-MS-0808-9126 3200655300 NAME PLATE VSC 3-BIRD LOGO AL 14.5*10.0 FOR F/B ,REV:00 1
30 M-MS-0808-9127 3200655500 NAME PLATE AL VIEWSONIC L38 T1.2 FOR F/B ,REV:00 1
31 M-LB-0813-0384 3200712700 LABEL CONTROL 100*90 Stick on pallet 0.063
32 M-LB-0813-0551 3200744000 LABEL BAR CODE 55*15 VSC-G Stick on flow 1
33 M-LB-0813-0696 3200753101 LABEL BAR CODE 76*121 VIEWSONIC 1
34 M-LB-0813-0759 3200930800 LABEL VER. CONTROL 20*20 VIEWSONIC Stick on Carton 0.167
35 M-LB-0813-0917 3201965500 LABEL ID 160*43 VSC VG910S 1
36 M-LB-0813-0913 3202005900 LABEL SERIAL 42*11 SONY FOR STICK ON I/F BD 1
37 M-LB-0813-0914 3202009100 LABEL REISTRATION 40*16 1
38 M-LB-0813-0900 3202011000 LABEL SERIES PANEL 42*11 T0.05 FOR STICK ON Travel Card 1
39 M-LB-0813-0915 3202215900 LABEL MCU 11*11 POLYESTER 50# 0.13
40 M-LB-0813-0714 3202310700 LABEL HV WARNING 100*25 FOR I/V SHIELD CAN, 1
41 M-MS-0808-8303 3211024500 MYLAR 435*350 T.1 F/B ,REV:03 1
42 M-MS-0808-9128 3240216601 INSULATOR PP T.43 60.86*129 1
43 M-MS-0808-9141 3240296500 THERMAL PAD SILICONE 20*14 T2 STICK ON IC401 1
44 M-MS-0808-8304 3240964900 RUBBER HOLD PLUG OD5.2 H3.8 GRAY CABINET BACK 4
45 PL-PD-0714-0067 3240956800 RUBBER FOOT 81*13*3T BLK BKT BSAE 2
46 M-MS-0808-8157 3240957400 SPONGE EVA 100*7 T1 BLACK BASE COVER 1
47 PL-PD-0714-0068 3240957500 RUBBER FOOT 75*10 T3 BKT BASE 2
48 PL-PD-0714-0111 3240968200 RUBBER PAD 50*10 T3 GRAY PANEL+FFC CABLE 1
49 M-MS-0808-9137 3240977700 RUBBER HOLE PULG OD11.4 ID6.5 T7.36 BLK ARM REAR 1
50 M-MS-0808-9142 3241132900 INSULATOR PC T.4 204*40 VG910 STICK ON CABINE T BACK 1
51 M-MS-0808-9143 3343715400 HSK PLATE AL1100F PICKLING T1 1
52 C-BC-0302-0566 3360249000 CABINET BACK ABS MIDNIGHT GRAY S9LRC1LS 1
53 M-CV-0830-2397 3360916700 ARM FRONT ABS MIDNIGHT GRAY VG800B-2 1
54 M-CV-0830-2508 3360919301 ARM REAR ABS MIDNIGHT GRAY S8LBA2LS 1
55 M-CV-0830-2400 3361205800 COVER BASE ABS MIDNIGHT GRAY VG800B-2 1
56 C-BC-0302-0567 3368216801 R/C ASSY L19BMW05BBB S9LRC1LS 1
57 C-FP-0301-9920 3368303002 F/B ASSY L19BMR05ABB S9LFC1LS 1
58 M-MS-0808-8162 3421024500 CABLE CLAMP GROUNDING SPCC T.3mm K/B WIRE 1
59 PL-CL-0710-0034 3421095601 CLIP SUS301 T=0.4 1
60 M-BK-0805-0061 3460144800 BRACKET CONN SECC 41.7*30 T0.6 PANEL BKT+LVDS CABLE 1
61 M-MS-0808-8561 3460146100 BRACKET VESA SECC 110*20 T1 CABINET BACK 2
ViewSonic Corporation Confidential
29
-
Do Not Copy VG910s/b
Page 33

VG910b Recommended Spare Parts List
CABLE+D-SUB
Item ViewSonic P/N Ref. P/N Description Location Q'ty
62 M-MS-0808-8563 3460146300 BRACKET KEYLOCK SECC 20.4*16.45*4.9 T.6 CABINET BACK 1
63 M-BK-0805-0048 3460165200 BRACKET D-SUB SECC 266*30*29 T.8 1
64 M-BK-0805-0049 3460165300 BRACKET HINGE SECC 228*60*16 T.8 1
65 M-BK-0805-0050 3460165401 BRACKET PANEL SECC 406.3*332.3*19.8 T.8 1
66 M-MS-0808-9144 3460165500 BRACKET SHIELD CAN INV SECC 220.6*66.8*2 1
67 M-MS-0808-9145 3461235402 SHIELD CAN IF SPTH 280.7*156.72*30.4 T.3 1
68 M-MS-0808-9130 3461752700 HINGE-R SUS304 62*20 T2 1
69 M-MS-0808-9131 3461752800 HINGE-L SUS304 62*20 T2 1
70 M-BK-0805-0043 3461753201 BRACKET ARM SECC 156*126.1*153.6 T2 1
71 M-BK-0805-0044 3461753301 BRACKET BASE SECC 266.6*161.4 T2 1
72
P-FM-0602-0851
73
P-FM-0602-0852
74 M-MS-0808-9132 3500932402 PE BAG 640*580*.06T CLEAR 3% SPARE PARTS 1
75 M-MS-0808-8762 3500937501 PE BAG 300*200*0.06T
76 P-BX-0601-0928 3512251700 CARTON 556*515*252 VG910B L19BMR05ABB 3% FOR SPARE PARTS 1
77 A-CD-VG910B 3532078300 CD-ROM VSC A-CD-VG910B-1 PUT IN MANUAL PACKING ASSY 1
78 A-UG-0107-0511 3532078601 MANUAL PACKING ASSY VSC VG910B PUT IN CARTON 1
79 M-MS-0808-9135 3610171802 AC SOCKET ASSY VG810S 1
80 M-WR-0828-6622 3670479500 WIRE WITH HOUSING 1007 #24 L120 4P CN201,POWER TO I/F 1
81 M-WR-0828-6619 3670479600 WIRE WITH HOUSING 2547 #28 L500 4P I/F TO SPEAKER 1
82 M-WR-0828-6623 3679009500 WIRE WITH HOUSING 20276 #30 L395 12P I/F TO K/B 1
83 E-SK-0412-0086 3790182900 SPEAKER ASSY L18FMR05AAB 2
84 M-LCD-0826-0192 5051901202 LCD 19" TFT PANEL SXGA
85 B-IF-0222-0053 5600110127 LCD I/F BD ASSY L19BMR 05AAB 1
86 B-SB-0221-0590 5600110128 LCD INVERTER BD ASSY L19BMR 05AAB 1
87 B-PS-0204-0059 5600110175 LCD POWER BD ASSY L19BMR 05AAB 1
88 B-KB-0207-0046 5600110180 LCD FUN KEY BD ASSY L19BMR 05AAB 1
3500117000 END BLOCK-TOP L19BMR05AAB 1
3500117100 END BLOCK-BOTTOM L19BMR05AAB 1
FOR PACKING POWER CORD+AUDIO
1
ViewSonic Corporation Confidential
30
-
Do Not Copy VG910s/b
Page 34

VG910s Recommended Spare Parts List
Item ViewSonic P/N Ref. P/N Description Location Q'ty
1 A-PC-0106-0193 3070000501 AC POWER CORD L1800 BLACK EURO 1
2 M-MS-0808-9140 3070168334 HEADER NYLON66 94V-0 3P P3.96 CN101 1
3 A-AU-0120-0033 3080005100 CABLE AUDIO L=1800 BLK PC99 1
4 A-VC-0101-0359 3080426400 CABLE D-SUB/D-SUB L1800 BLK 20276 1
5 M-FC-0809-0790 3080517603 CABLE FFC 30P P1.0 L270 T2 PANEL TO I/F 1
6 A-PC-0106-0150 3090107600 AC POWER CORD L=1800 BLACK UL/CSA 1
7 M-SCW-0824-0410 3100300600 SCREW M M3*0.5*6 PAN C S+P S20C ZN I/V+PANEL BKT 10
8 M-SCW-0824-0734 3102710800 SCREW M M4*0.7*8 PAN C S S18C ZN YEL AC SOCKET GND 1
9 M-SCW-0824-0690 3105051501 SCREW M #4-40*7 HEXH #4-40*3 S18C NI CONN. D-SUB 4
10 M-SCW-0814-0691 3105120100 SCREW M M4*0.7*12 PAN C S+P S10C ZN YEL STAND ASSY+cabinet back 6
11 M-SCW-0814-0692 3105124000 SCREW M M4*0.7*6 PAN C S18C NI HINGE R&L+BKT ARM 6
12 M-SCW-0824-6793 3105125300 SCREW M M4*0.7*6 FF C S18C ZN BLK NYLCOK Cabinet Back+Panel BKT 2
13 M-SCW-0824-6793 3105125300 SCREW M M4*0.7*6 FF C S18C ZN BLK NYLCOK BKT ATM+BKT BASE 3
14 M-SCW-0824-6793 3105125300 SCREW M M4*0.7*6 FF C S18C ZN BLK NYLCOK BKT BASE+COVER BASE 4
15 M-SCW-0824-0776 3105221000 SCREW M M3*0.5*6 FF C S18C ZN Panel BKT+BKT Hinge 2
16 M-SCW-0824-6796 3105223600 SCREW M M3*0.5*8 FF C S18C ZN PANEL+Panel BKT 4
17 M-SCW-0824-0777 3105225300 SCREW M M3*0.5*4 FF C S18C ZN CABLE CLAMP+PANEL BKT 8
18 M-SCW-0824-0778 3105229400 SCREW M M3*0.5*10 FF C S18C ZN 2
19 M-SCW-0824-0007 3109010100 SCREW T f3*0.5*8 BIND C S18C ZN I/F BD+IC803 1
20 M-SCW-0824-0413 3109011400 SCREW T M3*0.5*6 BIND C S18C ZN YEL ARM REAR+BKT ARM 1
21 M-SCW-0824-0779 3109017700 SCREW T M3*2.7*7.5 FF C S18C ZN YEL F/B+K/B 7
22 M-SCW-0824-0620 3109020500 SCREW T f4*1.6*10 PAN C S18C ZN YEL Cabinet Back+BKT Hinge 4
23 M-SCW-0824-0620 3109020500 SCREW T f4*1.6*10 PAN C S18C ZN YEL ARM FRONT+BKT ARM 4
24 M-SCW-0824-6795 3109023700 SCREW T M4*1.6*8 FPH C S18C ZN YEL Speaker R&L+F/B 4
25 M-MS-0808-9125 3110110900 NUT M3*0.5 AISI1018 2
26 M-MS-0808-8040 3110250000 WASHER SPRING SWRT CONN DVI-D 4
27 M-LB-0813-0785 3200158900 LABEL STICKER OD10 WHT HI-POT 1
28 M-LB-0813-0712 3200449700 LABEL WARING BY AIR SHIPPING,STICK ON TUBE, 0.125
29 M-MS-0808-9126 3200655300 NAME PLATE VSC 3-BIRD LOGO AL 14.5*10.0 FOR F/B ,REV:00 1
30 M-MS-0808-9127 3200655500 NAME PLATE AL VIEWSONIC L38 T1.2 FOR F/B ,REV:00 1
31 M-LB-0813-0384 3200712700 LABEL CONTROL 100*90 Stick on pallet 0.063
32 M-LB-0813-0551 3200744000 LABEL BAR CODE 55*15 VSC-G Stick on flow 1
33 M-LB-0813-0696 3200753101 LABEL BAR CODE 76*121 VIEWSONIC 1
34 M-LB-0813-0759 3200930800 LABEL VER. CONTROL 20*20 VIEWSONIC Stick on Carton 0.167
35 M-LB-0813-0917 3201965500 LABEL ID 160*43 VSC VG910S 1
36 M-LB-0813-0913 3202005900 LABEL SERIAL 42*11 SONY FOR STICK ON I/F BD 1
37 M-LB-0813-0914 3202009100 LABEL REISTRATION 40*16 1
38 M-LB-0813-0900 3202011000 LABEL SERIES PANEL 42*11 T0.05 FOR STICK ON Travel Card 1
39 M-LB-0813-0915 3202215900 LABEL MCU 11*11 POLYESTER 50# 0.13
40 M-LB-0813-0714 3202310700 LABEL HV WARNING 100*25 FOR I/V SHIELD CAN, 1
41 M-MS-0808-8303 3211024500 MYLAR 435*350 T.1 F/B ,REV:03 1
42 M-MS-0808-9128 3240216601 INSULATOR PP T.43 60.86*129 1
43 M-MS-0808-9141 3240296500 THERMAL PAD SILICONE 20*14 T2 STICK ON IC401 1
44 M-MS-0808-8608 3240956400 RUBBER HOLD PLUG OD4.9 H3.2 BLK CABINET BACK 4
45 PL-PD-0714-0067 3240956800 RUBBER FOOT 81*13*3T BLK BKT BSAE 2
46 M-MS-0808-8157 3240957400 SPONGE EVA 100*7 T1 BLACK BASE COVER 1
47 PL-PD-0714-0068 3240957500 RUBBER FOOT 75*10 T3 BKT BASE 2
48 PL-PD-0714-0111 3240968200 RUBBER PAD 50*10 T3 GRAY PANEL+FFC CABLE 1
49 M-MS-0808-9137 3240977700 RUBBER HOLE PULG OD11.4 ID6.5 T7.36 BLK ARM REAR 1
50 M-MS-0808-9142 3241132900 INSULATOR PC T.4 204*40 VG910 STICK ON CABINE T BACK 1
51 M-MS-0808-9143 3343715400 HSK PLATE AL1100F PICKLING T1 1
52 C-BC-0302-0568 3360248900 CABINET BACK ABS 41 S9LRC1LS 1
53 M-CV-0830-2381 3360916300 ARM FRONT ABS 41 VX700-2 1
54 M-CV-0830-2509 3360919201 ARM COVER REAR ABS 41 S8LBA2LS 1
55 M-CV-0830-2394 3361205900 COVER BASE ABS 41 VG800-2 1
56 C-BC-0302-0569 3368216701 R/C ASSY L19BMR05BAB S9LRC1LS 1
57 C-FP-0301-9921 3368302901 F/B ASSY L19BMR05AAB S9LFC1LS 1
58 M-MS-0808-8162 3421024500 CABLE CLAMP GROUNDING SPCC T.3mm K/B WIRE 1
59 PL-CL-0710-0034 3421095601 CLIP SUS301 T=0.4 1
60 M-BK-0805-0061 3460144800 BRACKET CONN SECC 41.7*30 T0.6 PANEL BKT+LVDS CABLE 1
61 M-MS-0808-8561 3460146100 BRACKET VESA SECC 110*20 T1 CABINET BACK 2
62 M-MS-0808-8563 3460146300 BRACKET KEYLOCK SECC 20.4*16.45*4.9 T.6 CABINET BACK 1
63 M-BK-0805-0048 3460165200 BRACKET D-SUB SECC 266*30*29 T.8 1
64 M-BK-0805-0049 3460165300 BRACKET HINGE SECC 228*60*16 T.8 1
65 M-BK-0805-0050 3460165401 BRACKET PANEL SECC 406.3*332.3*19.8 T.8 1
66 M-MS-0808-9144 3460165500 BRACKET SHIELD CAN INV SECC 220.6*66.8*2 1
67 M-MS-0808-9145 3461235402 SHIELD CAN IF SPTH 280.7*156.72*30.4 T.3 1
68 M-MS-0808-9130 3461752700 HINGE-R SUS304 62*20 T2 1
ViewSonic Corporation Confidential
31
-
Do Not Copy VG910s/b
Revised: 1/7/04
Page 35

VG910s Recommended Spare Parts List
CORD+AUDIO CABLE+D-SUB
Item ViewSonic P/N Ref. P/N Description Location Q'ty
69 M-MS-0808-9131 3461752800 HINGE-L SUS304 62*20 T2 1
70 M-BK-0805-0043 3461753201 BRACKET ARM SECC 156*126.1*153.6 T2 1
71 M-BK-0805-0044 3461753301 BRACKET BASE SECC 266.6*161.4 T2 1
72
P-FM-0602-0851
73
P-FM-0602-0852
74 M-MS-0808-9132 3500932402 PE BAG 640*580*.06T CLEAR 3% SPARE PARTS 1
75 M-MS-0808-8762 3500937501 PE BAG 300*200*0.06T
76 P-BX-0601-0929 3512251800 CARTON 556*515*252 VG910S L18BMR05AAB 3% FOR SPARE PARTS 1
77 A-CD-VG910S 3532078400 CD-ROM VSC A-CD-VG910S-1 PUT IN MANUAL PACKING ASSY 1
78 A-UG-0107-0512 3532078501 MANUAL PACKING ASSY VSC VG910S PUT IN CARTON 1
79 M-MS-0808-9135 3610171802 AC SOCKET ASSY VG810S 1
80 M-WR-0828-6622 3670479500 WIRE WITH HOUSING 1007 #24 L120 4P CN201,POWER TO I/F 1
81 M-WR-0828-6619 3670479600 WIRE WITH HOUSING 2547 #28 L500 4P I/F TO SPEAKER 1
82 M-WR-0828-6623 3679009500 WIRE WITH HOUSING 20276 #30 L395 12P I/F TO K/B 1
83 E-SK-0412-0086 3790182900 SPEAKER ASSY L18FMR05AAB 2
84 M-LCD-0826-0192 5051901202 LCD 19" TFT PANEL SXGA
85 B-IF-0222-0053 5600110127 LCD I/F BD ASSY L19BMR 05AAB 1
86 B-SB-0221-0590 5600110128 LCD INVERTER BD ASSY L19BMR 05AAB 1
87 B-PS-0204-0059 5600110175 LCD POWER BD ASSY L19BMR 05AAB 1
88 B-KB-0207-0046 5600110180 LCD FUN KEY BD ASSY L19BMR 05AAB 1
3500117000 END BLOCK-TOP L19BMR05AAB 1
3500117100 END BLOCK-BOTTOM L19BMR05AAB 1
FOR PACKING POWER
Revised: 1/7/04
1
ViewSonic Corporation Confidential
32
-
Do Not Copy VG910s/b
Page 36

BKT
CAN I/F TOP
CONN. EACH 70m
CAN I/F &
WIRE
CAN I/V LEFT
CAN I/F RIGH
AR EA R&L SID
VG910b BOM LIST
Item ViewSonic P/N Ref. P/N Description Location Q'ty
1 A-PC-0106-0193 3070000501 AC POWER CORD L1800 BLACK EURO 1
2 A-AU-0120-0033 3080005100 CABLE AUDIO L=1800 BLK PC99 1
3 A-VC-0101-0359 3080426400 CABLE D-SUB/D-SUB L1800 BLK 20276 1
4 M-FC-0809-0790 3080517603 CABLE FFC 30P P1.0 L270 T2 PANEL TO I/F 1
5 A-PC-0106-0150 3090107600 AC POWER CORD L=1800 BLACK UL/CSA 1
6 M-SCW-0824-0410 3100300600 SCREW M M3*0.5*6 PAN C S+P S20C ZN
7 M-SCW-0824-0734 3102710800 SCREW M M4*0.7*8 PAN C S S18C ZN YEL AC SOCKET GND 1
8 M-SCW-0824-0690 3105051501 SCREW M #4-40*7 HEXH #4-40*3 S18C NI CONN. D-SUB, DVI-D 2
9 M-SCW-0814-0691 3105120100 SCREW M M4*0.7*12 PAN C S+P S10C ZN YEL STAND ASSY+cabinet back 6
10 M-SCW-0824-6793 3105125300 SCREW M M4*0.7*6 FF C S18C ZN BLK NYLCOK Cabinet Back+Panel BKT 2
11 M-SCW-0824-0776 3105221000 SCREW M M3*0.5*6 FF C S18C ZN Panel BKT+BKT Hinge 2
12 M-SCW-0824-6796 3105223600 SCREW M M3*0.5*8 FF C S18C ZN PANEL+Panel BKT 4
13 M-SCW-0824-0777 3105225300 SCREW M M3*0.5*4 FF C S18C ZN CABLE CLAMP+PANEL BKT 1
14 M-SCW-0824-0777 3105225300 SCREW M M3*0.5*4 FF C S18C ZN D-SUB BKT+Panel BKT 3
15 M-SCW-0824-0777 3105225300 SCREW M M3*0.5*4 FF C S18C ZN D-SUB BKT+Shield Can 3
16 M-SCW-0824-0777 3105225300 SCREW M M3*0.5*4 FF C S18C ZN I/V SHIELD+Panel BKT 1
17 M-SCW-0824-0007 3109010100 SCREW T f3*0.5*8 BIND C S18C ZN I/F BD+IC803 1
18 M-SCW-0824-0779 3109017700 SCREW T M3*2.7*7.5 FF C S18C ZN YEL F/B+K/B 3
19 M-SCW-0824-0779 3109017700 SCREW T M3*2.7*7.5 FF C S18C ZN YEL Cabinet Back+bkt Hinge 4
20 M-SCW-0824-0620 3109020500 SCREW T f4*1.6*10 PAN C S18C ZN YEL Cabinet Back+BKT Hinge 4
21 M-SCW-0824-6795 3109023700 SCREW T M4*1.6*8 FPH C S18C ZN YEL Speaker R&L+F/B 4
22 M-MS-0808-8040 3110250000 WASHER SPRING SWRT CONN DVI-D 2
23 M-MS-0808-8040 3110250000 WASHER SPRING SWRT CONN D-SUB 2
24 M-LB-0813-0785 3200158900 LABEL STICKER OD10 WHT HI-POT 1
25 M-LB-0813-0712 3200449700 LABEL WARING BY AIR SHIPPING,STICK ON TUBE 0.125
26 M-MS-0808-9126 3200655300 NAME PLATE VSC 3-BIRD LOGO AL 14.5*10.0 FOR F/B ,REV:00 1
27 M-MS-0808-9127 3200655500 NAME PLATE AL VIEWSONIC L38 T1.2 FOR F/B ,REV:00 1
28 M-LB-0813-0384 3200712700 LABEL CONTROL 100*90 Stick on pallet 0.063
29 M-LB-0813-0551 3200744000 LABEL BAR CODE 55*15 VSC-G Stick on flow card 1
30 M-LB-0813-0696 3200753101 LABEL BAR CODE 76*121 VIEWSONIC 1
31 M-LB-0813-0759 3200930800 LABEL VER. CONTROL 20*20 VIEWSONIC Stick on Carton 0.167
32 #N/A
33 M-LB-0813-0900 3202011000 LABEL SERIES PANEL 42*11 T0.05 FOR STICK ON Travel Card 1
34 M-LB-0813-0714 3202310700 LABEL HV WARNING 100*25 FOR I/V SHIELD CAN 1
35 M-MS-0808-8303 3211024500 MYLAR 435*350 T.1 F/B 1
36 M-MS-0808-7507 3220136000 TAPE W=29 #1350F-1 3M
37 M-MS-0808-7507 3220136000 TAPE W=29 #1350F-1 3M AUDIO WIRE+PANEL BKT 0.05
38 M-MS-0808-7507 3220136000 TAPE W=29 #1350F-1 3M
39 M-MS-0808-7507 3220136000 TAPE W=29 #1350F-1 3M
40 M-MS-0808-7507 3220136000 TAPE W=29 #1350F-1 3M
41 M-MS-0808-7507 3220136000 TAPE W=29 #1350F-1 3M
42 M-MS-0808-7507 3220136000 TAPE W=29 #1350F-1 3M
43 #N/A 3220161733 TAPE W=20 #3800A NITTO FOR TWO TOP ANG LE OF F/B 0.09
44 #N/A 3220182510 TAPE W=28 2L #1350F-1 3M
45 #N/A 3222201300 TAPE AL FOIL W=25 #80023 CATERON AUDIO WIRE+PANE L BKT 0.06
46 M-MS-0808-8608 3240956400 RUBBER HOLD PLUG OD4.9 H3.2 BLK CABINET BACK 4
47 PL-PD-0714-0111 3240968200 RUBBER PAD 50*10 T3 GRAY PANEL+FFC CABLE T BACK 1
48 M-MS-0808-9142 3241132900 INSULATOR PC T.4 204*40 VG910 STICK ON CABINE 1
49 C-BC-0302-0566
50 C-BC-0302-0567
51 M-MS-0808-7747
52 #N/A
53 #N/A
54 PL-FK-0709-0150
55 #N/A
3201965600 LABEL ID 160*43 VSC VG910B
3360249000 CABINET BACK ABS MIDNIGHT GRAY S9LRC1LS
3368216801 R/C ASSY L19BMW05BBB S9LRC1LS
3200649300 NAME PLATE VIEWSONIC ABS94HB MIDNIGHT GR
3360249201 R/C ABS MIDNIGHT GRAY VG910B S9LRC1LS
3368303001 F/B ASSY L19BMR05ABB S9LFC1LS
3360732801 FUNCTION KEY ABS CR S8LFC1LS
3361086001 F/B ABS MIDNIGHT GRAY VG910B S9LFC1LS
I/V+PANEL BKT,POWER BD+Panel
STICK ON PANEL BKT & SHIELD
STICK ON TOP BOT SIDE&FFC
STICK ON PANEL BKT & SHIELD
STICK ON PANEL TOP & BOTTOM
STICK ON PANEL BKT & SHIELD
STICK ON PANEL BKT & SHIELD
STICK ON PANEL BKT POWER BD
3361086200TL 1
10
1
0.14
0.21
0.09
0.1
0.14
0.14
2
1
1
1
1
1
1
ViewSonic Corporation Confidential
33
-
Do Not Copy VG910s/b
Page 37

VG910b BOM LIST
CORD+AUDIO CABLE+D-SUB
16SETS/PALLET
Item ViewSonic P/N Ref. P/N Description Location Q'ty
56 #N/A
57 M-SCW-0814-0692 3105124000 SCREW M M4*0.7*6 PAN C S18C NI HINGE R&L+BKT ARM 6
58 M-SCW-0824-6793 3105125300 SCREW M M4*0.7*6 FF C S18C ZN BLK NYLCOK BKT ATM+BKT BASE 3
59 M-SCW-0824-6793 3105125300 SCREW M M4*0.7*6 FF C S18C ZN BLK NYLCOK BKT BASE+COVER BASE 4
60 M-SCW-0824-0413 3109011400 SCREW T M3*0.5*6 BIND C S18C ZN YEL ARM REAR+BKT ARM 1
61 M-SCW-0824-0620 3109020500 SCREW T f4*1.6*10 PAN C S18C ZN YEL ARM FRONT+BKT ARM 4
62 PL-PD-0714-0067 3240956800 RUBBER FOOT 81*13*3T BLK BKT BSAE 2
63 M-MS-0808-8157 3240957400 SPONGE EVA 100*7 T1 BLACK BASE COVER 1
64 PL-PD-0714-0068 3240957500 RUBBER FOOT 75*10 T3 BKT BASE 2
65 M-MS-0808-9137 3240977700 RUBBER HOLE PULG OD11.4 ID6.5 T7.36 BLK ARM REAR 1
66 M-CV-0830-2397
67 M-CV-0830-2508
68 M-CV-0830-2400
69 M-MS-0808-8612 3461750602 HINGE SUB ASSY R L19EMW05BAW 1
70 M-MS-0808-8613 3461750702 HINGE SUB ASSY L L19EMW05BAW 1
71 M-MS-0808-9130 3461752700 HINGE-R SUS304 62*20 T2 1
72 M-MS-0808-9131 3461752800 HINGE-L SUS304 62*20 T2 1
73 M-BK-0805-0043 3461753201 BRACKET ARM SECC 156*126.1*153.6 T2 1
74 M-BK-0805-0044 3461753301 BRACKET BASE SECC 266.6*161.4 T2 1
75 M-MS-0808-8162 3421024500 CABLE CLAMP GROUNDING SPCC T.3mm K/B WIRE 1
76 M-BK-0805-0061 3460144800 BRACKET CONN SECC 41.7*30 T0.6 PANEL BKT+LVDS CABLE 1
77 M-MS-0808-8561 3460146100 BRACKET VESA SECC 110*20 T1 CABINET BACK 2
78 M-MS-0808-8563 3460146300 BRACKET KEYLOCK SECC 20.4*16.45*4.9 T.6 CABINET BACK 1
79 M-BK-0805-0048 3460165200 BRACKET D-SUB SECC 266*30*29 T.8 1
80 M-BK-0805-0049 3460165300 BRACKET HINGE SECC 228*60*16 T.8 1
81 M-BK-0805-0050 3460165401 BRACKET PANEL SECC 406.3*332.3*19.8 T.8 1
82 M-MS-0808-9144 3460165500 BRACKET SHIELD CAN INV SECC 220.6*66.8*2 1
83 M-MS-0808-9145 3461235402 SHIELD CAN IF SPTH 280.7*156.72*30.4 T.3 1
84 M-MS-0808-9143 3343715400 HSK PLATE AL1100F PICKLING T1 1
85 M-MS-0808-9146 3500117000 END BLOCK-TOP L19BMR05AAB 1
86 M-MS-0808-9147 3500117100 END BLOCK-BOTTOM L19BMR05AAB 1
87 M-MS-0808-9132 3500932402 PE BAG 640*580*.06T CLEAR 3% SPARE PARTS 1
88 M-MS-0808-8762 3500937501 PE BAG 300*200*0.06T
89 #N/A 3510441600 TRAY 1166*1076*142H(INSIDE) VX900 AIR SHIPPING 0.125
90 M-LCD-0826-0127 3510552100 TUBE 1156*1066*1050(H) LCD 19" BY AIR SHIPPING 0.063
91 #N/A 3510807600 ANGLE PAPER 2190*55*55 BY SEA 0.125
92 M-MS-0808-9133 3510878400 CAP PAPER 1140*1050*120 BY SEA FOR 32 SETS/PALLET 0.032
93 P-BX-0601-0928
94 #N/A 3520026001 PALLET FUMIGATE 1070*1140*120
95 #N/A 3520026001 PALLET FUMIGATE 1070*1140*120 BY SEA 0.032
96 M-MS-0808-5135 3520082400 PE FILM t=0.02mm W=500 0.04
97 M-MS-0808-7820 3520130500 DRYER 15G 80*60 2
98 PL-SP-0723-0002 3520142700 PLASTIC STRIP W=12 T.5 BLACK 1
99 A-CD-VG910B
100 A-UG-0107-0511
101 M-MS-0808-8396 3520094201 PE BAG 260*155*0.1T 1
102 #N/A
103 M-MS-0808-9135 3610171802 AC SOCKET ASSY VG810S 1
104 M-WR-0828-6619 3670479600 WIRE WITH HOUSING 2547 #28 L500 4P I/F TO SPEAKER 1
105 M-WR-0828-6623 3679009500 WIRE WITH HOUSING 20276 #30 L395 12P I/F TO K/B 1
106 E-SK-0412-0086 3790182900 SPEAKER ASSY L18FMR05AAB 2
107 M-LCD-0826-0192 5051901202 LCD 19" TFT PANEL SXGA 1
108 B-IF-0222-0053 5600110127 LCD I/F BD ASSY L19BMR 05AAB 1
109 #N/A 2970040202 PWB D0 FR-4 145*117 (I/F BD) 1
110 M-LB-0813-0913 3202005900 LABEL SERIAL 42*11 SONY FOR STICK ON I/F BD 1
111 M-LB-0813-0914 3202009100 LABEL REISTRATION 40*16 1
112 M-LB-0813-0915 3202215900 LABEL MCU 11*11 POLYESTER 50# 0.13
113 M-MS-0808-9141 3240296500 THERMAL PAD SILICONE 20*14 T2 STICK ON IC401 1
114 #N/A 3670706002 WIRE WITH HOUSING 1007 #26 L120 7P CN302,I/V TO I/F 1
115 B-SB-0221-0590 5600110128 LCD INVERTER BD ASSY L19BMR 05AAB 1
3368992301 STAND ASSY L18FMW05ABB S8LBA1AT SERVICE
3360916700 ARM FRONT ABS MIDNIGHT GRAY VG800B-2
3360919301 ARM REAR ABS MIDNIGHT GRAY S8LBA2LS
3361205800 COVER BASE ABS MIDNIGHT GRAY VG800B-2
3512251700 CARTON 556*515*252 VG910B L19BMR05ABB
3532078300 CD-ROM VSC A-CD-VG910B-1
3532078601 MANUAL PACKING ASSY VSC VG910B
5011097400 MANUAL QUICK START GUIDE VSC VG910B
FOR PACKING POWER
3% FOR SPARE PARTS 1
BY AIR SHIPPING FOR
PUT IN MANUAL PACKING ASSY 1
PUT IN CARTON 1
1
1
1
1
1
0.063
1
ViewSonic Corporation Confidential
34
-
Do Not Copy VG910s/b
Page 38

VG910b BOM LIST
INSULATOR(32402166XX)
47,R648,R808,R810
R634
07,R308,R611
R817
17,C820,C821,C834
02,C804,C806,C836
Item ViewSonic P/N Ref. P/N Description Location Q'ty
116 #N/A 2970040301 PWB S0 CEM-1 175*43 (INVERTER BD) 1
117 B-PS-0204-0059 5600110175 LCD POWER BD ASSY L19BMR 05AAB 1
118 #N/A 2970040002 PWB S0 CEM-1 125*60 (PWR BD) 1
119 M-SCW-0824-0778 3105229400 SCREW M M3*0.5*10 FF C S18C ZN 2
120 M-MS-0808-9125 3110110900 NUT M3*0.5 AISI1018 2
121 M-MS-0808-8202 3220133600 TAPE W=10 #1350F-1 3M
122 M-MS-0808-9128 3240216601 INSULATOR PP T.43 60.86*129 1
123 PL-CL-0710-0034 3421095601 CLIP SUS301 T=0.4 1
124 B-KB-0207-0046 5600110180 LCD FUN KEY BD ASSY L19BMR 05AAB 1
125 #N/A 2970039902 PWB S0 FR-1 140*24.3 (KEY BD) 1
126 #N/A 313121000 RES CH 1/4W 120 J 1206 R801,R828 2
127 #N/A 341062300 RES CH 1/10W 15K F 0603 R261 1
128 E-R-0405-7034 341077300 RES CH 1/10W 47K F 0603 R262 1
129 #N/A 341448300 RES CH 1/10W 392 F 0603 R401 1
130 E-R-0405-7041 343000300 RES CH 1/10W ZERO J 0603
131 E-R-0405-7049 343100300 RES CH 1/10W 10 J 0603 R260 1
132 E-R-0405-6684 343101300 RES CH 1/10W 100 J 0603
133 E-R-0405-7054 343102300 RES CH 1/10W 1K J 0603 R320,R636,R638 3
134 E-R-0405-6685 343103300 RES CH 1/10W 10K J 0603
135 E-R-0405-7042 343220300 RES CH 1/10W 22 J 0603 R804,R805 2
136 E-R-0405-6687 343222300 RES CH 1/10W 2.2K J 0603 R321,R633,R812,R813 4
137 #N/A 343434300 RES CH 1/10W 430K J 0603 R263 1
138 E-R-0405-6690 343470300 RES CH 1/10W 47 J 0603 R603,R604,R622,R623 4
139 E-R-0405-7033 343471300 RES CH 1/10W 470 J 0603
140 E-R-0405-7031 343472300 RES CH 1/10W 4.7K J 0603
STICK ON
R641,R642,R643,R644,R645,R646,R6
R327,R328,R329,R335,R336,R350,R6
12,R613,R614,R615,R616,R617,R632,
R316,R318,R323,R324,R326,R331,R3
33,R334,R339,R341,R342,R346,R347,
R353,R355,R357,R601,R602,R607,R6
28,R629,R635,R823,R824,R825,R826
R301,R302,R303,R304,R305,R306,R3
R309,R312,R315,R319,R322,R325,R3
30,R332,R337,R338,R343,R344,R815,
0.15
10
14
26
11
14
141 E-R-0405-7031 343472300 RES CH 1/10W 4.7K J 0603 R817 1
142 E-R-0405-7035 343473300 RES CH 1/10W 47K J 0603 R809,R811,R816,R827 4
143 E-R-0405-7036 343511300 RES CH 1/10W 510 J 0603 R313 1
144 E-R-0405-6691 343562300 RES CH 1/10W 5.6K J 0603 R806,R807 2
145 #N/A 343681300 RES CH 1/10W 680 J 0603 R310 1
146 E-R-0405-6693 343750100 RES CH 1/8W 75 J 0805 R624,R625,R626 3
147 #N/A 343823300 RES CH 1/10W 82K J 0603 R317 1
148 #N/A 619900705 RES ARRAY 10K J 8P4R 1206 RP301,RP302,RP303,RP304 4
149 #N/A 619900712 RES ARRAY 10K J 8P4R 1206 RP301,RP302,RP303,RP304 4
150 #N/A 730060412 CRYSTAL 14.318MHZ+-30PPM AT-49 X401 1
151 M-LCD-0826-0128 730500212 CRYSTAL 11.0592MHZ 30PPM 16PF X301 1
152 E-FS-0410-0074 841110702 FUSE F/P 4A 125V UL CSA F251 1
153 E-C-0404-4805 142122211200 CAP AL 16V 220U M 8*11.5 TP5
154 #N/A 142141001200 CAP AL 25V 10U M 5*11 TP5
155 E-C-0404-3839 142141011200 CAP AL 25V 100U M 6.3*11 TP5 C825 1
156 E-C-0404-3953 142142201200 CAP AL 25V 22U M 5*11 TP5
157 E-C-0404-3851 142164781200 CAP AL 50V 4.7U M 5*11 TP5 C824,C832,C835,C837 4
158 #N/A 1511447000 CAP MC CP 50V 3.3KP J X7R 0603 C259 1
159 E-C-0404-4869 1511454000 CAP MC CP 50V .01U J X7R 0603 C256 1
160 #N/A 1511508000 CAP MC CP 50V 10P J C0G 0603 C609,C610,C611 3
161 E-C-0404-4878 1511514000 CAP MC CP 50V 22P J C0G 0603 C321,C322,C403,C404 4
162 #N/A 1511518000 CAP MC CP 50V 33P J C0G 0603 C613 1
163 E-C-0404-4874 1511530000 CAP MC CP 50V 100P J C0G 0603 C829,C831 2
164 #N/A 1511536000 CAP MC CP 50V 180P J C0G 0603 C257 1
165 E-C-0404-4877 1511538000 CAP MC CP 50V 220P J C0G 0603 C614 1
C254,C255,C262,C265,C311,C319,C2
52,C253,C828,C830 10
C313,C320,C323,C325,C807,C810,C8
C406,C414,C419,C423,C425,C428,C8
10
10
ViewSonic Corporation Confidential
35
-
Do Not Copy VG910s/b
Page 39

VG910b BOM LIST
C422,C838
613,D614,D615
803
803
FB302,FB303,FB304,FB305,FB306,FB
FB806
Item ViewSonic P/N Ref. P/N Description Location Q'ty
166 E-C-0404-4875 1511545000 CAP MC CP 50V 1KP J C0G 0603 C602,C818 2
167 E-C-0404-4875 1511545000 CAP MC CP 50V 1KP J C0G 0603 C819 1
168 E-C-0404-4870 1512454000 CAP MC CP 50V .01U K X7R 0603
169 #N/A 1512457000 CAP MC CP 50V .047U K X7R 0603 C603,C604,C605,C606,C607,C608 6
170 #N/A 1541577000 CAP MC CP 16V 2.7KP J C0G 0603 C808,C809 2
171 #N/A 1547667100 CAP MC CP 16V 1U Z Y5V 0805 C312 1
172 #N/A 1552458000 CAP MC CP 25V .1U K X7R 0603
173 E-D-0403-2139 202351080105 DIO SBD 3A 40V DO-201AD D251 1
174 #N/A 203812510731 DIO ZEN 0.5W 2.540-2.750V MINI D253 1
175 #N/A 203812510736 DIO ZEN 0.5W 2.540-2.750V LLDS(MINIMELF) D253 1
176 E-D-0403-2130 203812540831 DIO ZEN 0.5W 5.45-5.73V MINIMELF D602,D604,D605,D616,D807 5
177 E-D-0403-2053 203812540836 DIO ZEN 0.5W 5.45-5.73V LLDS(MINIMELF) D602,D604,D605,D616,D807 5
178 #N/A 203812550631 DIO ZEN 0.5W 6.66-7.01V MINIMELF D802,D803,D804,D805 4
179 #N/A 203812580223 DIO ZEN 0.5W 8.57-9.01V MINIMELF D801 1
180 #N/A 203812580231 DIO ZEN 0.5W 8.57-9.01V MINIMELF D801 1
181 #N/A 203812580236 DIO ZEN 0.5W 8.57-9.01V LLDS(MINIMELF) D801 1
182 E-D-0403-2049 204520700207 DIO SW 0.215A 75V SOT-23 SE.
183 #N/A 204520700305 DIO SW 0.2A 70V SOT-23 C.C. D601,D603 2
184 E-D-0403-2046 204810750131 DIO SW 0.15A 75V MINIMELF D254,D301,D302,D313,D314,D806 6
185 #N/A 205300530005 DIO SI 1A 50V DO-41 D252 1
186 E-D-0403-2069 205300530023 DIO SI 1A 50V DO-204AL(DO-41) D252 1
187 E-Q-0402-1087 210522000405 TR 40V 0.2A SOT-23 100-300
188 E-Q-0402-1180 210522000417 TR 40V 0.2A SOT-23 100-300
189 E-Q-0402-0407 210522000717 TR 40V 1A SOT-23 75 Q802 1
190 #N/A 211522000205 TR -40V -0.2A SOT-23 100-300 Q301,Q302 2
191 E-Q-0402-7017 211522000217 TR -40V -0.2A SOT-23 100-300 Q301,Q302 2
192 E-Q-0402-1554 242522500005 FET 60V 0.115A 7.5OHM LL SOT-23 Q304,Q312 2
193 E-Q-0402-1553 242522500017 FET 60V 0.115A 5OHM LL SOT-23 Q304,Q312 2
194 #N/A 242601100217 FET 30V 7.9A 0.022OHM LL SO-8 IC804,IC805 2
195 #N/A 243601000317 FET -30V -5.3A 0.05OHM LL SOIC-8 Q306,Q310 2
196 E-IC-0401-2940 2500082937 IC LDO REGU 3.3V 5A TO-263 IC253 1
197 #N/A 2500254080 IC REGU ADJ 3A 1.22V 21V SO-8P IC251 1
198 #N/A 2510337297 IC 8051 UP WITH ISP PLCC-44P IC301 1
199 E-IC-0401-1927 2530085011 IC 4-CH AUDIO PROCESSOR SO-28P IC802 1
200 E-IC-0401-1928 2530100016 IC 2*6 STEREO CARD RADIO 9P IC803 1
201 #N/A 2530222052 IC SXGA LCD CTL PQFP-128P IC401 1
202 E-IC-0401-2942 2610049742 IC CMOS 2K EEPROM SOIC-8P IC601,IC602 2
203 #N/A 2610188212 IC E2PROM 16K 5V 8PIN IC302 1
204 #N/A 2610188612 IC EEPROM 16K SOIC-8P IC302 1
205 E-IC-0401-2937 2610527042 IC EEPROM 16K SO-8P IC302 1
206 E-IC-0401-2938 2610527312 IC EEPROM 16K(2048*8) SOIC-8P IC302 1
207 E-L-0407-1183 2816300400 CHOKE CD 14.5uH K L252 1
208 #N/A 2816315300 CHOKE CD 19uH +-10% L251 1
209 #N/A 2921093612 BEAD CH 100MHZ 120 OHM 0.2A 0603 FB301 1
C301,C302,C303,C304,C305,C306,C3
07,C308,C309,C326,C331,C332,C333,
C251,C258,C261,C264,C266,C314,C3
15,C316,C318,C324,C334,C335,C401,
C402,C405,C407,C408,C409,C410,C4
11,C412,C413,C415,C416,C417,C418,
C420,C421,C424,C426,C427,C429,C6
01,C612,C803,C805,C811,C812,C813,
C814,C815,C816,C827,C833
D607,D608,D609,D610,D611,D612,D
Q303,Q305,Q307,Q308,Q309,Q801,Q
Q303,Q305,Q307,Q308,Q309,Q801,Q
15
44
9
7
7
210 #N/A 2921093612 BEAD CH 100MHZ 120 OHM 0.2A 0603
211 E-R-0405-2330 13153000 RES CF 1/4W 15K J R06 1
212 E-R-0405-5916 23221000 RES CF 1/2W 220 J R118 1
213 #N/A 311434000 RES CH 1/4W 140K F 1206 R08 1
ViewSonic Corporation Confidential
36
307,FB308,FB309,FB310,FB251,FB25
2,FB254,FB311,FB312,FB313,FB314,F
B316,FB401,FB402,FB403,FB404,FB4
05,FB406,FB801,FB802,FB803,FB804,
-
Do Not Copy VG910s/b
28
Page 40

VG910b BOM LIST
3,R34
C36,C37
Item ViewSonic P/N Ref. P/N Description Location Q'ty
214 #N/A 313000000 RES CH 1/4W ZERO J 1206
215 #N/A 313104000 RES CH 1/4W 100K J 1206 R24 1
216 #N/A 313154000 RES CH 1/4W 150K J 1206 R02 1
217 #N/A 313331000 RES CH 1/4W 330 J 1206 R46 1
218 #N/A 313333000 RES CH 1/4W 33K J 1206 R09 1
219 #N/A 341069100 RES CH 1/8W 27K F 0805 R13 1
220 #N/A 341243100 RES CH 1/8W 402 F 0805 R39,R43 2
221 #N/A 343000100 RES CH 1/8W ZERO J 0805 R35 1
222 #N/A 343102100 RES CH 1/8W 1K J 0805 R38,R42 2
223 E-R-0405-6685 343103100 RES CH 1/8W 10K J 0805 R04,R07,R31,R47 4
224 E-R-0405-6686 343105100 RES CH 1/8W 1M J 0805 R12,R25,R26 3
225 #N/A 343332100 RES CH 1/8W 3.3K J 0805 R37,R41 2
226 #N/A 343333100 RES CH 1/8W 33K J 0805 R17,R18,R44 3
227 #N/A 343431100 RES CH 1/8W 430 J 0805 R22,R30 2
228 E-R-0405-6689 343432100 RES CH 1/8W 4.3K J 0805 R03 1
229 #N/A 343512100 RES CH 1/8W 5.1K J 0805 R05,R14,R15,R16 4
230 #N/A 343563100 RES CH 1/8W 56K J 0805 R10 1
231 #N/A 343623100 RES CH 1/8W 62K J 0805 R01 1
232 #N/A 653305002 RES HI-VOL 1/2W 3M J R36,R40 2
233 #N/A 653305022 RES HI-VOL 1/2W 3M J R36,R40 2
234 #N/A 841110802 FUSE F/P 5A 125V UL CSA F01 1
235 #N/A 1160410332 CAP CD 3KV 15P J SL KI7.5 C27,C30 2
236 #N/A 1165104012 CAP CD 3KV 5P D SL P7.5 C34,C35 2
237 #N/A 144144711403 CAP AL 25V 470U M 10*16 TP5 C02,C03 2
238 #N/A 1512452100 CAP MC CP 50V 6.8KP K X7R 0805 C29 1
239 #N/A 1512453100 CAP MC CP 50V 8.2KP K X7R 0805 C25,C33 2
240 E-C-0404-4496 1512454100 CAP MC CP 50V .01U K X7R 0805 C10 1
241 #N/A 1512458100 CAP MC CP 50V .1U K X7R 0805
242 #N/A 1512479100 CAP MC CP 50V 1.5KP K X7R 0805 C11 1
243 #N/A 1518542100 CAP MC CP 50V 470P F C0G 0805 C14 1
244 #N/A 1542467100 CAP MC CP 16V 1U K X7R 0805 C05,C06,C08 3
245 #N/A 1542473100 CAP MC CP 16V .33U K X7R 0805 C07 1
246 #N/A 1552487200 CAP MC CP 25V 2.2U K X7R 1206 C21,C22,C23,C24 4
247 #N/A 15A7689100 CAP MC CP 10V 4.7U Z Y5V 0805 C217,C26 2
248 E-D-0403-2053 203812540836 DIO ZEN 0.5W 5.45-5.73V LLDS(MINIMELF) D01,D02,D03,D04,D05 4
249 #N/A 203812580223 DIO ZEN 0.5W 8.57-9.01V MINIMELF D11 1
250 #N/A 203812580231 DIO ZEN 0.5W 8.57-9.01V MINIMELF D11 1
251 #N/A 203812580236 DIO ZEN 0.5W 8.57-9.01V LLDS(MINIMELF) D11 1
252 E-D-0403-2049 204520700207 DIO SW 0.215A 75V SOT-23 SE. D06,D09,D10,D13,D15,D16,D17,D18 8
J1,J11,J12,J16,J2,J20,J24,J3,J4,R32,R3
C09,C13,C15,C16,C17,C18,C19,C20,
12
10
253 E-D-0403-2050 204520700217 DIO SW 0.2A 70V SOT-23 SE. D06,D09,D10,D13,D15,D16,D17,D18 8
254 #N/A 204810750107 DIO SW 0.2A 75V SOD80C(MINIMELF) D07,D08,D19 3
255 E-D-0403-2136 204810750123 DIO SW 0.15A 75V MINIMELF D07,D08,D19 3
256 E-D-0403-2046 204810750131 DIO SW 0.15A 75V MINIMELF D07,D08,D19 3
257 E-D-0403-2047 204810750136 DIO SW 0.15A 75V MINIMELF D07,D08,D19 1
258 E-Q-0402-0906 210102500011 TR 50V 0.5A TO-92 100-200 Q01 1
259 E-Q-0402-7019 210522000505 TR 40V 0.6A SOT-23 80 Q06,Q07 2
260 E-Q-0402-7020 210522000517 TR 40V 1.0A SOT-23 80 Q06,Q07 2
261 E-Q-0402-7018 211522000405 TR -40V -0.6A SOT-23 100 Q02 1
262 E-Q-0402-1554 242522500005 FET 60V 0.115A 7.5OHM LL SOT-23 Q03,Q04,Q05 3
263 E-Q-0402-1553 242522500017 FET 60V 0.115A 5OHM LL SOT-23 Q03,Q04,Q05 3
264 #N/A 242601000217 FET 30V 7A 0.028OHM LL SO-8 N+P IC02,IC03,IC04,IC05 4
265 #N/A 2510301254 IC PWM CCFL INVERTER CONTROLLER SOP-20P IC01 1
266 #N/A 2811980980 X'FMR IT 1.2H K T01,T02 2
267 #N/A 3070335534 HEADER NY66 94V0 7P P2.0 BROWN CN01 1
268 E-R-0405-5763 23100000 RES CF 1/2W 10 J R112 1
269 #N/A 133104000 RES MOF 1W 100K J R101 1
270 #N/A 143399000 RES MOF 2W .39 J R103 1
271 E-R-0405-6645 190204200 RES FUSING MF 1/2W .1 J R108 1
ViewSonic Corporation Confidential
37
-
Do Not Copy VG910s/b
Page 41

VG910b BOM LIST
,S908
Item ViewSonic P/N Ref. P/N Description Location Q'ty
272 #N/A 313000000 RES CH 1/4W ZERO J 1206 J2,R109,R116,R219,R115 5
273 #N/A 313101000 RES CH 1/4W 100 J 1206 R201,R202 1
274 #N/A 313125000 RES CH 1/4W 1.2M J 1206 R111,R113 1
275 #N/A 313471000 RES CH 1/4W 470 J 1206 R205 1
276 #N/A 313514000 RES CH 1/4W 510K J 1206 R104,R105,R106,R107 4
277 #N/A 341109100 RES CH 1/8W 1.96K F 0805 R215 1
278 #N/A 341185100 RES CH 1/8W 7.5K F 0805 R209 1
279 #N/A 343303100 RES CH 1/8W 30K J 0805 R114 1
280 #N/A 855340721 FUSE TSC 4A 250V UL VDE 11*4 PIG F101 1
281 #N/A 910500311 NTC R=5 OHM L 4A NTC101 1
282 #N/A 910500316 NTC R=5 OHM L 4A NTC101 1
283 #N/A 923610045 VARISTOR 360V 47J 2500A VA102 1
284 #N/A 1101030027 CAP Y CD 250VAC 100P K B I CY101,CY102 2
285 #N/A 1101030032 CAP Y CD 250VAC 100P K B I CY101,CY102 2
286 #N/A 1101346000 CAP Y CD 250VAC 2.2KP M E II CY103 1
287 #N/A 140121021303 CAP AL LD 16V 1KU M 12.5*15 C209,C210 2
288 #N/A 140121021348 CAP AL LD 16V 1KU M 12.5*16 C209,C210 2
289 E-C-0404-3851 144164781400 CAP AL 50V 4.7U M 5*11 TP5 C105 1
290 #N/A 145401010208 CAP AL 400V 100U M 18*30 C101 1
291 #N/A 145401010433 CAP AL 400V 100U M 18*25 C101 1
292 E-C-0404-4497 1517658100 CAP MC CP 50V .1U Z Y5V 0805 C106,C214,C217 3
293 #N/A 1532445100 CAP MC CP 200V 1KP K X7R 0805 C212 1
294 E-C-0404-4920 1604314224 CAP X MP PC 275VAC .33U K P15 CX101 1
295 E-C-0404-4685 1604314237 CAP X MP PC 275VAC .33U M P15 CX101 1
296 #N/A 200101110023 DIO BRD 2A 600V KBPM CR101 1
297 E-D-0403-2025 201330630007 DIO FRD 1A 1000V SOD57 75nS D102 1
298 #N/A 202003660005 DIO SBD 20A 100V TO-220 C.C. D201 1
299 #N/A 202003660108 DIO SBD 20A 100V TO-220AB C.C. D201 1
300 #N/A 202003660123 DIO SBD 20A 100V TO-220AB C.C. D201 1
301 #N/A 203349610231 DIO TVS 1.5KW 143-158V DO-201AE D101 1
302 #N/A 203812760036 DIO ZEN 0.5W 24.97-26.26V LLDS(MINIMELF) D104 1
303 E-D-0403-1937 204322000207 DIO SW 0.25A 200V SOD-27(DO-35) D103 1
304 #N/A 2310040207 PHOTO 70V 4PIN 160-320% 10.16mm IC102 1
305 #N/A 2310040208 PHOTO 55V 4PIN 150-300% 10.16 IC102 1
306 E-IC-0401-2340 2310040209 PHOTO 70V 4PIN 160-320% 10.16mm IC102 1
307 #N/A 2310089008 PHOTO 80V 4PIN 150-300% 10.16mm IC102 1
308 #N/A 242017800008 FET 700V 6A 1.38ohm TO-220FP Q101 1
309 #N/A 2500004210 IC VOL ADJ 37V 2.5V 1% T92 IC201 1
310 #N/A 2500004213 IC VOL ADJ 37V 2.5V 1% T92 IC201 1
311 #N/A 2500004214 IC VOL ADJ 37V 2.5V 1% T92 IC201 1
312 #N/A 251039702B IC PWM GREEN MODE SO-8PIN IC101 1
313 #N/A 2811100080 X'FMR SMT 480uH J T101 1
314 #N/A 2817131480 CHOKE CR 600uH MIN 4P FL101 1
315 #N/A 2817219380 LF 4mH MIN FL102 1
316 #N/A 3411000500 JUMP WIRE COPPER 0.6*12.5*4.0 J1 1
317 M-MS-0808-8179 2301462531 LED HI-RED/GRN 3*4*2 C.C. D901 1
318 #N/A 3070337934 HEADER NY66 94V0 11P P2.0 R BROWN CN301 1
319 #N/A 3071297034 HEADER NYLON66 94V-0 4P P2.0 CN251 1
320 #N/A 3071312334 HEADER NY66 94V0 4P P2.5 CN804 1
321 #N/A 3072231000 CONN PHONE JACK OD3.5 7P R/A GREEN CN802 1
322 #N/A 3075308757 CONN D-SUB 15P R/A PC99 W/O SCREW CN602 1
323 #N/A 3075316467 CONN DVI-I 24P P1.905 R CN601 1
324 #N/A 3075353143 CONN D-SUB FEMALE 15P P2.29 BLUE CN602 1
325 #N/A 3075415766 CONN FFC/FPC BOTTOM 30P P1.0 SMT CN401 1
326 #N/A 3076290066 HEADER BOX NY46 94V0 2P P3.5 CN05,CN04,CN03,CN02 4
327 M-WR-0828-0224 3411000300 JUMP WIRE COPPER 0.6*7.5*4.0 J8,J13,J17,J18,J22,J23 6
328 M-WR-0828-0249 3411000400 JUMP WIRE COPPER 0.6*10.0*4.0 J10,J15 2
329 M-WR-0828-0388 3411000600 JUMP WIRE COPPER 0.6*15.0*4.0 J14,J9 2
330 M-WR-0828-0389 3411000700 JUMP WIRE COPPER 0.6*17.5*4.0 J5,J6,J7,J19,J2 5
331 #N/A 3000093900 SWITCH TACTILE DPST
S901,S902,S903,S904,S905,S906,S907
8
ViewSonic Corporation Confidential
38
-
Do Not Copy VG910s/b
Page 42

VG910b BOM LIST
Item ViewSonic P/N Ref. P/N Description Location Q'ty
332 #N/A 3071297834 HEADER NYLON66 94V-0 12P P2.0 CN901 1
333 M-WR-0828-0224 3411000300 JUMP WIRE COPPER 0.6*7.5*4.0 J1~J8 8
334 #N/A 3470500600 LED HOLDER NY66 94V-2 OD=8*4 D901 1
335 #N/A 3642321800 WIRE WITH TERMINAL 1015 #18 BLK L155 CND901,902(ESD SOLUTION) 2
336 #N/A 3341732501 HSK PLATE AL110F 46.5*21 T1.5 HS201 1
337 #N/A 3341732602 HSK PLATE AL1100F PICKLING 64*41.3*21 HS102 1
338 M-MS-0808-9140 3070168334 HEADER NYLON66 94V-0 3P P3.96 CN101 1
339 M-WR-0828-6622 3670479500 WIRE WITH HOUSING 1007 #24 L120 4P CN201 1
340 M-MS-0808-7754 3343705302 HSK AL T=1.5 21*9 IC803 1
ViewSonic Corporation Confidential
39
-
Do Not Copy VG910s/b
Page 43

VG910s BOM LIST
Item ViewSonic P/N Ref. P/N Description Location Q'ty
1 A-PC-0106-0193 3070000501 AC POWER CORD L1800 BLACK EURO 1
2 A-AU-0120-0033 3080005100 CABLE AUDIO L=1800 BLK PC99 1
3 A-VC-0101-0359 3080426400 CABLE D-SUB/D-SUB L1800 BLK 20276 1
4 M-FC-0809-0790 3080517603 CABLE FFC 30P P1.0 L270 T2 PANEL TO I/F 1
5 A-PC-0106-0150 3090107600 AC POWER CORD L=1800 BLACK UL/CSA 1
6 M-SCW-0824-0410 3100300600 SCREW M M3*0.5*6 PAN C S+P S20C ZN
7 M-SCW-0824-0734 3102710800 SCREW M M4*0.7*8 PAN C S S18C ZN YEL AC SOCKET GND 1
8 M-SCW-0824-0690 3105051501 SCREW M #4-40*7 HEXH #4-40*3 S18C NI CONN. D-SUB, DVI-D 2
9 M-SCW-0814-0691 3105120100 SCREW M M4*0.7*12 PAN C S+P S10C ZN YEL STAND ASSY+cabinet back 6
10 M-SCW-0824-6793 3105125300 SCREW M M4*0.7*6 FF C S18C ZN BLK NYLCOK Cabinet Back+Panel BKT 2
11 M-SCW-0824-0776 3105221000 SCREW M M3*0.5*6 FF C S18C ZN Panel BKT+BKT Hinge 2
12 M-SCW-0824-6796 3105223600 SCREW M M3*0.5*8 FF C S18C ZN PANEL+Panel BKT 4
13 M-SCW-0824-0777 3105225300 SCREW M M3*0.5*4 FF C S18C ZN CABLE CLAMP+PANEL BKT 1
14 M-SCW-0824-0777 3105225300 SCREW M M3*0.5*4 FF C S18C ZN D-SUB BKT+Panel BKT 3
15 M-SCW-0824-0777 3105225300 SCREW M M3*0.5*4 FF C S18C ZN D-SUB BKT+Shield Can 3
16 M-SCW-0824-0777 3105225300 SCREW M M3*0.5*4 FF C S18C ZN I/V SHIELD+Panel BKT 1
17 M-SCW-0824-0007 3109010100 SCREW T f3*0.5*8 BIND C S18C ZN I/F BD+IC803 1
18 M-SCW-0824-0779 3109017700 SCREW T M3*2.7*7.5 FF C S18C ZN YEL F/B+K/B 3
19 M-SCW-0824-0779 3109017700 SCREW T M3*2.7*7.5 FF C S18C ZN YEL Cabinet Back+bkt Hinge 4
20 M-SCW-0824-0620 3109020500 SCREW T f4*1.6*10 PAN C S18C ZN YEL Cabinet Back+BKT Hinge 4
21 M-SCW-0824-6795 3109023700 SCREW T M4*1.6*8 FPH C S18C ZN YEL Speaker R&L+F/B 4
22 M-MS-0808-8040 3110250000 WASHER SPRING SWRT CONN DVI-D 2
23 M-MS-0808-8040 3110250000 WASHER SPRING SWRT CONN D-SUB 2
24 M-LB-0813-0785 3200158900 LABEL STICKER OD10 WHT HI-POT 1
25 M-LB-0813-0712 3200449700 LABEL WARING BY AIR SHIPPING,STICK ON TUBE 0.125
26 M-MS-0808-9126 3200655300 NAME PLATE VSC 3-BIRD LOGO AL 14.5*10.0 FOR F/B ,REV:00 1
27 M-MS-0808-9127 3200655500 NAME PLATE AL VIEWSONIC L38 T1.2 FOR F/B ,REV:00 1
28 M-LB-0813-0384 3200712700 LABEL CONTROL 100*90 Stick on pallet 0.063
29 M-LB-0813-0551 3200744000 LABEL BAR CODE 55*15 VSC-G Stick on flow card 1
30 M-LB-0813-0696 3200753101 LABEL BAR CODE 76*121 VIEWSONIC 1
31 M-LB-0813-0759 3200930800 LABEL VER. CONTROL 20*20 VIEWSONIC Stick on Carton 0.167
32 M-LB-0813-0917 3201965500 LABEL ID 160*43 VSC VG910S 1
33 M-LB-0813-0900 3202011000 LABEL SERIES PANEL 42*11 T0.05 FOR STICK ON Travel Card 1
34 M-LB-0813-0714 3202310700 LABEL HV WARNING 100*25 FOR I/V SHIELD CAN 1
35 M-MS-0808-8303 3211024500 MYLAR 435*350 T.1 F/B 1
36 M-MS-0808-7507 3220136000 TAPE W=29 #1350F-1 3M
37 M-MS-0808-7507 3220136000 TAPE W=29 #1350F-1 3M AUDIO WIRE+PANEL BKT 0.05
38 M-MS-0808-7507 3220136000 TAPE W=29 #1350F-1 3M
39 M-MS-0808-7507 3220136000 TAPE W=29 #1350F-1 3M
40 M-MS-0808-7507 3220136000 TAPE W=29 #1350F-1 3M
41 M-MS-0808-7507 3220136000 TAPE W=29 #1350F-1 3M
42 M-MS-0808-7507 3220136000 TAPE W=29 #1350F-1 3M
43 #N/A 3220161733 TAPE W=20 #3800A NITTO FOR TWO TOP ANG LE OF F/B 0.09
44 #N/A 3220182510 TAPE W=28 2L #1350F-1 3M
45 #N/A 3222201300 TAPE AL FOIL W=25 #80023 CATERON AUDIO WIRE+PANE L BKT 0.06
46 M-MS-0808-8608 3240956400 RUBBER HOLD PLUG OD4.9 H3.2 BLK CABINET BACK 4
47 PL-PD-0714-0111 3240968200 RUBBER PAD 50*10 T3 GRAY PANEL+FFC CABLE T BACK 1
48 M-MS-0808-9142 3241132900 INSULATOR PC T.4 204*40 VG910 STICK ON CABINE 1
49 C-BC-0302-0568 3360248900 CABINET BACK ABS 41 S9LRC1LS 1
50 C-BC-0302-0569 3368216701 R/C ASSY L19BMR05BAB S9LRC1LS 1
51 M-MS-0808-7739 3200648800 NAME PLATE ABS 94HB VIEWSONIC 82.83*34.9 1
52 C-BC-0302-0581 3360249101 R/C ABS 41 VG910S S9LRC1LS 1
53 C-FP-0301-9921 3368302901 F/B ASSY L19BMR05AAB S9LFC1LS 1
54 PL-FK-0709-0150 3360732801 FUNCTION KEY ABS CR S8LFC1LS 1
I/V+PANEL BKT,POWER BD+Panel
BKT
STICK ON PANEL BKT & SHIELD
CAN I/F TOP
STICK ON TOP BOT SIDE&FFC
CONN. EACH 70m
STICK ON PANEL BKT & SHIELD
CAN I/F &
STICK ON PANEL TOP & BOTTOM
WIRE
STICK ON PANEL BKT & SHIELD
CAN I/V LEFT
STICK ON PANEL BKT & SHIELD
CAN I/F RIGH
STICK ON PANEL BKT POWER BD
AR EA R&L SID
10
0.14
0.21
0.09
0.1
0.14
0.14
2
ViewSonic Corporation Confidential
40
-
Do Not Copy VG910s/b
Page 44

VG910s BOM LIST
Item ViewSonic P/N Ref. P/N Description Location Q'ty
55 C-FP-0301-0961 3361085901 F/B ABS SILVER VG910S S9LFC1LS 3361086200TL 1
56 C-BS-0303-0511 3368991901 STAND ASSY L18FMR05AAB S8LBA1AT SERVICE 1
57 M-SCW-0814-0692 3105124000 SCREW M M4*0.7*6 PAN C S18C NI HINGE R&L+BKT ARM 6
58 M-SCW-0824-6793 3105125300 SCREW M M4*0.7*6 FF C S18C ZN BLK NYLCOK BKT ATM+BKT BASE 3
59 M-SCW-0824-6793 3105125300 SCREW M M4*0.7*6 FF C S18C ZN BLK NYLCOK BKT BASE+COVER BASE 4
60 M-SCW-0824-0413 3109011400 SCREW T M3*0.5*6 BIND C S18C ZN YEL ARM REAR+BKT ARM 1
61 M-SCW-0824-0620 3109020500 SCREW T f4*1.6*10 PAN C S18C ZN YEL ARM FRONT+BKT ARM 4
62 PL-PD-0714-0067 3240956800 RUBBER FOOT 81*13*3T BLK BKT BSAE 2
63 M-MS-0808-8157 3240957400 SPONGE EVA 100*7 T1 BLACK BASE COVER 1
64 PL-PD-0714-0068 3240957500 RUBBER FOOT 75*10 T3 BKT BASE 2
65 M-MS-0808-9137 3240977700 RUBBER HOLE PULG OD11.4 ID6.5 T7.36 BLK ARM REAR 1
66 M-CV-0830-2381 3360916300 ARM FRONT ABS 41 VX700-2 1
67 M-CV-0830-2509 3360919201 ARM COVER REAR ABS 41 S8LBA2LS 1
68 M-CV-0830-2394 3361205900 COVER BASE ABS 41 VG800-2 1
69 M-MS-0808-8612 3461750602 HINGE SUB ASSY R L19EMW05BAW 1
70 M-MS-0808-8613 3461750702 HINGE SUB ASSY L L19EMW05BAW 1
71 M-MS-0808-9130 3461752700 HINGE-R SUS304 62*20 T2 1
72 M-MS-0808-9131 3461752800 HINGE-L SUS304 62*20 T2 1
73 M-BK-0805-0043 3461753201 BRACKET ARM SECC 156*126.1*153.6 T2 1
74 M-BK-0805-0044 3461753301 BRACKET BASE SECC 266.6*161.4 T2 1
75 M-MS-0808-8162 3421024500 CABLE CLAMP GROUNDING SPCC T.3mm K/B WIRE 1
76 M-BK-0805-0061 3460144800 BRACKET CONN SECC 41.7*30 T0.6 PANEL BKT+LVDS CABLE 1
77 M-MS-0808-8561 3460146100 BRACKET VESA SECC 110*20 T1 CABINET BACK 2
78 M-MS-0808-8563 3460146300 BRACKET KEYLOCK SECC 20.4*16.45*4.9 T.6 CABINET BACK 1
79 M-BK-0805-0048 3460165200 BRACKET D-SUB SECC 266*30*29 T.8 1
80 M-BK-0805-0049 3460165300 BRACKET HINGE SECC 228*60*16 T.8 1
81 M-BK-0805-0050 3460165401 BRACKET PANEL SECC 406.3*332.3*19.8 T.8 1
82 M-MS-0808-9144 3460165500 BRACKET SHIELD CAN INV SECC 220.6*66.8*2 1
83 M-MS-0808-9145 3461235402 SHIELD CAN IF SPTH 280.7*156.72*30.4 T.3 1
84 M-MS-0808-9143 3343715400 HSK PLATE AL1100F PICKLING T1 1
85 M-MS-0808-9146 3500117000 END BLOCK-TOP L19BMR05AAB 1
86 M-MS-0808-9147 3500117100 END BLOCK-BOTTOM L19BMR05AAB 1
87 M-MS-0808-9132 3500932402 PE BAG 640*580*.06T CLEAR 3% SPARE PARTS 1
88 M-MS-0808-8762 3500937501 PE BAG 300*200*0.06T
89 #N/A 3510441600 TRAY 1166*1076*142H(INSIDE) VX900 AIR SHIPPING 0.125
90 M-LCD-0826-0127 3510552100 TUBE 1156*1066*1050(H) LCD 19" BY AIR SHIPPING 0.063
91 #N/A 3510807600 ANGLE PAPER 2190*55*55 BY SEA 0.125
92 M-MS-0808-9133 3510878400 CAP PAPER 1140*1050*120 BY SEA FOR 32 SETS/PALLET 0.032
93 P-BX-0601-0929 3512251800 CARTON 556*515*252 VG910S L18BMR05AAB 3% FOR SPARE PARTS 1
94 #N/A 3520026001 PALLET FUMIGATE 1070*1140*120
95 #N/A 3520026001 PALLET FUMIGATE 1070*1140*120 BY SEA 0.032
96 M-MS-0808-5135 3520082400 PE FILM t=0.02mm W=500 0.04
97 M-MS-0808-7820 3520130500 DRYER 15G 80*60 2
98 PL-SP-0723-0002 3520142700 PLASTIC STRIP W=12 T.5 BLACK 1
99 A-CD-VG910S 3532078400 CD-ROM VSC A-CD-VG910S-1 PUT IN MANUAL PACKING ASSY 1
100 A-UG-0107-0512 3532078501 MANUAL PACKING ASSY VSC VG910S PUT IN CARTON 1
101 M-MS-0808-8396 3520094201 PE BAG 260*155*0.1T 1
102 M-MS-0808-9203 5011097300 MANUAL QUICK START GUIDE VSC VG910S 1
103 M-MS-0808-9135 3610171802 AC SOCKET ASSY VG810S 1
104 M-WR-0828-6619 3670479600 WIRE WITH HOUSING 2547 #28 L500 4P I/F TO SPEAKER 1
105 M-WR-0828-6623 3679009500 WIRE WITH HOUSING 20276 #30 L395 12P I/F TO K/B 1
106 E-SK-0412-0086 3790182900 SPEAKER ASSY L18FMR05AAB 2
107 M-LCD-0826-0192 5051901202 LCD 19" TFT PANEL SXGA 1
108 B-IF-0222-0053 5600110127 LCD I/F BD ASSY L19BMR 05AAB 1
109 #N/A 2970040202 PWB D0 FR-4 145*117 (I/F BD) 1
110 M-LB-0813-0913 3202005900 LABEL SERIAL 42*11 SONY FOR STICK ON I/F BD 1
111 M-LB-0813-0914 3202009100 LABEL REISTRATION 40*16 1
112 M-LB-0813-0915 3202215900 LABEL MCU 11*11 POLYESTER 50# 0.13
FOR PACKING POWER
CORD+AUDIO CABLE+D-SUB
BY AIR SHIPPING FOR
16SETS/PALLET
1
0.063
ViewSonic Corporation Confidential
41
-
Do Not Copy VG910s/b
Page 45

VG910s BOM LIST
Item ViewSonic P/N Ref. P/N Description Location Q'ty
113 M-MS-0808-9141 3240296500 THERMAL PAD SILICONE 20*14 T2 STICK ON IC401 1
114 #N/A 3670706002 WIRE WITH HOUSING 1007 #26 L120 7P CN302,I/V TO I/F 1
115 B-SB-0221-0590 5600110128 LCD INVERTER BD ASSY L19BMR 05AAB 1
116 #N/A 2970040301 PWB S0 CEM-1 175*43 (INVERTER BD) 1
117 B-PS-0204-0059 5600110175 LCD POWER BD ASSY L19BMR 05AAB 1
118 #N/A 2970040002 PWB S0 CEM-1 125*60 (PWR BD) 1
119 M-SCW-0824-0778 3105229400 SCREW M M3*0.5*10 FF C S18C ZN 2
120 M-MS-0808-9125 3110110900 NUT M3*0.5 AISI1018 2
121 M-MS-0808-8202 3220133600 TAPE W=10 #1350F-1 3M
122 M-MS-0808-9128 3240216601 INSULATOR PP T.43 60.86*129 1
123 PL-CL-0710-0034 3421095601 CLIP SUS301 T=0.4 1
124 B-KB-0207-0046 5600110180 LCD FUN KEY BD ASSY L19BMR 05AAB 1
125 #N/A 2970039902 PWB S0 FR-1 140*24.3 (KEY BD) 1
126 #N/A 313121000 RES CH 1/4W 120 J 1206 R801,R828 2
127 #N/A 341062300 RES CH 1/10W 15K F 0603 R261 1
128 E-R-0405-7034 341077300 RES CH 1/10W 47K F 0603 R262 1
129 #N/A 341448300 RES CH 1/10W 392 F 0603 R401 1
130 E-R-0405-7041 343000300 RES CH 1/10W ZERO J 0603
131 E-R-0405-7049 343100300 RES CH 1/10W 10 J 0603 R260 1
132 E-R-0405-6684 343101300 RES CH 1/10W 100 J 0603
133 E-R-0405-7054 343102300 RES CH 1/10W 1K J 0603 R320,R636,R638 3
134 E-R-0405-6685 343103300 RES CH 1/10W 10K J 0603
135 E-R-0405-7042 343220300 RES CH 1/10W 22 J 0603 R804,R805 2
136 E-R-0405-6687 343222300 RES CH 1/10W 2.2K J 0603 R321,R633,R812,R813 4
137 #N/A 343434300 RES CH 1/10W 430K J 0603 R263 1
138 E-R-0405-6690 343470300 RES CH 1/10W 47 J 0603 R603,R604,R622,R623 4
139 E-R-0405-7033 343471300 RES CH 1/10W 470 J 0603
140 E-R-0405-7031 343472300 RES CH 1/10W 4.7K J 0603
141 E-R-0405-7031 343472300 RES CH 1/10W 4.7K J 0603 R817 1
142 E-R-0405-7035 343473300 RES CH 1/10W 47K J 0603 R809,R811,R816,R827 4
143 E-R-0405-7036 343511300 RES CH 1/10W 510 J 0603 R313 1
144 E-R-0405-6691 343562300 RES CH 1/10W 5.6K J 0603 R806,R807 2
145 #N/A 343681300 RES CH 1/10W 680 J 0603 R310 1
146 E-R-0405-6693 343750100 RES CH 1/8W 75 J 0805 R624,R625,R626 3
147 #N/A 343823300 RES CH 1/10W 82K J 0603 R317 1
148 #N/A 619900705 RES ARRAY 10K J 8P4R 1206 RP301,RP302,RP303,RP304 4
149 #N/A 619900712 RES ARRAY 10K J 8P4R 1206 RP301,RP302,RP303,RP304 4
150 #N/A 730060412 CRYSTAL 14.318MHZ+-30PPM AT-49 X401 1
151 M-LCD-0826-0128 730500212 CRYSTAL 11.0592MHZ 30PPM 16PF X301 1
152 E-FS-0410-0074 841110702 FUSE F/P 4A 125V UL CSA F251 1
153 E-C-0404-4805 142122211200 CAP AL 16V 220U M 8*11.5 TP5
STICK ON
INSULATOR(32402166XX)
R641,R642,R643,R644,R645,R646,R6
47,R648,R808,R810
R327,R328,R329,R335,R336,R350,R6
12,R613,R614,R615,R616,R617,R632,
R634
R316,R318,R323,R324,R326,R331,R3
33,R334,R339,R341,R342,R346,R347,
R353,R355,R357,R601,R602,R607,R6
28,R629,R635,R823,R824,R825,R826
R301,R302,R303,R304,R305,R306,R3
07,R308,R611
R309,R312,R315,R319,R322,R325,R3
30,R332,R337,R338,R343,R344,R815,
R817
C254,C255,C262,C265,C311,C319,C2
52,C253,C828,C830 10
0.15
10
14
26
11
14
154 #N/A 142141001200 CAP AL 25V 10U M 5*11 TP5
155 E-C-0404-3839 142141011200 CAP AL 25V 100U M 6.3*11 TP5 C825 1
156 E-C-0404-3953 142142201200 CAP AL 25V 22U M 5*11 TP5
157 E-C-0404-3851 142164781200 CAP AL 50V 4.7U M 5*11 TP5 C824,C832,C835,C837 4
158 #N/A 1511447000 CAP MC CP 50V 3.3KP J X7R 0603 C259 1
159 E-C-0404-4869 1511454000 CAP MC CP 50V .01U J X7R 0603 C256 1
160 #N/A 1511508000 CAP MC CP 50V 10P J C0G 0603 C609,C610,C611 3
C313,C320,C323,C325,C807,C810,C8
17,C820,C821,C834
C406,C414,C419,C423,C425,C428,C8
02,C804,C806,C836
ViewSonic Corporation Confidential
42
-
Do Not Copy VG910s/b
10
10
Page 46

VG910s BOM LIST
Item ViewSonic P/N Ref. P/N Description Location Q'ty
161 E-C-0404-4878 1511514000 CAP MC CP 50V 22P J C0G 0603 C321,C322,C403,C404 4
162 #N/A 1511518000 CAP MC CP 50V 33P J C0G 0603 C613 1
163 E-C-0404-4874 1511530000 CAP MC CP 50V 100P J C0G 0603 C829,C831 2
164 #N/A 1511536000 CAP MC CP 50V 180P J C0G 0603 C257 1
165 E-C-0404-4877 1511538000 CAP MC CP 50V 220P J C0G 0603 C614 1
166 E-C-0404-4875 1511545000 CAP MC CP 50V 1KP J C0G 0603 C602,C818 2
167 E-C-0404-4875 1511545000 CAP MC CP 50V 1KP J C0G 0603 C819 1
168 E-C-0404-4870 1512454000 CAP MC CP 50V .01U K X7R 0603
169 #N/A 1512457000 CAP MC CP 50V .047U K X7R 0603 C603,C604,C605,C606,C607,C608 6
170 #N/A 1541577000 CAP MC CP 16V 2.7KP J C0G 0603 C808,C809 2
171 #N/A 1547667100 CAP MC CP 16V 1U Z Y5V 0805 C312 1
172 #N/A 1552458000 CAP MC CP 25V .1U K X7R 0603
173 E-D-0403-2139 202351080105 DIO SBD 3A 40V DO-201AD D251 1
174 #N/A 203812510731 DIO ZEN 0.5W 2.540-2.750V MINI D253 1
175 #N/A 203812510736 DIO ZEN 0.5W 2.540-2.750V LLDS(MINIMELF) D253 1
176 E-D-0403-2130 203812540831 DIO ZEN 0.5W 5.45-5.73V MINIMELF D602,D604,D605,D616,D807 5
177 E-D-0403-2053 203812540836 DIO ZEN 0.5W 5.45-5.73V LLDS(MINIMELF) D602,D604,D605,D616,D807 5
178 #N/A 203812550631 DIO ZEN 0.5W 6.66-7.01V MINIMELF D802,D803,D804,D805 4
179 #N/A 203812580223 DIO ZEN 0.5W 8.57-9.01V MINIMELF D801 1
180 #N/A 203812580231 DIO ZEN 0.5W 8.57-9.01V MINIMELF D801 1
181 #N/A 203812580236 DIO ZEN 0.5W 8.57-9.01V LLDS(MINIMELF) D801 1
182 E-D-0403-2049 204520700207 DIO SW 0.215A 75V SOT-23 SE.
183 #N/A 204520700305 DIO SW 0.2A 70V SOT-23 C.C. D601,D603 2
184 E-D-0403-2046 204810750131 DIO SW 0.15A 75V MINIMELF D254,D301,D302,D313,D314,D806 6
185 #N/A 205300530005 DIO SI 1A 50V DO-41 D252 1
186 E-D-0403-2069 205300530023 DIO SI 1A 50V DO-204AL(DO-41) D252 1
187 E-Q-0402-1087 210522000405 TR 40V 0.2A SOT-23 100-300
188 E-Q-0402-1180 210522000417 TR 40V 0.2A SOT-23 100-300
189 E-Q-0402-0407 210522000717 TR 40V 1A SOT-23 75 Q802 1
190 #N/A 211522000205 TR -40V -0.2A SOT-23 100-300 Q301,Q302 2
191 E-Q-0402-7017 211522000217 TR -40V -0.2A SOT-23 100-300 Q301,Q302 2
192 E-Q-0402-1554 242522500005 FET 60V 0.115A 7.5OHM LL SOT-23 Q304,Q312 2
193 E-Q-0402-1553 242522500017 FET 60V 0.115A 5OHM LL SOT-23 Q304,Q312 2
194 #N/A 242601100217 FET 30V 7.9A 0.022OHM LL SO-8 IC804,IC805 2
195 #N/A 243601000317 FET -30V -5.3A 0.05OHM LL SOIC-8 Q306,Q310 2
196 E-IC-0401-2940 2500082937 IC LDO REGU 3.3V 5A TO-263 IC253 1
197 #N/A 2500254080 IC REGU ADJ 3A 1.22V 21V SO-8P IC251 1
198 #N/A 2510337297 IC 8051 UP WITH ISP PLCC-44P IC301 1
199 E-IC-0401-1927 2530085011 IC 4-CH AUDIO PROCESSOR SO-28P IC802 1
200 E-IC-0401-1928 2530100016 IC 2*6 STEREO CARD RADIO 9P IC803 1
201 #N/A 2530222052 IC SXGA LCD CTL PQFP-128P IC401 1
202 E-IC-0401-2942 2610049742 IC CMOS 2K EEPROM SOIC-8P IC601,IC602 2
203 #N/A 2610188212 IC E2PROM 16K 5V 8PIN IC302 1
204 #N/A 2610188612 IC EEPROM 16K SOIC-8P IC302 1
205 E-IC-0401-2937 2610527042 IC EEPROM 16K SO-8P IC302 1
206 E-IC-0401-2938 2610527312 IC EEPROM 16K(2048*8) SOIC-8P IC302 1
207 E-L-0407-1183 2816300400 CHOKE CD 14.5uH K L252 1
208 #N/A 2816315300 CHOKE CD 19uH +-10% L251 1
209 #N/A 2921093612 BEAD CH 100MHZ 120 OHM 0.2A 0603 FB301 1
C301,C302,C303,C304,C305,C306,C3
07,C308,C309,C326,C331,C332,C333,
C422,C838
C251,C258,C261,C264,C266,C314,C3
15,C316,C318,C324,C334,C335,C401,
C402,C405,C407,C408,C409,C410,C4
11,C412,C413,C415,C416,C417,C418,
C420,C421,C424,C426,C427,C429,C6
01,C612,C803,C805,C811,C812,C813,
C814,C815,C816,C827,C833
D607,D608,D609,D610,D611,D612,D
613,D614,D615
Q303,Q305,Q307,Q308,Q309,Q801,Q
803
Q303,Q305,Q307,Q308,Q309,Q801,Q
803
15
44
9
7
7
ViewSonic Corporation Confidential
43
-
Do Not Copy VG910s/b
Page 47

VG910s BOM LIST
Item ViewSonic P/N Ref. P/N Description Location Q'ty
210 #N/A 2921093612 BEAD CH 100MHZ 120 OHM 0.2A 0603
211 E-R-0405-2330 13153000 RES CF 1/4W 15K J R06 1
212 E-R-0405-5916 23221000 RES CF 1/2W 220 J R118 1
213 #N/A 311434000 RES CH 1/4W 140K F 1206 R08 1
214 #N/A 313000000 RES CH 1/4W ZERO J 1206
215 #N/A 313104000 RES CH 1/4W 100K J 1206 R24 1
216 #N/A 313154000 RES CH 1/4W 150K J 1206 R02 1
217 #N/A 313331000 RES CH 1/4W 330 J 1206 R46 1
218 #N/A 313333000 RES CH 1/4W 33K J 1206 R09 1
219 #N/A 341069100 RES CH 1/8W 27K F 0805 R13 1
220 #N/A 341243100 RES CH 1/8W 402 F 0805 R39,R43 2
221 #N/A 343000100 RES CH 1/8W ZERO J 0805 R35 1
222 #N/A 343102100 RES CH 1/8W 1K J 0805 R38,R42 2
223 E-R-0405-6685 343103100 RES CH 1/8W 10K J 0805 R04,R07,R31,R47 4
224 E-R-0405-6686 343105100 RES CH 1/8W 1M J 0805 R12,R25,R26 3
225 #N/A 343332100 RES CH 1/8W 3.3K J 0805 R37,R41 2
226 #N/A 343333100 RES CH 1/8W 33K J 0805 R17,R18,R44 3
227 #N/A 343431100 RES CH 1/8W 430 J 0805 R22,R30 2
228 E-R-0405-6689 343432100 RES CH 1/8W 4.3K J 0805 R03 1
229 #N/A 343512100 RES CH 1/8W 5.1K J 0805 R05,R14,R15,R16 4
230 #N/A 343563100 RES CH 1/8W 56K J 0805 R10 1
231 #N/A 343623100 RES CH 1/8W 62K J 0805 R01 1
232 #N/A 653305002 RES HI-VOL 1/2W 3M J R36,R40 2
233 #N/A 653305022 RES HI-VOL 1/2W 3M J R36,R40 2
234 #N/A 841110802 FUSE F/P 5A 125V UL CSA F01 1
235 #N/A 1160410332 CAP CD 3KV 15P J SL KI7.5 C27,C30 2
236 #N/A 1165104012 CAP CD 3KV 5P D SL P7.5 C34,C35 2
237 #N/A 144144711403 CAP AL 25V 470U M 10*16 TP5 C02,C03 2
238 #N/A 1512452100 CAP MC CP 50V 6.8KP K X7R 0805 C29 1
239 #N/A 1512453100 CAP MC CP 50V 8.2KP K X7R 0805 C25,C33 2
240 E-C-0404-4496 1512454100 CAP MC CP 50V .01U K X7R 0805 C10 1
241 #N/A 1512458100 CAP MC CP 50V .1U K X7R 0805
242 #N/A 1512479100 CAP MC CP 50V 1.5KP K X7R 0805 C11 1
243 #N/A 1518542100 CAP MC CP 50V 470P F C0G 0805 C14 1
244 #N/A 1542467100 CAP MC CP 16V 1U K X7R 0805 C05,C06,C08 3
245 #N/A 1542473100 CAP MC CP 16V .33U K X7R 0805 C07 1
246 #N/A 1552487200 CAP MC CP 25V 2.2U K X7R 1206 C21,C22,C23,C24 4
247 #N/A 15A7689100 CAP MC CP 10V 4.7U Z Y5V 0805 C217,C26 2
248 E-D-0403-2053 203812540836 DIO ZEN 0.5W 5.45-5.73V LLDS(MINIMELF) D01,D02,D03,D04,D05 4
249 #N/A 203812580223 DIO ZEN 0.5W 8.57-9.01V MINIMELF D11 1
250 #N/A 203812580231 DIO ZEN 0.5W 8.57-9.01V MINIMELF D11 1
251 #N/A 203812580236 DIO ZEN 0.5W 8.57-9.01V LLDS(MINIMELF) D11 1
252 E-D-0403-2049 204520700207 DIO SW 0.215A 75V SOT-23 SE. D06,D09,D10,D13,D15,D16,D17,D18 8
FB302,FB303,FB304,FB305,FB306,F
B307,FB308,FB309,FB310,FB251,FB
252,FB254,FB311,FB312,FB313,FB31
4,FB316,FB401,FB402,FB403,FB404,
FB405,FB406,FB801,FB802,FB803,F
B804,FB806
J1,J11,J12,J16,J2,J20,J24,J3,J4,R32,R
33,R34
C09,C13,C15,C16,C17,C18,C19,C20,
C36,C37
28
12
10
253 E-D-0403-2050 204520700217 DIO SW 0.2A 70V SOT-23 SE. D06,D09,D10,D13,D15,D16,D17,D18 8
254 #N/A 204810750107 DIO SW 0.2A 75V SOD80C(MINIMELF) D07,D08,D19 3
255 E-D-0403-2136 204810750123 DIO SW 0.15A 75V MINIMELF D07,D08,D19 3
256 E-D-0403-2046 204810750131 DIO SW 0.15A 75V MINIMELF D07,D08,D19 3
257 E-D-0403-2047 204810750136 DIO SW 0.15A 75V MINIMELF D07,D08,D19 1
258 E-Q-0402-0906 210102500011 TR 50V 0.5A TO-92 100-200 Q01 1
259 E-Q-0402-7019 210522000505 TR 40V 0.6A SOT-23 80 Q06,Q07 2
260 E-Q-0402-7020 210522000517 TR 40V 1.0A SOT-23 80 Q06,Q07 2
261 E-Q-0402-7018 211522000405 TR -40V -0.6A SOT-23 100 Q02 1
262 E-Q-0402-1554 242522500005 FET 60V 0.115A 7.5OHM LL SOT-23 Q03,Q04,Q05 3
ViewSonic Corporation Confidential
44
-
Do Not Copy VG910s/b
Page 48

VG910s BOM LIST
Item ViewSonic P/N Ref. P/N Description Location Q'ty
263 E-Q-0402-1553 242522500017 FET 60V 0.115A 5OHM LL SOT-23 Q03,Q04,Q05 3
264 #N/A 242601000217 FET 30V 7A 0.028OHM LL SO-8 N+P IC02,IC03,IC04,IC05 4
265 #N/A 2510301254 IC PWM CCFL INVERTER CONTROLLER SOP-20P IC01 1
266 #N/A 2811980980 X'FMR IT 1.2H K T01,T02 2
267 #N/A 3070335534 HEADER NY66 94V0 7P P2.0 BROWN CN01 1
268 E-R-0405-5763 23100000 RES CF 1/2W 10 J R112 1
269 #N/A 133104000 RES MOF 1W 100K J R101 1
270 #N/A 143399000 RES MOF 2W .39 J R103 1
271 E-R-0405-6645 190204200 RES FUSING MF 1/2W .1 J R108 1
272 #N/A 313000000 RES CH 1/4W ZERO J 1206 J2,R109,R116,R219,R115 5
273 #N/A 313101000 RES CH 1/4W 100 J 1206 R201,R202 1
274 #N/A 313125000 RES CH 1/4W 1.2M J 1206 R111,R113 1
275 #N/A 313471000 RES CH 1/4W 470 J 1206 R205 1
276 #N/A 313514000 RES CH 1/4W 510K J 1206 R104,R105,R106,R107 4
277 #N/A 341109100 RES CH 1/8W 1.96K F 0805 R215 1
278 #N/A 341185100 RES CH 1/8W 7.5K F 0805 R209 1
279 #N/A 343303100 RES CH 1/8W 30K J 0805 R114 1
280 #N/A 855340721 FUSE TSC 4A 250V UL VDE 11*4 PIG F101 1
281 #N/A 910500311 NTC R=5 OHM L 4A NTC101 1
282 #N/A 910500316 NTC R=5 OHM L 4A NTC101 1
283 #N/A 923610045 VARISTOR 360V 47J 2500A VA102 1
284 #N/A 1101030027 CAP Y CD 250VAC 100P K B I CY101,CY102 2
285 #N/A 1101030032 CAP Y CD 250VAC 100P K B I CY101,CY102 2
286 #N/A 1101346000 CAP Y CD 250VAC 2.2KP M E II CY103 1
287 #N/A 140121021303 CAP AL LD 16V 1KU M 12.5*15 C209,C210 2
288 #N/A 140121021348 CAP AL LD 16V 1KU M 12.5*16 C209,C210 2
289 E-C-0404-3851 144164781400 CAP AL 50V 4.7U M 5*11 TP5 C105 1
290 #N/A 145401010208 CAP AL 400V 100U M 18*30 C101 1
291 #N/A 145401010433 CAP AL 400V 100U M 18*25 C101 1
292 E-C-0404-4497 1517658100 CAP MC CP 50V .1U Z Y5V 0805 C106,C214,C217 3
293 #N/A 1532445100 CAP MC CP 200V 1KP K X7R 0805 C212 1
294 E-C-0404-4920 1604314224 CAP X MP PC 275VAC .33U K P15 CX101 1
295 E-C-0404-4685 1604314237 CAP X MP PC 275VAC .33U M P15 CX101 1
296 #N/A 200101110023 DIO BRD 2A 600V KBPM CR101 1
297 E-D-0403-2025 201330630007 DIO FRD 1A 1000V SOD57 75nS D102 1
298 #N/A 202003660005 DIO SBD 20A 100V TO-220 C.C. D201 1
299 #N/A 202003660108 DIO SBD 20A 100V TO-220AB C.C. D201 1
300 #N/A 202003660123 DIO SBD 20A 100V TO-220AB C.C. D201 1
301 #N/A 203349610231 DIO TVS 1.5KW 143-158V DO-201AE D101 1
302 #N/A 203812760036 DIO ZEN 0.5W 24.97-26.26V LLDS(MINIMELF) D104 1
303 E-D-0403-1937 204322000207 DIO SW 0.25A 200V SOD-27(DO-35) D103 1
304 #N/A 2310040207 PHOTO 70V 4PIN 160-320% 10.16mm IC102 1
305 #N/A 2310040208 PHOTO 55V 4PIN 150-300% 10.16 IC102 1
306 E-IC-0401-2340 2310040209 PHOTO 70V 4PIN 160-320% 10.16mm IC102 1
307 #N/A 2310089008 PHOTO 80V 4PIN 150-300% 10.16mm IC102 1
308 #N/A 242017800008 FET 700V 6A 1.38ohm TO-220FP Q101 1
309 #N/A 2500004210 IC VOL ADJ 37V 2.5V 1% T92 IC201 1
310 #N/A 2500004213 IC VOL ADJ 37V 2.5V 1% T92 IC201 1
311 #N/A 2500004214 IC VOL ADJ 37V 2.5V 1% T92 IC201 1
312 #N/A 251039702B IC PWM GREEN MODE SO-8PIN IC101 1
313 #N/A 2811100080 X'FMR SMT 480uH J T101 1
314 #N/A 2817131480 CHOKE CR 600uH MIN 4P FL101 1
315 #N/A 2817219380 LF 4mH MIN FL102 1
316 #N/A 3411000500 JUMP WIRE COPPER 0.6*12.5*4.0 J1 1
317 M-MS-0808-8179 2301462531 LED HI-RED/GRN 3*4*2 C.C. D901 1
318 #N/A 3070337934 HEADER NY66 94V0 11P P2.0 R BROWN CN301 1
319 #N/A 3071297034 HEADER NYLON66 94V-0 4P P2.0 CN251 1
320 #N/A 3071312334 HEADER NY66 94V0 4P P2.5 CN804 1
321 #N/A 3072231000 CONN PHONE JACK OD3.5 7P R/A GREEN CN802 1
ViewSonic Corporation Confidential
45
-
Do Not Copy VG910s/b
Page 49

VG910s BOM LIST
Item ViewSonic P/N Ref. P/N Description Location Q'ty
322 #N/A 3075308757 CONN D-SUB 15P R/A PC99 W/O SCREW CN602 1
323 #N/A 3075316467 CONN DVI-I 24P P1.905 R CN601 1
324 #N/A 3075353143 CONN D-SUB FEMALE 15P P2.29 BLUE CN602 1
325 #N/A 3075415766 CONN FFC/FPC BOTTOM 30P P1.0 SMT CN401 1
326 #N/A 3076290066 HEADER BOX NY46 94V0 2P P3.5 CN05,CN04,CN03,CN02 4
327 M-WR-0828-0224 3411000300 JUMP WIRE COPPER 0.6*7.5*4.0 J8,J13,J17,J18,J22,J23 6
328 M-WR-0828-0249 3411000400 JUMP WIRE COPPER 0.6*10.0*4.0 J10,J15 2
329 M-WR-0828-0388 3411000600 JUMP WIRE COPPER 0.6*15.0*4.0 J14,J9 2
330 M-WR-0828-0389 3411000700 JUMP WIRE COPPER 0.6*17.5*4.0 J5,J6,J7,J19,J2 5
331 #N/A 3000093900 SWITCH TACTILE DPST
332 #N/A 3071297834 HEADER NYLON66 94V-0 12P P2.0 CN901 1
333 M-WR-0828-0224 3411000300 JUMP WIRE COPPER 0.6*7.5*4.0 J1~J8 8
334 #N/A 3470500600 LED HOLDER NY66 94V-2 OD=8*4 D901 1
335 #N/A 3642321800 WIRE WITH TERMINAL 1015 #18 BLK L155 CND901,902(ESD SOLUTION) 2
336 #N/A 3341732501 HSK PLATE AL110F 46.5*21 T1.5 HS201 1
337 #N/A 3341732602 HSK PLATE AL1100F PICKLING 64*41.3*21 HS102 1
338 M-MS-0808-9140 3070168334 HEADER NYLON66 94V-0 3P P3.96 CN101 1
339 M-WR-0828-6622 3670479500 WIRE WITH HOUSING 1007 #24 L120 4P CN201 1
340 M-MS-0808-7754 3343705302 HSK AL T=1.5 21*9 IC803 1
S901,S902,S903,S904,S905,S906,S907
,S908
8
ViewSonic Corporation Confidential
46
-
Do Not Copy VG910s/b
Page 50

8. Exploded Diagram And Spare Parts List
Exploded Parts List
Item ViewSonic P/N Ref. P/N Description Q'TY
1 C-FP-0301-0962 3361085902 F/B ABS SILVER VG910S S9LFC1LS 1
2 PL-FK-0709-0150 3360732801 FUNCTION KEY ABS CR S8LFC1LS 1
3 B-KB-0207-0046 5600110180 LCD FUN KEY BD ASSY L19BMR 05AAB 1
4 E-SK-0412-0086 3790182900 SPEAKER ASSY L18FMR05AAB 2
5 M-LCD-0826-0208 5051901122 LCD 19" TFT PANEL LVDS SXGA (TCO03) 1
6 M-BK-0805-0050 3460165401 BRACKET PANEL SECC 406.3*332.3*19.8 T.8 1
7 B-PS-0204-0059 5600110175 LCD POWER BD ASSY L19BMR 05AAB 1
8 B-IF-0222-0057 5600110140 LCD I/F BD ASSY L19BMR 05BAB 1
9 B-SB-0221-0606 5600110135 LCD INVERTER BD ASSY L19BMR 05BAB 1
10 M-BK-0805-0048 3460165200 BRACKET D-SUB SECC 266*30*29 T.8 1
11 M-MS-0808-9145 3461235402 SHIELD CAN IF SPTH 280.7*156.72*30.4 T.3 1
12 M-MS-0808-9144 3460165500 BRACKET SHIELD CAN INV SECC 220.6*66.8*2 1
13 M-MS-0808-9135 3610171802 AC SOCKET ASSY VG810S 1
14 M-BK-0805-0049 3460165300 BRACKET HINGE SECC 228*60*16 T.8 1
15 M-MS-0808-8561 3460146100 BRACKET VESA SECC 110*20 T1 2
16 M-MS-0808-8563 3460146300 BRACKET KEYLOCK SECC 20.4*16.45*4.9 T.6 1
17 C-BC-0302-0568 3360248900 CABINET BACK ABS 41 S9LRC1LS 1
18 C-BC-0302-0581 3360249101 R/C ABS 41 VG910S S9LRC1LS 1
19 M-MS-0808-7739 3200648800 NAME PLATE ABS 94HB VIEWSONIC 82.83*34.9 1
20 M-CV-0830-2381 3360916300 ARM FRONT ABS 41 VX700-2 1
21 M-BK-0805-0043 3461753201 BRACKET ARM SECC 156*126.1*153.6 T2 1
22 M-MS-0808-9131 3461752800 HINGE-L SUS304 62*20 T2 1
23 M-MS-0808-9130 3461752700 HINGE-R SUS304 62*20 T2 1
24 M-CV-0830-2509 3360919201 ARM COVER REAR ABS 41 S8LBA2LS 1
25 M-CV-0830-2394 3361205900 COVER BASE ABS 41 VG800-2 1
26 M-BK-0805-0044 3461753301 BRACKET BASE SECC 266.6*161.4 T2 1
27 PL-PD-0714-0068 3240957500 RUBBER FOOT 75*10 T3 2
28 M-SCW-0824-6795 3109023700 SCREW T M4*1.6*8 FPH C S18C ZN YEL 4
29 M-SCW-0824-0779 3109017700 SCREW T M3*2.7*7.5 FF C S18C ZN YEL 4
30 M-SCW-0824-6796 3105223600 SCREW M M3*0.5*8 FF C S18C ZN 4
31 M-SCW-0824-0776 3105221000 SCREW M M3*0.5*6 FF C S18C ZN 2
32 M-SCW-0824-0620 3109020500 SCREW T f4*1.6*10 PAN C S18C ZN YEL 4
33 M-SCW-0814-0691 3105120100 SCREW M M4*0.7*12 PAN C S+P S10C ZN YEL 6
34 M-SCW-0824-6793 3105125300 SCREW M M4*0.7*6 FF C S18C ZN BLK NYLCOK 7
ViewSonic Corporation Confidential
47
-
Do Not Copy VG910s/b
Page 51

ViewSonic Corporation Confidential
48
-
Do Not Copy VG910s/b
Page 52

ViewSonic Corporation Confidential
49
-
Do Not Copy VG910s/b
Page 53

ViewSonic Corporation Confidential
50
-
Do Not Copy VG910s/b
Page 54

CN602
HD-15
CON1
5 PIN
R
VHBG
S
VGA-SDA
VGA-SCL
Analo
g
I/P
IC401
DISPLAY ENGIN
MST9131
ADC+DVI+SCALE
E
R
CN401
LVD
CON
30 Pins
S
PANEL
Do Not Copy VG910s/b
-
CN601
DVI-D
CON
24 PINS
IC601
DVI-D
DDC
EEPRO
IC602
HD-15
DDC
EEPRO
POWER
BOARD
RX0/RX1/RX2/RXC
DVI-D SDA
DVI-D SCL
DVI-D SDA
DVI-D SCL
M
VGA-SDA
VGA-SCL
M
+12
V
IC251
+5V
IC253
D25
D25
X40
Digital
I/P x 8 Pin
V
S
H
S
DDC_SDA/R
DDC_SCL/T
VCC2.
VCC3.
5
3
2
3
CN802
Audio
X
X
s
IC301
MCU
IC802
Audio
Process
Audio Portion
BACKLIGHT_CONTROL
BACKLIGHT-E
SDA
SCL
IC803
Audio
AMP
N
1
1
SPK L
SPK R
X'TAL
+12
X30
X'TAL
IC302
DAT
EEPRO
KEY
BOARD
0
V
1
A
M
INVERTE
BOARD
R
51
9. Block Diagram
ViewSonic Corporation Confidential
Page 55

VG910s/b
py
o
C
t
No
Do
l
a
nfidenti
o
C
52
10. Schematic Diagrams
n
o
i
t
a
r
o
rp
o
C
nic
So
View
Page 56

VG910s/b
py
o
C
t
No
Do
l
a
nfidenti
o
C
53
n
o
ti
a
r
o
rp
o
C
nic
So
View
Page 57

VG910s/b
py
o
C
t
No
Do
l
a
nfidenti
o
C
54
n
o
i
t
a
r
o
rp
o
C
nic
So
View
Page 58

VG910s/b
py
o
C
t
No
Do
l
a
nfidenti
o
C
55
n
o
i
t
a
r
o
rp
o
C
nic
So
View
Page 59

VG910s/b
py
o
C
t
No
Do
l
a
nfidenti
o
C
56
n
o
ti
a
r
o
rp
o
C
nic
So
View
Page 60

VG910s/b
py
o
C
t
No
Do
l
a
nfidenti
o
C
57
n
o
ti
a
r
o
rp
o
C
nic
So
View
Page 61

VG910s/b
py
o
C
t
No
Do
l
a
nfidenti
o
C
58
n
o
i
t
a
r
o
rp
o
C
nic
So
View
Page 62

VG910s/b
py
o
C
t
No
Do
l
a
nfidenti
o
C
59
n
o
ti
a
r
o
rp
o
C
nic
So
View
Page 63

Do Not Copy VG910s/b
-
60
ViewSonic Corporation Confidential
Page 64

VG910s/b
py
o
C
t
No
Do
l
a
nfidenti
o
C
61
n
o
i
t
a
r
o
rp
o
C
nic
So
View
Page 65

11. PCB Layout Diagrams
Main Board
ViewSonic Corporation Confidential
62
-
Do Not Copy VG910s/b
Page 66

Main Board
ViewSonic Corporation Confidential
63
-
Do Not Copy VG910s/b
Page 67

Power Board
ViewSonic Corporation Confidential
64
-
Do Not Copy VG910s/b
Page 68

Control Board
ViewSonic Corporation Confidential
65
-
Do Not Copy VG910s/b
Page 69

*Readers Response*
Dear Readers:
Thank you in advance for your feedback on our Service Manual,which allows continuous improvement
of our products. We would appreciate your completion of the Assessment Matrix below, for return to
ViewSonic Corporation.
Assessment
A.What do you think about the content after reading VG910s/b Service Manual?
1.
Precautions And Safety Notices
2. Specification
Front Panel Function Control Description
3.
4. Circuit Description
5.
Adjusting Procedure
6. Trouble Shooting Flow Chart
7. Recommended Spare Parts List
8. Exploded Diagram and Spare Parts List
9. Block Diagram
10. Schematic Diagrams
11. PCB Layout Diagrams
tinU riaF daB
B.Are you satisfied with the VG910s/b service manual?
metI tnellecxE dooG riaF daB
dooGtnellecxE
.1
Service Manual Content
.2
Service Manual Layout
.3
The form and listing
C.Do you have any other opinion or suggestion about this service manual?
Readers basic data:
Name: Title:
Company:
Add.:
Tel:
E-mail:
After completing this form, please return it to ViewSonic Quality Assurance
1-909-839-7943.
(marc.maupin@viewsonic.com)
You may also e-mail any suggestions to the Director, Quality Systems & Processes
Fax:
in the USA at facsimile
ViewSonic Corporation Confidential
66
-
Do Not Copy VG910s/b
 Loading...