


Page 1 of 14
Viavi OneAdvisor ONA-1000 100G module Software Update Instructions
April 29, 2020
Table of Contents |
|
Scope................................................................................................................................................................ |
2 |
1. Network Upgrade ..................................................................................................................................... |
2 |
2.USN Upgrade…………………………………………………………………………………………….8
3. StrataSync............................................................................................................................................... |
12 |
Technical Support |
tac@viavisolutions.com |
1-844-468-4284 option 3, 1, 1 |

Page 2 of 14
Scope
The ONA-1000 platform base software includes software for the 400G module and supported Fiber Optics modules (OTDR, etc.). The 100G module, for the ONA-1000, has its own software and is upgraded separately. This procedure addresses upgrade to the software for the ONA-1000 100G module.
NOTE: The ONA 100G module is identified as a MAP-2100 on info and upgrade screens. This is normal. Navigation and upgrades, for the ONA 100G module, are controlled from the 100G module itself. It is important to make sure that you are on 100G module GUI when performing upgrades, regardless of the method chosen. The 100G module GUI is accessed, from the ONA base, by clicking on the 100G icon at top of the screen.
To upgrade the ONA-1000 base and 400G module, consult the “OneAdvsior ONA-1000 400G software upgrade procedure”.
There are three methods to update ONA-1000 100G module software:
1.Network upgrade - Use this method to update your module via an Internet connection.
2.USB upgrade - Use this method to update your module with a USB thumb drive.
3.StrataSync upgrade - Use this method if your ONA is managed using Viavi’s StrataSync Asset Management system and you company has elected to deploy software via this method.
The ONA must be connected to AC Power, regardless of update method. Please note that network upgrades are NOT supported over WiFi.
1. Network Upgrade
Step |
Action |
Details |
|
|
|
|
|
1. |
Power On |
Press and release the power button icon, on the 100G module GUI to power |
|
|
|
on the 100G module. NOTE: It is important that you are on the GUI of the |
|
|
|
100G module and the ONA base. The 100G module is accessed, from the |
|
|
|
base ONA GUI, by clicking on the 100G icon at the top of the GUI. |
|
2. |
AC Power |
Connect the AC power adapter to the |
|
|
|
power connector on the right side of the mainframe. |
|
3. |
LAN Connection |
Connect the Ethernet Management |
|
|
|
Port, on the right side of the mainframe, |
|
|
|
to a network connection with internet |
|
|
|
access, using CAT 5E or better cable. |
|
4. |
System |
Press the System icon, |
, at the top of the 100G module screen, to |
display the System Menu. NOTE: It is important that you are on the GUI of the 100G module and not the ONA base. The 100G module is accessed, from the base ONA GUI, by clicking on the 100G icon at the top of the GUI.
Technical Support |
tac@viavisolutions.com |
1-844-468-4284 option 3, 1, 1 |

Page 3 of 14
Technical Support |
tac@viavisolutions.com |
1-844-468-4284 option 3, 1, 1 |
Page 4 of 14
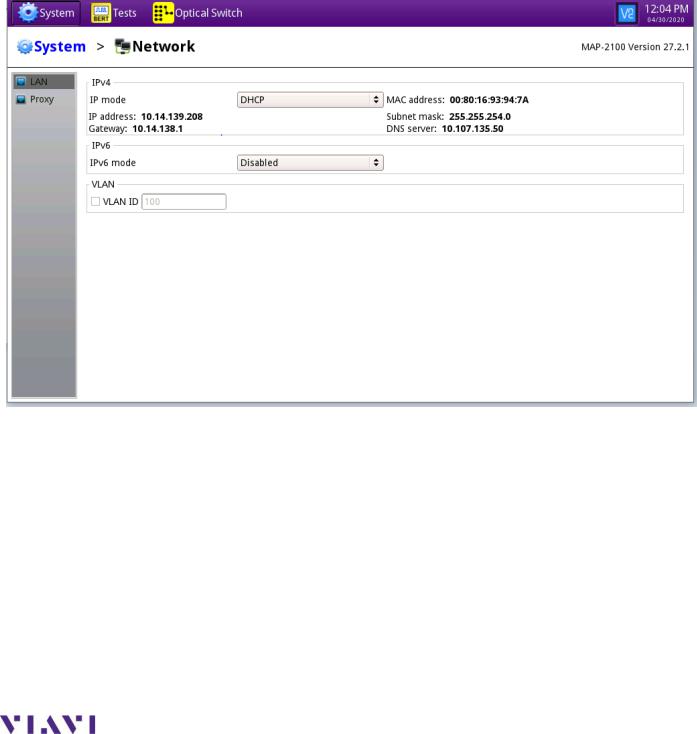
5. Network Settings Press the Network icon, , to display LAN Settings. Set IP Mode to “DHCP” for automatic IP address assignment or “Static” for manual input. If using a static address, be sure to configure the DNS server for an accurate address or the upgrade will fail to locate the upgrade server. Note: If you are using static addresses, ensure the IP address is not the same as ONA-1000 base IP address.
Technical Support |
tac@viavisolutions.com |
1-844-468-4284 option 3, 1, 1 |
Page 5 of 14
After configuring LAN settings, press the System icon,  , to redisplay the System Menu.
6. |
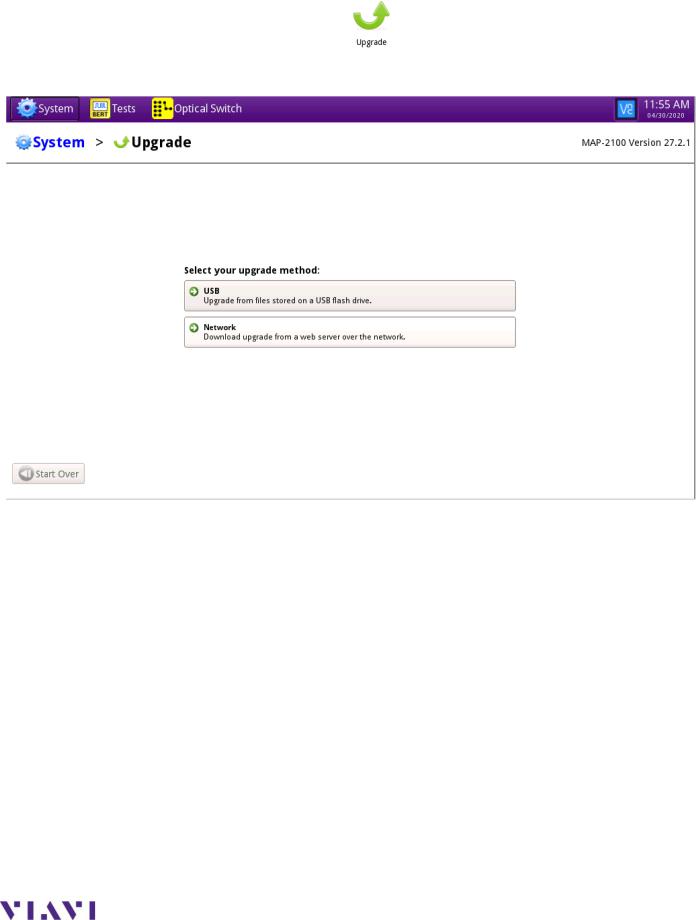
Upgrade |
Press the Upgrade icon, |
, to display upgrade methods. |
Technical Support |
tac@viavisolutions.com |
1-844-468-4284 option 3, 1, 1 |
 Loading...