

Vestfrost VLS200, VLS300, VLS400, VLS350 Service And Maintenance Instructions
CORPORATE PRESENTATION
Service and maintenance instructions: VLS200/300/350/400
Vestfrost Solutions
CORPORATE PRESENTATION
Topics
1: General required maintenance
2: Vital components
3: Warning
4: Required basic Tools
5: Replacement of components
6: Trouble shooting
7: On site Checklist
CORPORATE PRESENTATION
General required maintenance
Daily Check:
Monitor Temperature
Internal lid is placed properly
Lid fits and lock tight to cabinet
Lid gasket not faulty
Monthly:
Clean grill for compressor compartment
6 Month:
Clean condenser coils
Yearly:
Check electrical connections and components

CORPORATE PRESENTATION
Vital Components
Position Item no Description
129 8-036038255 Compressor
5717 7020274 Thermostat
071 A921115 Starting Device
5714 7020144 Thermostat sensor
5851 520229 Run capacitor

CORPORATE PRESENTATION
Warning!
Before any repair job be aware of following!
WARNING:
Before servicing or cleaning the appliance, disconnect it from
power source.
WARNING:
Danger risk of fire or explosion. Flammable refrigerant used.
To be repaired only by trained personnel.
(R600a)
CORPORATE PRESENTATION
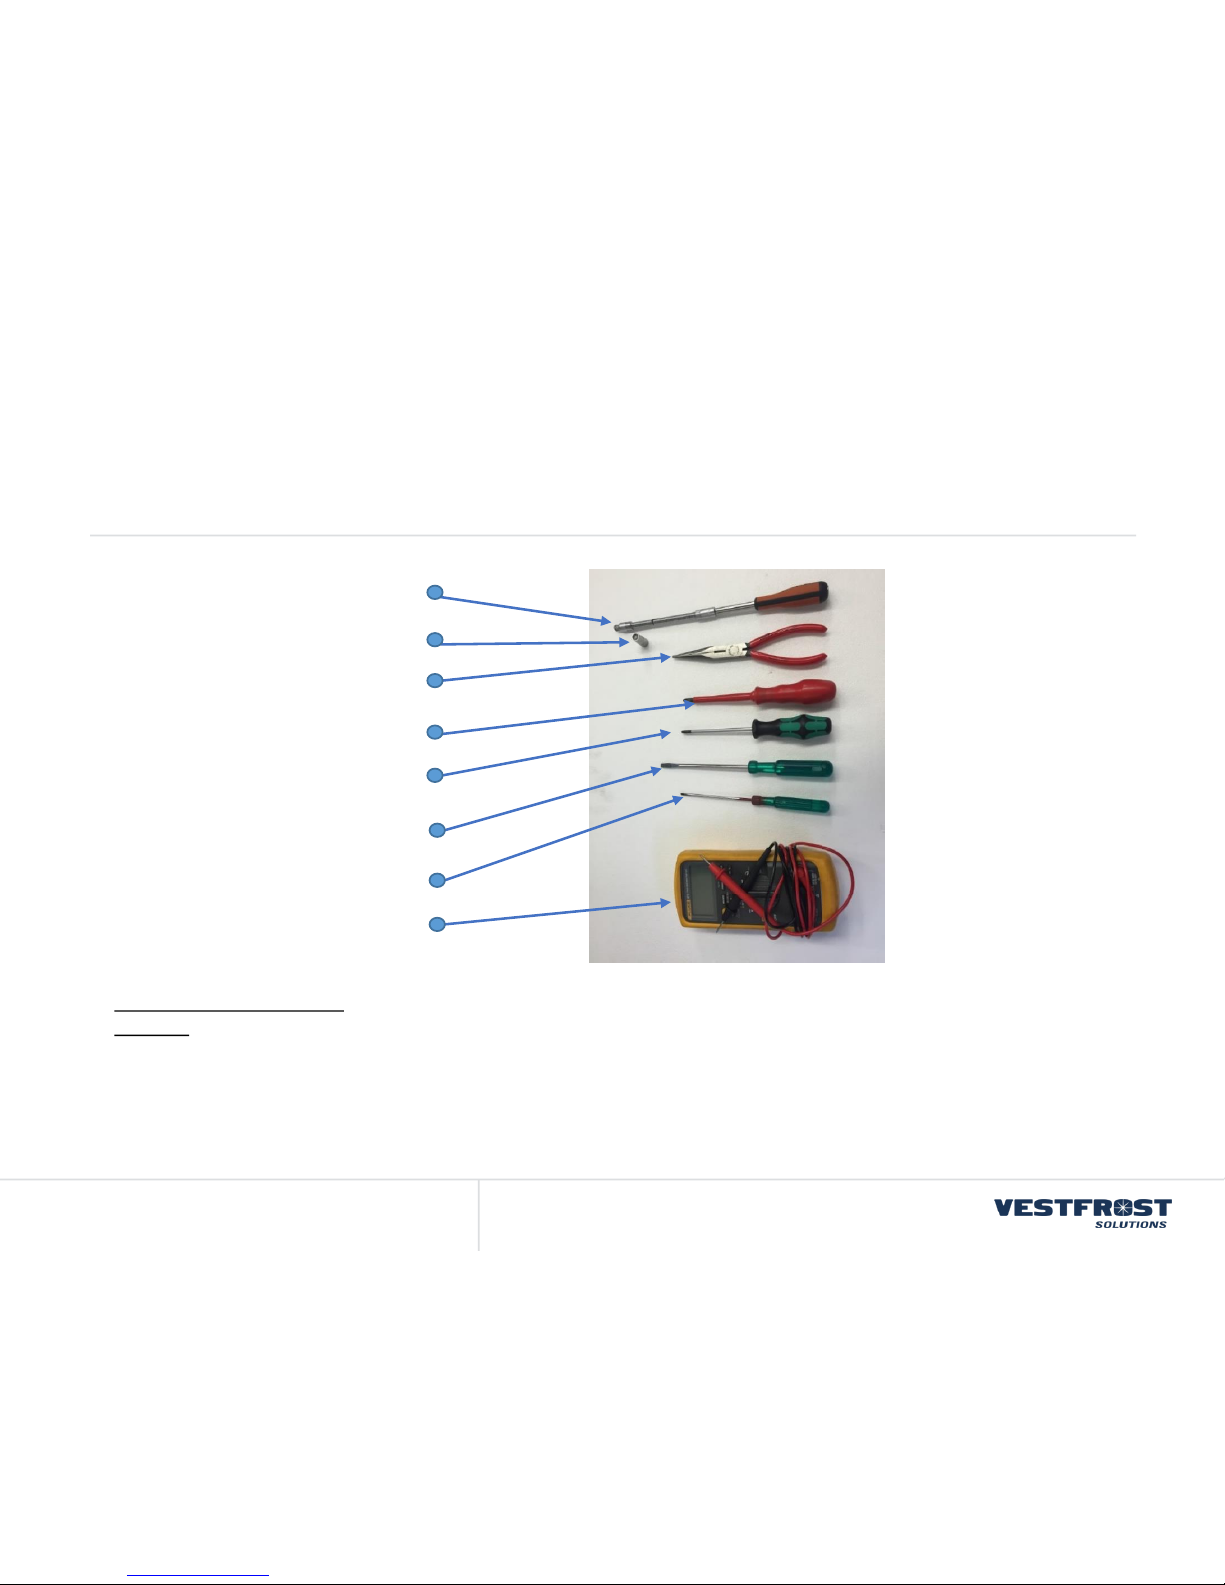
Required Basic Tools
1. Flexible socket wrench
2. Socket wrench - size 6+7+12mm
3. Nose plier
4. Phillips screwdriver
5. Torx screwdriver - size t10+t20
6. Screwdriver - size 1,0x6,0
7. Screwdriver – size 0,6x3,5
8. Multimeter
Proposed additional service
kit/items
Sealing kit
Tar tape
Extra self-tapping screws

CORPORATE PRESENTATION
1. Motor Compartment
2. Thermostat Replacement
3. Thermostat Adjustment VLS
4. Wiring Diagram
Replacement of components
4. Starting Device Replacement
5. Thermostat sensor
6. Run Capasitor Replacement
7. Thermometer replacement
CORPORATE PRESENTATION
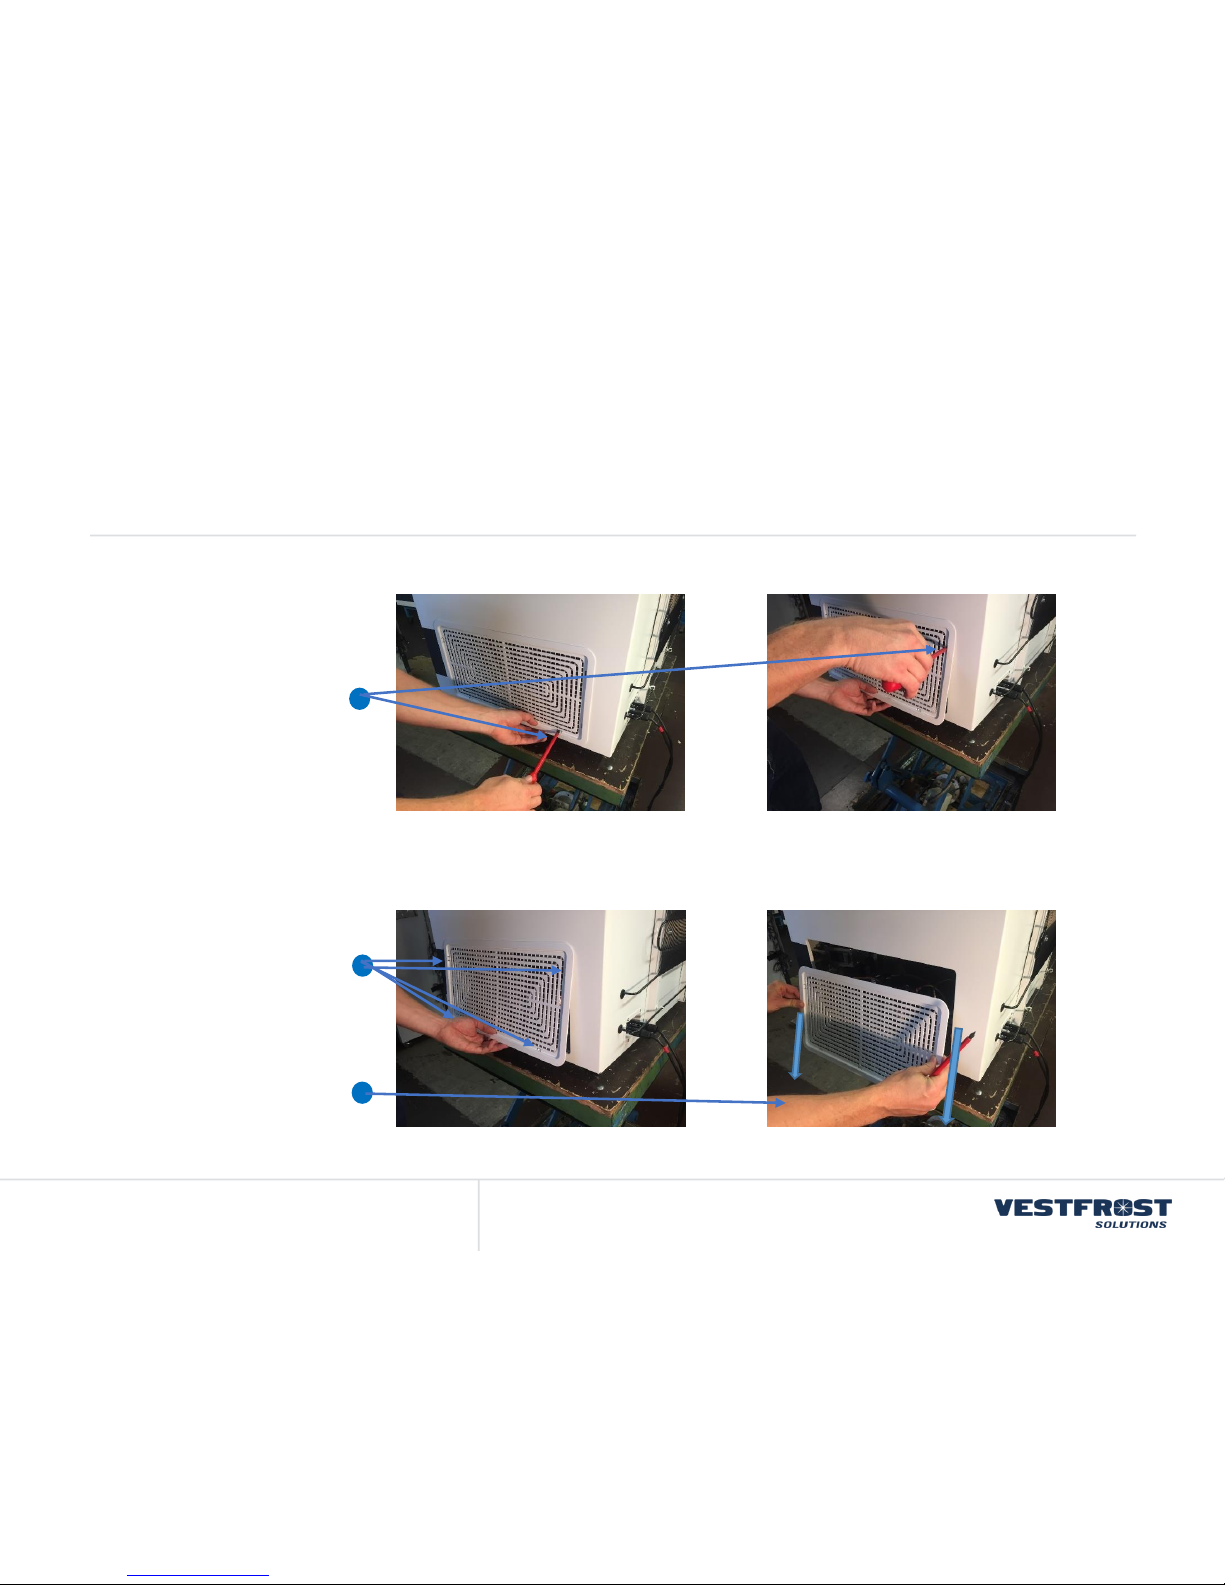
Motor Compartment
How to get acces to the
motor compartment.
Use a screwdriver to
remowe grill
Unluck all 4 clamps
Pull the compressor grill
CORPORATE PRESENTATION
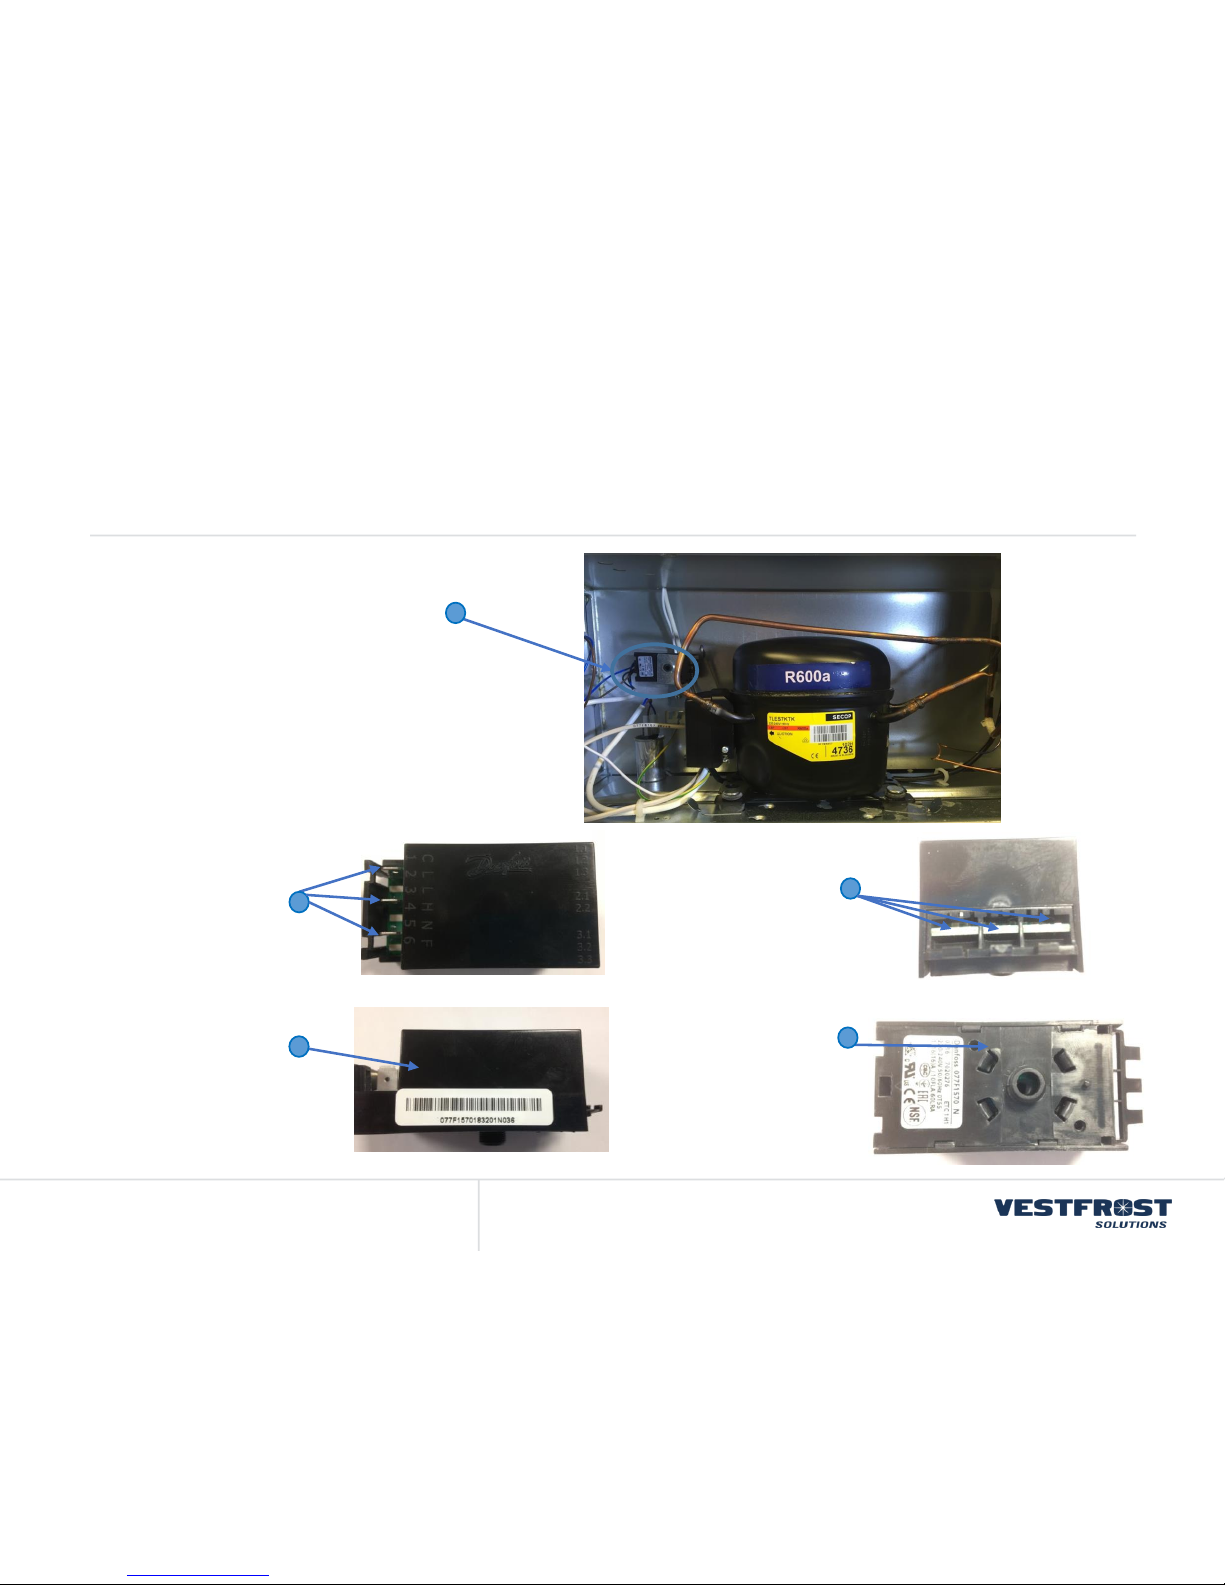
Thermostat Replacement
The thermostat is placed in the left
corner of the compressor
compartment on the back of the
cabinet
Front with wire 3x
sockets
Side view
Front with 3x wire
sockets
Back
 Loading...